Living Room Built-Ins "Tutorial" + Cost
/Today is a very important day! It's Nate's birthday! The big 33. So old. Luckily he appears to be getting better with age.
To celebrate Nate becoming elderly, let's discuss how he built our living room built-ins. This post is heavy on pictures. Light on words. Just like my husband. Pretty on the eyes, easy on the ears.
Pretend that makes sense.
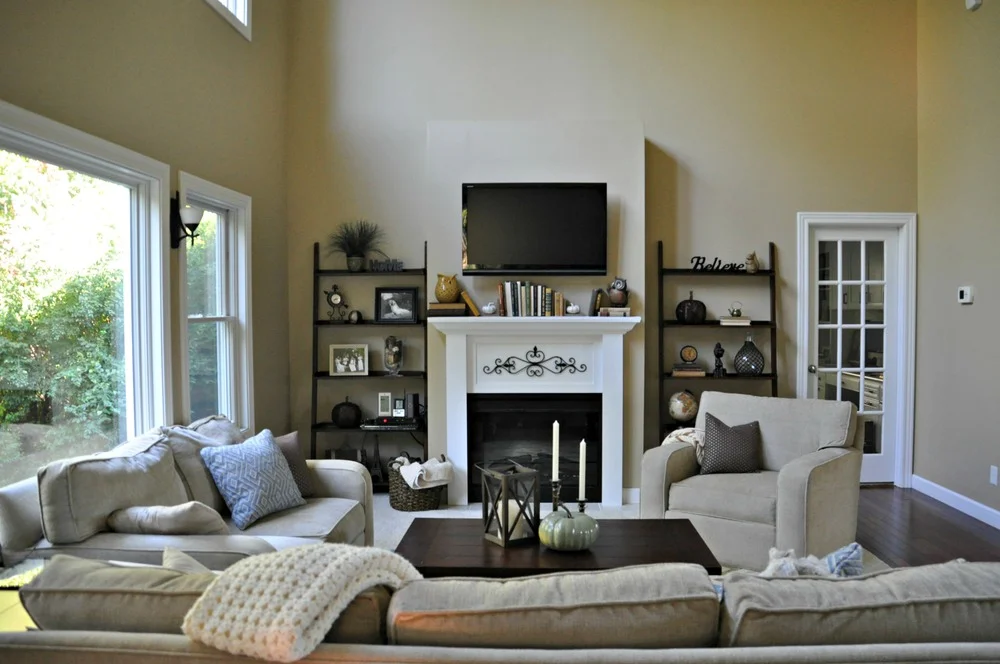
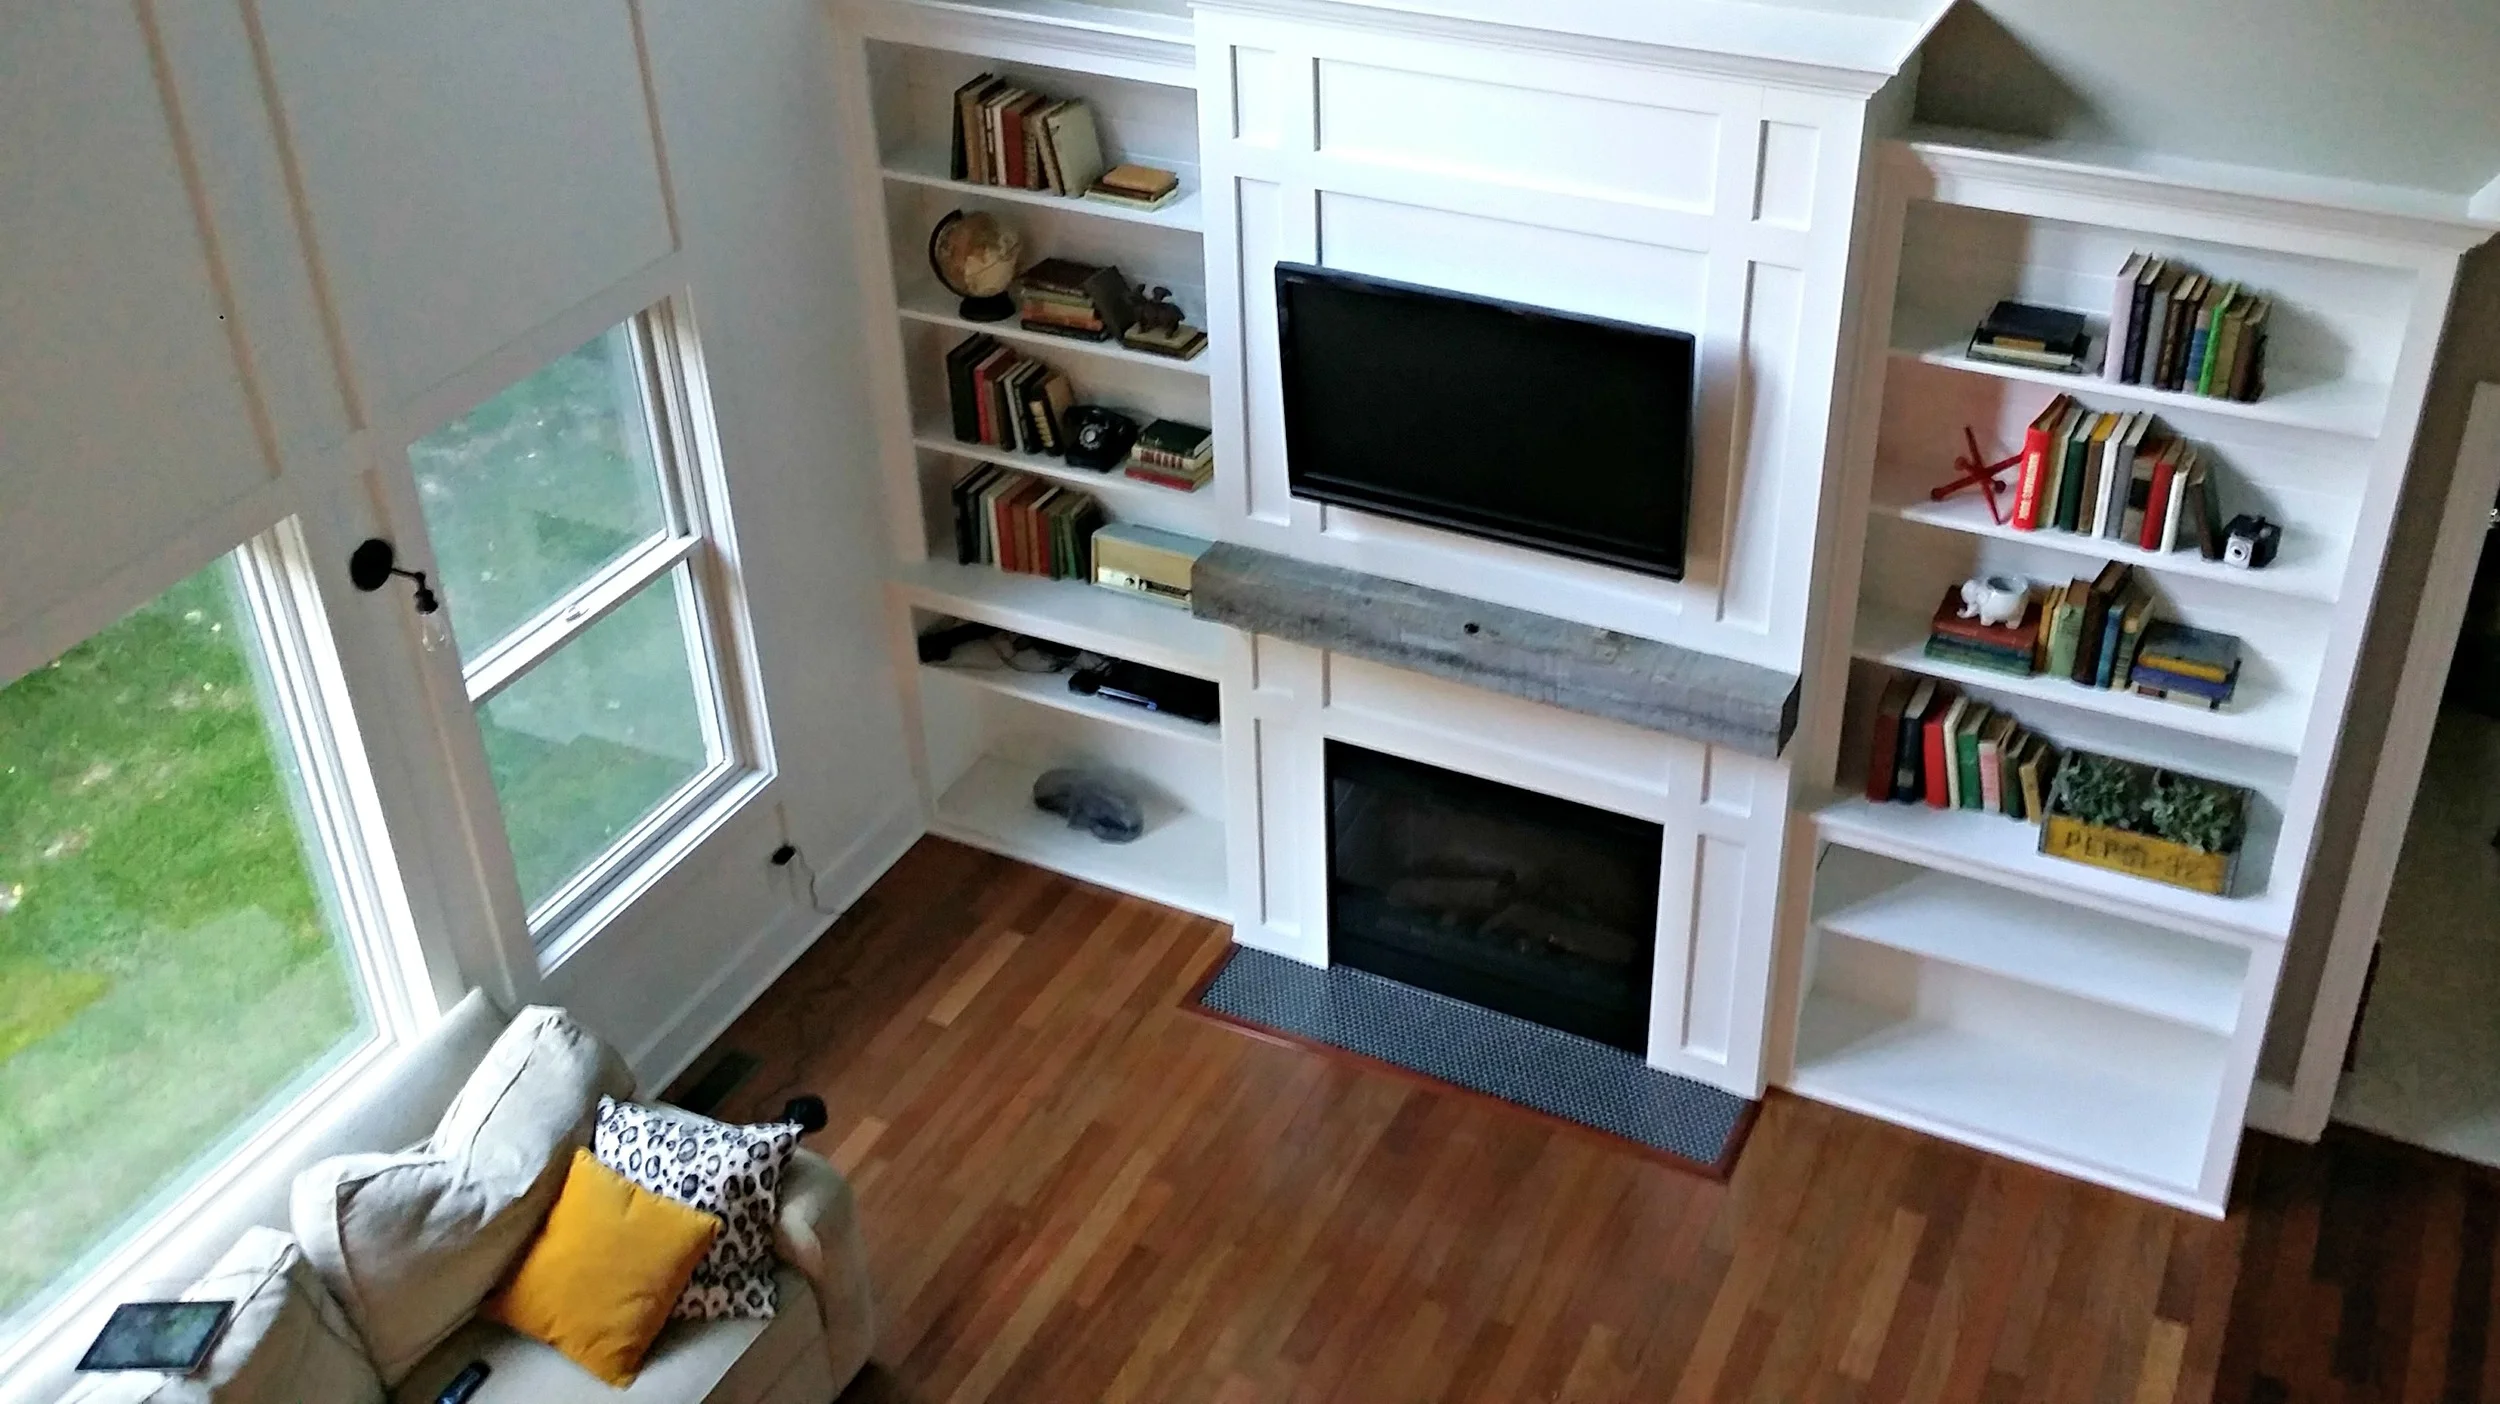
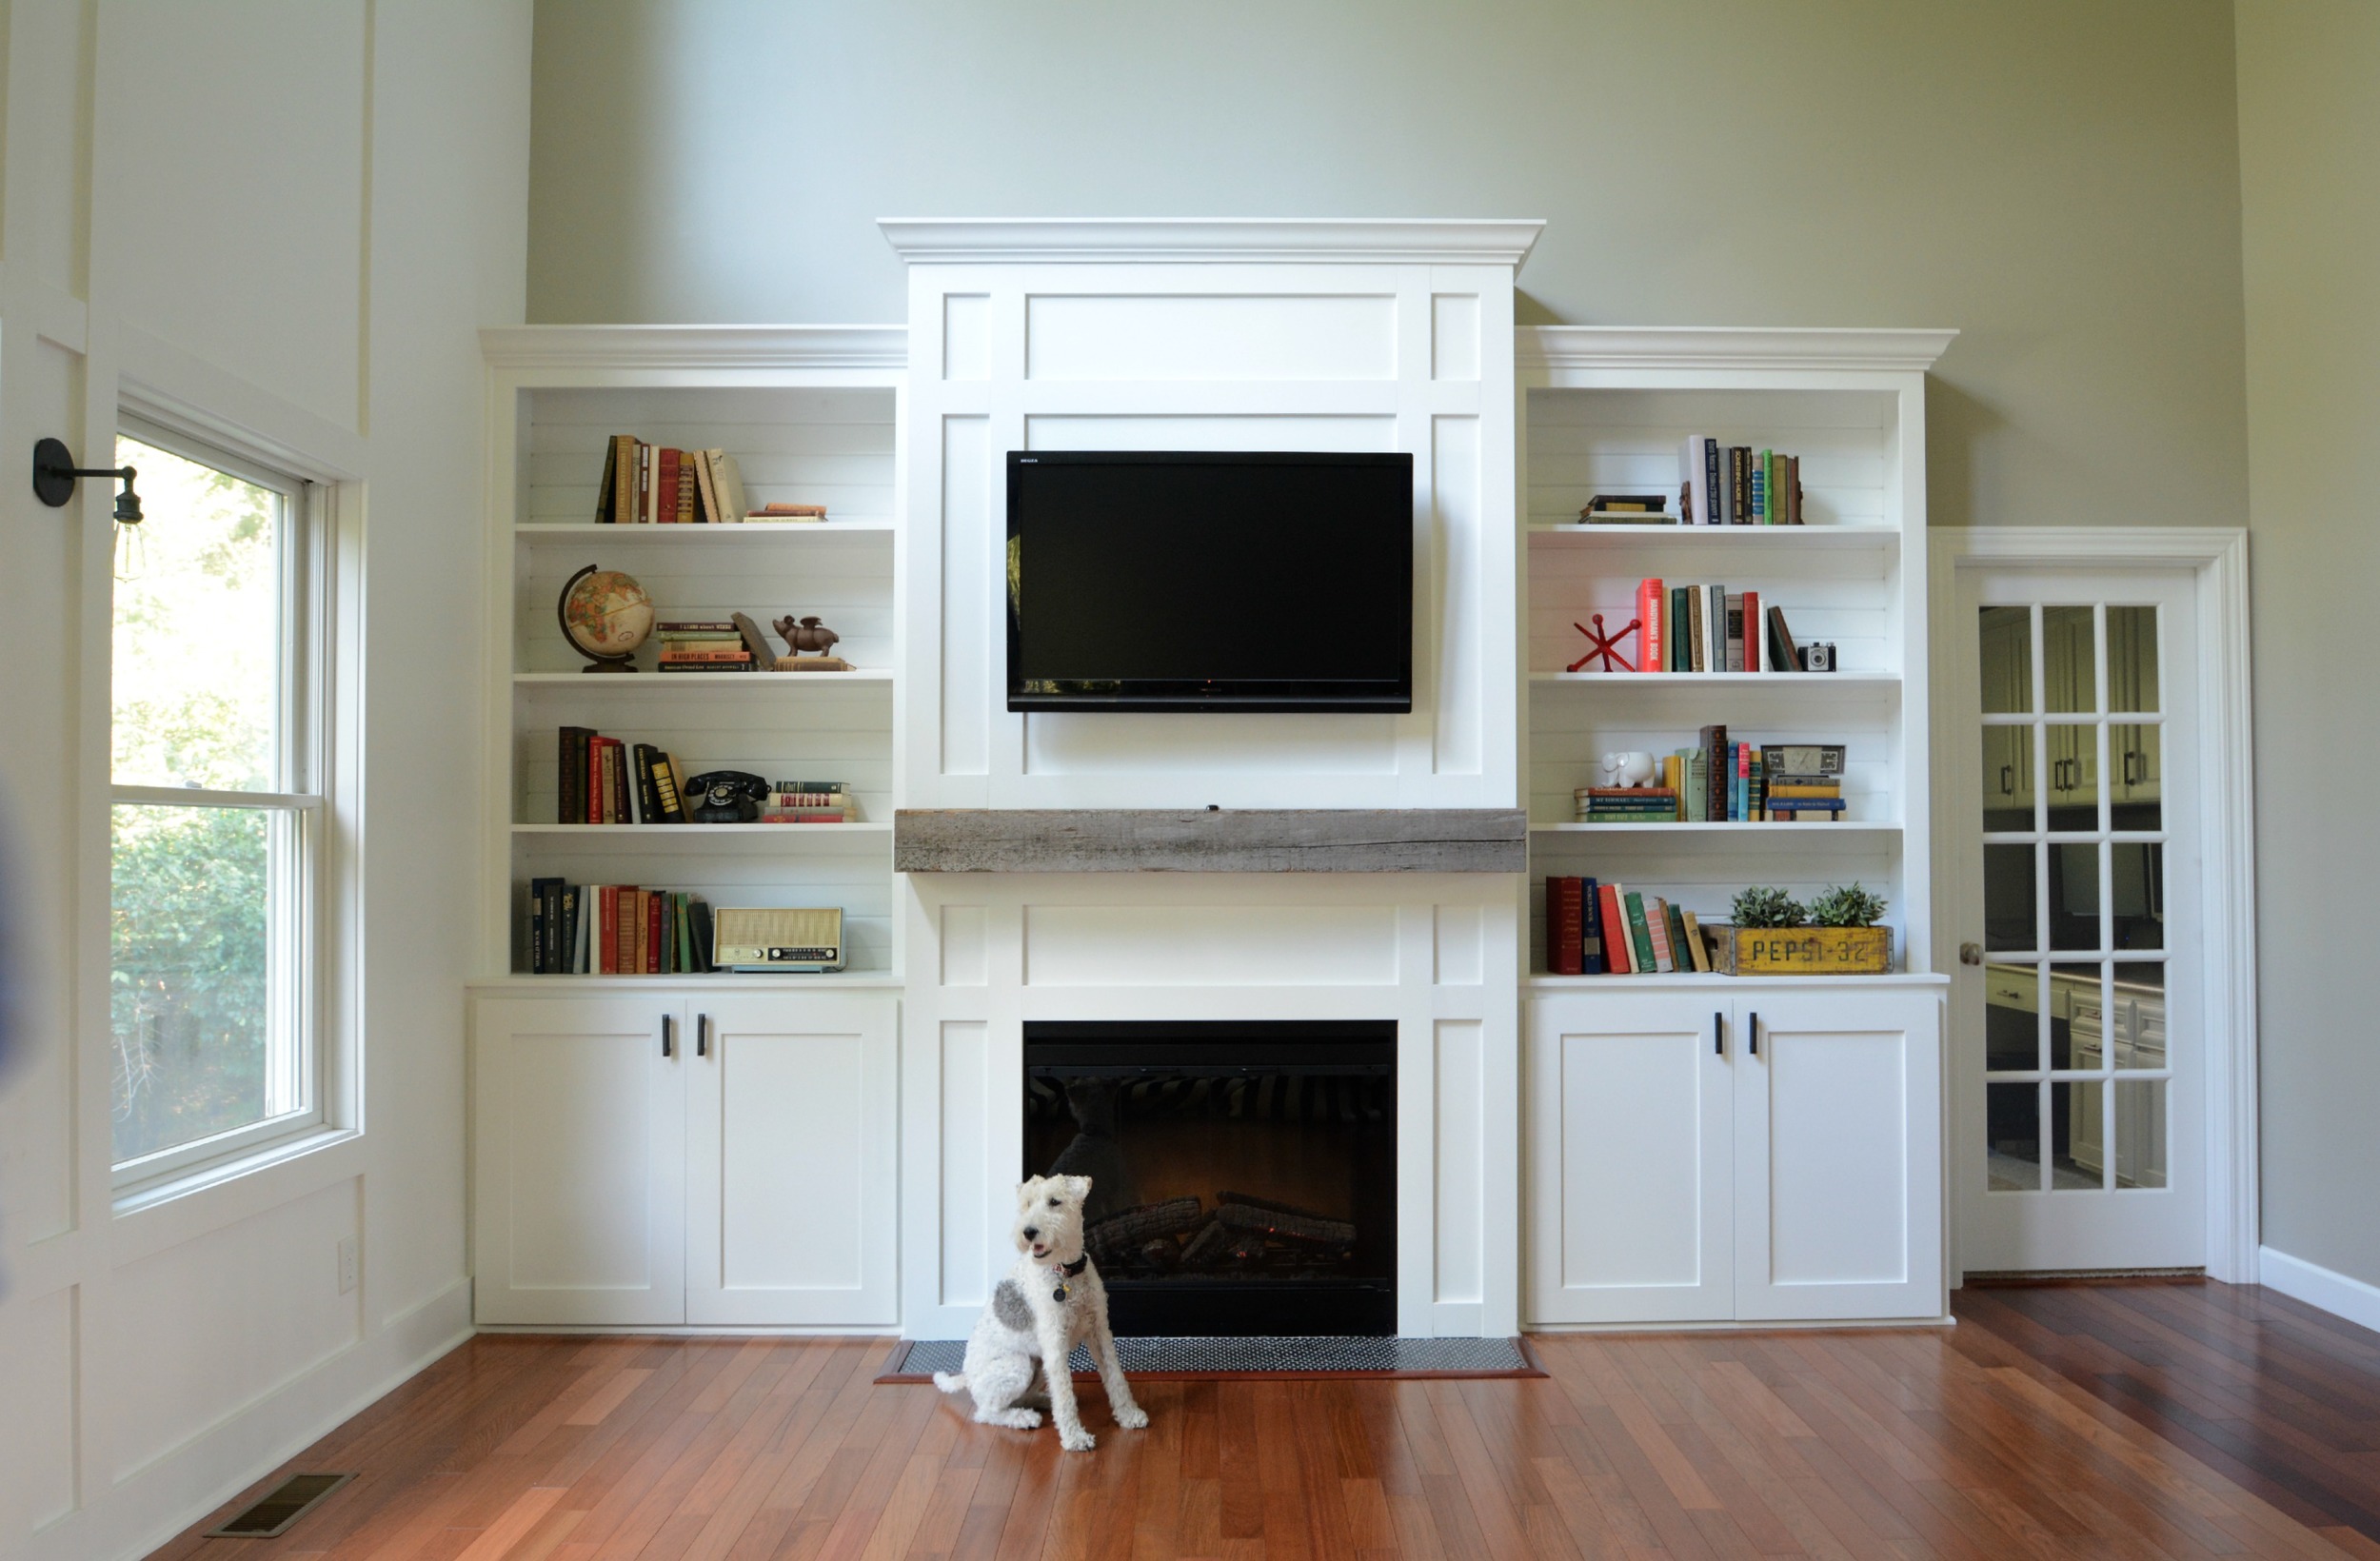
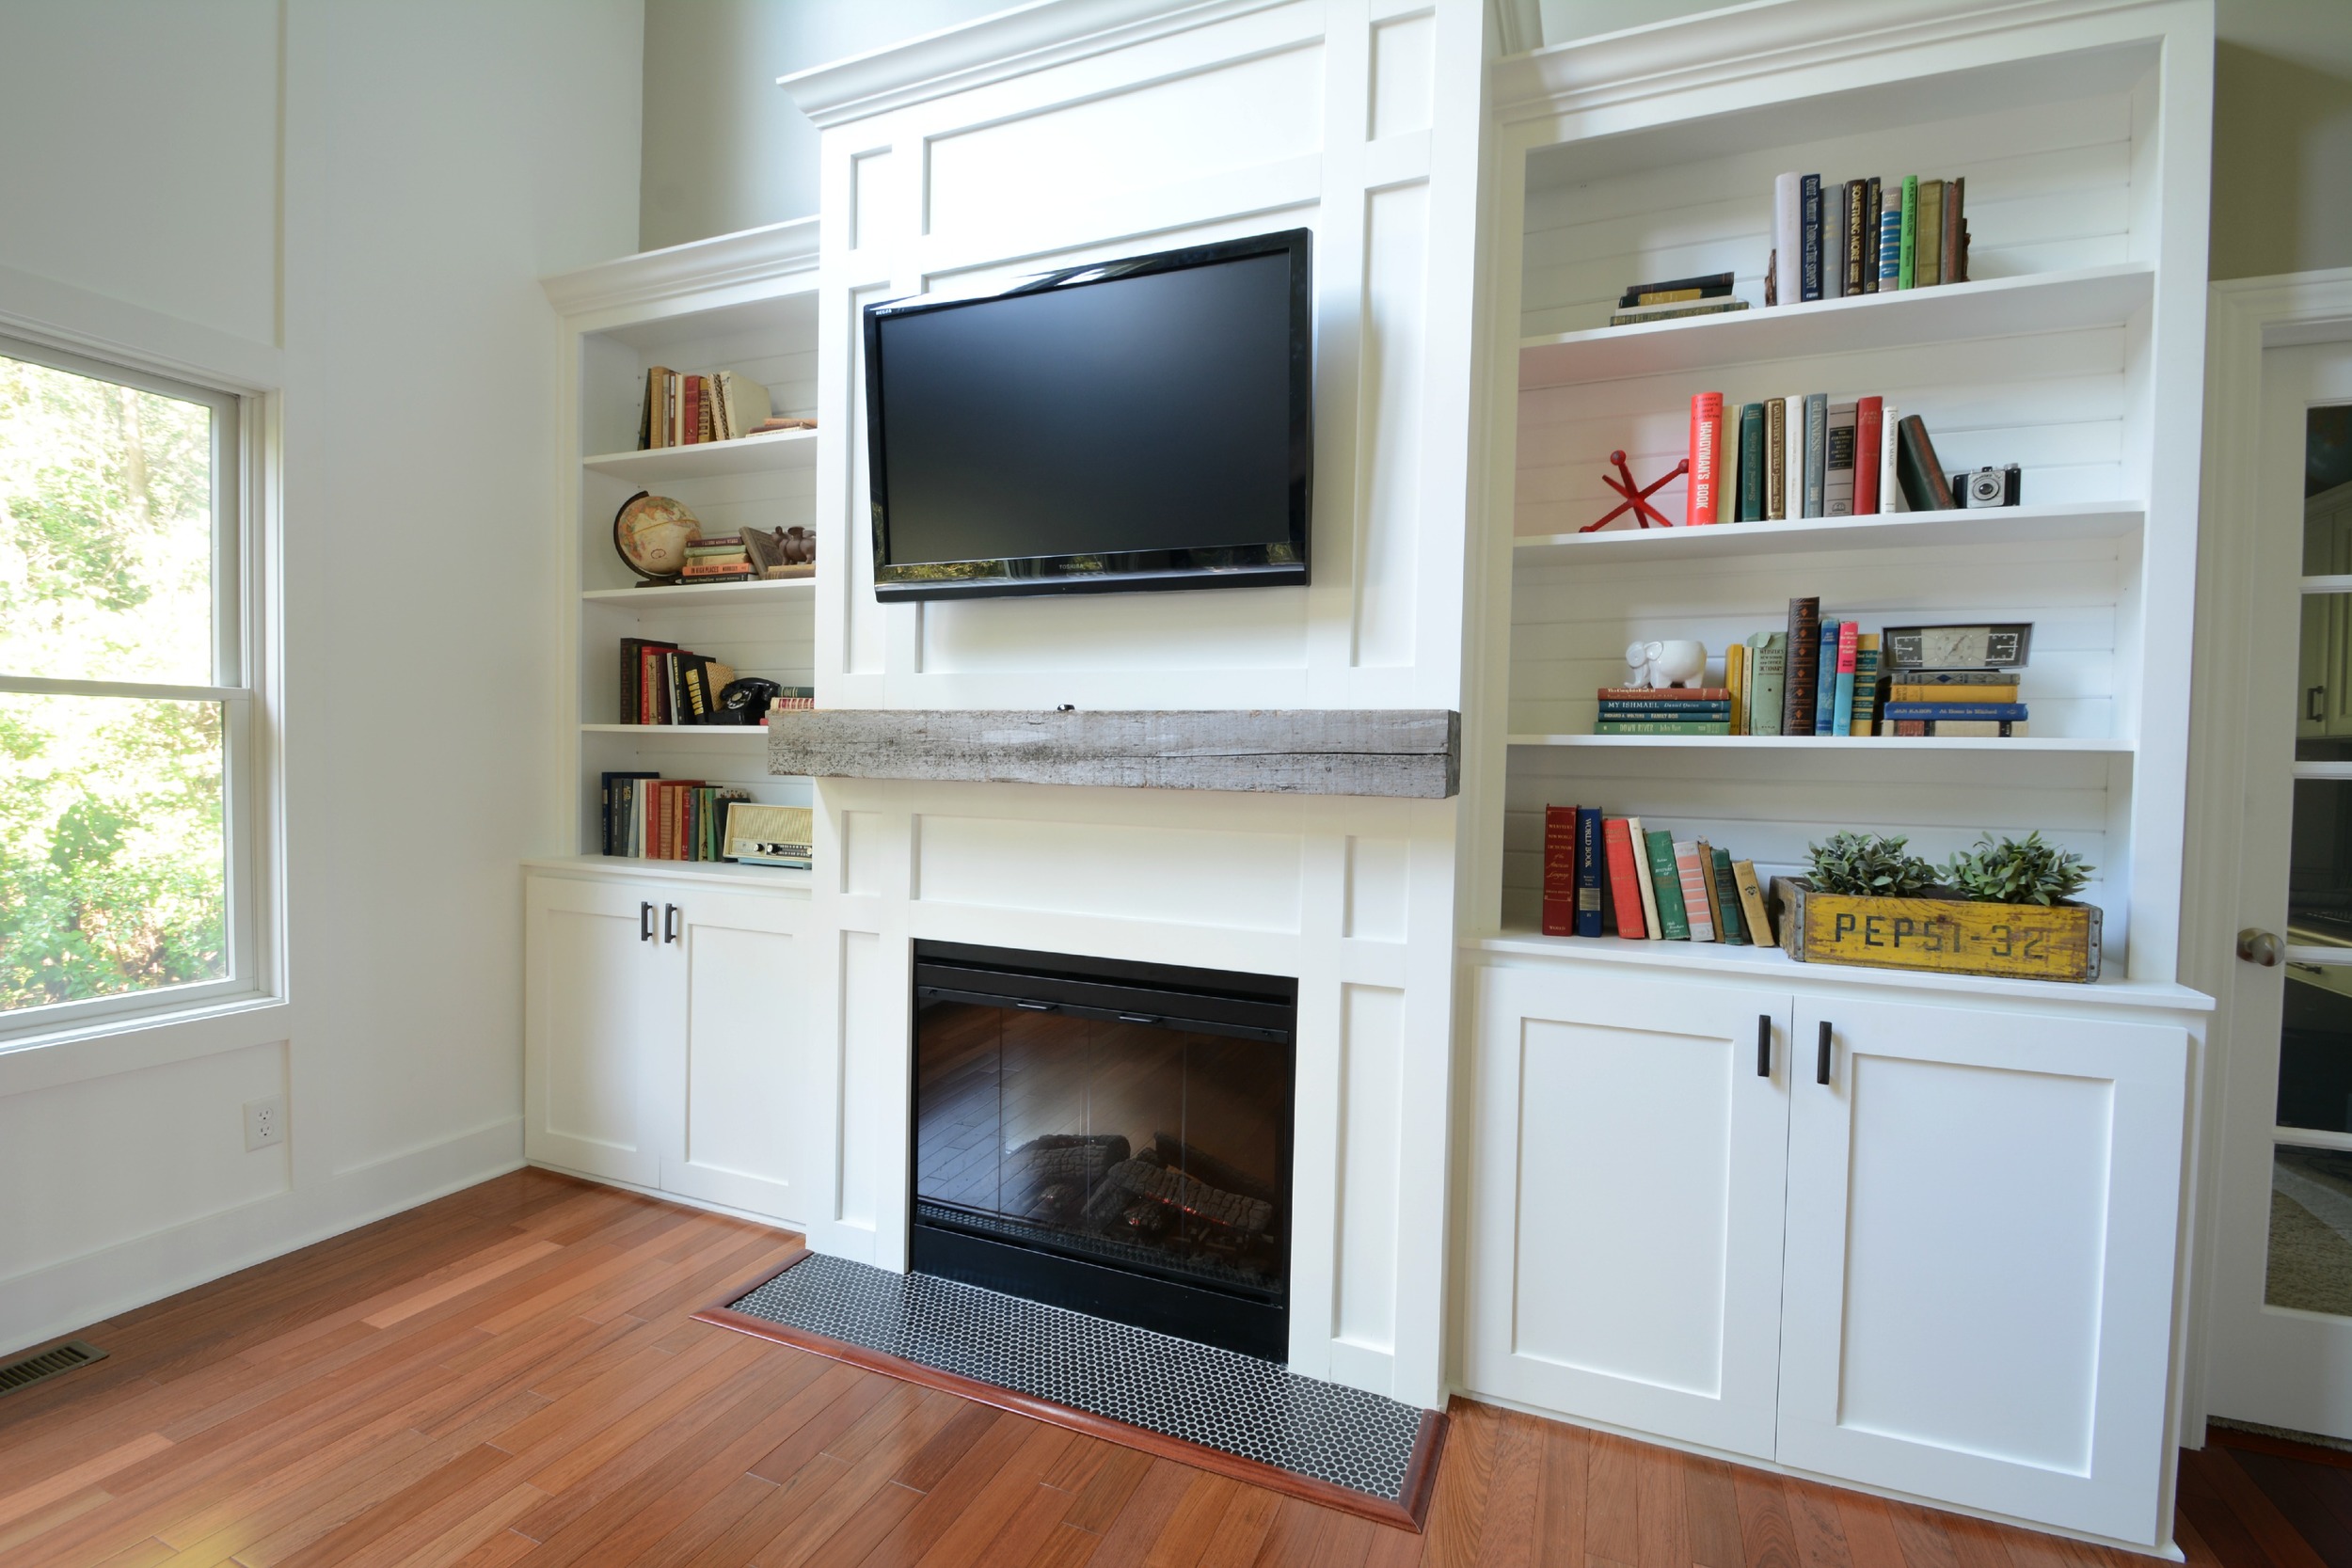
We recently revealed the finished built-ins.
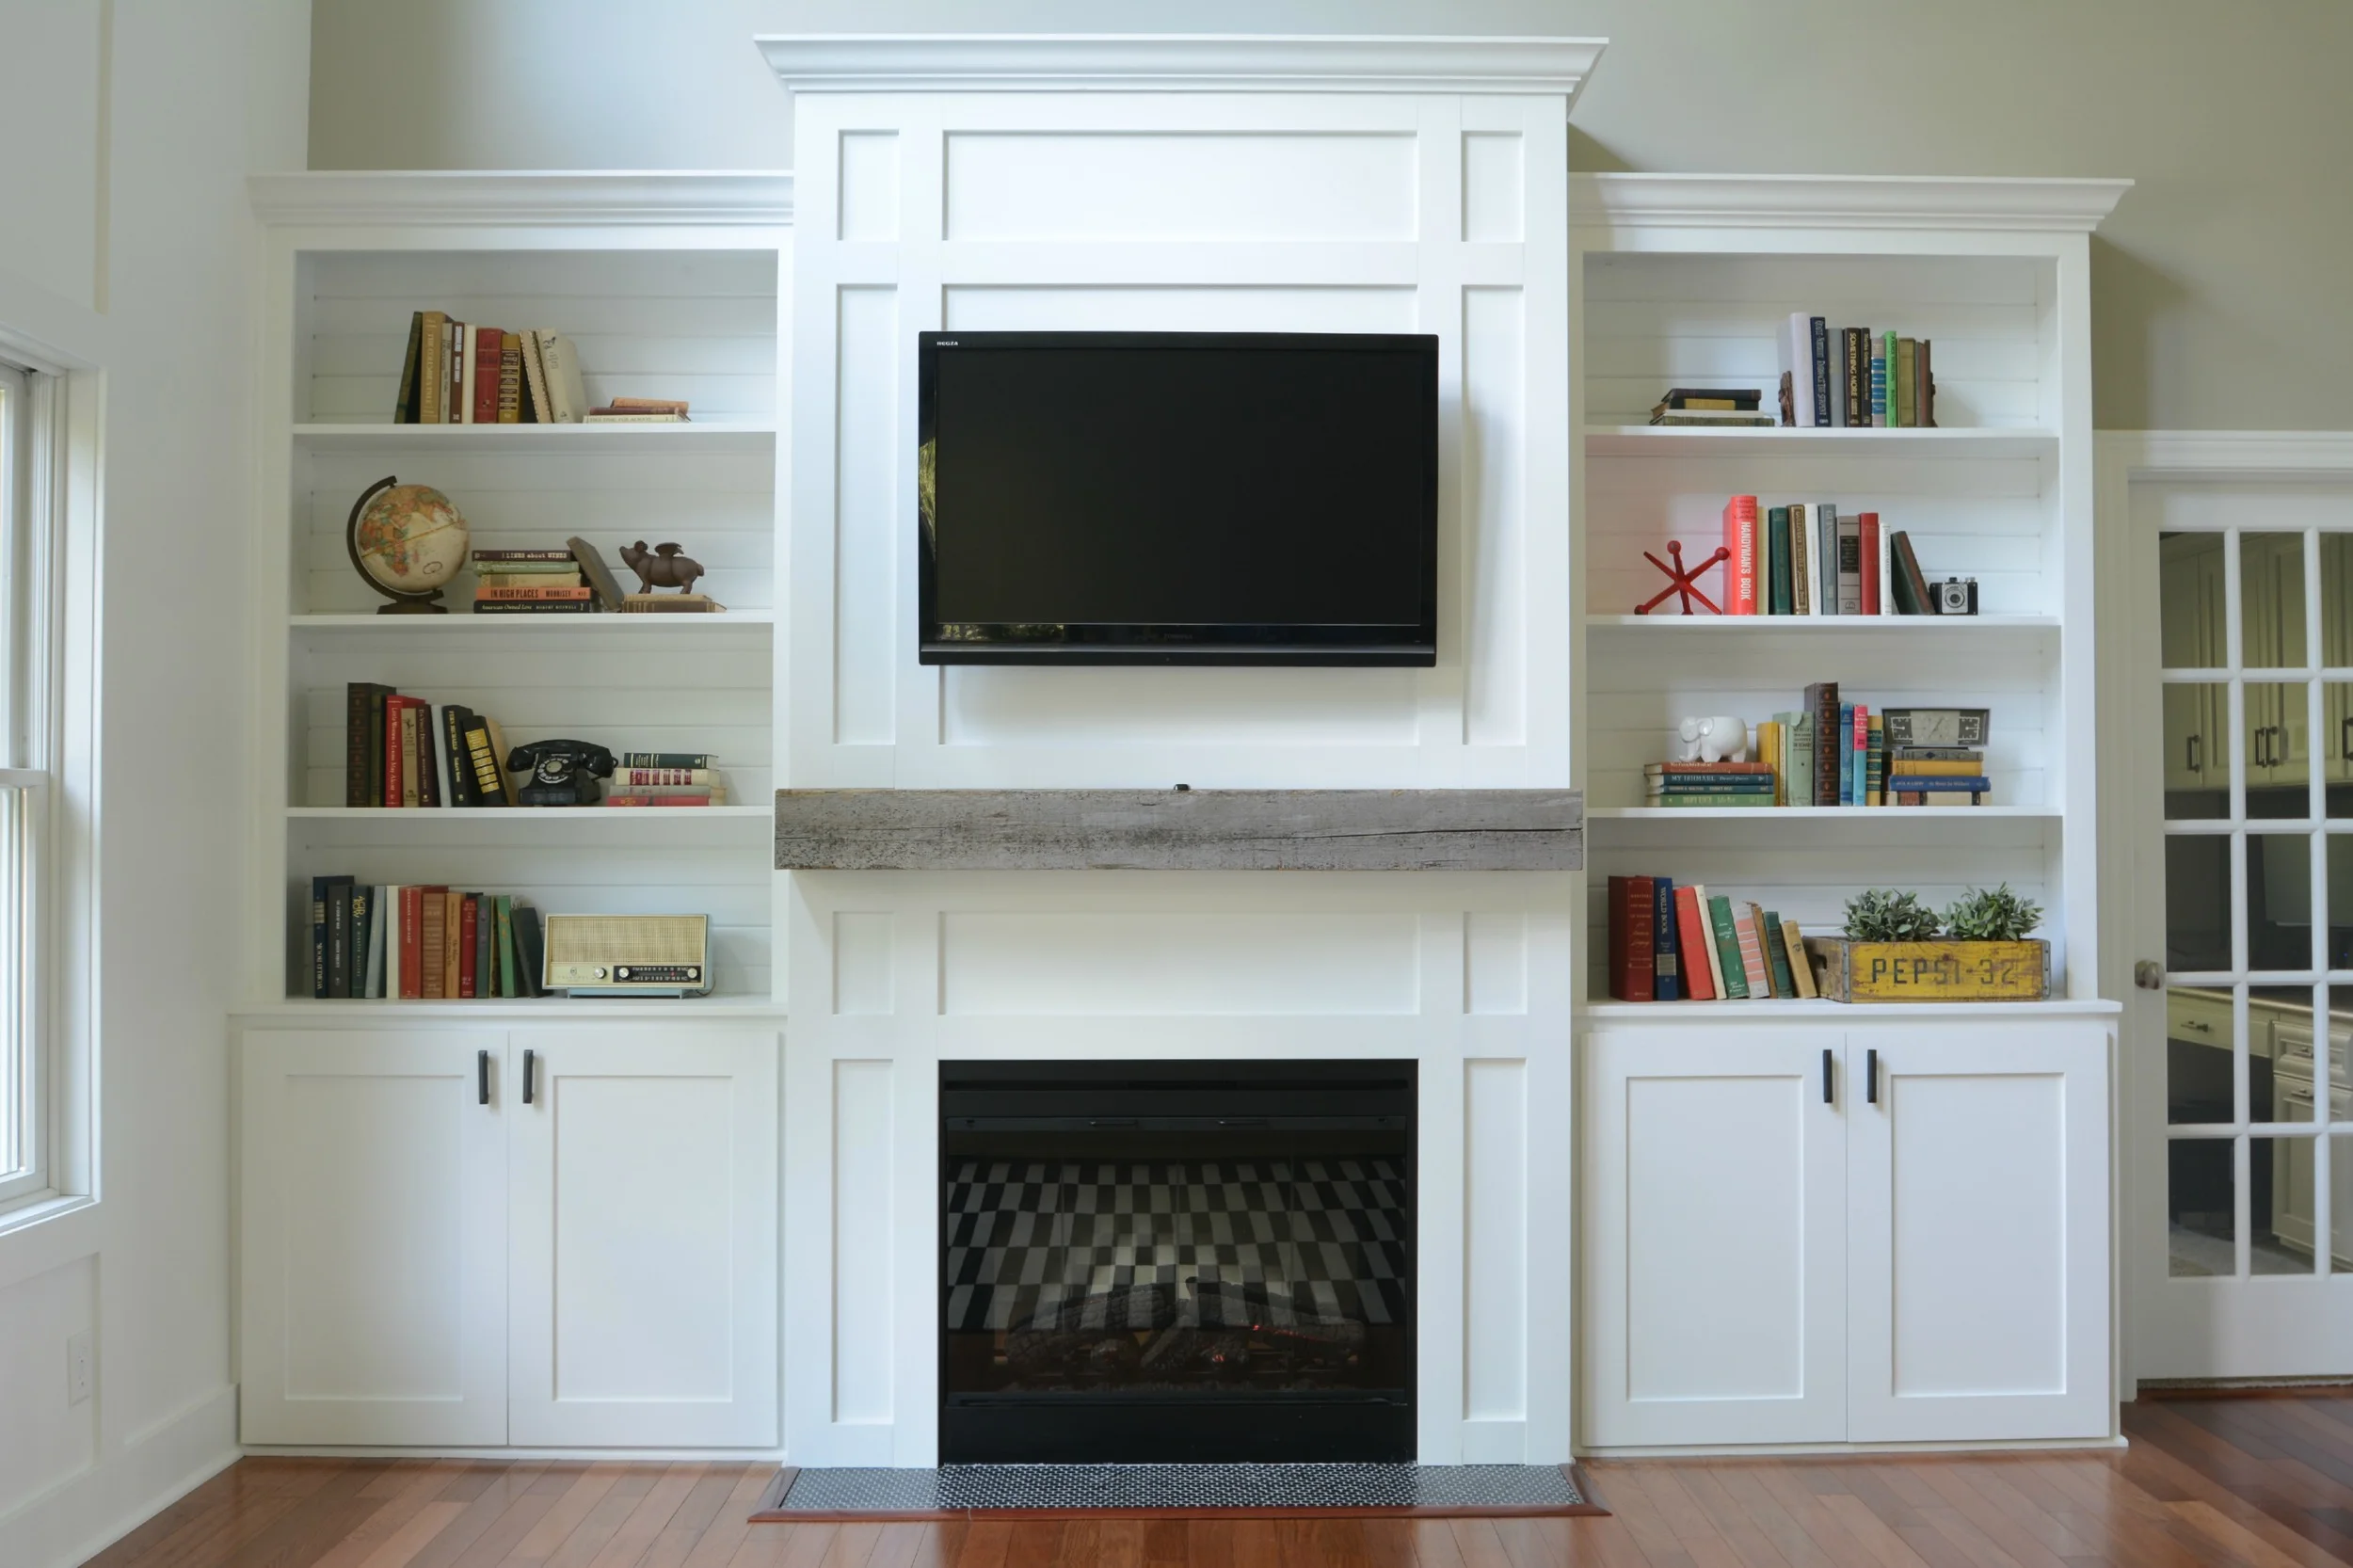
Today we prove that Nate actually built them.
I asked him for tips and tricks that he learned along the way. His number one suggestion is to "not build them." But he doesn't mean that. Especially after he added up the cost. As you may know, accountants speak in numbers. We spent about $450 total for the above built-ins (including mantel, molding, hardware, and paint). This project would have easily cost us thousands of dollars if we would have hired it out.
Today we are sharing how we built our built-ins. This isn't so much an in-depth tutorial like our other projects but more like a guide. These cabinets are obviously custom so our dimensions may not be super helpful to you. Hopefully they can help guide you if you are building your own. (Unfortunately there isn't enough time for us to supply everyone with their very own custom dimensions. Sorry!)
It's okay if you just look at the pictures. That's totally what I would do. #busted
Nate started by building the base cabinets.
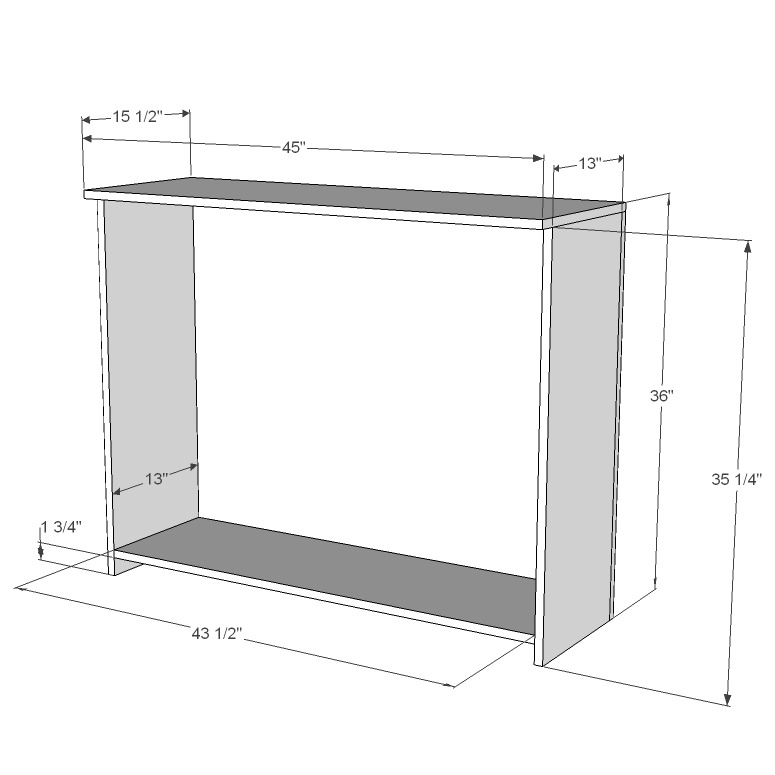
He used 3/4" MDF (4x8 sheets). We chose MDF because it's smooth, inexpensive and easy to work with. If you plan to stain to your cabinets, you will want to choose a different material.
He cut the MDF sheets to the appropriate dimensions with a circular saw.
He attached the boards with screws. Anywhere you would see a screw, he used a pocket hole screw. If you wouldn't see the screw, he used a regular screw. He also used wood glue on all of the edges.
He attached the top of base cabinet with finish nailer.
He then built the frame using pocket hole screws.
He attached the frame with finish nails and wood glue. Always wood glue. Always.
He then filled holes, caulked, sanded, etc. Repeat. Etc.

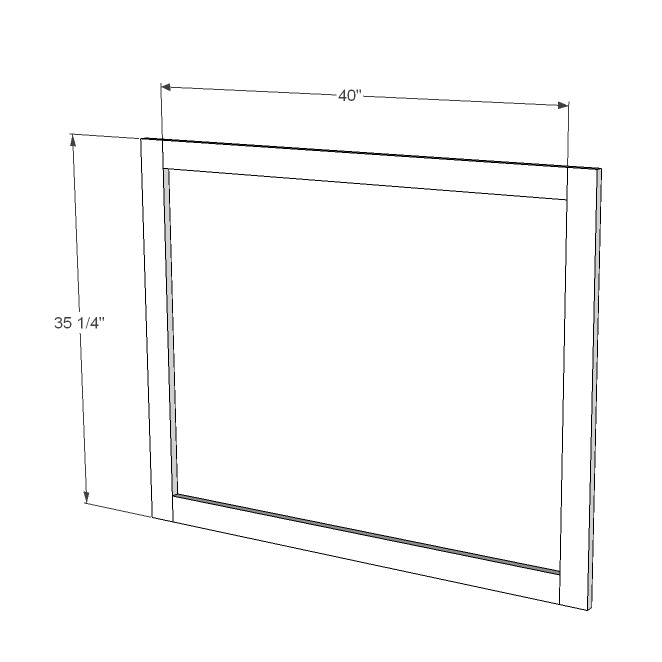
He then built the top part of the cabinets.
He started by attaching the long sides to top.
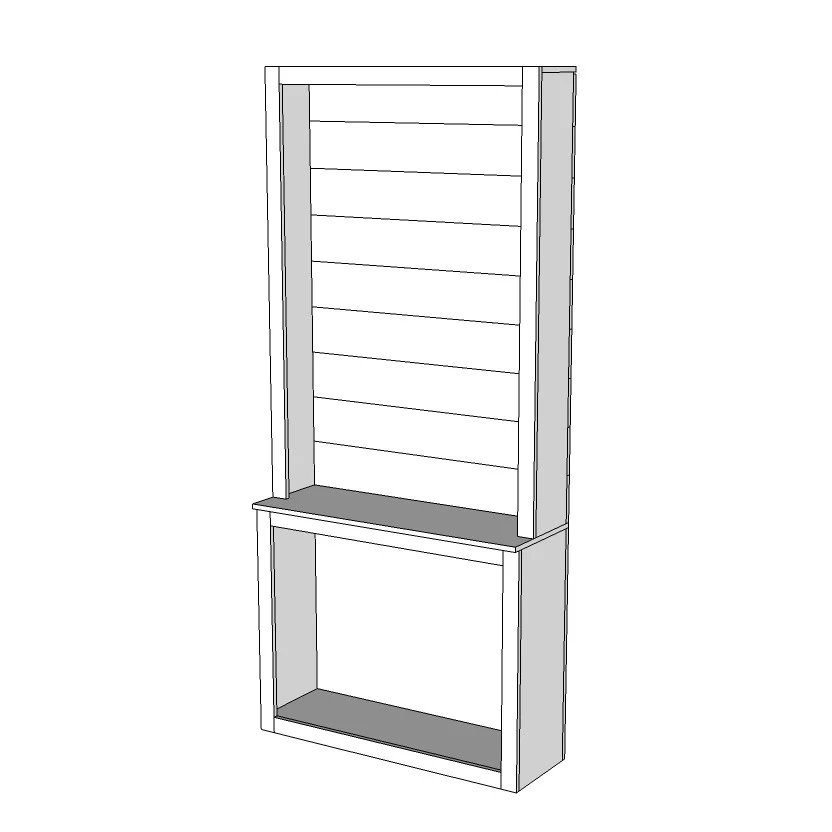
We used grooved boards for the back. He built the top by attaching each one individually to the frame with a finish nailer and wood glue.

He then made frame similar to the base cabinet.

He attached the frame to the cabinet with a finish nailer and wood glue. Finish nailer.
Fill, caulk, sand, repeat.

We then painted the cabinets using our paint sprayer. We did 2 coats primer, 1 coat paint.
We attached our shelves after painting (just based on time constraints). It would be easier to attach the shelves before painting. We sometimes like to do things the hard way. We permanently attached our shelves. You could do brackets. We know we're far too lazy to adjust shelves so we went with them permanently attached.
We installed the base cabinet first. Nate made sure it was level front to back and side to side, using shims on the bottom as necessary.
He attached the base cabinet to walls with screws.
We then placed the upper cabinet on top. These cabinets are heavy. I thought we might die each time. Maybe grab a friend or two to help you and your spouse out. Again, level front to back and side to side. Attach to the wall with finish nails.
Install both sides. Then caulk, sand, paint until you never want to see filler, caulk or paint ever again.

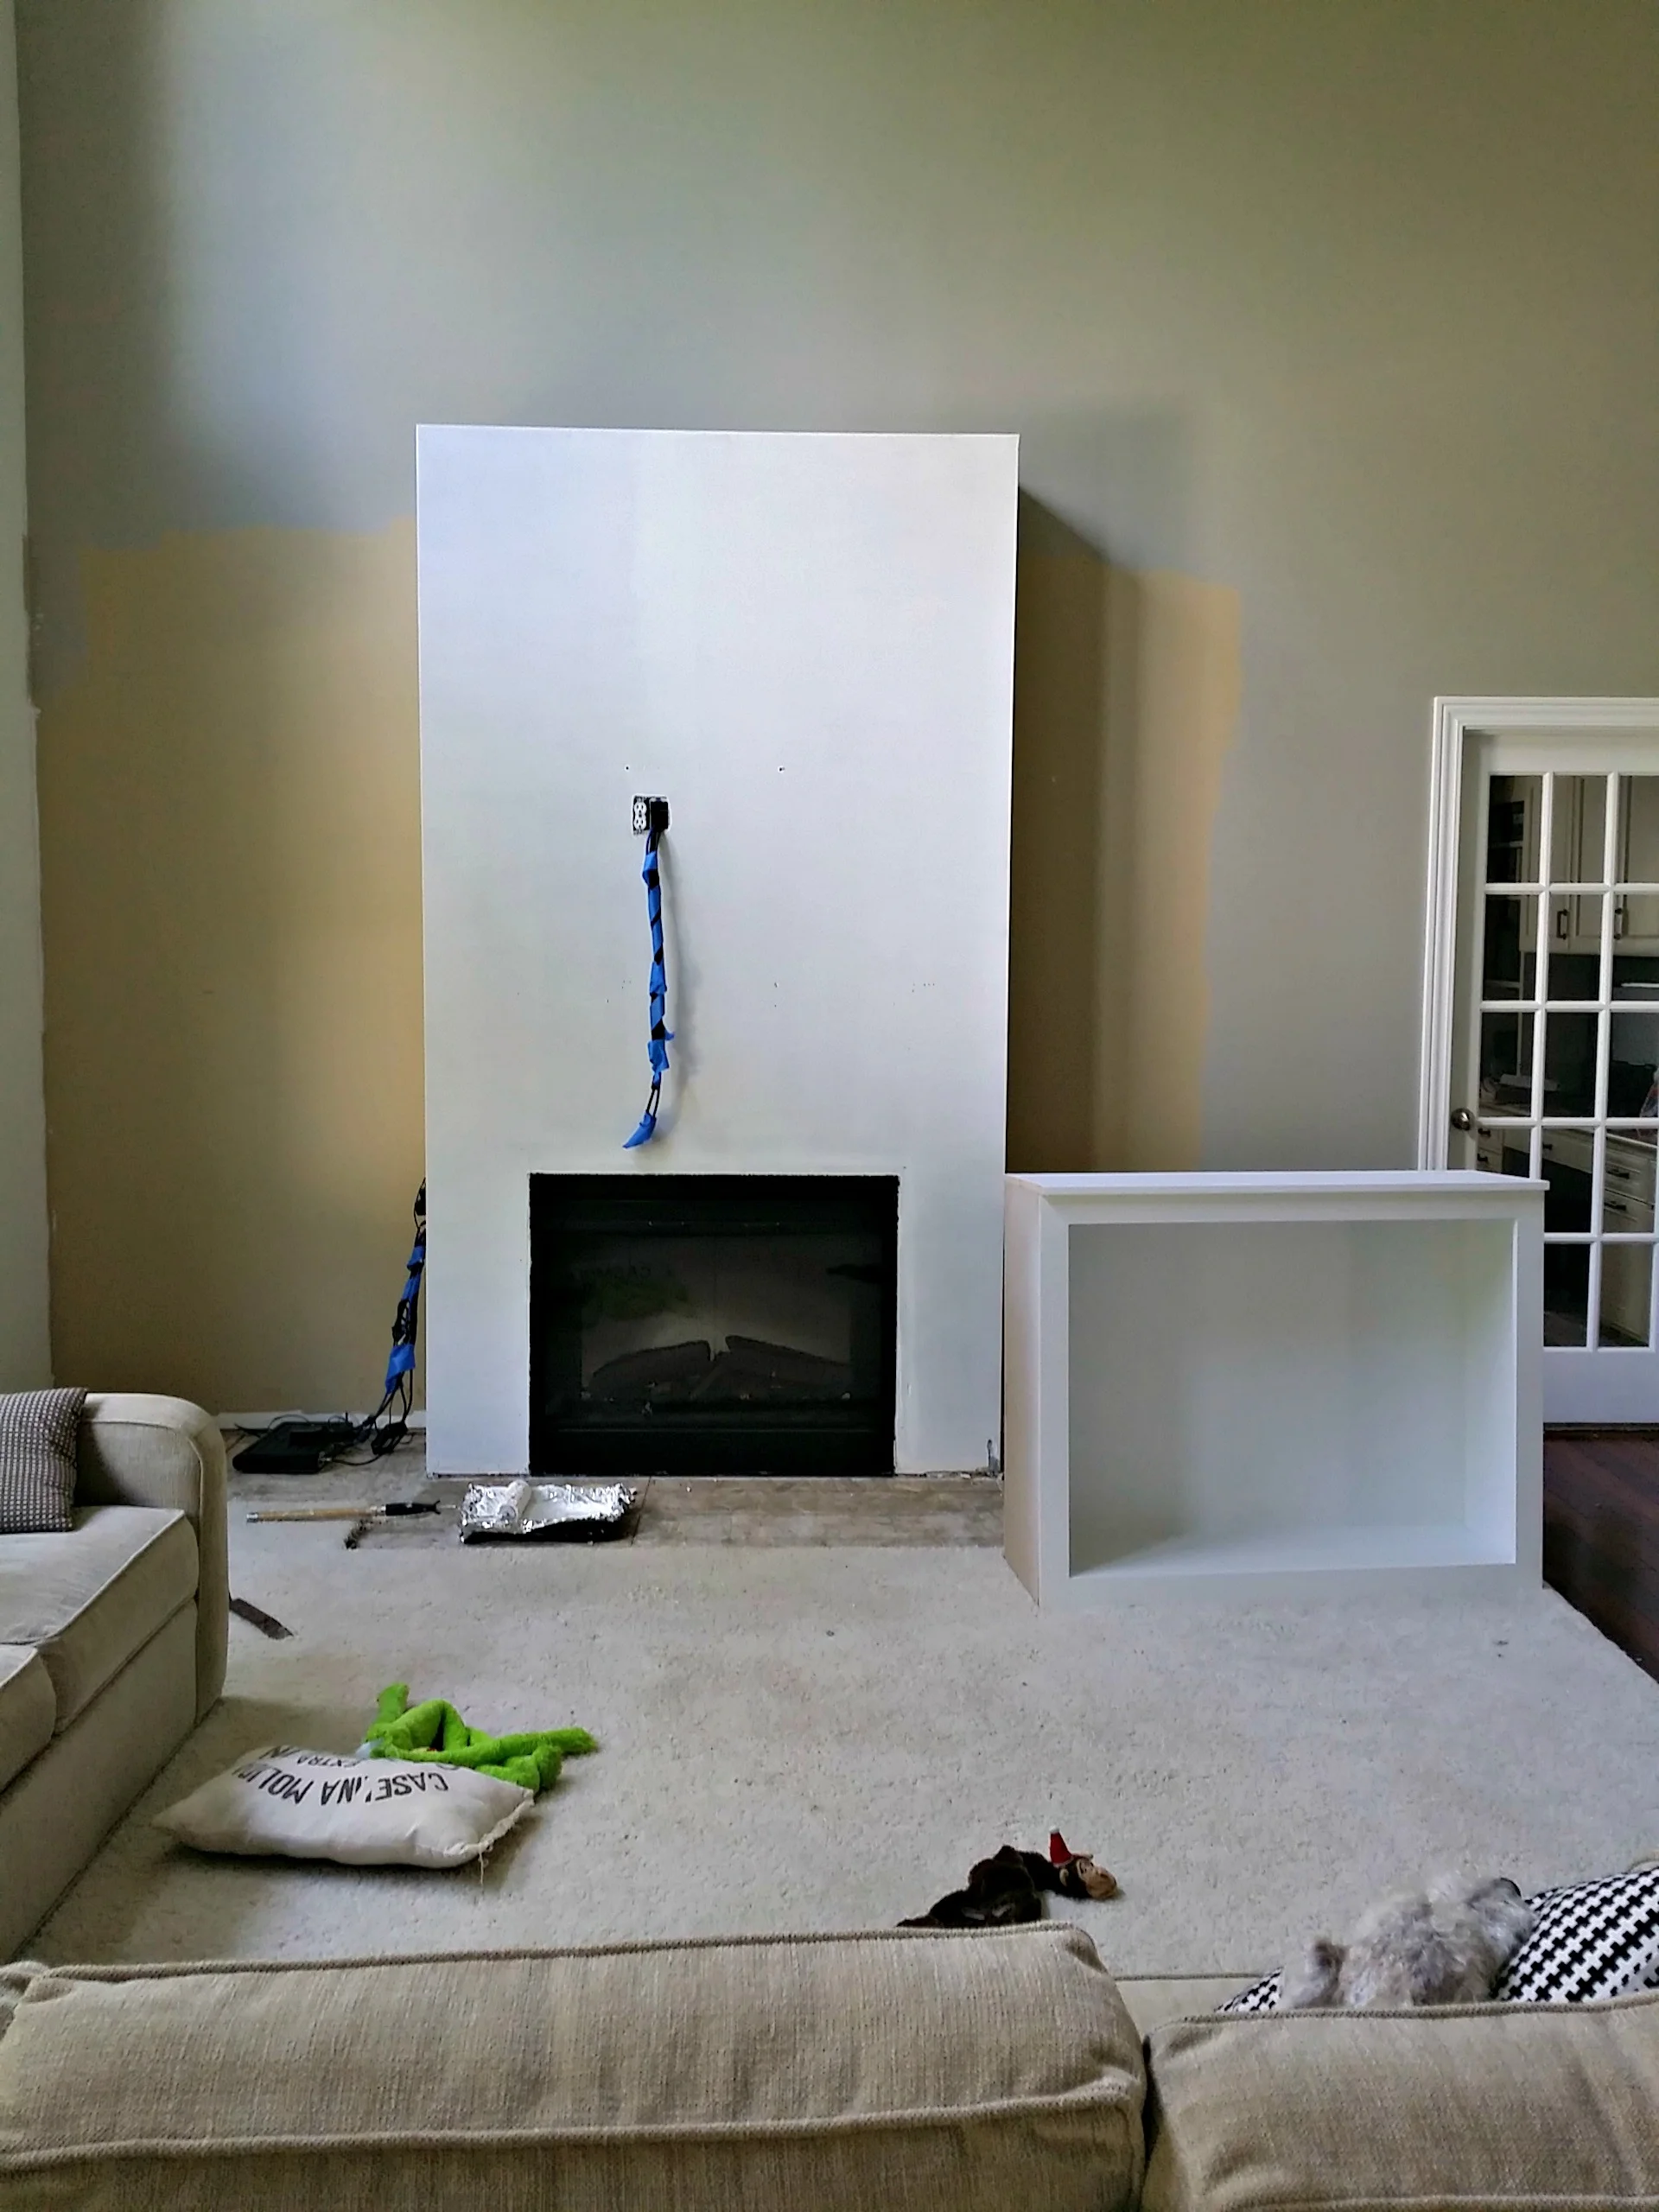
Here we have the cabinets in their naked state. You could only imagine the stares we got with this set up.


Nate's a paint sprayer hog. Luckily watching is just as fun. It's like magic.


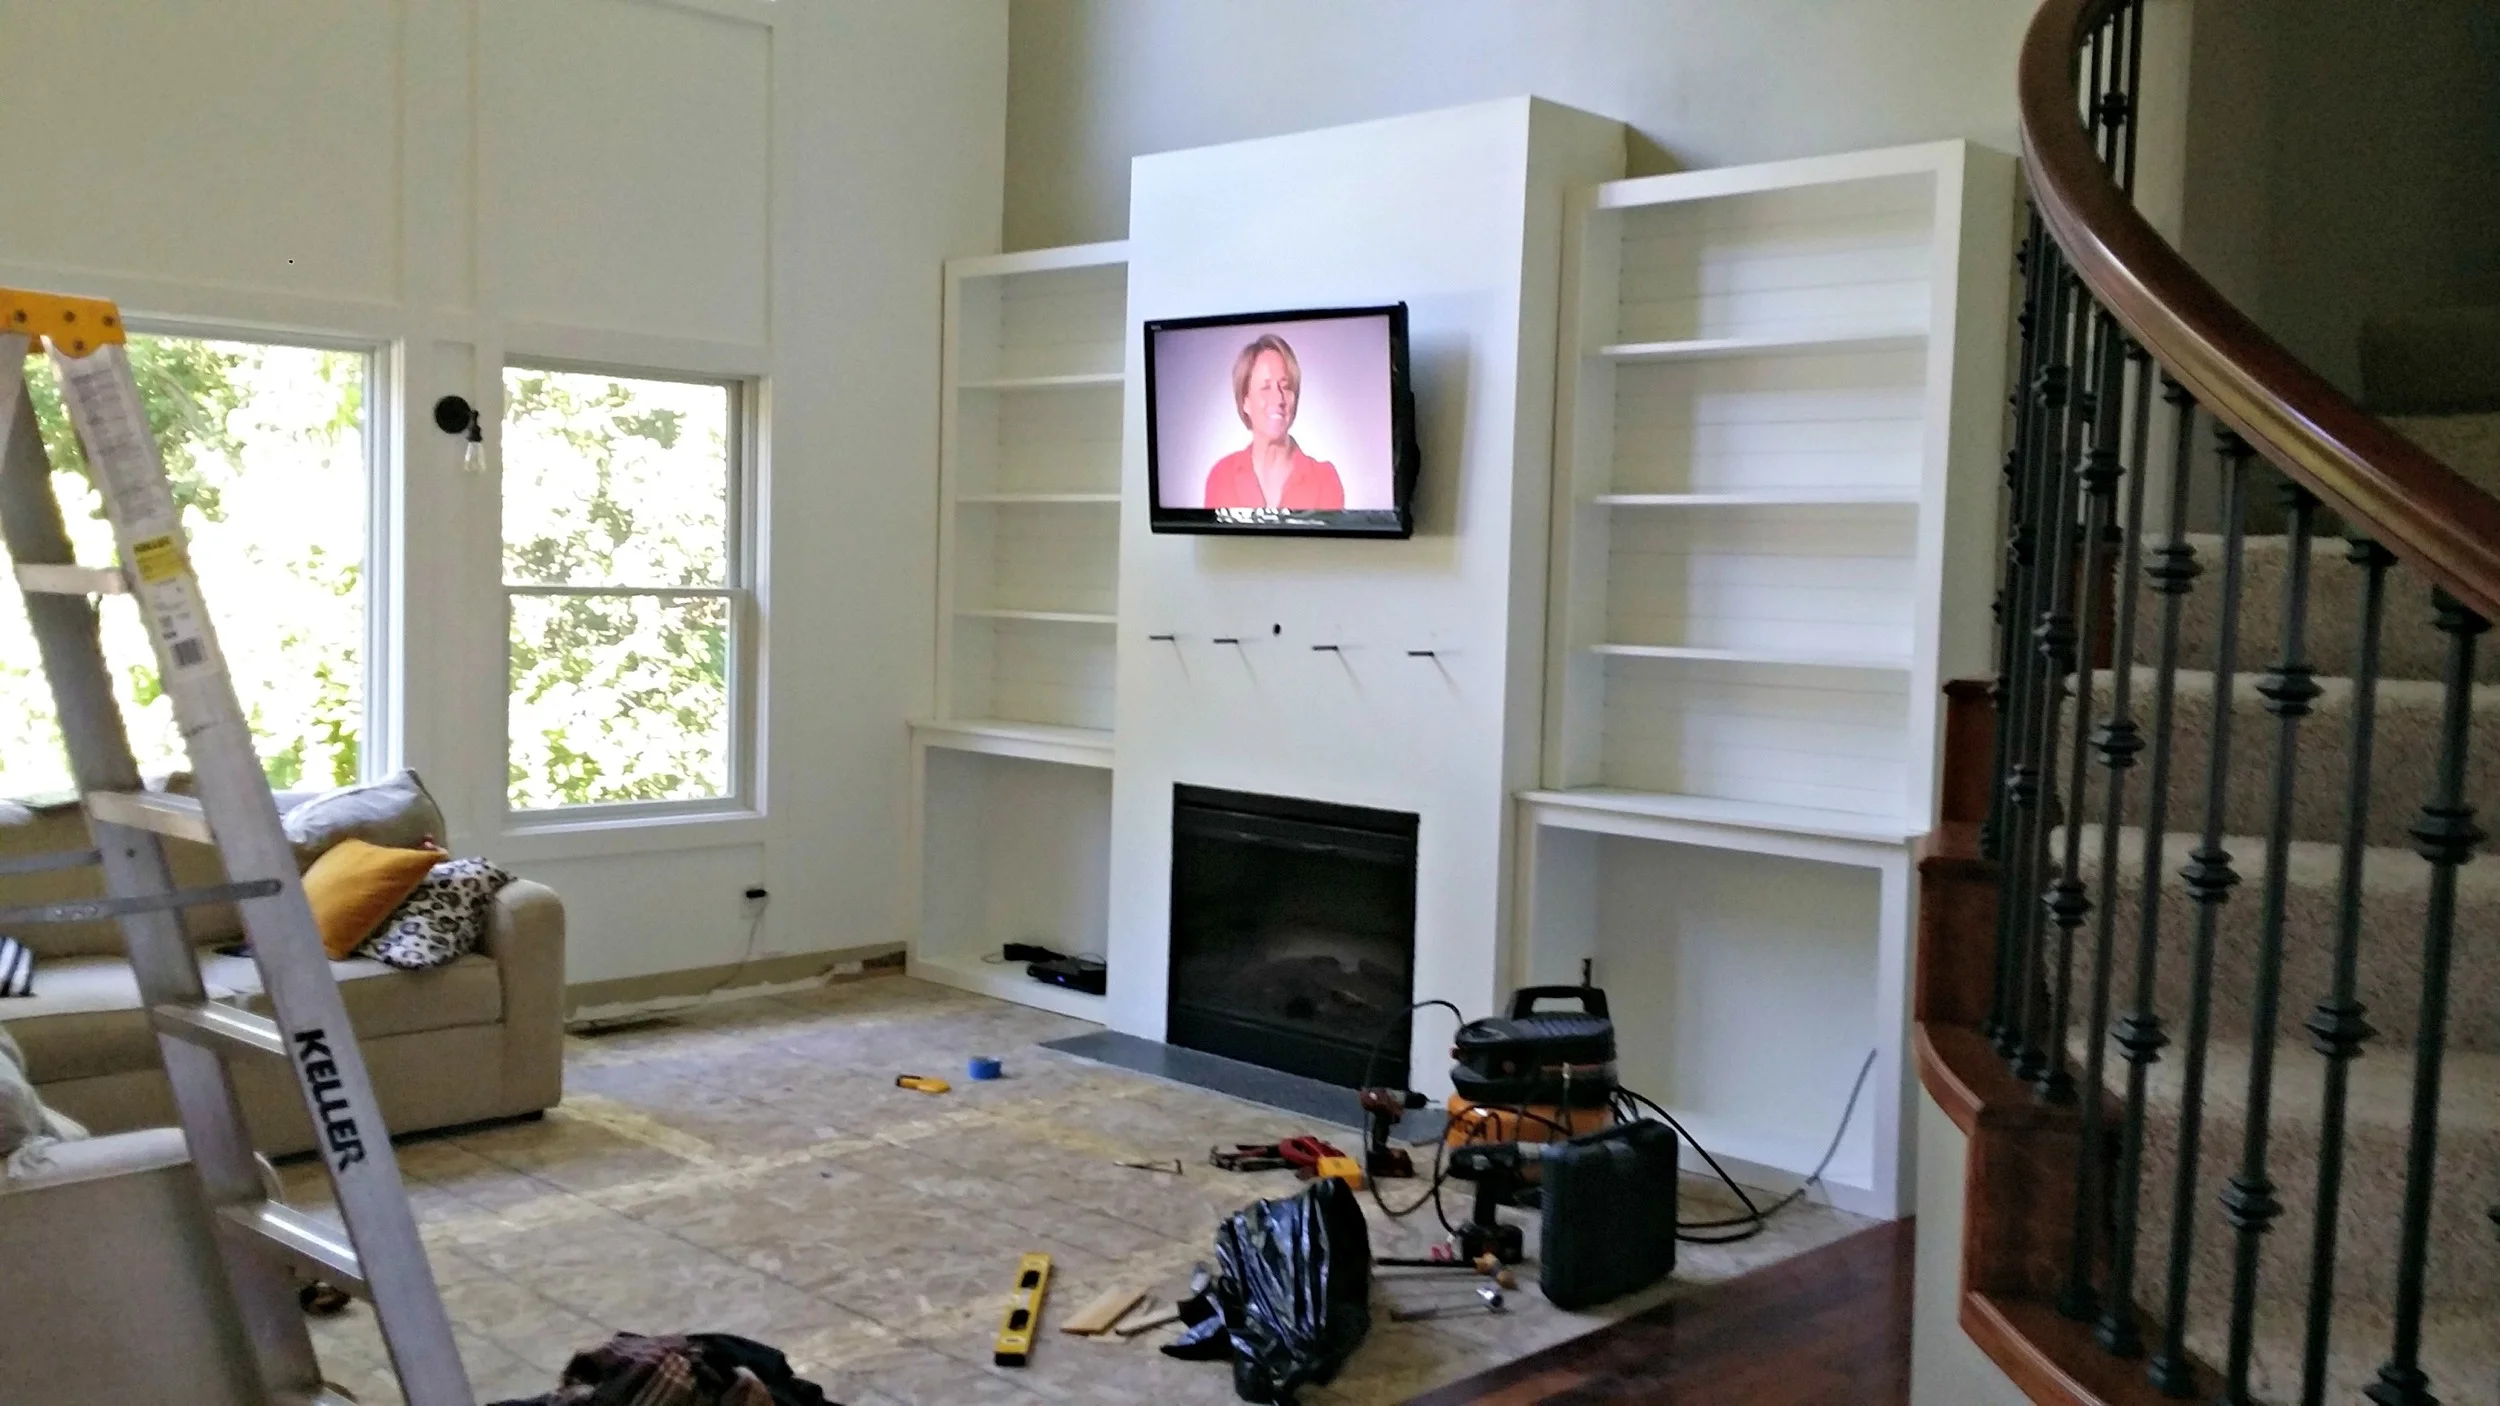
Once the cabinets were built and painted. We worked on the install.
As a refresher, here's where we started.
We first installed the base cabinet on the right. Nate was terrified the left wouldn't fit so we started with the one that would be the smoothest to install.
Starting on the right was a good decision. A little dry wall needed to be removed before installing the left. Turns out most of the walls in our home aren't straight. Whatever.

We almost died putting on the top left but we squeezed it in.

I went to work on Labor Day morning and came home to beautiful molding on the fireplace. I should work on holidays more often. Wait. No.
He also installed quarter round to finish off most of the edges. He then caulked and sanded. I followed with the paint brush.

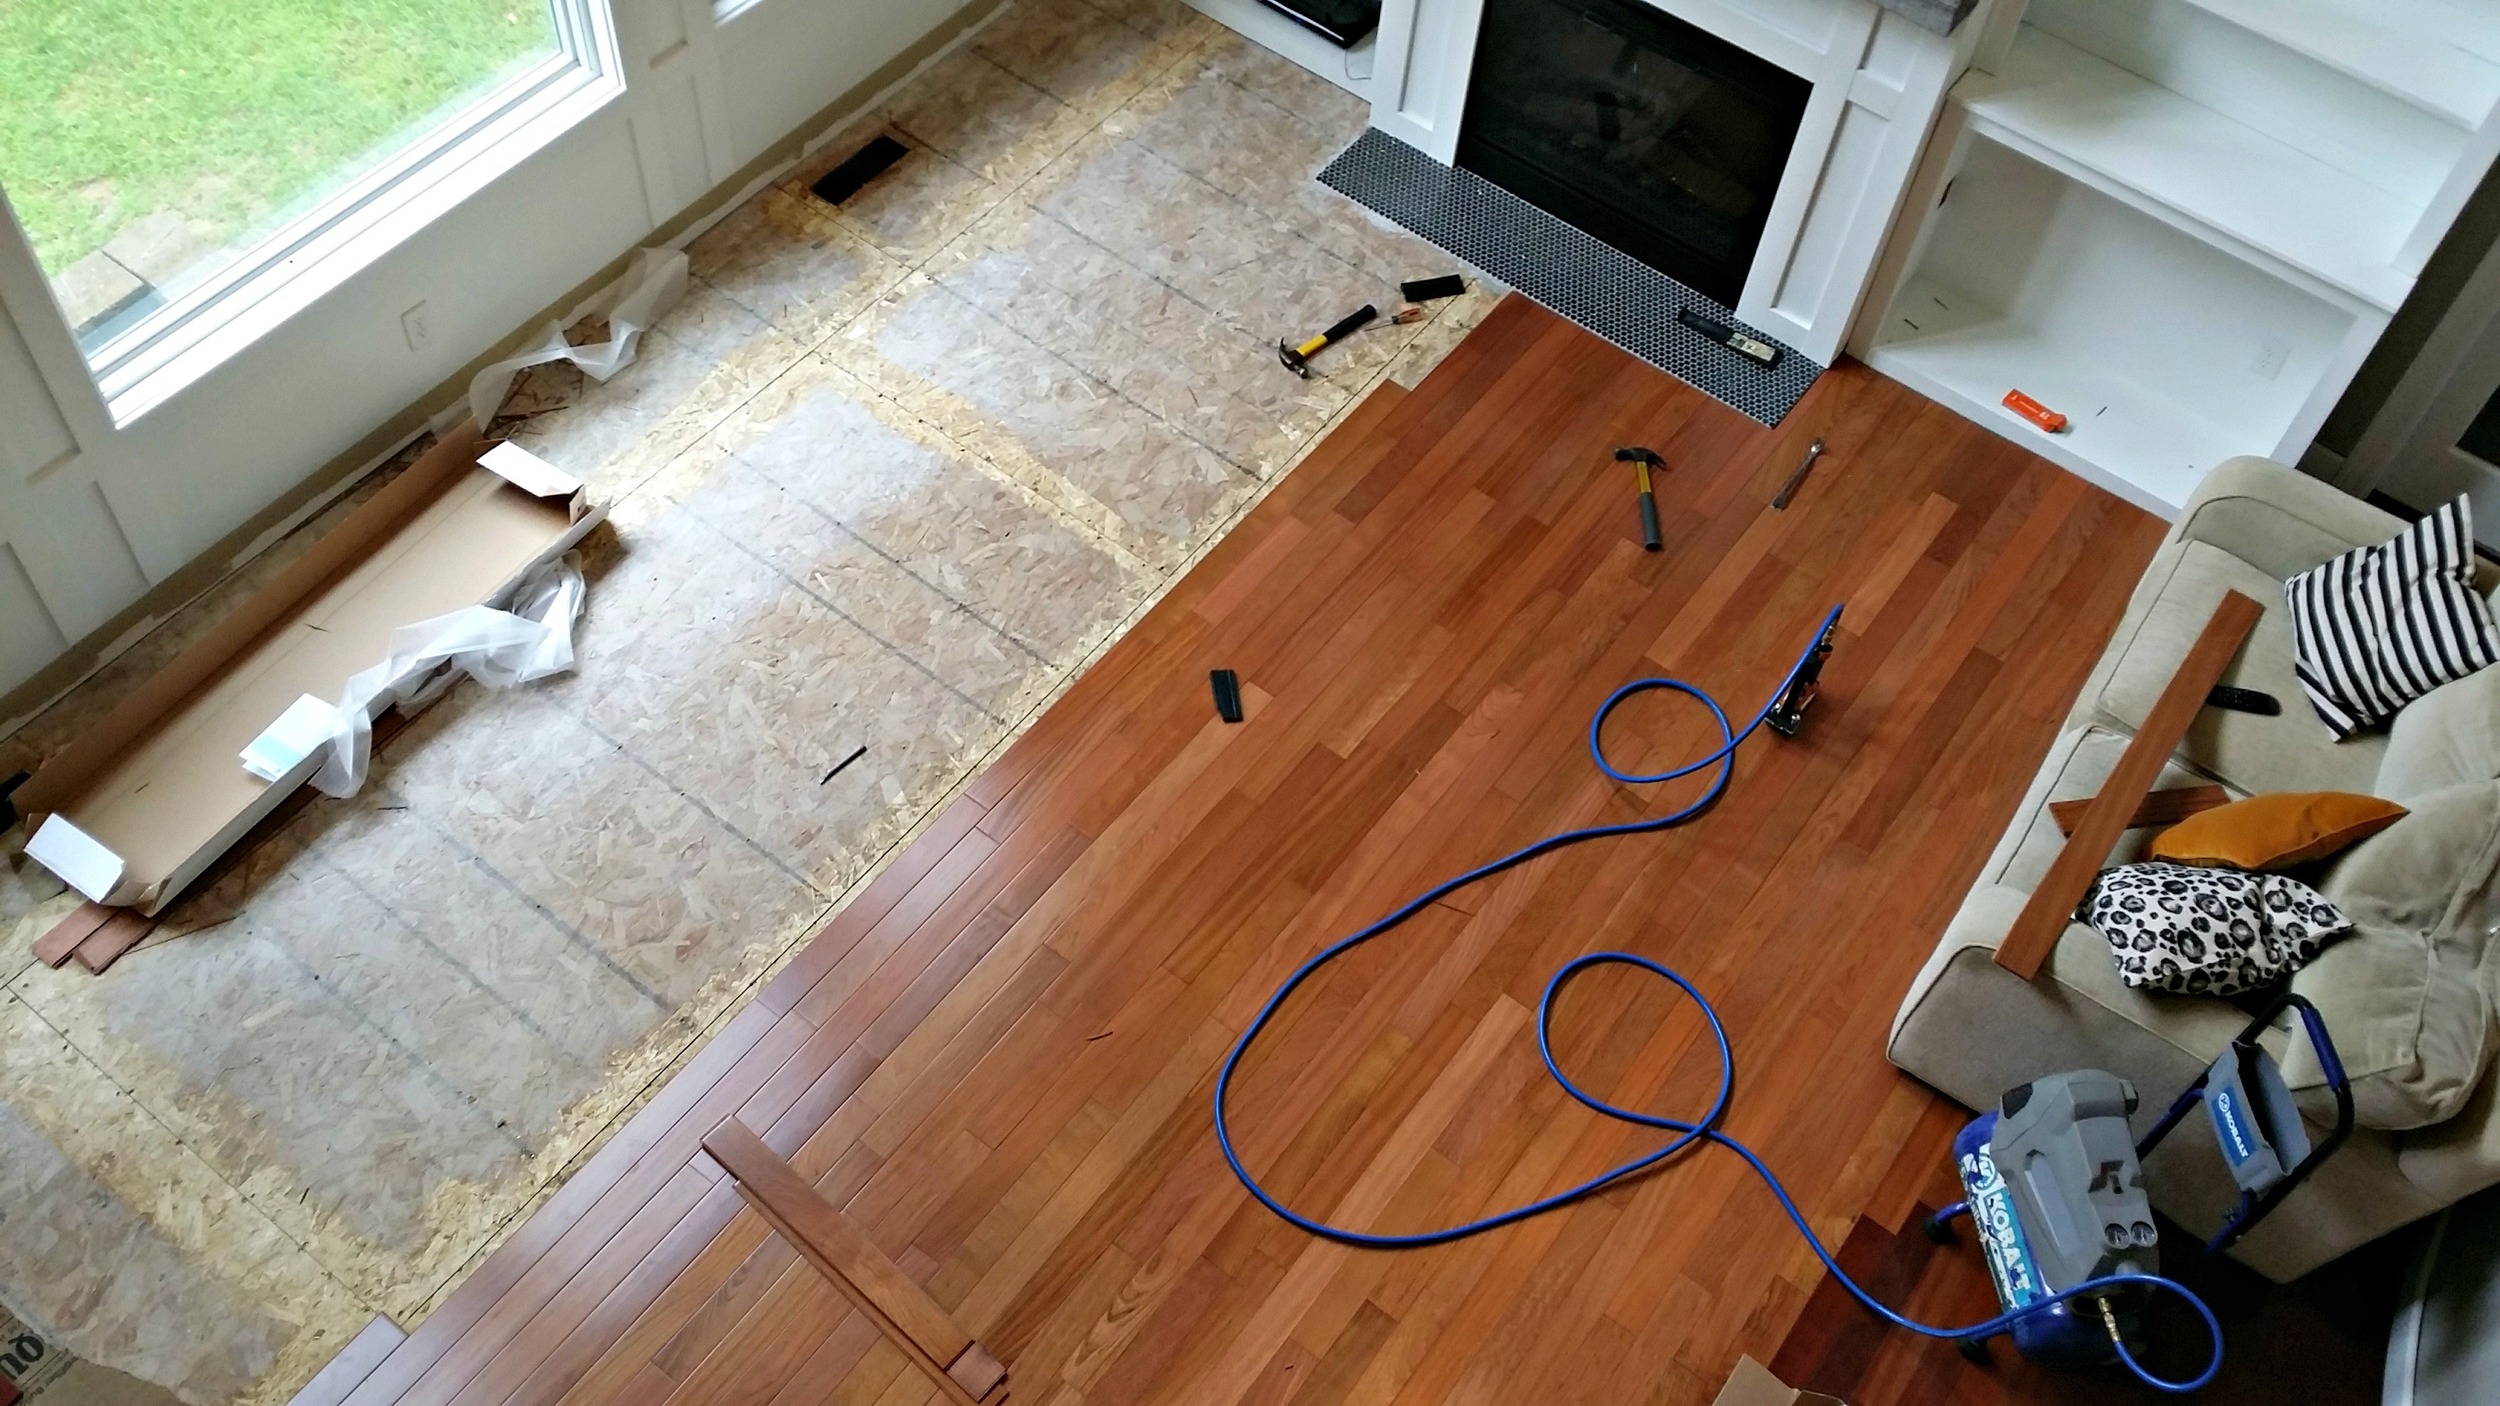
The floors were installed part way through the cabinet installation. We decided to go ahead and install the cabinets before the wood floors. We have zero plans of removing these cabinets so it shouldn't matter. Famous last words.
I was so excited that I styled the shelves before there were cabinet doors.
I went to craft night one night and came home to doors. Clearly the moral of this story is that I should go away more often. (Door tutorial located here!)

There you have it. The never-ending story of our darling built-ins.