New Arrival

There’s something I’d like to share with you all.

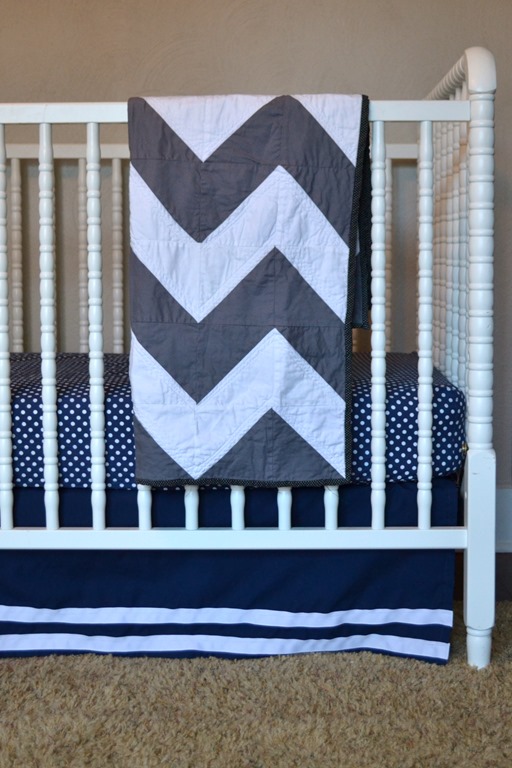
Grey and white chevron quilt from Sew Midwestern

There’s a new baby quilt available over at Sew Midwestern!  Super exciting right???

I love messing with people about babies.  Everyone keeps expecting me to be pregnant.  Last week I really wanted a kid.  This week, not so much.  Anyone want to co-parent with Nate and I? One week we have the kid, the next week you have it.  Genius, right?  I’m sure the kid wouldn’t be maladjusted at all.  (Don’t send me hate mail. I’m totally joking.  Or am I?)

All joking aside, the above quilt is lovely.  I kind of wanted to keep it for Ike. I will totally have about four when the time comes for me to give up sleep.  I mean, cuddle a bundle of joy.

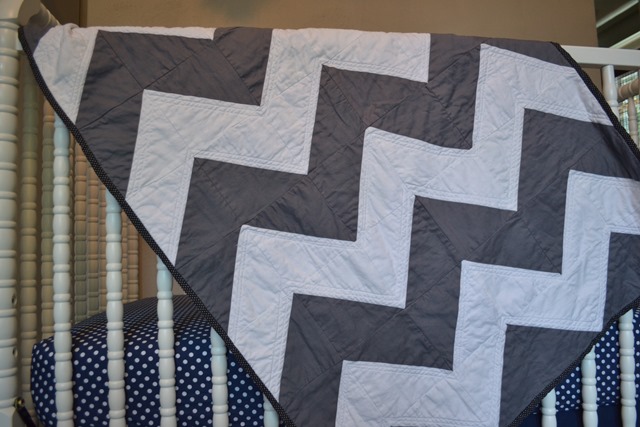
Kim and I worked on this lovely quilt together.  These quilts are a labor of love. The quilt  features carefully-chosen 100% cotton fabric.  It is machine pieced and straight-line quilted. (Not easy tasks.)  It is then pre-washed for a soft, broken-in feel. Many woman hours went into creating this handmade keepsake.

Grey and white chevron quilt from Sew Midwestern

Grey and white chevron quilt from Sew Midwestern

We hope you all love it as much as we do!

See more quilt options at Sew Midwestern!

Have a fabulous weekend!  My family is in town which means junk shopping galore!  Woo hoo!

Who loves chevron quilts?  Anyone interested in co-parenting? (I kid. I kid.)

Easy Valentine’s Yarn Wreath

I am a wreath making fool lately.  It’s become some sort of sickness.

This Valentine’s Day wreath isn’t entirely my fault.

Valentine's Yarn Wreath

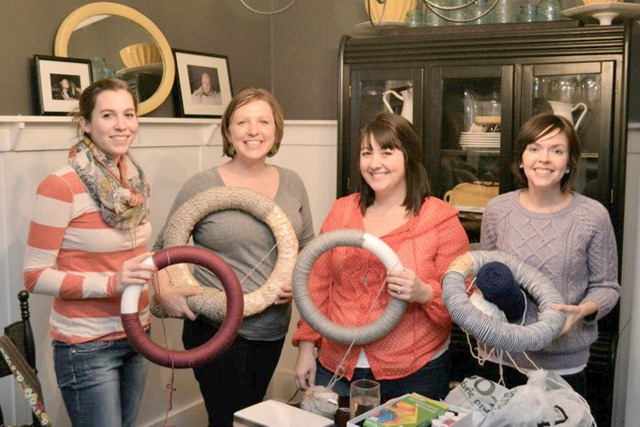
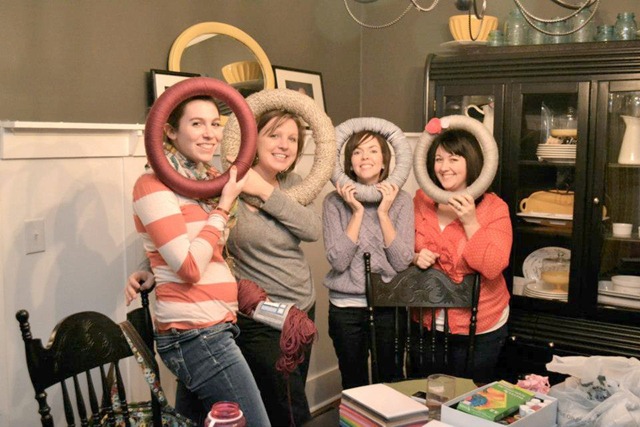
Kim (NewlyWoodwards) and I have started a monthly craft night.  We’ve even allowed others to join us in our crafting awesome.  We’re nice like that.

Our craft night has two simple rules:  1. The host picks a project that the will be completed by the group.  (Other crafty things can be worked on after the group craft.)   2. Everyone brings a dessert or appetizer.

craftnight

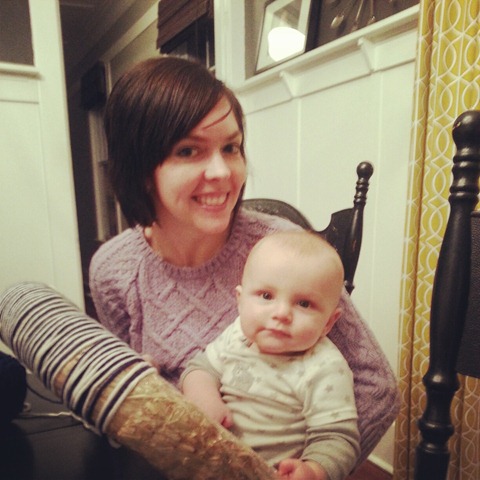
Kim was the first to host.  She chose yarn wreaths as our craft.  These wreaths only took us about 3 hours to wrap. (Please note how far behind Mrs. Woodward is.) Of course there were food and adorable baby distractions. 

IMG_20130124_183143

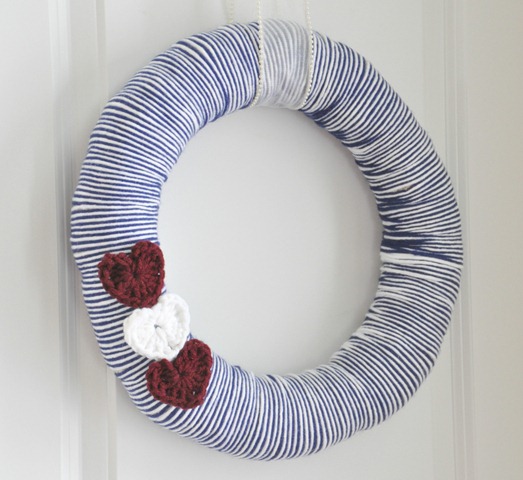
The directions for yarn wreaths are pretty self-explanatory. Wrap yarn around the wreath until it’s covered.  I used two colors (because I like to make things hard) but it was fairly easy to keep the colors alternating.

This is how we ended the night.  Most of us were yarn wrapped but not finished.  Even though none of us completed our wreaths, we are still considering craft night a huge success.

craftnight2

I finally took some time this week-end to crochet some hearts to finish off my project.  (I used an excellent tutorial from Maybe Matilda.)  In true Michelle fashion, I wanted to keep the wreath nice and simple.  I’m not big on things screaming “HAPPY VALENTINE’S DAY!!”.  I like more of a Valentine’s whisper.

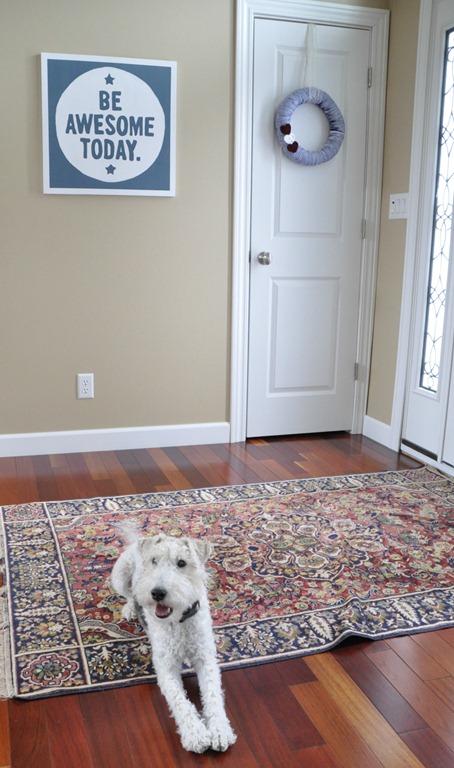
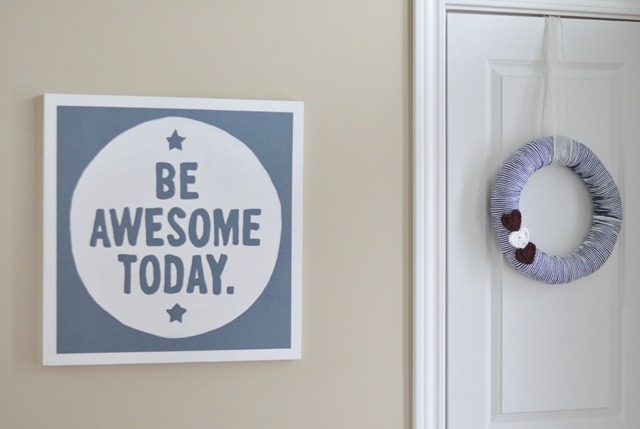
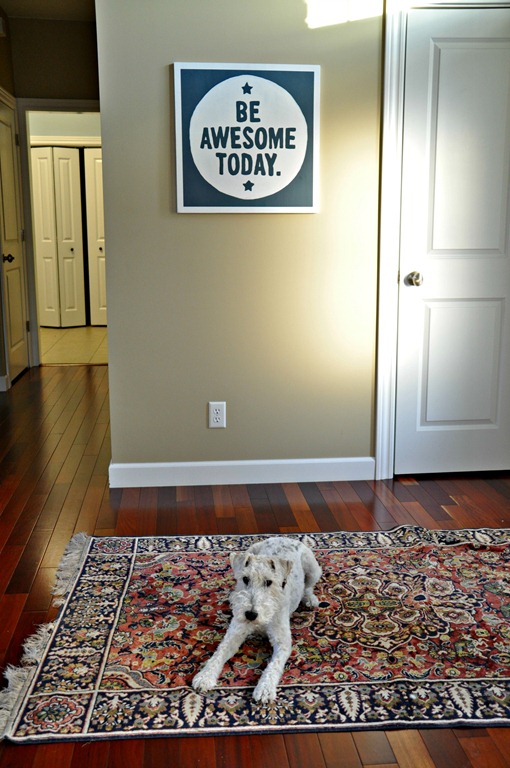
Ike loves how the wreath ties in colors from our Be Awesome Today sign and our rug.

Valentine's Yarn Wrapped Wreath Crochet Hearts Wire Fox Terrier

Valetine's Wreath Crochet Hearts Be Awesome Today Sign

Easy Valentine's Crochet Heart Wreath

I’m this month’s host.  Which reminds me.  I need to pick a date and a craft. Yikes.

(Read Kim’s version of this story over here!)

Any craft night project suggestions?  Are you a wreath fan?  Do you like Valentine’s decor to scream or whisper?

Linking up to: Bower Power

Sign Painting and Resolutions

Let’s talk New Year’s Resolutions.  On the 14th of January.

I like to set one resolution.  Nate thinks resolutions are dumb.  Ike has no idea it’s 2013.

My resolution for 2013 is to be tough.  Tough physically and tough mentally.  The physical aspect is pretty self-explanatory.  I exercise regularly but avoid weights.  Therefor I am a weenie.  I will not be a weenie in 2013.  As for the mental part of this resolution.  I am big on homeostasis. I like to be a certain temperature.  I need a certain amount of sleep.  I need a certain amount of food.  I am Type A and things must go as planned.  If the above things don’t go as scheduled, I shut down.  I am going to be tougher in 2013.  I will not shut down.  Tough. Tough. Tough.

I wanted something to remind myself of my resolution.  I thought a sign by our front door would appropriate.

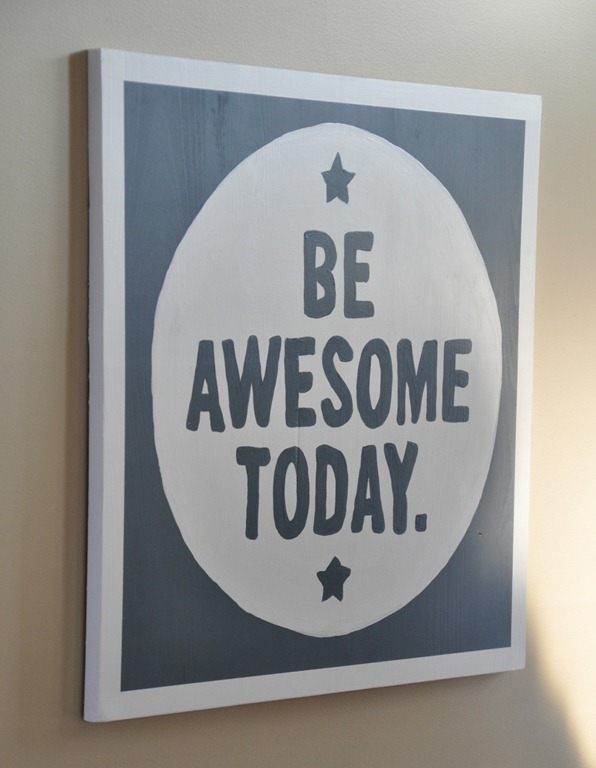
Be Awesome Today Sign by Decor and the Dog

Okay, so a “Be Awesome Today” sign doesn’t really have anything to do with being tough.  Just go with it.  I wanted to make a “Punch Today In the Face” sign but Nate said that was too violent. Being awesome is all encompassing.

I originally saw this phrase from LuciusArt.  There are a bazillion and twelve “Be Awesome” prints on Etsy today but that one was my inspiration.

159

I’ve been getting questions about how I sign paint.  I’m still learning my way.  I generally freak out about 17 times while painting.  I think this sign was only 15.  Tough.  Tough. Tough.  Bring it 2013.

I learned the basic skills from the wonderful Jen ofOnion Grove Mercantile.  (Jen painted the Locally Grown sign hanging next to our laundry room.)  I highly recommend checking our her work!  She is beyond talented.  Jen taught me the basics at a fundraising event hosted by the lovely Kim of NewlyWoodwards.  I’ve been painting away ever since.  It’s very therapeutic…minus the freak outs.

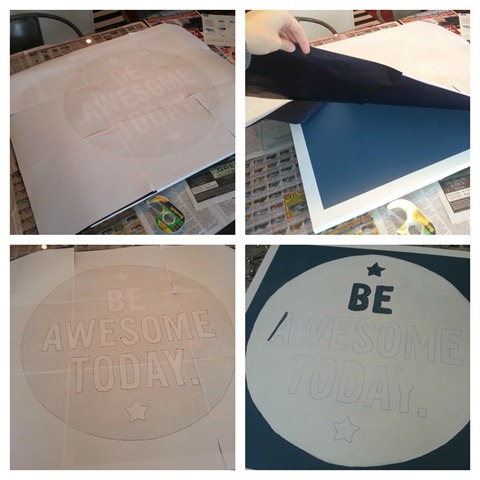
My sign painting steps are as follows:

  • Purchase whatever wood is cheapest at Lowe’s.  (This sign is 24”x24”.) 
  • Paint the background color. I also usually do a border. I use painters tape for a crisp edge. 
    • I use any kind of paint I have laying around in the basement.
    • Design the sign in Photoshop Elements. 
    • Print the design poster sized.  (If anyone has interest in a tutorial on this, let me know!) 
    • Tape carbon paper on the back of the design. 
    • Trace the design with a ball point pen. 
    • Carefully paint away with a small brush.
How to Paint Signs

I have found that I am only capable of painting large letters.  I totally fail at small letters.  It’s okay.  I don’t like little letters anyways. I’m going to blame my paint brush.

Ike is Awesome Every Day
Sign Painting Tips and Tricks.jpg
Photobucket Photobucket Photobucket Photobucket PhotobucketPhotobucketfollow us in feedly

Because You Need MORE Gift Ideas

I’m shoving handmade gift ideas down your throat.  Take that.

Are you done with your holiday gift shopping/making?  Yeah, me neither.  I don’t like to start too early.  Takes the fun out of the season, you know.

Today I have compiled 8 posts from days past.  I have tackled and succeeded at these projects.  You will too.

Decor and the Dog Gift Collage

You could sew your dog a long tie or even a bow tie.  Who wouldn’t love a monogram made from washersInfinity scarves are all the rage this year.  I suggest a lingerie bag for that friend that travels a lot?  Want to bang your head against the wall?  You could make a state pillow.  Got 15 minutes before that big gift exchange?  Go with the wood bead necklace.  Got a messy cook or hipster in the family?  Go with the apron in a mason jar.

What’s really funny is that no one on my list will get handmade gifts this year because I’m too busy putting together a post on handmade gifts.  Oh, the irony.

Are you giving handmade?  Are you done shopping?  Who is ready for some stinking snow already?

Dare to Deck the Halls- Burlap Stocking Tutorial

Can you believe that Monday is the last link party for the Dare to DIY?  Where does time go?

Monday’s theme is “Dare to Deck the Halls.”  I’m sure you have been wanting to make something for your home for the holidays.  Hopefully the Dare to DIY is that extra little push that you’ve been needing!

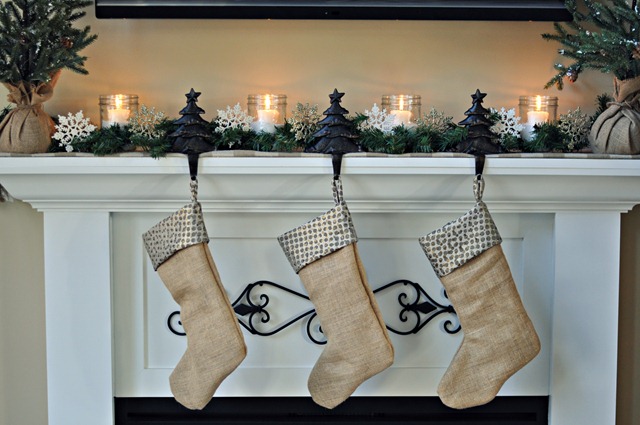
On Tuesday I shared with you our holiday mantel. One of the finishes touches on the mantel was the addition of burlap stockings.

Decor and the Dog Holiday Mantel 3

I’ve had my eye on burlap stockings for awhile.  When I found some gold polka dot fabric and burlap with gold flecks in at Joann’s, I knew it was a sign that these stockings were to made in 2012.  Unfortunately I learned that burlap and I don’t get along (major congestions/headache/think I might die/seriously) but I suffered through for these beauties.

Stockings are like the throw pillows of holiday decorating.  There are seriously easy to make.  I will show you how.

You will need:

  • 1/2 yard exterior fabric (I used the gold flecked burlap.)
  • 3/4 yard interior/cuff fabric (I used the gold polka dot fabric.)
  • 6” ribbon or fabric remnant for hanging loop (I used a strip of fabric.)
  • Coordinating thread
  • Stocking template (I’m not smart enough to do this as 1 download so you will need all 3 pages. Page 1, Page 2, and Page 3.)
Burlap Stocking Supplies

Print out the stocking pattern (links above).  Cut out the pattern with a rotary cutter or trace and cut out with scissors. Repeat for the lining.  (You will need 2 exterior pieces and 2 lining pieces.)

Burlap Stockings Step 1

To assemble the body of the stocking, put the two exterior body pieces right sides together. Pin in place. Sew the two layers together with a 1/4-1/2"-ish seam allowance.  I’m super precise when I sew.  I’m having trouble coming up for the right words for this but it’s important to sew as along the circular edges as smoothly as possible.  If you sew them too square or at a point, your stocking will look funny when you turn it right side out.

Burlap Stocking Step 2

Trim the fabric along the edge of toe and ankle to help make the stocking less bulky when you turn it right side out. Turn right side out.

Do the same with your lining pieces except you will not turn the lining pieces right side out.  (My lining fabric was hard to determine which side is right side so don’t let the photos fool you.)

Burlap Stockings Step 4

Place the lining inside the body of the stocking.

Burlap Stockings Step 5

Next you will need to make the cuff.  Cut out a 16" x 9" rectangle.  Fold the fabric in half (right sides together) and sew up the short side.

Burlap Stockings Step 6

Fold this in half so right sides are showing. 

Burlap Stockings Step 7

Place the cuff inside the body of the stocking.  You want the finished/folded edge to go in first.  The raw edges of the cuff should match up with the raw edges of the body.  You also want the seam of the cuff to match up with the back body seam. 

Burlap Stockings Step 8

Cut a 6" piece of ribbon (or use a fabric scrap like I did) and fold in half. Place the ribbon between the lining and the cuff along the back body seam of the stocking. The loop of the ribbon should be facing into the body of the stocking.  Align the raw edges of the ribbon and the body of the stocking.

Burlap Stockings Step 9

Pin body of stocking, cuff, and ribbon.  Sew cuff onto body of stocking.  Fold the cuff over and enjoy your handmade lined stocking!

031
Burlap Stocking Tutorial from Decor and the Dog

Hang by the mantel with care!

Burlap and Gold Stockings from Decor and the Dog
Decor and the Dog Burlap Stocking Tutorial
Decor and the Dog Holiday Mantel 2012

In case you missed them, I also whipped up a Glittery Gold Whispy Ornament Wreath.

Glittery Gold Whispy Wreath

And some reindeer prints.

Decor and the Dog Vignette 2

Are you ready for Monday’s link up?  We double dog dare you on this last challenge! Seriously.  What are you waiting for? Go forth and craft!

Burlap Stocking Tutorial.  Custom stockings are easy to make!
Photobucket Photobucket Photobucket PhotobucketPhotobucketPhotobucketfollow us in feedly

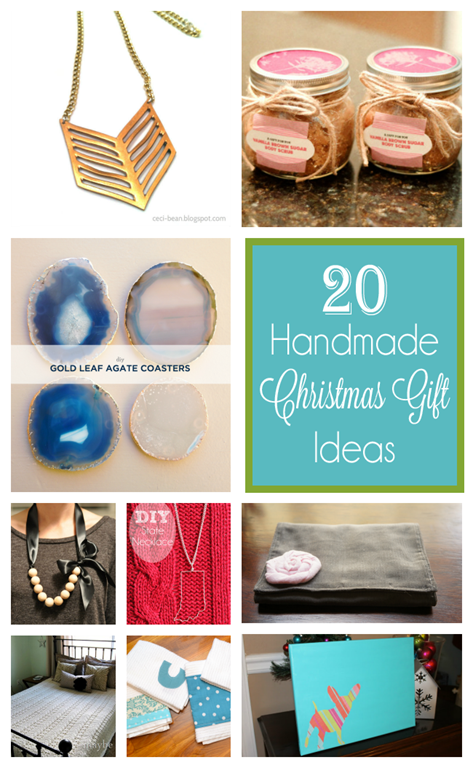
20 Handmade Christmas Gift Ideas (Dare to DIY)

Thank you all for linking up to the Dare to DIY Give Handmade link up!  There were so many great projects that we decided to compile our favorites into one handy post.  Hopefully you can use this compilation to help you out with those last minute handmade gifts.

20 Handmade Christmas Gift Ideas

Click the images or the links below to check out these fantastically awesome gift ideas!

 House Drawing by Planting Sequoias * Card Table Playhouse by Anything Pretty

Dog Silhouette by A Peachtree City Life * Wine Gift Bags by Bowl of Cherrys

Wine Cork Trivet by B&B Build a Life * Christmas Joy Felt Pillow by Our Next Great Adventure

Owl Coasters by Boxy Colonial  * Vanilla Brown Sugar Body Scrub by Wills Casa

Sharpie Mugs by Shannaigans * Travel Jewelry Holder by Naptime DIY

Gold Leaf Agate Coasters by Desert Domicile * Lilly Doll by Home in the Country

Festively Red Spread by Little Rays of Sunshine * R2D2 Stocking by Creative Chaos Art

Geometric Necklace by Ceci Bean * Mason Jar Snow Globes by The Sweetest Digs

Woodbead Necklace by Decor and the Dog * Crochet Blanket by Maybe Matilda

Dish Towels by NewlyWoodwards * State Necklace by Two Twenty One

We will be pinning all of these handmade gifts to the Dare to DIY Projects board.  You can also find all of the co-hosts on Pinterest: Decor and the Dog, Maybe MatildaNewlyWoodwards, and Two Twenty One.

Are you ready for next week’s Dare to Deck the Halls Challenge?  What’s the most fantastically awesome handmade gift that you have received?

Dare to DIY Handmade: Wood Bead Necklace

Who’s ready for the Dare to Give Handmade link up on Monday?
dare to diy 675x675 pixels

Monday’s challenge is Dare to Give Handmade.  We dare you to DIY a gift made by you. Nothing is more special to give than something you created. Ideas include bath and body items, kitchen gifts, hand-sewn clothing or home decor. 

My handmade gift is a ribbon and wood bead necklace that I made for my mom.
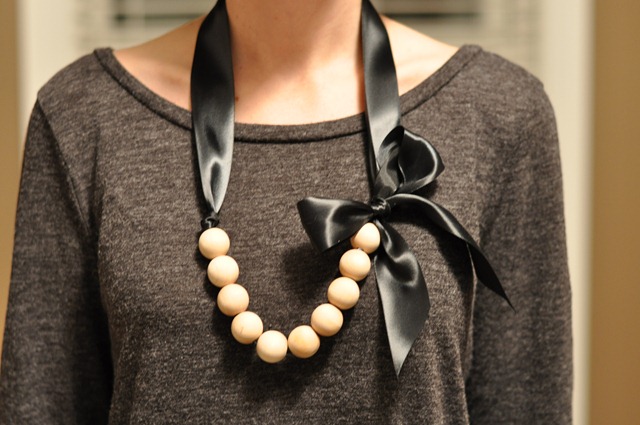
057

Well, I made her help me design one and then I made one for her. If that isn’t love, I don’t know what is.

This necklace takes about 15 minutes to make and will cost you about $2 per necklace.

You will need 1.5” ribbon in the color of your choice.  10 wood beads.  (I purchased both of these items at Joann’s.  You will only need one spool of ribbon.  Don’t let the photo mislead you.)
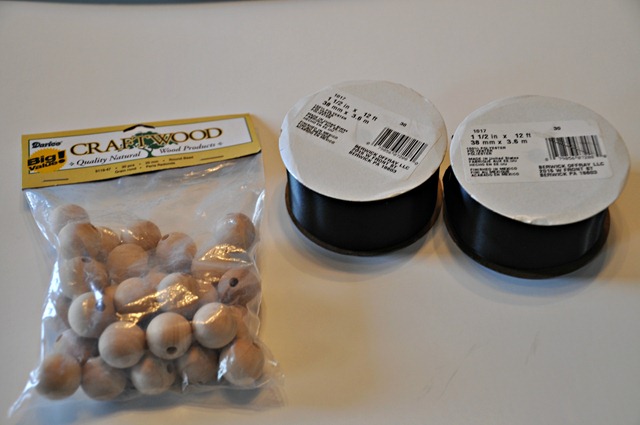
Wood Bead Necklace Supplies

Step 1: Cut the end of your ribbon into a point.
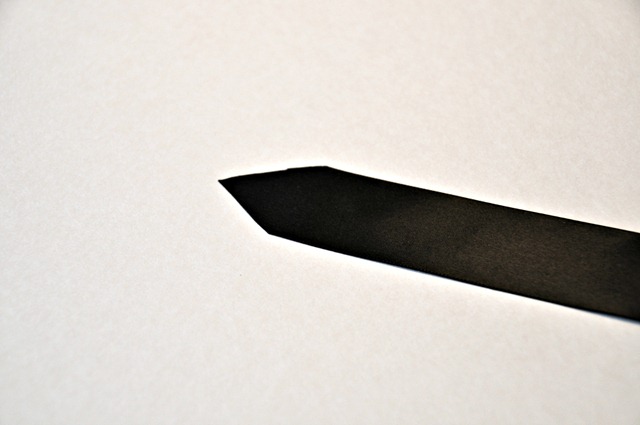
Step 1

Step 2.  Fold this point in half and cover in tape.  The tape isn’t completely necessary but we did find it was easier to place the beads on the ribbon by using it.
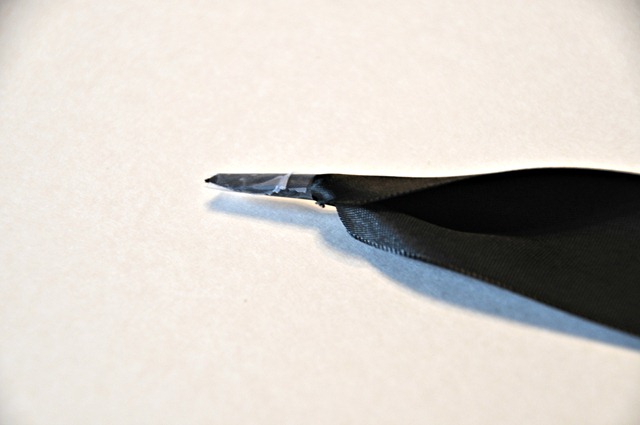
Step 2

Step 3: String your ten beads onto the ribbon.  You need to string them on so you have at least 10 inches of ribbon on the end that you are stringing them from.  Be gentle while adding the beads.  We found that we scratched the ribbon a little if we fought with the beads too much.
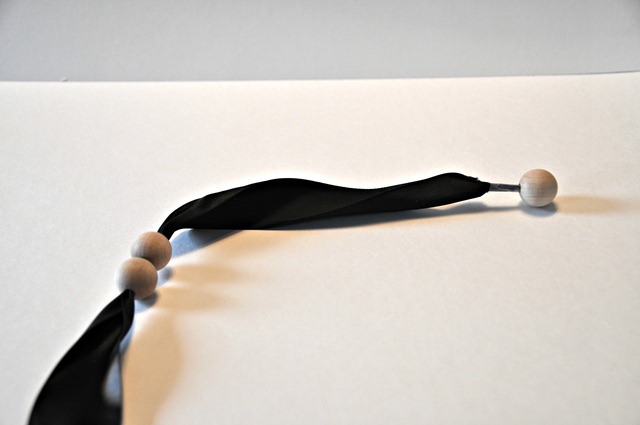
Step 3

Step 4:  Tie a knot at the end of the beads. The knot should be tied at the end where the ribbon is still attached to the spool.
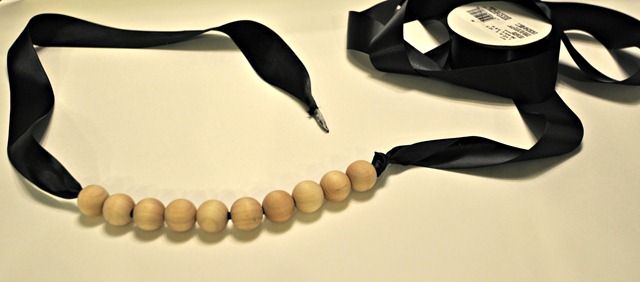
Step 4

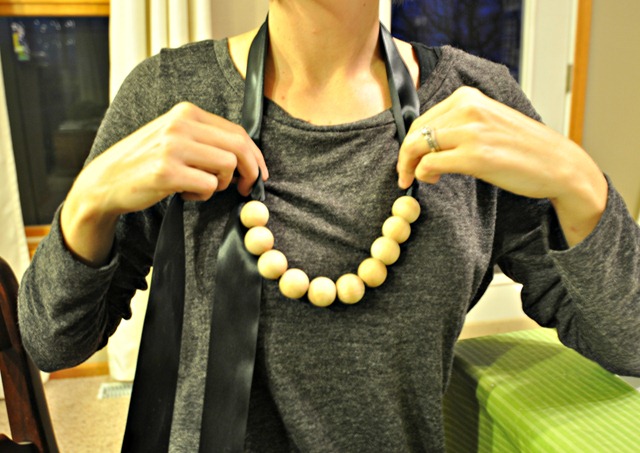
Step 5.  Determine the length of your necklace.  I did this by holding the ribbon and beads.  You need enough ribbon to get the necklace over your head easily plus some additional to tie the bow.  I erred on the side of having too much ribbon. 
Step 5

Step 6:  Tie a bow.  This step is just like tying your shoes.  Seriously. Don’t over think it.  My bow looked worse when I thought about it.  Be sure that your ribbon is not twisted when you tie the bow.  You don’t want to give your recipient a necklace that looks wonky around the neck, do you?
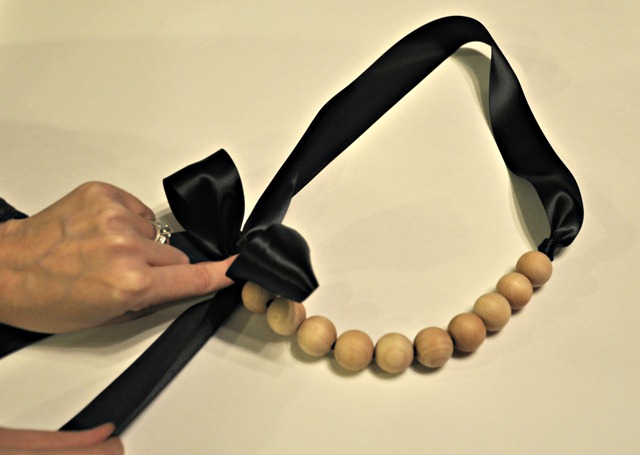
Step 7

Step 7:  Trim the ribbon ends to your desired length and you have completed your super easy (yet adorable) handmade gift.
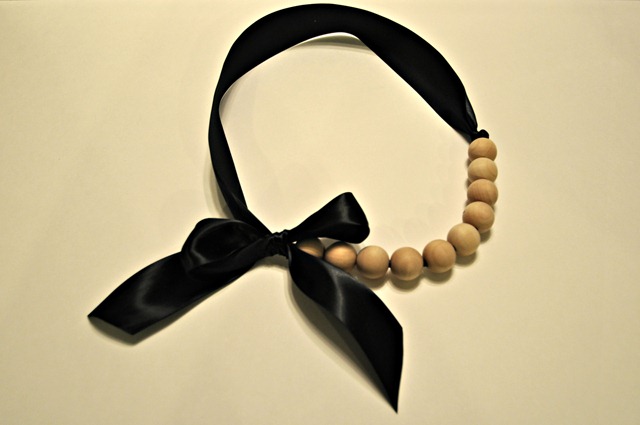
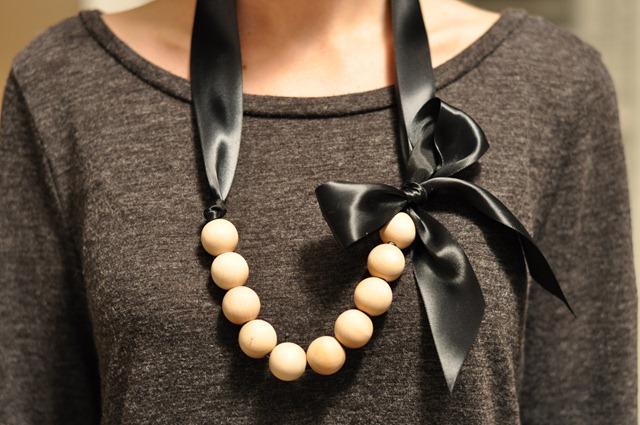
Necklace Final

062

Why is the bow on different sides in these photos?  Good question.  You can twist the necklace.  I took the final photos at a different time than when I made them.  I probably had the ribbon twisted on my neck and didn’t pay attention.  Eh.  Guess that not twisting step isn’t so important.

I looking forward to seeing your handmade gifts on Monday! If you want more Dare to DIY inspiration, check out my co-hosts' projects at Maybe Matilda, NewlyWoodwards, and Two Twenty One.

Next week we get all holiday decorating up in here.  Get ready to brush the glitter of your clothes now.  That’s what you get when you wake up reading Décor and the Dog.  *sing to similar Katy Perry’s Waking Up in Vegas*

Linking up to: Funky Junk Interiors

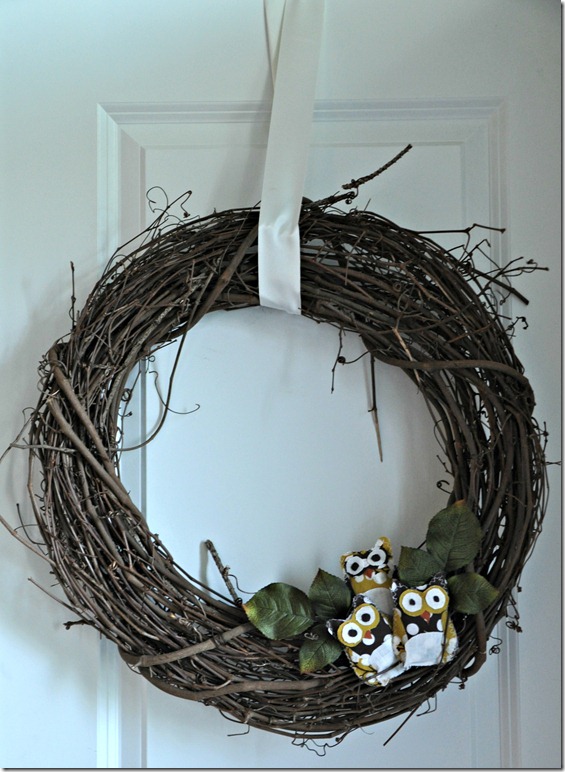
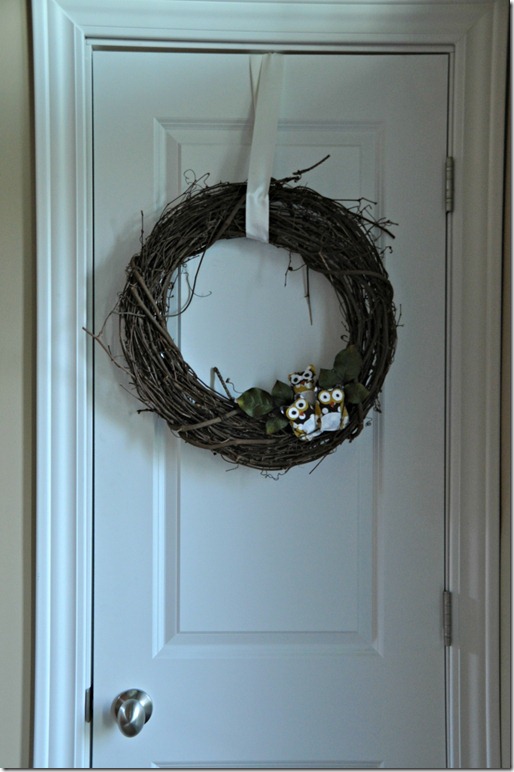
Quirky Owl Wreath

Me:  “Nate, what do you think about this wreath?”

OwlWreath2

Nate: “Eh.  It’s okay.”  As he runs upstairs.

Me: “You didn’t even look at it.”

Nate:  “I did too.  Sticks.  Owls.”

Me:  “Well, I just need to know if it’s too quirky.”

OwlWreath1

Nate:  “Not too quirky.  Just Michelle quirky.”

Me: “Okay, good.”

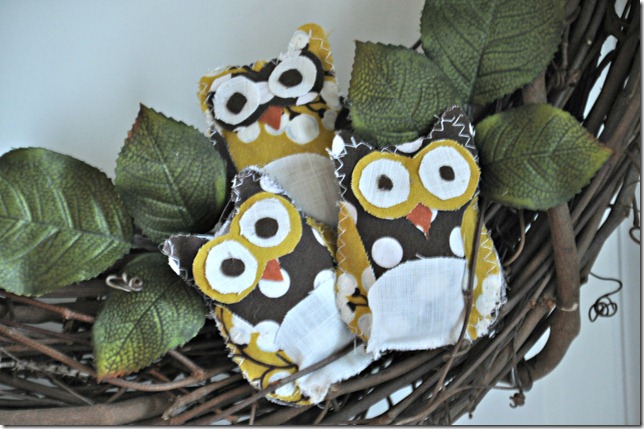
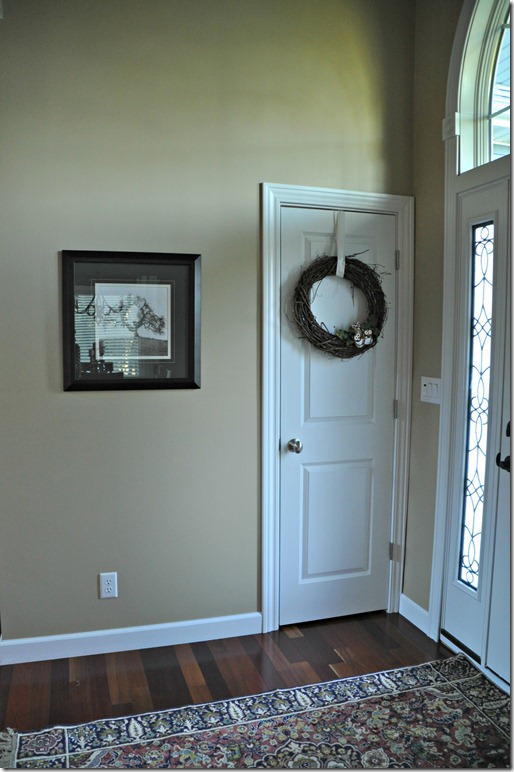
As you can see, my quirky owl obsession continues.  I’ve decided to use them to cure my bird phobia.  Yes, I’m afraid of birds.  My heart races when one is near me or if I can see them plotting to peck my eyes out.  I think it all stems from a childhood encounter with an angry momma goose.  Mothers, keep your kids away from the fowl.  This cute little cartoony owls make me smile though.  They’re helping me rethink birds.  Except for the real owl that lives in the trees behind my house and makes his owly noises while I watch New Girl….as he plots how he is going to take me down.  He has me rethinking nothing.

This wreath was quite simple to make.  I cut out some fabric and used some super glue to attach it to the front of the body.  I sewed around the edges, stuffed it with filler, and sewed it on up.  I can make a template for those of you that are interested.  I was just not interested in making at template last night.  (It’s season premiere week.  I have priorities.)  It’s quirky and old ladyish. My favorite kind of décor wreath.

OwlWreath4

OwlWreath3

Do you have a fall wreath up?  What’s on it?  Anyone else using quirky owls to cure their bird phobia?  What’s are your favorite shows this season?

Random Acts of Craftiness- September

***First up, the winner of the Goose Creek Scented Candle Giveaway is Ashley M.  An e-mail was sent your way!  Remember you can still use the coupon code for 1050 for 25% off your entire purchase!***

Oh boy.  Today is a big day.  It’s the first link up of the Random Acts of Craftiness challenge.

blog craft challenge

If you are new around here/have a bad memory…the Random Acts of Craftiness challenge is being hosted by Erin over at His and Hers.  Each month a random item is selected.  Bloggers are encouraged to use their noggins and come up with a unique/never been completed craft project using the selected item.

September’s challenge item was game pieces.

I love board games.  I especially love board games when I win.  I get competitive.  I resort to any and all measures to win.  I’m a notorious cheater.  I should probably be paying for therapy for my younger brother.  The kid never won a single board game growing up.  Seriously.  I can teach you to cheat at any and all board games.  It’s a skill.

I chose Clue for my challenge.  Clue is one of my favorites.  How do you cheat at Clue?  You look at what cards are left in the box to eliminate Mrs. Peacock and that pesky Professor Plumb.

You know what goes good with board game cheating? Wine.  And that ladies and gentlemen is how I came up with the answer to September’s challenge.

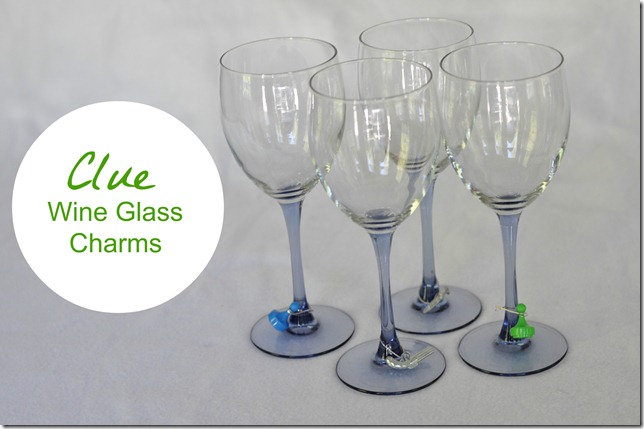
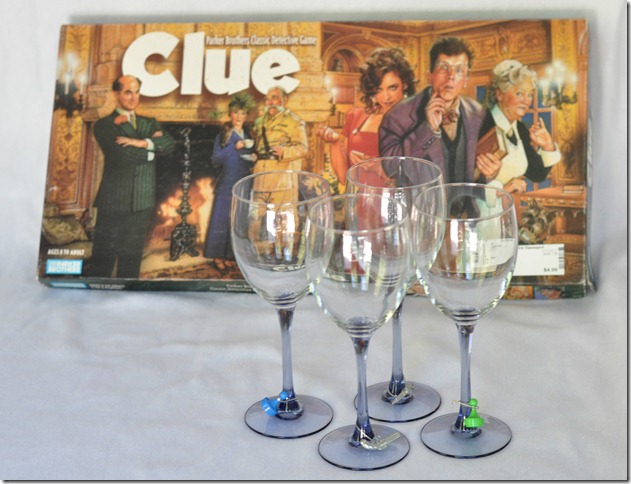
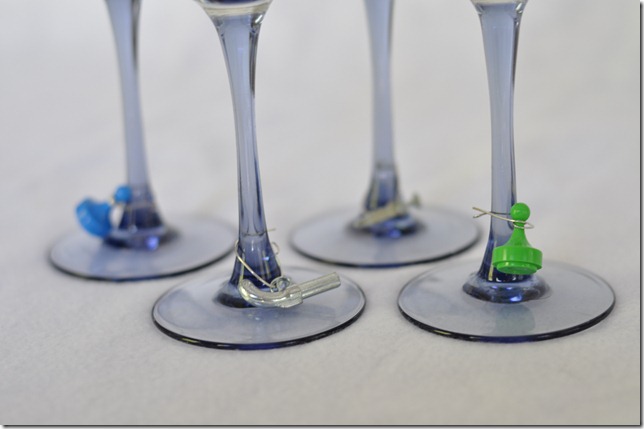
I combined the Clue weapons and board markers with some earwires to make wine glass charms.

Clue Wine Glass Charms2

Clue Wine Glass Charms-1

097

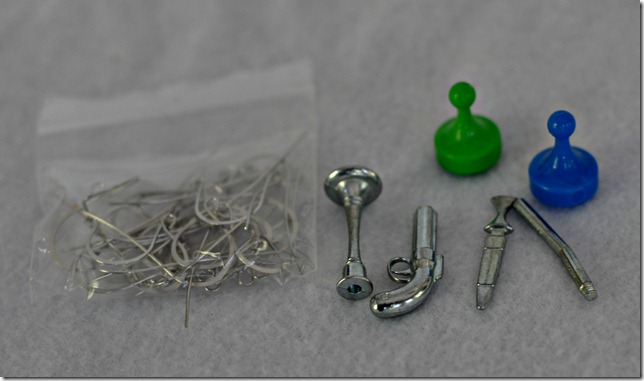
These are super easy to make.  Attach your earwires to the pieces either by slipping the wire into holes (like the revolvers trigger opening) or wrap them around the pieces. Regular ol’ wire would actually probably work as well.  Place the new “wine charms” at the base of your wine glasses.  It’ll be hard to mix up wine glasses now.  You definitely won’t confuse Mr. Green for a revolver.

Game Piece items

Be sure to head on over to His and Hers and check out all of the entries.  Nate is the husband judge this month so we’ll be stopping by all of them!

Did you participate in the challenge?  What’s your favorite board game?  Do you cheat at board games or do you insist on fair play?

Linking up to: His and Hers

Easy Sew Infinity Scarf

Who is sick of those “I’m so ready for fall posts”?  Aww, too bad.  You get another one.  

I’m normally a summer girl but this summer was just too hot.  I’m ready for cooler weather…until it actually comes and then I’ll be whining that I want warmth…like any good Iowan does.

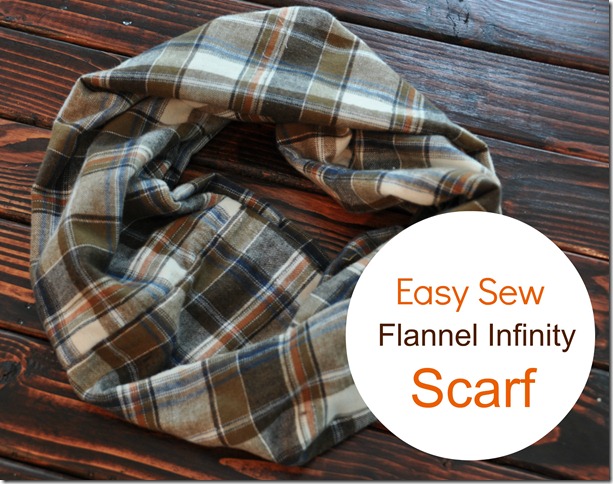
I recently sewed this fun  infinity scarf.  I’m on a sewing roll.  Infinity scarves are so easy to make that I just can't stop!

Easy Sew Infinity Scarf

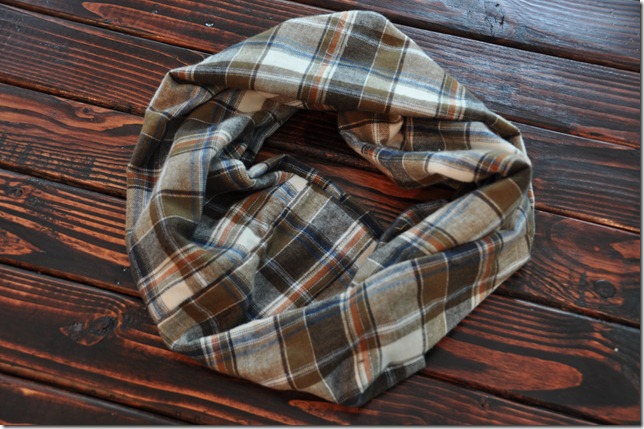
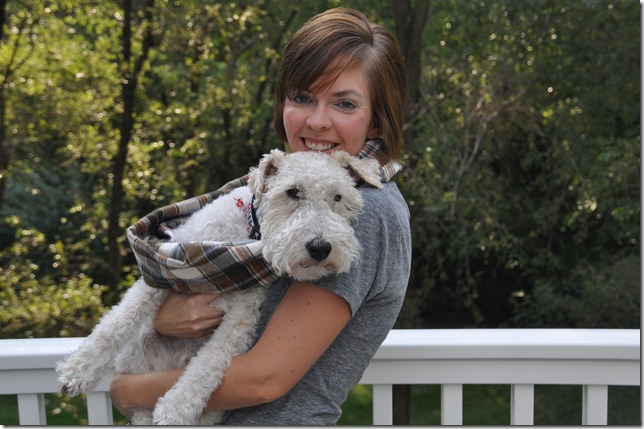
Nothing says fall like flannel.  I think Nate is glad I’ve traded a pair of ridiculously ugly flannel pajama pants for this flannel scarf.

Easy Sew Flannel Infinity Scarf

I sometimes wear something other than grey shirts and jeans.  Sometimes.  It would look better with a long sleeved shirt but it 90 degrees when I took this photo. I only sacrifice so much for this little blog of mine.

This infinity scarf cost me $4.00 and 30 minutes of time. I can’t wait to make more!

Anyone with a sewing machine can make this. Seriously. Dust that baby off. You only have to sew sort of straight lines. You can do this!

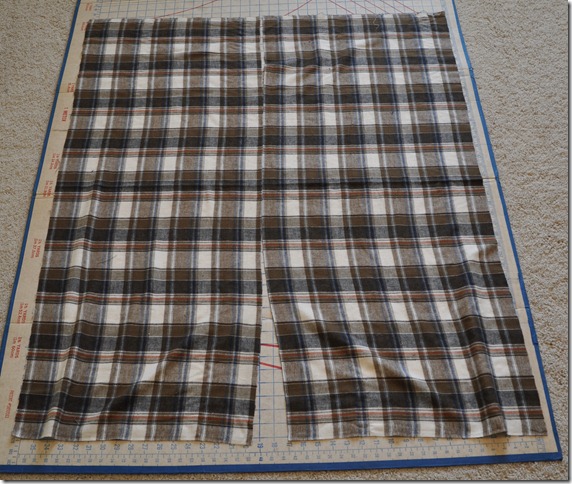
You will need some fabric of your choice, some thread, and a sewing machine.  I used a yard of fabric to make this infinity scarf.  It’s a little large.  I think I will like the bulk once it cools down and I’m sipping hot cocoa and pretending to watch Hawkeye football.  Oh, Fall.

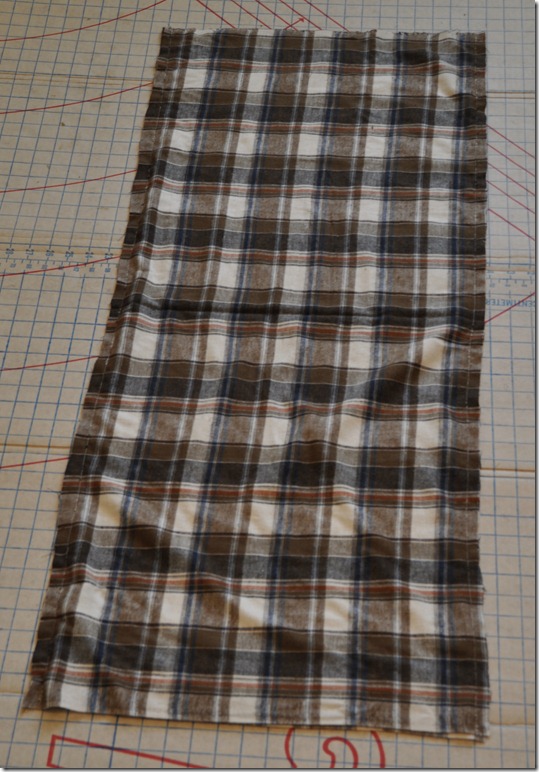
Start by cutting two 18” x 40-45” rectangles.  You don’t have to be exact.  I used the length that was provided by the flannel fabric which was about 43”.

DIY Flannel Infinity Scarf

Pin the right sides together and sew the long edges.  You will be left with a long tube.

Easy Sew Flannel Infinity Scarf

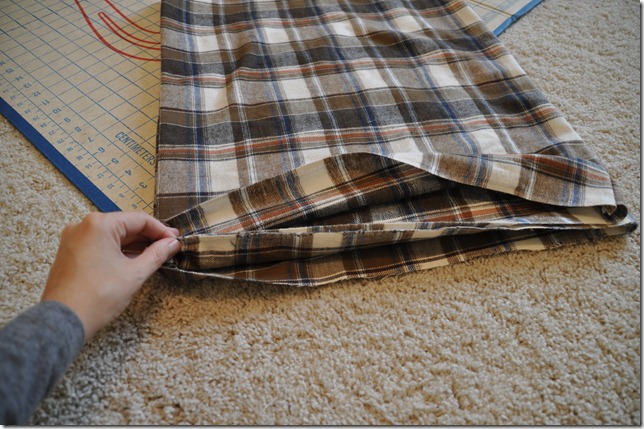
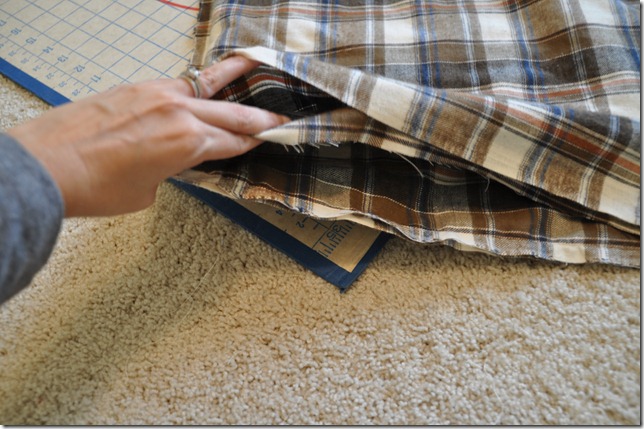
Turn inside out.  Bring the two ends together and pin the inner two layers right sides together.

Easy Sew Flannel Infinity Scarf

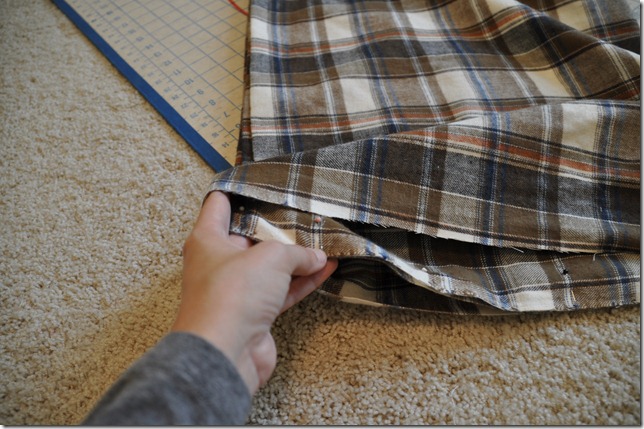
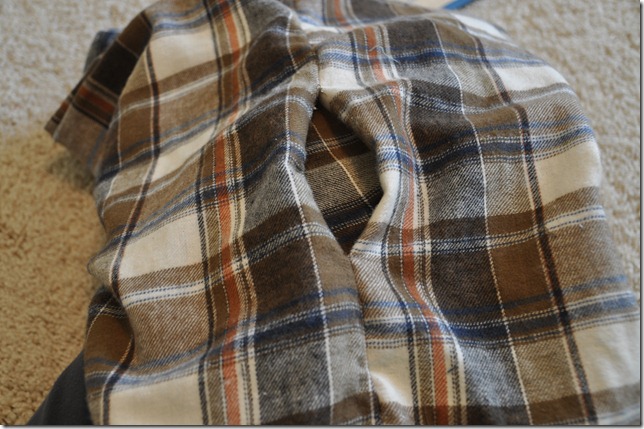
Sew together.  Turn the scarf inside out and pin the back sides right side together.

Easy Sew Flannel Infinity Scarf

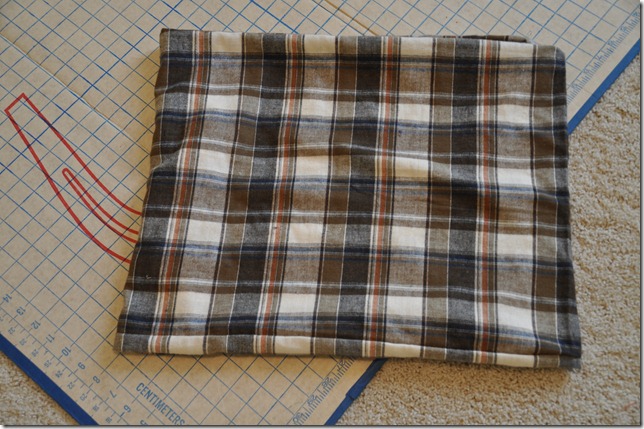
Sew the end together leaving a 4-5 inch gap in the middle-ish.

Easy Sew Flannel Infinity Scarf

Turn the scarf right side out through the 4-5 inch gap.

Easy Sew Flannel Infinity Scarf

Hand stitch the opening closed and enjoy your lovely flannel infinity scarf!

Easy Sew Flannel Infinity Scarf

Feel free to share it with your favorite friend.

Easy Sew Flannel Infinity Scarf

Who’s ready for fall?  Any favorite scarf patterns?  Any flannel fans out there?

Infinity Scarf Tutorial

Be sure to check out more sewing projects on our "craft it" page!

Photobucket Photobucket Photobucket Photobucket PhotobucketPhotobucketfollow us in feedly