Kitchen Backsplash: Subway Tile Edition

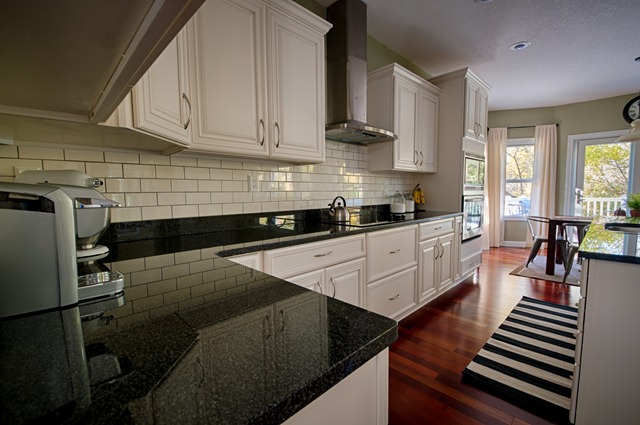
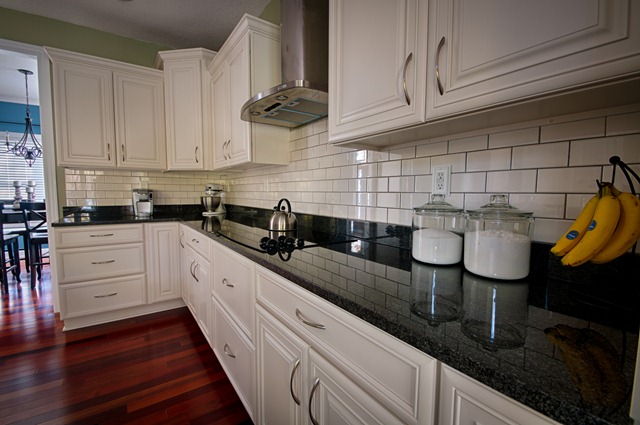
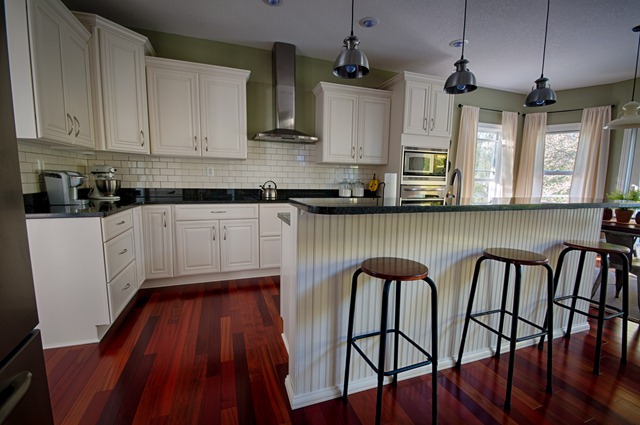
Our backsplash is done! Our backsplash is done!
Install a Kitchen Backsplash without Mortar!

We had intended on installing a backsplash soon after we moved in…almost four years ago. I’m glad we waited because we had originally planned for a mosaic tile backsplash. Sometimes laziness patience pays off and you end up finding a perfect fit for your kitchen.  I like mosaic backsplashes but I think the subway tile ended up being a better fit for our overall design style.  (I act like I know what I’m talking about because I write a blog with the word “Décor” in the title.)

Our ivory cabinets made finding the perfect tile a challenge.  We ended up choosing the Imperial Bone Gloss subway tile from The Tile Shop.  The employees in the Des Moines store were awesome to work with.  (Not a sponsored post, just the facts.) We used Delorian Grey Premixed Grout. Contrasting grout is a love it or hate it type of thing. We both loved the look of it so we went for it. Good choice.

Install a Kitchen Backsplash without Mortar!

Installing the tile was fairly easy.  We used the Tile Setting Mat from the Simple Mat in place of mortar. Cleaning the dark grout off of the ivory tiles was less easy.  We’ll share our thoughts on the Tile Setting Mat tomorrow. I think I will also share some things to think about when installing a backsplash in a later post. 

This project wasn’t the cheapest.  The tile for the entire kitchen cost us ~$280.  We also had $100 in supplies.  (Luckily we had a $100 gift card to the Home Depot from a previous blog thing.  We paid the Home Depot $0.11.  It was pretty awesome.)  The cost was worth it to class the joint up.
Install a Kitchen Backsplash without Mortar!

It kind of looks like grown ups live here.  Weird.

Install a Kitchen Backsplash without Mortar!
Install a backsplash.jpg

Did you think we would ever finish this project (darn old age!)?  What are your thoughts on contrasting grout?  Do you prefer subway or mosaic tile or do you have a love for both?


How to Add Cabinet Molding

Today’s post is brought to you by Nate. 

He is going to tell you all about adding simple molding to plain ol’ boring cabinets and how my brother can’t measure…

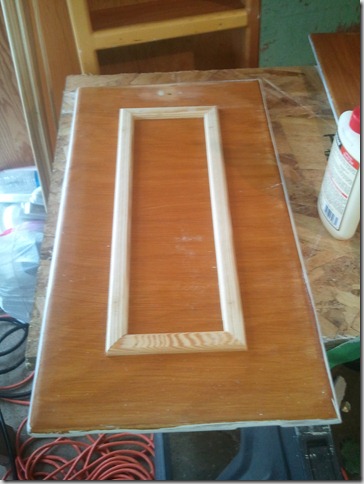
The first step in the molding process was picking out the molding.  We need something simple and on the thinner side.  We purchased the molding above from Lowe’s.

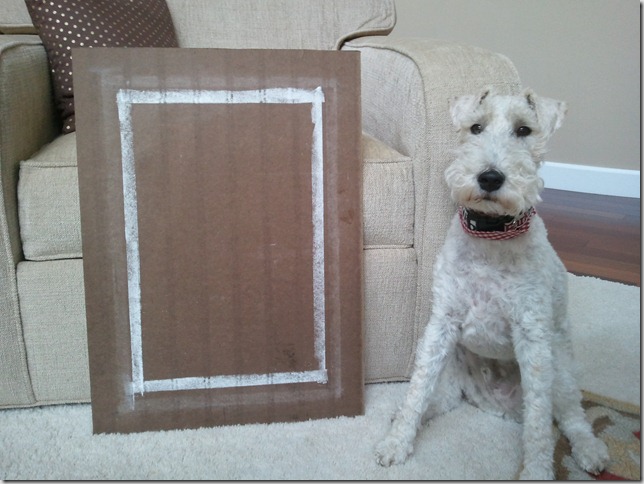
The next step in adding cabinet molding was deciding where to place the molding on the cabinet.  We used a spare piece of wood and marked 1” from the edge with chalk.  The 1” placement did not look right so we went to 2.5” in from the edges.  Ike approved of the 2.5”.

Adding molding to old cabinets, DIY, tutorial

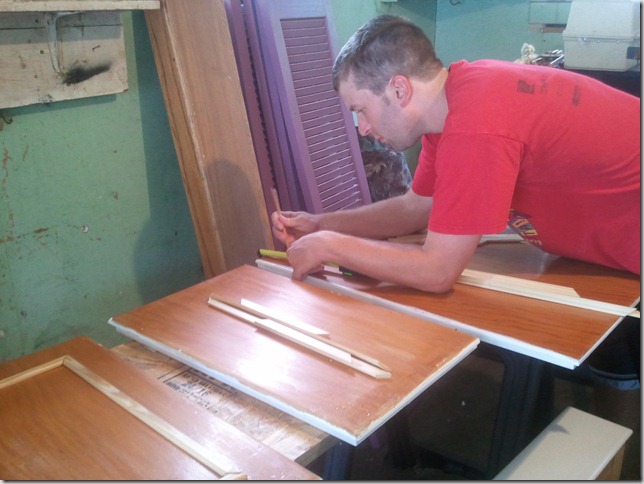
Marshall (Michelle’s little brother) provided us with all of the dimensions before hand. (They were all incorrect.  Always measure from the edges.  It makes things a lot easier when installing. I could cut all the pieces (with a miter saw at 45 degrees on each side) the weekend before to save some time. Or so I thought.

On all of the doors, I marked the selected length in from all sides.  I laid out the pieces to make sure the person that originally measured did so correctly.  After discovering that all doors were measured incorrectly, I made the necessary adjustments and remarked all of the doors (I should have verified before marking all doors, but I assumed he knew what he was doing.  A learning lesson for both of us.).

Adding molding to old cabinets, DIY, tutorial

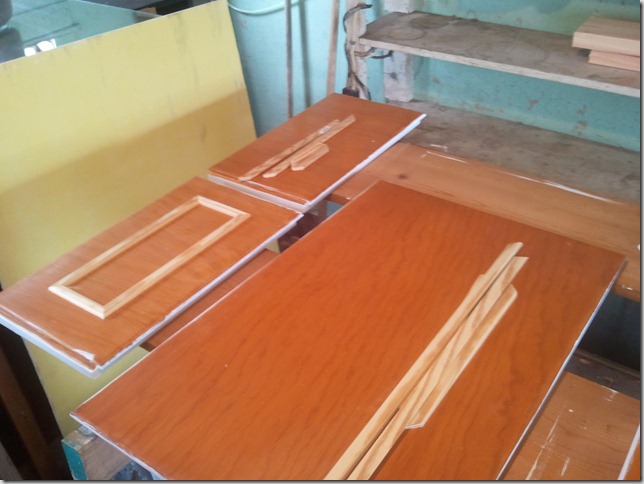
I put a little bead of wood glue on the molding and placed it on the door at the selected marks. I then used a brad nail gun to securely attach to the molding to the doors. I used 5/8” brads as they were just long enough to get through the molding into the door but not all the way through the door.  Repeat on all doors.  Fill in the holes and corners with wood filler and sand.

Adding molding to old cabinets, DIY, tutorial

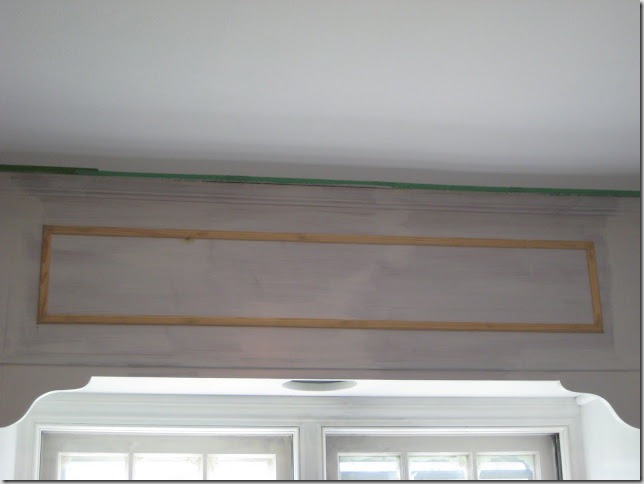
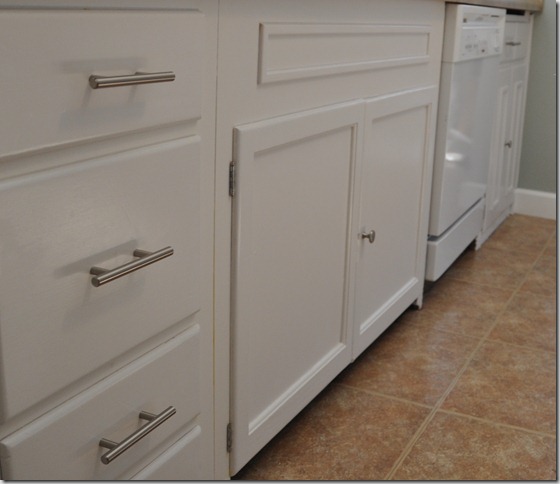
I also installed molding on a plain area of the cabinets.

Adding molding to old cabinets, DIY, tutorial

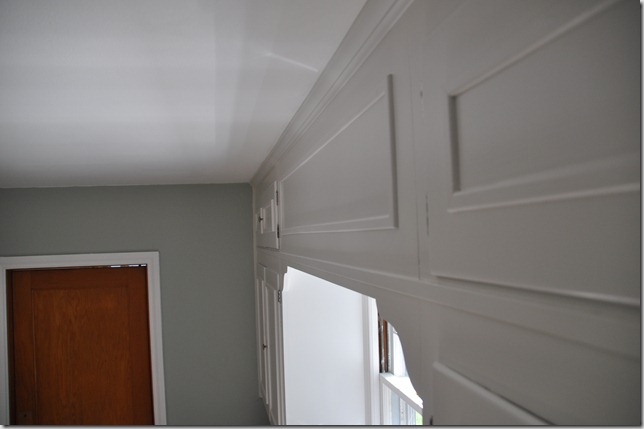
The next step is to paint over the entire thing (read about that here and here) and enjoy the added dimension.

Adding molding to old cabinets, DIY, tutorial

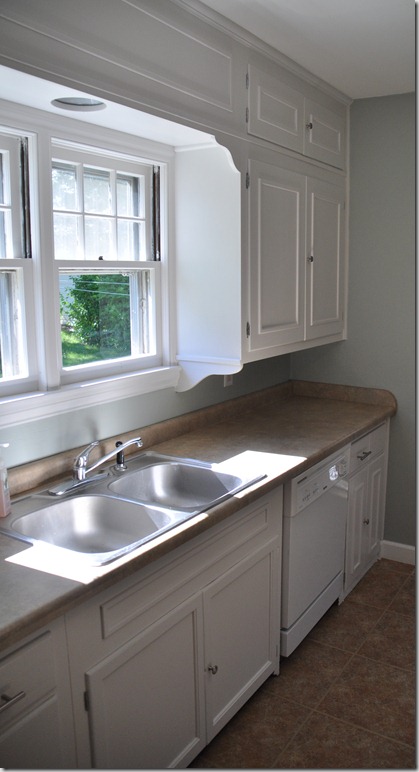
$50 in molding definitely helped improve the looks of this kitchen.

Adding molding to old cabinets, DIY, tutorial
Add Molding to Old Cabinets.jpg


Read about the paint we used here.

See more before and after photos here!

Anyone’s kitchen in need of some molding love?  Anyone else out there struggle with measuring?

Painted Cabinets Kitchen Reveal

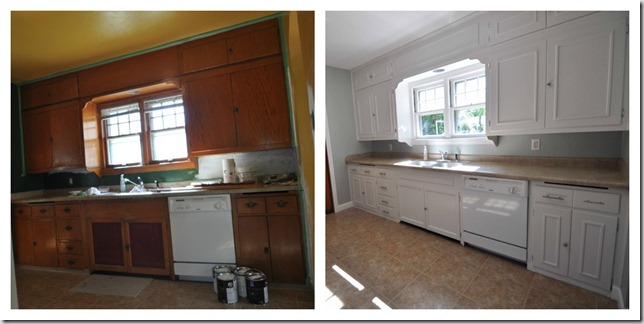
Nate and I spent Memorial Day week-end helping my baby brother paint his kitchen.  We only threatened to ditch the place and go tubing about 10 times.  But we didn’t.  Sibling love.

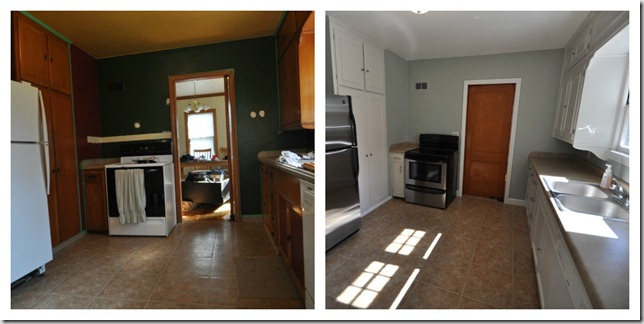
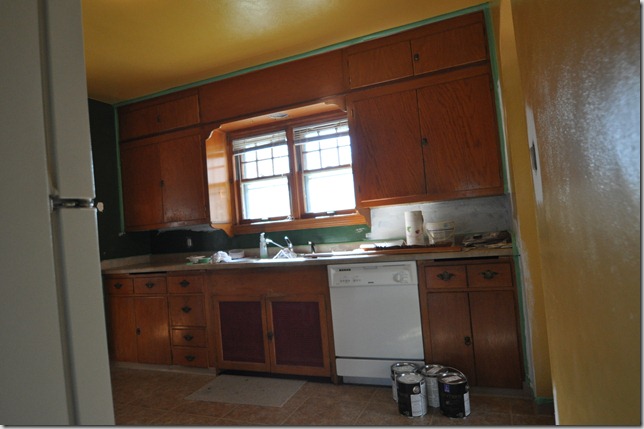
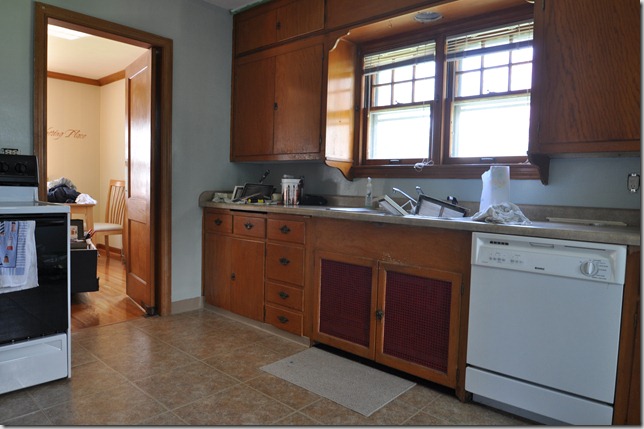
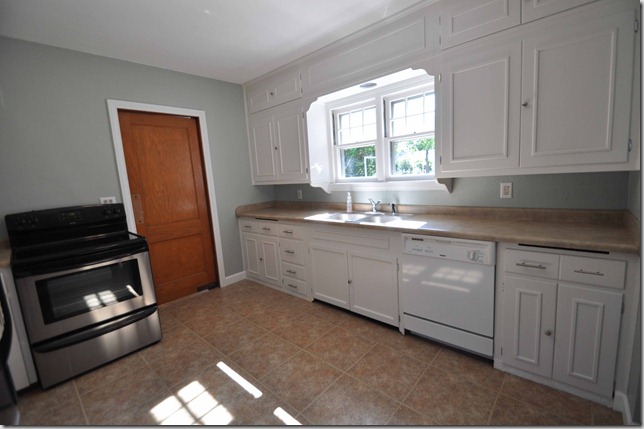
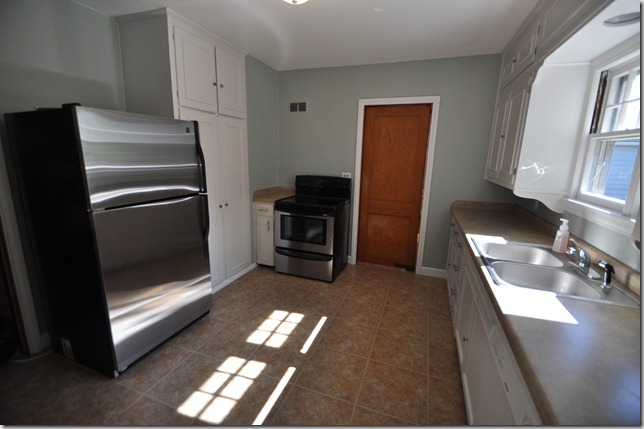
This is what my brother’s kitchen looked like when he purchased the home.

Painting kitchen cabinets Before and After
029

Pretty, no?  Fiesta is always my favorite color scheme.

I told little brother not to worry.  We can make this kitchen pretty for not a lot of dinero.

A few weeks back we painted the walls Comfort Grey by Sherwin Williams.  It definitely lightened up the room and made me want to barf less.  Just less.  I still wanted to barf.

Painting kitchen cabinets Before and After

Those cabinets were in such sad shape.  Nothing some new moldings, hardware, a loving family and paint couldn’t fix.

Painting kitchen cabinets Before and After

Hard to believe it’s the same room, right?

My brother got a great deal on the stainless appliances purchased from a friend’s brother.  $700 total for both.  The oven had been used 3 times.  The fridge was spotless.

Nate added some simple molding to add dimension to the cabinets.

Painting kitchen cabinets Before and After

Nate also replaced that lovely red mesh with some plywood.  Cheap and easy fix!

649

Nate also installed some floor trim to replace the plastic trim.  Little brother is moving up in the world.

Brother still needs to install some molding underneath the cabinets under the sink and replace the cutting boards (holes under counter) but otherwise this kitchen is done!  Unless he’ll let me add some decorative touches.  Or paint that door.

Source List:

  • Wall color:  Comfort Grey by Sherwin Williams ($30) 
  • Cabinet color:  Rust-Oleum’s Cabinet Transformations kit in Linen ($70) 
    • Review to come!
    • Hardware:  Handles from Lowe’s, knobs from Menards (no clue on names) ($50) 
    • Cabinet molding:   Lowe’s ($50) 
    • Floor molding:  Menard’s ($20)
Before + After Budget Kitchen Reveal.jpg
Photobucket Photobucket Photobucket Photobucket PhotobucketPhotobucketfollow us in feedly