DIY Dining Cart Reveal

Find the complete tutorial here!

The following is the birth story of our dining cart.  The world loves birth stories.  Luckily this one doesn't contain the words uterus or vagina.  Wait.  It does now.  Crap.

Me:  "Hey, Nate.  Want to build some open shelves for the dining room?"

Nate:  "Whatever."

One week later.

Nate:  "How big do you want these open shelves?"

Me: "Well, it kind of depends on the size of the cabinet that will go below them.  Want to build one?  Or how about something like this one from Restoration Hardware but smaller?  I saw it the other day and I kind of fell in love."

Nate: "Whatever."  Heads to office to whip up a dining cart in Sketch-Up.

A trip to Lowe's and a few hours later, our precious dining cart arrived into the world.

DIY Dining Cart 3.jpg

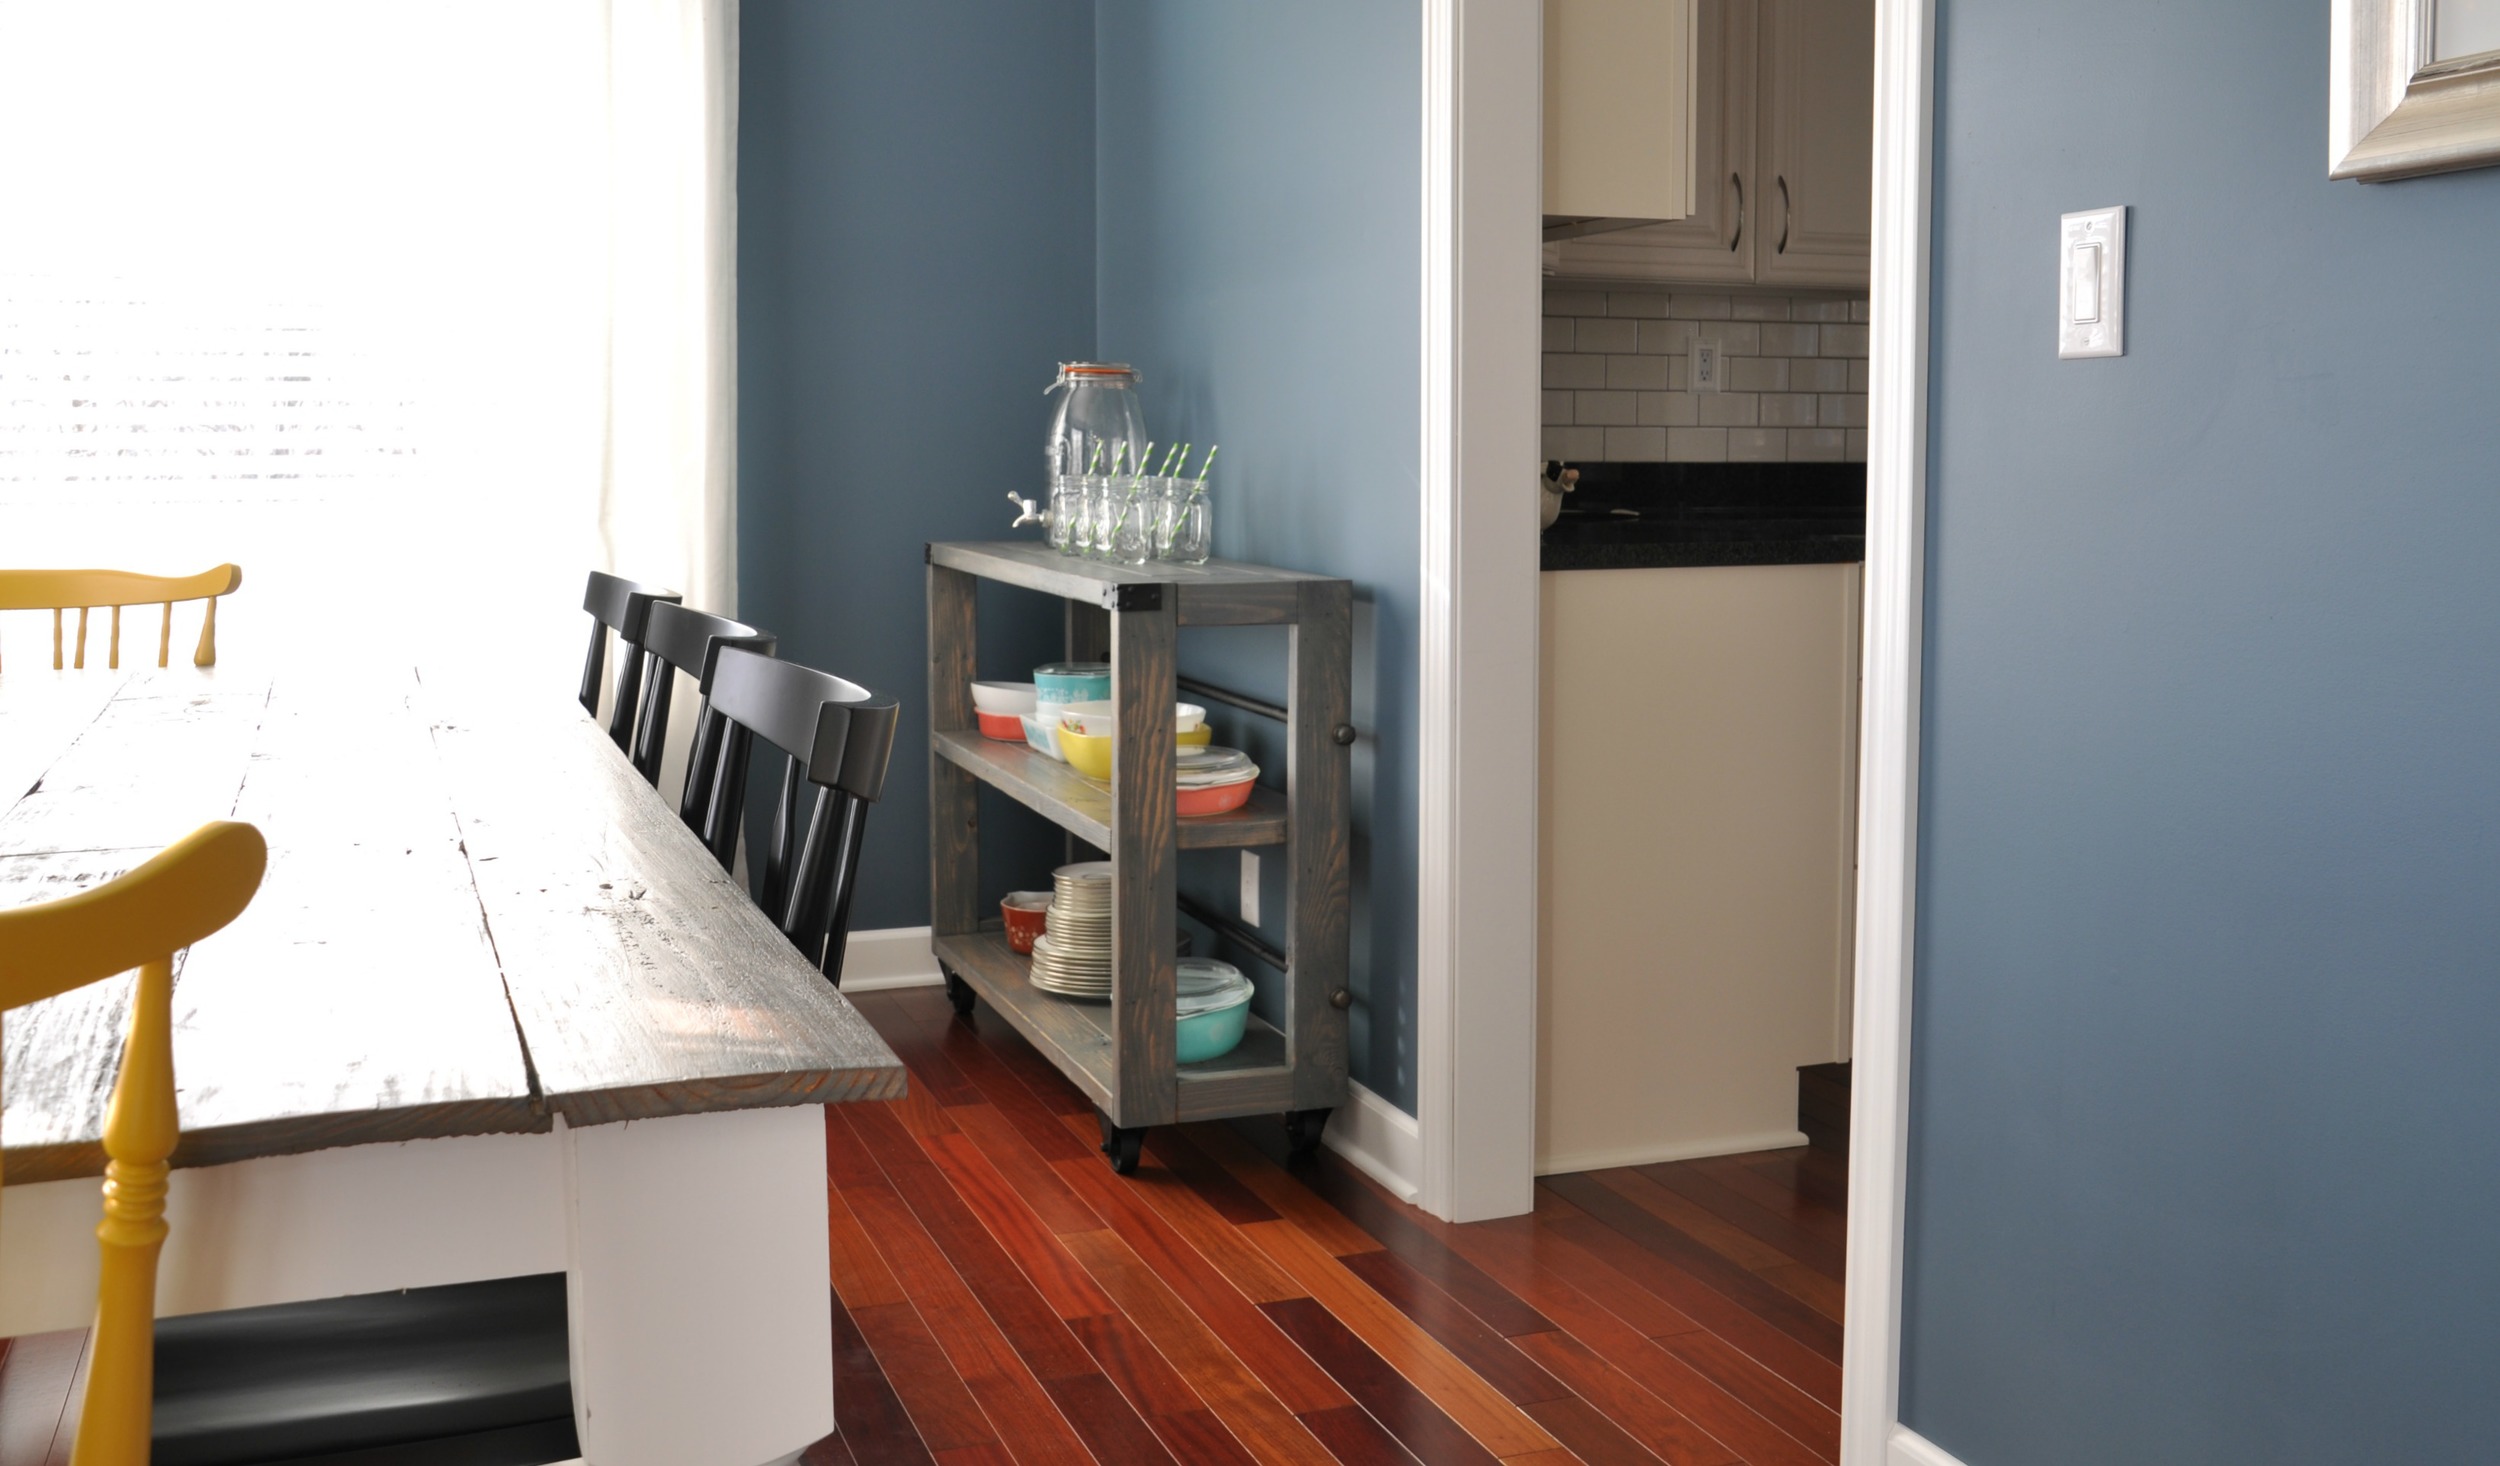
She's beautiful, isn't she?  

We were hoping our bundle of joy would be just the right amount of rustic and industrial.  Modern enough to keep Nate happy.  Vintage enough to keep me happy.  She didn't disappoint.

DIY Dining Cart 2.jpg

We didn't photograph the shelves without my beautiful Pyrex but you can sort of see the fancy breadbox work Nate did on the ends.  He far exceeded my expectations on this project.  He's a keeper.  (I have to say that since he's the father of my newest addition.)

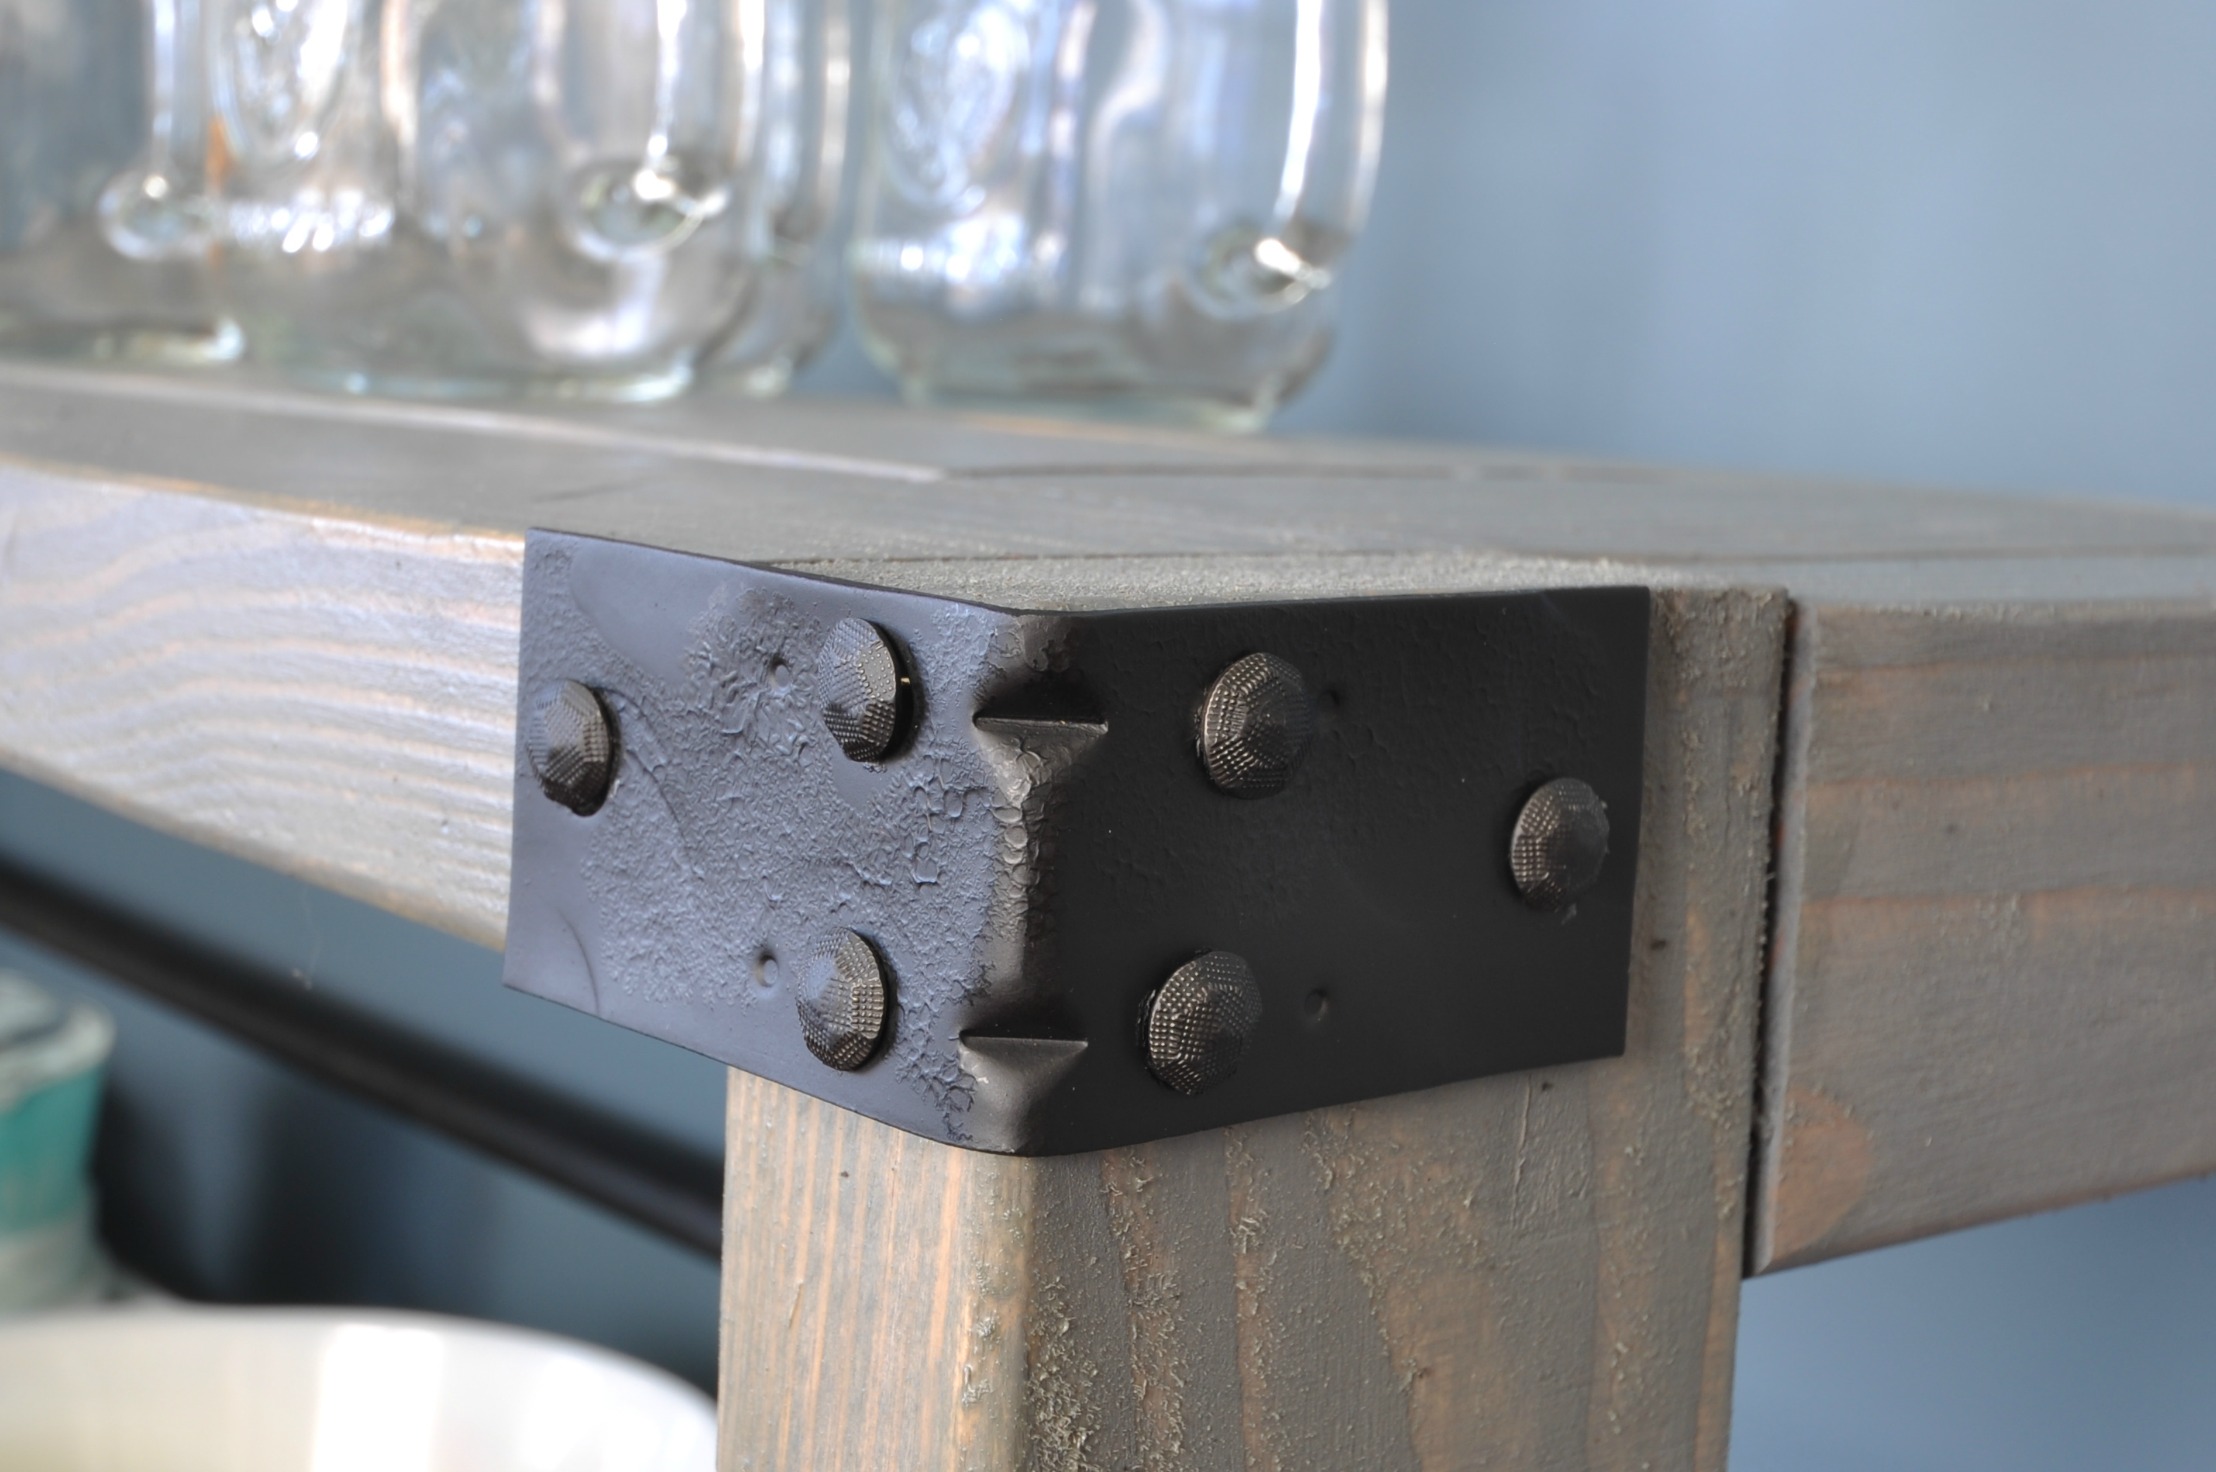
This cart has some unique touches.  We used a metal bracket on the end.  (The cheap ones from any home improvement store.)  We used upholstery tacks to fill in the holes.  We used black spray paint and beat it up a little to give it an aged look.

DIY Dining Cart Corner

The wheels were $4.99 a piece on Amazon.  They got the same spray paint and a beating treatment.

DIY Dining Cart wheel.jpg

Please don't mind the dirty floor.  We were busy creating.

Threaded black iron caps were used on the ends of the pipes running along the back.

DIY Dining Cart knob.jpg

The whole thing was finished like our farmhouse table.  We used the same stain (Rustoleum's Wood Stain in Weathered Grey).  

It coordinates lovely with our farmhouse table.

DIY Dining Cart in Room
DIY dining cart. Unique furniture build!

So, the whole open shelf idea turned into something different.  Now I'm working on a big ol' piece of art to hang above the dining cart.  And probably one hundred million other things because that's my thing.

We'll have a tutorial in the next week or so (Update: Find the tutorial here.).  If the blog doesn't get eaten by holiday posts.

Beer Bottle Opener {DIY, Tutorial}

This post is for the dudes that read Decor and the Dog.  (Hey, John and Nick!  And baby brother.)  

Or the root beer in a bottle drinking crowd.

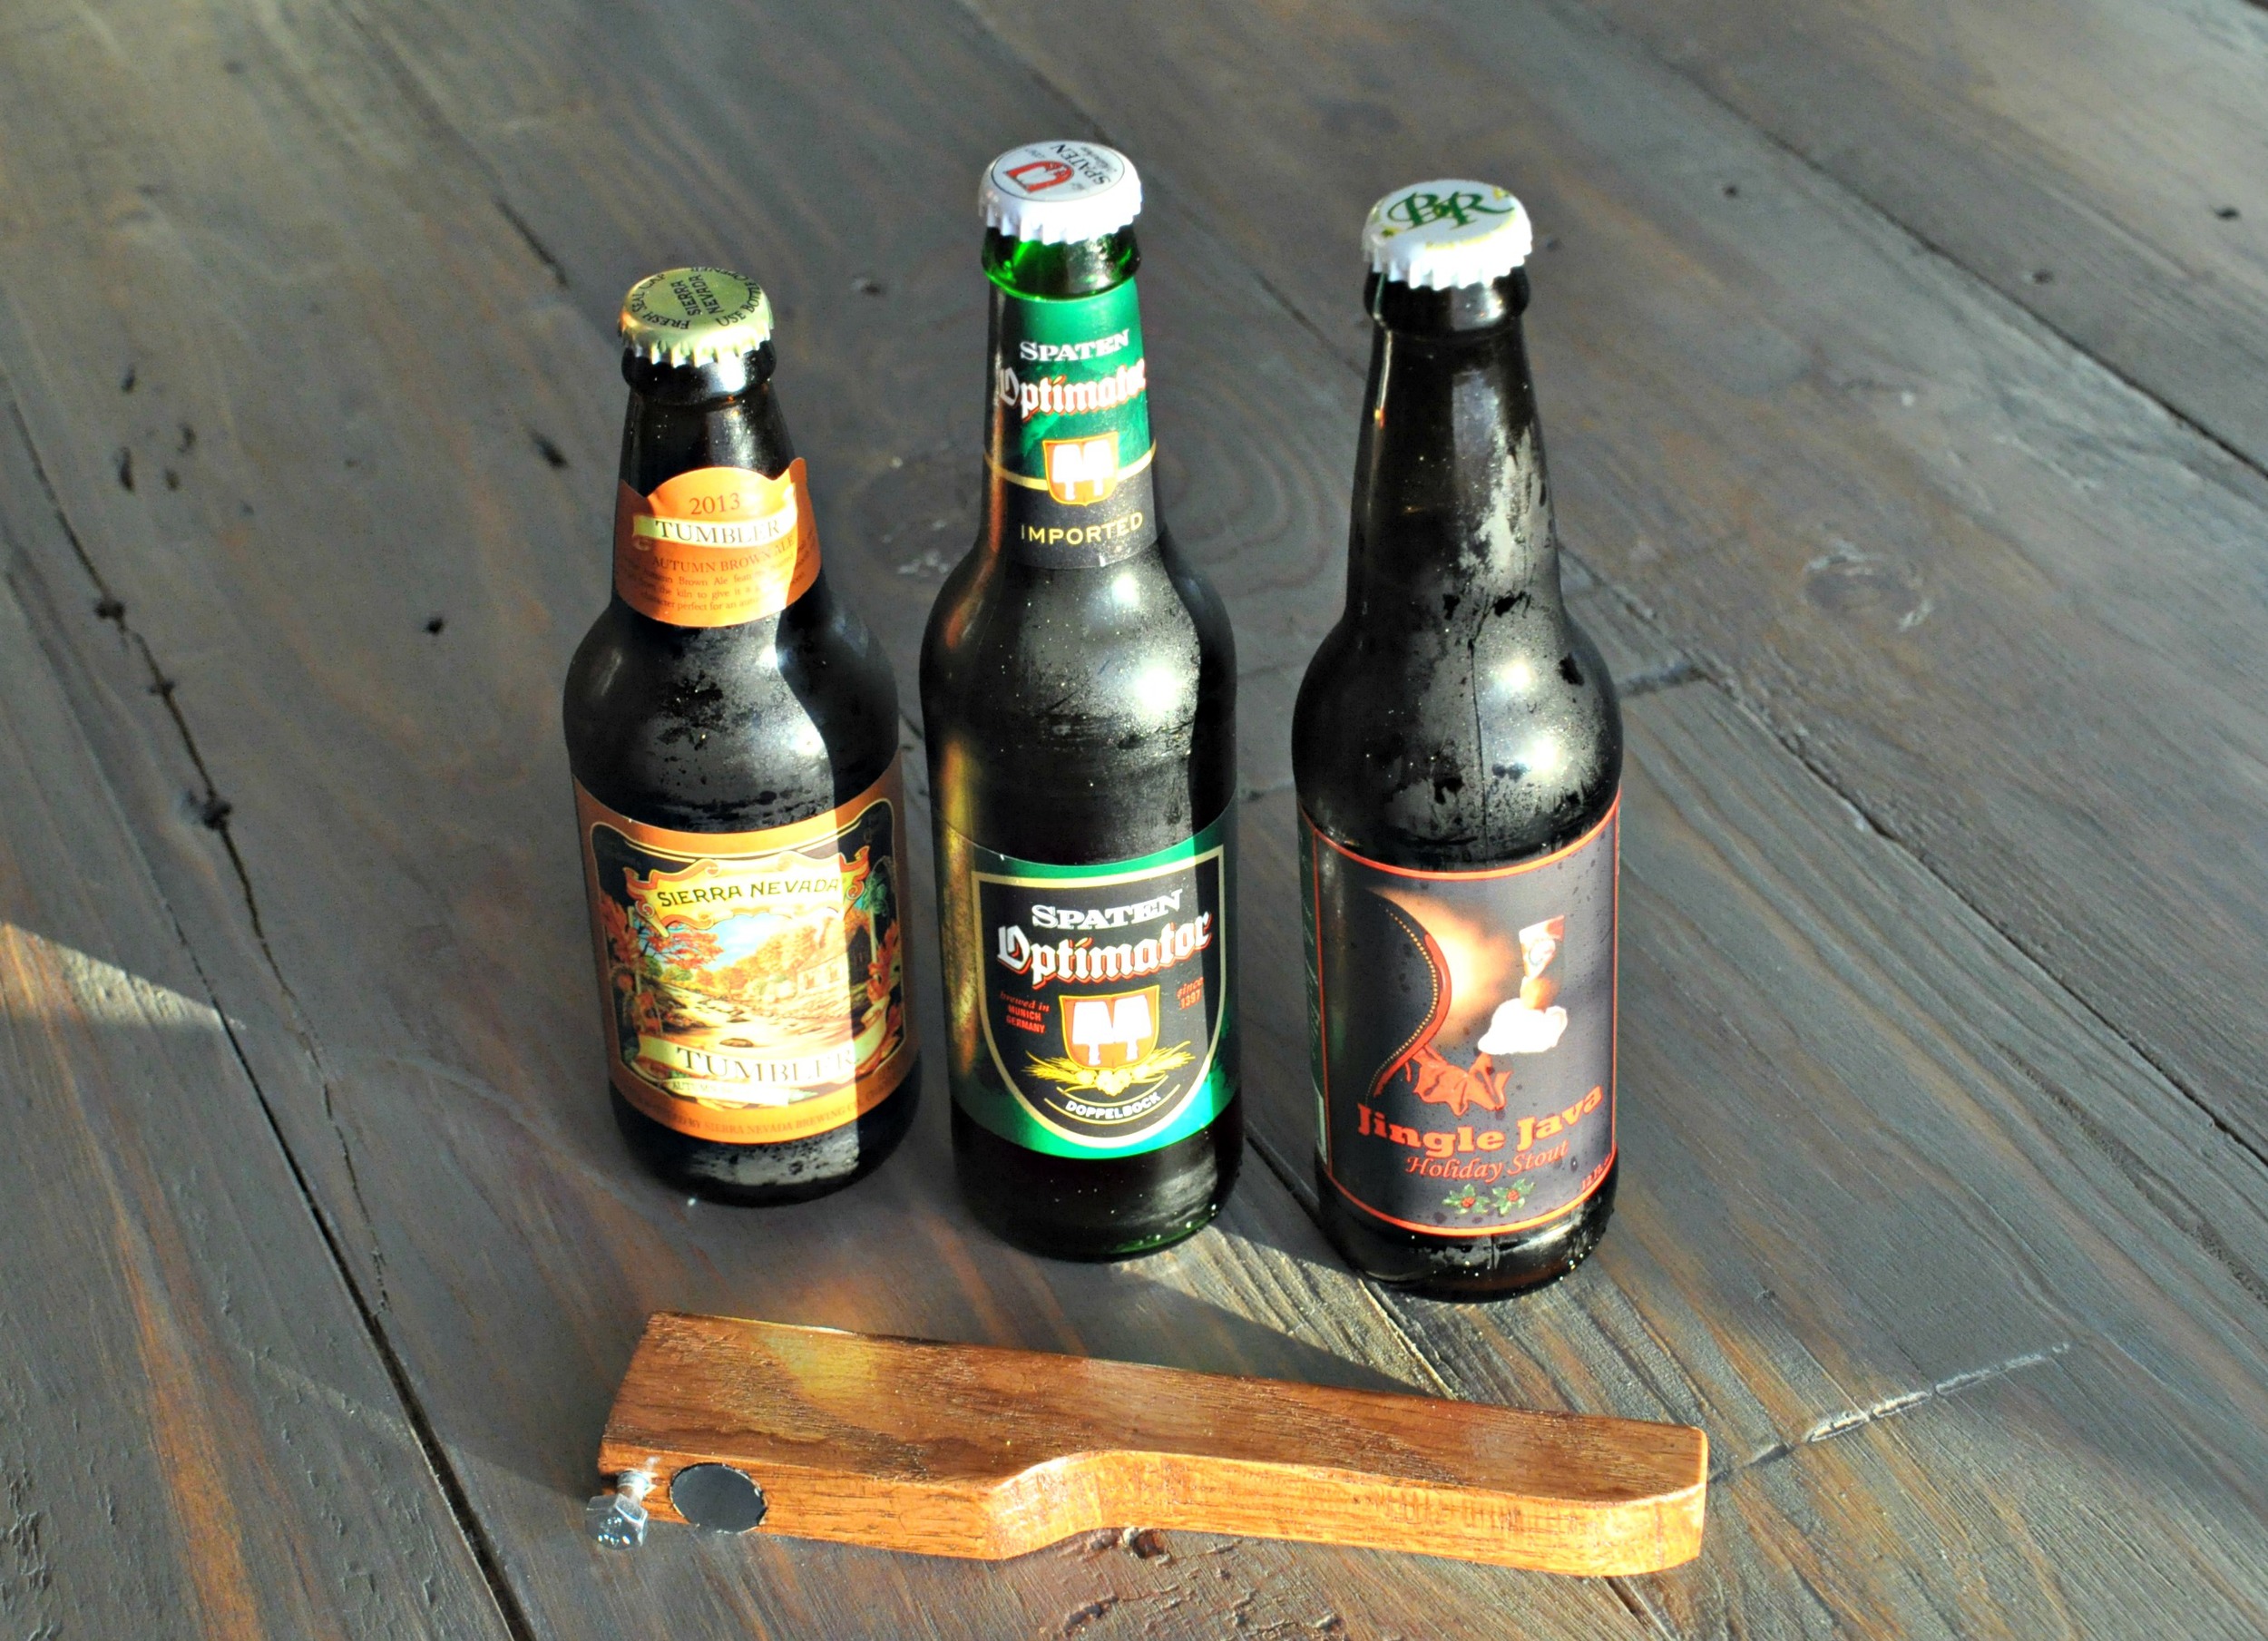
I mentioned that we hosted a beer tasting the weekend before last.  We aren't big on special party touches (we don't really do the hosting thing well) but we use hosting as an excuse to get things done around the house.  Nate had been wanting to make a beer opener (which is clearly as important as our living room built-ins).  He totally got that done.  

Beer Bottle Opener 8.jpg

Want to make your own fancy wooden beer opener?  This would make a great holiday gift for the dudes in your life.  Pair it with a six pack or two.  Gift complete.

It's also easy enough that I can make it without an ER trip.  #winning

Materials

  • One 1"x2" board (We bought a 2' Red Oak board.)
  • 1 1/4" lag screw
  • 1/2" magnet
  • Stain/Poly
  • Beer

Instructions

Step 1: Cut the board to 8 inches long.  Sketch out handle.  (See pencil mark below.)

Beer Bottle Opener 1

Step 2:  Use a scroll saw to cut on drawn line.  Sand smooth.

Beer Bottle Opener 3.jpg

Step 3: Using a 1/2" drill bit, place the magnet on the bit.  Mark with painter's tape to get the depth of the magnet.

Beer Bottle Opener 4.jpg

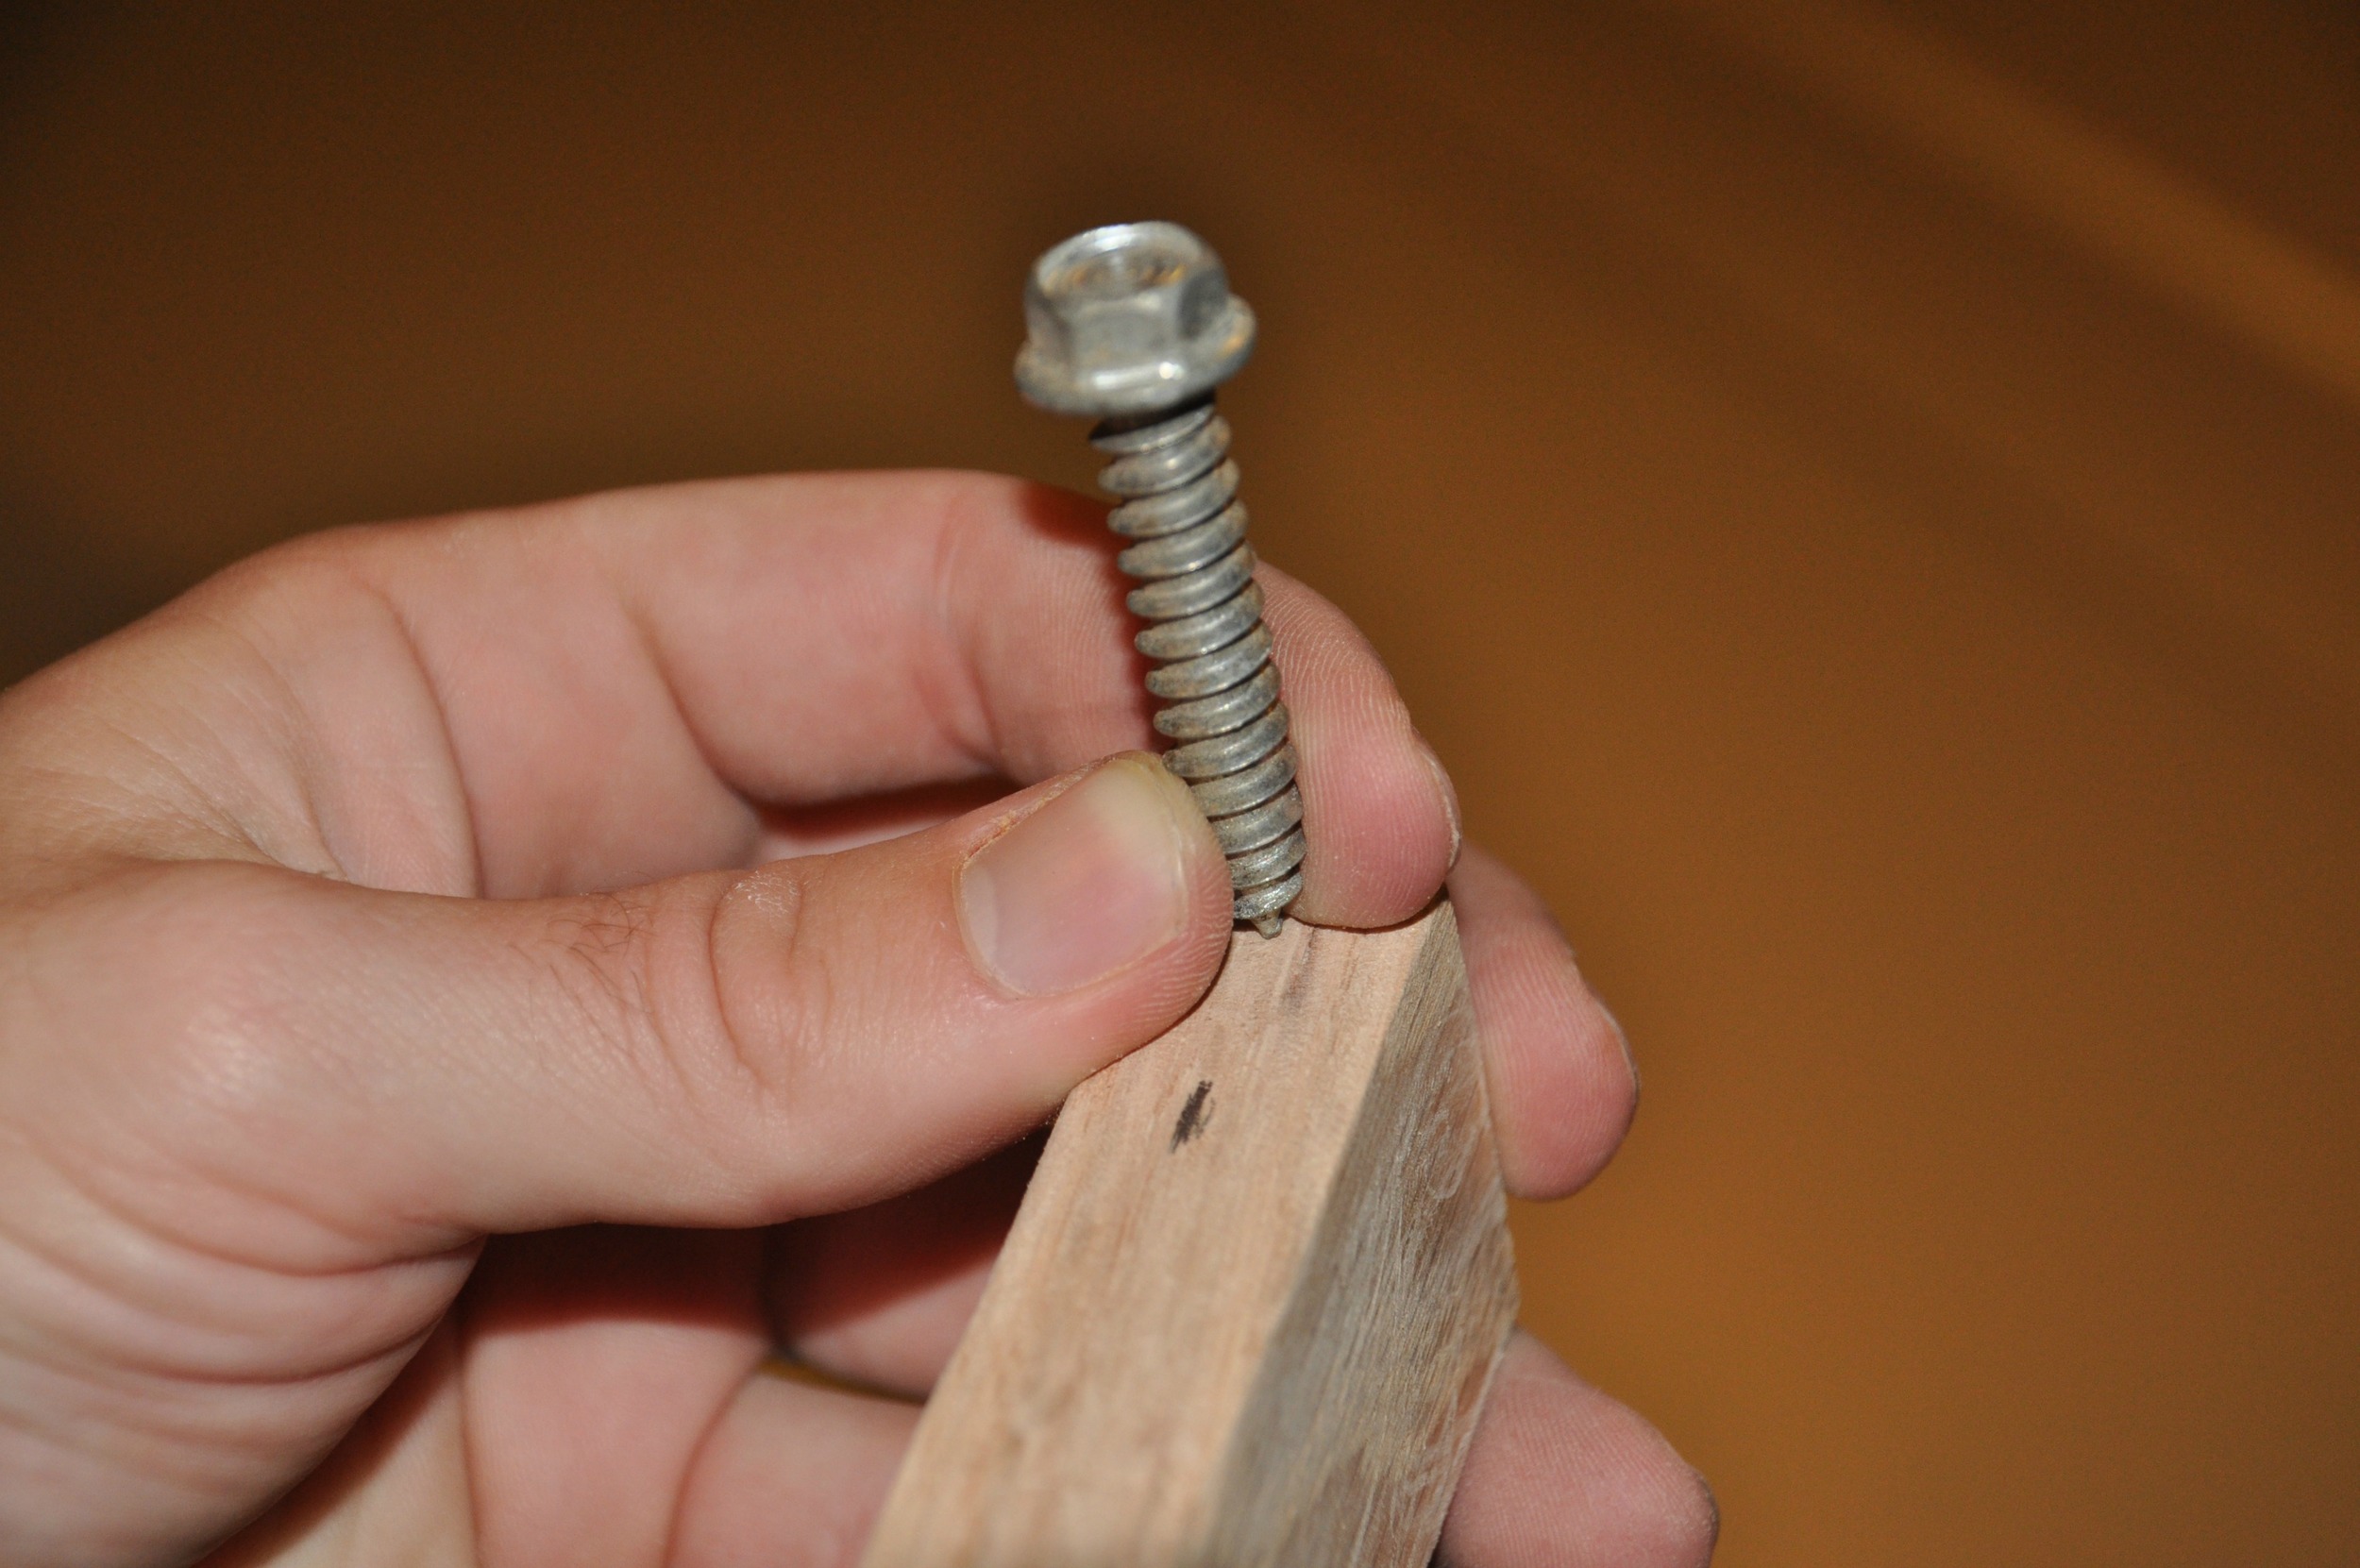
Step 4: Hold the screw on the end to help determine the best placement for the magnet.  Place a mark in the middle of the board to help guide where you will drill/place the magnet.  

Beer Bottle Opener Tutorial

Step 5: Drill the hole for the magnet.  Try to make yours more centered than ours.  Womp. Womp.

Beer Bottle Opener 6.jpg

Step 6:  Drill pilot hole for screw.

Step 7: Stain/poly

Step 8: Hammer the magnet into drilled hole.  Screw lag screw in leaving the depth as thick as most beer bottle caps.  (Ours has a 1/2" gap between the wood and bottom of the bolt.)

Beer Bottle Opener 7.jpg

Step 9: Open beer!  Look at the beer cap stick to the magnet.  FANCY!!!

Beer Bottle Opener 9.jpg

Step 10: Host a beer tasting. And open ALL OF THE BEERS.

Beer Bottle Opener Tutorial
DIY Magnetic Beer Bottle Opener

Like this beer opener?  Be sure to check out our beer tasting flight carrier!  (Also a great gift idea!)

Any thoughts on beer gifts for the dudes in your lives?  

Free Farmhouse Dining Table Plans

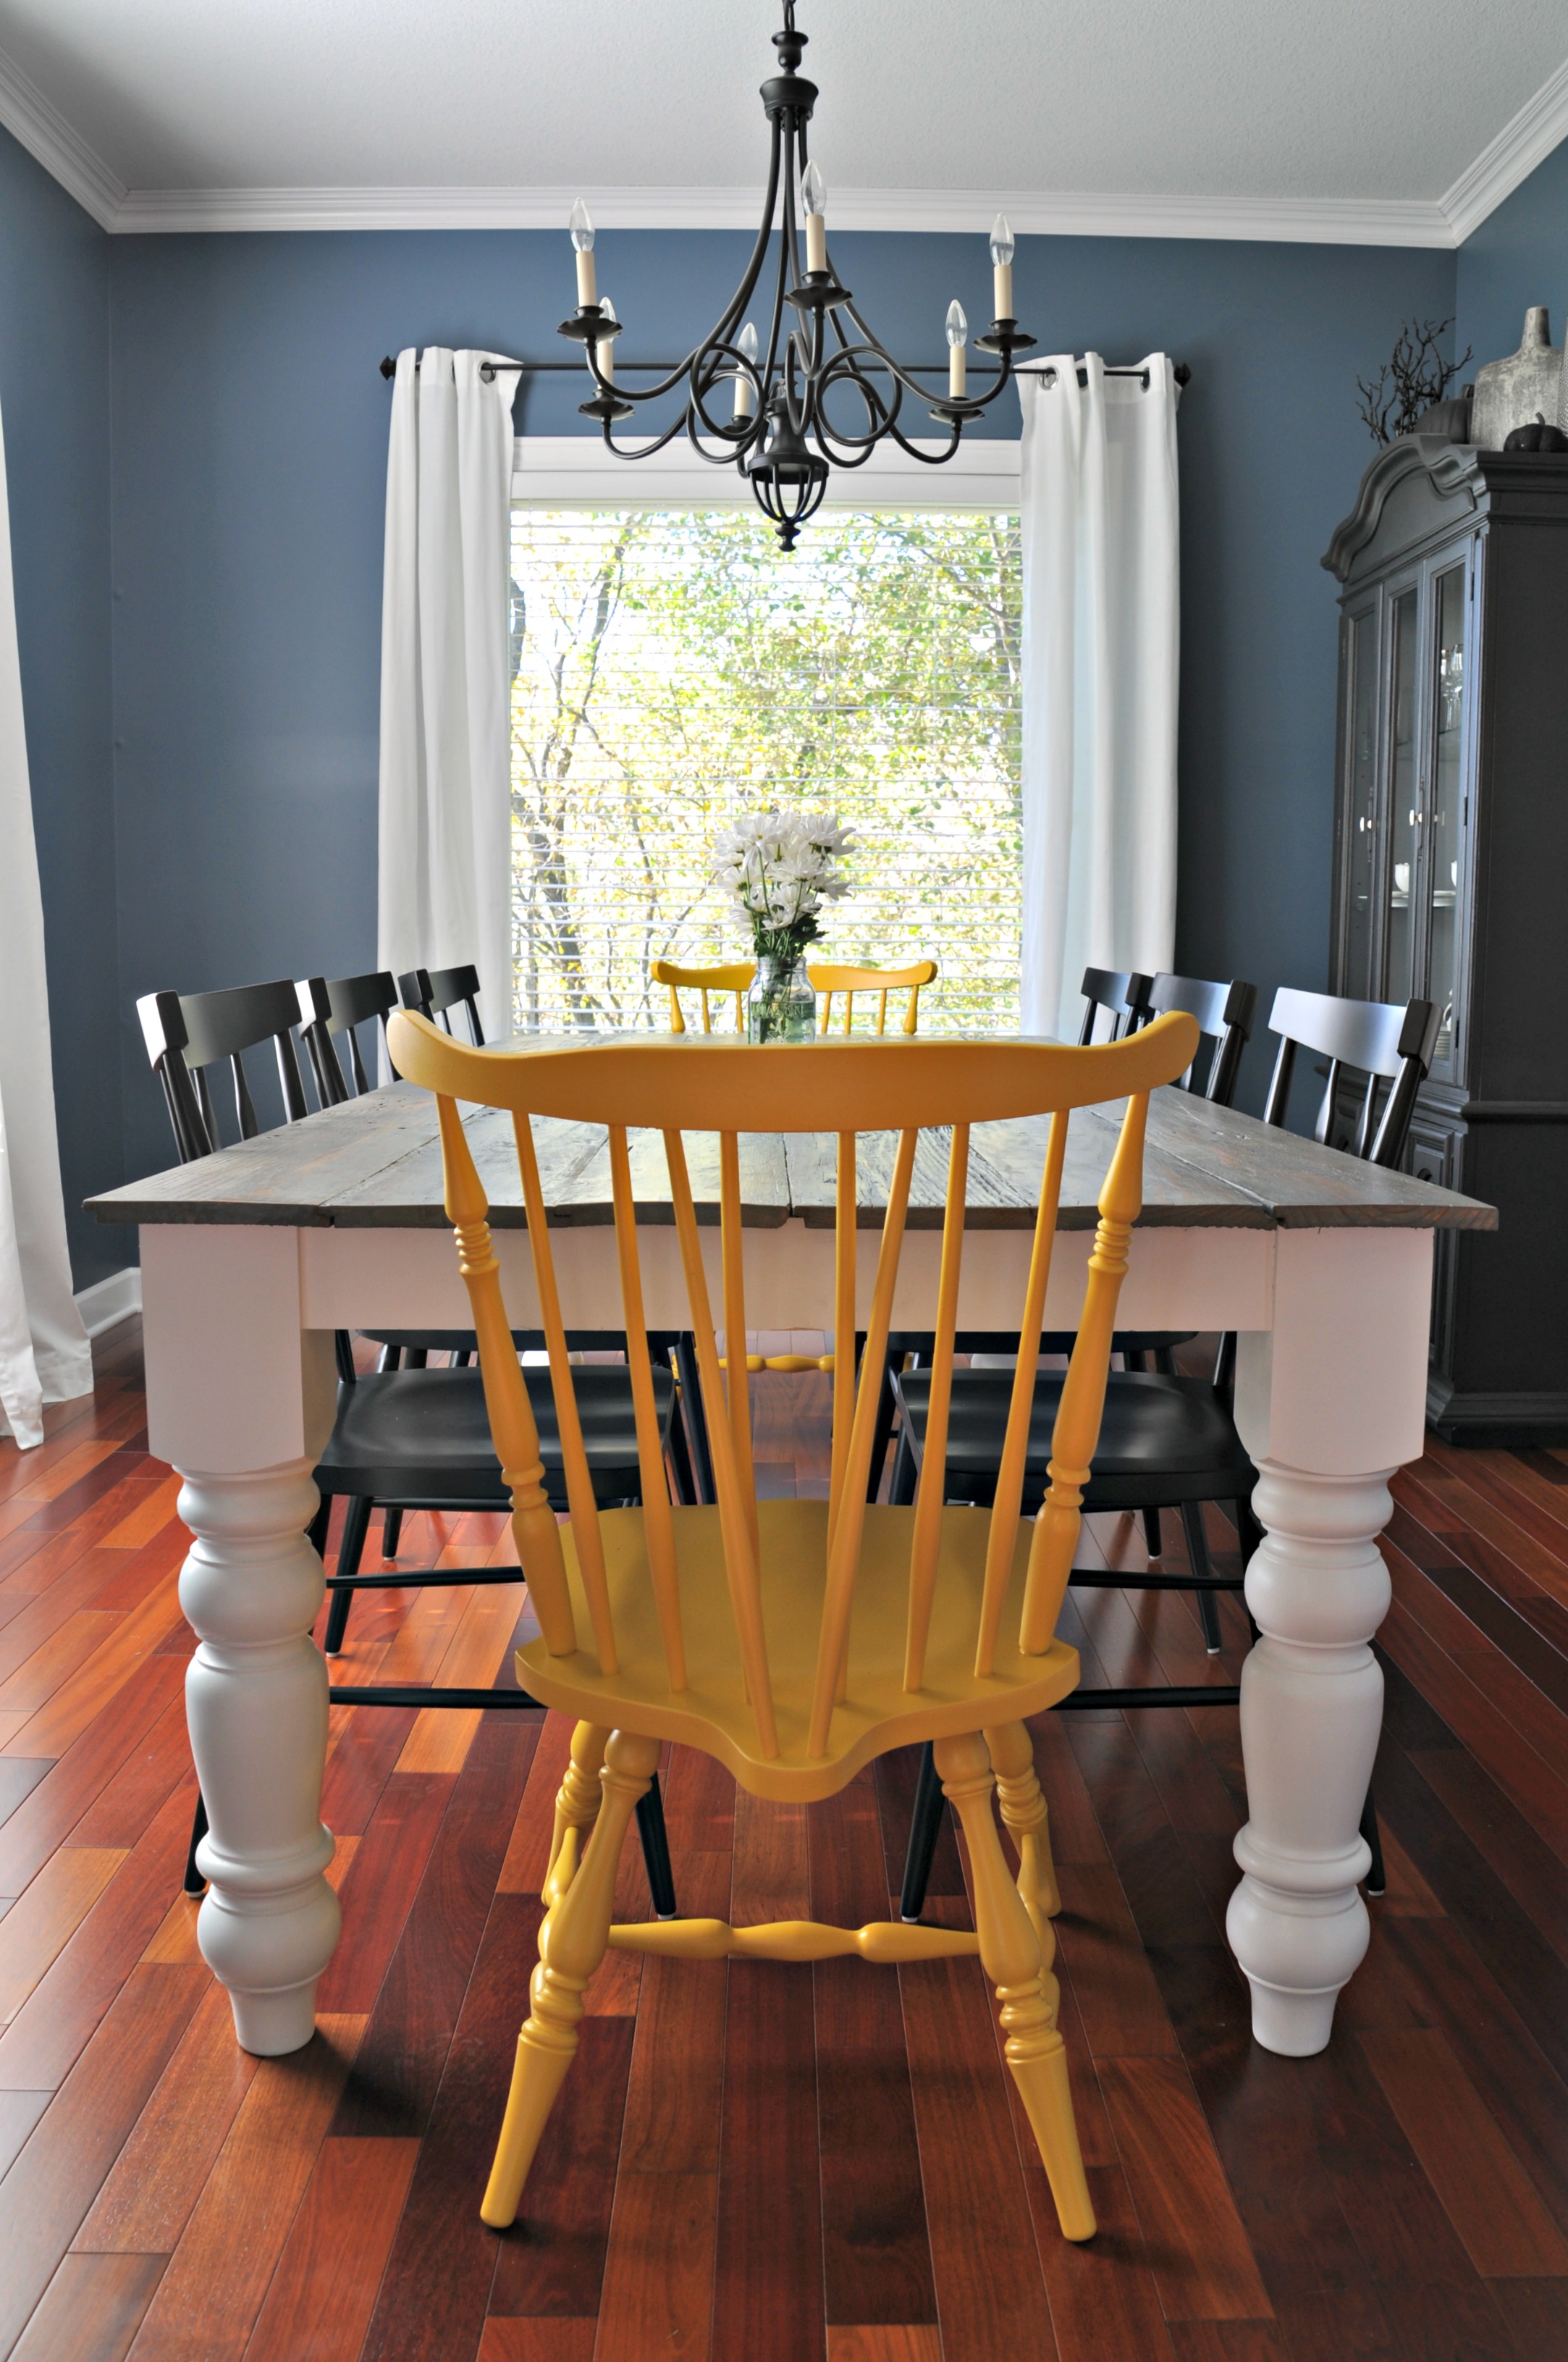
Today we'd like to share with you how Nate built our farmhouse table.  Nate wrote the directions last night.  I had to translate them.  I wonder if there is a Rosetta Stone for Nate.  He can build farmhouse tables but he most definitely can't write coherent sentences.  I can sort of write coherent sentences but I can't build tables.  We're quite the pair.

Free Farmhouse Dining Table Plans

Here are free dining table plans so you can make your own farmhouse dining table!

Material List

4 Table legs (We used these from Osborne Wood.)
3 - 1"x4"x8'
3 - 2"x4"x8'
6 - 1"x7"x8' barn boards (You can use 1"x8"x8' boards, ripped down to 7")
Kreg 1 1/4-Inch Pocket Hole Screws
Kreg Mini Jig Kit
Titebond-3 Ultimate Wood Glue
Brad Nailer
1 5/8" Brad nails (if using ship lap barn boards)

Cut list

  • 1"x4" (Apron boards)
    •  2 @ 30.25"
    • 2 @ 82"
  • 2"x4"
    • 5 @ 38"

*affiliate links included

Directions {Table Base}

Attach the 1"x4"s to the legs using pocket hole screws and wood glue, offsetting 3/8" back from the front/sides of the leg tops. 

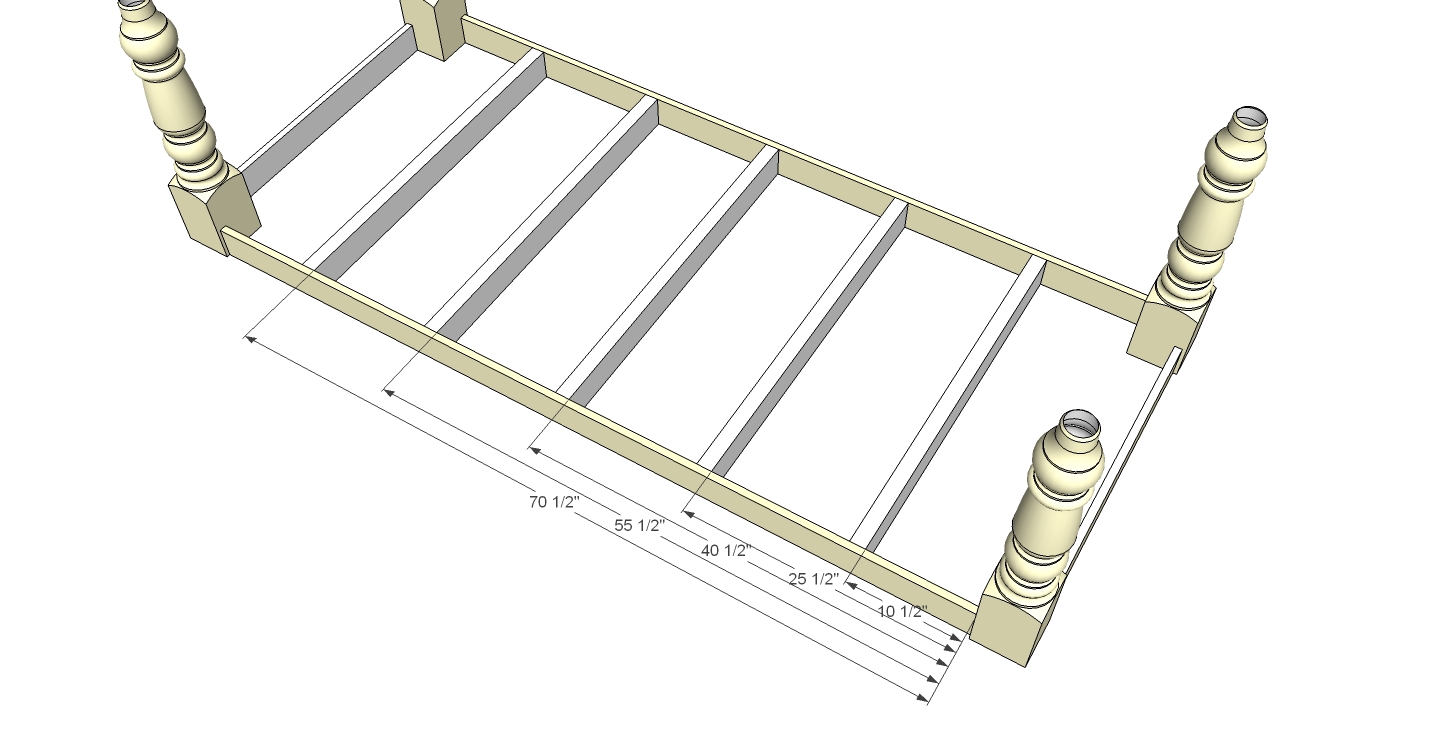
Dinning Room Table Skirt Spacing

Assembling the table is easiest done on the floor or work bench if you have one large enough.  I recommend assembling the table upside down, as shown in the photos.  Starting from the leg, mark 10.5", 25.5", 40.5", 55.5" and 70.5" on the long 1"x4". Using these marks, attach the 2"x4"s to the 1"x4".

Dinning Room Table Support Dimensions

Depending on the finish of the bottom and table top, paint or stain the legs and apron. 
 

Directions {Tabletop}

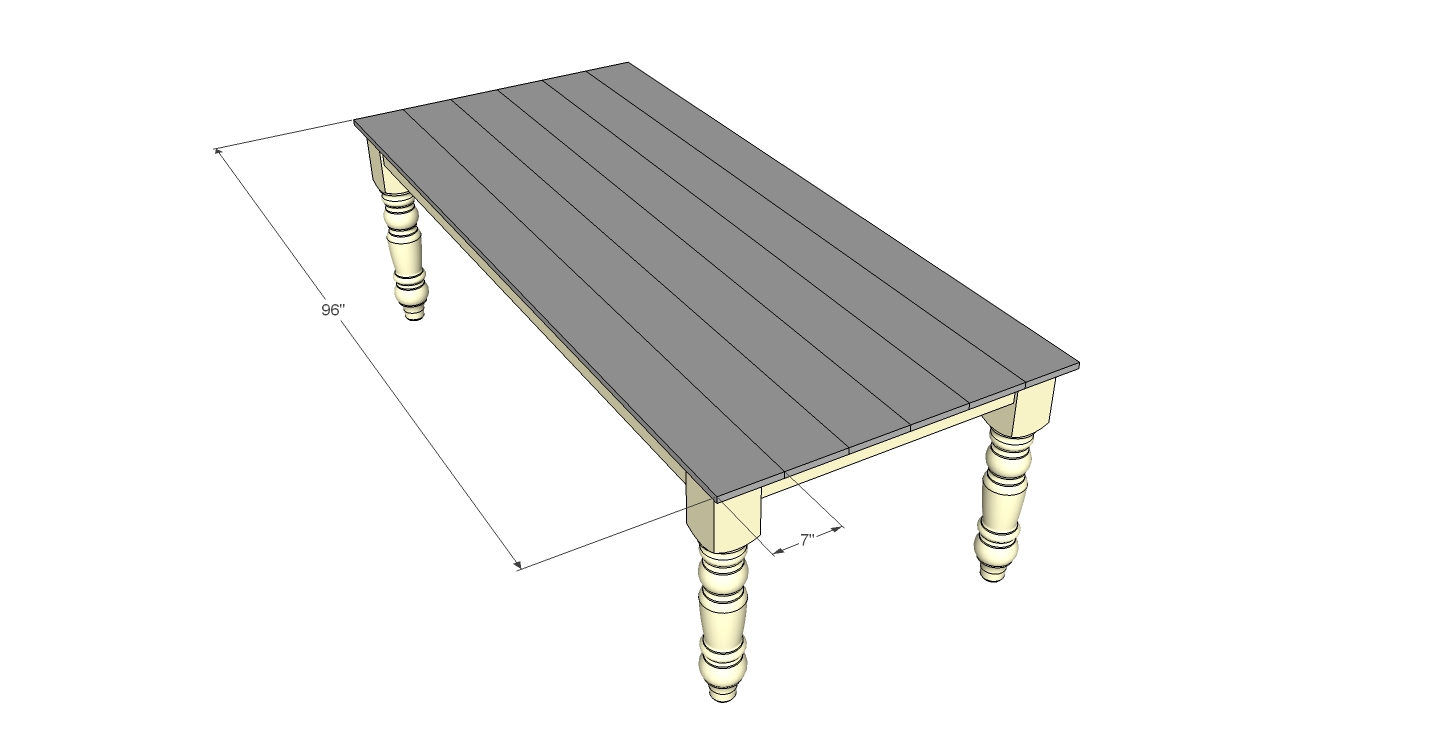
On the first board you are attaching the tabletop, determine the top of the board and then flip it over.  Mark the board using the drawing below.  You need a mark 2" from the end and 1" from the side.  Flip board back over and place it on top of the table matching up the marks with the top corner of the table legs. 

Dinning Room Table Corner.jpg

If using ship lap barn boards, secure the board to the top with brad nails.  

Contuine attachign all boards with brad nails until all boards are attached.  I did have some boards that were slightly warped, as is expected with barn boards.  Really big clamps came in handy to help straighten them out.  I also had some boards that did not want to stay down with brad nails so I went under the table and drilled in some pocket holes which helped pull the board down and secure it better.

If you are not using ship lap barn boards, attach all boards using pocket hole screws, then attach top to the bottom using pocket hole screws.

Dinning Room Table Top


A hand planer (or larger planar) really helps in starting to get the boards all level.  If you don't have a planar, a belt sander will work.  It just might take you longer.  Plane and sand the boards until all smooth.  Apply stain and poly (or paint).  Read how we finished our tabletop here.

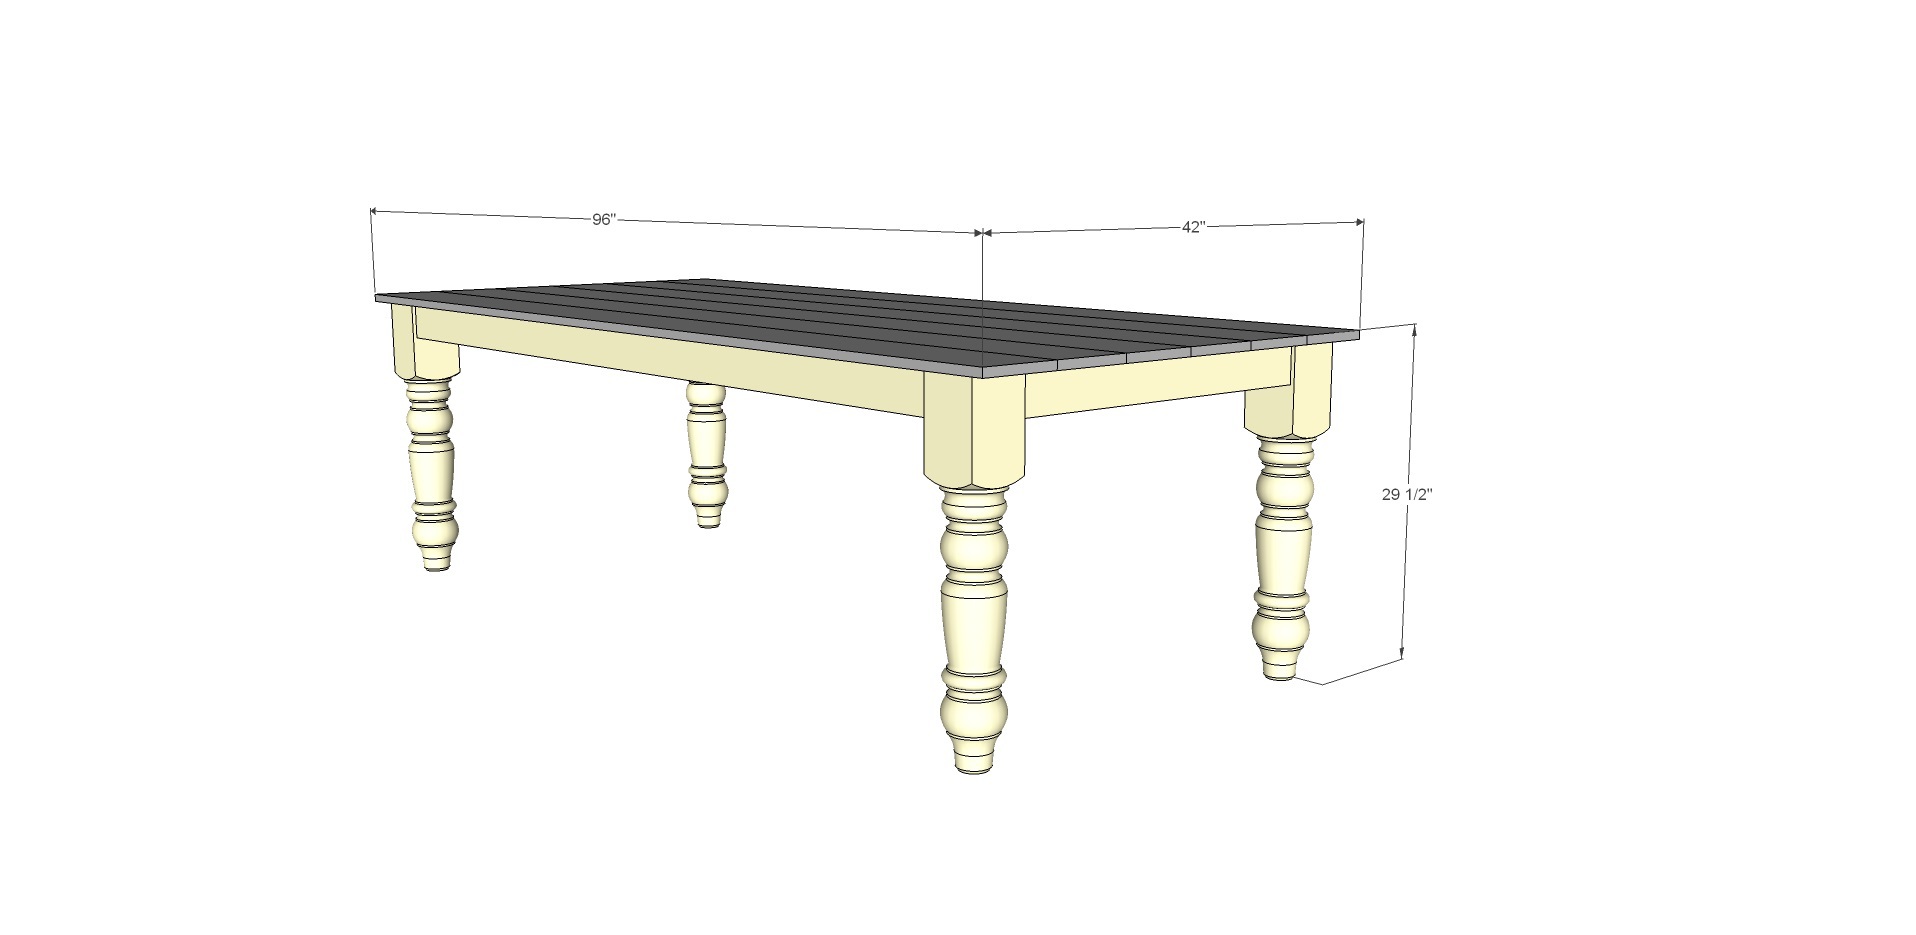
Dinning Room Table Dimensions
Free Farmhouse Dining Table Plans {DIY Tutorial}

Who's ready to build their own?  Do you speak Nate? ;)

Photobucket Photobucket Photobucket Photobucket PhotobucketPhotobucketfollow us in feedly