Easy Sew Dog Tie
/Nate won’t let Ike wear dog clothes. He’s very opposed. Normally I do things to test our marriage but I don’t push the dog clothes situation. That’s how strongly Nate feels about the dog in outfits.
Nate surprisingly does not oppose accessories though. Well, he probably will after he reads this post and realizes I wasted part of an afternoon making the dog a tie instead of doing something useful like cleaning windows or laundry or something.
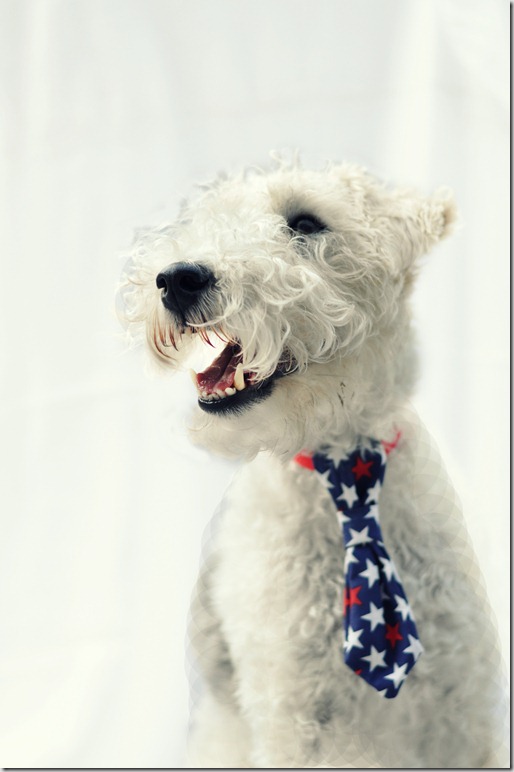
Ike loves accessories. He’s normally a bandana type of dog but he’s always willing to dress up for the holidays. Like the 4th of July for instance. Nothing like a good dog tie to celebrate our country’s freedoms!


Want to make your furry friend a dog tie? Of course you do!
Here’s what you’ll need:
- One 14'” x 3” piece of fabric with pointed ends
- This piece makes the long tie piece.
- I used a piece of iron on interfacing on the back of this piece for extra support.
- One 4” x 3” piece
- This piece is what your dogs collar will slide through.
- One 3” x 2.5” piece
- This piece is that little portion that is wrapped around the long tie.

You can be flexible with these measurements. Ike is about 24 pounds and 16 inches tall. You can adjust for your dogs size. It may take some experimenting but the ties are pretty easy to make.
Take your 3” x 2.5” piece and place the ends right side together. Sew with a 1/4” seam allowance.

Turn right side out. I use a pen to assist me with this step. Press so the seam is in the middle.

Fold this piece right sides together, sew together, and turn right sides out.

Place the 4” x 3” piece on top of the tie piece (centered). You will want the wrong right sides (the pretty sides) together.

Sew 1/4 inch seam along the two edges of the 4” x 3” inch piece.

Turn this right side out. You may want to press it flat if it’s too bulgy.

Fold the pointed ends of the tie right side together and sew with a 1/4”ish seam allowance around the edges. Try to get a few stitches up into the covered piece to help hold the tie together better.

Trim the edges up so you get a pointy tie. (I need to learn to switch out lenses. The wide angle does wonders for close ups. But you get the picture, right?)

Turn the dog tie right side out. You will now have the tie piece and the little wrap piece.

Scrunch (technical term) the tie at the top and slide the wrap piece over the tie. (A better use of your time may be repainting your nails but you’ve made it this far without me telling you this so continue on.)


Admire your pretty tie!

Place your dog’s collar through the loop at the top.

Watch your dog smile because he loves his fancy new dog tie. He seriously loves this thing.

This is a good beginners project because if you screw up, your client will still be happy! Just remember that the tie should only be worn with supervision!.

How do you feel about dogs in clothes? Accessories? What dog doesn’t need a tie?
Linking up to: Serenity Now, Honey We're Home


