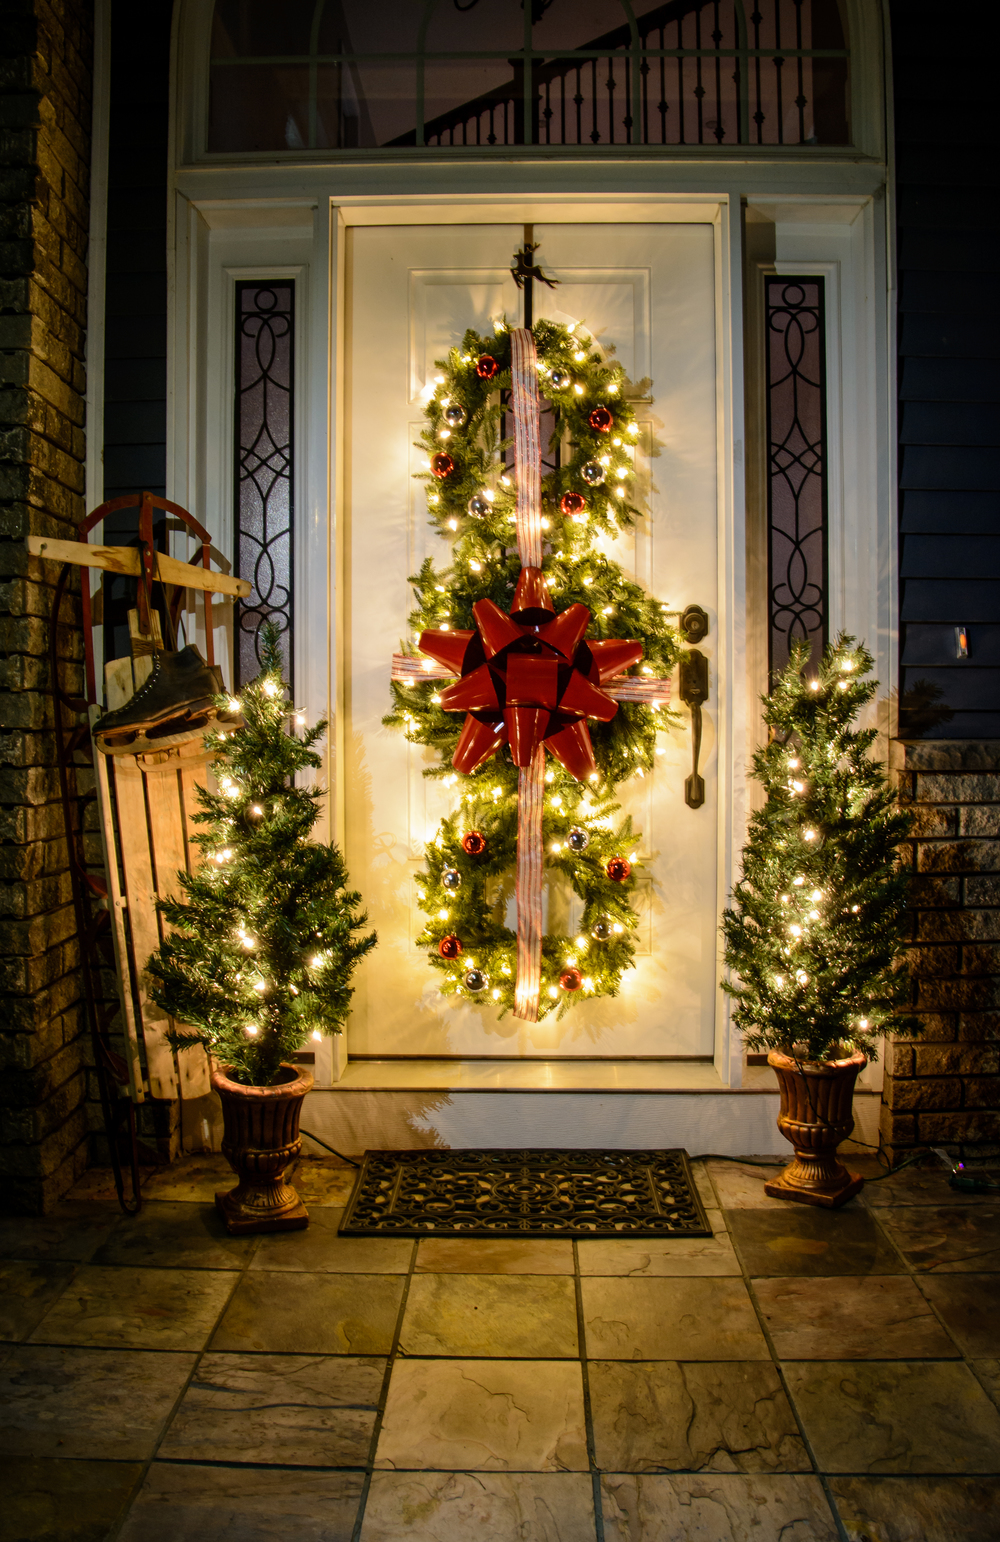
Lighted Christmas Balls + Outdoor Lights 2013

Sometimes I wonder how I got so lucky in the husband department.  I mean, most dudes don't willingly put up Christmas lights let alone enjoy putting up a display like this.

Outdoor Lights 2013 {decor and the dog}

We hang lights instead of shoveling our driveway.  It snows light every other day so we've given up.

There might be some lights thrown in the bushes if I was in charge (which was my job this year).  You would never catch me up there in those peaks.  I definitely wouldn't spend the time outlining the sides of the house.

So instead of thanking Nate, I pull out a quote from one of my favorite Christmas movies.

Michelle: The little lights... they aren't twinkling.

Nate: I know, Michelle. Thanks for noticing.

Outdoor Lights {decor and the dog}

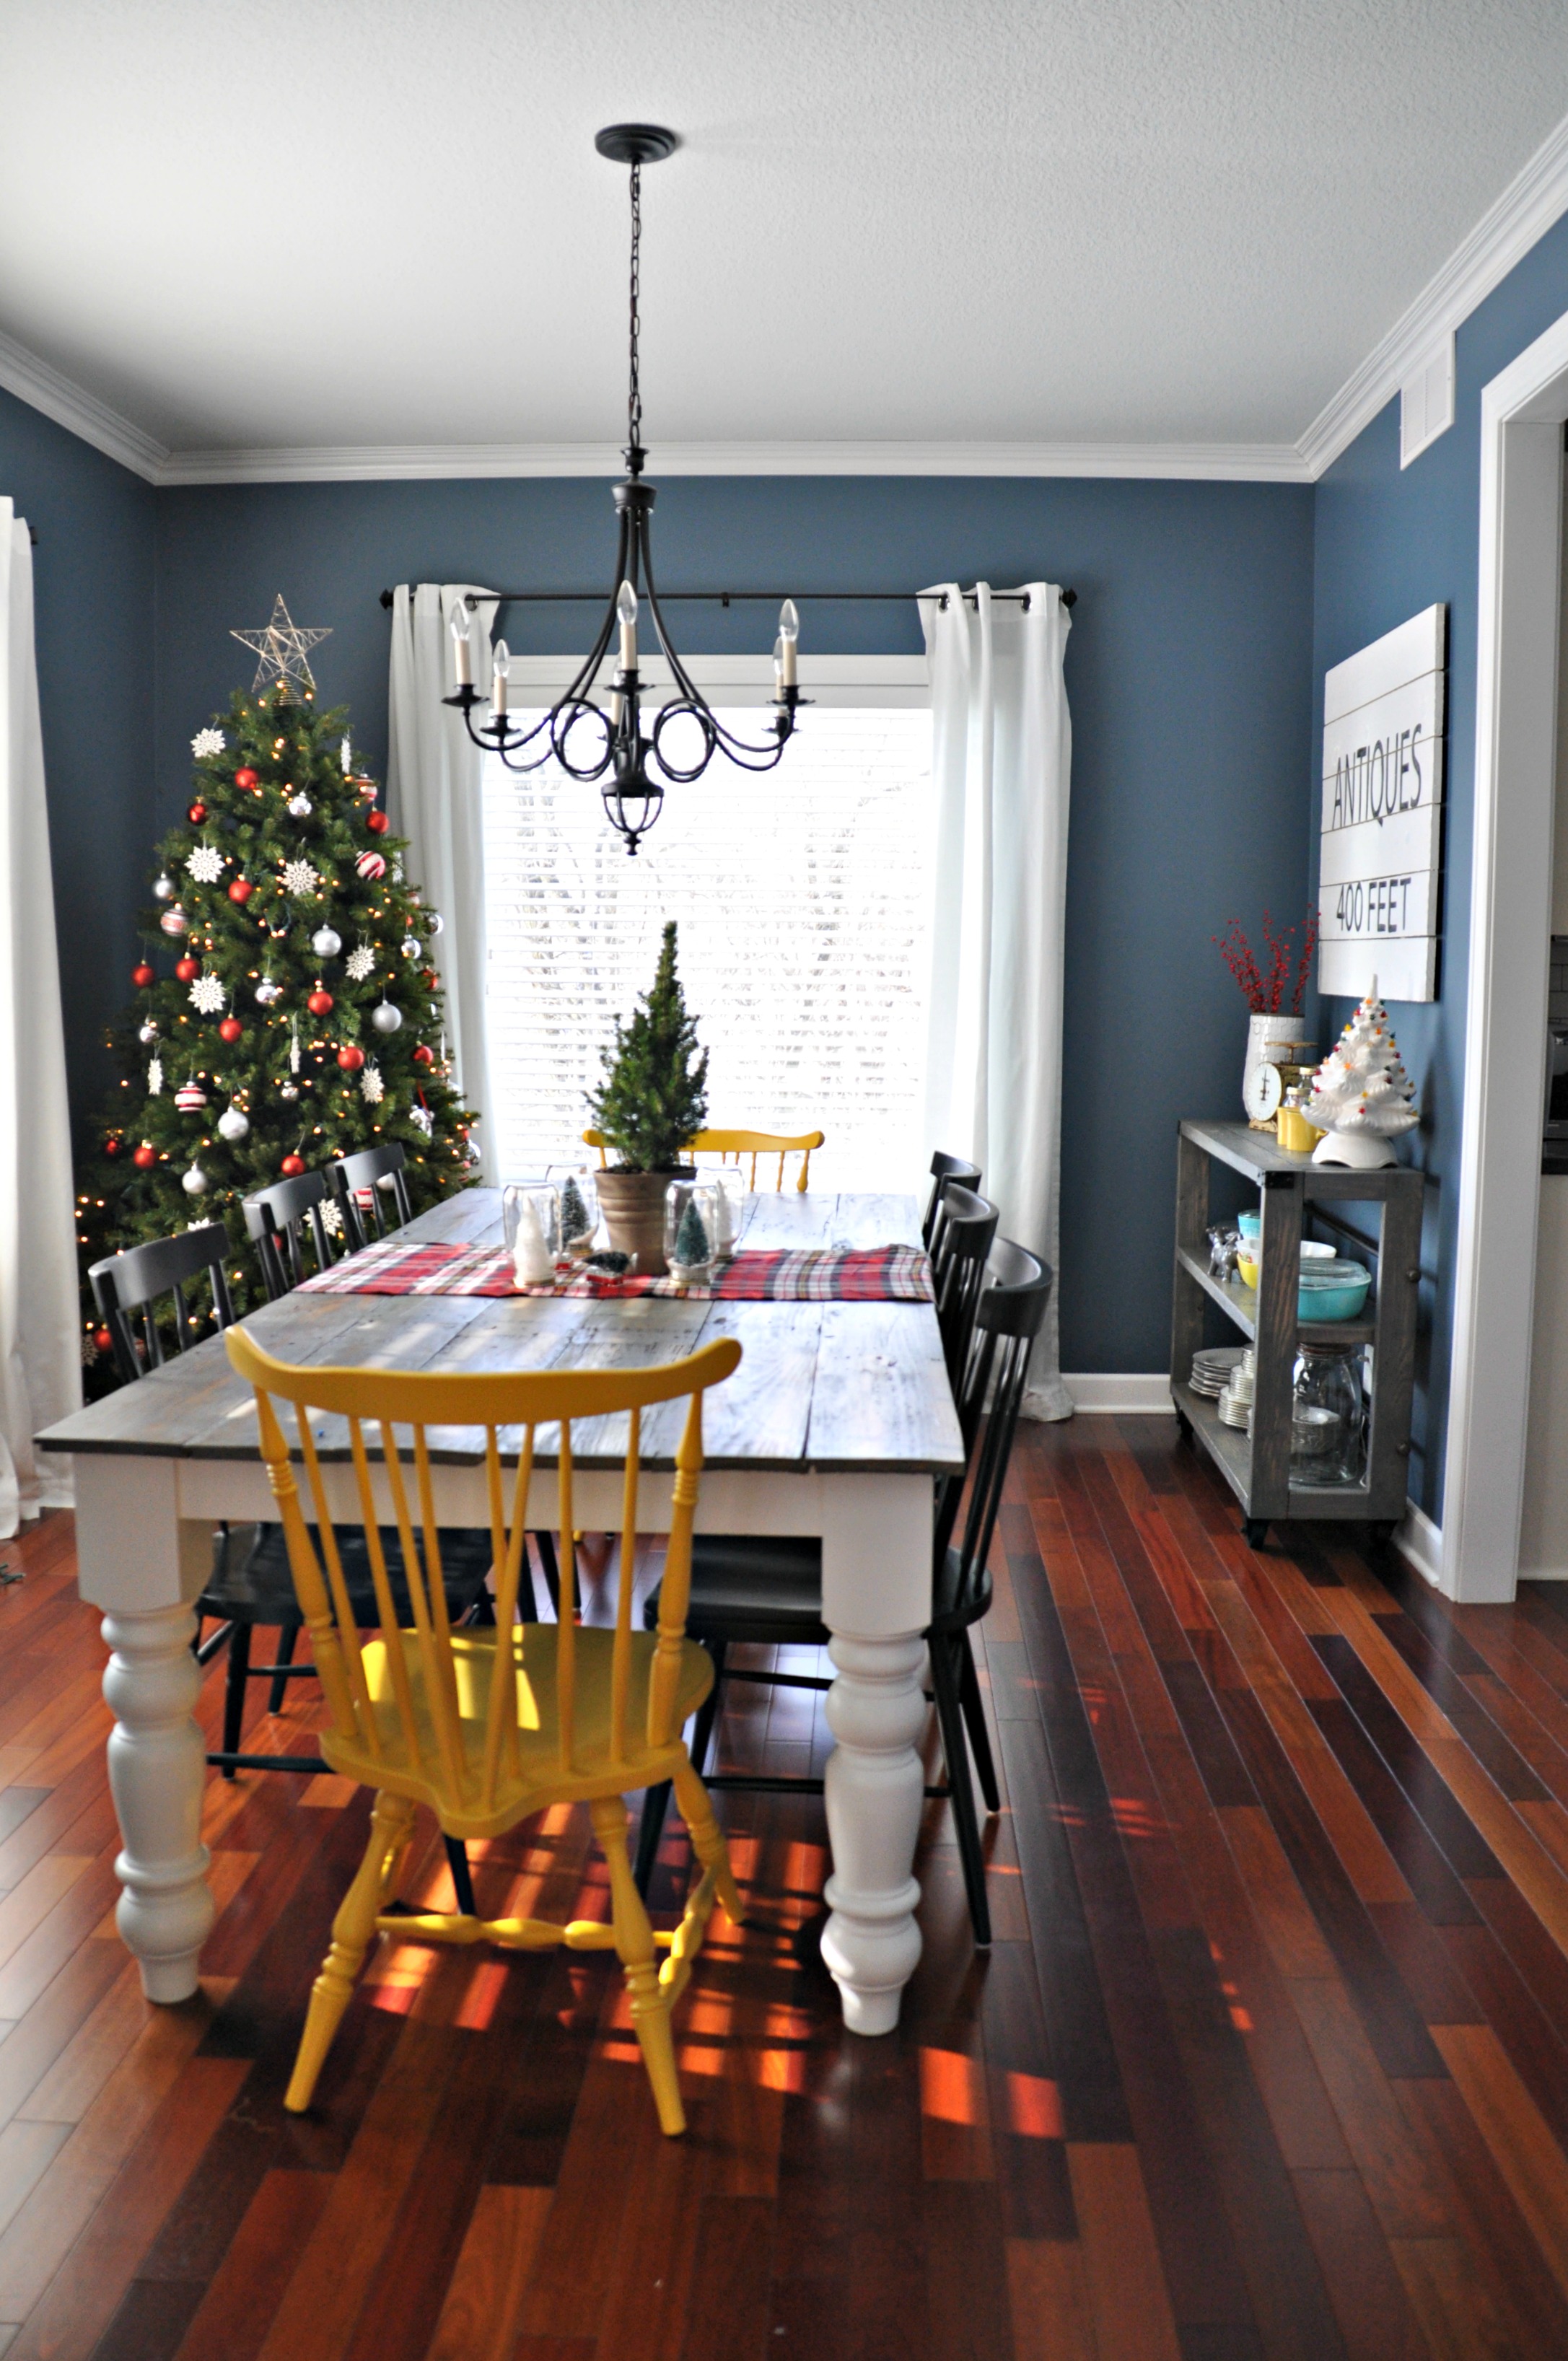
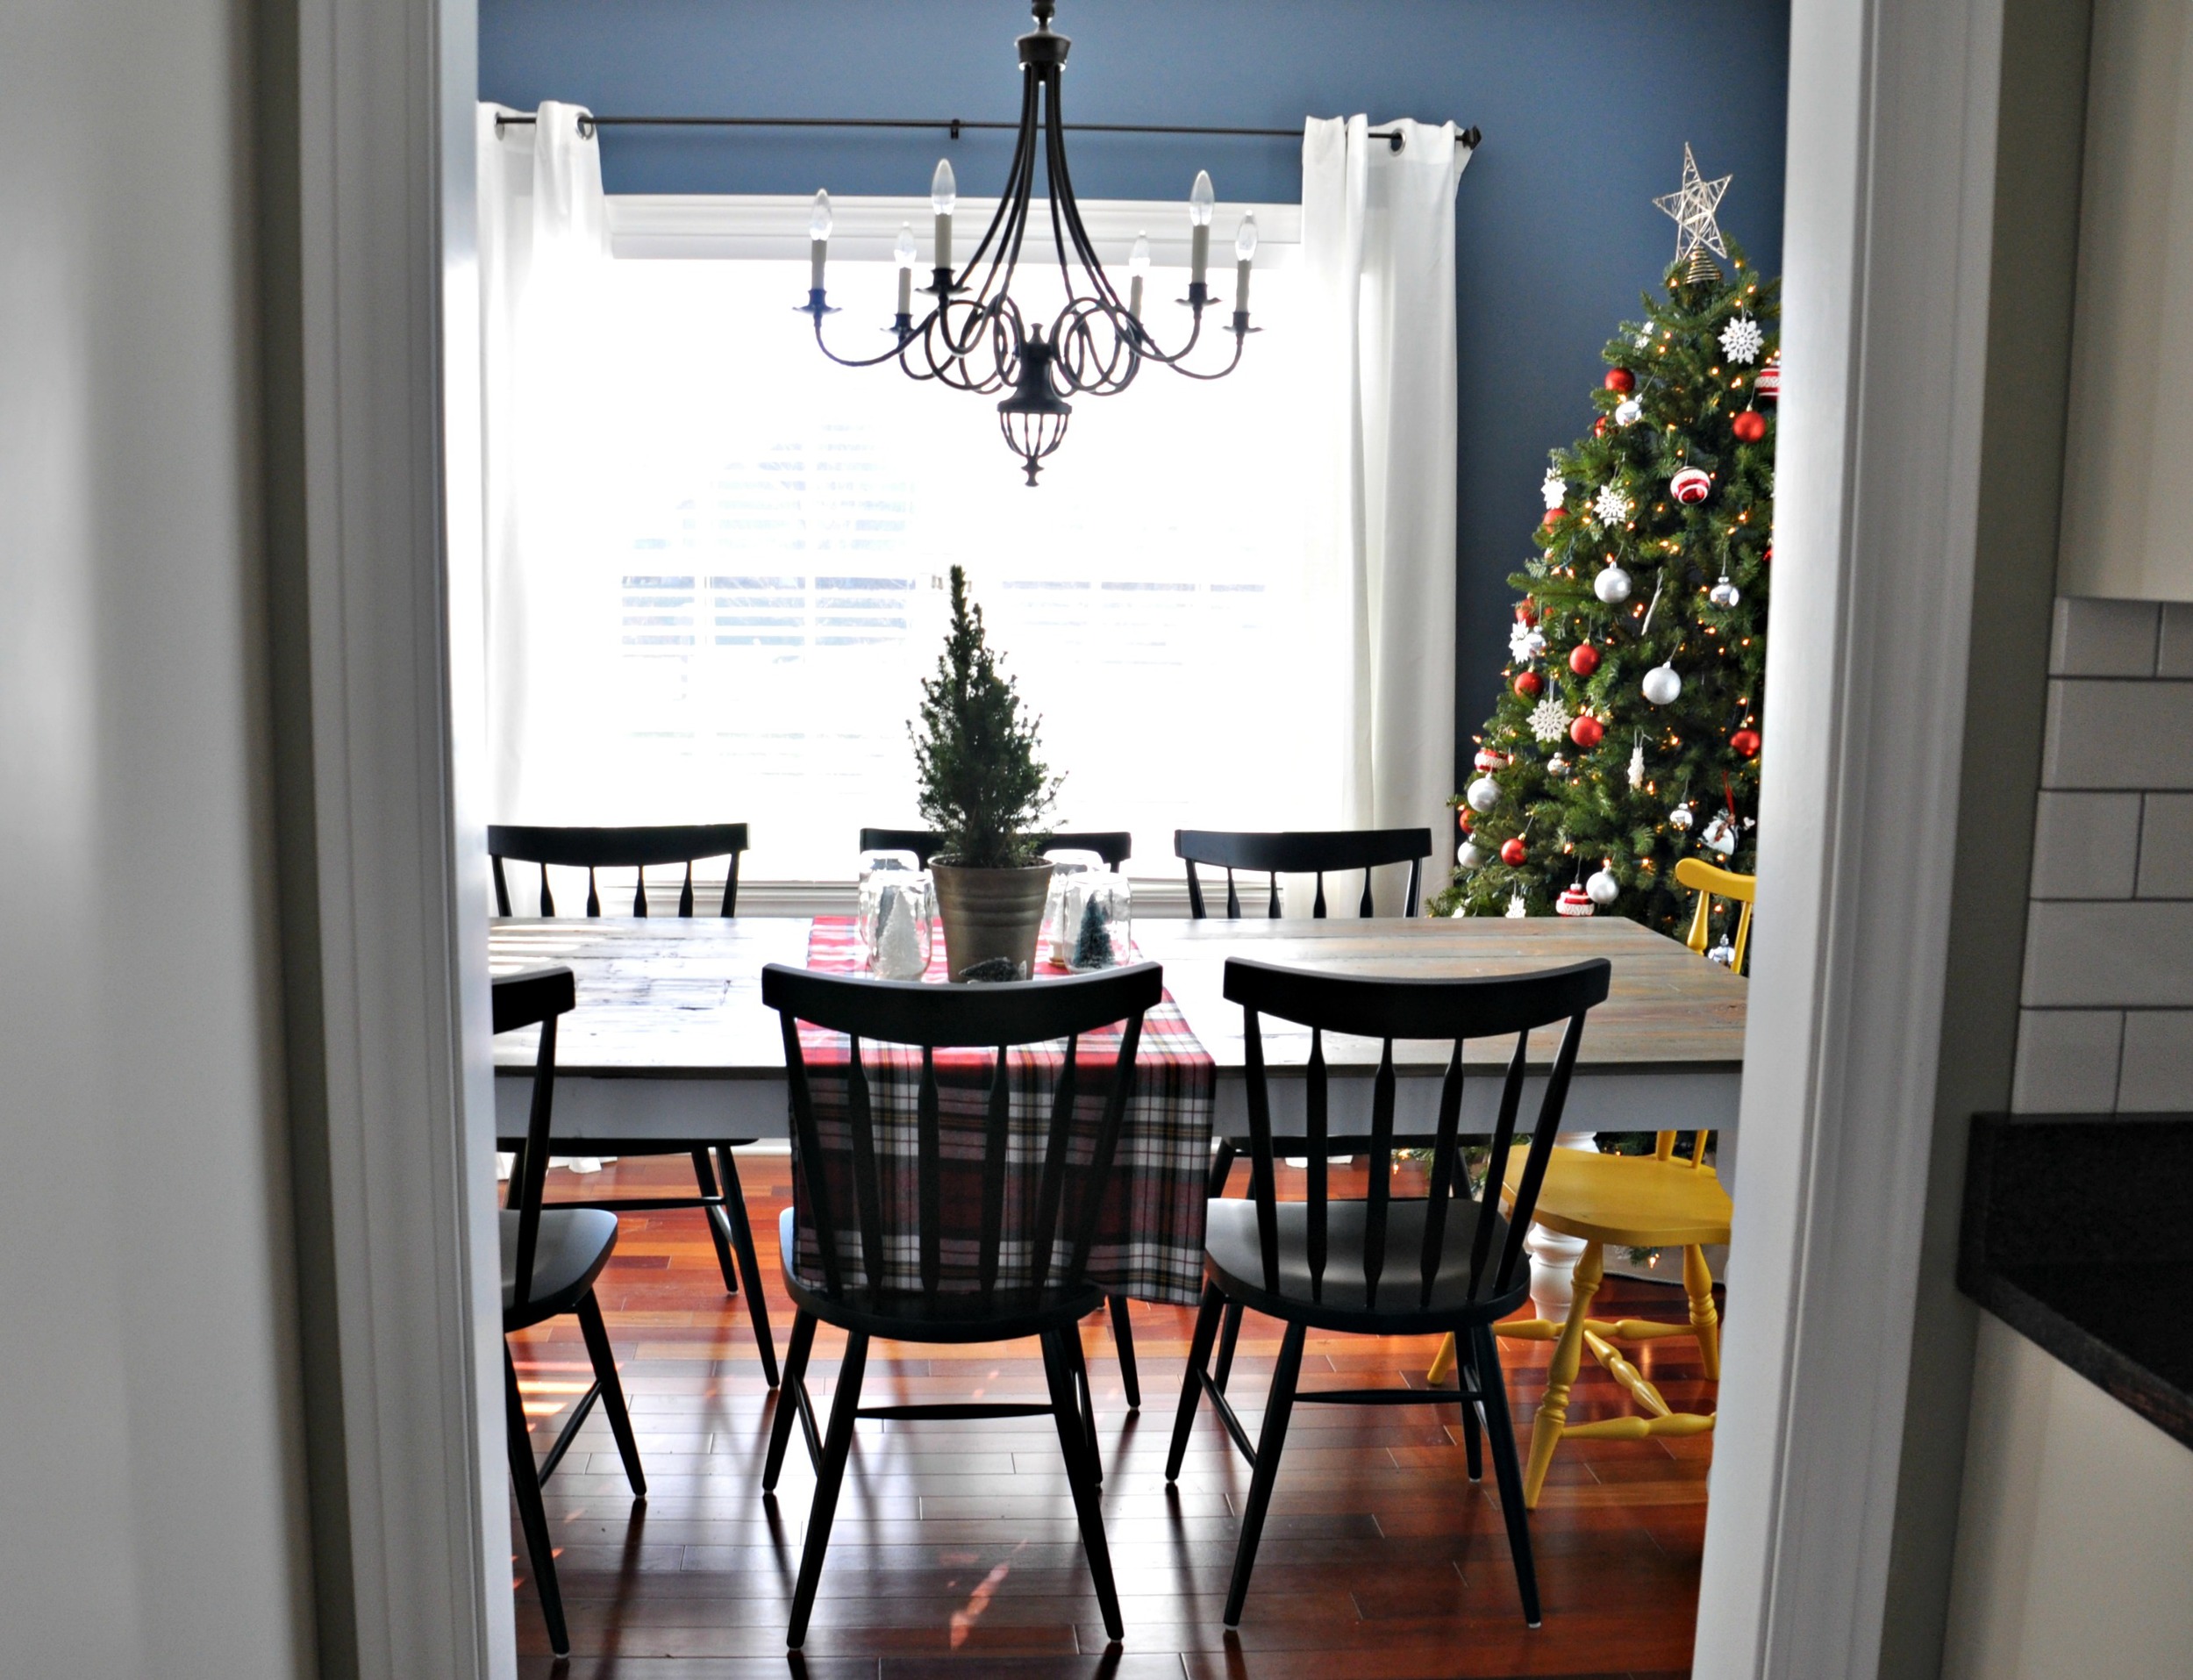
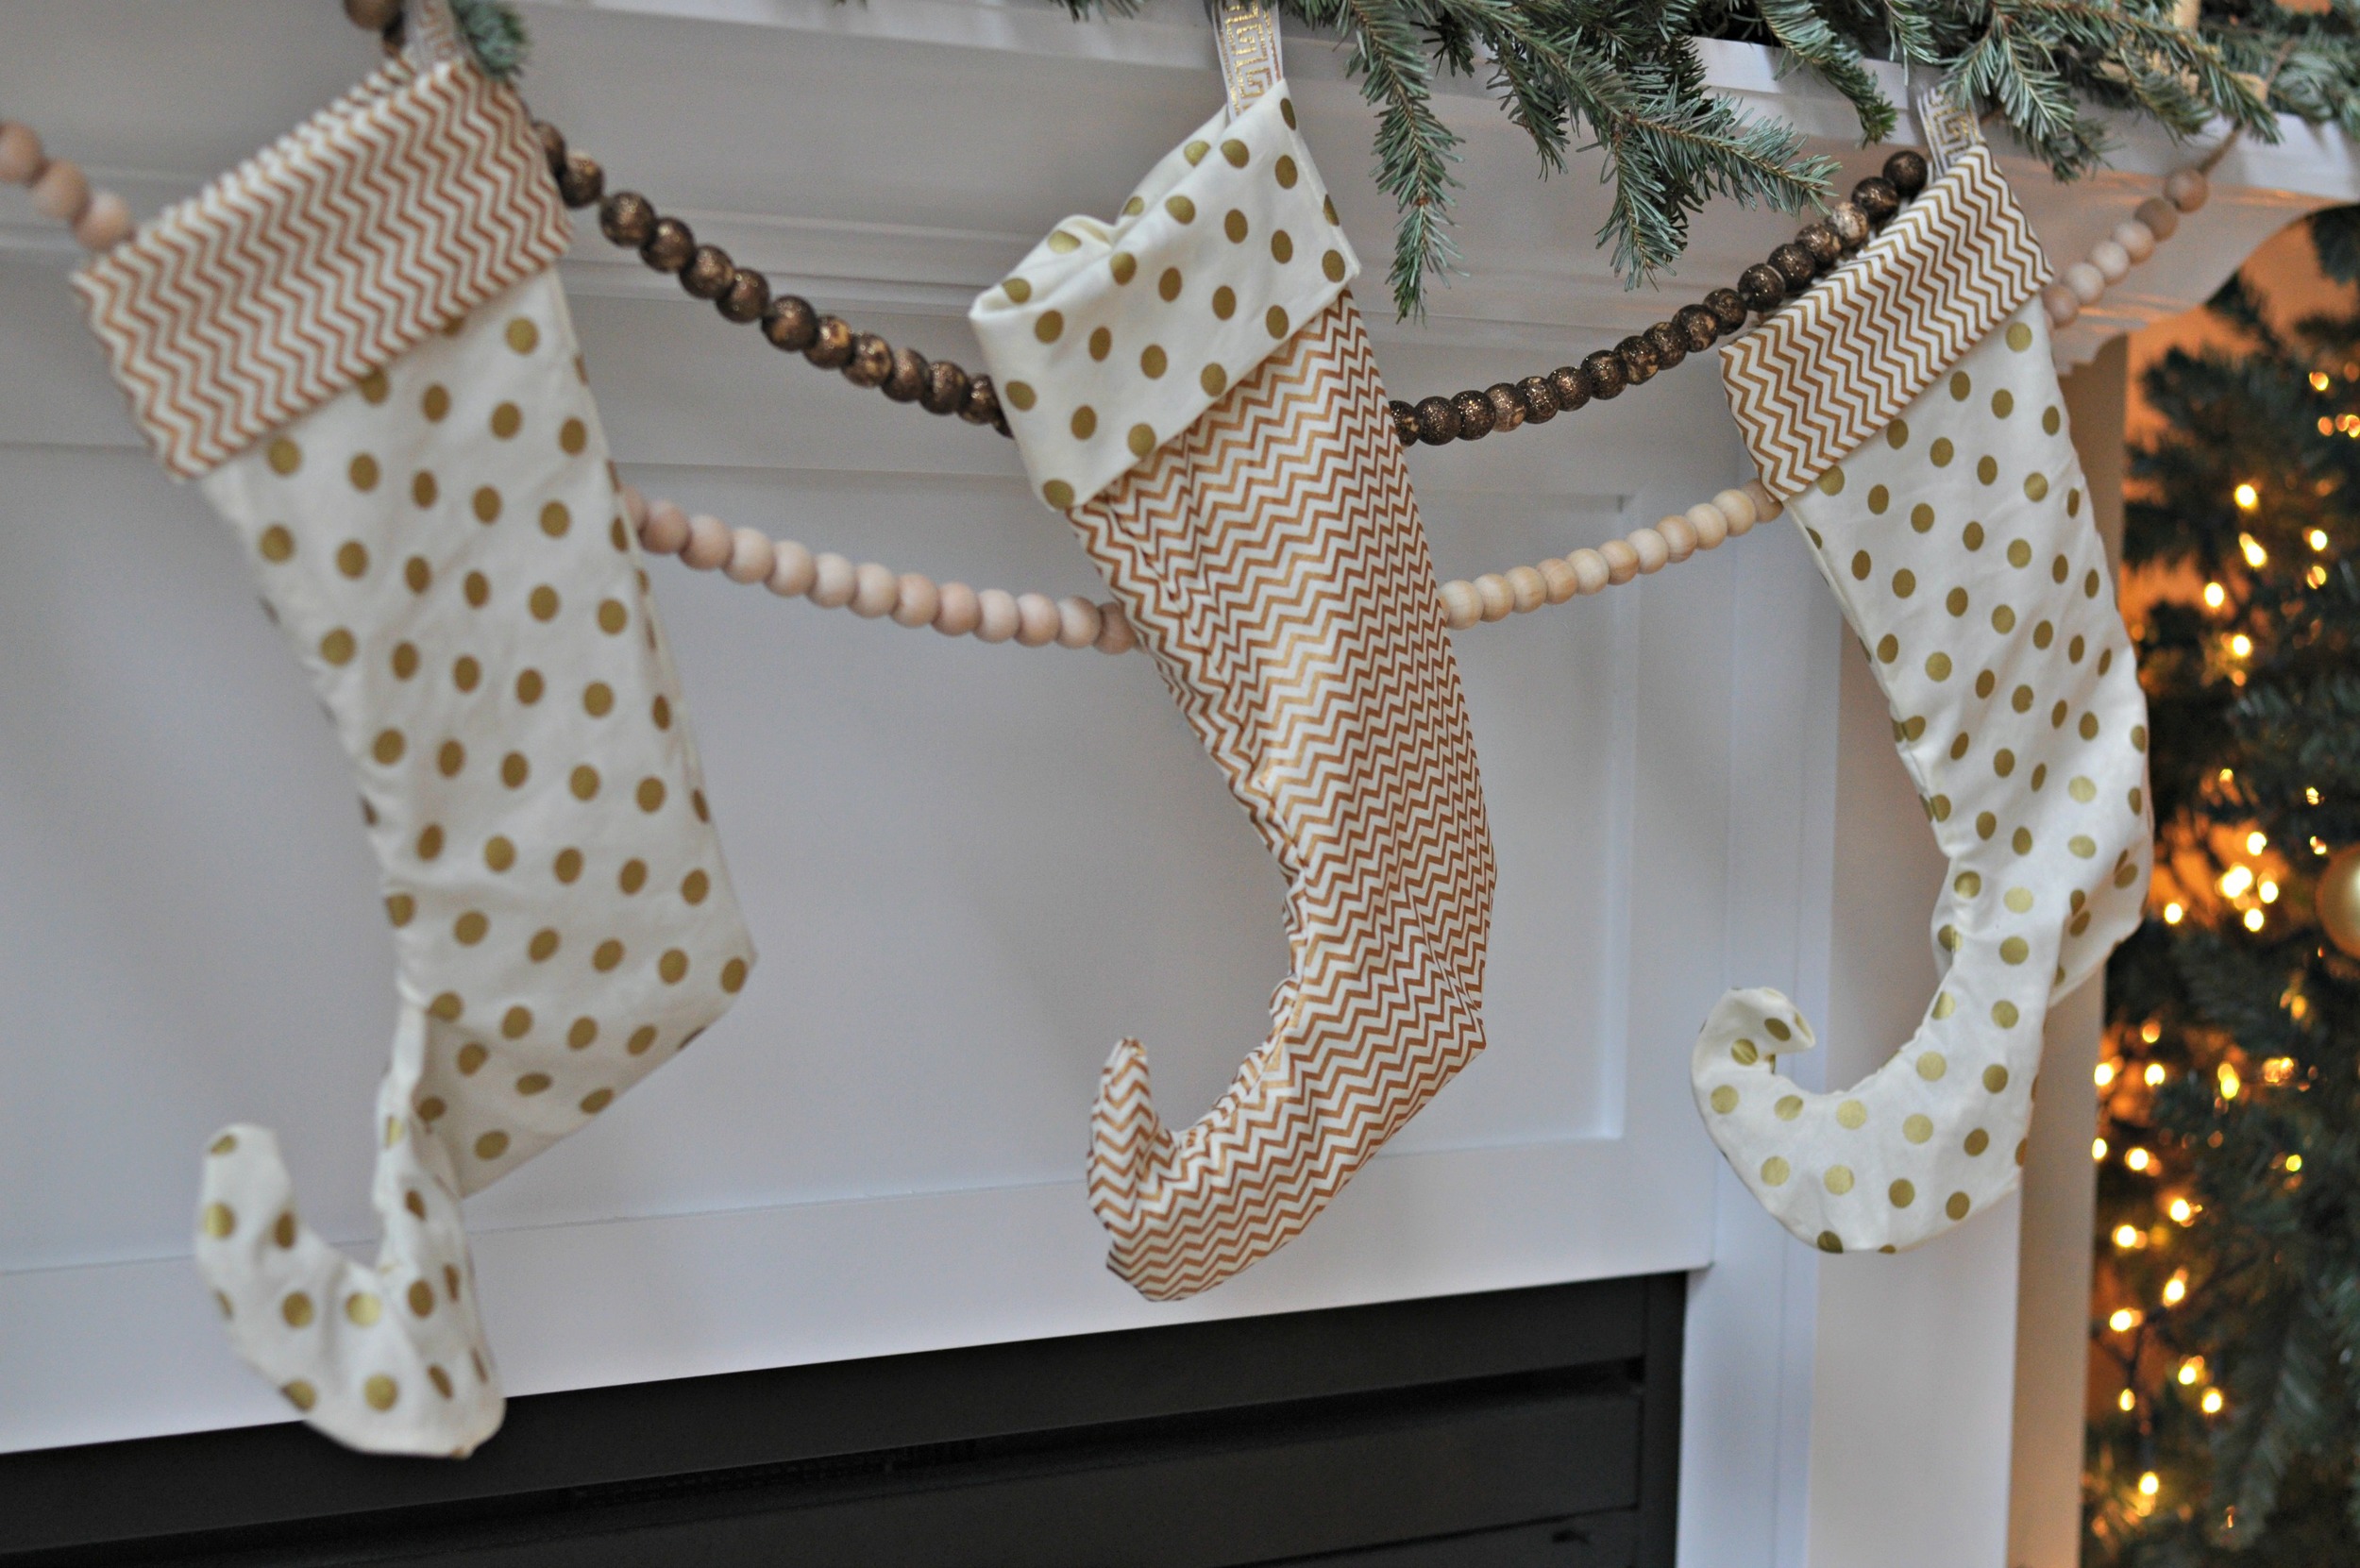
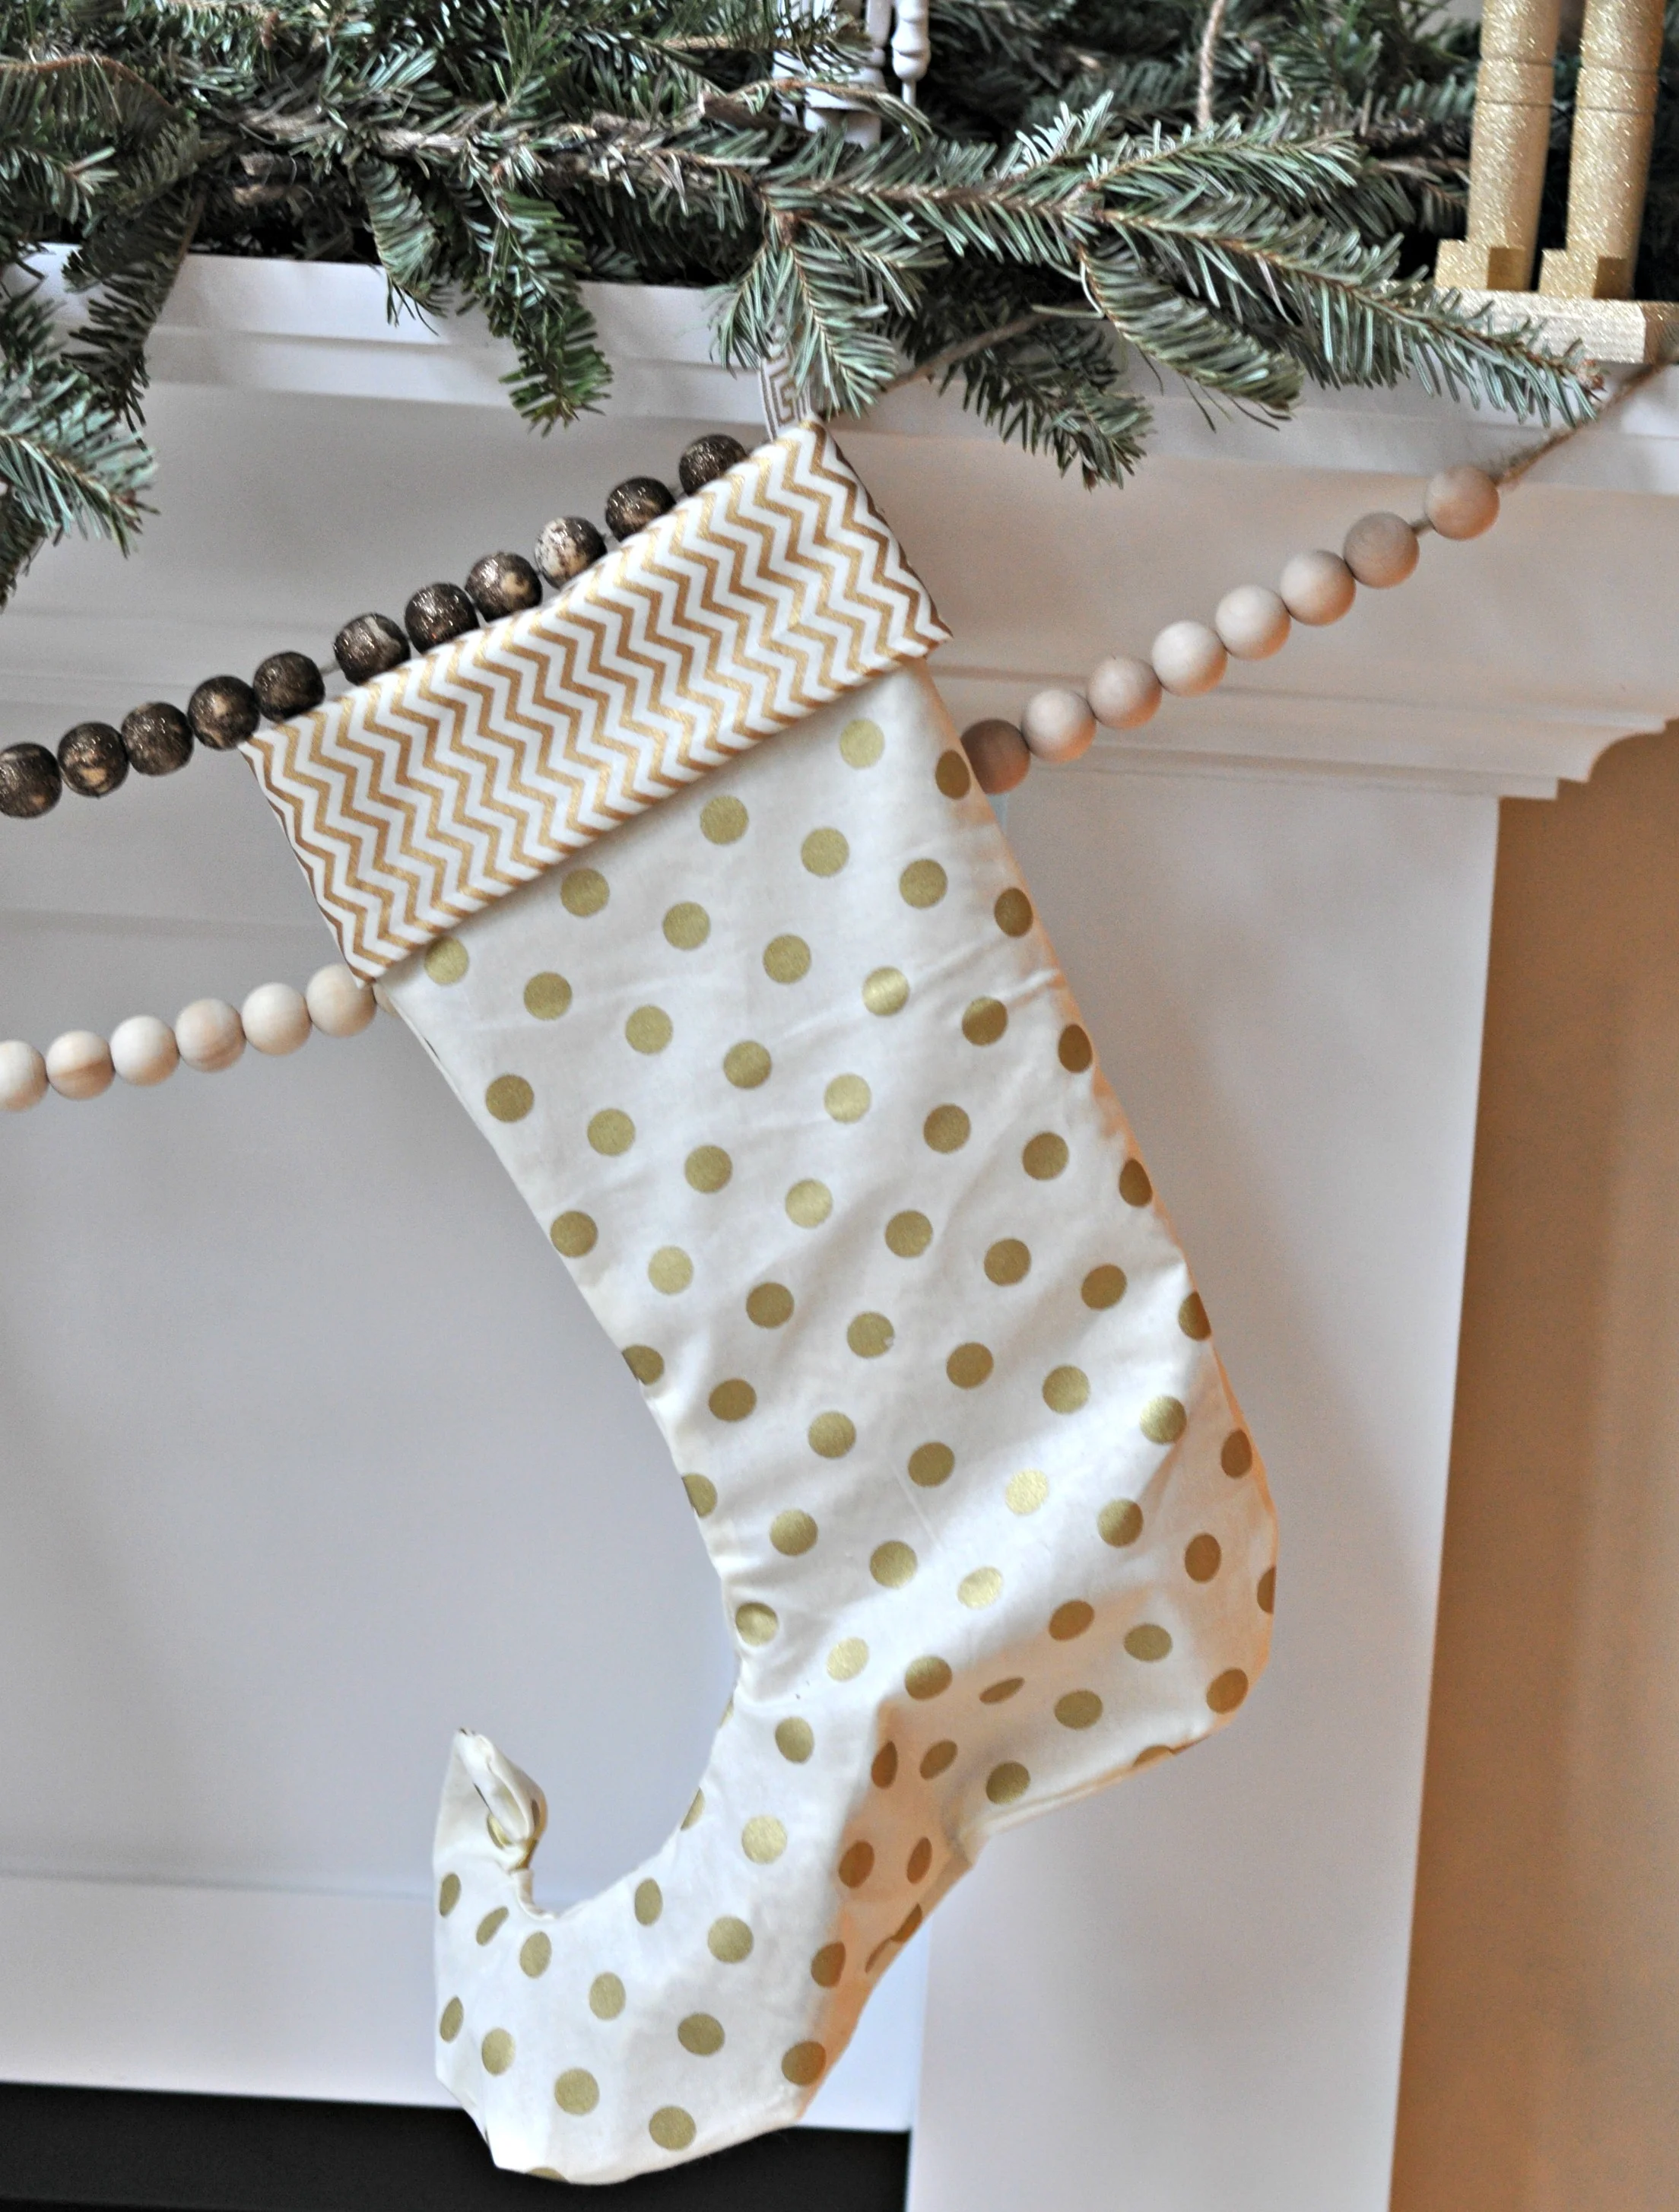
We are slowly adding lighted Christmas balls to our little tree area.  We made these last year but I never blogged about them.

Outdoor Lights 2013 {decor and the dog}

These balls are easy to make.  We hope to have a big ol' forest of hanging ball in the future.  We added a few more this year.

We were originally inspired by this pin which no longer leads to a valid site.  Awesome.  It did at one time and it taught us how to make these lovely lighted Christmas balls.

Here's what you'll need to make your own:

  • Chicken wire
    • We used the 2" kind.  About 2 feet for each ball.
  • Wire cutters
  • Mini Christmas lights (1 box per ball)
  • 3 prong outdoor adapters
  • Outdoor Extension cords
Lighted Christmas Balls {decor and the dog}

Form the cut ends into a cylinder.  Twist the cut ends together.

Hanging Lighted Christmas balls {decor and the dog}

Close both ends of the cylinder.  Trial and error will get you to a point where the ends look more like a sphere than a square.

Outdoor Hanging Lighted Christmas balls {decor and the dog}

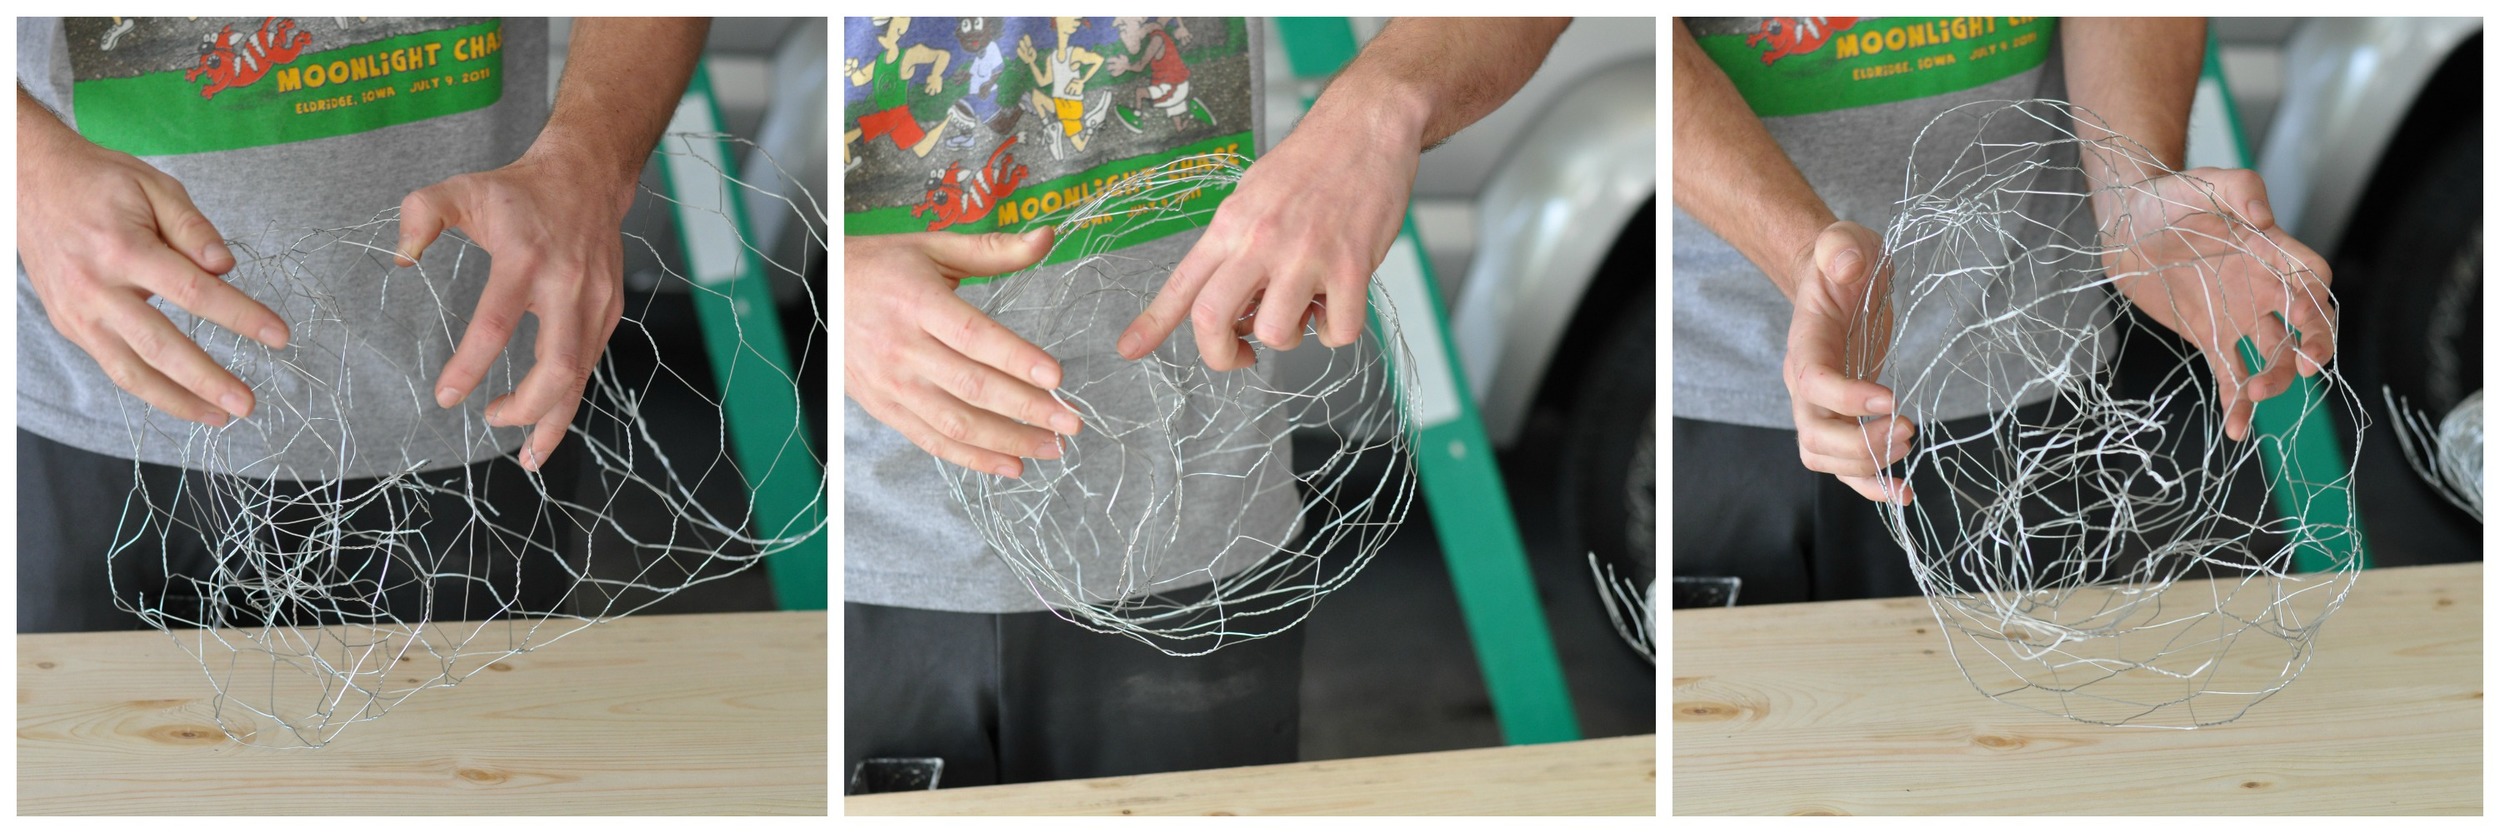
Keep fluffing and twisting until you end up with something that resembles a ball.  Wrap the lights around the ball.  (We stuck some inside to help keep in place during the windy/snowy month of December.

Outdoor Hanging Lighted Christmas balls {decor and the dog}

To hang, drape an extension cord over a tree branch.  Thread the power cord into the ball.  Loop it up and in and plug into the lights.  It's seriously a stupid easy outdoor light project!   

Outdoor hanging lighted ball
Outdoor Lighted Christmas balls {decor and the dog}
DIY Christmas Light Balls

Do you have outdoor lights?  Are you one of those awesome houses that has the display set to music? 

Christmas Countdown Art {Dare to Deck the Halls}

Happy Monday!  I hope you all had a fabulous weekend.  Nate and I enjoyed a lovely snowy weekend in Chicago.  The city is pretty much magical covered in snow.  More on that later.

Today is the last link up for the Dare to DIY.  Goodbyes are always hard.  The theme this week is Dare to Deck the Halls and the party is over at NewlyWoodwards!  I've been working on quite a few DIY holiday projects (which I have already completed) but the one I wanted to share for Dare to DIY is a Christmas Countdown.  Which I finished last night.  I'm so on top of this blogging stuff.  

Christmas Countdown 6.jpg

I've always wanted some sort of Christmas countdown art.  This is one of those projects that in my head was going to be quick and easy and turn out beautifully.  None of that happened but it's still cute in it's own quirky way.  (It also photographs horribly. Eh.)

Christmas Countdown Art {decor and the dog}

I started with a blank piece of wood that I painted with chalk board paint (two coats).  I then designed the lettering/numbers in Photoshop.  I traced them onto the sign using tracing paper.  (I'm going all old school on you.)  I then used white Sharpie paint pens to poorly go over my tracing paper marks.  

You could just do this with chalk pens.  I wanted something that I could use year after year.  

Christmas Countdown Art {Decor and the Dog}
Christmas Countdown Art {decor and the dog}

This year I am just "priming" the circles as I fill them in.  Next year I will probably "x" them out.

Christmas Countdown Art {decor and the dog}

Here is it hanging in our festive dining room.  And I still have like 10 days to enjoy it.   Go team Michelle.

Christmas Countdown Art {decor and the dog}

Now it's party time.  Be sure to check out the fabulous projects by my partners in crime.

(Colorful pom pom wreath via Primitive and Proper, Joy to the World print via Maybe Matilda, Christmas countdown via Decor and the Dog, Plaid and Union Jack pillows via NewlyWoodwards)

(Colorful pom pom wreath via Primitive and Proper, Joy to the World print via Maybe Matilda, Christmas countdown via Decor and the Dog, Plaid and Union Jack pillows via NewlyWoodwards)

Now it's time for you to head on over to NewlyWoodwards and link up your best deck the halls projects!  There are some great handmade items for one lucky person that links up!

Dare to do-it-yourself 2013

Did you dare to deck the halls?

Photobucket Photobucket Photobucket PhotobucketPhotobucketPhotobucketfollow us in feedly

Dare to DIY Features + Dog Art Giveaway

Happy Friday the 13th!  Last day of work for the week.  Yes!  Nate and I are headed to Chicago.  He surprised me with tickets to Elf the Musical.  We're both pumped.  Hopefully we can beat the snow!  We've never been to Chicago during the Winter so we'll so how tough we are.

Today I'd like to share with you features from Monday's Dare to DIY {Give Handmade} link party, a sneak peek of Monday's Dare to Deck the Halls project and an awesome giveaway.  Action packed post, right?

First up, the features.  There were seriously a ton of great ideas.  Be sure to check them all out right here!

I really loved this DIY novelty IPhone speaker from CeciBean.  It's beautiful!

DIY Novelty iphone speaker from CeciBean

Next up is this delicious looking lemon sugar scrub from Made2Style.  I'm kind of obsessed with body scrubs and this one's ingredients look like a winner to me!  

Lemon sugar scrub from Made2Style

Check out our Dare to DIY pinterest board for inspiration!  Wanna see the other co-hosts picks? Check them out at Maybe Matilda, Newlywoodwards and Primitive and Proper!

The party is over at NewlyWoodwards on Monday.  The challenge is Dare to Deck the Halls. 

"DIY something new to deck your halls. Did you find something in a catalog that you wish you had? Wreaths, stockings, pillows or advent calendars? Make it! Inspire us all to do the same."

Here's a peek at what I'm working on!

dare to deck the halls peek

And now it's time for a fun giveaway from a childhood friend's Etsy shop, Painfully Polite.  

Amanda and I grew up in the tiny town of Dayton, Iowa.  I don't talk about my hometown much but it was a pretty awesome town to grow up in.  800 people.  No stop lights.  One of those towns where you seriously know everyone and their families.  We ran the town until dark and then went home to have suppers with our families.  Us Dayton girls stick together.

Amanda is a graphic designer that is looking for a way to use her skills outside of work.  And I'm madly in love with her latest dog art. 

Amanda took this darling photo of the Ike-ster in his Charlie Be Good tie...

Charlie Be Good Tie

and turned it into this masterpiece!

ike by painfully polite

I die.

Ike's girlfriend, Daisy, got in on the action too.

daisy
Daisy by painfully polite

TOO MUCH CUTENESS!!!

Would you like to win a masterpiece of your pup?  Amanda is kindly offering up a digital print for one lucky reader!  Be sure to check out the quirky collection of art available from Painfully Polite.  I know some of you will love this grammar art print.  Enter via rafflecopter below!

Happy weekend!

Photobucket Photobucket Photobucket PhotobucketPhotobucketPhotobucketfollow us in feedly

Holiday Home Tour {Living Room}

Are you rested up from the start of our home tour yesterday?  Okay, good!

Let's continue in the living room.  Our living room is decked in gold, wood tones and a furry dog.  All important elements in design.

holiday home tour {decor and the dog}

I had thought about making Ike move but he gets grouchy when you kick him out of his spot.  And I'd have to fluff that couch cushion.

holiday home tour {decor and the dog}

Here's the view from upstairs.  Ike keeps a close eye on me at all times.

holiday home tour {decor and the dog}

He leads a hard life.

holiday home tour {decor and the dog}

Our tree is 12' tall.  It's super fun to light and decorate.  It's a good thing Nate isn't afraid of heights.  It may only be half decorated otherwise.

Living room 4.jpg

We are so on top of the present game this year that it's not even funny.  We have one gift left to buy and wrap.  We are killing it.  Wrapping is easier when you have the cutest fox paper in the world (thanks, Target).  

holiday home tour {decor and the dog}

I'm not big on the same decor each year but there are a few items that make a reappearance.  Like this old A Christmas Carol book I bought a few years back at an antique store.  Don't mind the dust.  I'm out of Swiffers and clearly we need to change our filter.

holiday home tour {decor and the dog}

You may remember our nutcracker mantel.  Update:  they have not attacked us in our sleep.  Yet.

Holiday 2013 Mantel {decor and the dog}

Our console table is home to this year's Christmas card display.  I usually just throw our cards in a basket but I figured I had this great wire thingy that I bought in the fall. It works perfectly for Christmas cards.  Extras can go in the basket.  The houses are part of a village that Nate's family had growing up.  We need to find a place for the whole set in the future!

Greeting Card display.jpg

Are you all decorated for the holidays?  Does your pet have their own "spot" in your living room?

Photobucket Photobucket Photobucket PhotobucketPhotobucketPhotobucketfollow us in feedly

Holiday Home Tour {Dining & Kitchen}

Welcome to the start of our holiday home tour!  Today I'm joining a lovely bunch of bloggers for a holiday home tour blog hop.  The Blogger Stylin' Home Tour organized by Lindsay {The White Buffalo Styling Co.} to be exact.  Be sure to stop by Craftberry Bush to see Lucy's beautiful home!

I'm going to share our holiday house tour in two parts.  I put so much time into decorating that it seems like a lot for only one post. (I also have focus issues and there were just way too many photos for one post.)  Today you can check out our dining room and kitchen.   You can then rest up and check out our living room tomorrow!

Holiday Home Tour- {decor and the dog}

Our dining room is sporting some red and plaid this holiday season.  I've been embracing the world of color since adding the yellow chairs to our farmhouse table.  I have to keep telling myself, "Color good."  It's been an adjustment but I love how the dining room is looking lately.

We have two trees that we put up each year.  We were worried there wouldn't be enough room for the tree we usually place in the dining room beings our new table is much larger than our old table.  The tree still fits in here snugly! 

Holiday Home Tour- Dining 2.jpg

Our dining cart is sporting a little hot cocoa station up top along with my vintage Christmas tree.  The lower shelves hold my darling Pyrex and our wedding china.  The "antiques" sign is a recent addition.  More on that soon!

Holiday Home Tour- {decor and the dog}

You may remember my VW van with bottle brush tree place cards.  And the time I hosted a fake dinner party.  I mean, our Christmas tablescape.

Holiday Home Tour- Dinner Party

Moving onto the kitchen.  I like to keep things simple in the kitchen.  I'm a tidy person.  Our kitchen gets abused during the holidays and I don't need a bunch of extra junk in my way. 

Holiday Home Tour {decor and the dog}
Holiday Home Tour- Kitchen

I always add a poinsettia in the kitchen.  It's one of the few items that remains consistent in our holiday decor.  This year I slapped it into a metal bucket.  Classed the joint right up.

Holiday Home Tour {decor and the dog}

There are a few other pops of Christmas cheer.  My Santa cookie jar makes me happy. He's so jolly.   I make him guard my Kitchen Aid.  Like Santa isn't busy enough this time of year.  I have a berry tree hidden in the corner.  Color good.

Holiday Home Tour Kitchen

I love the view of our dining room from the kitchen.  My farmhouse-but-not-cheesy-farmhouse dreams are coming to life!

holiday home tour {decor and the dog}
Holiday Home Tour {decor and the dog}.  Lots of simple holiday decorating ideas!

***Update: Finish our home tour here!***

Head on over to The Curtis Casa to continue the blog hop!  I also recommend stopping by the whole big ol' list of fabulous homes!  Tons of great holiday inspiration!

Blogger Stylin' Home Tours Christmas 2013

Monday:

Lindsay - The White Buffalo Styling Co.

Roeshel - DIY Showoff

Jess and Monica - East Coast Creative

Laura - Finding Home

Jesse - Scout and Nimble

Sarah - Sarah M. Dorsey Designs

Angela - Number Fifty-three

Gwen - The Makerista

Brittany - Brittany Makes


Tuesday:

Ashley - The Handmade Home

Anneke - This, That, & Life

Gina - Shabby Creek Cottage

Cassie - Primitive & Proper

Caitlin - Desert Domicile

Jenna - Rain on a Tin Roof

Sarah - The Thriftress

Carolyn - Sweet Chaos Home

Jamie - So Much Better with Age

Shavonda - A Home Full of Color


Wednesday

Emily - Jones Design Company

Jamie - C.R.A.F.T.

Lucy - Craftberry Bush

Michelle - Decor and the Dog

Whitney - The Curtis Casa

Kristin - Bliss at Home

Summer - Simple Stylings

Sarah - Lacquer and Linen

Kelly - View Along the Way


Thursday:


Kennesha – Restoration House Interiors

Jenna - SAS Interiors

Chris - Just a Girl

Kelly - Eclectically Vintage

Michelle - Iron and Twine

Amanda - Our Humble Abode

Julia - Cuckoo 4 Design

Bethany - Dwellings by Devore

Lindsay - Makely Home

Jennifer - Dimples & Tangles


Friday:

Shauna - Perfectly Imperfect

Traci - Beneath My Heart

Jen - The Chronicles of Home

Jennifer - Tatertots and Jello

Kristin - Hunted Interior

Eileen - A Creative Day

Gabbi - Retro Ranch Reno

Shannon - Shannon Berry Design

Lakeitha - Lakeitha Duncan

Kristen - KFD Designs

Jessica - Dear Emmeline

Sarah - Royal Marigold

Carmel - Our Fifth House


Also, don't forget to link up your handmade gift idea in the Dare to Give Handmade link up!

Photobucket Photobucket Photobucket PhotobucketPhotobucketPhotobucketfollow us in feedly

Simple Sangria Recipe

It's that time of year again.  The time where you have to find a way to deal with your family so you turn to booze.

I kid.  I kid.

I do, however, love to celebrate the holidays with a tasty sangria.  I love sangria because it's usually sweet and doesn't taste like alcohol.  (I'm one of those sissy girls.)  There aren't a lot of ingredients for sangria.   I also like sangria because it's pretty.  Always important.  Today I thought I'd share with you one of my holiday favorites.

Simple Sangria Recipe

Sangria is also ridiculously easy to make. It's one of those drinks that looks fancy/hard to make but totally isn't.

Holiday Sangria

Here are the ingredients for sangria:

  • 1 bottle white wine (cheap is always good for sangria)
  • 1/2-1 bottle sparkling apple cider or apple juice (both work. amount depends on how bubbly you like your sangria)
  • 2 clementines
  • 1 Granny Smith apple
  • 1 Gala apple
  • 1-2 cups cranberries
Holiday Sangria

You will need to chop up your fruit.

Holiday Sangria
holiday sangria fruit.jpg

Once you have your fruit all clean and chopped and sliced and diced, you will add it to a pitcher with the wine and cider.

Holiday Sangria

Look how pretty it is!  Look who finally learned how to use the DSLR!  *pats self on back*

Holiday Sangria 5.jpg

Chill in the fridge until you're read to serve.  You could mix this up over night.  I would probably wait to add the sparkling cider until just before serving if you are waiting that long.  (Make sure it's chilled!)

Holiday Sangria

Here's a handy dandy recipe for printing if you're into that sort of thing.

Click on the photos below for more holiday fun!

Holiday Sangria Recipe Card.jpg
Simple Sangria Recipe

Are you a sangria fan?  What's your holiday drink of choice?

Photobucket Photobucket Photobucket PhotobucketPhotobucketPhotobucketfollow us in feedly

DIY Dog Treat Jar {Dare to DIY}

Happy Monday!  It's a party today here at Decor and the Dog.  I'm hosting the Dare to DIY Give Handmade party today.  Don't worry, there's Sangria.  You can do this.  

I was talking out loud again.  Sorry.

Handmade gifts can get a bad rap.  Thanks for the 100th fleece tie blanket, Grandma.  Ike and I, however, love a handmade gift that is thoughtful and well executed.  Handmade gifts don't need to be expensive or difficult.  As is the case with my Dare to Give Handmade gift, a DIY Good Dog Treat Jar.

DIY Good Dog Treat Jar.  Easy and inexpensive gift for your furry friends!

Ike loves Christmas so very much.  He loves spending time with family and opening presents.  He totally approved of my treat jar.  And then he kept begging for treats.

holiday ike

Here's how to make your own for those special pups in our life. This could totally work for your feline friends as well.  Shove that jar full of those tiny cat toys that Ike loves so much.  Or how about a "Good Kid" treat jar?

Supplies

  • 1 glass jar with lid (I purchased one guy from Hobby Lobby.)
  • Glass Etching Cream (I purchased mine at Hobby Lobby.  Bring your coupon!)
  • Painter's tape
  • Stickers (or some form of lettering that is sticky)
  • Paint brush
Good Dog Treat Jar  supplies

Apply your stickers to your jar.  You could also use some form of fancy cutting machine (Silhouette, etc).  I don't own anything fancy like that so I bought some stickers.  Press those stickers on well.  You don't want the etching cream to sneak under the letters.

DIY Good Dog Treat Jar

Apply your painter's tape as close to the lettering as possible.  The etching cream doesn't work the best in large areas so keep it close.  Press the tape down well also.

DIY Good Dog Treat Jar

Apply the etching cream according to the package instructions.  Mine said 5 minutes. I did almost 10 because I'm a rebel.  Or get distracted easily.  

DIY Good Dog Treat Jar

Run the jar under water to remove the etching cream.  It takes a little bit of time. Dry the jar. Remove the tape and stickers and marvel at your superior glass etching skills.

Good Dog Treat Jar 5.jpg

Now it's time to fill the jar with your favorite treats.  I made some of Ike's favorite treats to fill the jar.  I figure if they are Ike approved, any dog will love them!  I used a scrap of fabric to tie around the top to add a little festive flare!

DIY Dog Treat Jar.  Great holiday gift for your furry friends.

Be sure to stop by my lovely co-hosts and check out their handmade gift ideas.  I can't wait for all of them to arrive at my doorstep.

Cassie {Primitive and Proper} assembled some beautifully quirky vintage mug planters.  Kim {Newlywoodwards} whipped up a cozy knit infinity scarf.  Rachel {Maybe Matilda} made the cutest kid pants I have ever seen.

dare to give handmade

Now it's time to see your handmade gift creations! One of the links from the link party will be randomly chosen to win this week’s giveawayβ€” A $50 stencil shopping spree from Royal Design Studio Stencils.  (I'm a BIG fan.  Check out their stencils in use in my powder room and craft room!) 

Be sure to "like" Royal Design Studio on facebook for more stencil inspiration! 

Now there ain't no party like a Decor and the Dog party and a Decor and the Dog party has rules.

1. Up to two links per person.
2. Your post must be β€˜give handmade’ related.
3. Please link back to at least one of the hosts of Dare to DIY.  I'll make it easy.  Copy and paste this:

Linking up with: Decor and the Dog, Maybe Matilda, Newlywoodwards and Primitive and Proper!

4. Hop around and visit other links and leave some comment love.

I can't wait to see what you all are making me for Christmas.

35 Unique Handmade Gift Ideas!

Dare to Entertain Features + Sneak Peek

How was everyone's week? Who's glad it's Friday?  I have a four day weekend.  A busy four day weekend.  We have two little girl birthday parties to attend and some Christmas gift shopping to accomplish!

Did you check out the Dare to Entertain projects over at Maybe Matilda?  If not, hop to it!

Today I'd like to share with you two of my favorites!

First up we have the lovely Mindy from at Finding Silver Linings.  Between trying to set her house on fire and preparing a holiday meal for her family, she whipped up these beautiful coffee filter peonies.  They make for a simple, yet beautiful, centerpiece.

Coffee Filter Peonies from Finding Silver Linings

Next we have the ever-so-buff Cindy from The Flipping Couple.  Cindy put together this neutral, and oh so beautiful, winter tablescape.  I love the bowls of pine cones!  The whole thing looks perfect for a cozy dinner party.  (Did I mention that Cindy and Nick are pretty stellar hosts.  'Cause they are.)

Beautifl Winter Tablescape from The Flipping Couple

Be sure to check out all of the features on the Dare to DIY Pinterest board!

Are you ready for Monday's sneak peek.  I'm still trying to decide between two projects.  I will share them both but only one on Monday.  I just can't decide!  (I also haven't made either one yet.  No biggie.)

Dare to Give Handmade Sneak Peak

Now.  Here's the important part.  (If anyone is still reading. :P)  Monday I am the host.  The party is right here at Decor and the Dog.  The theme is "Dare to Give Handmade".  I need you all to join the party.  Get those handmade gifts going!  Anything goes as long as you make it and want to gift it!  (Did I mention I haven't started yet and I'm the host? You've got this.)

I also don't want to hang out at a party with just the hosts.  I mean, I love them all but they'll probably just talk about all of their ridiculously cute children.  Don't leave me hanging.

If that isn't enough motivation, you also have the chance to win a $50 stencil shopping spree from Royal Design Studio!

2013_shopping_spree.jpg
Dare to do-it-yourself button 2013.jpg

Will you dare to give handmade?  PEER PRESSURE!!!

Photobucket Photobucket Photobucket PhotobucketPhotobucketPhotobucketfollow us in feedly

Holiday Mantel 2013: Nutcrackers Galore

I'm starting off the 2013 holiday season by sharing our mantel.  

Our mantel that is full of glittery gold and white nutcrackers.  Along with some elf stockings, garland and wood beads.  A very cohesive mix.  (Or something that makes me sound like I know what I'm doing when in reality I just throw stuff on the mantel until it looks decent enough.)

Holiday Mantel 2013 Nutcrackers and Gold.jpg

I sure hope nutcrackers are friendly.  We have a whole army of them and I'm pretty sure they might murder us in our sleep some night.  These are the things that run through my head.  Totally rational thoughts. 

holiday mantel nutcracker.jpg
Holiday 2013 Mantel

I whipped up some elf stockings. I really liked the burlap stockings that I made last year.  Turns out that burlap makes Nate and I feel all icky. I couldn't risk death by burlap AND nutcrackers.  Safety first.

I'm kind of obsessed with the elf stocking look.  They are quirky.  I might put together a tutorial for these if I get my act together.   So probably not.

I also made some wood bead garland.  It was super easy.  Ike helped me make it.  Seriously. I might do a post on that too.

Holiday Mantel Elf Stockings.jpg
Holiday mantel elf stocking.jpg

We bought real garland this year.  We have artificial trees so this gives us that glorious tree smell.  Mmmm, tree.

Holiday 2013 Mantel 1.jpg

It also makes a giant mess.

Worth it.

Holiday Mantel.  Gold and nutcrackers..jpg

Check out our mantels circa 2011 and 2012.  

Linking up to Our Fifth House and Ten June!

Be sure to share your Dare to DIY entertaining project with us today!

What's your mantel looking like this year?  Anyone else terrified of being murdered by holiday decorations?

***Pssst. Looking for a holiday gift idea?  There are few flannel infinity scarves left in the shop!***  


Photobucket Photobucket Photobucket PhotobucketPhotobucketPhotobucketfollow us in feedly

DIY Dining Cart Reveal

Find the complete tutorial here!

The following is the birth story of our dining cart.  The world loves birth stories.  Luckily this one doesn't contain the words uterus or vagina.  Wait.  It does now.  Crap.

Me:  "Hey, Nate.  Want to build some open shelves for the dining room?"

Nate:  "Whatever."

One week later.

Nate:  "How big do you want these open shelves?"

Me: "Well, it kind of depends on the size of the cabinet that will go below them.  Want to build one?  Or how about something like this one from Restoration Hardware but smaller?  I saw it the other day and I kind of fell in love."

Nate: "Whatever."  Heads to office to whip up a dining cart in Sketch-Up.

A trip to Lowe's and a few hours later, our precious dining cart arrived into the world.

DIY Dining Cart 3.jpg

She's beautiful, isn't she?  

We were hoping our bundle of joy would be just the right amount of rustic and industrial.  Modern enough to keep Nate happy.  Vintage enough to keep me happy.  She didn't disappoint.

DIY Dining Cart 2.jpg

We didn't photograph the shelves without my beautiful Pyrex but you can sort of see the fancy breadbox work Nate did on the ends.  He far exceeded my expectations on this project.  He's a keeper.  (I have to say that since he's the father of my newest addition.)

This cart has some unique touches.  We used a metal bracket on the end.  (The cheap ones from any home improvement store.)  We used upholstery tacks to fill in the holes.  We used black spray paint and beat it up a little to give it an aged look.

DIY Dining Cart Corner

The wheels were $4.99 a piece on Amazon.  They got the same spray paint and a beating treatment.

DIY Dining Cart wheel.jpg

Please don't mind the dirty floor.  We were busy creating.

Threaded black iron caps were used on the ends of the pipes running along the back.

DIY Dining Cart knob.jpg

The whole thing was finished like our farmhouse table.  We used the same stain (Rustoleum's Wood Stain in Weathered Grey).  

It coordinates lovely with our farmhouse table.

DIY Dining Cart in Room
DIY dining cart. Unique furniture build!

So, the whole open shelf idea turned into something different.  Now I'm working on a big ol' piece of art to hang above the dining cart.  And probably one hundred million other things because that's my thing.

We'll have a tutorial in the next week or so (Update: Find the tutorial here.).  If the blog doesn't get eaten by holiday posts.