New Photos in the Ol’ Shop

Guess what?  There are new photos in our shop!

Digital File Bundle

Nate and I are both longing for a day on the beach.  We do have a trip planned but we need tax season to end first.  So we dug out some photos from our trip to Tybee Island/Savannah, GA and did a little day dreaming.  (You can read about our trip here, here, and here.)  We thought you might want to day dream with us!

I think I’m going to move to the beach when I retire.  Next year.  Or 30 years from now.  Whatever.

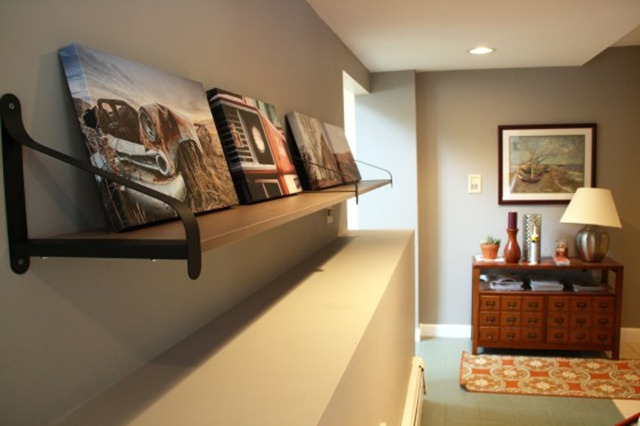
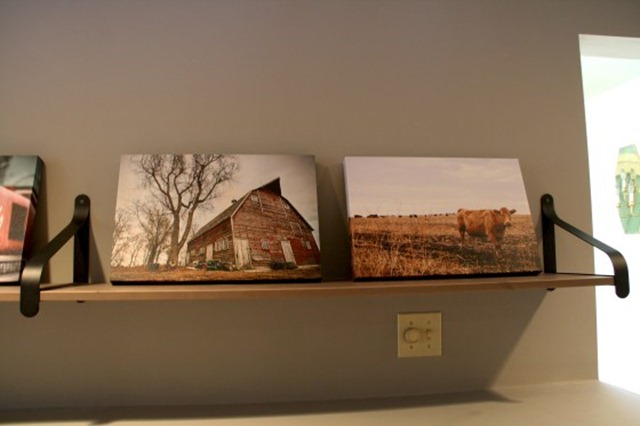
I eventually would love for you to make your way over to the shop to check out the new photos.  But I would first like to show you how Lyndsay (That 70's House) displayed her Decor and the Dog Photo purchases. Lyndsay had the digital files printed onto canvas.  She then displayed them proudly on an Ikea shelf.  I am currently trying to find a place to make this work in our house!

that70shousephoto1

that70shousephoto2

You can read more on how Lyndsay completed this project right here!

Head on over to the shop for more information on how to order your very own Decor and the Dog masterpiece.  We have decided to keep each collection of photos listed instead of placing them in the vault.  Who do we think we are?  Walt Disney?  We wish. 

Our Shop

What’s your favorite photo from the Tybee collection?  Don’t you just love Lyndsay’s display?

Baked Donuts

My parents got me a donut pan for my birthday.  They also got me a heavier kettlebell.  Good combo parental units.

I have been wanting a donut pan for awhile.  Like I would remind my mom that I wanted a donut pan for my birthday every time I called her  (which is almost daily).  My parents tell me that they are sure the donut pan will end up on our next garage sale. Like any good daughter, I aim to prove them wrong.

This past Sunday I whipped up some baked donuts.  They didn’t disappoint.

Baked Donuts

Keep in mind that baked donuts are baked.  Baked means that they will not taste nearly as good as their fried cousins.  They are more of a cake donut.  I, personally, am not picky when it comes to donuts.  If it’s sugar in a ring form, I’ll probably love it.

Did I mention that I’m trying to eat better this week.  Mmm, donuts.  It’s okay.  They are baked.

I have made two donut recipes.  The following is my favorite. 

Spiced Cake Donuts

  • 2 cups All-purpose flour
  • 3/4 cup white sugar
  • 2 tsp baking powder
  • 1/4 tsp ground cinnamon
  • 1 tsp salt
  • 3/4 cup milk
  • 2 eggs, beaten
  • 2 tsp vanilla extract
  • 1 tbsp shortening

Preheat oven to 325.  Lightly grease the oven pan.

In a large bowl, mix flour, sugar, baking power, nutmeg, cinnamon and salt.  Stir in milk, eggs, vanilla and shortening.  Beat together until well blended.

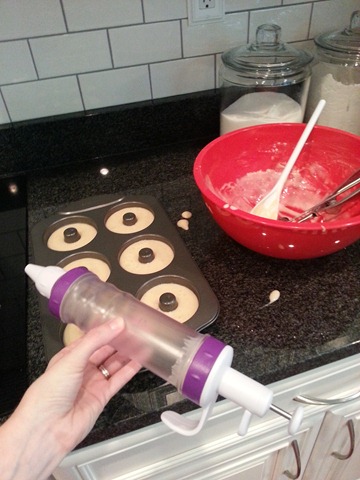
Fill each donut cup approximately 3/4 full.  I used the Wilton Dessert Decorator.  I’m still a messy donut maker but the decorator did make filling the pan easier.

20130310_103812

Bake 8-10 minutes or until donuts spring back when touched.

Allow to cool slightly before removing from the pan.

Now to choose your topping.

Baked Donuts from Decor and the Dog

Chocolate Glaze

  • 1/4 cup semisweet chocolate chips
  • 1 Tbs. melted butter
  • 1 tbsp corn syrup
  • 1 tsp, hot water

In medium bowl, microwave chocolate chips, butter and corn syrup on 50% power for 1 minute.  Stir frequently until completely melted.  Stir in hot water until the glaze is thick and smooth (~1 tsp).

Glazed

  • 1 cup powdered sugar
  • 2 tbsp hot water

Mix together and dip donut in the glaze.

Powdered Sugar

Place powdered sugar in a resealable plastic bag.  Add donut.  Shake until coated.

Are you a baked donut fan?  Any great donut recipes that I should try?

Stencil Dilemma

Because I was super lazy this week-end.  (I’m going to blame the gloomy weather.)

Because I can’t make up my mind.  (This I can’t blame on the weather.)

Because everyone loves surveys.  (It’s true.)

Because people like to tell other people what to do. (Super true.)

What should I do with that white wall in my craft room?

Craft Room

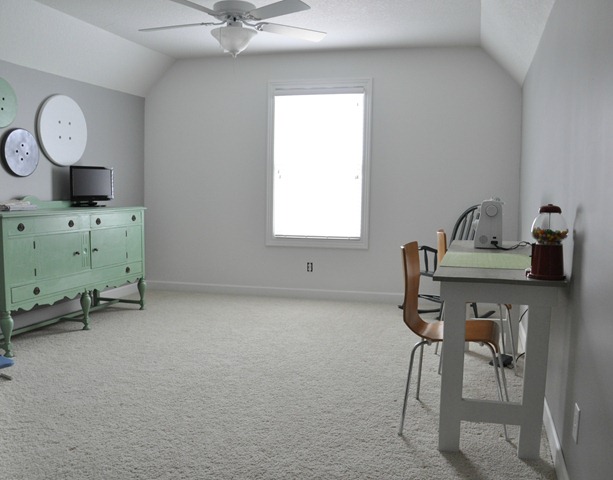
If you’re new/catching up on the craft room, the walls are Sherwin Williams March Wind. The buffet is Sherwin Williams Agate Green. The buttons are a mix of white, coral, green and grey.  The sewing table is white with a Sun Bleached stain. The chairs are getting a paint job but I think they depend on my wall choice.  I plan on replacing the light (get over it Nate) and adding some colorful art above the sewing table.

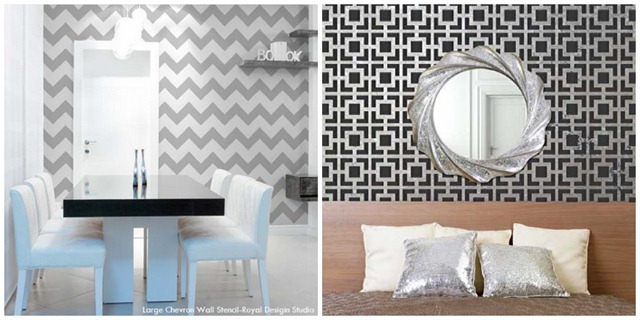
That white wall is confusing me.  I have two stencils options that I am pondering.  Royal Design Studios Modern Chevron and Royal Design Studios Hollywood Squares

(This is not a sponsored post.  I won the stencils by entering our powder room into a Craftbaby contest.  RDS will offer up a stencil for a giveaway if I get my act together and get to stenciling.  Think of that as motivation for helping me out.)

Stencil Woes

I just can’t commit. Design paralysis. I’m probably just overthinking this (in true Michelle fashion). I just can’t decide.

Do I do coral chevron?  Or grey chevron (I would use March Wind.  I have decided that much.)?  But chevron is so overdone.  But I like it.

The squares are really fun but will probably take me 100 years to finish.  But grey squares. I can see it.  Or coral.  Coral is always good.

Or I could leave the walls white, find a fun fabric for a curtain and call it done.

What would you do with that white wall? 

Thanks for helping out an indecisive blogger.

Paint a Chalkboard Wall

Everyone needs to sit down.  I have a unique and genius idea to share with you all. 

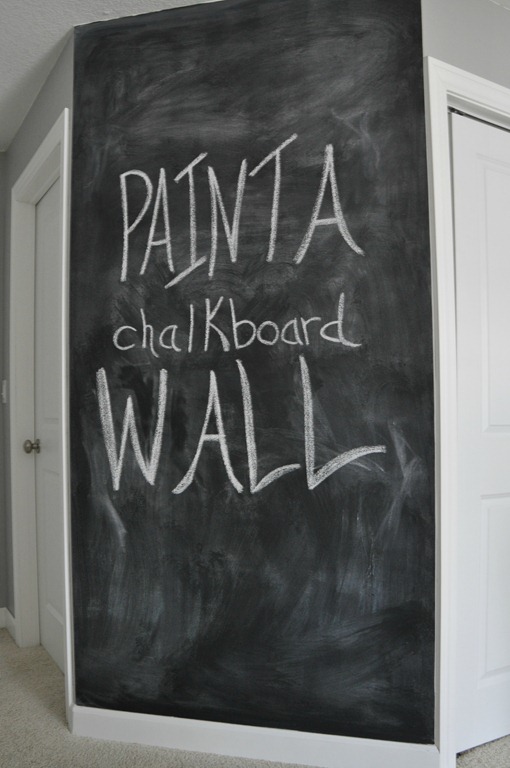
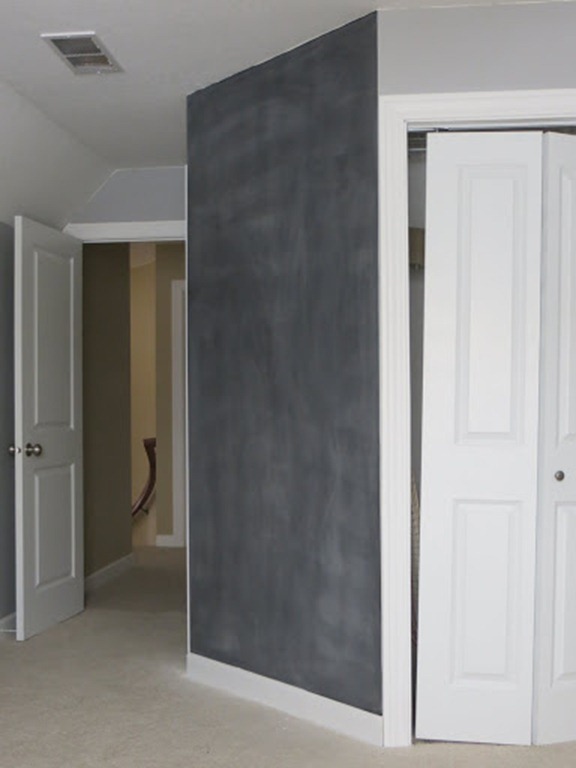
I painted a chalkboard wall in my craft room.  No one has ever painted a wall with chalkboard paint before.  I’m sure of it.

Paint a Chalkboard Wall

What’s that? I’m the millionth blogger to slap chalkboard paint on their wall?  Really?  Who knew.

I was only going to do a post where I showed you my new chalkboard wall (because the process is not a new one).  But my brother and mom had questions on how I did it.  I then remembered that quite a few of my readers only read this blog (Which is scary for blogging.  Shout out the ladies at the Fort Dodge Correctional Facility.)  Here’s what I learned.

How to Paint a Chalkboard Wall

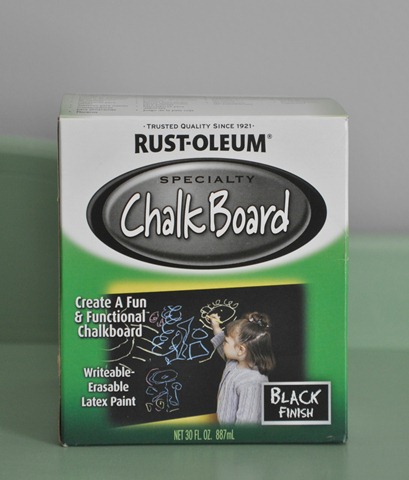
Purchase your chalkboard paint.  I went with Rust-Oleum’s ChalkBoard paint.  I purchased it at Menards for ~$10.  I’ve seen it at Lowe’s also.  It’s located near the spray paint.  It comes in black and green.  I went with black.

Rust-Oleum's ChalkBoard Paint

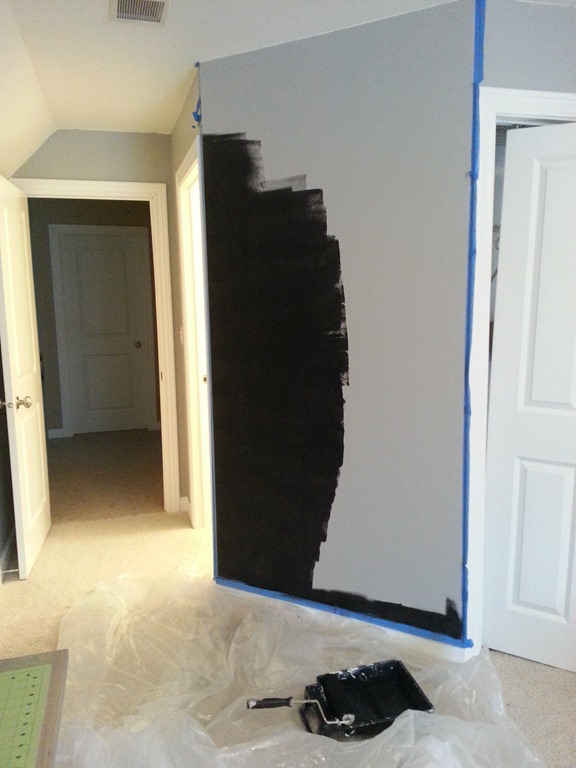
Paint your wall as you would with any other wall paint.  I used two coats.  I used almost the entire can on this small section of wall.  I’m also a messy painter so there’s that.

Chalkboard wall progress

Let the paint dry for at least 3 days. 

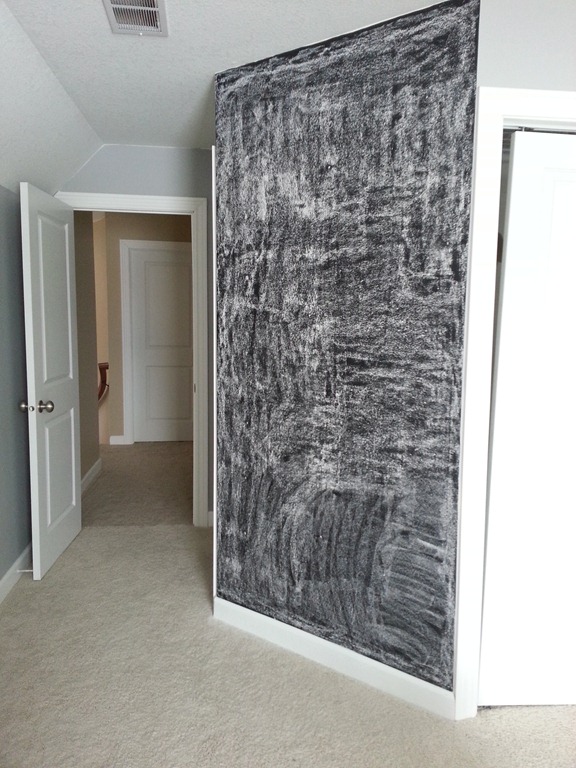
You will then need to “prime” the walls with chalk. You do this by rubbing the side of a piece of chalk all over the wall.  This step is a little messy but necessary.  Rubbing the chalk all over prevents your future writing from being permanently stuck on your wall.

chalkboardprep

I wiped the chalk off with a dry paper towel. And then vacuumed the floor because it was gross.

chalkclean

Now you are ready to draw on your wall!

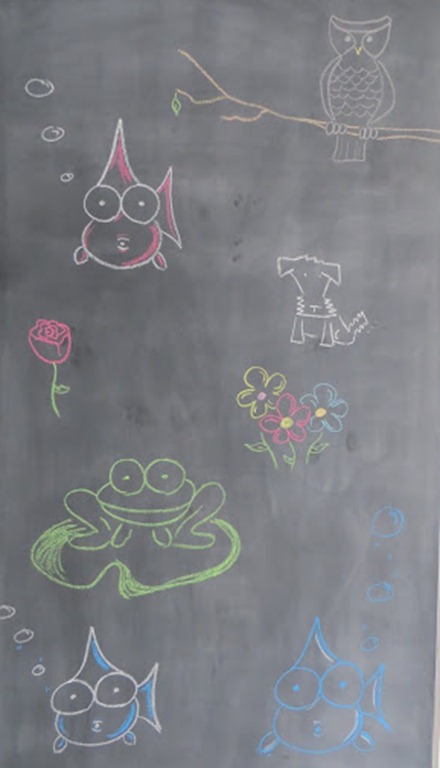
Chalkboard walls are great for doodling. (All drawn by my little brother. I have zero drawing abilities.)

chalkdrawings

Chalkboard walls are also great for weekly yearly maternity photos.

chalkboard wall maternity photo

I feel bad for the poor girl that ends up here after Googling “chalkboard wall maternity photo”.  Mwah ha ha.  It’s the little things in life that bring my brother and I joy.

Are you a fan of chalkboard walls or do they scare you?  Don’t worry.  They scared me.  And now I find them ridiculously fun. Even if it is totally over done.

Paint a Chalkboard Wall. How to!.jpg
Photobucket Photobucket Photobucket Photobucket PhotobucketPhotobucketfollow us in feedly

New Living Room Rug

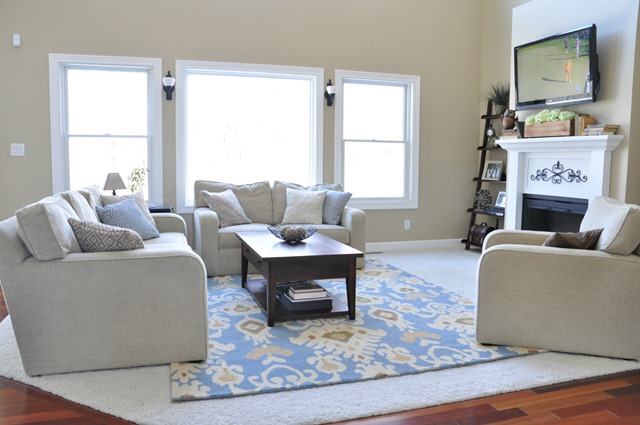
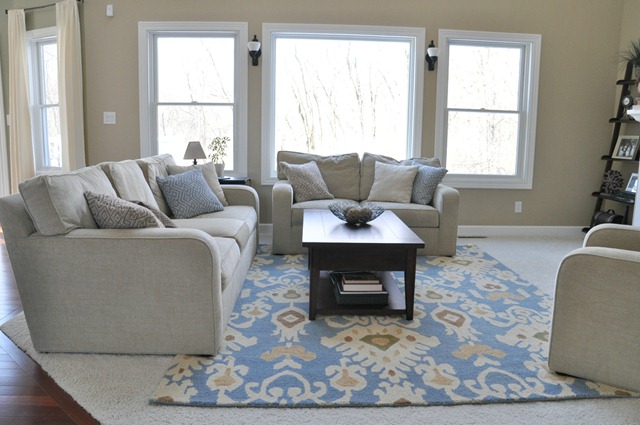
It’s another issue of “Blogger Show and Tell”.  I bought a new rug for the living room. 

New Living Room from RugsUsa

This is rug #3 for the living room. Rug #1 was too small. Rug #2 tried to kill me. Rug #3 appears to be a much better fit. It’s a good size and I can breathe. Minor details in life.

I sold rug #1 and rug #2 on Craigslist which gave me extra dollars to replace the killer rug.  And the Craigslist encounters weren’t too awkward. Well, not horribly awkward for someone with zero people skills like myself.

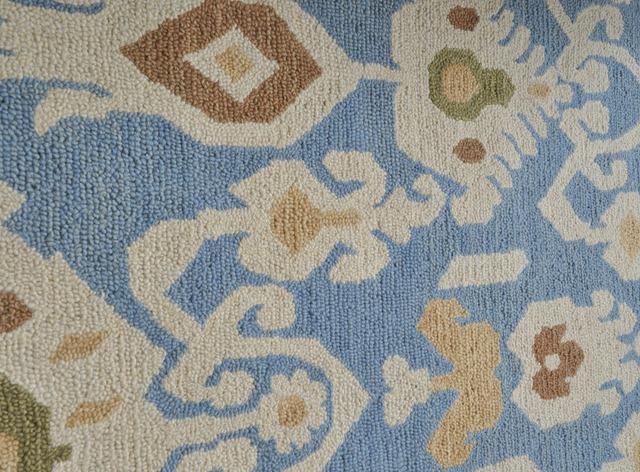
The new rug is the Santa Ana Faded Antique Ikat from RugsUSA.  This isn’t a sponsored post.  I spent my hard earned Craigslist dollars on this lovely.  The rug shipped fast and was in perfect condition.

Santa Ana Faded Antique Ikat Rug

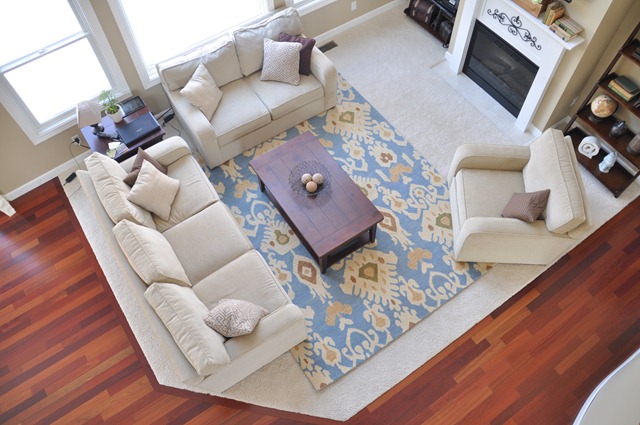
It’s definitely has more color than I’m used to but I really like it.  I works well with the vision I have for the living room.  (We plan to add antique white built-ins to replace to the ladder shelves.  We are also planning a new coffee table.  We’ll either repaint one or built one.  We’re being patient on this one.  At least Nate is.)

The colors of the rug work perfectly with our furniture.  It has a nice antiquey yet modern vibe.  The rug is very soft and squishy.  Important rug qualities.

Santa Ana Faded Antique Ikat Rug from RugsUSA

My mom asked why we needed a rug beings we have carpet.  I’m sure some of you are asking the same question.  The answer is because it looks pretty.  There is no functional reason.  Just prettiness.

craft room buttons 097

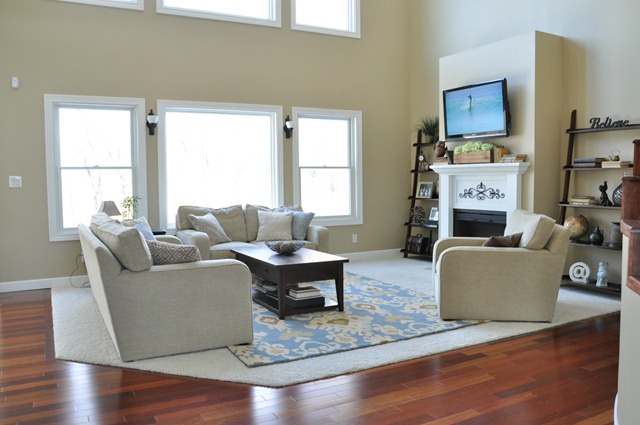
Two Story Living Room

Show and Tell is over now.  I’m not sure what Ike was doing while we were taking these photos because he isn’t in a one of them.  So very weird.  I think he may have been napping in the office.

This post is very discombobulated.  I’m blaming the drugs my career as a pharmacist.

What do you think about me adding color in my life?  Weird, right?  Any great coffee table recommendations?  How do you feel about rugs on carpet?

Birthday Thrifting

I turn 31 today.  Ouch.  Maybe I’ll just turn 30 again.  Yes, I like that plan.

My family was in town this week-end for the special occasion.  New tradition is to spend Saturday thrifting while Nate spends the day in accounting land.  I’d love for him to join us.  But I also enjoy the freedom of buying without judgment. I like to buy Pyrex in peace.

I found some great bargains that I will show with you.  Everyone loves blogger Show and Tell.

I have been looking for chairs for my craft room for the past 2 months.  I found these lovelies for $10 a piece.  They are the perfect shape.  They do, however, need a paint job.

thrift store chairs

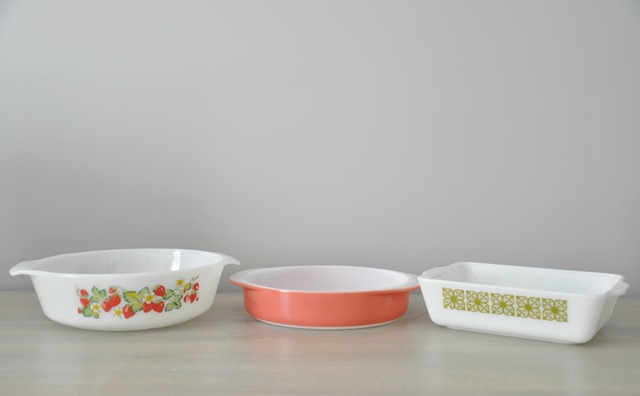
I can’t stop buying Pyrex.  It’s a sickness.  I told my mom to only let me buy square Pyrex.  She’s fired.  I guess I can’t blame her.  Can you pass up coral Pyrex or strawberry Pyrex?  You can’t.

Vintage Pyrex

I spotted this all bucket in an antique mall. I was telling my mom how adorable it was.  Long story short, the owner of the booth was there.  He kept trying to make a deal with me. I kept telling him it was cute but I am really cheap.  He told me he appreciated frugal people and ended up marking the bucket down from $45 to $5.  And I thought I was horrible at negotiating.

Vintage all bucket

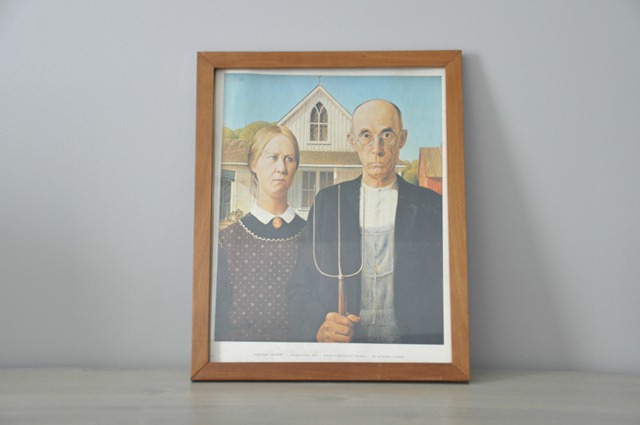
I’m a sucker for the American Gothic painting. It’s so very Iowa. I’m sure this one is totally an original.  I’m not exactly sure where it is going to live but I couldn’t pass it up.

American Gothic Print

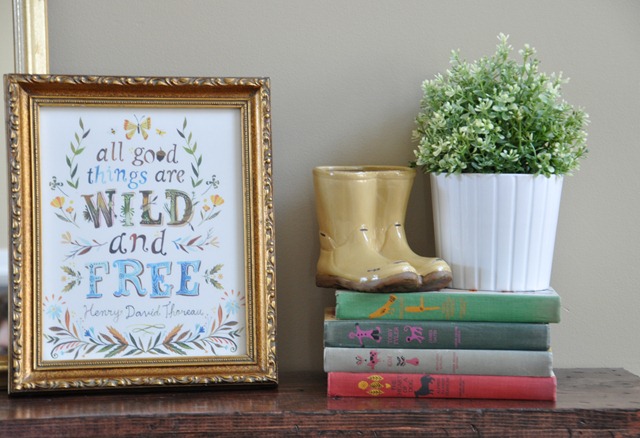
I found these cute little rain boots.  They make me think of Spring which will never arrive in Iowa.  4-7” inches more of snow over the next two days.  I will focus on how darling the boots look on our console table.

Yellow Boots

I love a successful birthday thrifting adventure.

Find any good bargains lately?  What color should I paint those chairs?  Who thinks I need a life size version of those yellow boots?  Me too.

February Recap

Where did February go?  And will it ever stop snowing in Iowa?  These are questions I do not have answers to.  All I know is that I think the groundhog is full of it.  And March is definitely coming in like a lion here in the Midwest.

IMG_20130226_142253

My birthday is on Monday. My incessant complaining about the weather leads me to believe that I will be turning 81.  Which isn’t too far from the actual 31 I will be turning.  Where is my AARP card?

I am, however, able to answer what happened on the blog in February.  This. 

If you are new around here, welcome!  You can catch up on what happened in January right here.  Be sure to visit our home projects page for even more DIY fun!

See you back next week.  I have a new living room rug, a black wall, and some crafts to talk about.  Whoa.

What was your favorite project on Decor and the Dog in February?  Big week-end plans?  Is March coming in like a lion or lamb where you live?

Pinterest Challege: Button Wall Art + Link Party

Who’s pumped for the Pinterest Challenge reveal today?  This girl.  I can’t wait to see what you all tackled.
Print
As a refresher, the Pinterest Challenge is a fun blogland motivator to get us to step away from pinning and get to doing.  I stepped away (for a very short period of time) and I did.
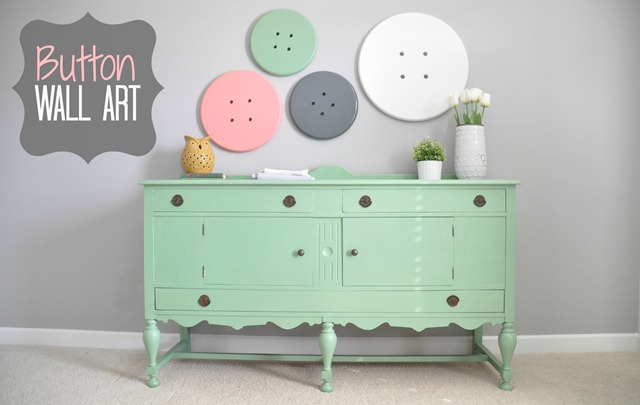
I have been working on my craft room and I figured the challenge would be a good excuse to knock out another project.  I have a completed sewing table and a painted buffet.  I needed something for the walls.  And then it came to me during a Pinterest scrolling session.  Buttons!
Button Wall Art Decor and the Dog
These buttons make me happy.  They add a touch of whimsy to the room with only a small dose of cheese.  I mean, they are buttons on the wall which makes them slightly cheesy.  But I think they work perfectly in my craft room.
Button Wall Art for Craft Room
I was originally inspired by this pin. 


My inspiration buttons had some nice edges and a great variety of sizes.  It’s tax season so I knew fancied router edges were out.  I had seen some round pieces of wood at Lowe’s while I waited patiently for Nate to pick out lumber for various past projects (like our farmhouse table or console table). I knew that I would need them for something some day.  I just didn’t know exactly what for. 
20130219_165121
The answer was buttons.
Craft Room Button Wall Art
The buttons were super simple to make.  I was going to complete them all by my little lonesome.  Nate, however, decided that assisting me with the buttons would take less time than taking me to the ER.  I still believe I could have completed them on my own.  With all 10 fingers intact.  Probably.  Maybe.
If you’re interested in making buttons of your own, you will need:
  • Round Wood
    • We cheated and used the Ponderosa Panels that we found in the lumber section of Lowe’s.  Any round wood would do.
  • A drill
  • Various sizes of drill bits
  • A screw to hang the button on the wall
  • Primer and paint
I was just going to guestimate where to drill holes.  Nate reminded me that I was a co-host for the Pinterest Challenge and this project should be done right.  He took this whole co-host thing way more serious than I did.  Probably a good thing. He got out his ruler and right angle. *cough, nerd, cough*
Sewing Table 014
He marked the center of the circle.  He then measure out equal distance from the center to ensure even spacing of the button holes.
Sewing Table 042
He clamped the wood to the work table and drilled away.
Sewing Table 046
We eye balled the drill bits for size and guessed what would look decent.
Sewing Table 048
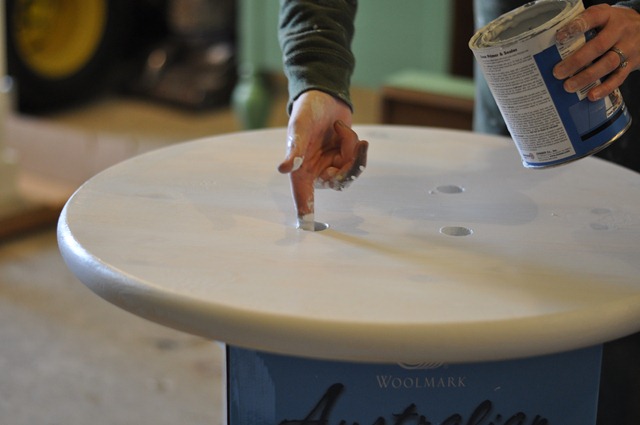
I was in charge of the primer and paint.  The holes were hard to paint so I resorted to painting them with my finger.  I’m sure a small brush would have work too but then I’d have to wash another brush.  I told Nate that I was giving the button a rectal exam.  He told me that I shouldn’t write that in a blog post.  He’s probably right.
Sewing Table 054
I used a base white from Sherwin Williams for the white button. The green button is the same green as the buffet, Sherwin Williams Agate Green. The coral button is Sherwin Williams Dishy Coral. I used spray paint on the gray button (Rust-Oleum Painter’s Touch dark gray).  I found it easier to paint the buttons with a brush than to use spray paint.  Lesson learned.
craft room buttons
To hang the buttons, Nate drilled a small hole in the back of the button.  We put a screw in the wall (using a wall anchor) and hung the button from the screw.  We didn’t use a fancy system to decide how to place the buttons on the wall.  We’re all about crossing our fingers and hoping for the best.  And we had an extremely helpful supervisor so we weren’t too concerned.
20130224_144618
He’s a fantastic supervisor.  If we can keep him focused.
Ike and the Wall Buttons
There you have it.  Pinterest Challenge complete!  Happy, whimsical button art. 
Button Wall Art
Be sure to check out the projects completed by my lovely co-hosts:
Print
Now it’s your turn!  It’s time to share your project!
  1. Click on the blue “Add Your Link” button (you might have to do some scrolling, depending how many projects are added).
  2. Add a link to your specific blog post about your project in the url field (not your home page).
  3. Where it says “name” write a descriptive name for your project (ex: “Button Art”) as opposed to your actual name .
  4. We’d also love if you could quickly link back over to our project posts within your own.  I’ll make it easy, just copy this:  Linking up to the Pinterest Challenge with Megan (The Remodeled Life), Katie (Bower Power), Sherry (Young House Love) and Michelle (Decor and the Dog).
  5. Please also link to your inspiration project on Pinterest as well as to directly link to the original project/site.  Share the Pinterest love.
Did you take the Pinterest challenge?
I’ll be pinning my favorites to the Pinterest Challenge Awesomeness board! I’ll probably share some on facebook as well!
Linking up to: House of Hepworths

Painted Buffet

My craft room is coming along swimmingly!

This green beauty recently joined my new table.

Painted Green Buffet

It almost didn’t make it into my craft room.  I asked Nate if he thought the two of us could carry it upstairs.  He told me he didn’t think so.  It’s pretty heavy.  (Keep in mind that I am scrawny.)  I really wanted to photograph it in the room.  I asked him again.  He told me that we should wait for my brother who is coming this week-end.  I decided that I couldn’t wait and the two of us could totally do it.  Things went great until we got to the top of the stairs.  The buffet needed to be turned vertically, on the stairs, to make it around the corner.  I am a weanie.  Nate was frustrated.  I was pretty sure the buffet was going to fall on top of me and we’d both topple down the stairs. The headline would read “Death by Buffet”.  (Which would be an awesome way to go if it was one of those all you can eat buffets.) Long story long.  We made it.  Where Michelle has a will, there is a way.

You may remember that the buffet originally looked like this.

Antique Buffet Before

We could go around and around about how horrible it is or isn’t to paint antique furniture.  My dad is probably cringing as he reads this.  But this piece had  peeling veneer on the sides and it was very scratched up.  And I wanted a green buffet.  So I made it green.  No piece of wood is safe from my messy paint brush.

To achieve this transformation, I sanded this lovely down.  Filled in some of the deeper holes with wood filler.  I then used one coat of a Sherwin Williams primer.  I used two coats of Sherwin Williams Agate Green.  I finished with a layer of Minwax Paste Finishing Wax.

I hadn’t painted furniture in awhile and it felt good.

I kept the original hardware.  One handle was missing so I purchased two knobs to use on the doors.  I’m not completely sold on the oil rubbed bronze.  I’m living with it for a bit before I make a final decision.  Or until it’s warm enough to use spray paint.

Painted antique buffet

This buffet will hold my fabric stash.  The doors open up to a giant storage area.  One of top drawers has dividers and will be great for storing scissors, pins, etc.

It makes me happier than Dikembe Mutombo blocking a shot.

Painted Green Buffet

My Pinterest Challenge project is also for the craft room.  I can’t wait to share it with you all on Wednesday.  Do you have your project done?  If not, there is still time!  (Check it out here!)

What do you think?  Is your dad cringing along with mine?  Thoughts on the hardware? Carried heavy furniture lately? Who’s pumped for Wednesday?

diy furniture makeover.jpg
Photobucket Photobucket Photobucket Photobucket PhotobucketPhotobucketfollow us in feedly

Craft Room Sewing Table Tutorial

On Monday, I posted the reveal of my new sewing table.  Today I’d like to share with you a tutorial so you can build your very own.

DIY Craft Room Table Sewing Table

Nate wrote the tutorial.  During tax season.  I tried to translate the directions to English.  But I fell asleep.  I wish you luck.  (This tutorial explains why I write and Nate takes photos.  You’ll see.)

(This tutorial is based off a plan from Ana White.)

The dimensions for this table are 20”x72”.  The perfect length for a sewing machine and some room to cut.

You will need to purchase:

*affiliate links included

From your supplies you will need to cut:

  • 2 - 64.5" 1x4
  • 2 - 18" 1x4
  • 4 - 29.25" 2x4
  • 2 - 9.5" 2x4
  • 3 - 16.5" 2x2

Start by drilling 2 pocket holes into the ends of the 64.5" 1x4 boards.  Using a square, attach the long 1x4's (64.5”) into the short 1x4's (18”) using wood glue and 1.25" pocket hole screws.   (The Kreg pocket hole drill will include directions on how to do this.)

Craft Table Bottom Edge

Make sure each corner is as square as possible.  I found that I thought it was not going to turn out square but when the center supports were added, it really squared it up.

222

Mark 16.5" on the each side of the long (64.5”) boards. Then mark 16.5" from those points 2 more times for the center supports. (Michelle translation: You will add a total of 3 support boards 16.5” apart.) Drill pocket holes on each side of the center supports and attach the 16.5” boards with wood glue and 1.25" pocket hole screws. 

Craft Table Center Supports
229

Place each 29.5” 2x4 boards one by one on the inside corners. Attach with wood glue and 2" screws.  Drill pilot holes with a drill bit slightly smaller than the diameter of the screws.  I found it easier to keep the board where I wanted by using a couple of clamps on the boards.  I used 4 screws in each board for stability.

Craft Table Legs
226

Mark 6" up from the bottom of the legs (29.5” boards) and drill 2 pocket holes in each side of the 9.5" 2x4s.  Using clamps to keep the boards in place, use wood glue and 1.5" pocket hole screws to attach.

Craft Table Leg Supports

Fill in all gaps and the pocket holes in the leg supports with wood filler. Sand well and then fill again as some of the gaps and pocket holes will be too big to fill only once.  Sand again when the filler is dry.  Prime or stain the bottom.

257

Paint or stain and poly the table top.

Once all of the legs and top are dry, drill pocket holes in the outside edge of the 2x4 legs at the top of the table. 

Place the top of the table upside down on the floor onto cardboard (or something else to protect it).  

You will now need to determine where to place the bottom of the table onto the top.  At each corner on the under side of the table top, mark 3" from short edge and 1" from the long edge.  Place wood glue on the top of the legs and supports that will attach to the table top.  Place onto the table top.  Be sure to match the corners of the bottom up with the marks made on the underneath of the table top. 

Using 1.25" pocket hole screws, attach the 2x4 legs to the top. 

Sewing Table 010

On each center support, drill 3 holes, on the outsides and the middle, and use 2" (I don't know if my center supports were slightly bigger because I had to use 2.5" screws. I recommend comparing the size of the screw to the support before drilling.) to secure the top to the supports.

Sewing Table 013
Sewing Table 006

Turn table over, enjoy.

Craft Table
DIY Sewing Table
Sewing Table 087

Bam. Sewing table.  Amazing.  Feel free to ask questions.  I was involved in part of the building process which helped me translate but I’m still not convinced it makes complete sense. 

Now I need to finish this craft room so I have time to actually sew.

Big plans for the week-end?  What are you working on for The Pinterest Challenge?

Linking up to: Home Stories a to z