How to Paint a Vintage Sign

They say imitation is the sincerest form of flattery.  

If that's the case, I hope that Cassie {Primitive and Proper} is flattered.  I have had my eye on her painted wood antiques sign for quite some time.  Something about it spoke to me.  I really wanted it for my dining room.  

My options were:

  • Borrow it from Cassie during the Winter while she is using her fireplace (she offered). 
  • Steal it (illegal).
  • Make my own (good choice).
Vintage Sign Tutorial {Decor and the Dog}

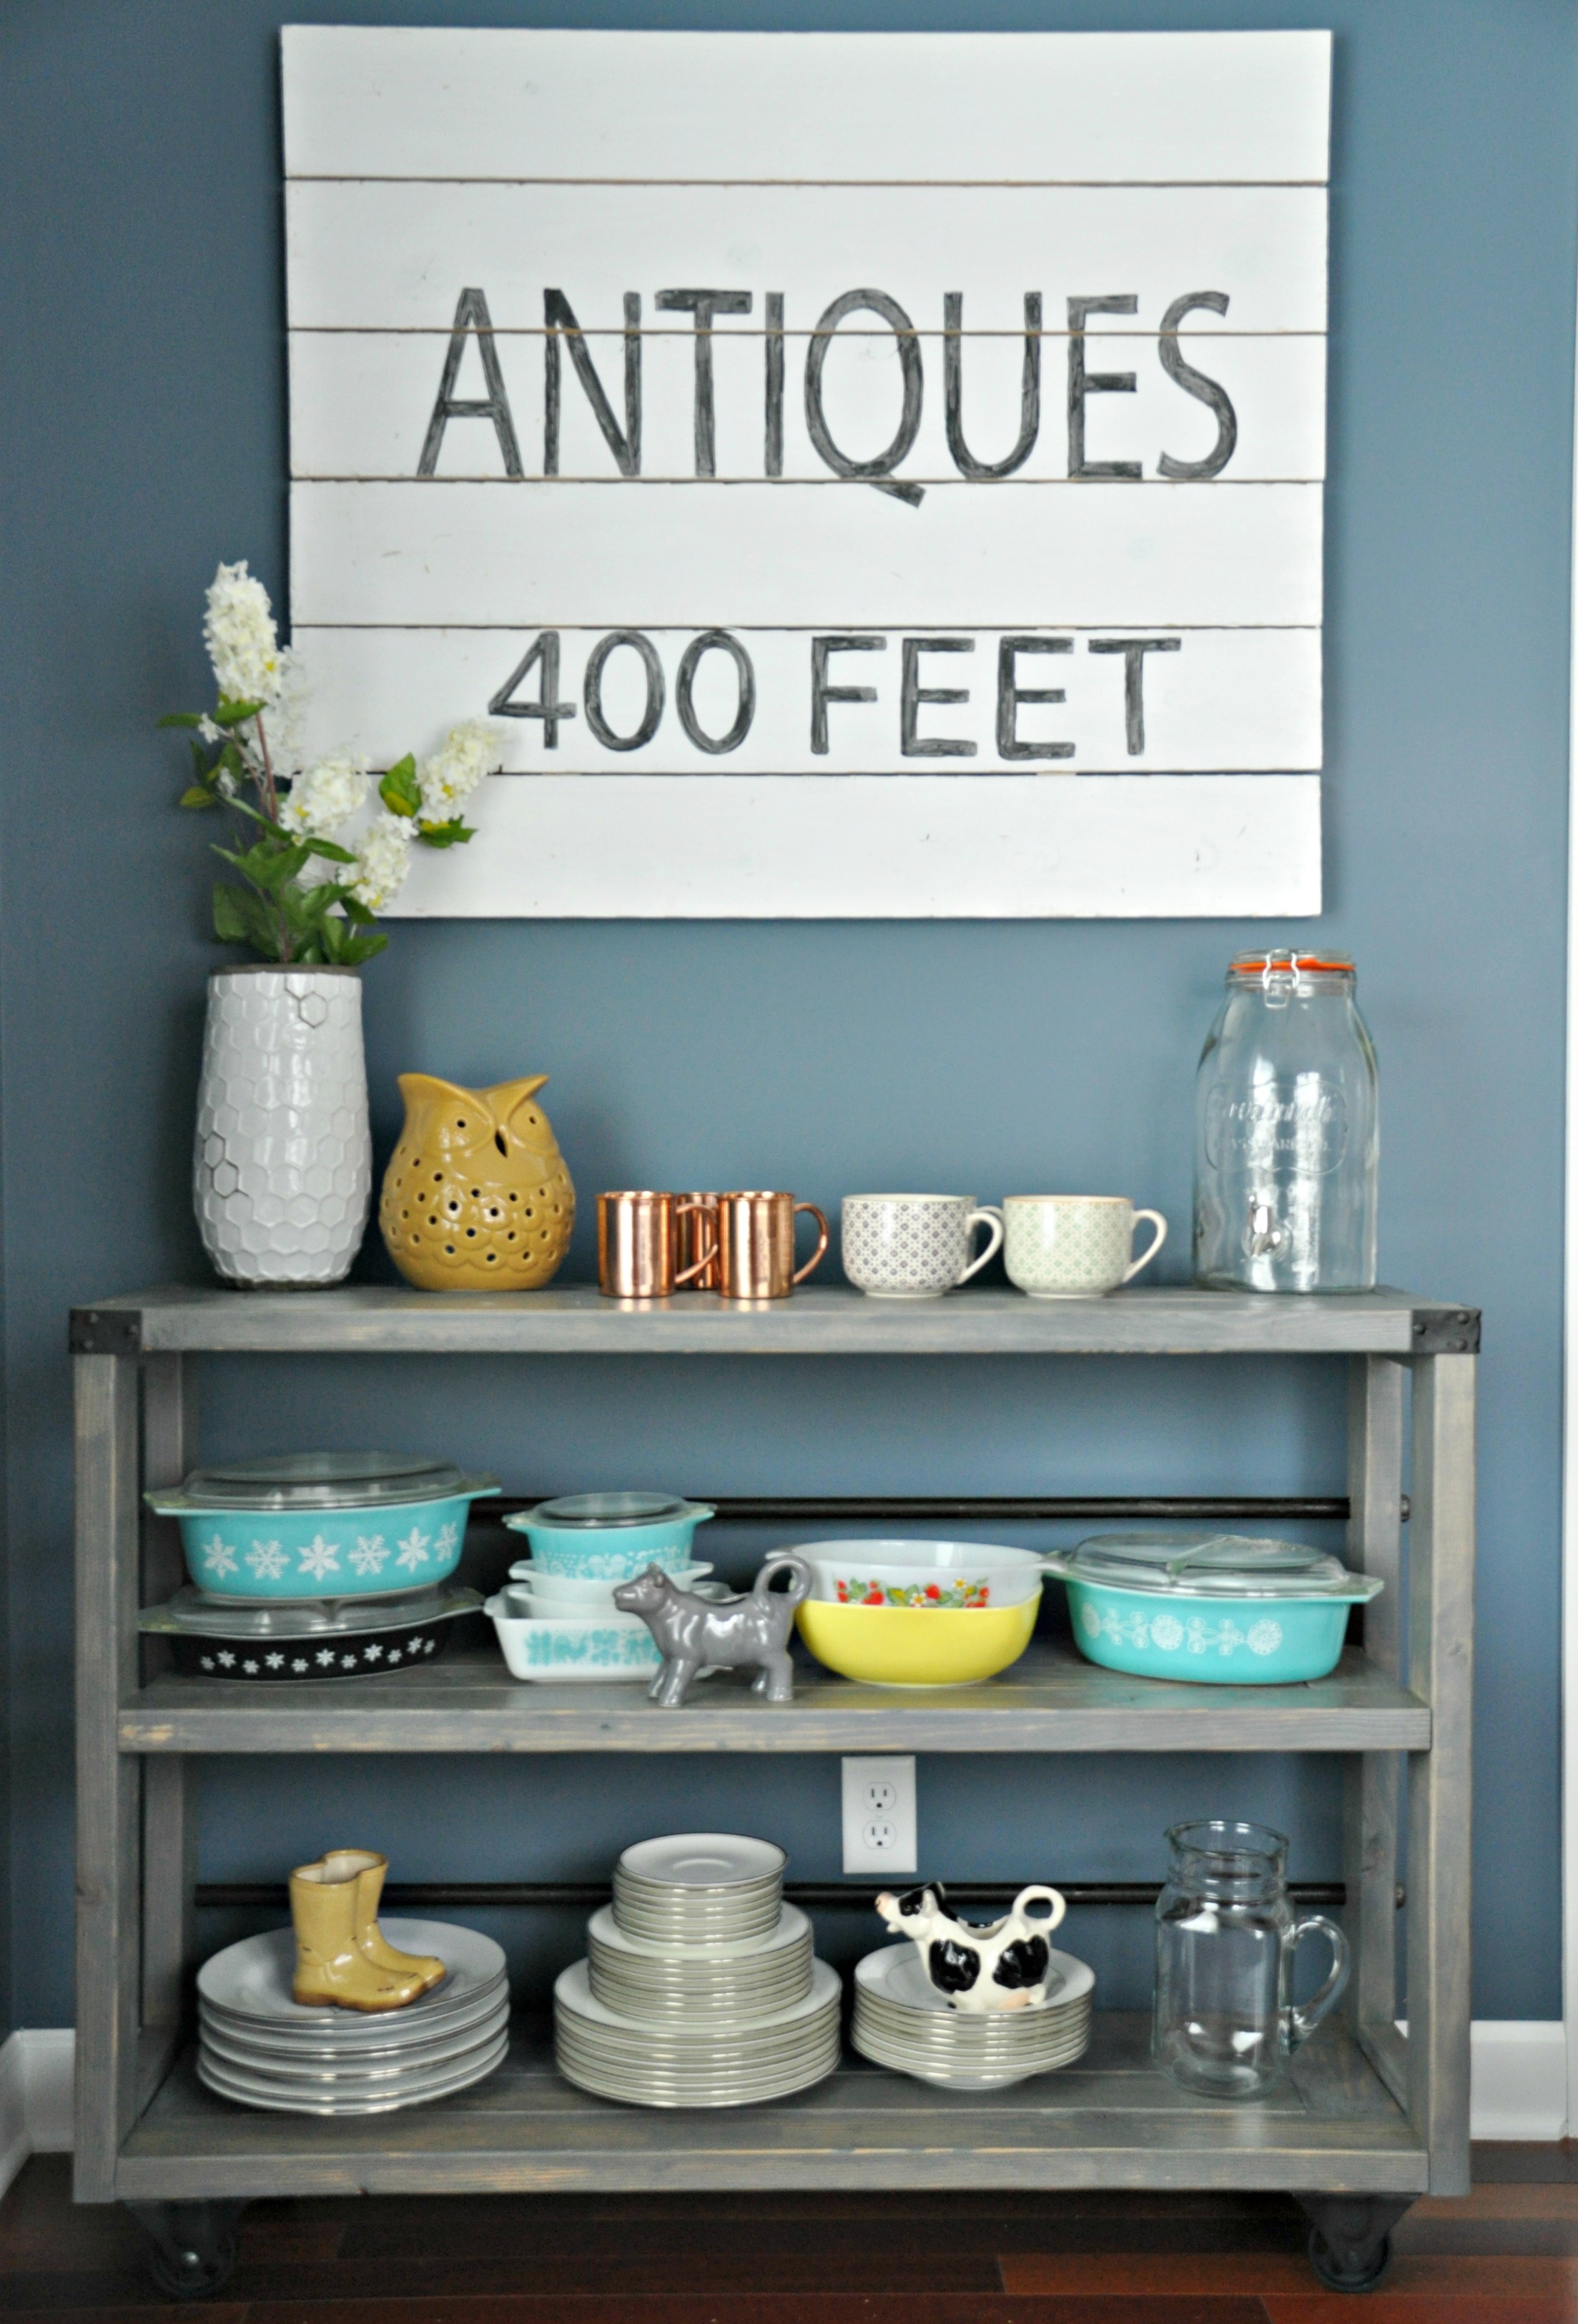
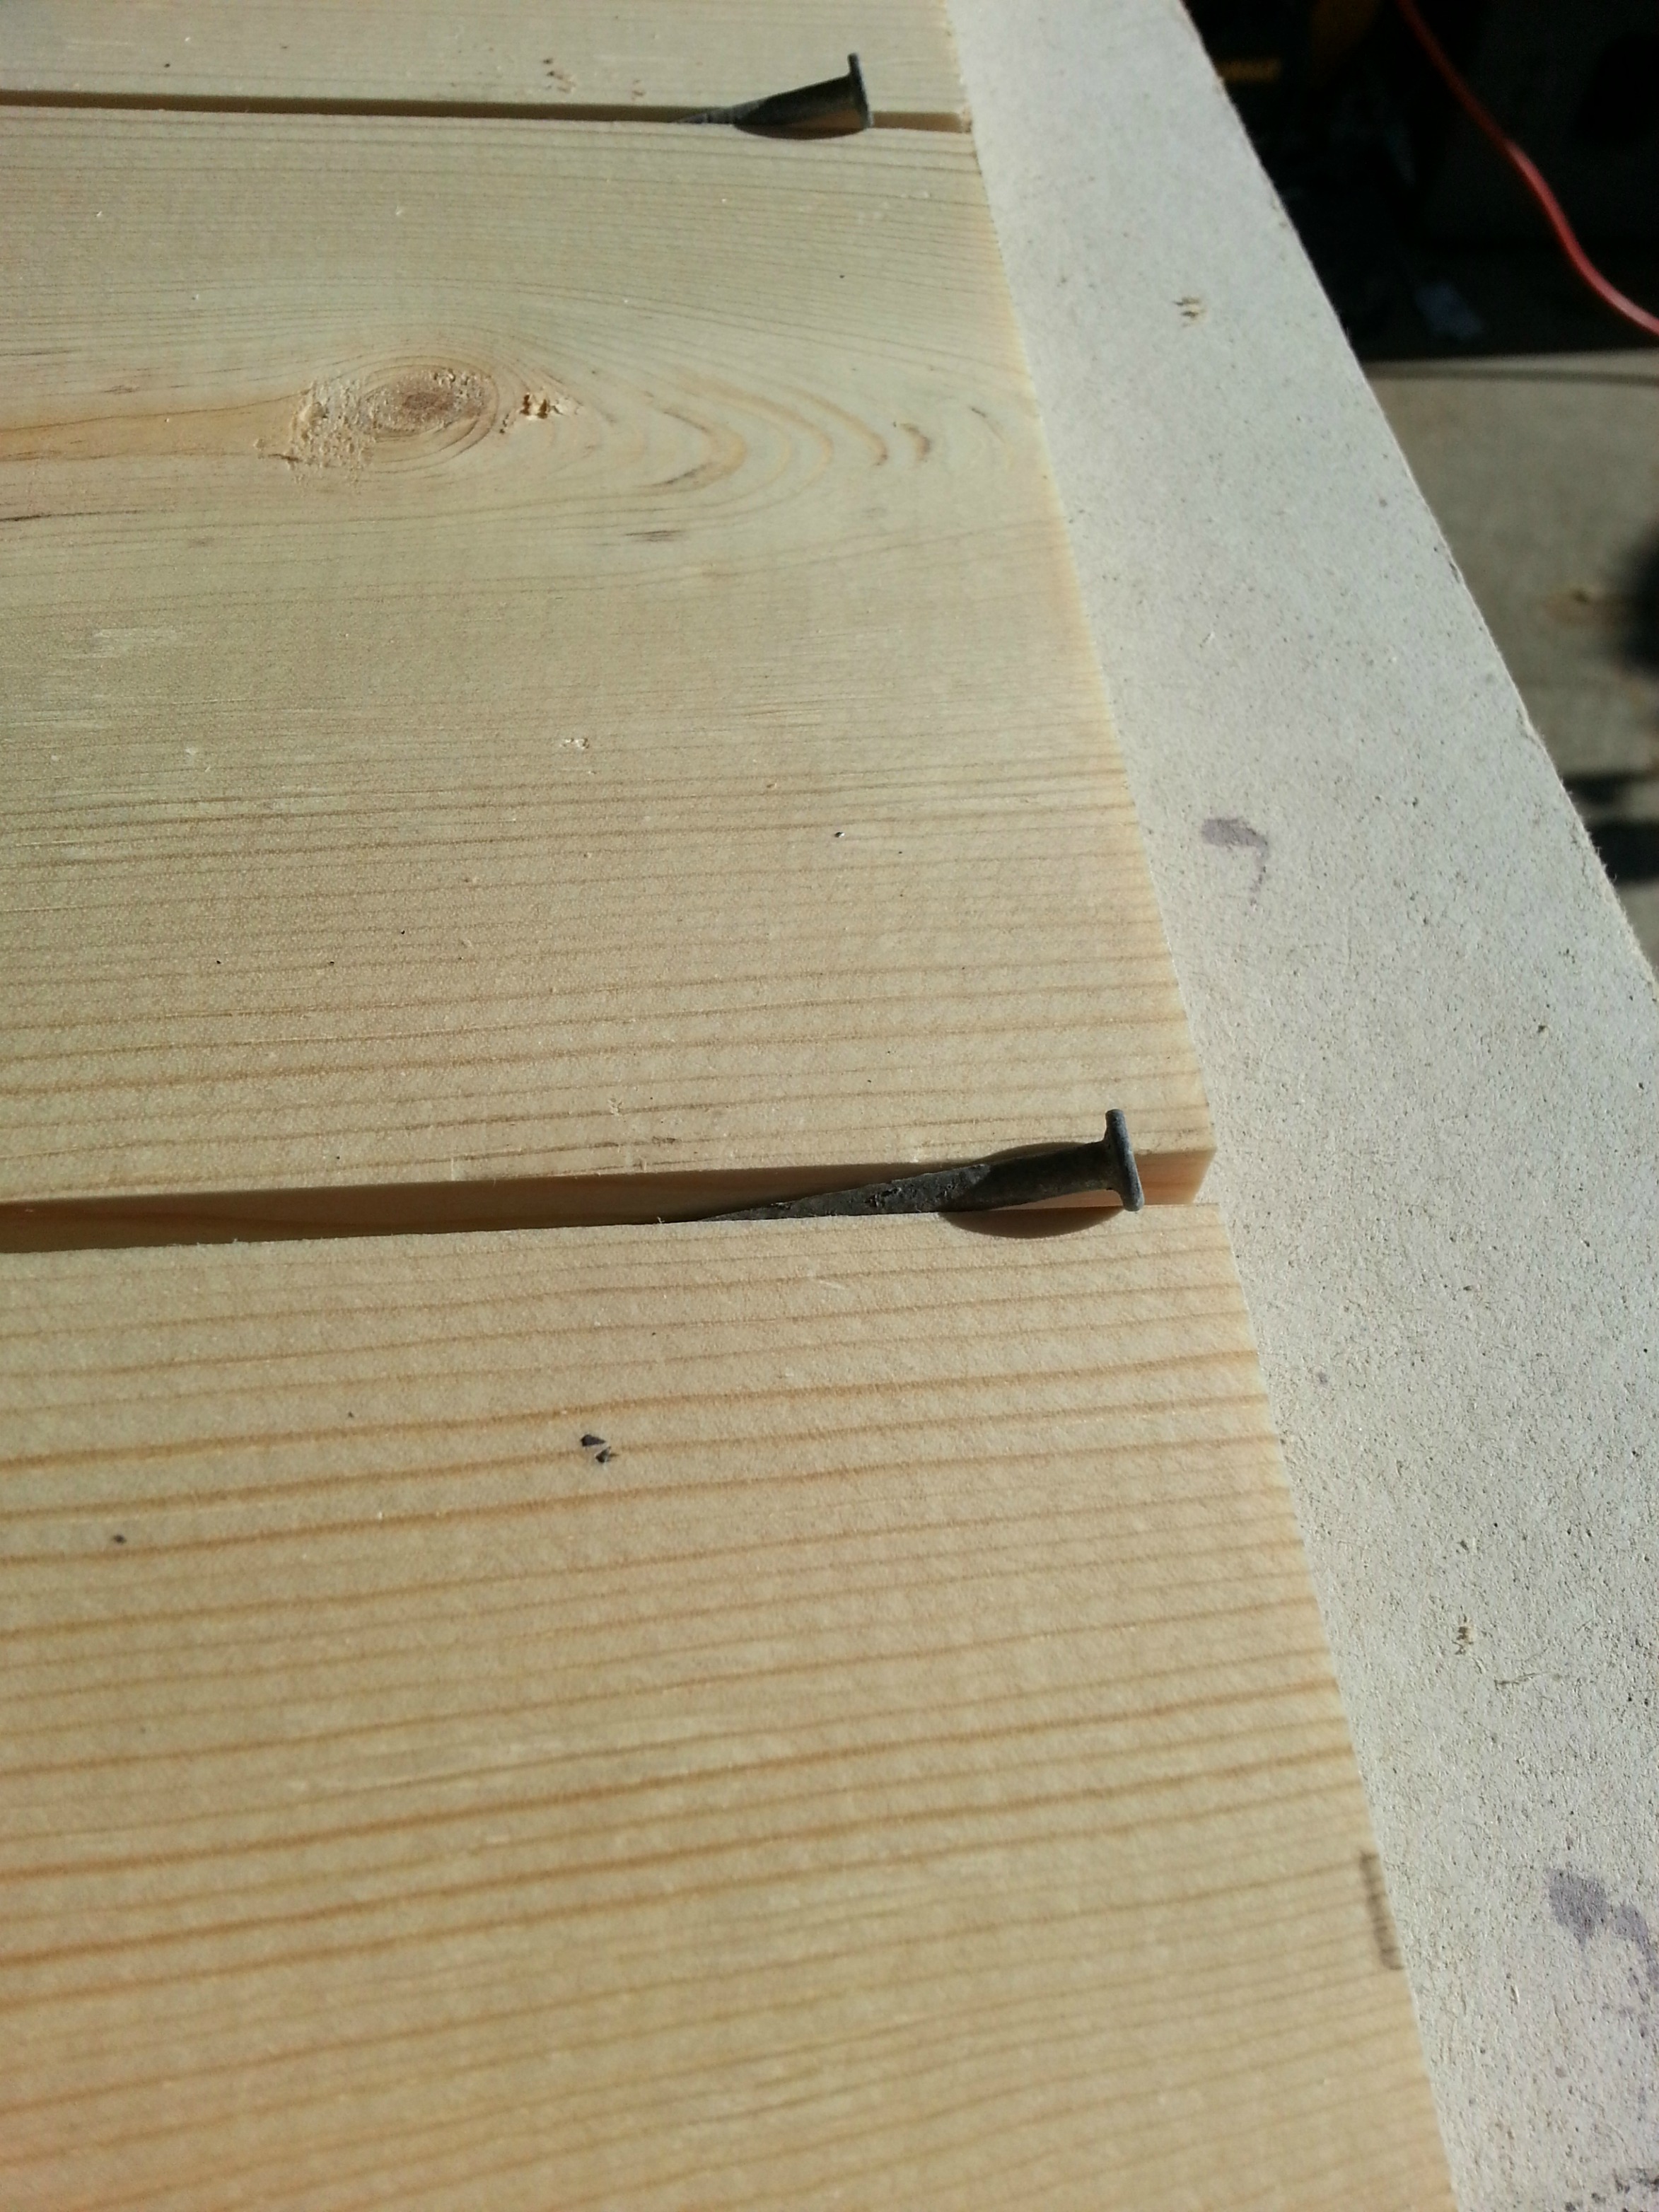
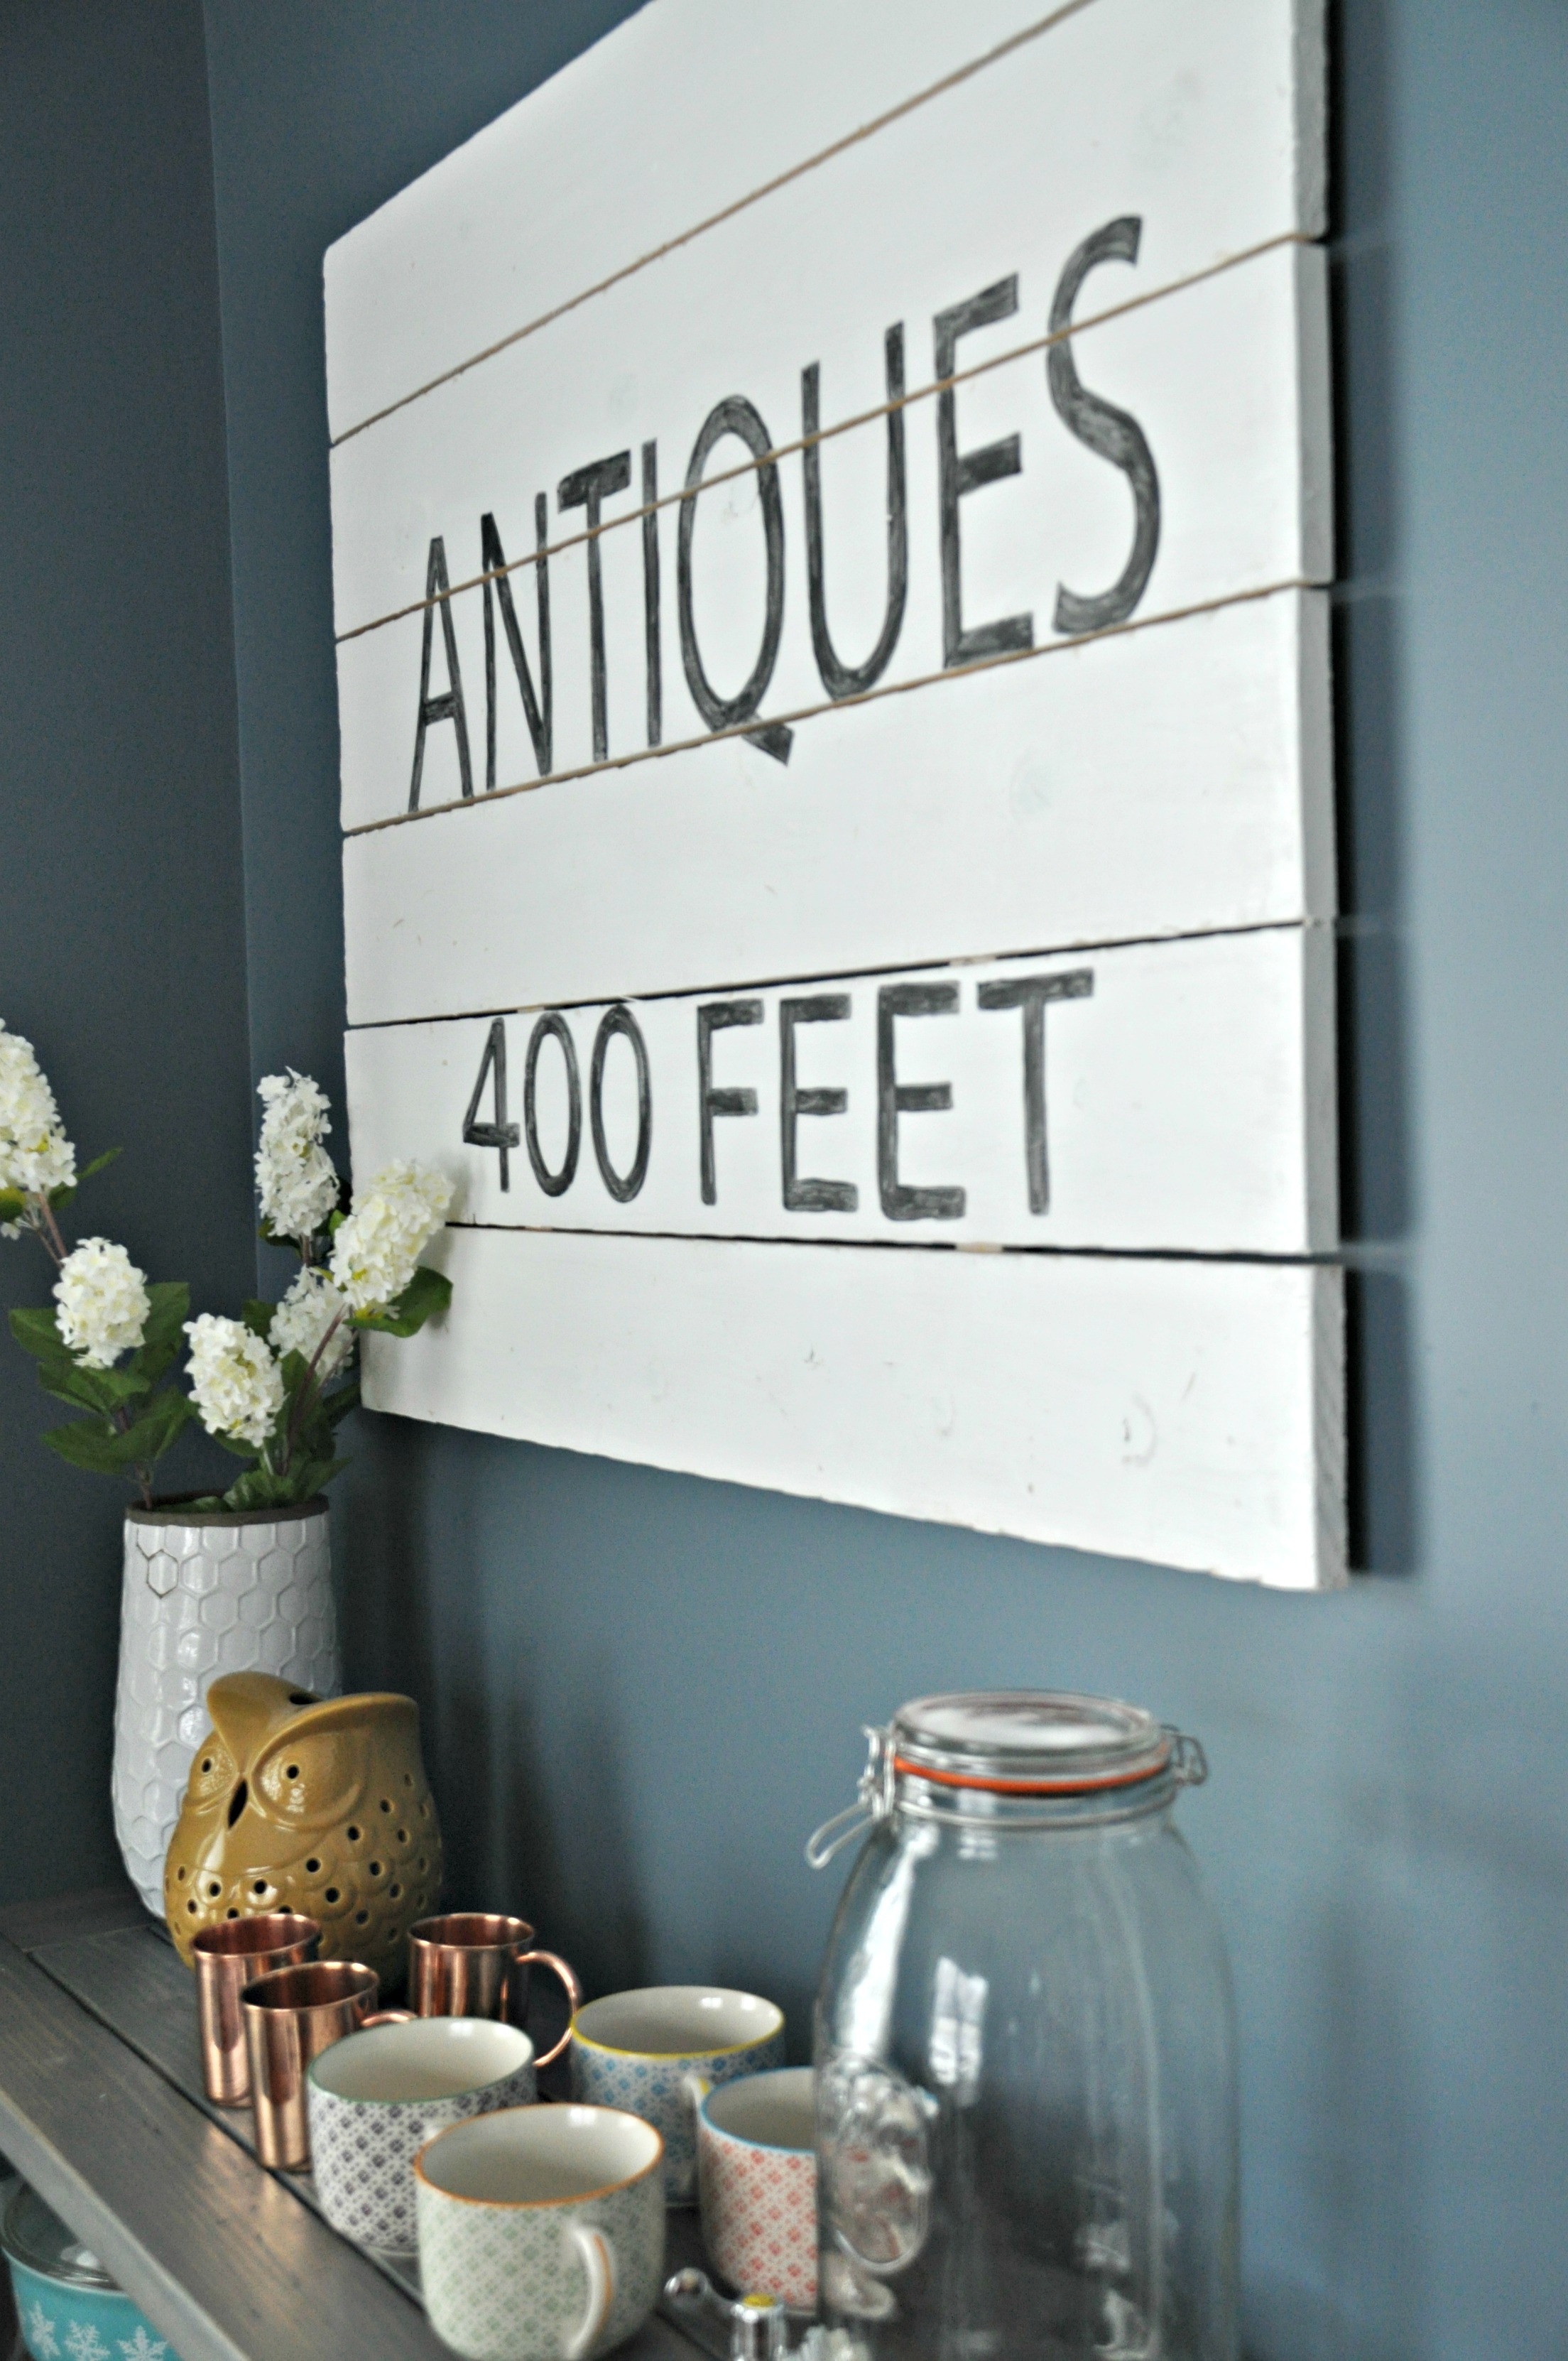
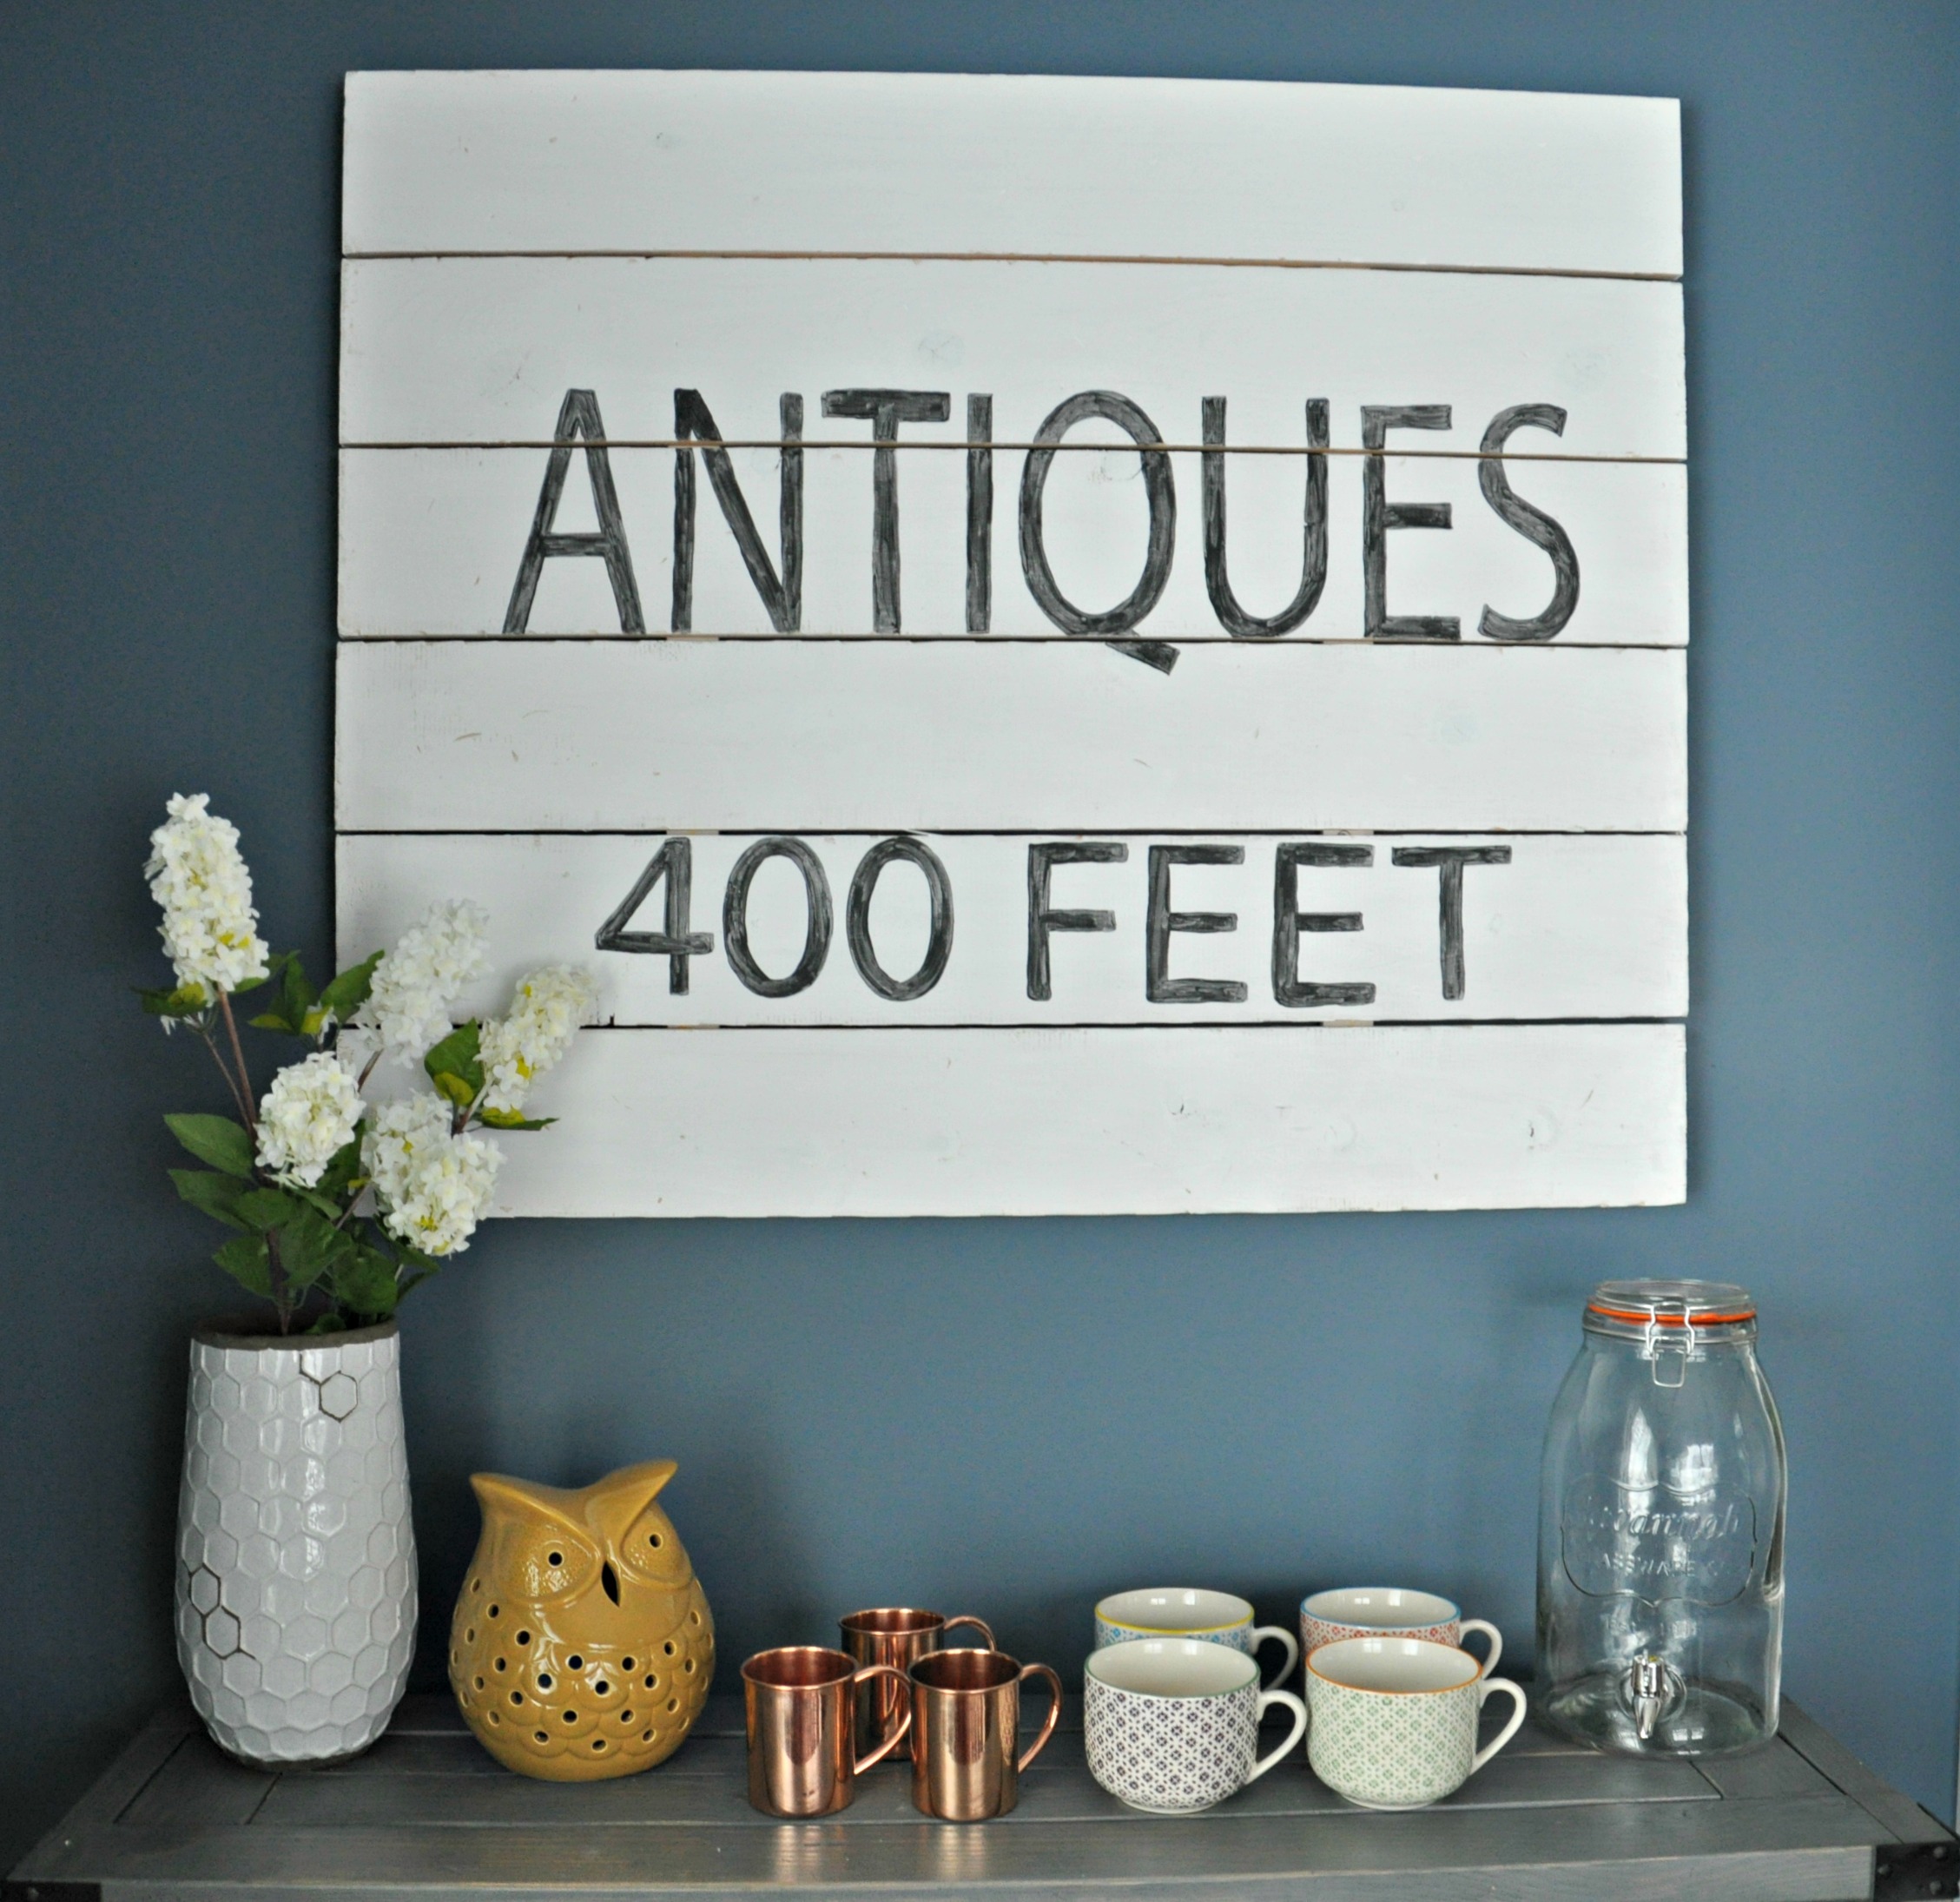
I had Nate cut some 1x6's to size.  (Our sign is 34" long x 40" wide.)  We then beat up the boards with a hammer and screw driver to give the painted sign a "vintage" look.

Nate then placed the boards on a flat surface using a nail to space them evenly. 

Vintage Sign Tutorial {Decor and the Dog}

He then cut two 1 x2's a little shorter (1/2 inch) than the length of the sign.   (33.5" in our case.)

Place the 1x2's about 6" from each edge and put a screw in each board.

Vintage Sign Tutorial {Decor and the Dog}

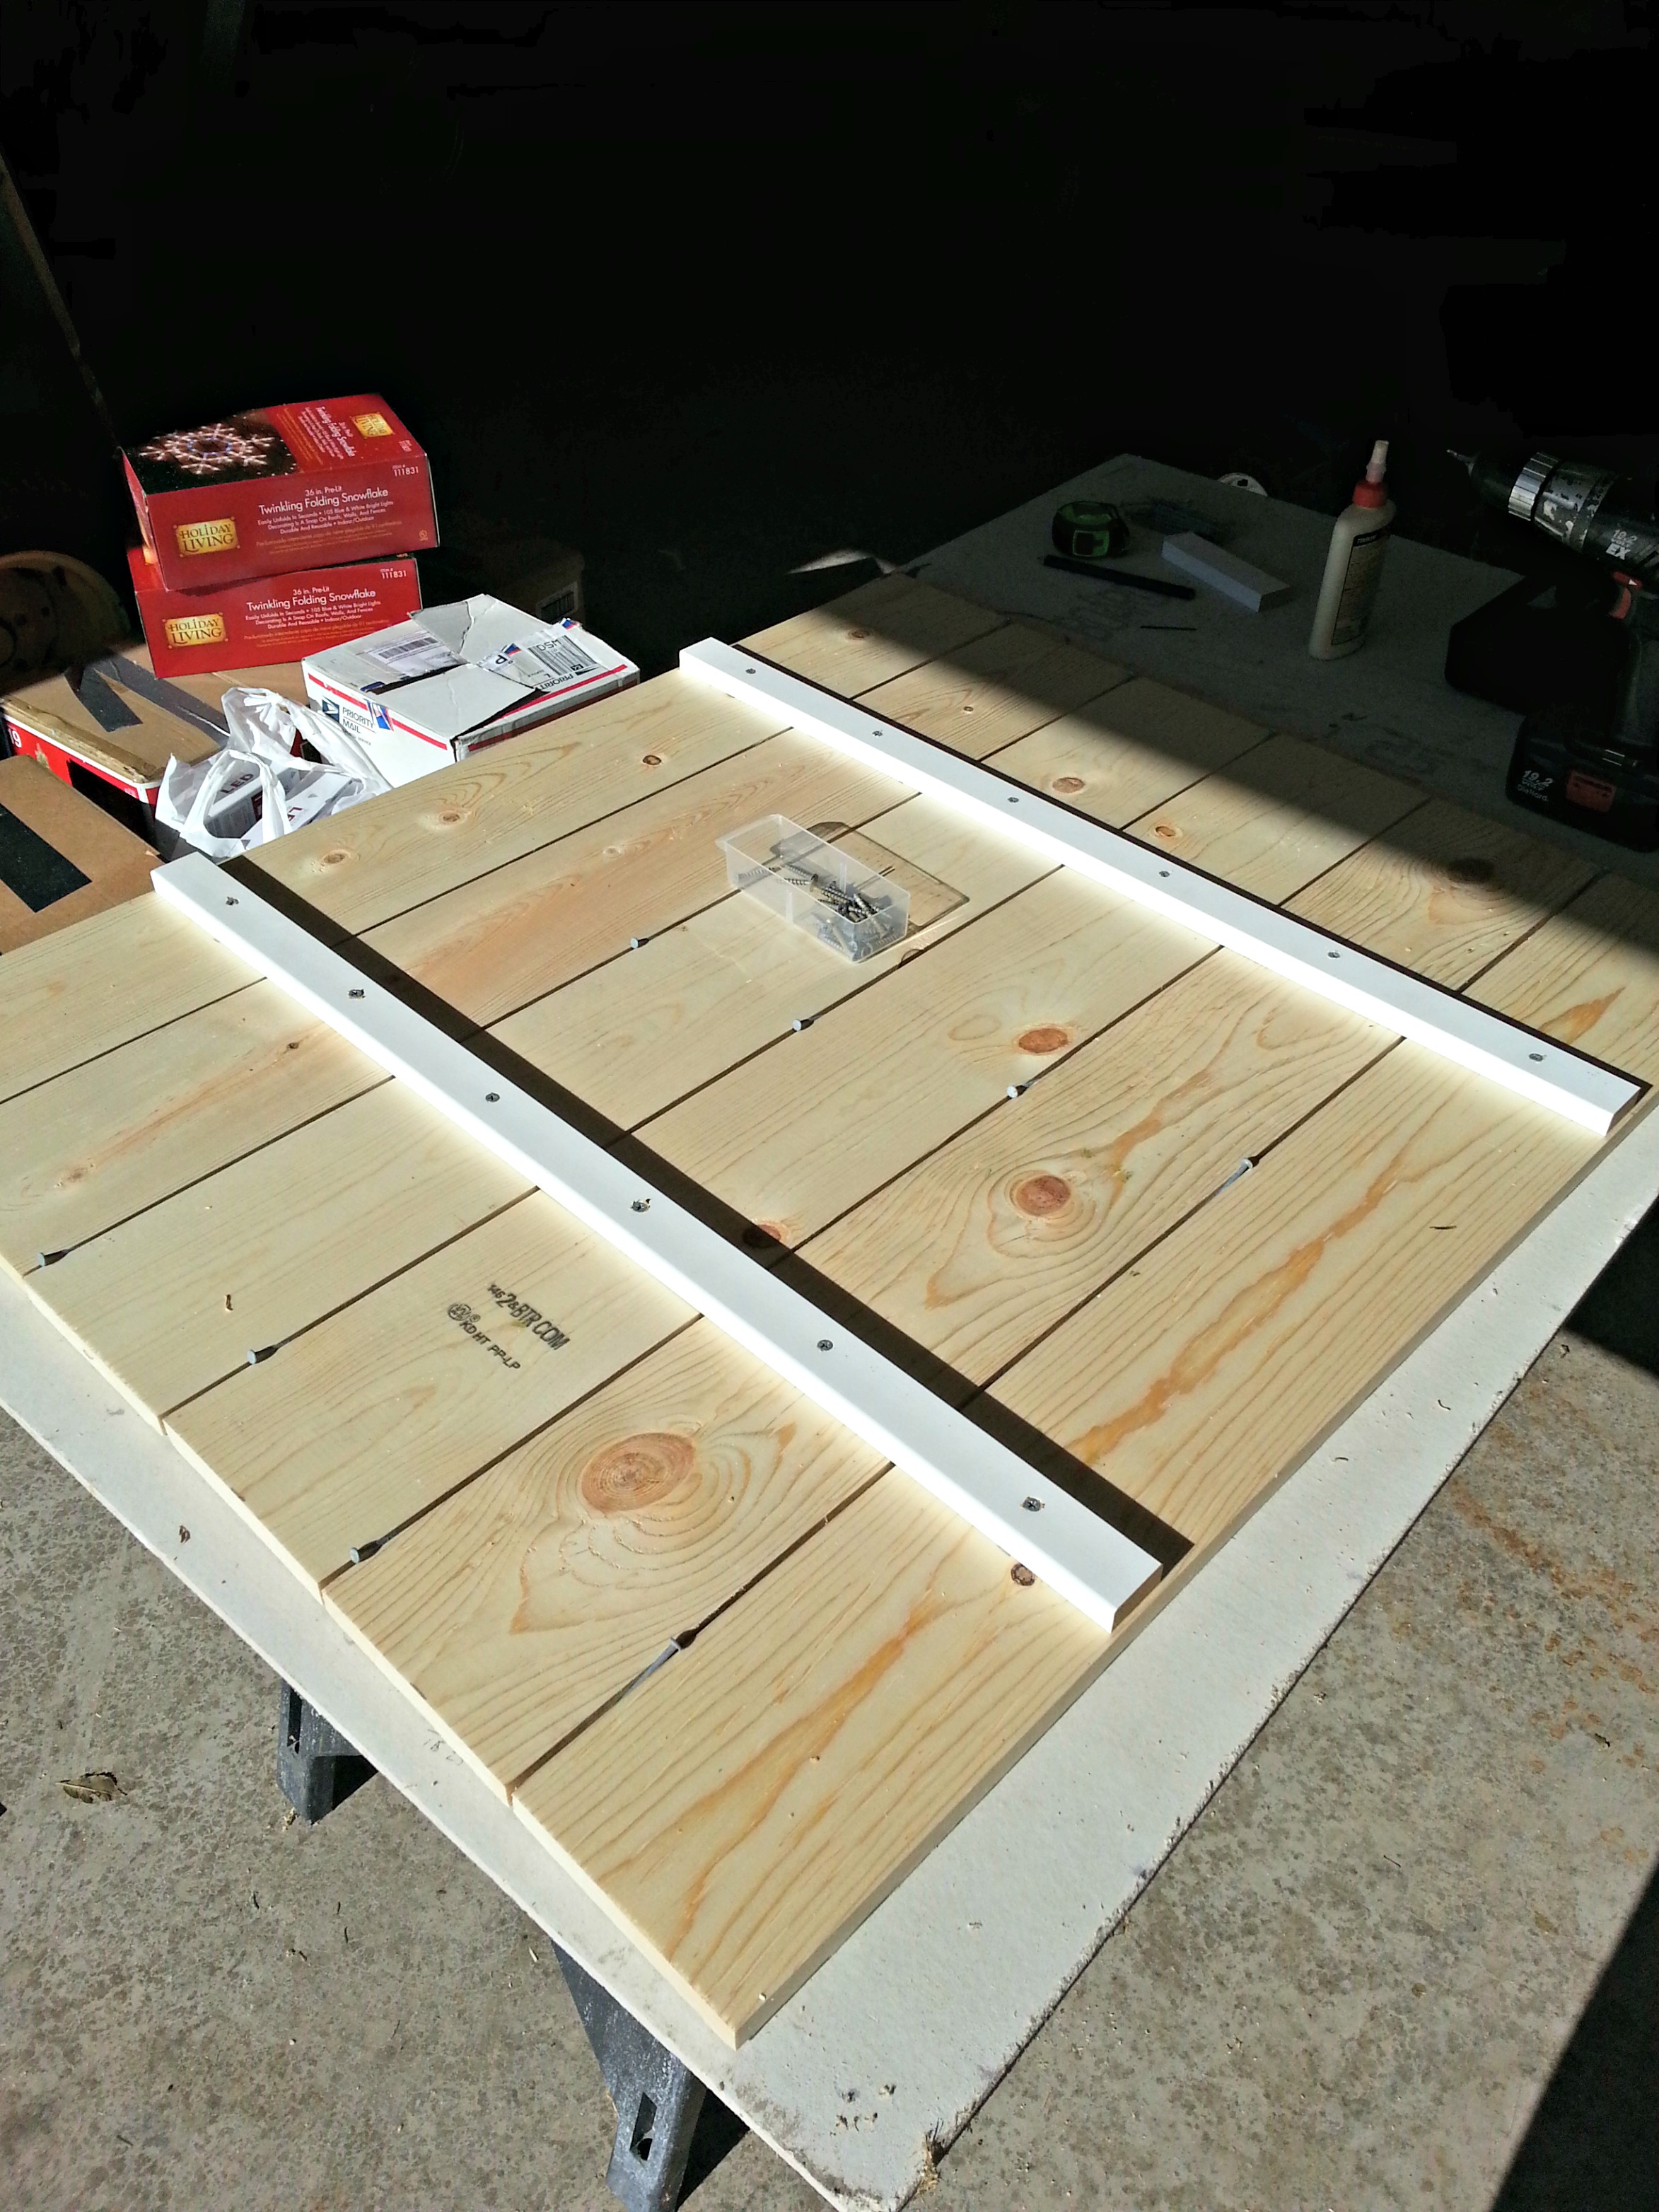
After the sign was assembled I gave it two quick coats of white paint.  I applied the paint thinly and didn't worry about even coverage or painting into grooves or holes.  Again, I wanted this to look old.

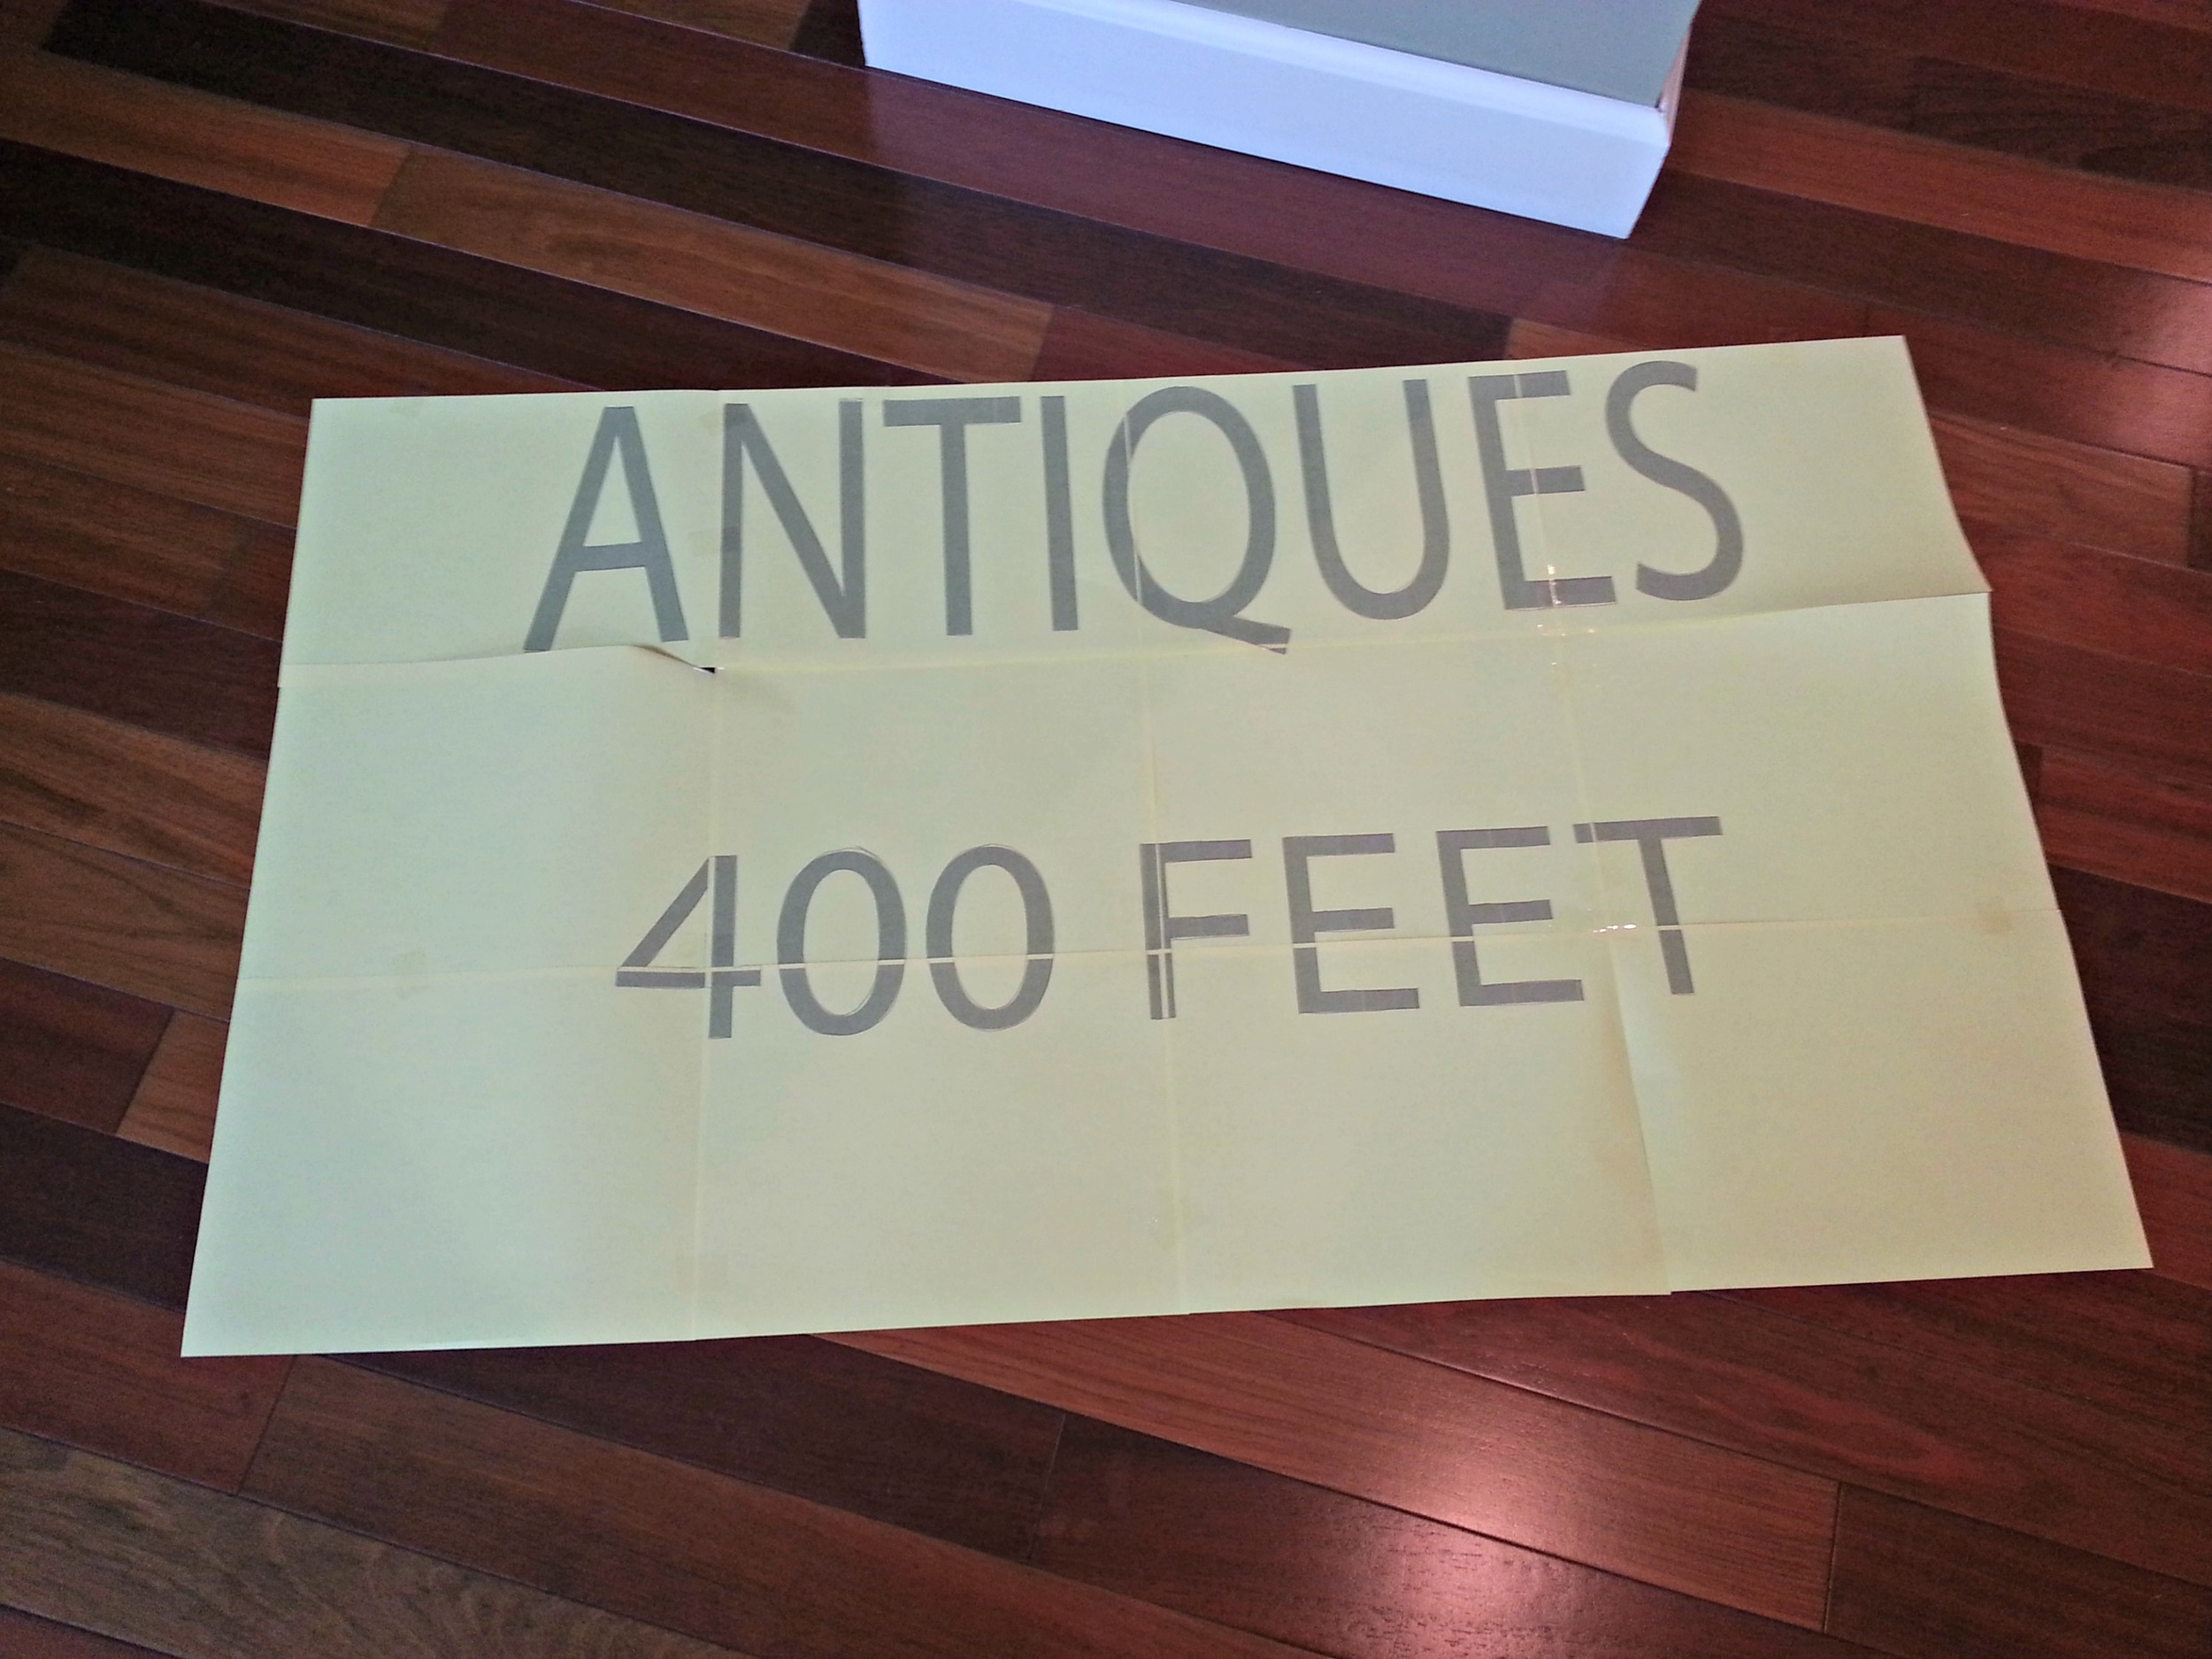
It was then time to add the lettering.  I started by designing my sign in Photoshop.  I wanted my sign to resemble something that would have been quickly hand painted and stuck outside a store back in the day.  A fancy font wouldn't have looked right.

Vintage Sign Tutorial {Decor and the Dog}

I placed my printed design on top of the wood.  I placed tracing paper under the sign.  I used a ball point pen to trace over my design.

Vintage Sign Tutorial {Decor and the Dog}

I then used some black paint and small paint brush to carefully fill in my tracings.  

Vintage Sign Tutorial {Decor and the Dog}

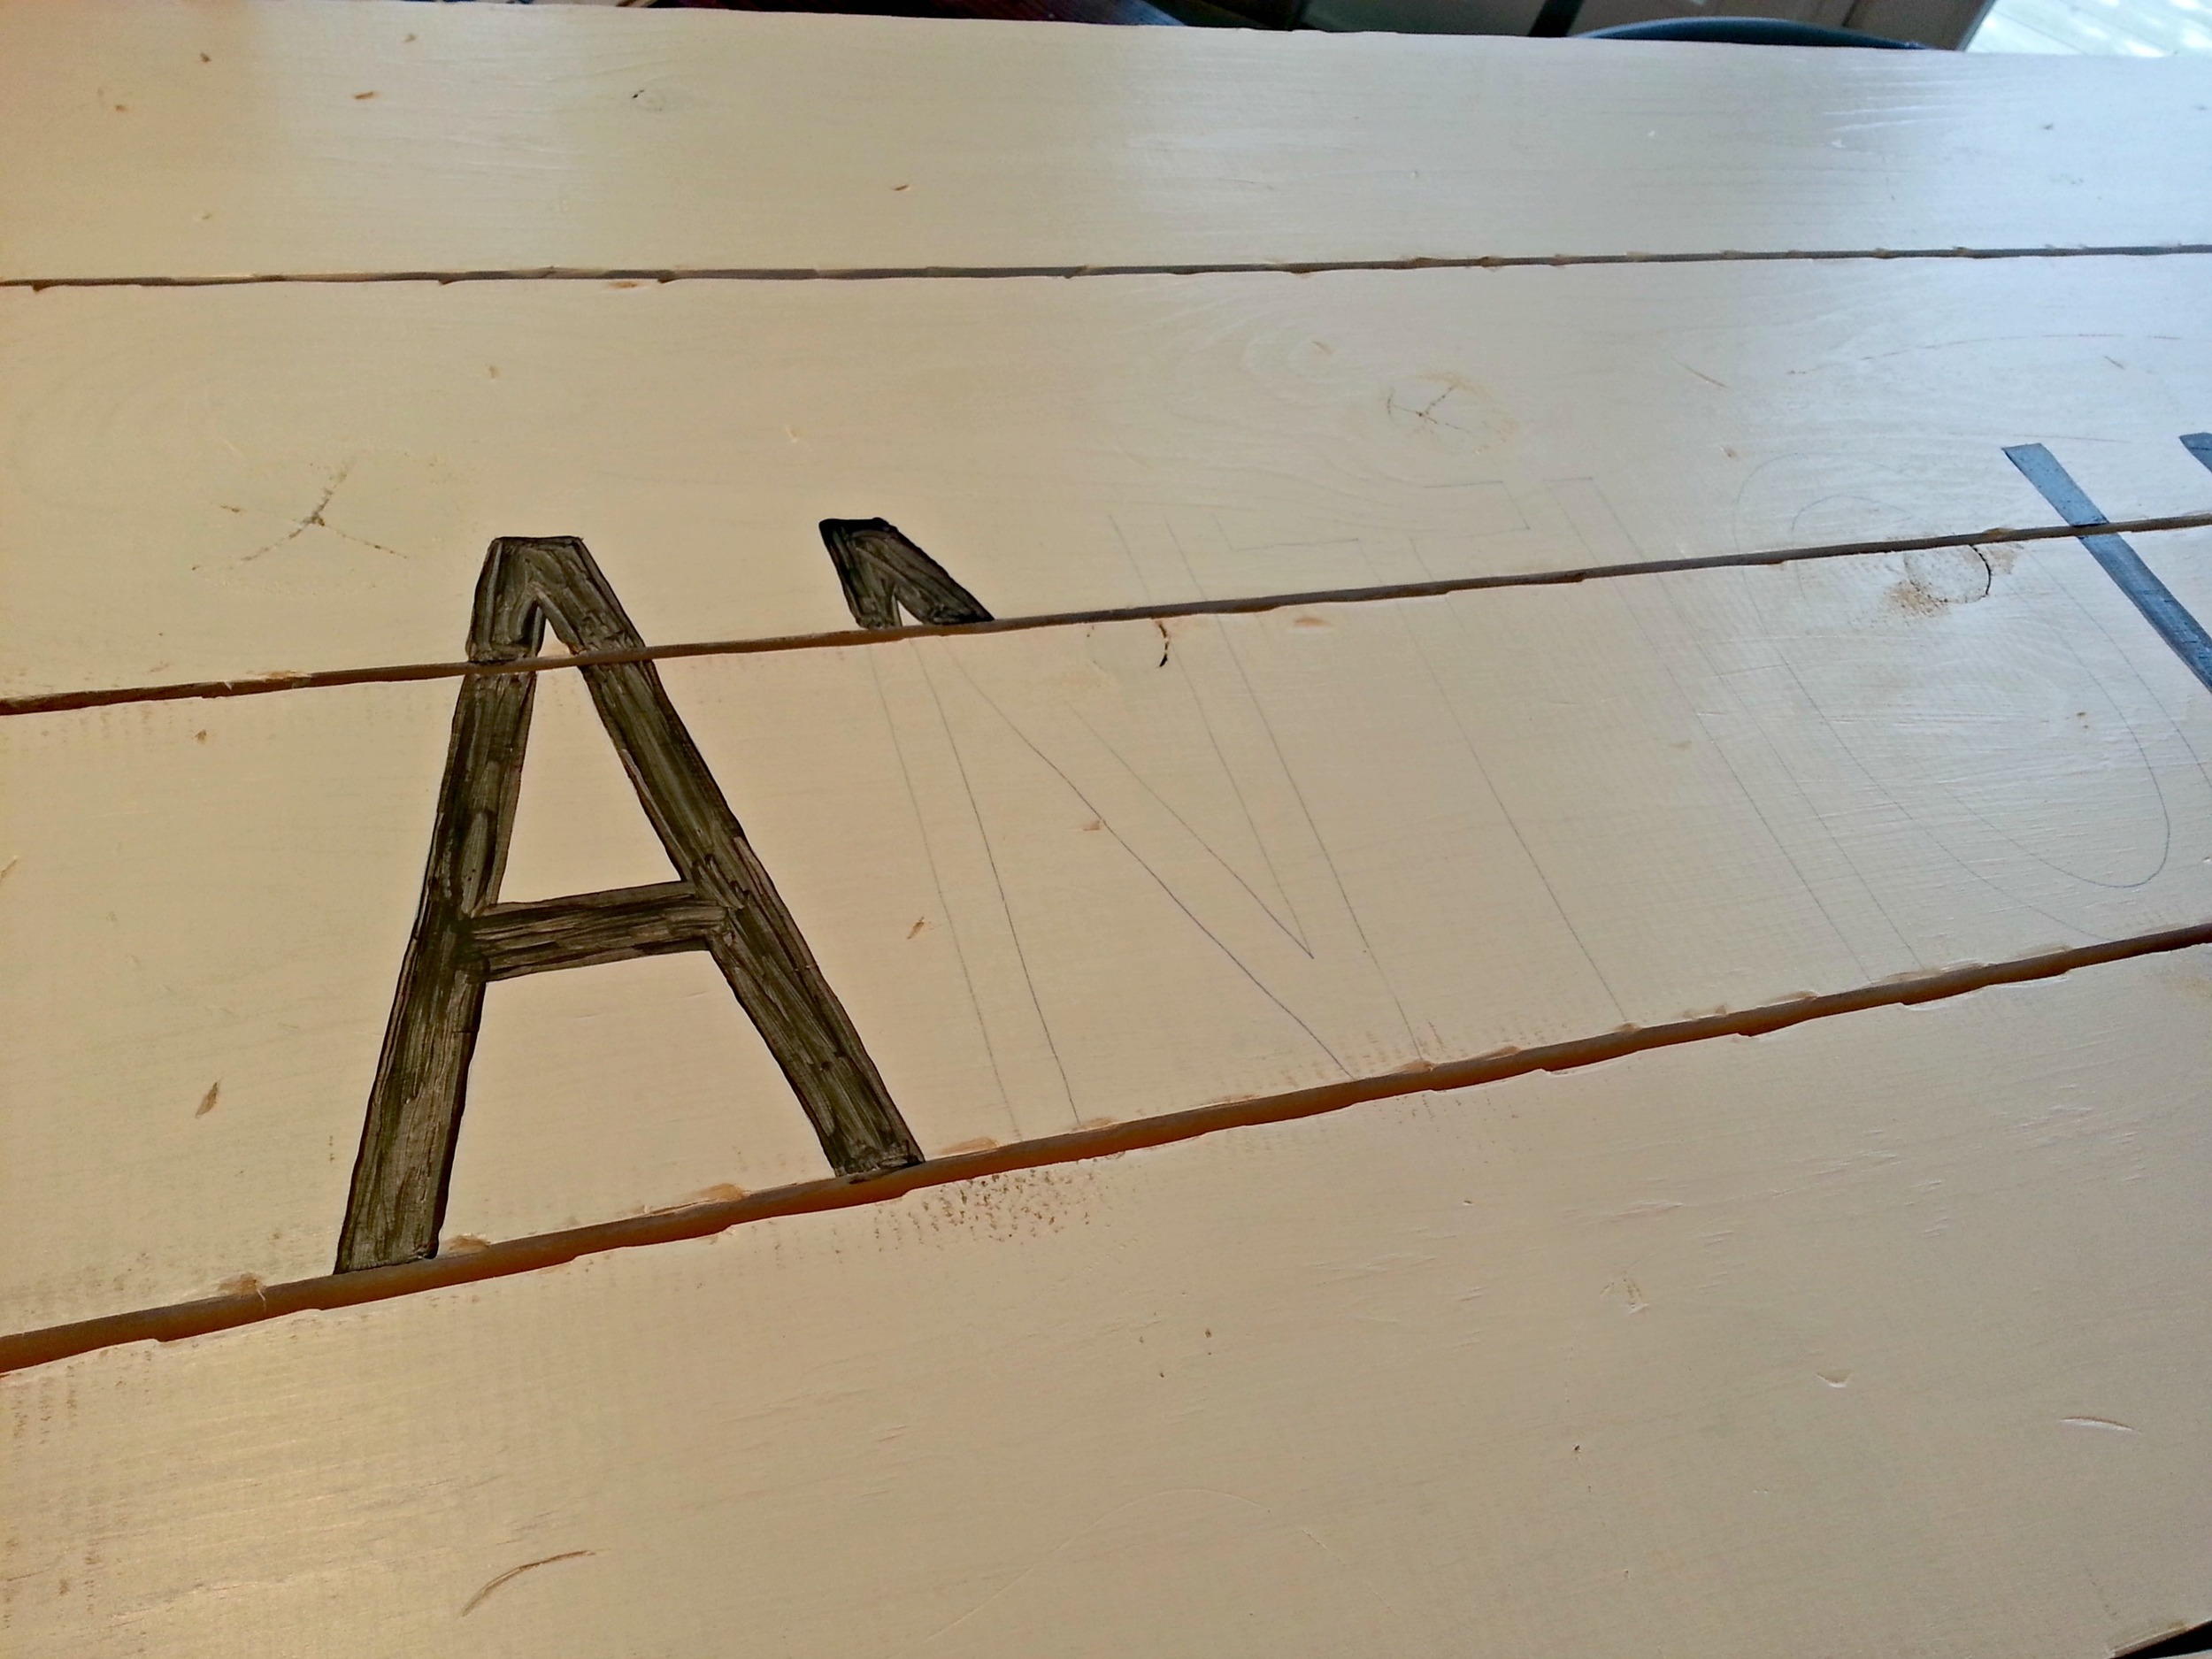
I was going to do two coats but I thought it would look more vintage if I did one coat and then a light sanding.

Vintage Sign Tutorial {Decor and the Dog}

After the painting and sanding, we hung it on the wall.

Vintage Sign Tutorial {Decor and the Dog}

I like how the vintage painted sign looks above our dining cart (tutorial coming soon).

Vintage Sign Tutorial {Decor and the Dog}
Antique Sign DIY Tutorial {Decor and the Dog}

It's always good when you can use your DIY skills to keep you from jail time, right?  

Cheeseburger Cups with Homemade Biscuits

Happy Friday!  It's been quite the week weather-wise here.  We started the week with -50 windchills.  Today it's supposed to rain.  Iowa is weird.

I'm blogging about the weather.  Oh, boy.  I have projects for next week.  Pinky swear.  And my Christmas tree might be down then.  Bonus.

Today I'd like to share with you an update to one of our  favorite quick and easy dinner recipes, Cheeseburger Cups.

Cheeseburger Cups {Decor and the Dog}

Nate and I have been trying to eliminate processed food from our diet. (We're not clean eaters.  We like flour.  We like ketchup.  We just want our food to no longer come in a box, bag or can.)  We've done fairly well over the past 4 months or so.  The problem is that like all good people from the Midwest, we like our comfort food.  We were missing our cheeseburger cups.  The problem with our old cheeseburger cups is that they are made with refrigerated biscuits.  Although delicious, the biscuits don't really fit well into our new eating plan.

The other night we decided to make them using our favorite baking powder biscuits.  (We also shred our own cheese now instead of buying the packaged stuff.)  Nate and I figured there was no way they would taste as good.  Turns out we both thought they were better.  Yay for real food.  

Enjoy this easy dinner idea!

Cheeseburger Cups with Homemade Biscuits {Decor and the Dog}

Be sure to check out our "cook it" page for more recipes!

Hope your weekend is fabulous!  We have plans to help a friend with her nursery and get our house in order. See you Monday!

Super Mustache Pillow Cover {Easy Sew Envelope Pillow}

I decided that beings my Christmas tree is still up, let's talk about a Christmas gift today.  Seems fitting.

My brother was in desperate need of pillows for his living room couch.  He's also a nerdy hipster wannabe like his sister so I thought some easy sew pillows with way too many mustaches seemed like a fitting handmade gift idea for him.  (That was a really long sentence.)

Totally adorable (I mean, manly) nerdy hipster, right?  I thought so.

More importantly, Ike approved. 

(Side note: Ike got a pretty bad hair cut right after these photos were taken.  Ike misses his fur. I miss his super furry face. HE'S SO FLUFFY!!!)

Ike was happy to assist me in the pillow making because he has a special relationship with his uncle.  They get each other. 

Oh, brother.  Someday he'll earn that Christmas card photos go faster if you stop messing around.  But then again, we wouldn't have this gem if he behaved.  

Back to the pillow making.  Through many rounds of trial and error, I have finally mastered the art of pillow cover making in under 10 minutes.  Seriously.  You can sew a pillow case in the same amount of time it takes to make macaroni and cheese.

Warning: this tutorial is super technical. And by super technical I mean that it is totally not at all.

First you need to cut your fabric to a size that correctly fits your pillow.  You don't want it too loose or too tight.  I err on the side of tight because I hate sloppy pillows.  

To determine the size of fabric I grab my pillow form (or whatever old pillow I'm covering) and my fabric.  I fold one end about half way on the pillow.  I fold the other end up and determine where to cut across.  I leave about a 3" overlap for the "envelope" on the back of the pillow.

To determine how wide to cut the pillow, I leave a small amount (1/4"ish) on each side.  Again, err on the side of tight.

After those wonderful instructions that make total sense, you should haven something like this.

You will need to hem each short end.  I fold under about 1", iron and sew a straight line.  The hard part of sewing isn't actually sewing. It's the dumb cutting.  Seriously.

Once both ends are hemmed, you fold the fabric right sides together.  I place my fabric next to the pillow and use the pillow as a guide for the size. Make sure to leave the 3"ish overlap.  (FYI, whatever hemmed side you put on the bottom will actually be on the top of the back of the pilllow.)

Pin and sew along both sides (I use a 1/4" seam allowance).  Fold inside out.  Bam!  Pillow cover sewn.  Look at you!

Now that your cover is sewn, you can add a mustache (or whatever your heart desires) on the front on the pillow.  I don't have a fancy cutting device so I go the old school route.  Google "mustache clip art".  Print one you like.  Trace it onto some Heat n' Bond.  Apply following Heat n' Bond's instructions.  (Once you trace and cut out your mustache, you will peel back the paper back backing and apply with an iron.)

Mustache pillow complete.

10 Minute Envelope Pillow Tutorial.jpg

Ike says he mustache you a question.  "Do you like his mustache pillow?"

You knew I couldn't go a whole post without the mustache line, right?

Photobucket Photobucket Photobucket PhotobucketPhotobucketPhotobucketfollow us in feedly