Gallery Wall: Change of Art

Reading blogs pays.  You heard it here first.

Awhile back, I won a giveaway from Kelly’s blog (View Along the Way).  The giveaway was for a set of six frames from Change of Art

I was super excited about winning this giveaway. I started a gallery wall in our guest bedroom approximately two years ago.  I wish I was over exaggerating. It was missing frames and photos.  My dad would make smart comments about not recognizing the people in the stock images.  Hardy, har, har.  I couldn’t decide what photos to put in the frames. I needed to buy more.  Excuses, excuses.

I took down the ratty attempt at a gallery wall.  I wish I had a photo. It was good. I patched and painted holes.  I was left with this big, blank wall.

Gallery Wall Change of Art

My Change of Art frames arrived about three months ago. I hung them on Sunday. I don’t like to rush things.  In about 15 minutes, we had our entire gallery wall hung.  Patience pays off.

Change of Art Gallery Wall Guest Room

I was super impressed with the Change of Art frames.  The frames are different because you can easily change out the photos/art you want to display. Which is awesome for someone as indecisive as myself. I’m also accident prone and end up stabbing myself with those stupid black tabby things on the back of most frames.  No blood was shed in this gallery wall.  There is also a spot in the back to store additional photos.  Handy!

Gallery Wall Change of Art

The frames were super easy to hang.  Each frame came individually boxed (all materials are eco-friendly).  In the box was the frame, a hanger, a nail and a paper template to use to assist in arranging/hanging the photo.

I arranged the paper templates on the wall.  I had Nate help me ensure that I had them evenly spaced/level.  I don’t see straight.  Minor problem.  After that, I was on my own.

Gallery Wall Change of Art

Well, I had Ike to help me out.

Gallery Wall Change of Art

All I had to do was place the hanger onto the appropriate spot on the template and hammer away.  (Excuse the look of fear in my eyes.  I hate putting nails in the wall.)

Gallery Wall Change of Art

Once the hangers were installed, I ripped down the templates.

Gallery Wall Change of Art

I then gently placed the frame onto the hanger.  There is a little notch that allows it to rest gently and self-level.

Gallery Wall Change of Art

Gallery wall hung.  And to think it only too me two years.

Change of Art Gallery Wall

Gallery Wall Change of Art

For the first gallery wall set-up, I used some black and white Chicago photos from Decor and the Dog Photo.  *shameless plug*

Guest Room Gallery Wall Change of Art

I’m a big fan of the Change of Art frames. Easy to hang, eco-friendly and made in America.  The only downfall I see is that they are a bit pricey for my cheapskate self. Having said that, I will be purchasing another set in the future because I really like how professional they look and how easy they are to hang.  As the old saying goes, sometimes you get what you pay for!

Are you a gallery wall fan?  What’s your longest running project?

***I wasn’t compensated for this post.  I won the frames in a giveaway and was in no way obligated to post about them. Ike and I just thought the frames were pretty awesome.***

Don’t forget to enter the Method Cute Pet Contest!

Method’s Cute Pet Contest

This post is sponsored by Method.

Today I have a quiz for you my dear Decor and the Dog readers.  There’s a potential prize at the end.

Q: Who is the cutest dog on the planet?  A dog that is arguably the happiest dog around.  A dog that has endless energy and is a fantastic snuggle buddy.  A dog that brings endless smiles even when he’s up to no good. A: Ike.

Method Cute Pet Photo Contest

Okay.  That was easy.

Q:  Who makes an entire product line that is pet friendly, not tested on animals and contains no animal by-products (that’s dirty!)?  A product line that suckered me in years ago with their amazing packaging and kept me around with their great performing products and inspiring do good mission.  A: Method.  I’m a big fan of their granite cleaner, bathroom cleaner, glass cleaner, hand soaps and laundry detergent! Okay, so basically all of their products.

method-designed-for-good-soap-series

Q: What do you get when you combine a cute pet and Method?

Method's Cute Pet Contest

A:  A Cute Pet Photo Contest and support for a good cause!

To highlight pet appreciation week and their own policy against animal testing, Method is supporting the ASPCA. Method and soap.com are teaming up create a photo contest on Facebook and Instagram.  The contest will begin on June 11 and end June 30. Method will select one winner each week to receive the two “designed for good” soaps and a $50 gift card to soap.com. The “designed for good” soaps were designed to help raise awareness for the fair treatment of animals. Cute with a cause. Method gets me every time. (Only residents of the US and Canada (excluding Quebec) are eligible to win.)

To further support the cause, Method and soap.com are teaming up to donate 15% of Method product sales on soap.com in June to the ASPCA®, whose mission is to provide effective means for the prevention of cruelty to animals throughout the United States.

Buying your Method products at soap.com? Use the code PAWPRINT at checkout to receive 20% off your purchase. This offer is only available to first time soap.com customers.

How To Enter Method’s Cute Pet Photo Contest:

Step 1: Take a photo of your ridiculously adorable pet. Or one hundred ridiculously adorable photos if your pet is as cute as the Ike man.

Method's Cute Pet Contest Runners Up

Step 2: Choose how you want to enter the contest: Facebook (desktop), Facebook (mobile) or Instagram
  • Facebook: Find the ‘pet photo contest’ tab on Method’s Facebook page and follow the instructions on the tab for uploading your photo.
  • Instagram: Post your pet’s photo to your Instagram account using the hashtag #methodcutepets. You must also follow @methodhome in order to be eligible to win.
Super easy and lots of fun!  Ike and I can’t wait to check out Facebook and Instagram to look for familiar furry faces!  Ike is super excited about helping out such a great cause!

DSC_0118-MOTION

What’s your favorite Method product?  Does your dog get super excited about helping out a good cause?  Did you enter your pet?  Let us know so we can “like” or “heart” your photo!

This post is sponsored by Method.  All thoughts and super cute dog images are my own.

How to Build a Flower Tower

I’ll let you in on a little secret.  Remember the vertical garden we built as part of a sponsored program for Home Depot?  Well, we were assigned the project.  We weren’t super excited about it at first with but we ended up really liking it after it was built.  That’s the inside scoop.

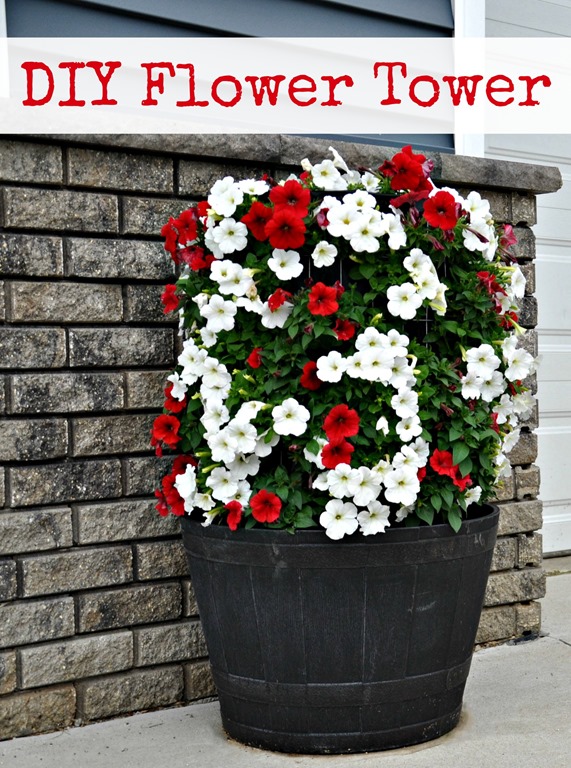
Where am I going with this?  Ah, yes.  What I really wanted to build was a diy flower tower!

How to Make a Flower Tower {DIY}

I mean, it’s a tower of flowers.  It has a cool name.  I love Home Depot’s commercial where the wife is all like “This won’t take long.  Will it?”  THAT’S TOTALLY ME.

I had to have one. So we headed to pick up our supplies.  I quickly began to realize that these little ol’ flower towers aren’t exactly cheap.  Like those people in the commercial with 15 of them in their backyard must be loaded.  Like Justin Bieber or drug dealer loaded.  Not pharmacist and accountant loaded.

But I had to have one.  You know how that goes. I compromised and limited myself to one tower instead of the 27 I had imagined in my head.

These towers are ridiculously easy to build.  Like I did it mostly by myself.  Whoa.  That’s going to be the theme for this week.  Michelle actually does stuff.  Alert the media.  Here's how to make your diy flower tower.

Gather your supplies. (The reason this project is expensive is that they don’t sell small quantities of some of the materials.  Like you need 3-4 feet of wire fencing and it comes in a 50 foot roll.  Nice.)

    • 4-foot galvanized wire fencing with 2-inch x 4-inch openings (~$30)
    • Landscape fabric (~$10. We had this left over from the vertical garden.)
    • 6-inch black zip ties (~$2)
    • flower pot (Price varies.  We used one we already had.)
    • Dirt (~$13 for a large bag.)

Gather your tools.  (We had all of the tools.)

  • Utility knife
  • Aviation snips or tin snips
  • Scissors
  • The Home Depot recommends gloves when working with the wire. I skipped them but thought I’d throw it in for safety purposes.

Step 1: Create a cylinder with the wire fencing that you will place inside your pot.  Allow an overlap of one fencing section to allow for a more stable seam.  Cut the fencing using aviation snips.

DIY Flower Tower

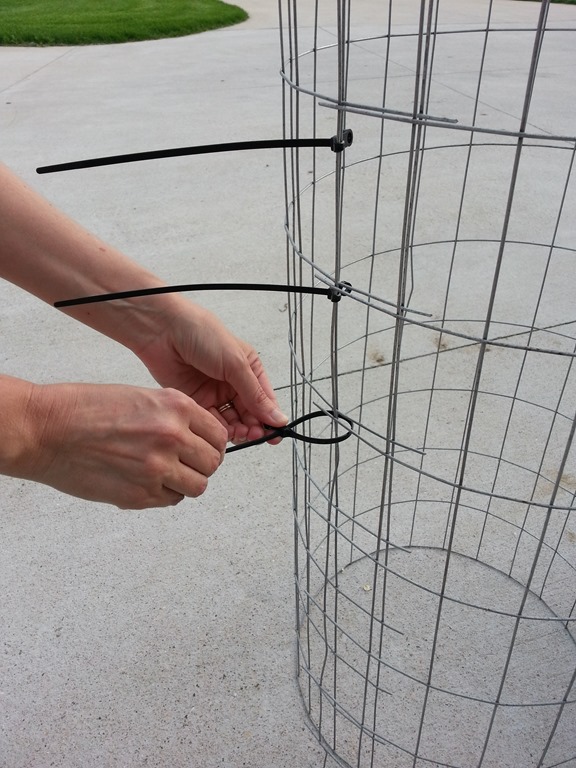
Step 2:  Overlap one section of the wire fencing and use the zip ties to tie the sides of the cylinder together.  I used a tie in each section from top to bottom.  Trim the zip ties to about 1/4”.

DIY Flower Tower

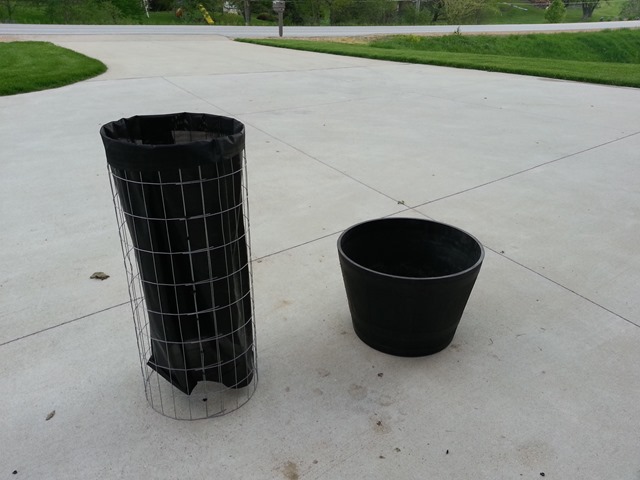
Step 3:  Wrap the landscape fabric around the outside of the tower to measure how much you’ll need.  Overlap an inch or two to ensure that soil doesn’t fall out through the seam.  Cut the fabric to size using scissors or a utility knife.  Slide the fabric inside the wire fencing.  Cut the excess fabric from the top of the tower leaving about 2 inches extending from the top of the tower to help secure the fabric to the tower.

DIY Flower Tower

Step 4: Fold the two inch flap over the top of the tower.  Use your utility knife cut small slits through both layers of fabric just under the metal rim.  Cut one slit in every third rectangle of the fencing.  Insert the zip ties through the slits and tie down the top of the fabric.  Cut the ends of the zip ties to about 1/4”.

DIY Flower Tower
DIY Flower Tower

Step 5:  Place fencing in your flower pot.  Fill the tower about 1/3 full with soil.  Add water to settle the soil.  Add another 1/3 of soil.  Add more water.  Fill to about 1 inch from the top of the tower with soil and add water.  Lightly press the soil once it is full to prevent sinking.  I repeated the last water and pressing step a few times.  Also add soil to the inside of the container just outside of the tower.

DIY Flower Tower

Step 7:  Cut a vertical slit in every other rectangle and stagger on your way down the tower.  (The Home Depot instructions suggest making a cross slit.  I found that the flowers were sturdier if I only made the horizontal slit.)

DIY Flower Tower

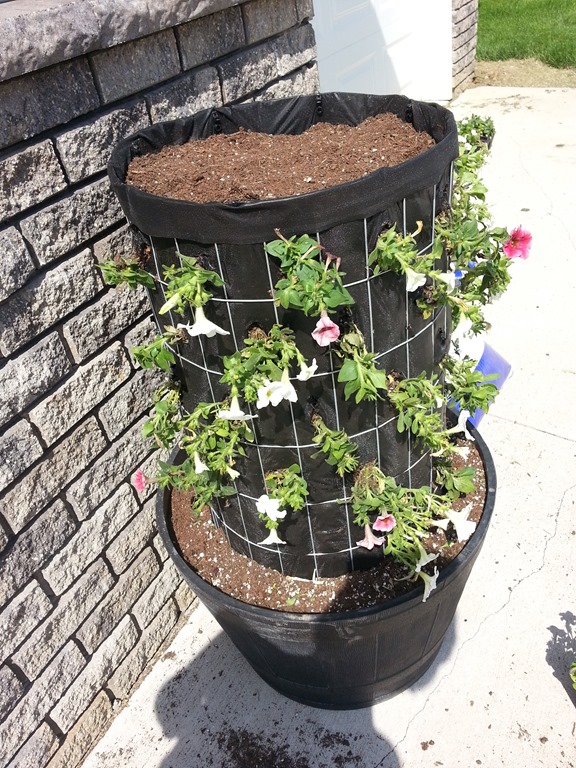
Step 8:  Add your flowers.  I chose petunias because they grow like weeds in sunny locations.  Use your finger to create a little pocket behind the opening to place the plant into.  It should fit snuggly but you don’t want to shove it in there and ruin the poor little plant’s roots.  Once the plant is inserted into the tower, make sure the flaps of the landscape fabric close around the stem of the flower to help keep the soil in while water.  Don’t forget to plant flowers in the top of the tower as well.

It doesn’t look like much at first.  I’m not going to lie.  It’s pretty hideous for the first two weeks.  I’m pretty sure the neighbors were wondering what the heck the monstrosity by our garage was. 

DIY Flower Tower
DIY Flower Tower

Step 9:  Water and cross your fingers that the thing lives.  As long as you chose petunias and you water them, the tower will live.  I’m certain of it.

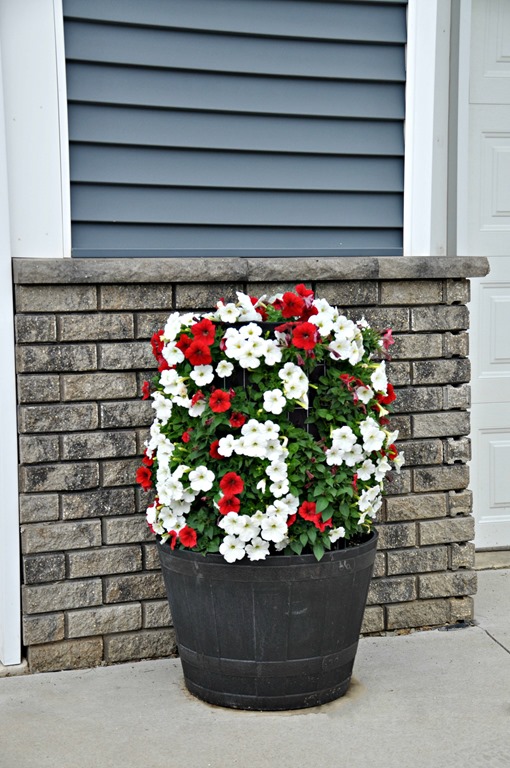
Our tower has been growing for about 3 weeks and it has filled in nicely.  There is still time for you to build one for the summer!

Flower Tower
DiY Flower Tower
How to build a Flower Tower {Decor and the Dog}
How to Build a Flower Tower {DIY}

Be sure to check out more projects on our DIY projects page!

Any fun outdoor projects planned for the summer? Do your neighbors wonder what the heck you are doing on a regular basis?