Blackberry Cobbler

If I haven’t yet convinced you to get yourself a cast iron skillet, this Blackberry Cobbler recipe just might do it.

This family favorite tastes even more delicious in a cast iron skillet.  But what doesn’t taste more delicious than something cooked in a pan coated in bacon grease?  Nothing is the correct answer.

Skillet Blackberry Cobbler from Decor and the Dog

The photography isn’t our finest. We made this for Nate’s dad’s birthday.  We made him sit and smell the deliciousness while we snapped photos. Happy birthday!!!

Start by mixing up the dough portion of this recipe.  In a large bowl, combine 2 cups flour, 1 cup sugar, 2 teaspoon baking powder and a teaspoon of salt.  Cut in butter until mixture looks like coarse crumbs. I used my hands.  Therefor there is no photo.  Stir in 1/4 cup boiling water just until moist.

In a separate bowl, dissolve cornstarch in 1/4 cup cold water.  Mix in 1 cup sugar, 1 tablespoon lemon juice and 4 cups of blackberries.  Transfer to your cast iron skillet and bring to a boil.  (We use our skillet on the side burner of our grill.)  Stir frequently.  You will get this.  Mmm, blackberries.

DSC_0148

Drop dough into the skillet by spoonfuls.

DSC_0151

Bake in a preheated oven at 400 degrees for ~25 minutes or until dough is golden brown.

DSC_0160

Serve with ice cream or whipped cream.  Take a generous portion.  It’s fruit. It’s good for you. And then go for a run.  Because that’s healthy too.

DSC_0168

Click the recipe below to download!

Blackberry Cobbler from Decor and the Dog

Are you a cobbler fan?  Are you a cast iron skillet fan?

DIY Outdoor Patio Table Tutorial

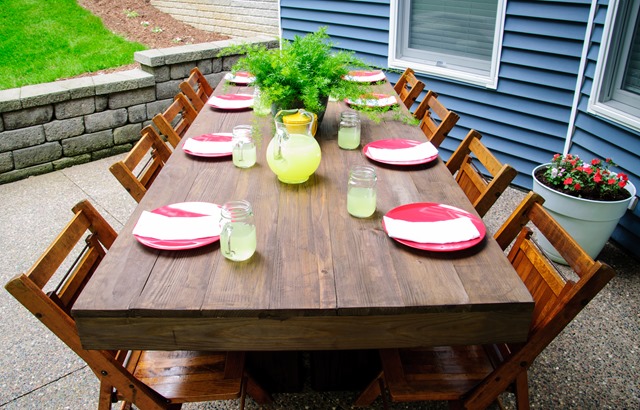
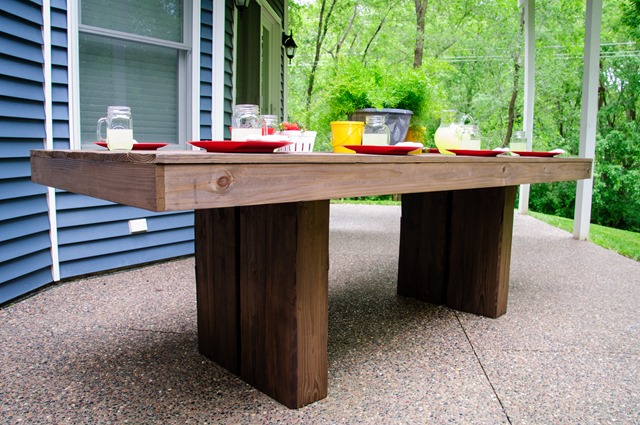
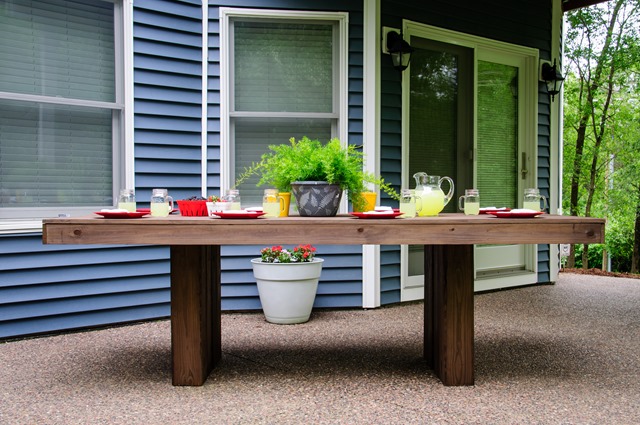
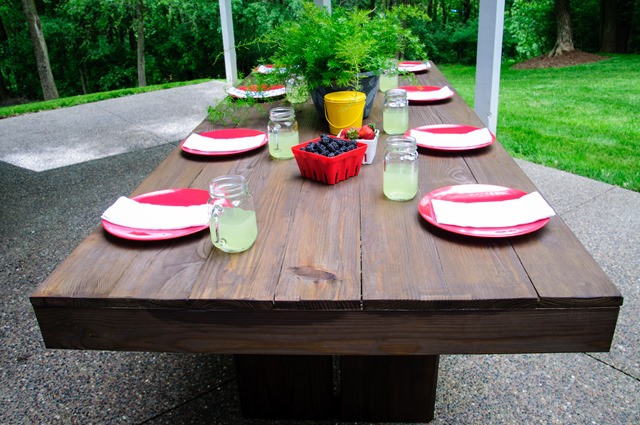
On Monday, I shared with you our newly built outdoor patio table.

DIY Patio Table Tutorial from Decor and the Dog
Outdoor Table-8

Today we’re back with a tutorial so you can make your very own.  The tutorial is wordy but we tried to include as many descriptions/instructions as possible.  We hate starting projects to find that the tutorial left out an important step or isn’t quite clear.  Feel free to ask any questions. We’ll answer them in the comment section below.

The table cost us about $150 to build.  Pressure treated wood is more expensive.  You could choose a less expensive wood.  We’re hoping that the pressure treated will better withstand the elements.  Do take proper precautions when working with pressure treated wood.  Wear a mask when cutting and sanding.  Wash hands well after handling the wood.  There are some concerns about pressure treated wood not being safe to eat from.  After much reading, we determined that it was the right choice for us.  We sealed the table and have no plans to eat directly off it.  It’s also not a table that we eat at every day so we feel the benefits of the pressure treated wood outweighed the risks for us. You choose what’s best for you!

Also, please excuse our disgusting hot mess of a garage in the photos below. Cleaning it is on our to-do list. We are two of the neatest and tidiest people but for some reason, our garage can never stay clean.  Ever.  There is some kind of law against it.  And it won’t stop raining in Iowa so all of our pictures are taken in our disgusting/poorly lit garage.  At least there are pretty sketch-up drawings?  Carry on.
Material List

Cut List

  • 1x4
    • 94.5" - 2
    •    38.5" - 2
    • 2x4
      • 37" – 4
      • 5" inside tapered out at 45 degrees for corner supports (can be approximate)
      • 6x6
        • 30" - 8

Directions

Glue one side of a 6x6 to another 6x6 to make one leg that is 11"x5.5"x30".  It is best to clamp these together overnight.  If you do not have clamps big enough for these, I think putting something heavy on it will work just fine.  Once dried overnight, sand smooth.

DIY Outdoor Patio Table Tutorial Leg
DIY Outdoor Patio Table Tutorial (Farmhouse)

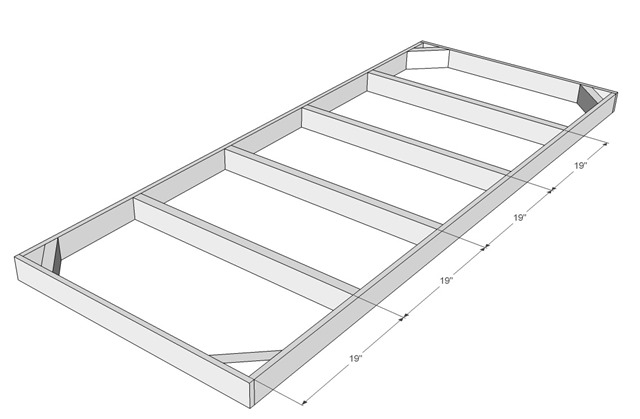
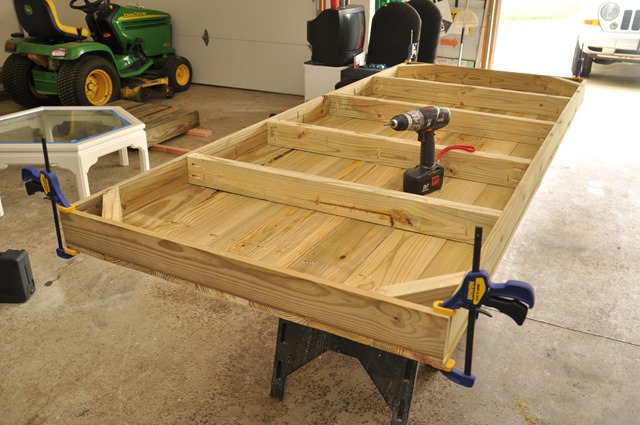
Using pocket hole screws, attach the 94.5" 1x4 to the 38.5” with the 1 1/4" outdoor screws and wood glue (do not use the regular kreg screws as they will rust with the pressure treated wood/weather conditions).  If you just have deck screws like I did, just make sure not to screw them too far as they will pop out the other side of the board.

DIY Outdoor Patio Table Tutorial (Outside frame)

Put the 37" center supports in at 19" intervals using glue, 1 1/4" screws and pocket holes.

DIY Outdoor Patio Table Tutorial Top Support

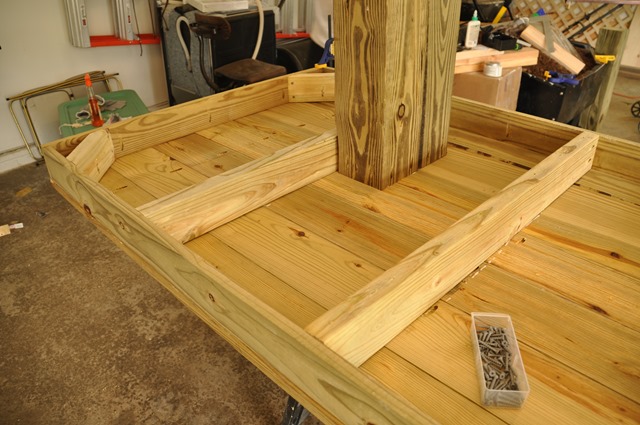
Drill straight down on the long sides of the corner supports so the hole comes out the middle of the 45 degree cut.  Using wood glue and 1 1/4" screws put in all 4 corners.

DIY Outdoor Patio Table Tutorial Corner Supports

Put pocket holes in each center support (I did 3) and in the center supports and on the edges.

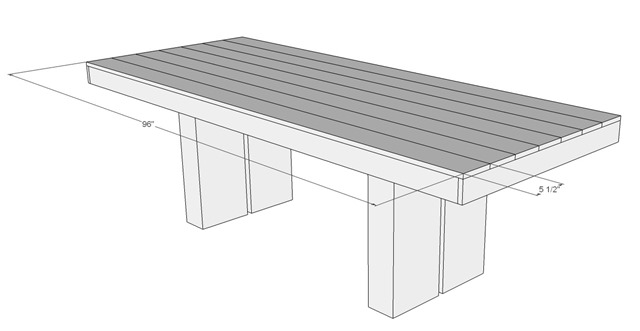
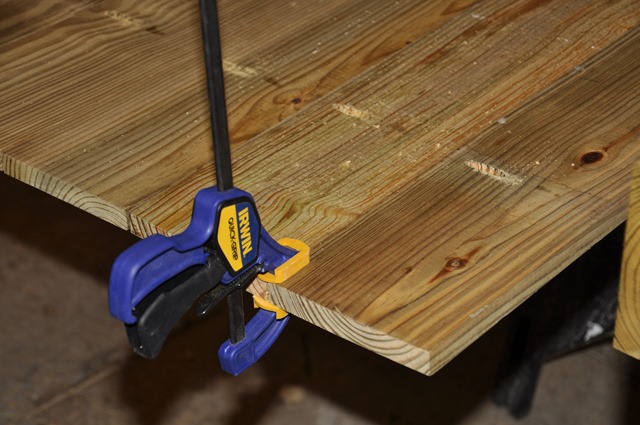
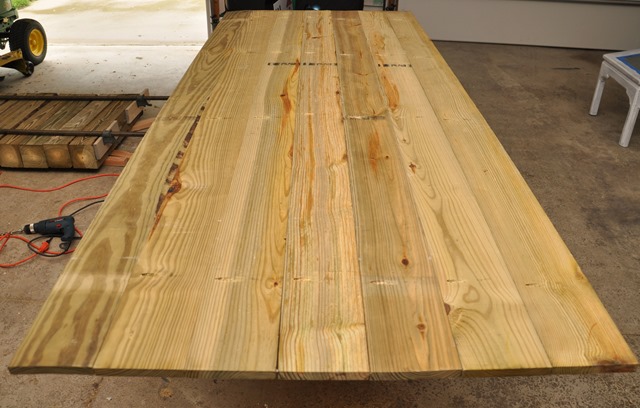
Check to make sure the 1x6 boards are 96" (mine were all uneven lengths longer than 96").  Place 4-5 pocket holes in each board, besides the last one, and using 1 1/4" screws and glue attach boards together for the table top.  I found it helpful to have a large clamp to help pull uneven boards together. Flip so top is up, sand out any unevenness. (Ignore the legs in the following photo.)

DIY Outdoor Patio Table Tutorial Top Dimension
DIY Outdoor Patio Table Tutorial (Farmhouse)

Flip top back over.  Put glue on top of the structure built earlier, flip down on top of the table top, screw together to top.

DIY Outdoor Patio Table Tutorial (Farmhouse)

While it still upside-down, on the outside 2x4 supports, measure 18" from each side, this is where the insides of the legs will go.  Make sure to mark the side of the board that is closest to the middle.

DIY Outdoor Patio Table Tutorial (Farmhouse)
DIY Outdoor Patio Table Tutorial Leg Bottoms

Put pocket holes on the 3 sides of the legs that will not be touching the 2x4 support.  Using glue place on the upside down table, using 1 1/4 screws in the pocket holes, and after drilling pilot holes in the 2x4 support (I did 4 in each 6x6, or 8 in each leg) attach with the 3" screws.  It might be best to stain the inside of the legs before attaching them as there is only 1" in between, we were able to get it stained with brushes after, but would be much easier before.

DIY Outdoor Patio Table Tutorial (Farmhouse)

Once all legs are attached, it is time to flip it back over.  You will want friends for this as it is heavy and awkward.  We had four of us (one on each corner).

DIY Outdoor Patio Table Tutorial Final Product

Stain with a outdoor stain/sealant or stain and outdoor poly.  We used Olympic Maximum (Stain + Sealant in One) in Oxford Brown.  We liked the fact that it was one coat and we were done.  Let dry and then you are ready to enjoy your new table.

DIY Outdoor Patio Table Tutorial (Farmhouse)
Outdoor Patio Table Tutorial | Decor and the Dog

See the full reveal here!

Any big outdoor patio plans this summer?  I need to get to hosting an outdoor gathering soon!

Photobucket Photobucket Photobucket PhotobucketPhotobucketPhotobucketfollow us in feedly

DIY Outdoor Patio Table

How was your weekend?  Nate and I were busy kids.  That’s what the old dude at the hardware store called us anyways. I’m going with it.

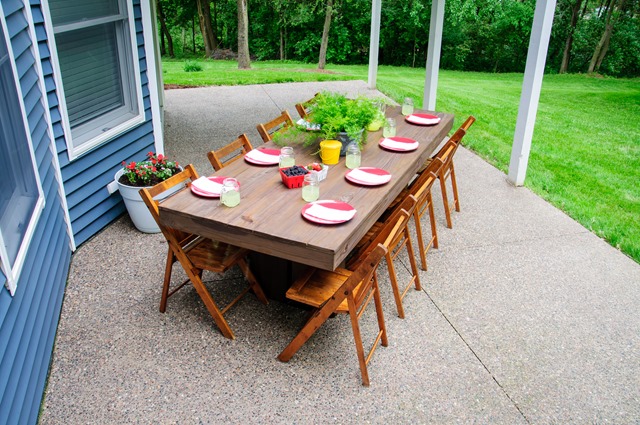
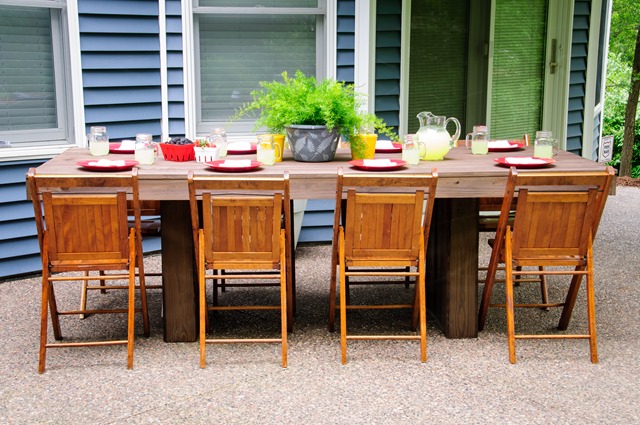
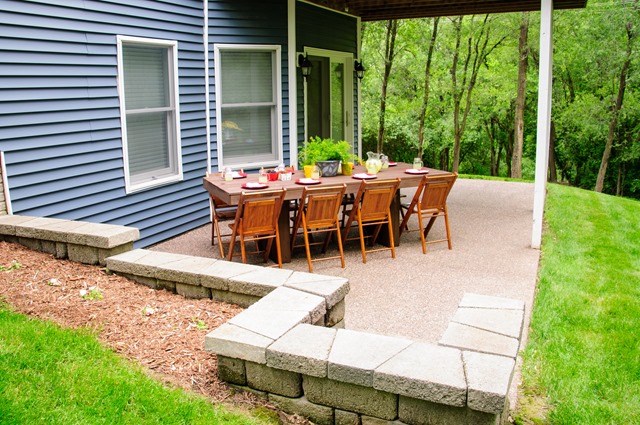
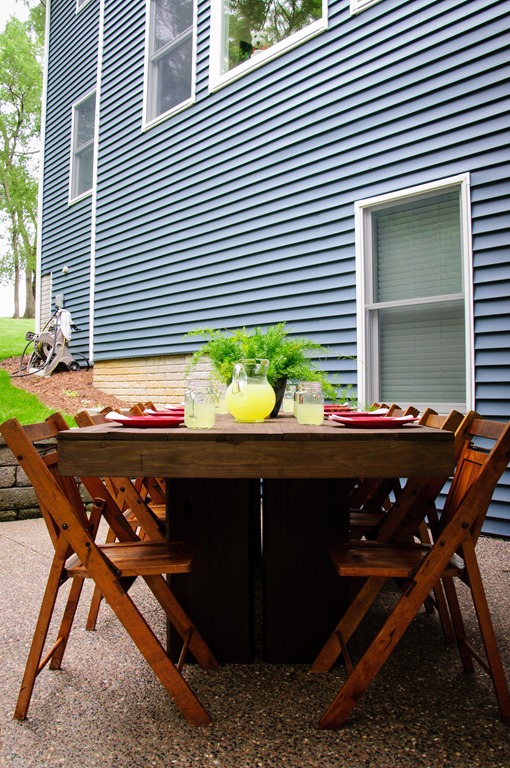
We put the finishing touches on our outdoor patio table that Nate built last weekend.  We enlisted the help of Nate’s parents to help us carry it from the garage.  Our patio now has a table and my car can go back in the garage. Double win.

DIY Outdoor Patio Table

This patio has been neglected for the 4 years that we have lived in the house.  We were holding off until we figured out how we wanted to use the space.  We are also cheap.  We aren’t done with the patio yet but we now have a good start.  We’ll probably finish the rest in another four years.  We don’t want to rush things.

DIY Outdoor Patio Table

Nate and I both liked this table.  Unfortunately $2000 wasn’t exactly in our outdoor budget range.  Or our indoor budget range for that matter. We were having a hard time shelling out hundreds of dollars (let alone thousands) for furniture that would end up eventually being covered in bird poo and insect guts.

DIY Outdoor Patio Table

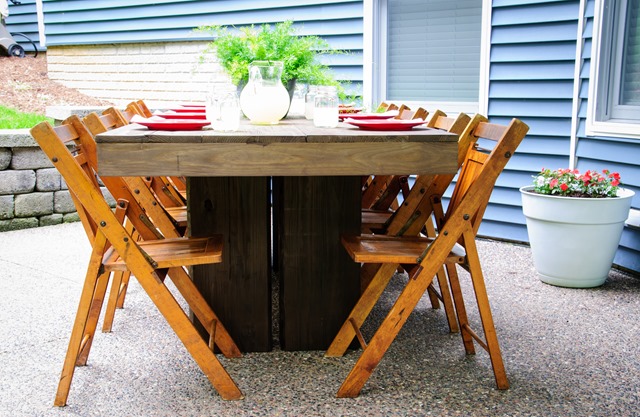
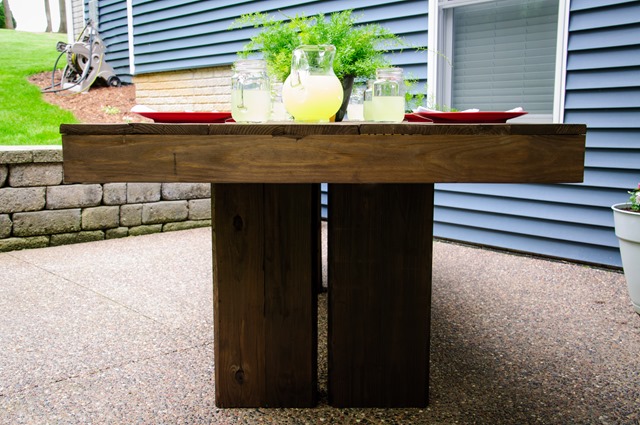
Nate thought he could build a similar table.  I said go for it.  $150 and a few hours later, we had ourselves an outdoor table. 

DIY Outdoor Patio Table

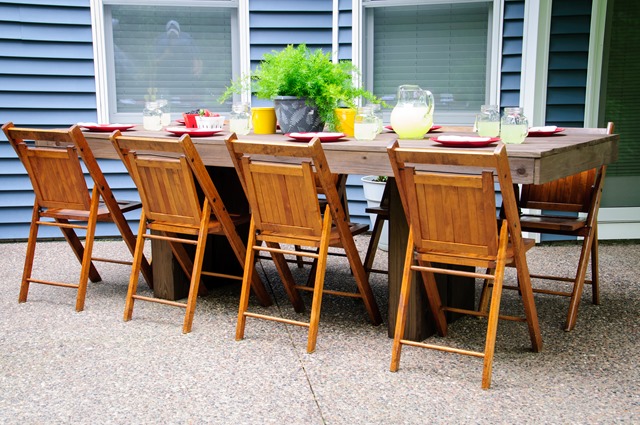
I found the outdoor chairs for $8/chair at a local antique store.  $220 isn’t exactly pocket change but we’re happy with it beings that we have a heavy/sturdy outdoor table with seating for eight.

DIY Outdoor Patio Table
Outdoor Table-4
DIY Outdoor Patio Table

Ike hasn’t been down to check out the table but he appeared to approve from his perch in the living room.

Outdoor Table-6

We’ll be back on Wednesday with a tutorial on how to make the table.  In the mean time, I have to continue to make the neighbors question why I’m setting a table for a fake dinner party outside.  We were actually going to use this setup yesterday until the gnats carried me back into the house.  You think I’m joking.  They are that bad.  Guess they dig the new outdoor table too.

Photobucket PhotobucketPhotobucket Photobucket PhotobucketPhotobucketfollow us in feedly