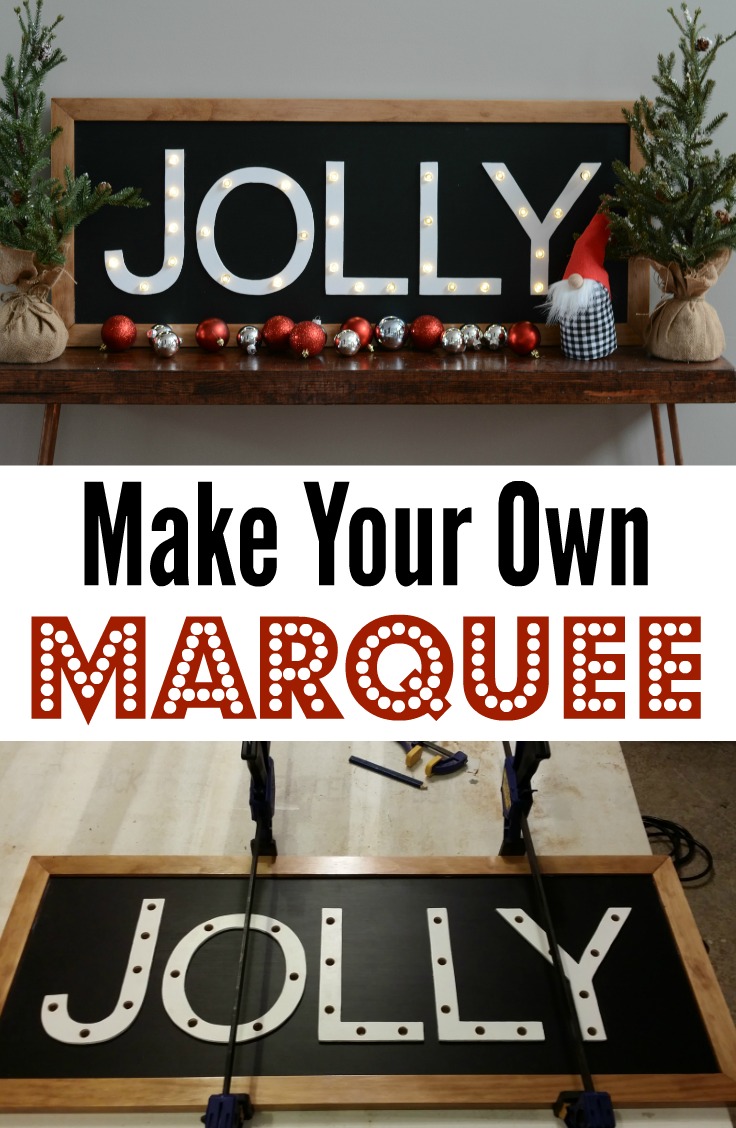
Holiday Marquee Tutorial-Ish
/I'm actually getting around to posting my holiday marquee sign tutorial before the 25th. Christmas miracles do happen.

Here we go. You can find the whole tutorial on Home Depot's website. I made a decent amount of modifications and I'm sharing them below!
Supplies:
SKILSAWBrad Nailer
Palm Sander
Drill with bits
Clamps
Loctite Power Grab Clear All Purpose Construction Adhesive
LED Battery Operated Globe Light Set
1/2" MDF (we used 2x2 sheet)
1/4" Plywood (we used a scrap from the garage but 2x2 would work for this sized sign)
You should start your marquee by cutting your 1/2" MDF board to size. (I used our circular saw.) An easier step would be to buy a board in a size that you can make work. I had to cut my board because I wanted to place it on my console table and there wasn't a readily available size that matched.
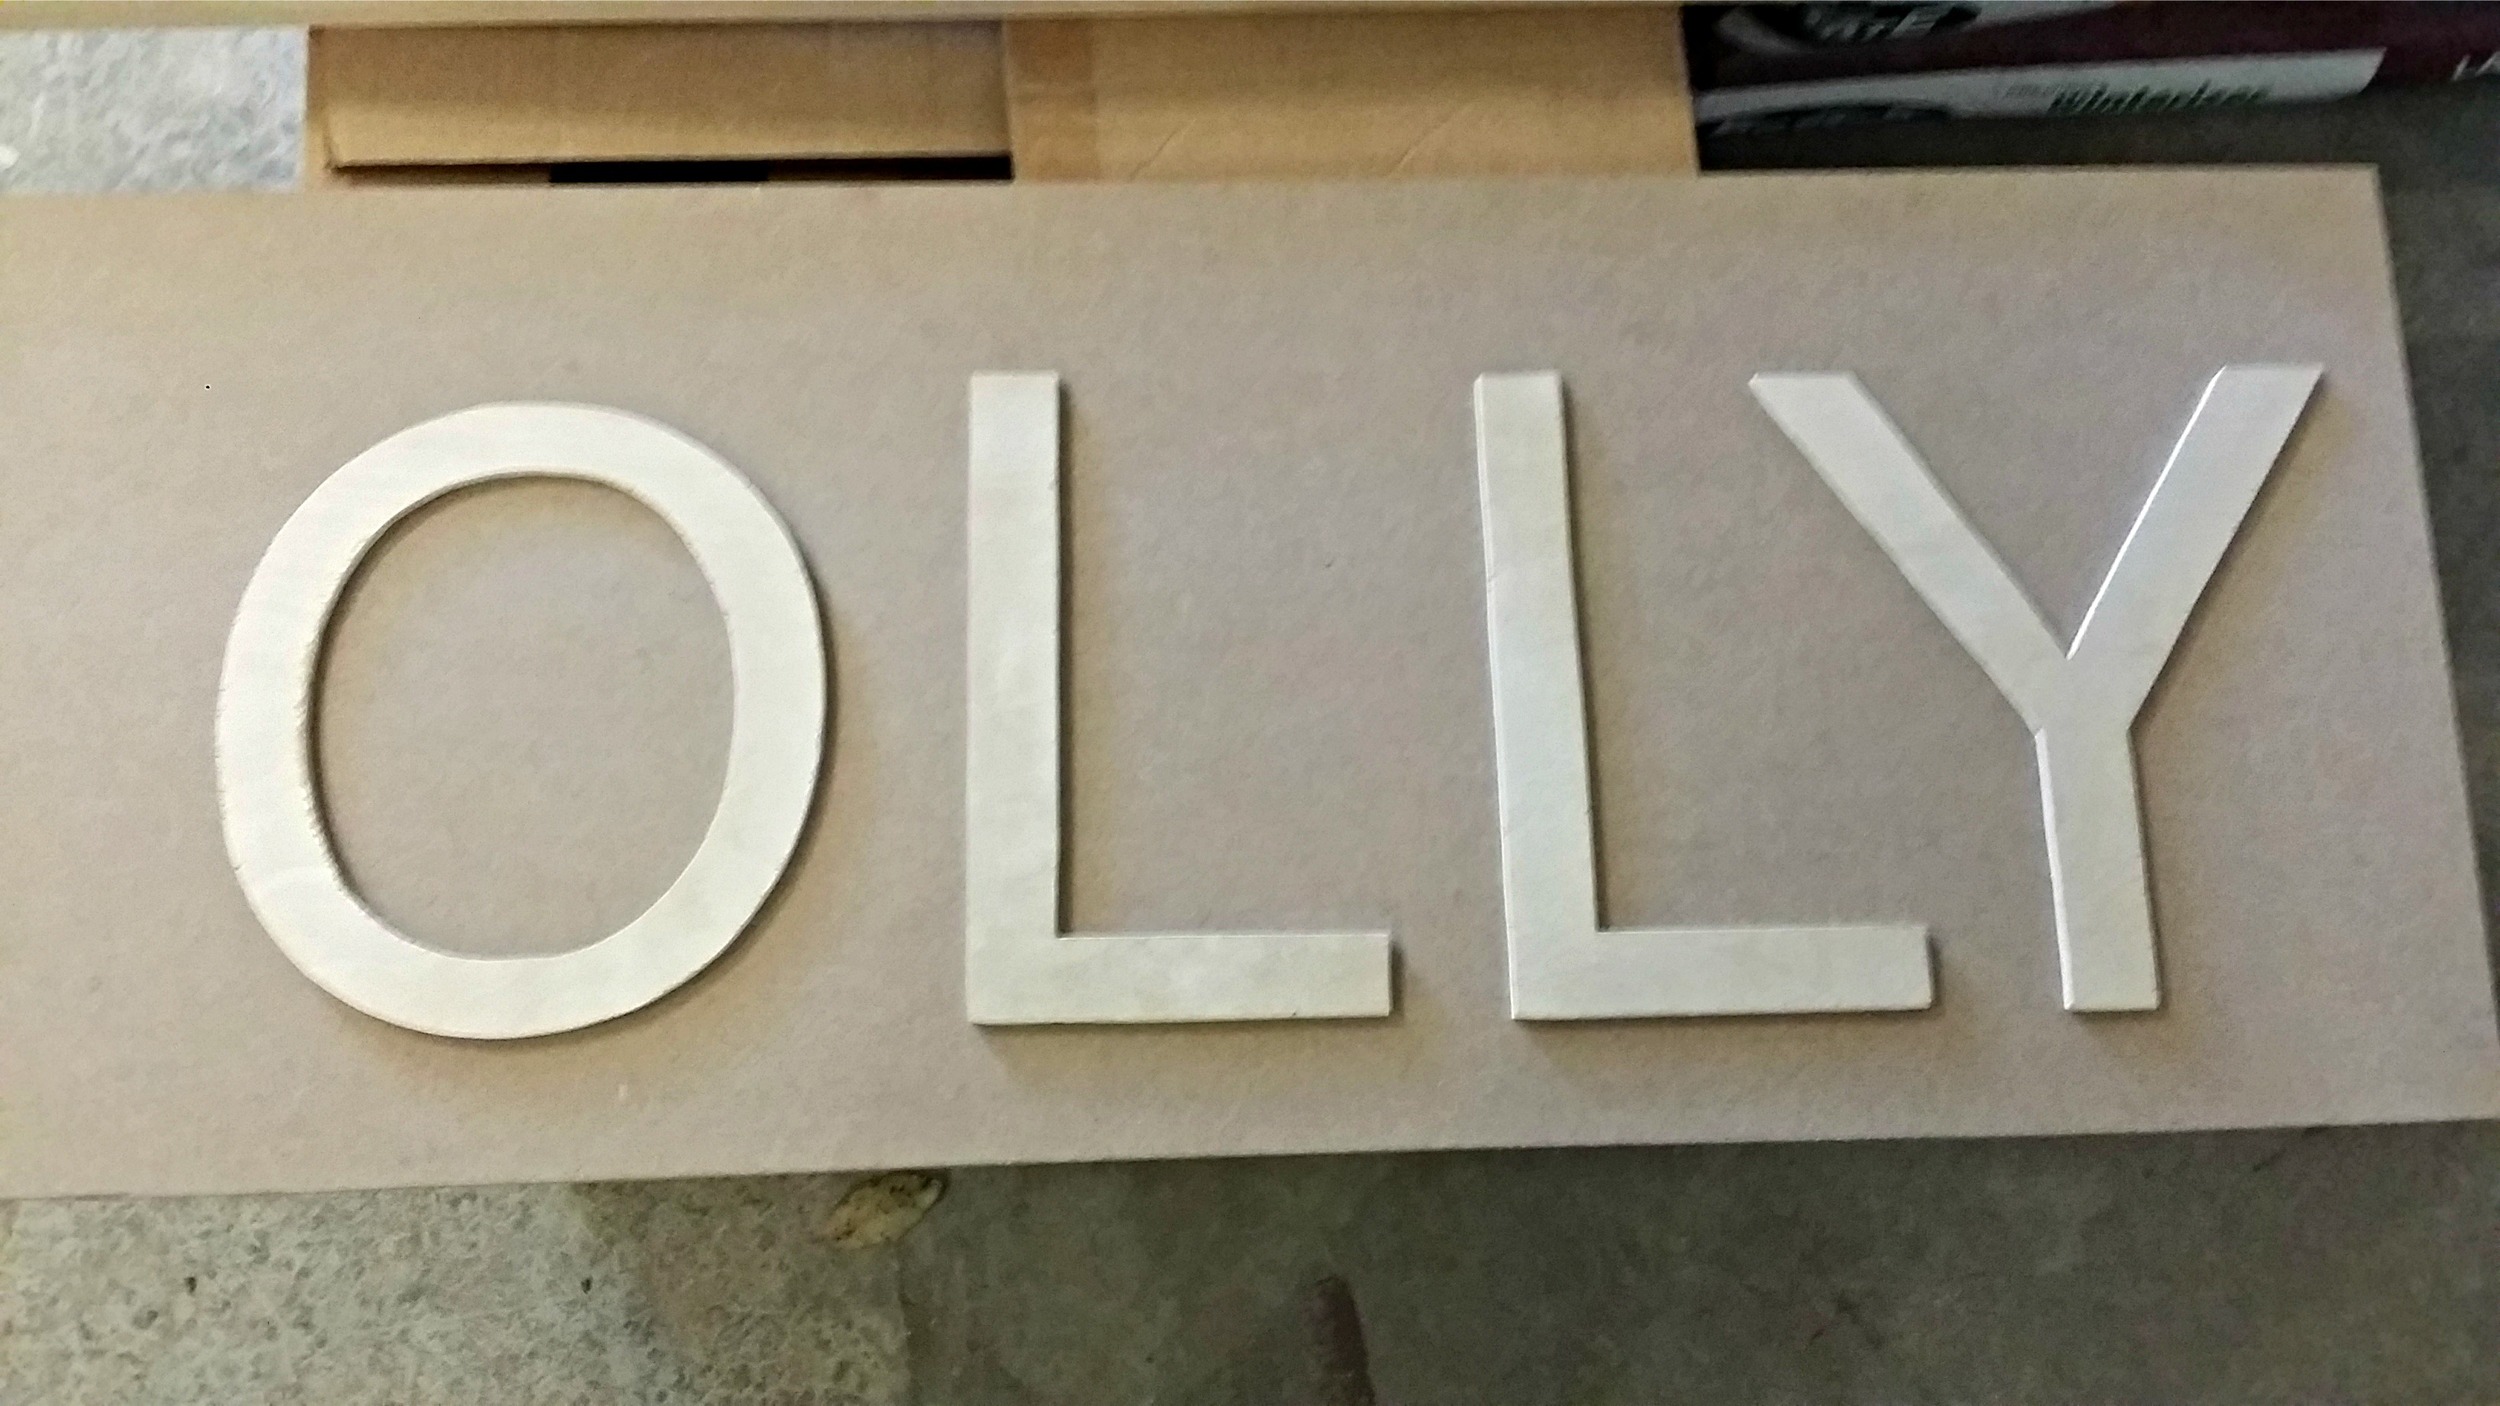
Next I traced my letters onto 1/4" plywood. I used plywood because it was easier to cut than the recommended 1/2" MDF. I used my Silhouette to cut out the letters. You could easily print letters from a Word document as well. Honestly, if I was to do this again I would probably just by pre-cut letters. I know that's sort of defeating the whole "Do-It-Herself: Use All of the Power Tools" thing. But for real, cutting the letters was a pain in the rear and super time consuming. I had never used a skill saw before so I had to practice a bunch before I could attempt the final letters. (There may have been tears of impatience. And mockery by my husband.) Also, pick the shortest word possible for your marquee. I kid. (I don't.)

Once my letters were painstakingly cut, I used a palm sander to smooth out the edges. I then placed them onto my board. Only to admire my handy work.
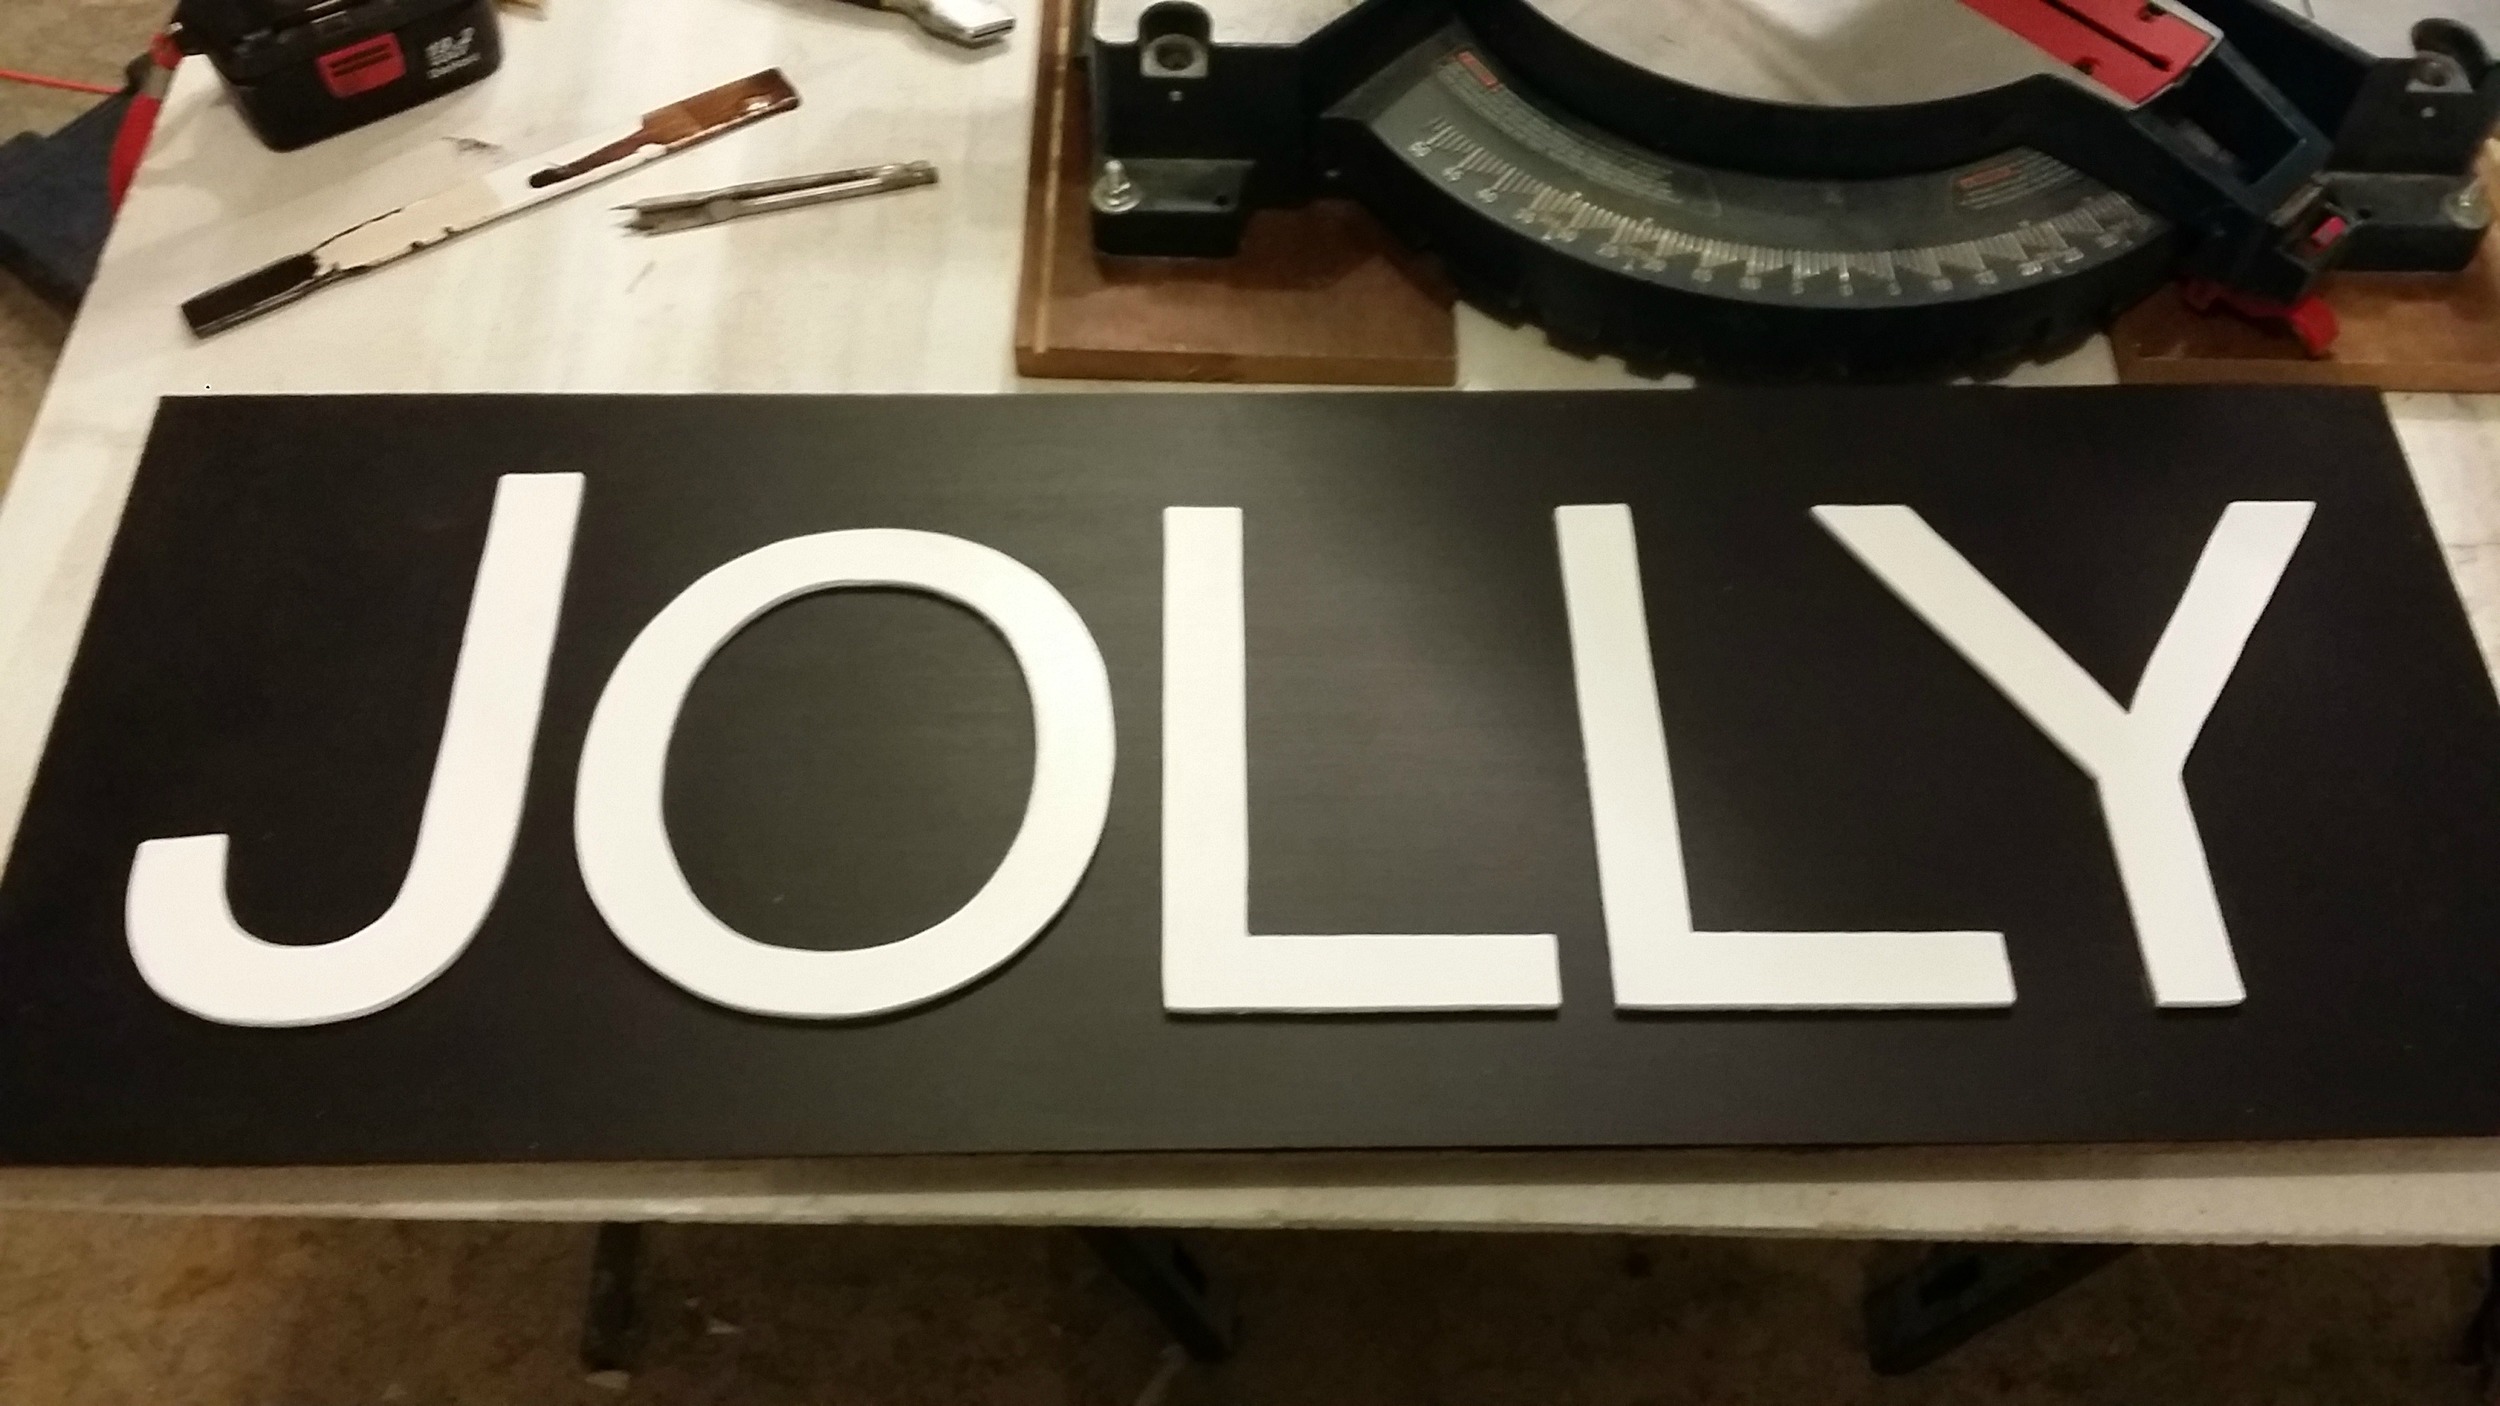
Next I painted the back board with chalk paint and the letters with white paint. I like the matte look of the chalk paint. Turns out it is very forgiving of saw dust which is nice in later steps.
Once the paint was dry, I adjusted my letters to their correct locations (evenly spaced). I then lightly traced around them with pencil so I would know where to replace them after I added construction adhesive to the back. I applied enough construction adhesive to hold the letter but not so much that it would ooze out the sides. The letters are light so it doesn't make much. You could also nail your letters at this point but I wanted a clean look so I went with adhesive.
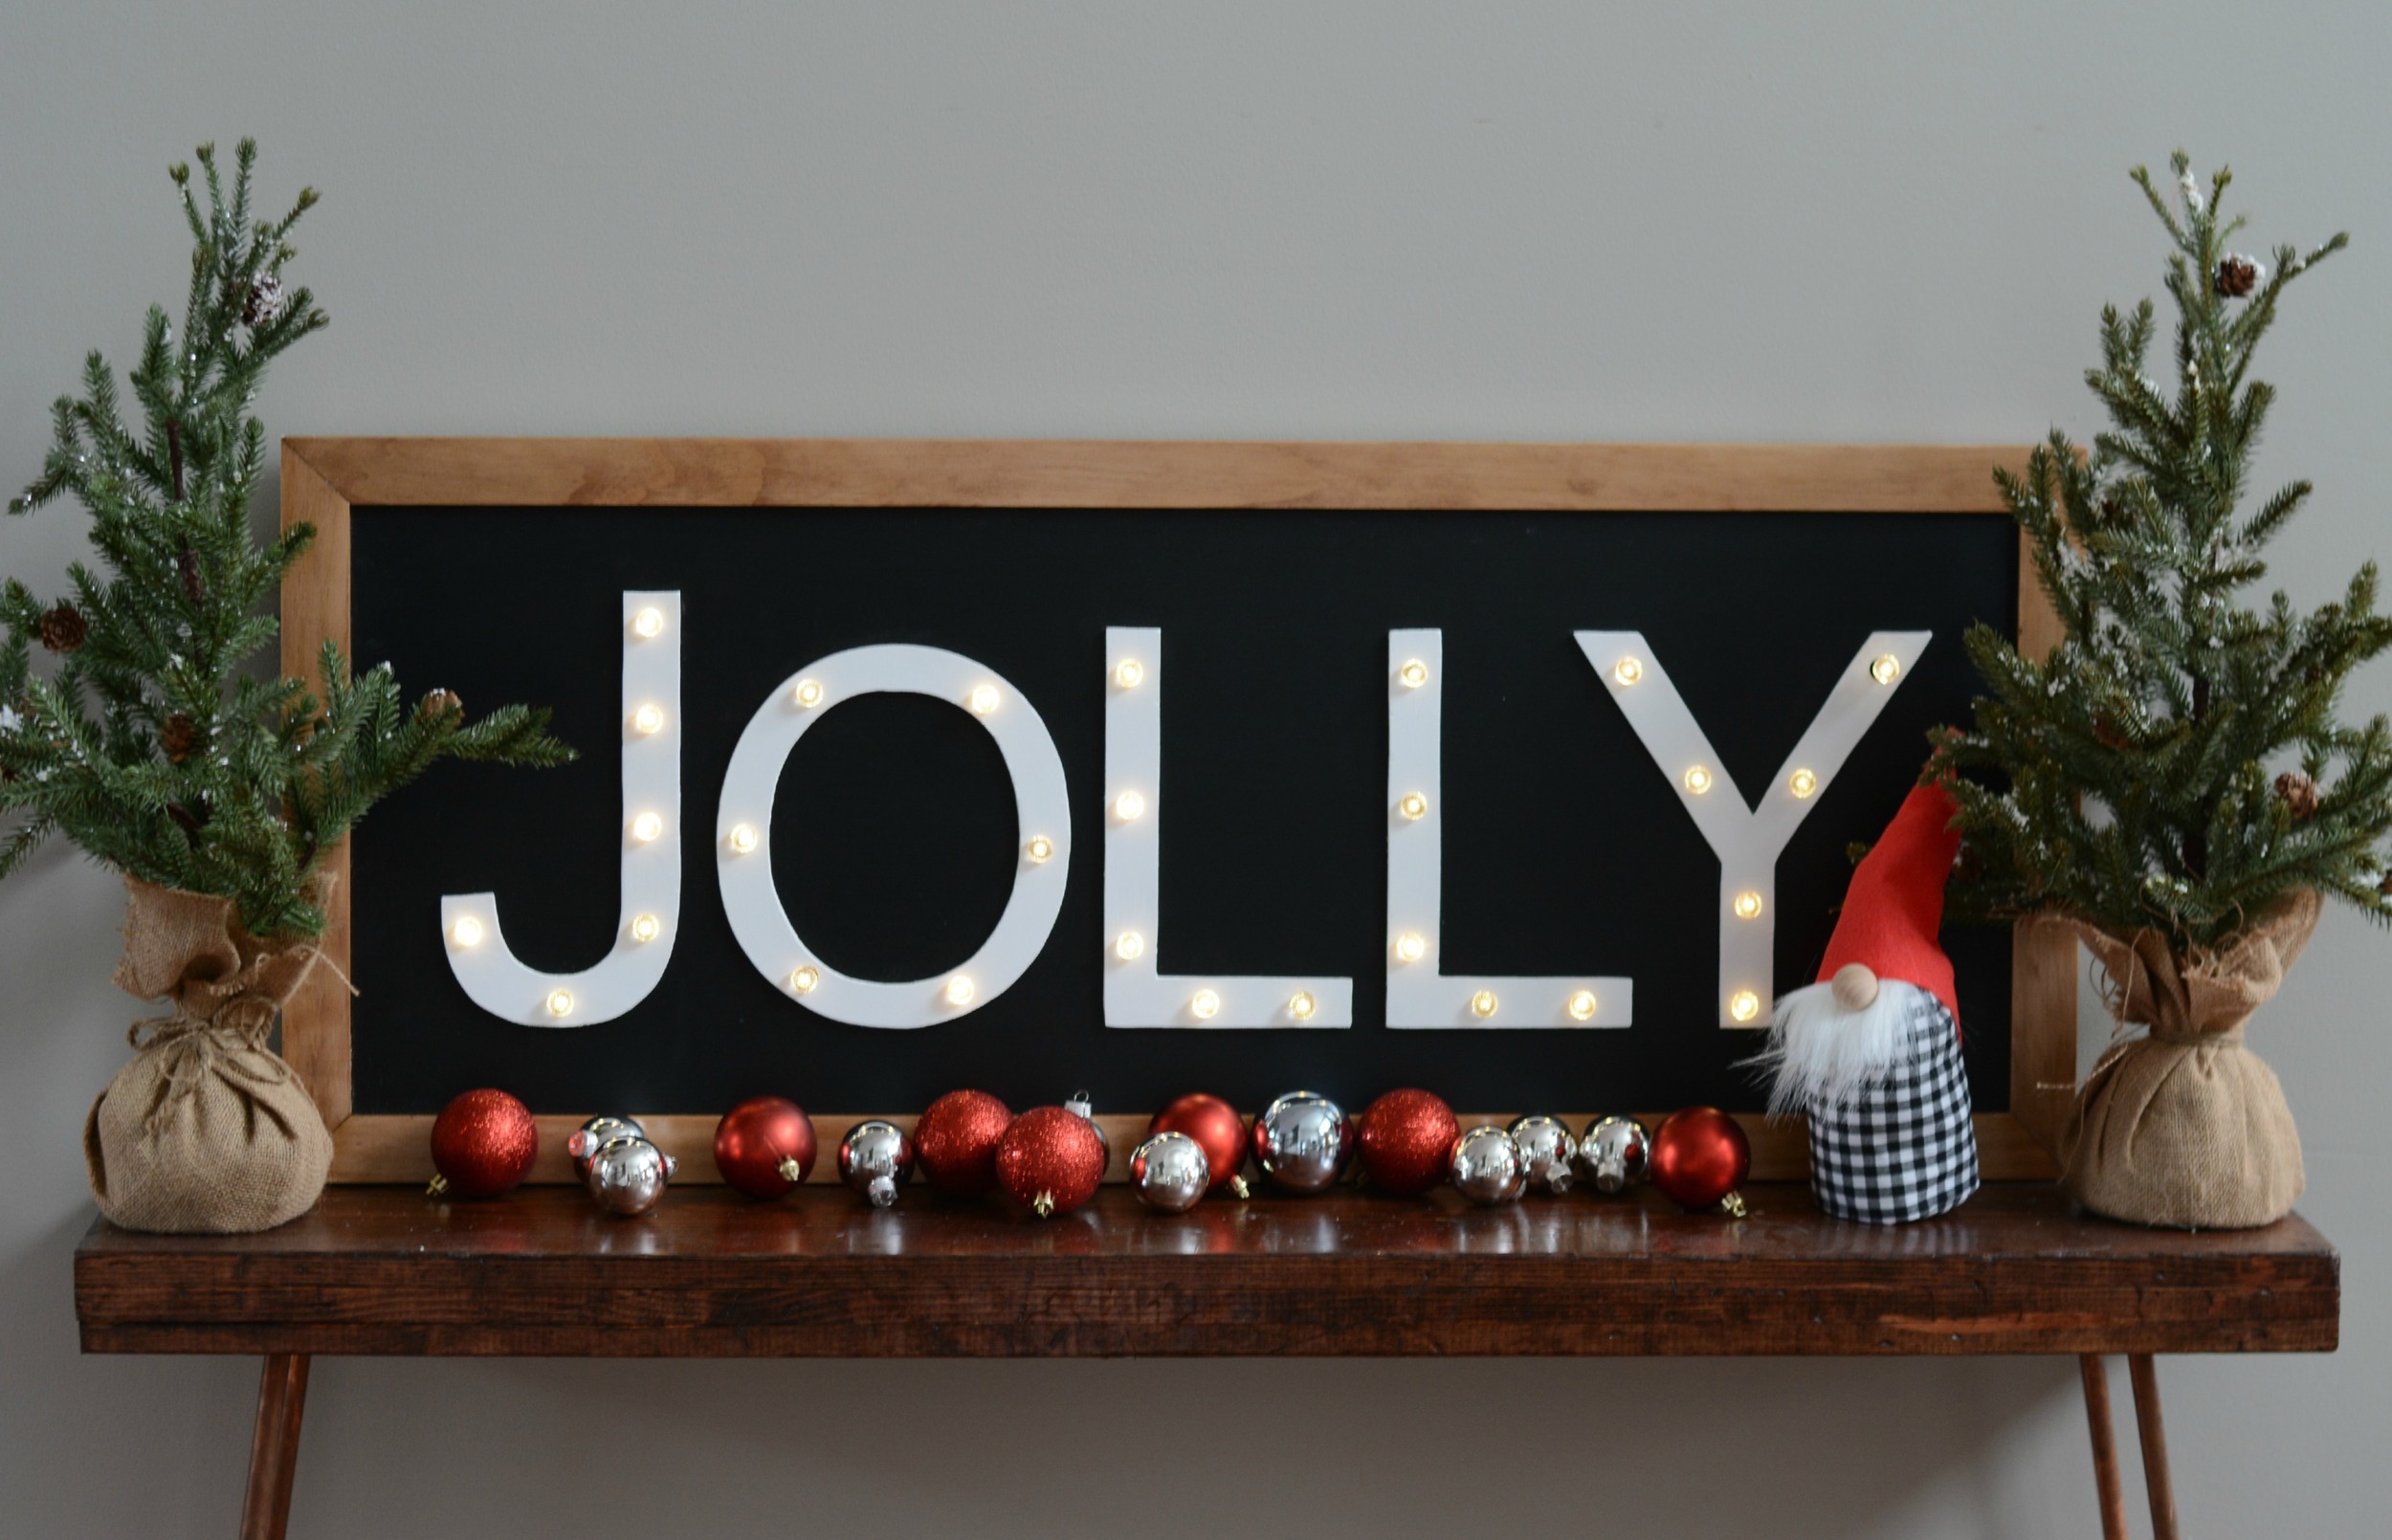
Here's the sign before I drilled a bunch of holes into. It'd make a really pretty sign without lights.
But there must be lights! Lights are everything at Christmas!
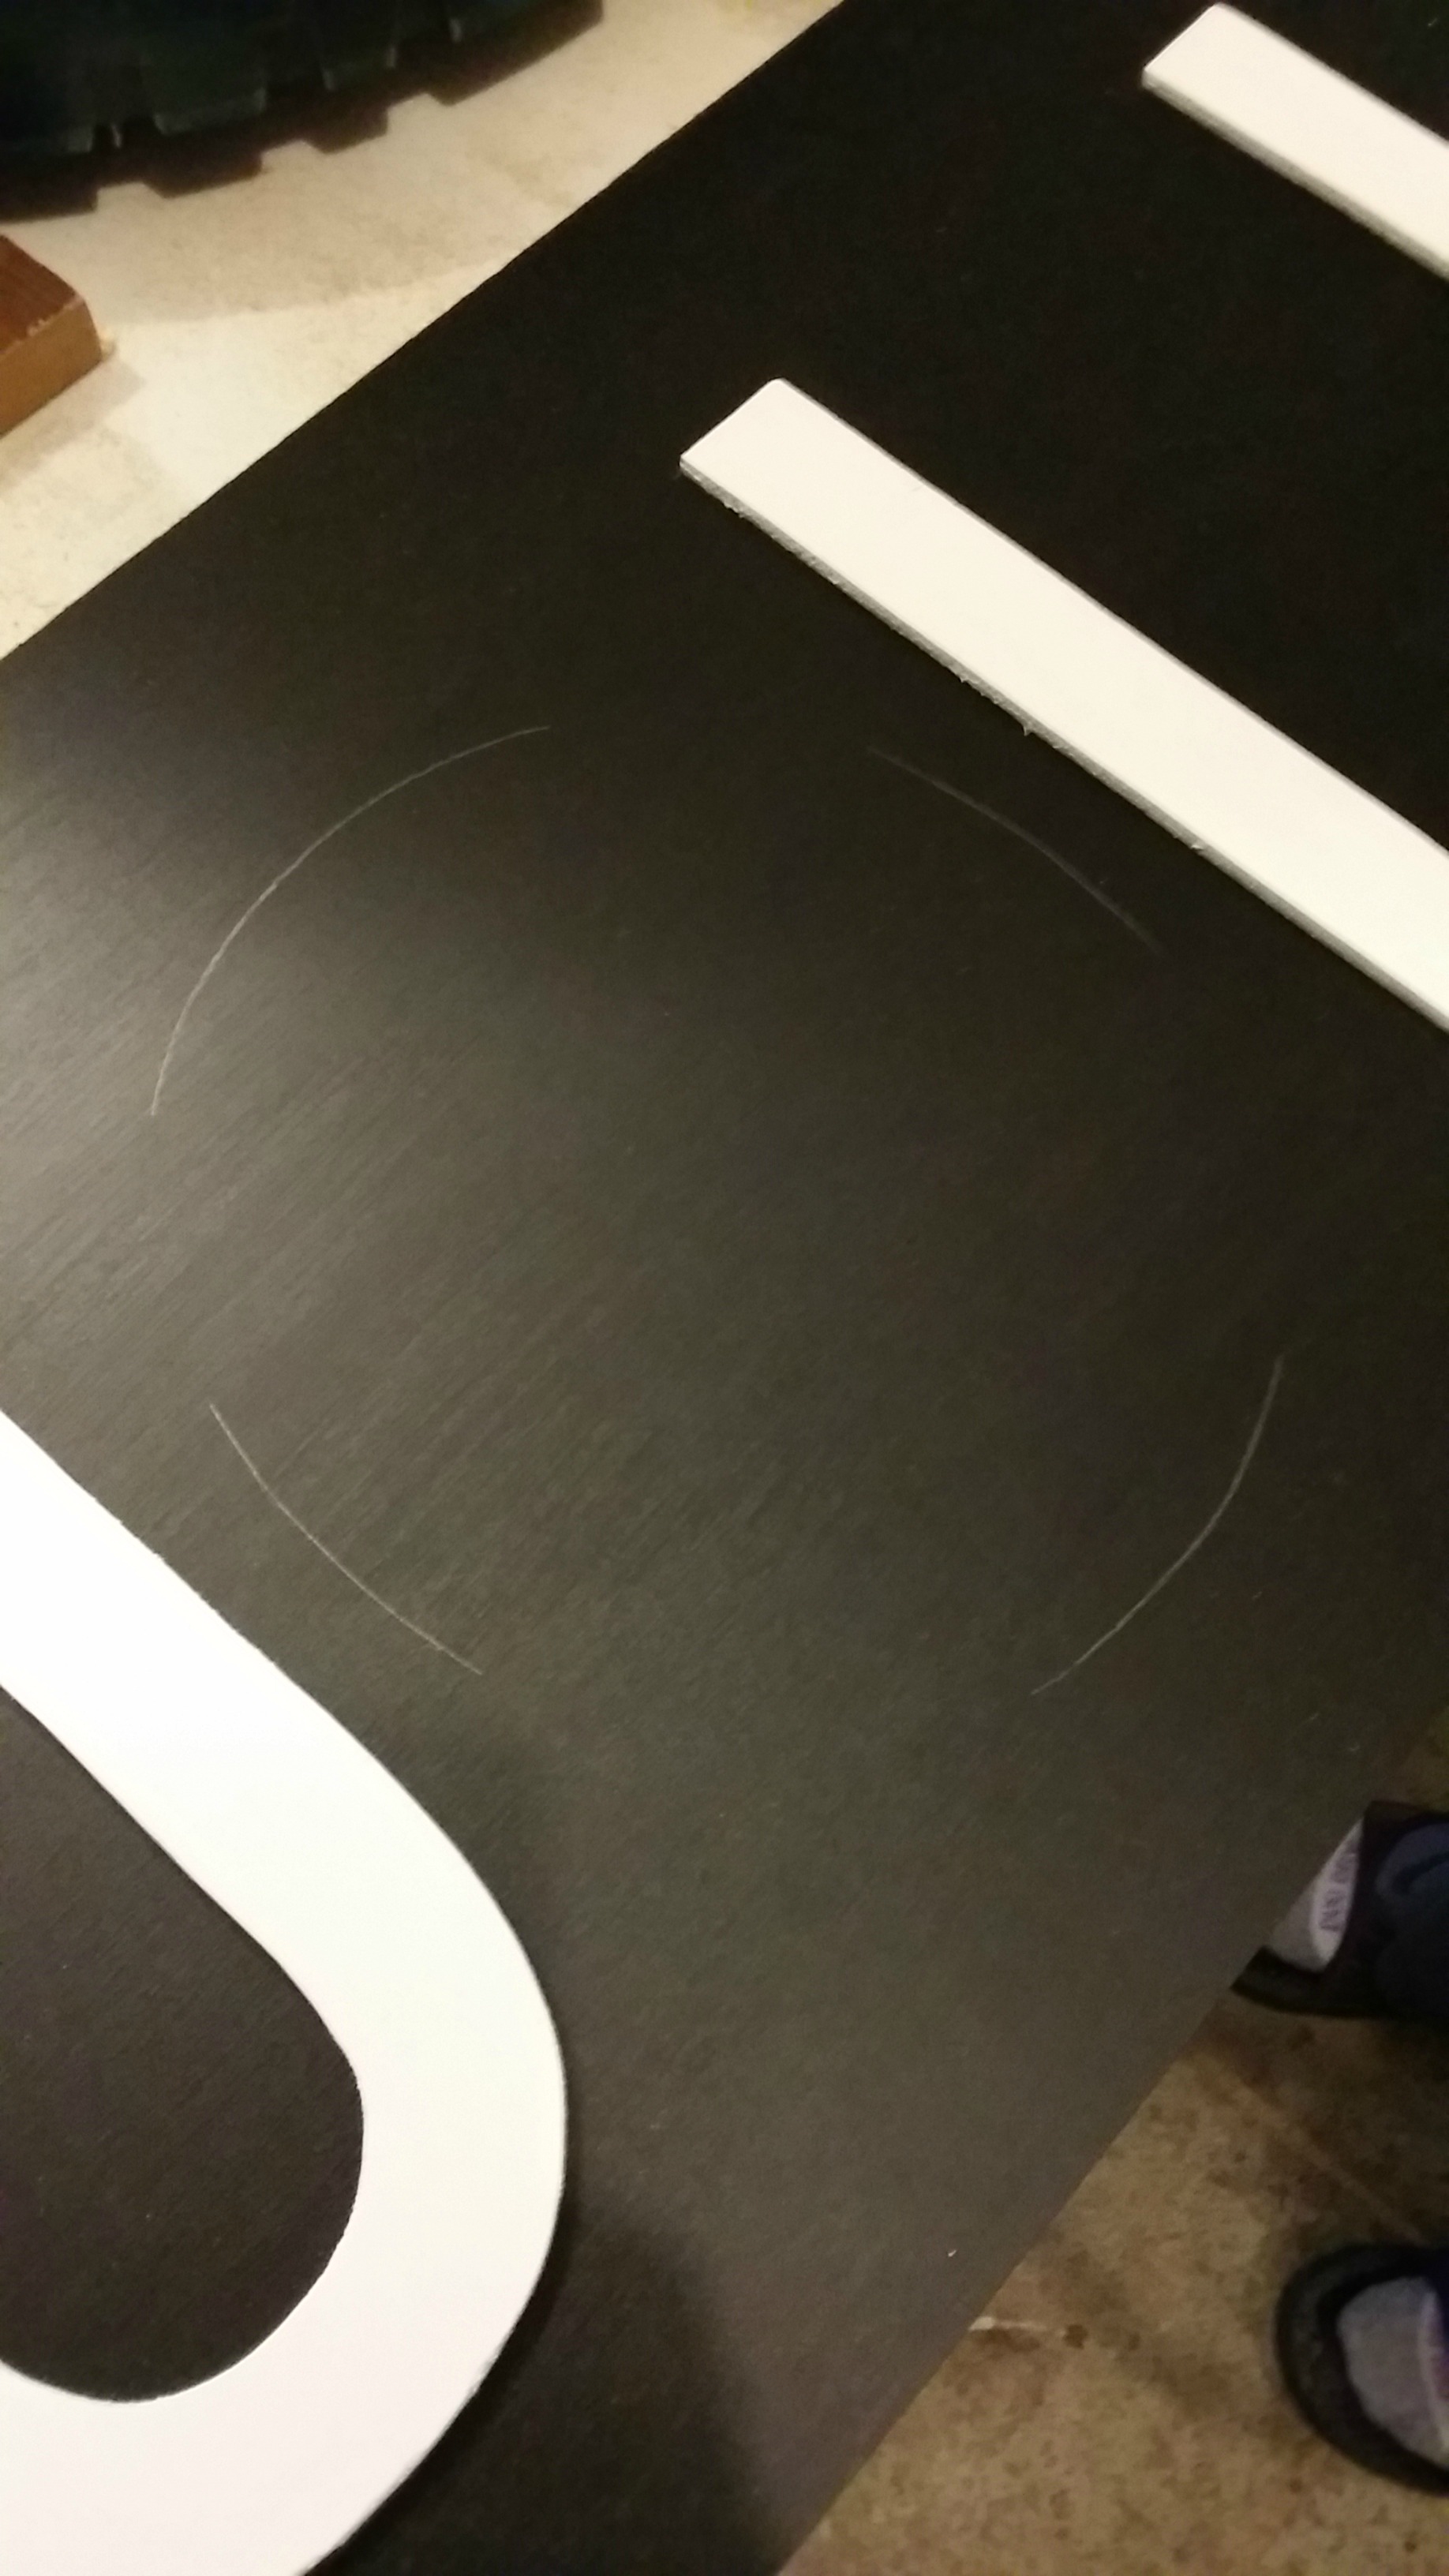
I then used my paper letters from the beginning. I determined the correct distance needed to space out my light set. I only bought one set so I needed to make it work. I determined the distance by figuring out how many lights I had. I wanted approximately even numbers on each letter. I also had to keep in mind the number of lights that would be needed on the back to get from letter to letter. A pencil is your friend at this point.

With the template on top. I drilled the holes. All 30-ish of them. This was probably my favorite part. I was all like "I am woman. Hear me and my power tools roar."

And then I was like "crap". I wanted to do this fancy frame and didn't know how to do it. So I had to ask Nate for help. Womp. Womp. This was the only step he helped me on so I figured that was pretty decent. (Well, he did a lot of supervising which was probably more work and more painful for him than actually doing the project.) I could have done something easier but I really wanted the frame to be super pretty with mitered edges and all. I can now cut at angles though. Not extremely well but I can do it. ROAR!
I stained the edges with Minwax's Polyshades in Antique Walnut. When that was dry, Nate helped me apply the border with construction adhesive. I added a few Brad nails to the corners to make sure they were snug.

I then shoved the lights through the holes. I did have to remove the bulbs to slide each light through the holes. No big deal. I taped the wires on the back to hold the lights in place. I used painter's tape and it's still holding up just fine. Duct tape would probably work better.

All in all a fairly doable project. It definitely took more time than I anticipated. Mainly because I like to make things harder than they need to be. I'd say it took me about 4 hours to construct the whole thing.
I'm so in love with it though that I would hands down make another one. Probably will next year!

Now it's time to check out our favorites from Monday's Dare to Give Handmade. (Be sure to check out the picks my Rachel, Katja and Kim as well!)
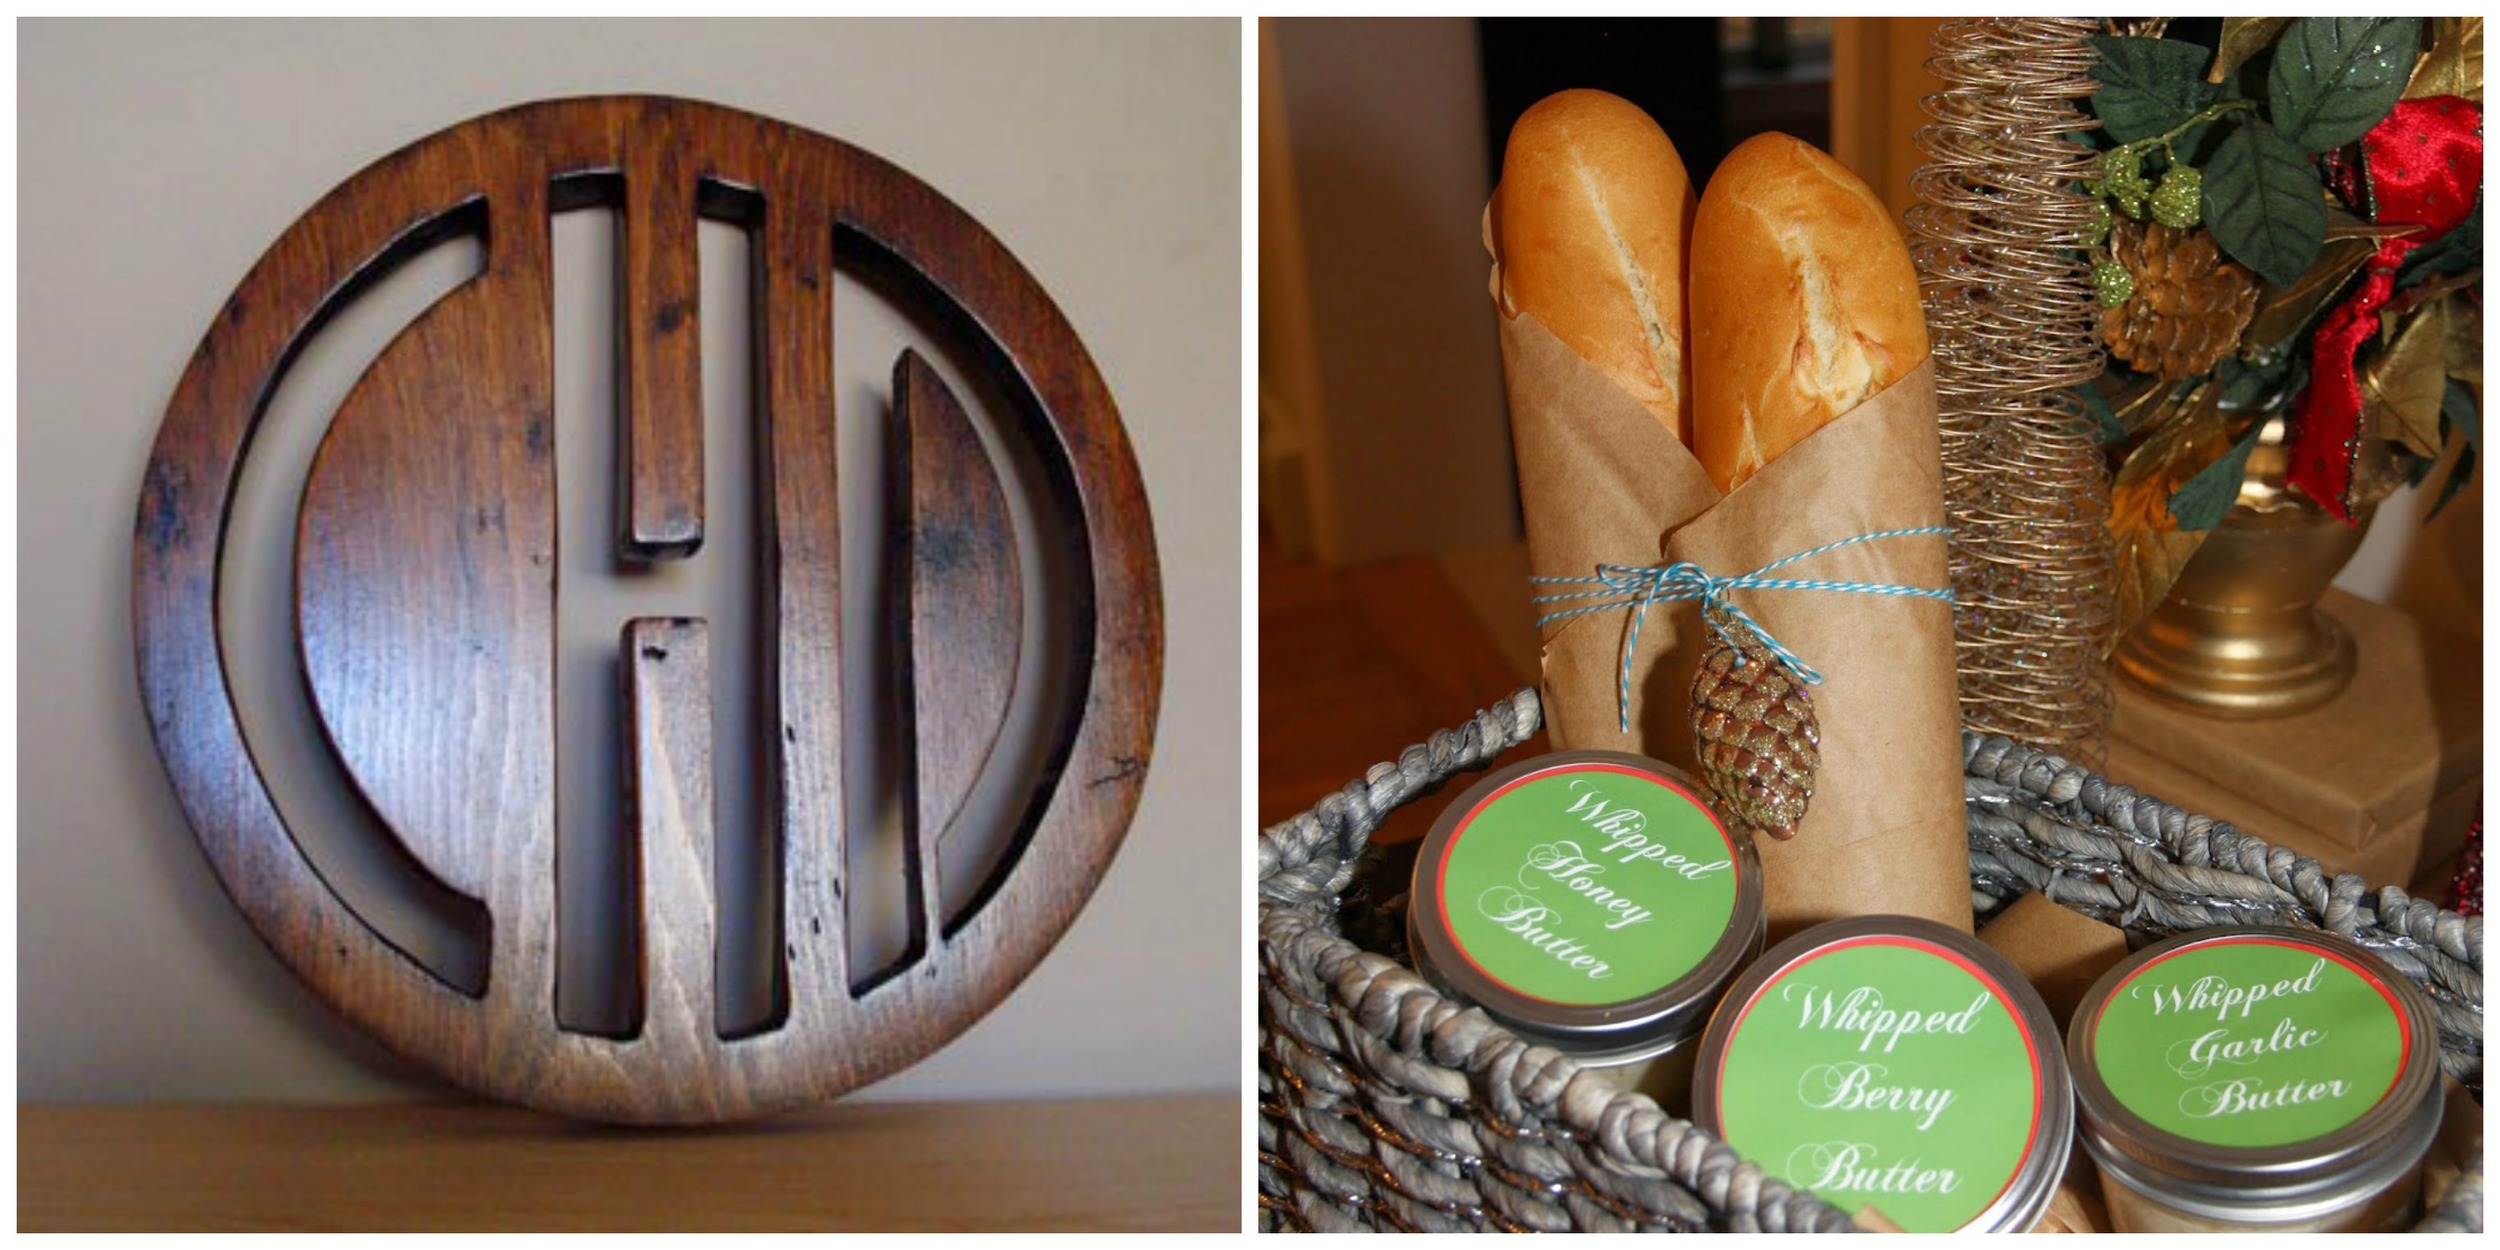
This wood monogram by Home on 129 Acres is stunning. If I wasn't recovering from the above letter cutting, I just might attempt it. I also loved the idea of gift bread and homemade butter from Food, Laughter and Happily Ever After. I always feel like there is SO MUCH FOOD at Christmas but it's usually in the form of sugar. Candy, candy canes, candy corn and syrup!!! But this, this is good stuff. I'd totally take that on my doorstep!
Don't forget to link up to Dare to DIY on Monday over at NewlyWoodwards. We dare you to deck the halls! DIY something new to deck your halls. Did you find something in a catalog that you wish you had? Wreaths, stockings, pillows or advent calendars? Make it! Inspire us all to do the same***
Who's making a marquee? There's still time! Big weekend plans? Shopping done? Nate and I are having a relaxing enjoy all things Christmas weekend!