How to Build a Vertical Garden Tutorial {Part 3: #DigIn}
/Who’s ready to see our vertical garden?

Fun, right? Well, it’ll be even more fun when it fills out. Hurry up Summer!
Who’s ready to tackle a DIY vertical garden of their own?
We used the vertical garden plans from the Garden Club over at Home Depot. There are written plans and a video on how to make the garden. We found the video to be the most helpful. We did notice that the cut list was incorrect and the material list was missing many items. We added those in our tutorial for completeness sake.
FYI, there are many photos and steps to this project. Don’t let the length of this tutorial scare you you away. We just wanted to make the tutorial as complete as possible. The build really isn’t super hard. It is, however, a little time consuming. I think it took us 3-4 hours in total. We’re happy with the results though so it was totally worth our time.
Get your shopping shoes/building shoes on!
Materials:
- One 8’ 1'”x4” whitewood (or pressure treated wood) (We choose whitewood for all.)
- Two 6’ 1”x2” whitewood (or pressure treated wood)
- Two 6’ 1”x6” whitewood (or pressure treated wood)
- 2’x4’ 1/4” plywood
- One 2’x8’ lattice
- Wood Stain (or exterior paint). (Sample size is the perfect amount.)
- We chose Behr Weather Proofing in Driftwood Grey.
- 1 1/2” exterior screws (1 small box)
- We also used Brad nails.
- Plastic drop cloth 2mil (or other moisture barrier cloth 2 mil)
- Weed barrier
- Two 2' 3/4” PVC pipe
- Two 3/4” PVC caps
- Two 3/4” x 1-1/4” PVC reducing bushing
- PVC glue
- Silicone caulk (optional)
- One bag (1.5 cubic feet) potting soil
- Flowers (Read about our suggestions for choosing vertical garden flowers here.)
- Tools needed:
- Drill, drill bits, pocket hole jig (optional), utility knife, staple gun/staples
- Miter saw, circular saw (or have the cuts made at Home Depot)

Cut List:
1”x6” whitewood
- 2 @ 32”
- 3 @ 15”
- 2 @ 32”
- 1 @ 15”
- 1 @ 18”
- Inside length: mitered at 45 degrees
- 2 @ 28.5”
- 2 @ 16.5”
3/4” PVC
- 1 @ 10”
- 1 @ 24” (If you bought a 2’ section, you do not need to cut this piece.)

You can stain your project at any time. I think it’s easier to do in the beginning and it gives the project a cleaner look. We used Behr Weather Proofing Stain in Driftwood Grey. It’s important that you choose a finish that is appropriate for outdoor projects. The Behr Weather Proofing is a stain and sealer in one which will help protect the box from the elements. I applied two thin coats. It’s also important that you wear your best paint shirt when photographing blog photos. (Go Hawks!)

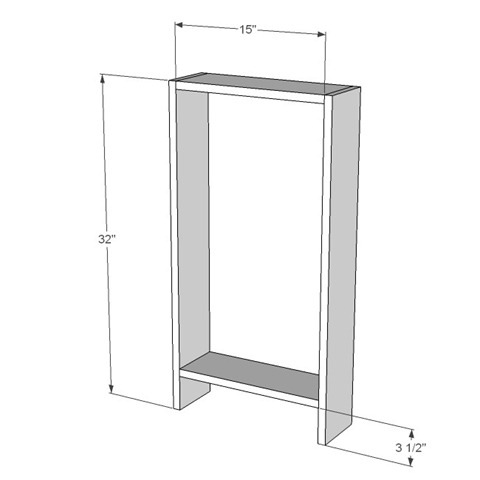
Take the 2 lengths of 32” wood and measure down from the top by 14” and up from the bottom by 3 ½”. Place a mark at each location. Now with the three 15” boards place one at the very top one at the 14” mark and one at the 3 ½” mark. These boards will form the body and compartments of the soil bed. With the exception of the board at the 14” mark secure these in place with 1 ½” exterior wood screws.
 |

Take the piece of 16 ½” x 32” plywood and secure it to the bed frame with wood screws or with Brad nails. This will form the back of the vertical garden.

 |
| Add caption |
Now it is time to add the holes for our drip irrigation system. We used ¾” PVC pipe, one routed to each compartment. Use a 1” spade bit to drill a hole in the top of the frame. This hole should be just off center.
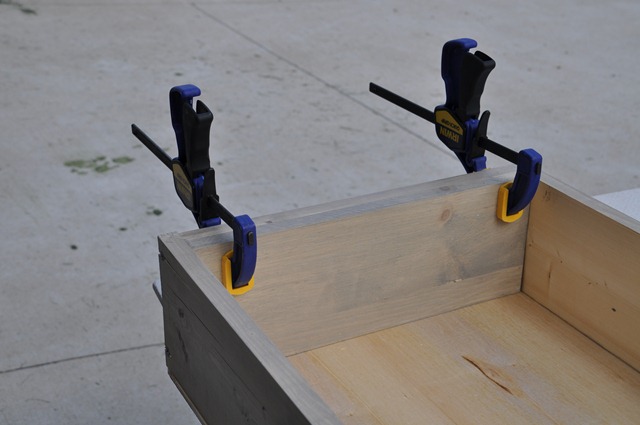
Take the middle support we didn’t screw in previously and slide it up and flush with the top board. Using clamps to hold the board in place, drill the hole for the lower compartment. Clamping the boards together insures that the holes line up perfectly for the PVC to pass through.

 |
Remove the clamps and move the center support back down to the 14” mark and fasten it into place as you did the top and bottom.


Use a 1” spade bit to drill a second hole in the top of the frame. This hole should be just off center. This hole will be used to provide irrigation for the top compartment.

To build the frame supports, the 32” long 1”x2” are drilled into place along the top edge of the soil bed. This frame will give us extra surface area to support the face frame.
Repeat this with the 18” long 1”x2” along the top and the 15” long 1”x2” along the bottom.


Now it is time to line the bed with a moisture barrier. This is to prevent wood rot and warping from the moist soil over time. We used a plastic drop cloth (2 mil) that stated it was waterproof.

Line each compartment and secure the plastic with staples. Cut away excess.

Next we need to add the irrigation system. Make “X” shaped incisions in the plastic liner at the 1” holes we drilled into the bed frame.

Take the piece of 10” long PVC and push through the hole without the pass through into the second compartment. When it’s about half way in attach the PVC cap to the end within the box. Glue the 1 ¼” - ¾” reducing bushing to the opposite end (this will be the water inlet). Repeat the process for the 24” long PVC line that runs into the second compartment.


We applied a thin strip of caulk to the outside to help keep moisture from getting in behind the pipes and plastic. Wipe away excess.

Use a small drill bit to place drip holes along the length of PVC, rotating slightly after each one. Make sure to get a hole as close to the bottom as possible to prevent standing water in the line. On the 24” pipe, you only need to drill the drip holes into the second compartment section of pipe, leaving the rest solid.

Now you are ready to add your soil. We filled the bed half way with soil and then wetted it down a little. We did this to help settle the soil to ensure that we filled it full enough. We then filled the bed with soil up to the edges. You should also shake the box a little to help the soil settle. Check out that heavy lifting. Hercules, Hercules!


Next, cover the bed with a layer of weed block placed tightly across the top. Staple in place. Cut away excess.

Now you need to construct the frame. Using the mitered 1”x4” pieces, place pocket holes (using a pocket hole jig) on the outside edges of the 16.5” pieces. Secure with clamps. Attach together with pocket hole screws. Optional: You could bypass this step and attach each piece to the bed frame with screws. We chose to use the pocket hole method because it creates a stronger and cleaner looking frame.


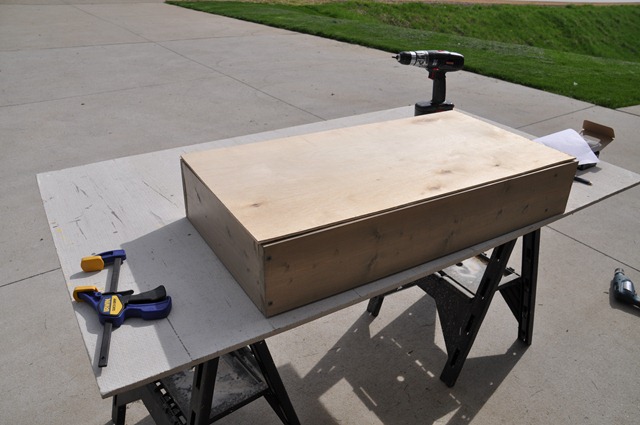
You now have a completed box and frame. It’s time to attach them using Brad nails (or screws).


I told Nate to look like he was having fun. That’s what I got.
You’re almost there. We just need to add the lattice!

Measure the inside of your box. It should be 20.5”x16.5” but it could vary. Cut your lattice with a circular saw. Attach the lattice to the inner support with Brad nails or staples.


Woo hoo! You did it. Your vertical garden build is ready for flowers! We’ll finish the series on Friday with planting the flowers, hanging and styling the vertical garden.


