DIY Nursery Mobile | Tutorial

People that follow me on Pinterest were all like "MICHELLE'S HAVING  A BABY!!!" because I was pinning nursery stuff.  I was pinning them onto a board titled "Meg's Nursery".  Meg isn't my alter ego.  She's a college buddy.  Don't you worry.   I'd totally have a secret board for my own nursery business.

I mentioned last week that I did a couple of quick projects to help Meg with her nursery decor. (See the growth chart here!)

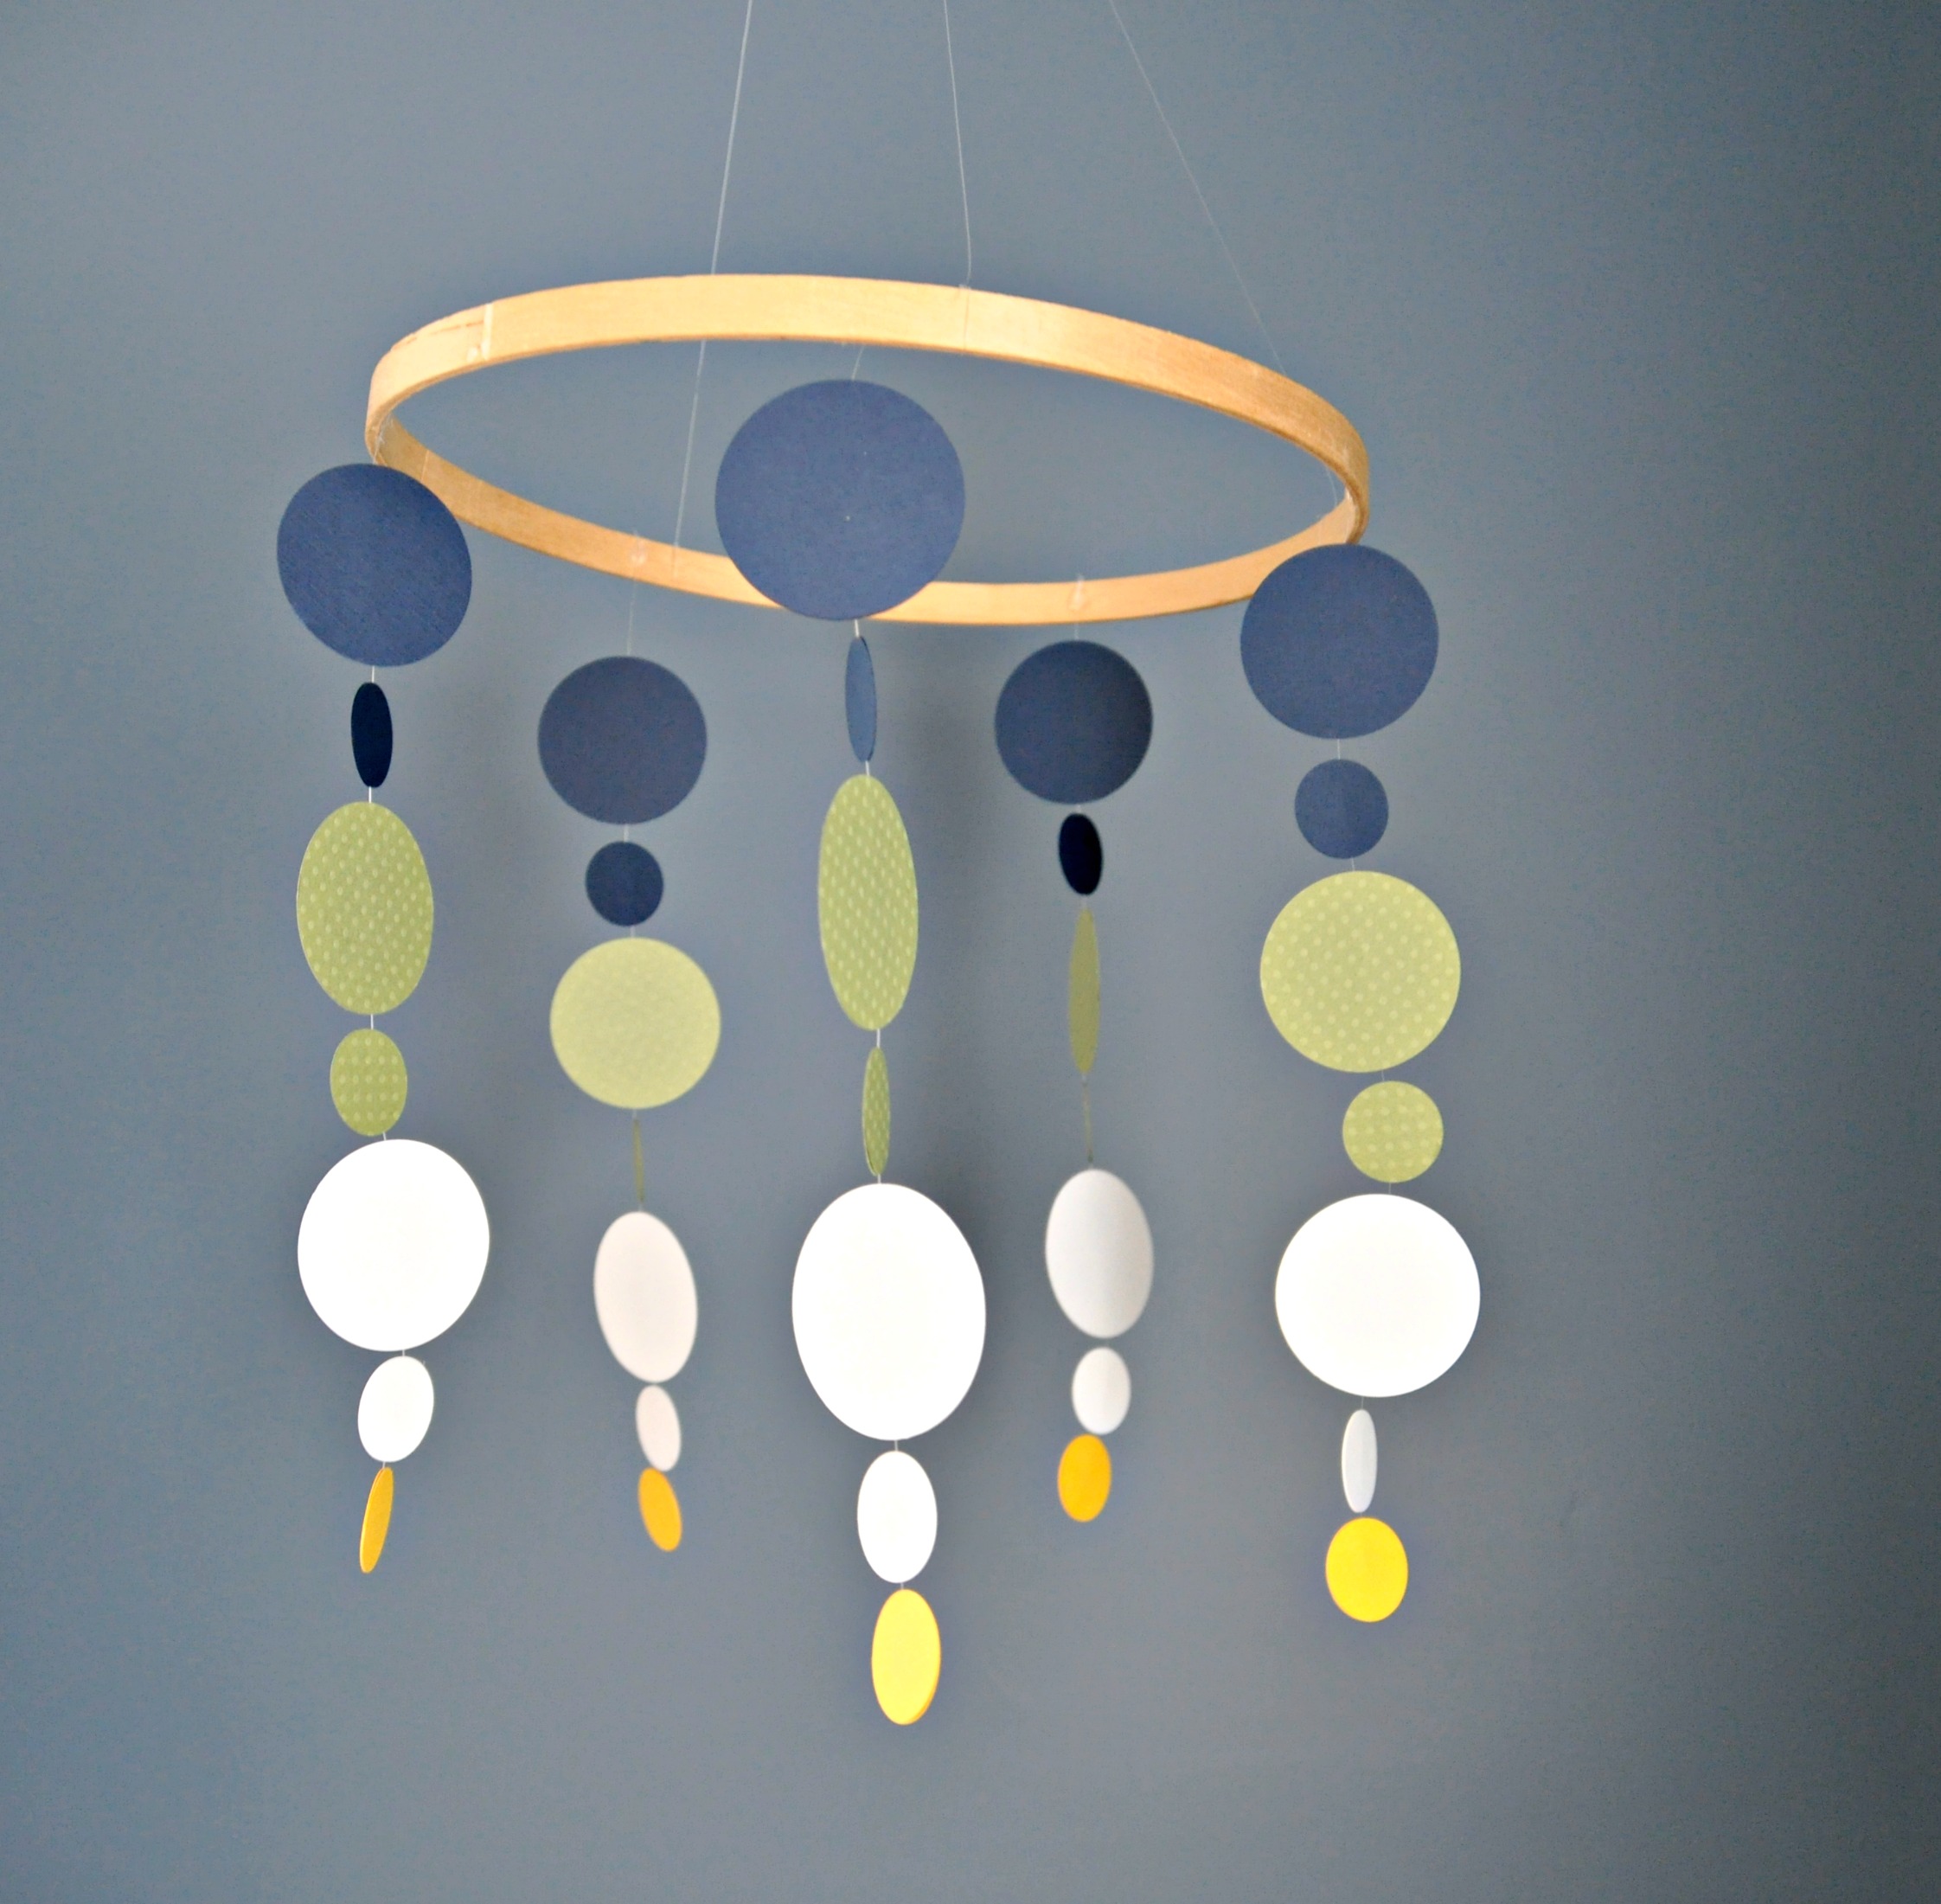
One project was a nursery mobile.  Or three.  Triplets.  Wow.

mobile 3.jpg

Meg had pinned some ideas of mobiles she liked.  They all involved threading the paper. That seemed difficult. I thought I remembered seeing a mobile similar to the ones Meg liked made by my buddy, Gretchen {Boxy Colonial}.   Gretchen is super smart and used double stick tape to keep the circles together.  I love blog friends.  

Here's how I made my mobile.  I'd say it took around 30 minutes to make one mobile.

Supplies:

1" circle hole punch

2" circle hole punch

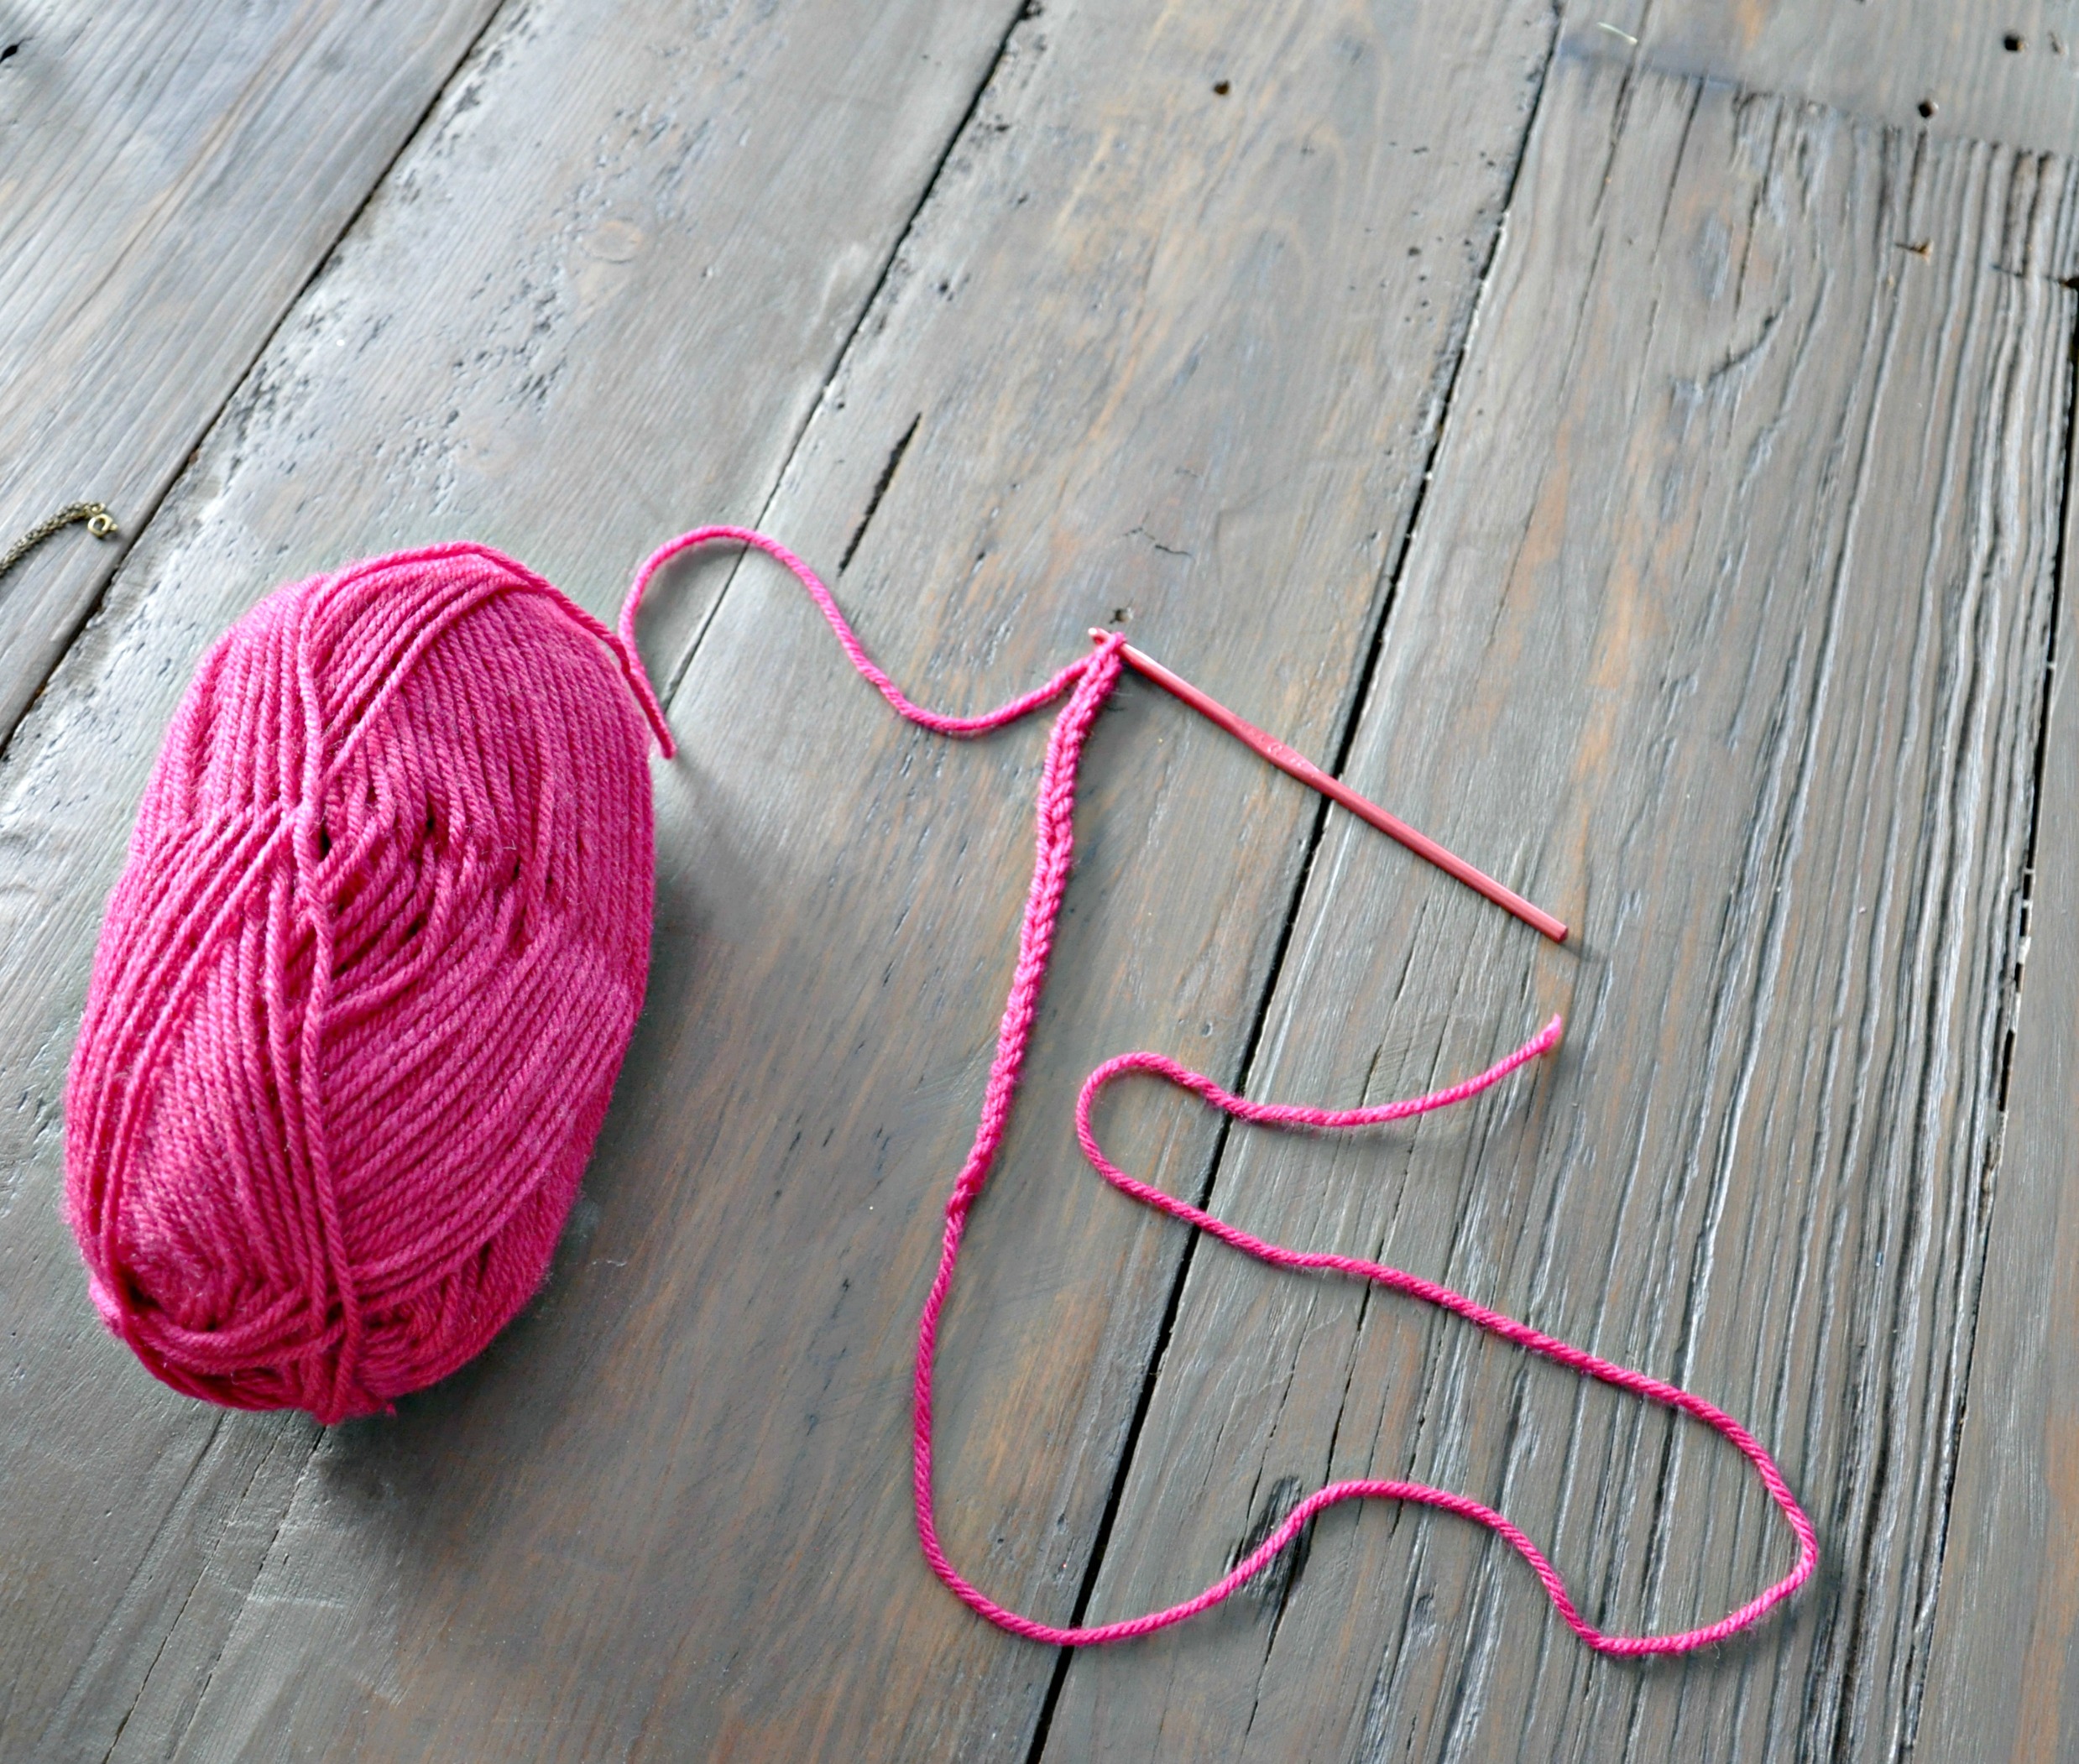
clear jewelry thread

cardstock  (I used 4 colors)

embroidery hoop

glue gun

mobile 5.jpg

Cut out 1 million circles.  Or if you are making one mobile like mine you will need ten 2" circles of three colors and 1" circles of four colors.

Grab an end of your clear thread.  Start with your bottom color (yellow for me).  Place a piece of double sided tape on one of the circles.  Place the thread on top of the tape.  Seal with a second circle.  Repeat for each dangly piece.  I just eye balled the spacing.  I think they look best with small gap between circles.  Leave a couple of inches of clear thread at the top to attach to the embroidery hoop.

mobile 6.jpg

Grab your hoop.  Apply a small dab of hot glue to the embroidery hoop.  Attach the clear clear to hot glue.  Allow to cool.  Move onto next strand spacing evenly apart.

mobile 7.jpg

Apply string to hang from the ceiling using a hook.

Mobile.jpg

These nursery mobiles were a lot easier to make than I expected.  Always a pleasant surprise.

nursery mobile.jpg

Hiding anything good on your Pinterest boards?  Do tell.

DIY Dining Cart Tutorial

Remember our precious dining cart that we posted about last year?  (I love jokes like that in January.)

We're here with the dining cart tutorial so you can build your very own.

DIY Dining Cart Tutorial | Decor and the Dog

I'm glad Nate humors me and my crazy furniture building ideas.  I like that he now makes my ideas come out better than I can even imagine.  That's love.  Enough mushy stuff.  Let's get to the tutorial which Nate wrote for the blog.  (Also love.)

Material List

8 - 2"x4"x8'

2"x3" - Only need 28", so get the smallest one possible, or rip a 2"x4" down

2 - 3/4" x 6' black iron pipe

4 - black iron end caps

4 - industrial wheels

2 - corner brackets

2 1/2" pocket hold screws

Kreg jig mini

wood glue

Construction adhesive (we use Loctite Power Grab)

Black spray paint

Small nails or upholstery tacks 

Cut List

2"x4"

4 - 30.5" (sides)

6 - 45" (outsides of shelves)

6 - 38" (middles of shelves

6 - 7" (ends of shelves)

Β 

2"x3"

4 - 7" (middles of sides)

Start by building the sides, using pocket holes and glue.  Attach the 7" 2x3 to the top and bottom of the 30.5 2x4.  I used one hole at the tops of the 2x3's as it will be hidden by the shelves.

DIY Dining Cart Tutorial | Decor and the Do

Β 

Next, build the 3 shelves.  I attached the two outside 7" 2x4's to the 45" 2x4 with wood glue and pocket holes on the bottom of the shelf.  

DIY Dining Cart Tutorial | Decor and the Do

Using wood glue and pocket holes attach the two 38" middle 2x4's, then attach the other outside 45" board.  Repeat for other 2 shelves.  If some of the boards are a little uneven, sand with belt sander or use a planer to even.

DIY Dining Cart Tutorial | Decor and the Do

Using pocket hole screws, attach the bottom shelf to the bottom of the 2 sides.  

DIY Dining Cart Tutorial | Decor and the Do

Then mark 13 3/4" up from the bottom shelf on the sides, attach the middle shelf using those marks with pocket hole screws. 

DIY Dining Cart Tutorial | Decor and the Do


Finally, attach the top shelf to the top of the sides.

DIY Dining Cart Tutorial | Decor and the Do

Β 

Drill holes for the rods in the back, measure up 5" from the bottom and middle shelves, then in 5/8".  Drill hole slightly larger than the pipe, the hole for ours was 7/8".  When drilling, put a scrap board behind the 2x4's in order to prevent the back side from "exploding" when the bit goes through.

DIY Dining Cart Tutorial | Decor and the Do

Β 

Sand any remaining uneven surfaces.  Stain or paint and poly.  We used Rust-Oleum wood stain in weathered gray.

DIY Dining Cart Tutorial | Decor and the Do

Β 

Using a hack saw, cut the black iron pipe so when a cap is placed on one end it will go into the opposite hole about 3/4". Test fit the cut, leaving it in the board, measure the remaining length needed (probably about 1 1/2" or so).  Cut that length off of the remaining pipe, making sure to keep the threaded part.  I did this in order to keep the threads on both sides so the cap will screw on.  There is probably a tool that will put threads on the end of the pipe after it is cut but I don't do that much work with this material so this seemed cheaper than buying a tool only to use it once.  Put end cap on short piece. Test fit making adjustments as necessary.  Put construction adhesive around the end of the cap and down pipe a bit, and on the longer pipe put adhesive on the end once just before putting it into the opposite hole.  Repeat for second shelf.  Let glue dry.

DSC_0061.JPG

If you cannot find vintage corner brackets and wheels, use new brackets (inexpensive ones from any hardware store) and beat them up a bit with a hammer.  We spray painted ours black.  We purchased these wheels and gave them the same treatment.

Attach the corner brackets with nails or tacks to the top front corners. We used upholstery tacks.  Note: You will have to spray paint nail or tack heads to match brackets.

DIY Dining Cart Tutorial | Decor and the Do

Attach wheels to bottom of the cart, I placed mine on the outside, with the end of the wheel on the end of the shelf.

DIY Dining Cart Tutorial | Decor and the Do

Place your dining cart in it's home and fill it with beautiful Pyrex.  Or whatever you want to store, I guess.

Antiques sign 1.jpg

Nate and I are now talking built in shelves for the living room.  Pesky tax season is going to make that a long process but we'll get there!

Check out our "build it" page for more free furniture building tutorials!

Any furniture builds in your future?

Linking up to: Thrifty Thursday

Crochet Bow Necklace | Tutorial

I have a new obsession.  Crochet.  All things crochet.  Crochet necklaces. Crochet baby hats. Crochet granny square blankets. I can't get enough crochet.

You may be asking "How old are you, Michelle?"  The answer is 87 trapped in an almost 32 year old body.

Before I go drink my prune juice, I'd like to share with you a tutorial for a crochet bow necklace.  I had seen a few on Etsy but couldn't find a tutorial that I liked.  The bows were either too flat or the steps looked way too long and drawn out for a silly necklace.  But I must have a bow necklace.  I mean, look how cute it is!

Crochet Bow Necklace Tutorial | Decor and the Dog

Please excuse the lack of face in these photos. I had a wicked sinus infection and no one needs to see what was happening above my chin.

Crochet Bow Necklace Tutorial | Decor and the Dog

I made two sizes.  I like them both but I'd choose the little yellow guy as my favorite if I had to.  I want to make an even tinier one but I need a smaller hook.

This is a fairly easy crochet project.  I have had people ask how I learned to crochet.  My grandma taught me how to knit and crochet when I was around 10.  I've mainly been a knitter since then but knitting takes so darn long.  I just never really caught on to crochet.   As I've aged, I've become increasingly impatient and I needed a quick yarn fix.  I started making a baby hat about a month ago and it just clicked.  As in, I get it. I get complicated patterns.  I'm not sure what happened but I like it.

If you want to learn (or re-learn in my case), I recommend the Learning Center at Lion Brand Yarn.  There are always Youtube tutorials.  My buddy, Rachel {Maybe Matilda}, has a great step-by-step guide for stitches.

For this "pattern", I realized that if I scrunched a basic tube in half I'd have a bow.  A bow that has some dimension to it.

Here's how to make your own!  You can do this.  Trust me.  I'm a doctor...of pharmacy.  

I'm going to write this in Michelle instead of normal crochet pattern.  Hopefully it will make it easier for beginners to understand.  And annoying for everyone else that crochets.

Crochet Bow Pattern

Size G hook

worsted weight yarn

Step 1: Little Bow: Cast on 20 stitches leaving a very long starting tail (~20 inches).

              Big Bow: Cast on 28 stitches leaving a very long starting tail (~20 inches).

Step 2: Join to first chain using a slip stitch to work in the round. Be careful to not twist your chain!

Step 3: Chain 2

Step 4: Double chain evenly around.  Join to first stitch using slip stitch.  Chain 2.

Step 5: Repeat step 4

Step 6: Repeat step 4

Step 7: Repeat step 4

Step 8: Fasten off leaving a very long tail (~20 inches).

Step 9: Wrap the two tails around the middle of the bow.

Step 10: Tie a knot to secure the ends.

Step 11: Thread chain onto necklace.

Step 12: Be proud of your new granny necklace!

Here's some visuals for you.

Step 1

Step 1

Step 2

Step 2

End of Step 4

End of Step 4

End of Step 7

End of Step 7

Step 8

Step 8

Step 9

Step 9

Step 10

Step 10

Step 11

Step 11

Step 12

Step 12

What's your favorite elderly pastime?