Molding Questions Answered

Who’s sick of my powder room?  I kind of am.  I’m not gonna lie.  I mean, I’m in love with it.  I’m just tired of posting about it.  This is the last post.  I think.  I hope.  Tomorrow will be fun.  I promise.  Oh, I can’t wait to share tomorrow’s post.

Here’s something fun.  A nice reader left an explanation of the term powder room in the comments…

“Supposedly the term powder room comes from a small room the was reserved for powdering wigs on the way out the house. That way it was contained in a small space.”

I learn so many things blogging.  (Thanks Julie!)

We’ve had some questions regarding the molding in our powder room.  Let’s hope I can answer them! 

Please refer to following picture…

339929pn2

How did you determine the height and spacing of the moldings?

We determined the height of the molding based on laziness.  I stenciled two full sheets on the wall and then stopped.  I thought this was genius.  The slight flaw in our plan is the outlet and light switch. Nate needs to cut the plate to cover both.  Eh.  You win some and you lose some.

339939pn2

As for spacing on the squares, we looked at our inspiration image.  We guessed that they used about 4” from the wall.  We held up the molding at 4” and we both liked it.  Done.

What did you use for the top part of the molding?

Nate ripped a 1x2 down to 1 1/8”. He thought the 1x2 stuck out too far.  I was impartial.  He nailed the 1x4 to the wall.  He then glued the ripped board and placed it on top of the 1x4.

What did you use to make the squares?

We used a decorative Colonial molding.  Nate installed the squares on the wall.  No pre-assembly here.  He cut the ends to 45 degrees and nailed them the molding into studs (where available) and also used glue when there were no studs.

Did you keep your original baseboard?

We did keep the original baseboard.  It worked with the rest of the molding so there was no need to replace it.

How’d you finish off this project?

We caulked between the wall and moldings to provide a seamless look.  We then painted over everything.  It was nice having the walls already painted white.  Made the molding going a lot faster.   Well, as fast as painting moldings go.

Any questions?  Moldings bore me.  I love them.  Just don’t love writing about them.  But I do try to be educational…sometimes. 

On a fun note, did you watch any good movies this week-end?  We watched Arthur (the Russell Brand re-make).  Amazing.  You must watch it. I’m serious.  You CAN have amazing and Mr. Brand.  I didn’t think it was possible. I now want to watch the original…

***The winner of the Royal Design Studio Stencil will be announced this evening.  Stop back to see if you were the lucky winner!***
Giveaway- Royal Design Studio Stencil

Today’s an exciting day on the blog!

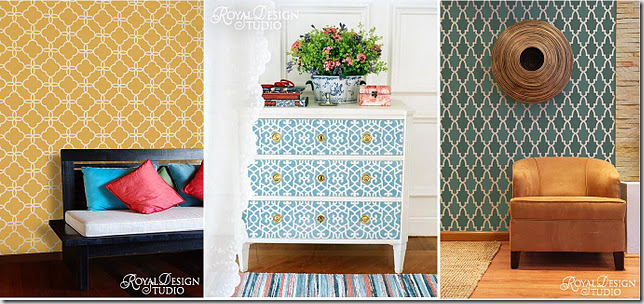
Royal Design Studio is giving away one stencil ($50 or less) to a lucky reader!

Royal Design Studio has an amazing selection of stencils.  Before I started on our powder room, I mentioned to some friends and family that I wanted to stencil.  They all gave me the same funny look.  I think they were all imagining my brother’s high school bedroom with the grizzly bear and evergreen stenciled border.  Stenciling has come a long ways.

image

I chose the Nova Trellis because I wanted something that was unique but not too crazy.  We are pretty conservative people and I wanted something that would fit in with the overall traditional feel of our home.  I also wanted to have a little fun with this room.  The Nova Trellis was a perfect fit for us!

339936pn

Do you have a room that could use a little pizzazz? If so, be sure to enter!

  • PRIZE: One stencil $50 or less with free shipping included
  • TO ENTER (required):  Visit Royal Design Studio and then leave a comment here with which stencil you like and where you would use it.  (Share colors too if you’re a real overachiever!)
  • GIVEAWAY CLOSES: Sunday, November 6th at 11:59 PM CST
  • NUMBER OF WINNERS: One
  • OTHER STUFF: The winner will be selected using random.org and announced on Monday, November 7th

Be sure to follow Royal Design Studio on facebook and Twitter to stay up-to-date on the latest stenciling news!

Stenciling Thoughts

On Tuesday, I showed you our powder room make-over. 

A key part to this make-over was the Royal Design Studio Nova Trellis stencil. Royal Design Studio has a great stencil selection. Picking out a stencil was almost harder than the actual act of stenciling.  Almost.

image image

Speaking of stenciling.  I’m by far the first blogger to stencil a wall.  There are a lot of tutorials out there.  I found Young House Love's tutorial to be the most helpful. 

Here’s what I learned:

The Stencil: 

  • The stencil was made of a good quality material and held up through the entire process. 
  • The repeating pattern made it easy to keep the stencil level.  I don’t see straight.  I usually think levels are wrong.  Nate was impressed with how well I did.  Especially when the molding also ended up level with the stenciling.
  • The stencil was large which made long portions of wall go smoothly.  You could cover a large portion of the wall without having to reposition the stencil.  I loved the big reveal after completing a section of stencil.  It was almost like Christmas morning over and over again.
  • Corners and shorter portions of wall were more difficult.  I solved this problem by cutting out parts of the stencil to use in the corners and above the door.  Not the most ideal (or probably recommended) situation but it definitely worked.
  • Below is the best picture of the size of the stencil.  (I started stenciling above the window and then decided I preferred that portion of the wall white.  Stencils trump wall paper because changing back to white was easy.)

169

Time:  Stenciling takes a lot of time. A lot.  I think I spent 16-18 hours stenciling this room.  I am not a patient person so this was definitely a test for me. At one point I thought I may be stenciling well into my 80’s.  I’m also sometimes dramatic. 

Tools:  I used a disposable plate, bowl, foam stencil brush, painter’s tape, spray adhesive (brush and adhesive purchased at Michael’s), and patience.  I used the bowl to hold the paint and the plate to dab the excess.  The adhesive was helpful to hold the stencil in place on the wall.  Painter’s tape was handy on the corners.  You could probably get by with just the tape but I think the adhesive helped prevent the paint from bleeding through the stencil.

Paint:  I used Black Leather by Dutch Boy in an eggshell finish. I think the contrast of black and white is what makes this bathroom but it also made stenciling difficult.  Getting the right amount of paint is an art.  You need enough to fill in the stencil but not so much that it bleeds through.  Too little black is greyish.  Enough to get a deep black was a mess.  I found that practicing on cardboard was helpful.  The trellis pattern was very forgiving though. The tiny pixels may not individually be perfect but they blend well overall.  As seen below…eye trickery…

339942pn

339933pn

Would I stencil again?  Yes. I love how the room turned out.  The time was definitely worth it. I love how it has the look of wallpaper but isn’t.  I’d like to think that the process taught me patience but I don’t know that I would go that far.  I did find it mildly therapeutic after I got the hang of it.  I loved the selection at Royal Design Studio.  I  really wanted something unique and their wide variety of designs made this possible.

Any other questions regarding stenciling? I’ll answer them all! 

Do you like the look of stenciled walls?  Would you like a chance to win your very own stencil from Royal Design Studio to spruce up your space?  Stop back tomorrow for a giveaway for a free stencil!!