Favorite Project- A Little Paint

Today’s guest is Gloria from A Little Paint.  I started reading Gloria’s blog after she had commented here.  (A wise person once said that good things come to those who comment. (P.S. I’m the wise person.)) 

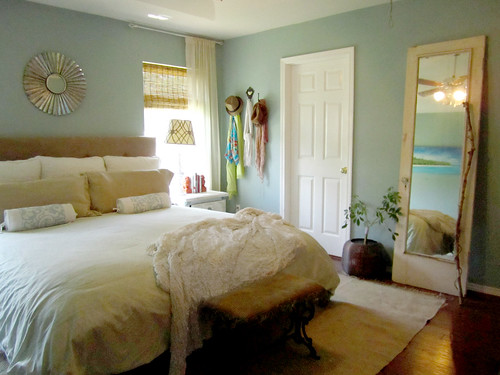
The original post I read on A Little Paint was about the ombre dresser she is going to share with you today.  But I was really impressed when I clicked on her house tour tab.  Look at this bedroom…darling…
IMG_0729

***

Hi! I'm Gloria from A Little Paint. I'm just getting into the swing of blogging and updating my house in Oklahoma. I am so honored to guest post here, because Michelle's house is amazing and I absolutely love her blog... and her dog. When she told me the theme was "Favorite Projects" I thought I couldn't be more perfect, I have at least a thousand. Yes, I'm one of those annoying people who is like Oh my gosh this is my favorite dessert, Oh THIS is my favorite, oh yeah definitely this cake is my favorite. So sometimes it's hard to pick one, but here goes my favorite project at the moment. It's my ombre armoire.

5567531691_a2bb2012a7_z

I bought this big guy on craigslist with no real purpose for it other than it was A) interesting B) cheap and C) something to do. This was somewhat of a whirlwind project for me. I have a tendency to buy furniture and let it sit around for weeks, months, even years agonizing, er waiting, on the perfect inspiration for it. Not this guy, I bought, painted and conquered all in a few short days.

2

It was a big brown box and needed some work. I sanded it down, and added some bun feet that I had laying around from a previously failed project. In my opinion, this is what truly changed the look and feel of this. It went from looking like a standing double coffin with mirrors to a much prettier piece of furniture that deserves to be appreciated.

3

The inspiration slapped me in the face as I was walking by it in the garage the day after I bought it. I wasn't even thinking or looking at it when it hit me. It was like a vision, a walking daydream and I knew right then and there that all of those pretty drawers needed to be ombre'd. I tried to set up a system since I didn't have a dark color that I could just add more white to. I went the wayyy difficult route of mixing each individual color. Sorry, this doesn't help much in the way of tutorial except for what NOT to do. I'm a go with the flow kind of person who does a lot of custom color mixing and just "eyeballing it".

4

Now that I've skipped the most interesting step of this project here are the drawer painted, and sexy legs on. I want to grab a pillow and blanket and sleep inside because I love it so much.

5

I kept the original hardware cause I love me some turquoise and brass. Plus hardware can be crazy expensive. Okay, so maybe that's my real reason, but I do like those handles.

Here are those pretty new feet I added for extra height. Now it doesn't have as much visual weight as it did before. Me likey. I bought these at Home Depot. They have a decent selection if you're impatient and don't want to order something off of the internet.

Here it happily sits in my studio. I get crazy amounts of storage out of it. There's tons of fabric, blank canvases, paint, spray paint, water colors, sketchbooks, paper. Basically, it's an artroom in a box and I couldn't be more pleased with it.

Originally, I planned to make it over and sell it. Now I could never do that. I mean, it's love and how do you sell love? I find myself walking into this room constantly just to see it again and admire it. That's how your home should make you feel. It doesn't matter if no one else likes this project as much as I do, it's part of my home and a perfect reflection of me!

***

Well put, Gloria!  I’m a big believer is surrounding yourself with things you love in your home. But I think she should sell the ombre dresser.  To me….

Be sure to stop by A Little Paint and check out Gloria’s charming house updates!

Favorite Project- A Kitchen Table for Two

Today's guest blogger is April from A Kitchen Table for Two.  I started reading April's blog after she was the lucky winner of our PetSmart giftcard giveaway.  April's dog, Teddy, is an excellent DIY helper..."Nah Mom, the curtains are the perfect length. No hemming needed."


Not only is her dog cute but April is also working on some fun DIY projects..on a budget of course!  April is now going to share with your her favorite project. 

***

Hello, Decor and the Dog readers!  I was so thrilled when Michelle asked me to guest post for her - don't you just love her blog?  I'm so thankful for my "blog-land" friends, and Michelle is definitely a kindred spirit... a professional with a love for DIY projects who loves her dog like most people love their kids (isn't Ike the cutest?!).  So, when she asked me to pop over and share a little somethin' with all of you, I jumped at the chance!

It's hard for me to choose a favorite project from our 1970's ranch home; we've done so much to it in the two years we've been living here!  We've removed the popcorn ceilings, done a few custom paint jobs, re-upholstered furniture, etc...  But the project with the most bang for our buck and the most incredible results has to be our kitchen overhaul, and the story starts a little like this...

My husband and I purchased out home in an older neighborhood that is close to downtown Tempe (a suburb of Phoenix, AZ)...


We loved the idea of living within a mile of our Alma Mater, ASU (GO DEVILS!), and having the home eventually become a rental property for college students.  This, of course, means no crazy-expensive remodeling projects, since college renters are characteristically party animals not the most careful.  So, when our nice little ranch home came with a kitchen that looked outdated (to say the least), we knew we needed to figure out an interim solution.  Hauling out the cabinetry and replacing it would cost over $10,000 (be still, my heart!!), and wasn't an option.  But paint - now THAT was something I could do. 

True Life Confession.... I have NO real "before" picture.  This is because I jumped into the project so fast, I didn't even think about it.  That is just a small taste of how crazy I truly am.  In my head, it went something like this... "Remodel my kitchen with a budget of $300? Sure, this will be easy and wonderful!! I'll start right now!  This very second!  To hell with pictures, I need a paintbrush, STAT!!" 

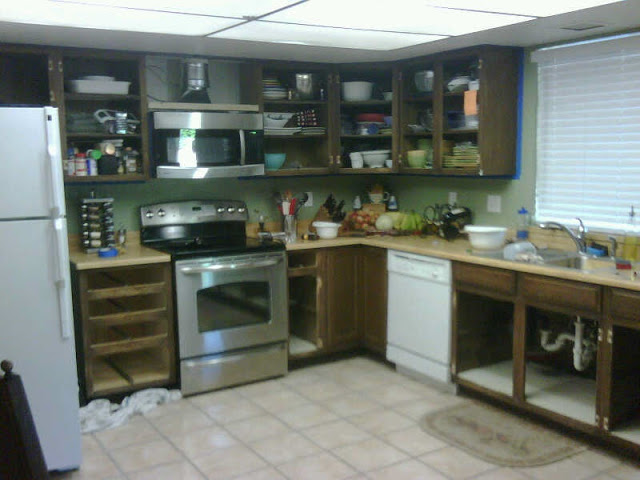
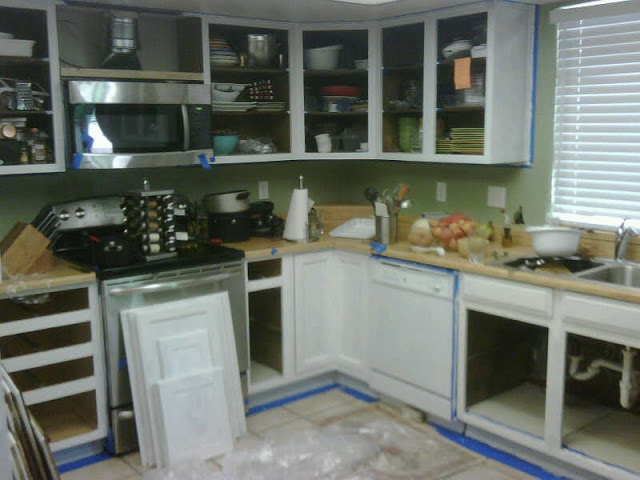
What I do have a is a picture of the beginning of the process.  This is after I removed the oak cabinet doors, taped everything off, and began sanding (and an gnome came in and deposited a bunch of crap on my counters because my kitchen would never look that dirty in real life *wink*)


Forgive the camera phone picture.  But it's truly frightening, no?  And doesn't fluorescent lighting just make everything look attractive?  Thanks, guy who invented it - all of our bleached out faces and tired, squinty eyes are forever in your debt.  

After a coat of primer, we were starting to look a bit more like a real kitchen...


Yes, I did leave everything inside my cabinet boxes.  And you should know that I declined to paint the inside of the cabinet boxes for one reason: I am lazy.  There's really no other excuse.  If you're going to judge me by the inside of my cabinet boxes, I guess you'd probably find out how ridiculous I can be anyway, so go right ahead.

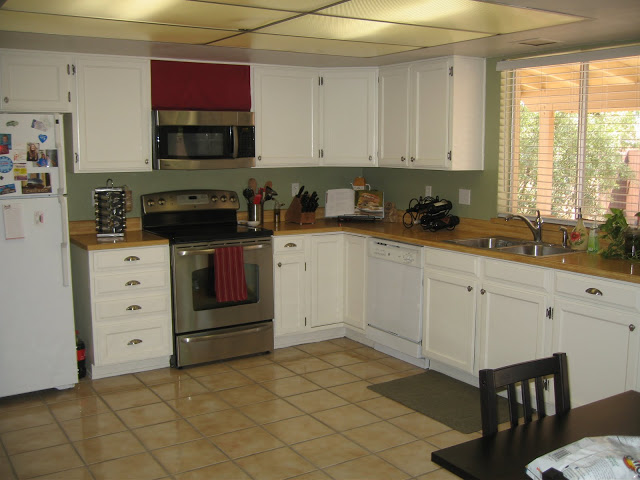
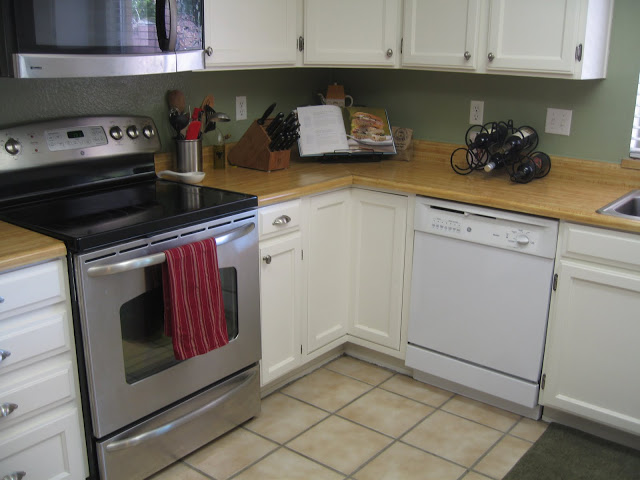
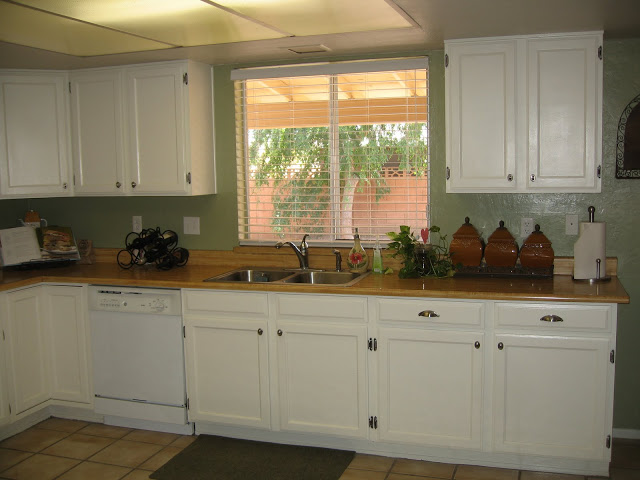
I chose to do all of it by hand - sanding (DEATH!  Next time I WILL rent a hand sander!), priming, painting (used Purdy brushes and a foam roller), and replacing all of the hardware (we went with the Amerock line from Lowe's).  Although I guess you're not technically "replacing" hardware if there was nothing there to begin with.  After 2 weeks (procrastination and I became BFFs), 2 coats of primer, 2 coats of Behr paint in semi-gloss, and only $322, we had this...


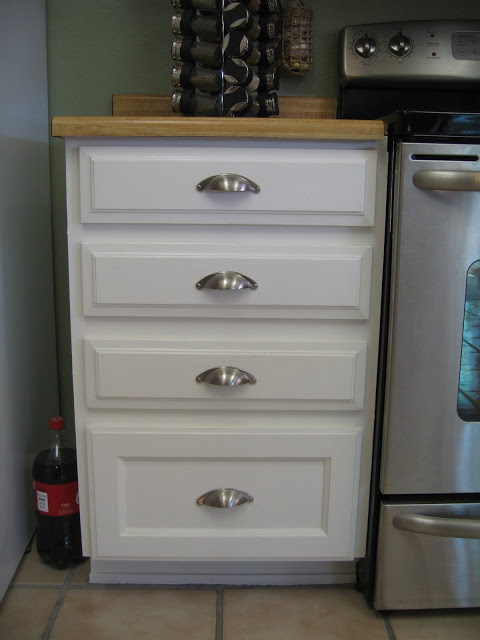
Hallelujah!  Cue angels singing!  It turned out better than I could have EVER hoped.  Especially since it was my first real painting project.  All of my friends and most of my family Some people may call me crazy for attempting such a big project as my first, but I knew my crazed perfectionism (for everything but the insides of my cabinet boxes) would carry me through to the end.  Here's a few detail shots for ya...


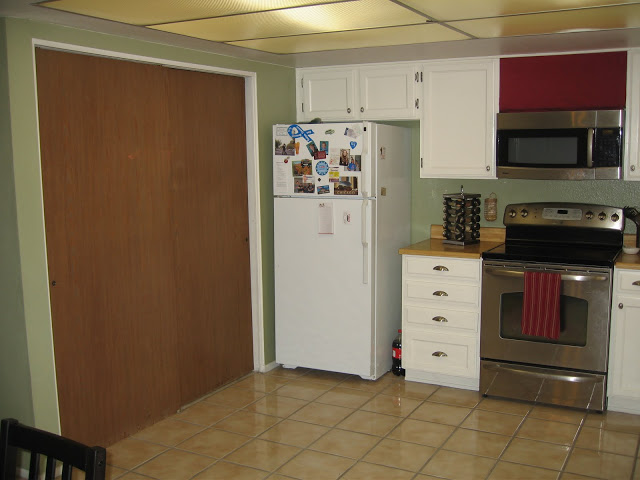
My pantry doors are getting painted with chalkboard paint soon!

 
And a new stainless steel dishwasher is going to be my birthday present (4.5 months and counting!).


I LOVE how the farmhouse-pulls we chose look against the white cabinets and the (faux) butcher-block counters.


Doing the dishes has never been more pleasant!

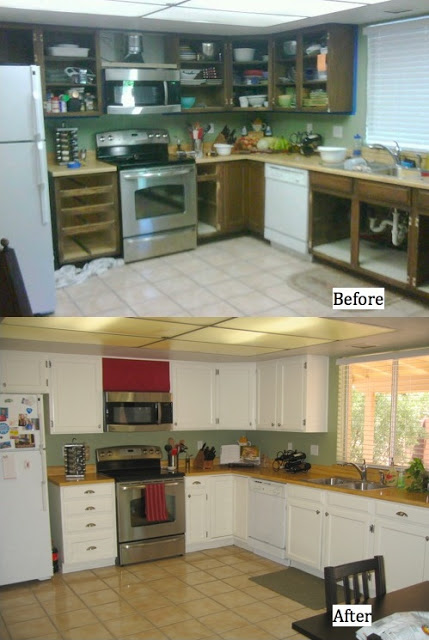
Here's the final before and after presentation...


Thanks for letting me share my kitchen, Michelle!  It was quite the project, but we're very happy with the results!

***
What's not to love about an inexpensive kitchen make-over?? Paint is a beatiful thing.  And a dishwasher as a birthday gift?  Bet she would have never predicted that would be on the ol' birthday list a few years back!  Be sure to head over to A Kitchen Table for Two and see what April (and Ted) are up to!

Favorite Project- The Flipping Couple

Today's guest is Cindy from The Flipping Couple.  Cindy and her husband are fixing up a lovely home up in Minnie-sOta (that's how I like to say it).  An alternate title to this week on the blog could have been "Young Professionals That Are Obsessed with Their Furry Children and Making Their Homes Pretty on a Budget"....but "My Favorite Project" works too. 

***

Hi! This is Cindy from The Flipping Couple, which I write with my handsome hubs, Nick. When Michelle asked if we would be willing to write a guest post we were absolutely thrilled to do it! I've been drooling over her kitchen ever since I found her in the blogosphere and am completely impressed with her knack for decorating. 


Michelle asked us to write about a favorite project. Well, narrowing down a favorite project is tricky, but Nick and I agreed that painting the exterior of the house is definitely one of our favorites to date. 


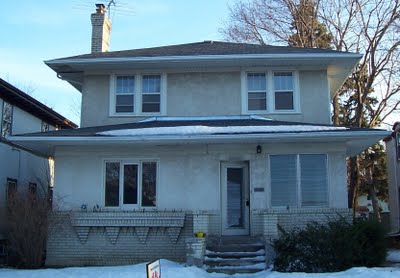
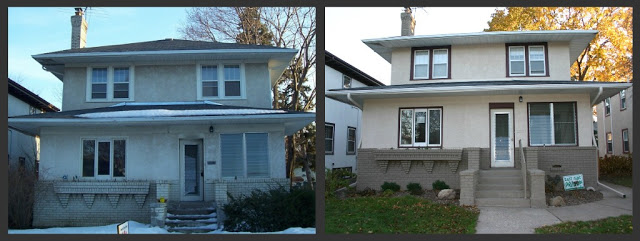
See, our house was pretty ugly when we bought it. Curb appeal was definitely lacking. Or nonexistent. In fact, when giving people directions to our house I would refer to it as “the ugly little white house.” Endearing, right?


Last summer we pulled out the paintbrushes and decided to work a little magic on the exterior of the house. Picking paint colors actually didn’t prove to be as tricky as we thought it would be. Maybe because we had so much room for improvement.


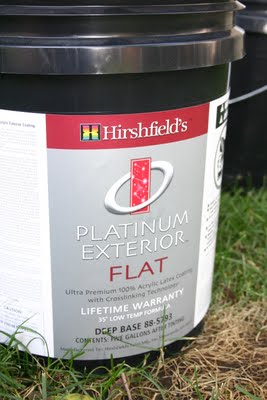
We used Hirschfield’s Platinum Exterior paint. It came highly recommended by a friend who has had the stuff on his house for about 20 years and it still looks fantastic! The only downside of the paint was the price tag, but we’re hoping it’ll last us a good 20 years for us, too. Or at least until we move out of the house. Because while painting the exterior might be one of our favorite projects, it's not exactly one we want to repeat anytime soon!


I had no idea how much prep works goes into this kind of painting project. Turns out you have to clean the entire exterior of your house first. We used a power washer very carefully. Our house is stucco, and we've heard horror stories about water coming into the house and ruining the walls if you use too much pressure with a power washer. Since re-doing every wall in the house wasn't at the top of our priority list we tried to avoid that at all costs.


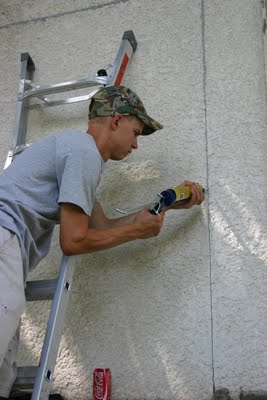
One preventative step was to caulk all the cracks in the stucco. Fortunately, we have very few, but there are several doors and windows that were filled in at some point in the past. The cracks around the border are pretty obvious, so we used caulk to fill those babies in.


Then came hours and hours of scraping and sanding, trying to get every surface as paint-ready as possible. And then. FINALLY, it was time to paint!


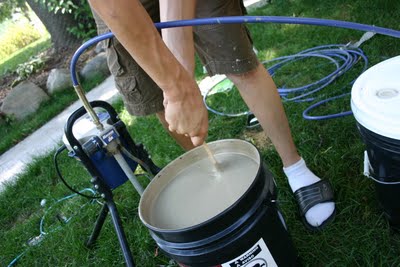
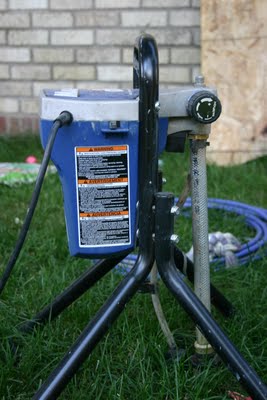
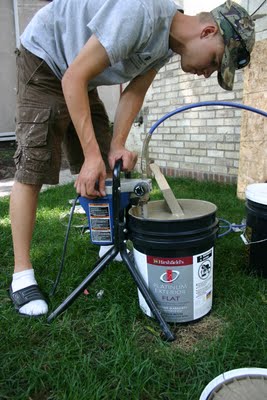
We used a sprayer for both of the main house colors. This was an absolute lifesaver. Had we painted by hand we would probably still be painting (now. a year later) and there's no possible way it would make it onto our "favorite project" list. Our stucco is very textured which makes it hard to get into all the cracks and crevices with a brush or roller. If you do paint stucco/brick by hand we recommend finding the thickest nap roller you can. It'll help a lot!


But really, we just recommend using a sprayer. So much easier. Especially handy if your friend's dad owns one and let's you borrow it for weeks on end. I had never seen one of these before, much less used one. Fortunately, it's pretty easy. You just set the suction hose into the bucket of paint and you're off and running. It does take quite a while to clean out, and you have to clean it promptly so dried paint doesn't wreak havoc on the machine. We quickly learned to factor clean-up time into our painting days.


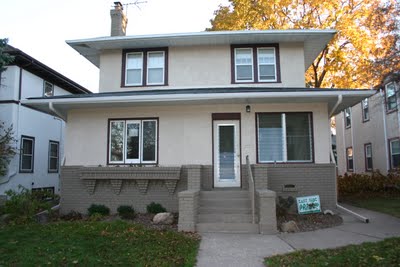
We opted to go for a three-tone look. We used a dark base on the brick, a really warm caramely neutral for the stucco, and then added a pop of color for the trim.


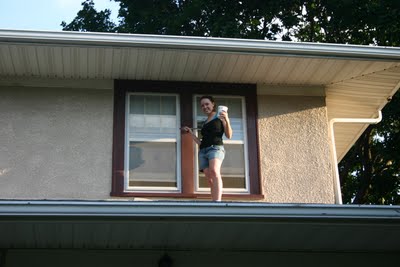
About halfway through said trim I was thinking we should have left it white. Thanks to the sprayer we flew through the brick and stucco but the trim was painstakingly slow. By the time we were done we agreed it was definitely worth it in the end.


And in the end? A not-so-ugly, no-longer-white house.


Here's a little before and after action to save you the trouble of scrolling up and down (am I the only one too lazy to do that??)


We still have some projects to tackle to amp up the overall curb appeal (new door, new light, landscaping that grows) but we love what a coat of paint did for our house!

***
Now Cindy and Nick can tell people....look for the really pretty house that we painted ourselves!  Be sure to stop by The Flipping Couple to see what Cindy and Nick are destroying with a sledge hammer...it's pretty cool. Trust me.