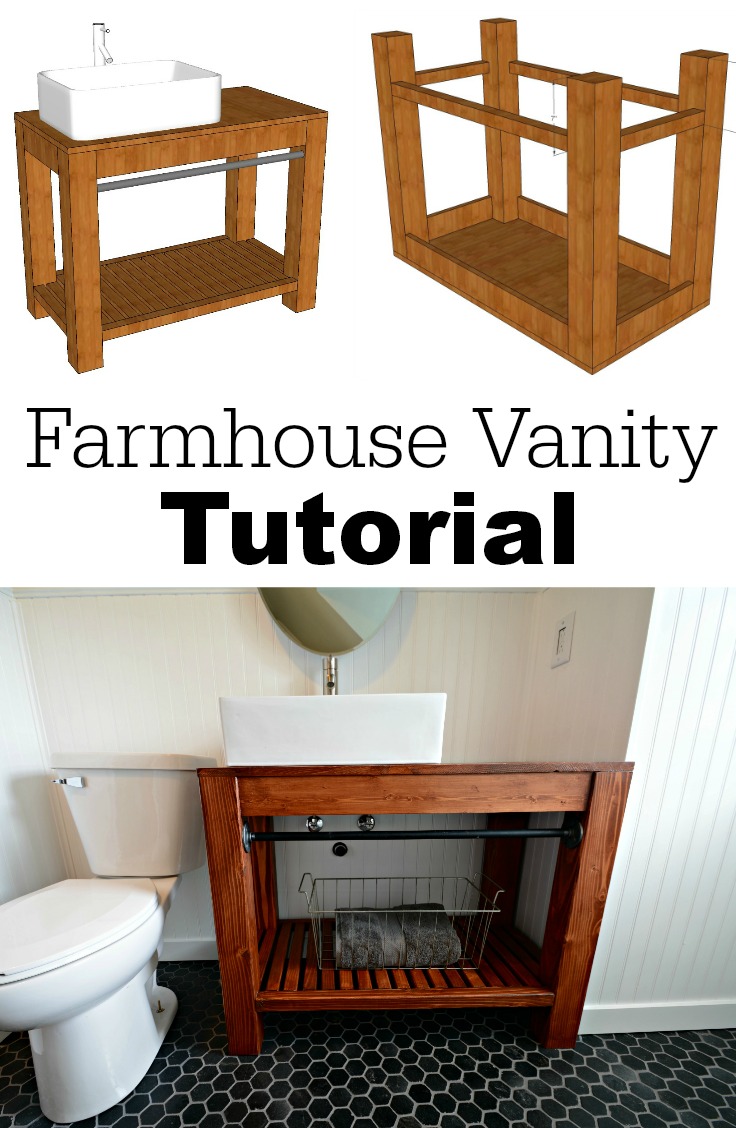
Modern Farmhouse Bathroom Vanity Tutorial
/If tutorials bore you like they bore me, there are goofy photos at the end. You know. Things I shouldn't post on the internet.
Whoa. How is it Thursday and how is it June? Crazy. I have all of these post ideas in my head but I never seem to get around to blogging lately. I'd get all "OMG so busy blogger" on you but the truth is Nate, Ike and I are trying to slow down a bit. (Ok, Ike isn't. Ike is always crazy.) We're loving every second of Summer. Minus the gnats. Do you have those man-eating swarming gnats in your area? They just arrived here a few years ago and I want them to return to their homeland.
Anywho, today's post. (This is why I don't write posts while drinking iced coffee.)
Last week I shared my little brother's bathroom reveal. We mentioned there would be a tutorial for the modern farmhouse bathroom vanity that Nate built. We don't break promises (all of the time).

Material List
-1 - 1"x20"x48"
-6 - 2"x2"x8' (or I used 3 2"x4" and ripped to width on a table saw)
-1 - 1"x4"x8'
-1 - 36" 1/2" black iron pipe
-2 - 1/2" Black iron flanges
-2" pocket hole screws
-1 1/4" pocket hole screws
-Franklin International Titebond Original Wood Glue
1 1/4" black screws (attaching flanges to legs)
Vessel sink and faucet
Plumbing connections in the same finish as the faucet
-Stain/paint
-Poly/Acrylic sealer
-Bath Adhesive Caulk
Tools List
-Kreg Mini Kreg Jig Kit
Large wood bits (size dependent on sink/facet choice)
-Pipe threader
*affiliate links included
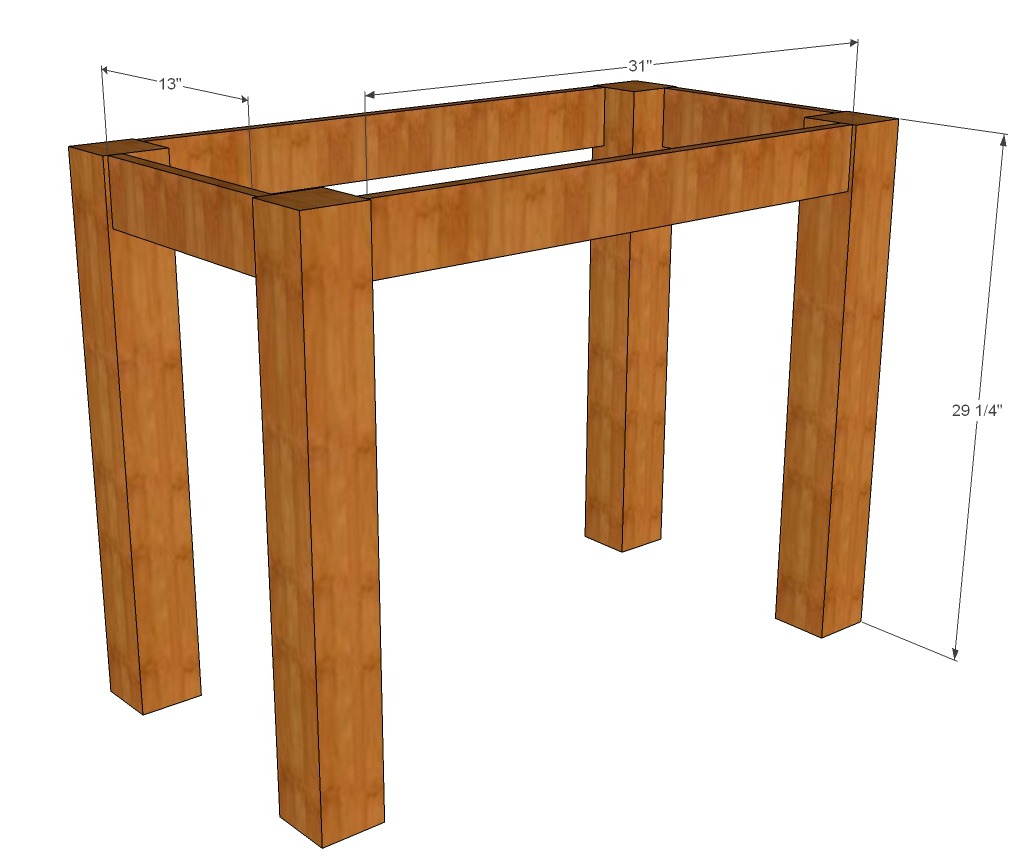
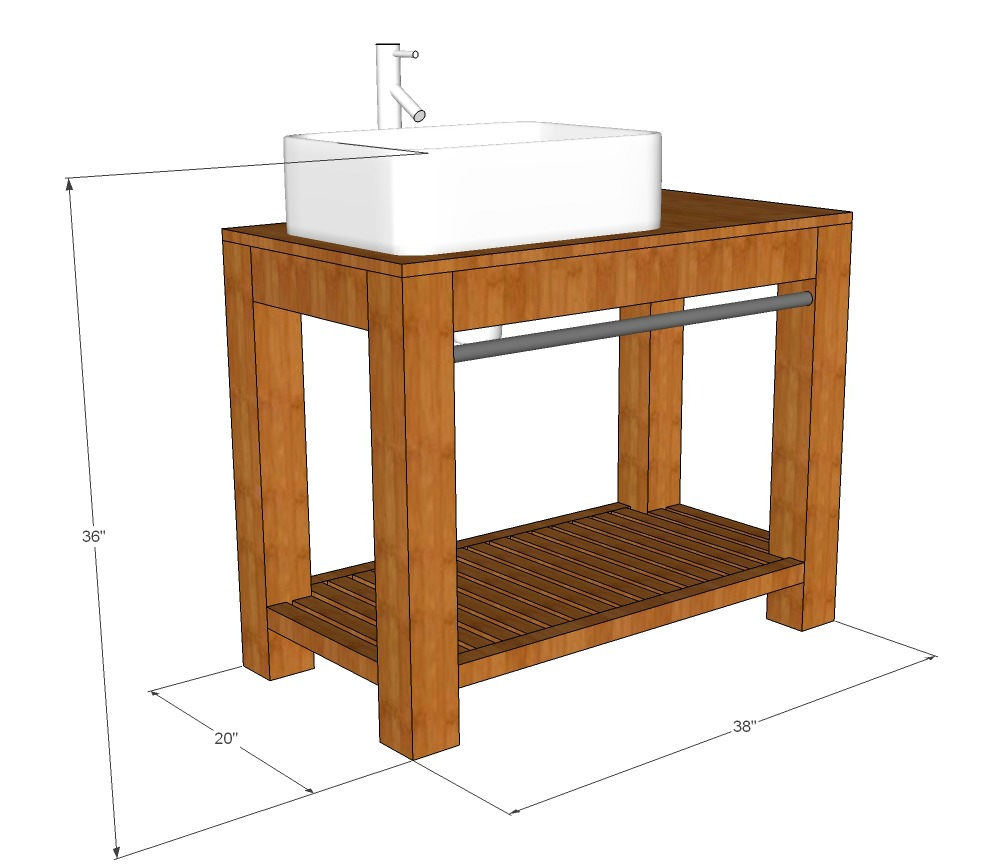
Cut List
- 4"x4"
- 4 - 29.25 (legs)
- 1"x 20"
- 38" (top)
- 2"x2"
- 2 - 31" (front/back of lower slats)
- 4 - 13" (Slats between 4x4's)
- 15 - 17" (Slats between 31" 2x2's)
- 1"x4"
- 2 - 31" (front/back apron)
- 2 - 13" (Side aprons)
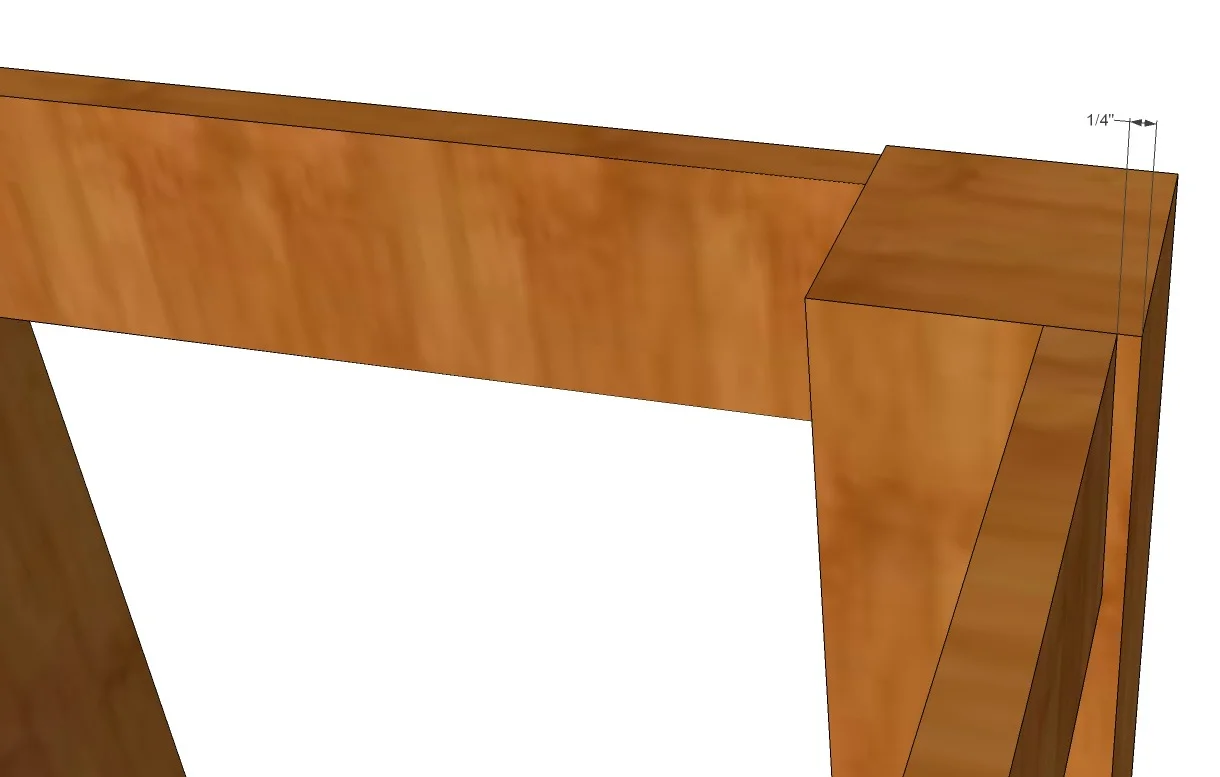
Put pocket holes into the back of both sides of all apron pieces. Use wood glue and attach to 4x4's, offsetting back 1/4" from the outside edge using 2" pocket hole screws.
Put pocket holes at the inside of the top of the 4x4's and along the top of the aprons. These will secure the top to the bottom. Using wood glue, place bottom upside down onto the top piece. Attach with 1 1/4" pocket hole screws.

At this point in time we stained/poly'd all pieces, including the ends of the slats. When they are attached, the a small amount of the natural rounded edges of the 2x2's could be exposed so it is best to have it stained ahead of time.
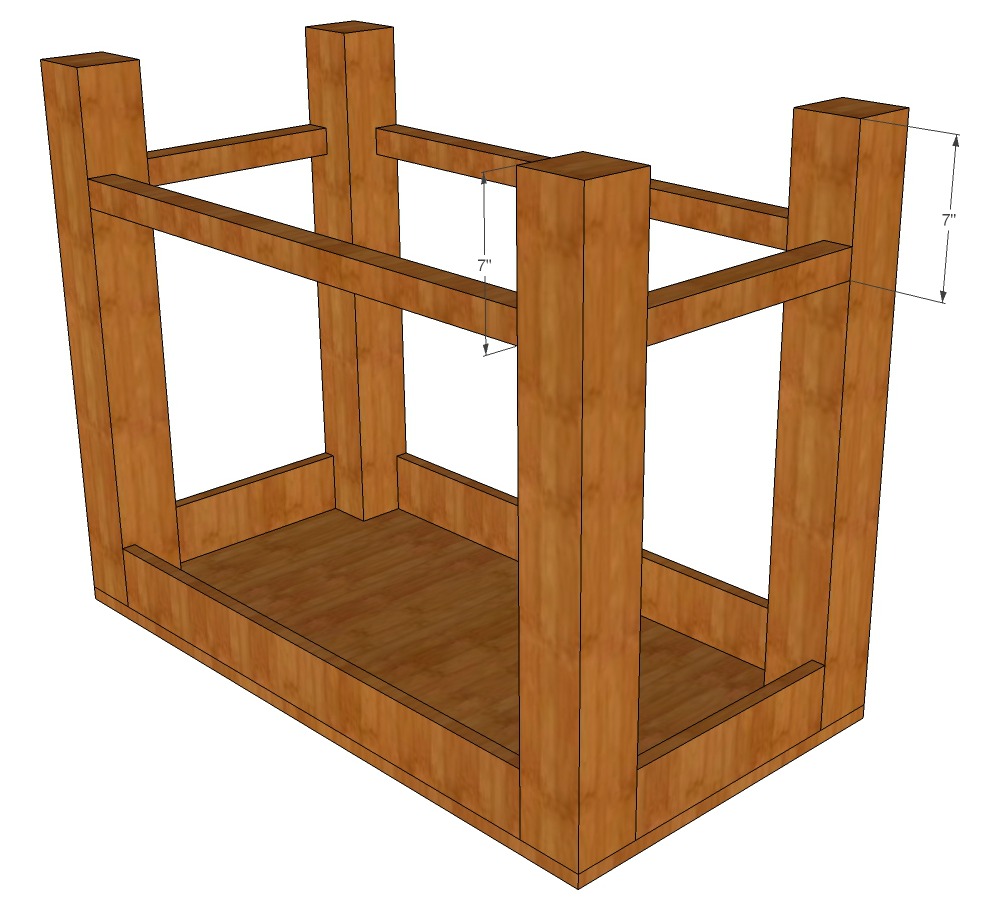
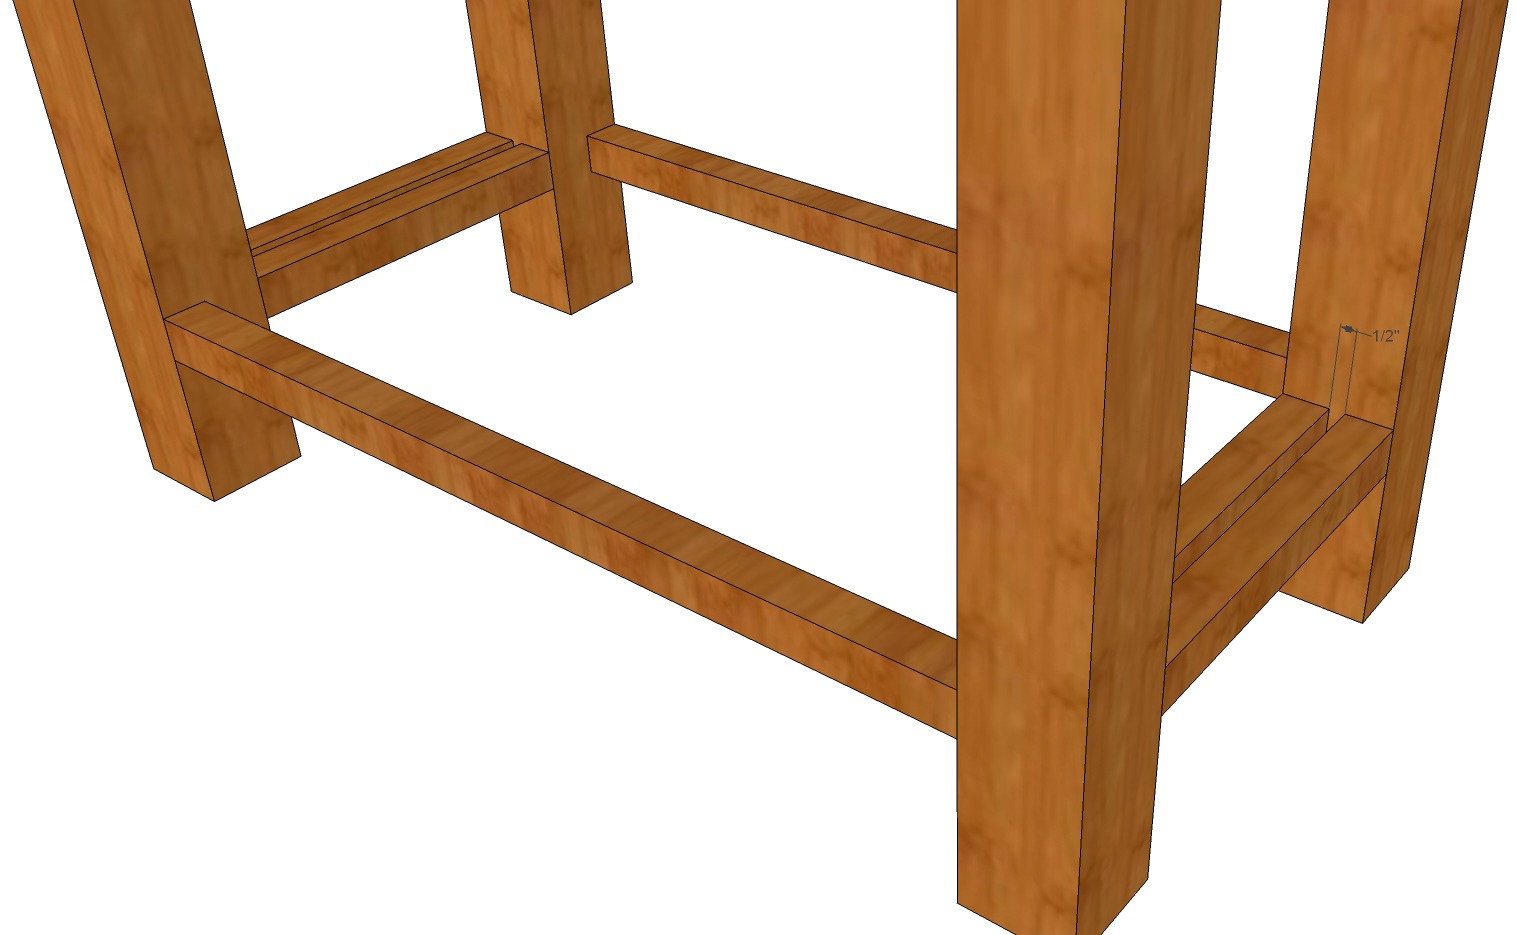
It is best to do the next part with the vanity upside down. Measure down 7" from the bottom of the inside of all legs. Attach the 4 outside 2x2's using pocket holes placed on the bottom and wood glue. Put the other 13" 2x2's so they are lined up with the inside of the 2x2's. They should be approximately 1/2" apart.
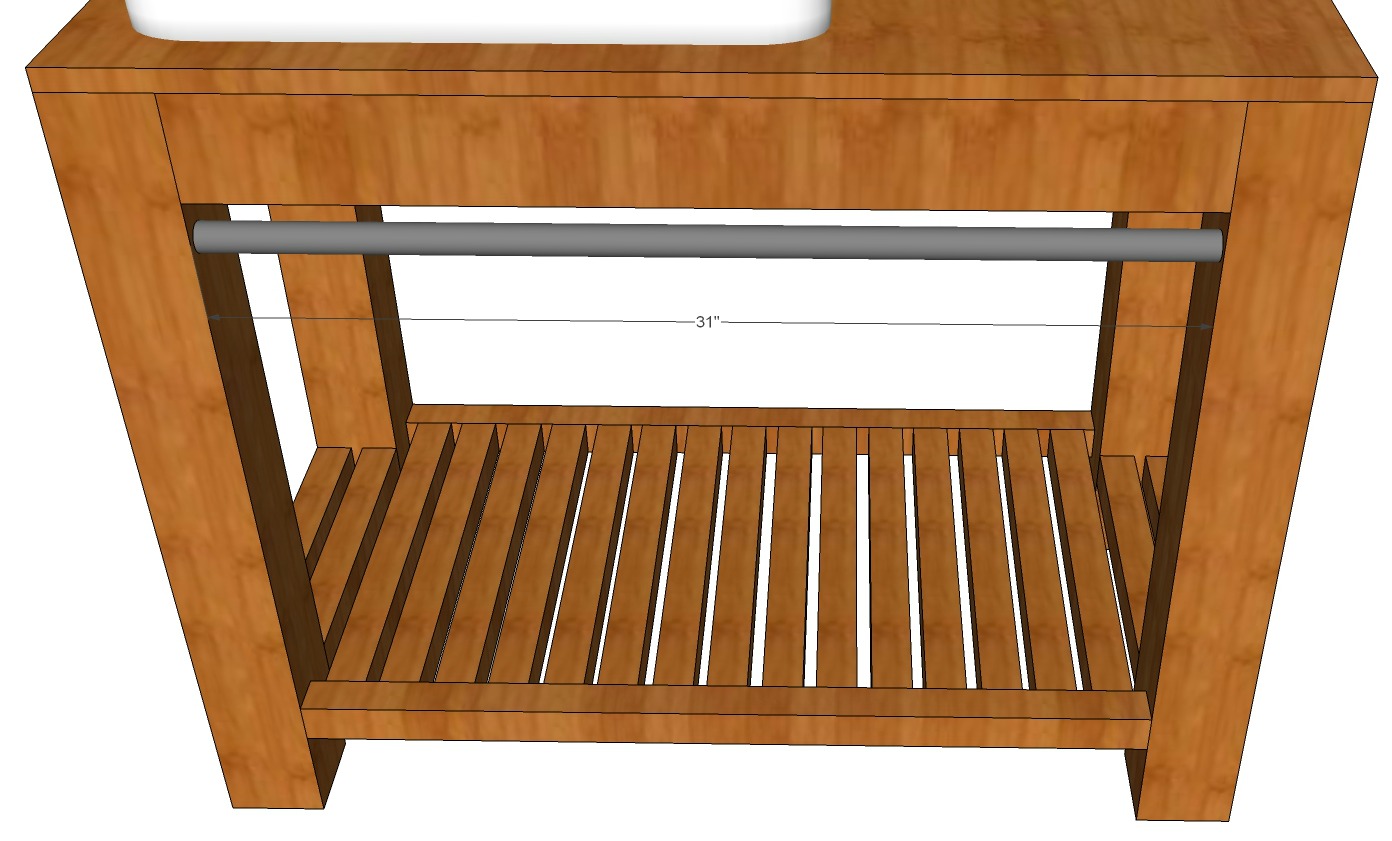
Mark the following lines on the 31" 2x2's (see photo below), both sides, these will be the starting points for the 17" slats in between. Attach all with 1 1/4" pocket hole screws and wood glue.

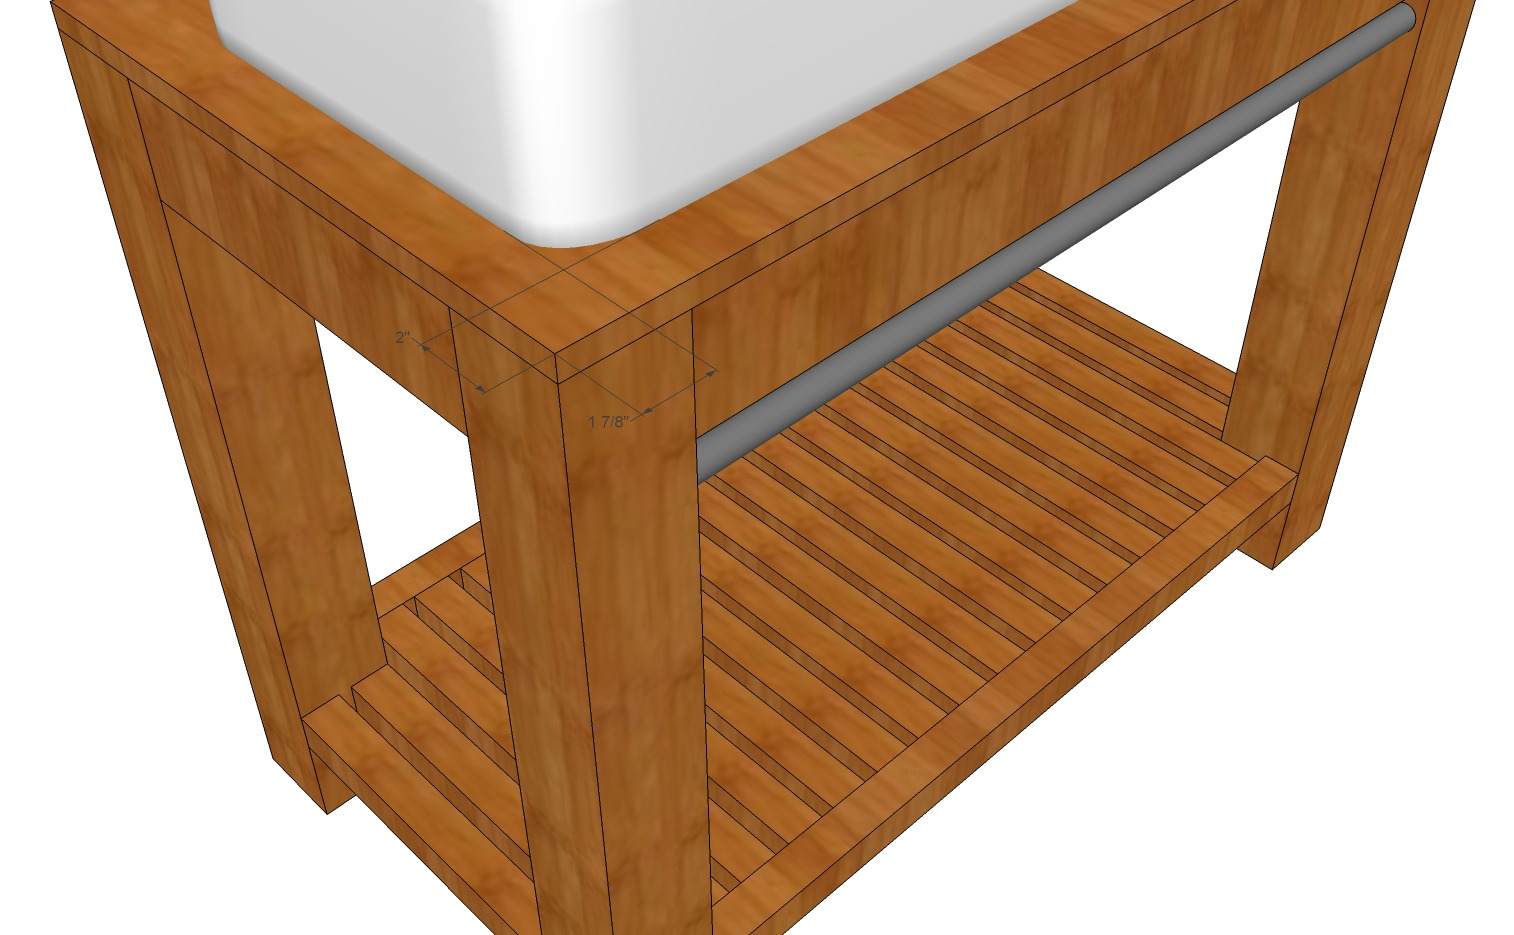
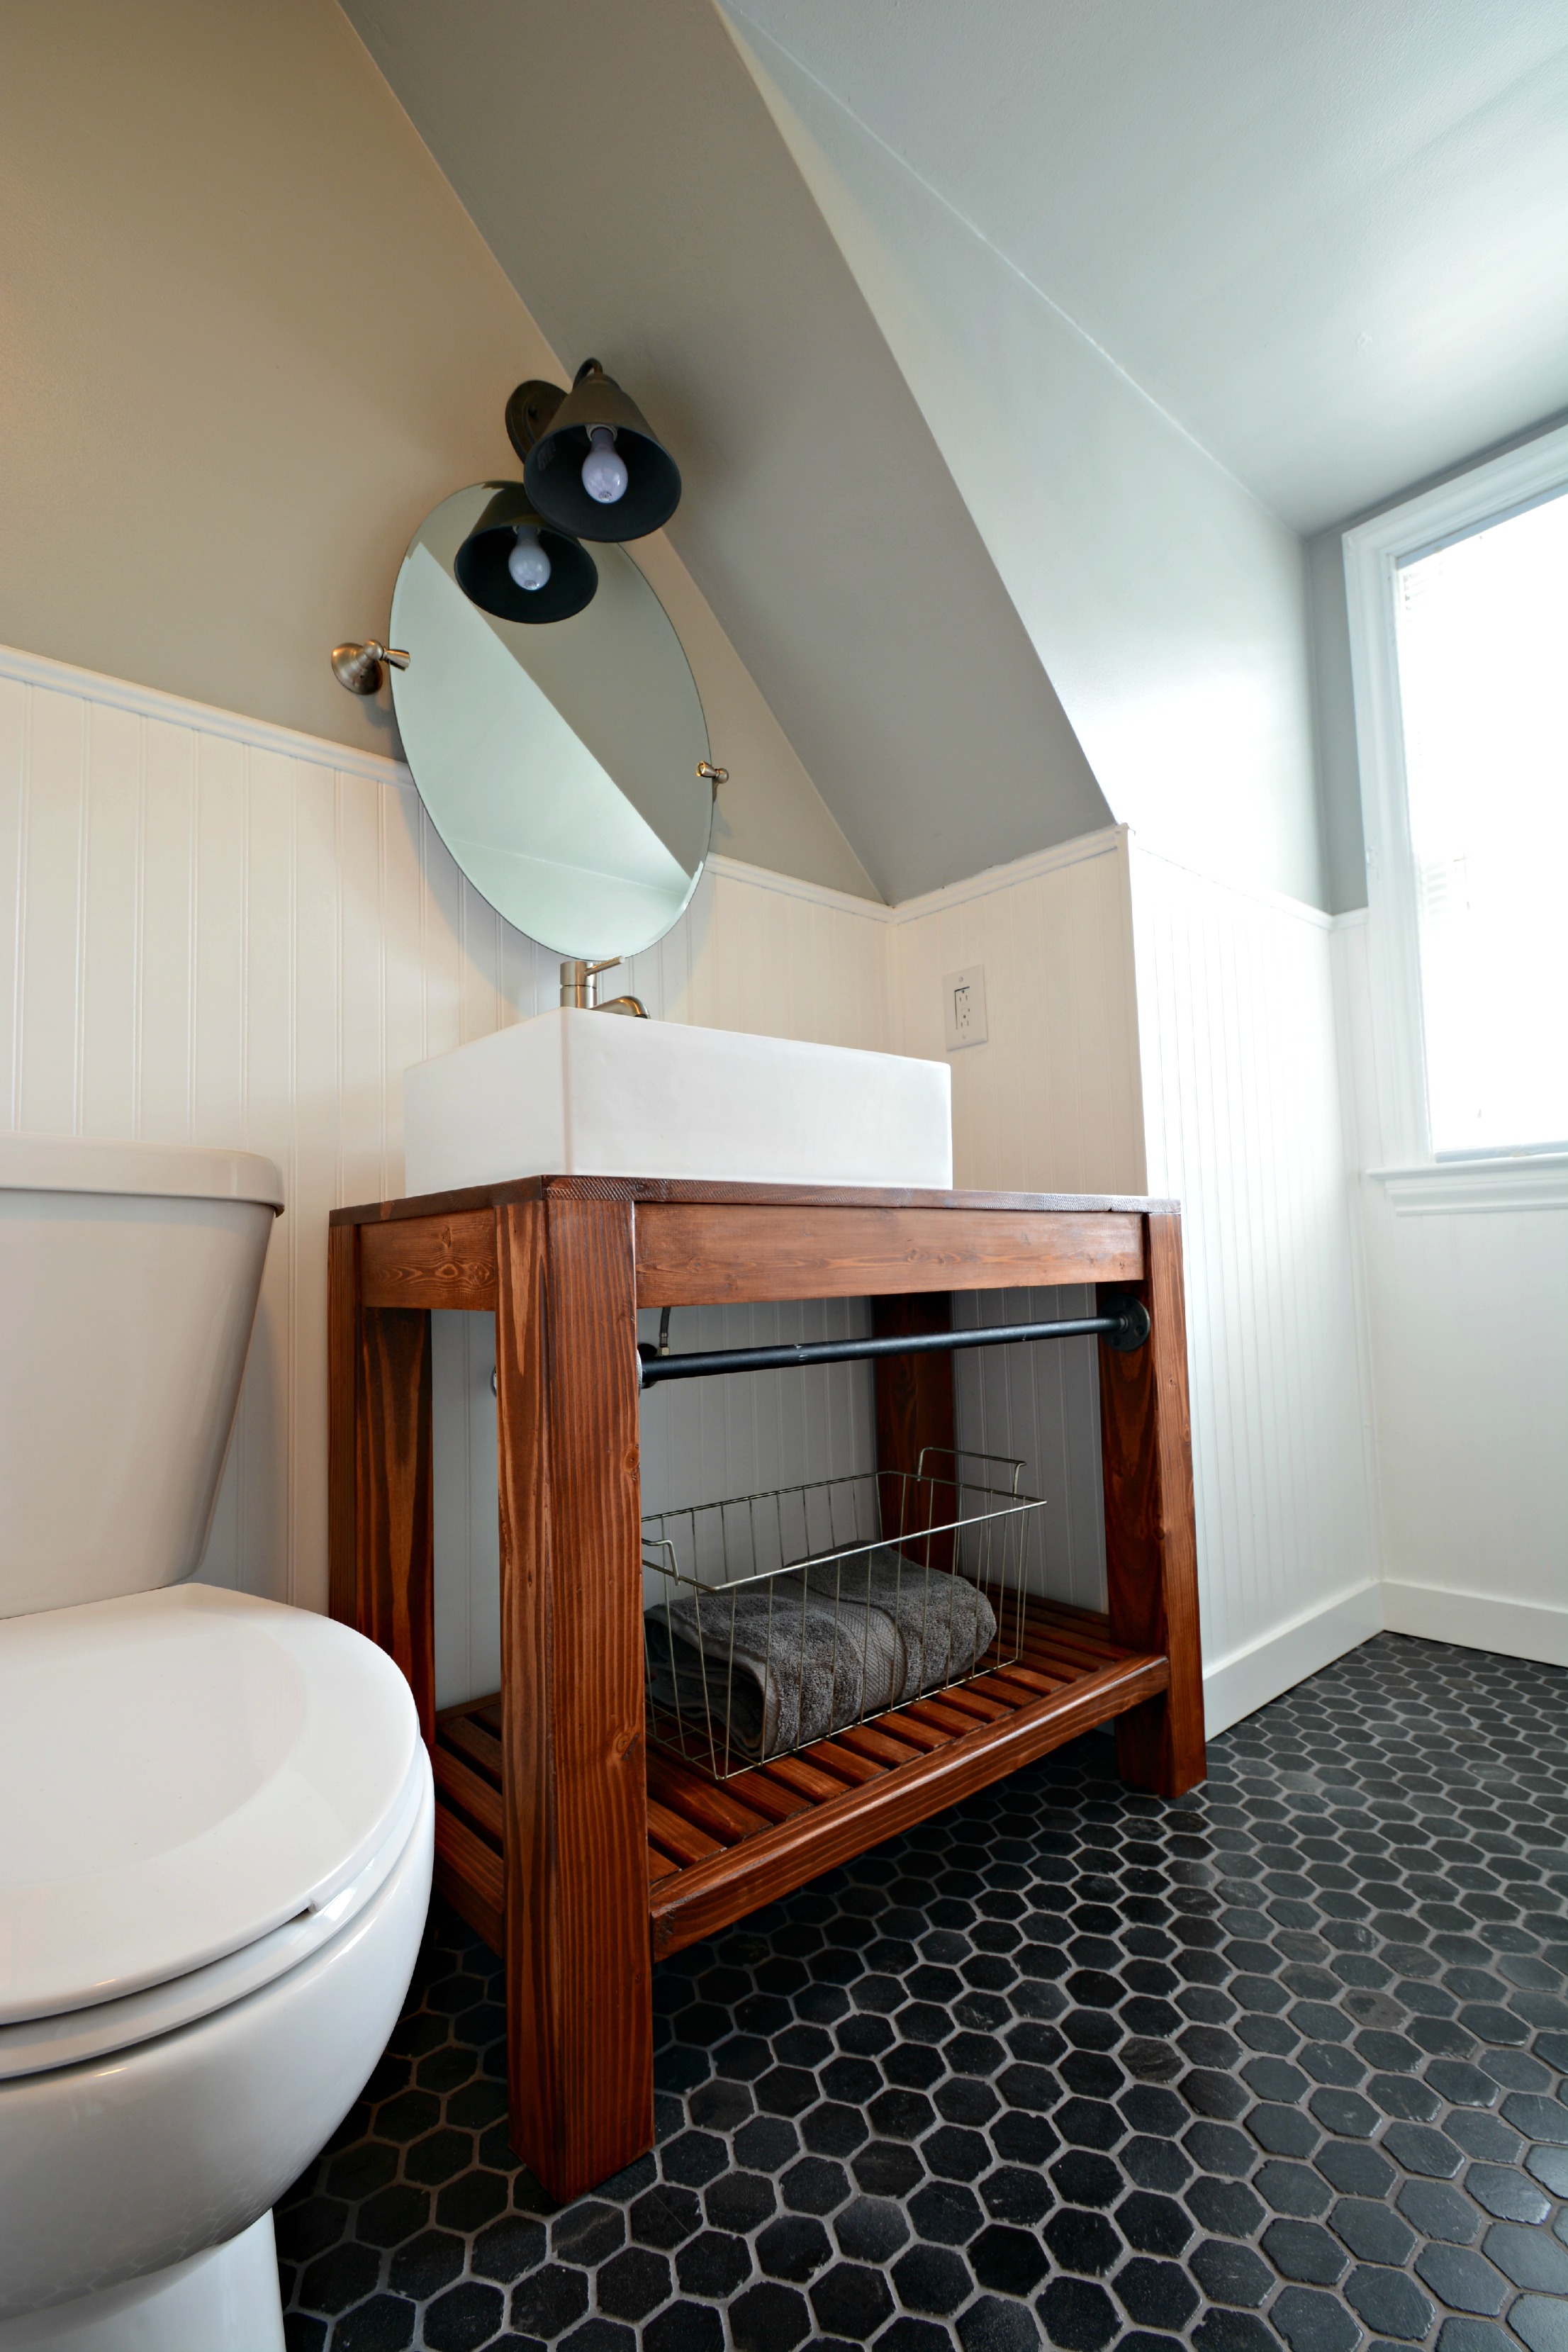
For the front metal bar, we used a black iron pipe. We used flanges that the pipe could screw into. I cut the pipe around 29 3/4" as there was a 1/2" on each flange between where the threading stopped and the leg, then a little room to get the pipe between, then screw it out so it out so it was tight. We purchased a pipe threader kit threads pipes up to 1". After cutting and threading the pipe, we held it up and marked the holes for each flange (doesn't have to be exact, just whatever looks good). They were probably 2" on center from the bottom of the apron. Attach with the black screws.
Place the sink/faucet on top of the vanity to determine the best placement. For this sink, we determined that placing the sink about 2" from each edge looked best. Mark holes for the drain and faucet.
Drill holes according to instructions provided with your sink. Our sink required a 1 1/4" hole for the sink and 1 3/4" for the drain. Attach sink/faucet according to the directions provided with the sink/faucet. Our sink required us to chisel out a small area around the drilled hole to accommodate a gasket for the bottom of the sink. A router or wood chisel may be needed.
Attach sink to vanity top using bath adhesive caulk. Hook up plumbing, etc.
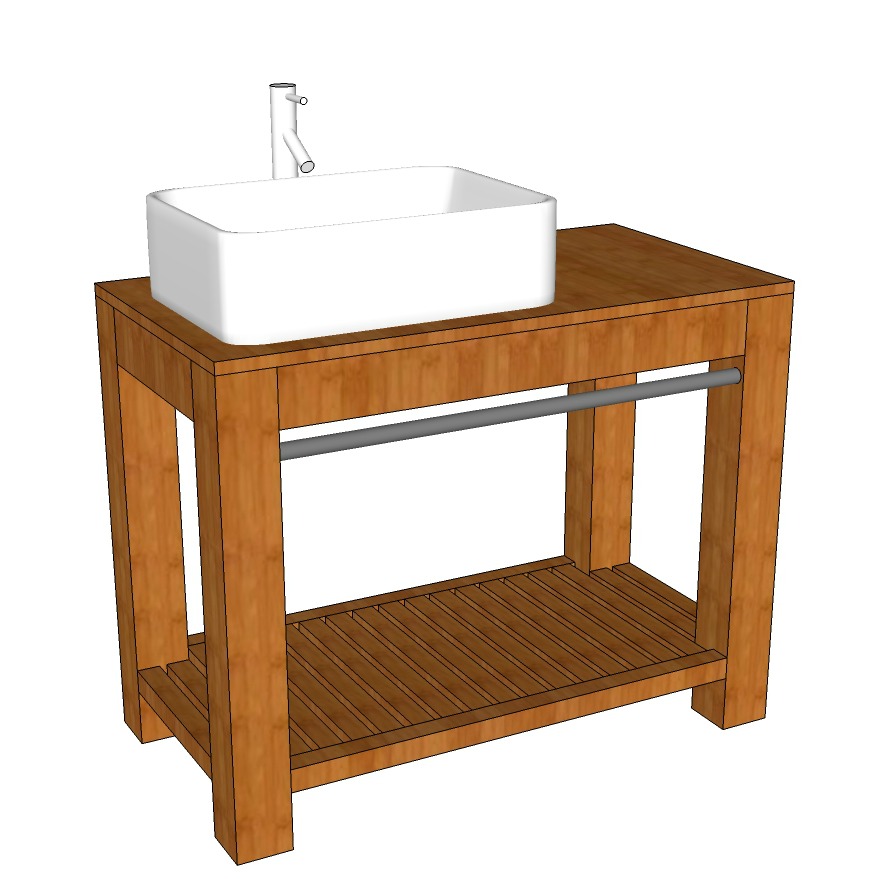
Enjoy that new bathroom vanity!

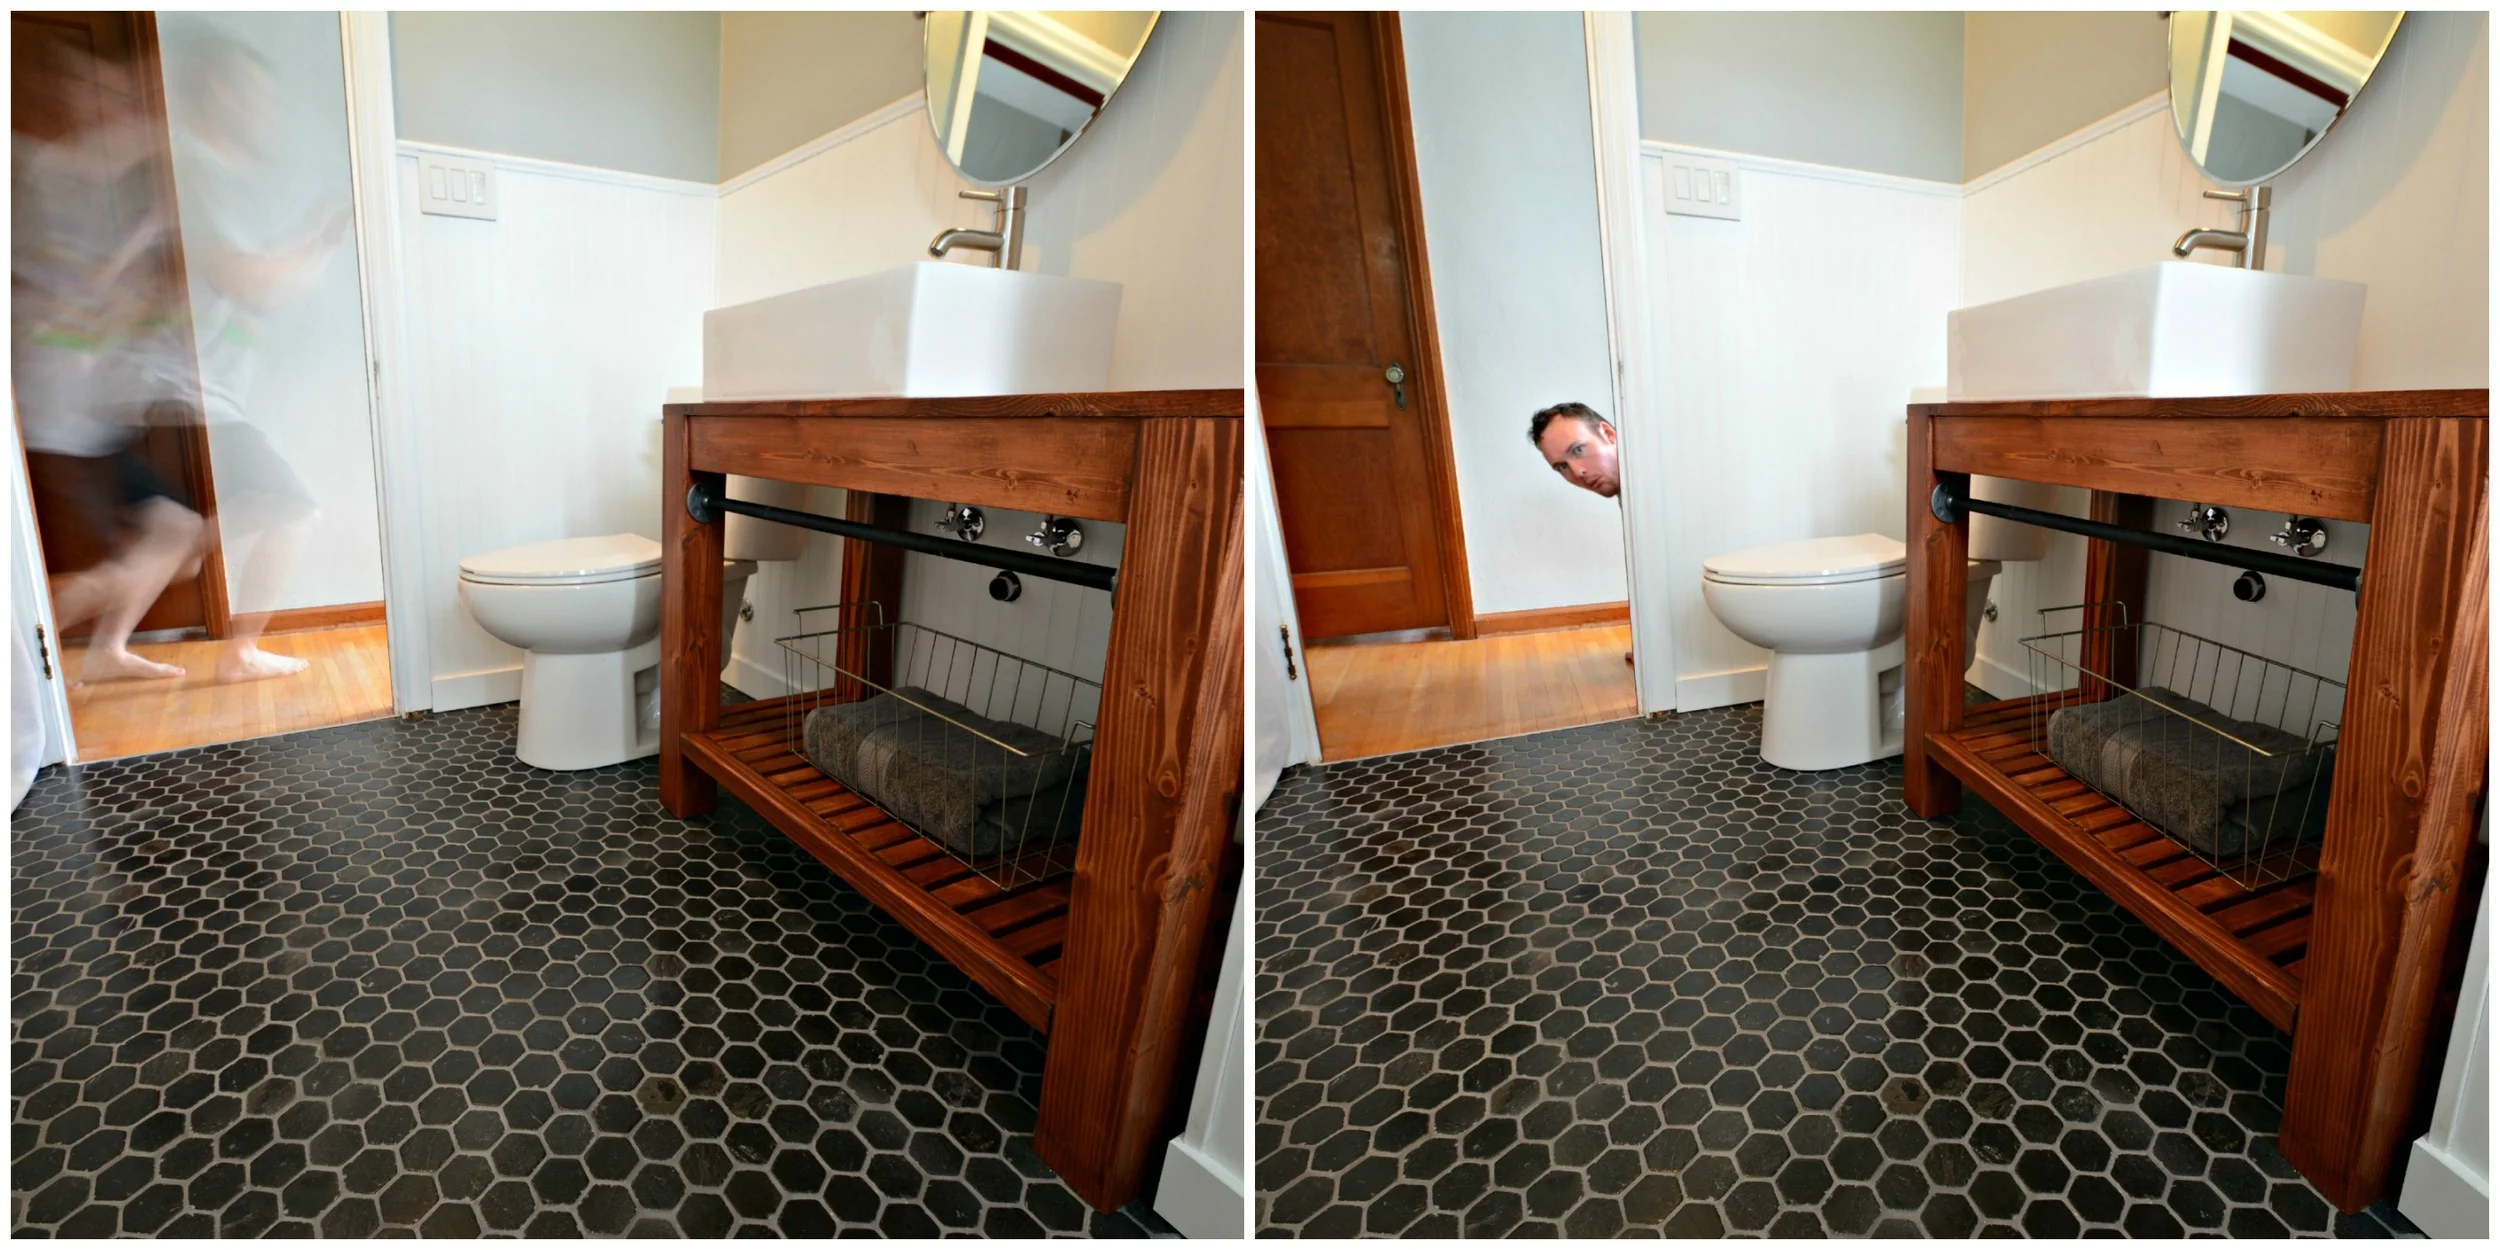
My brother is probably the most understanding of our family members with regards to blog photos. He gets it. (Especially when it gets him a shiny new bathroom.) It doesn't mean that he still doesn't mess with us.
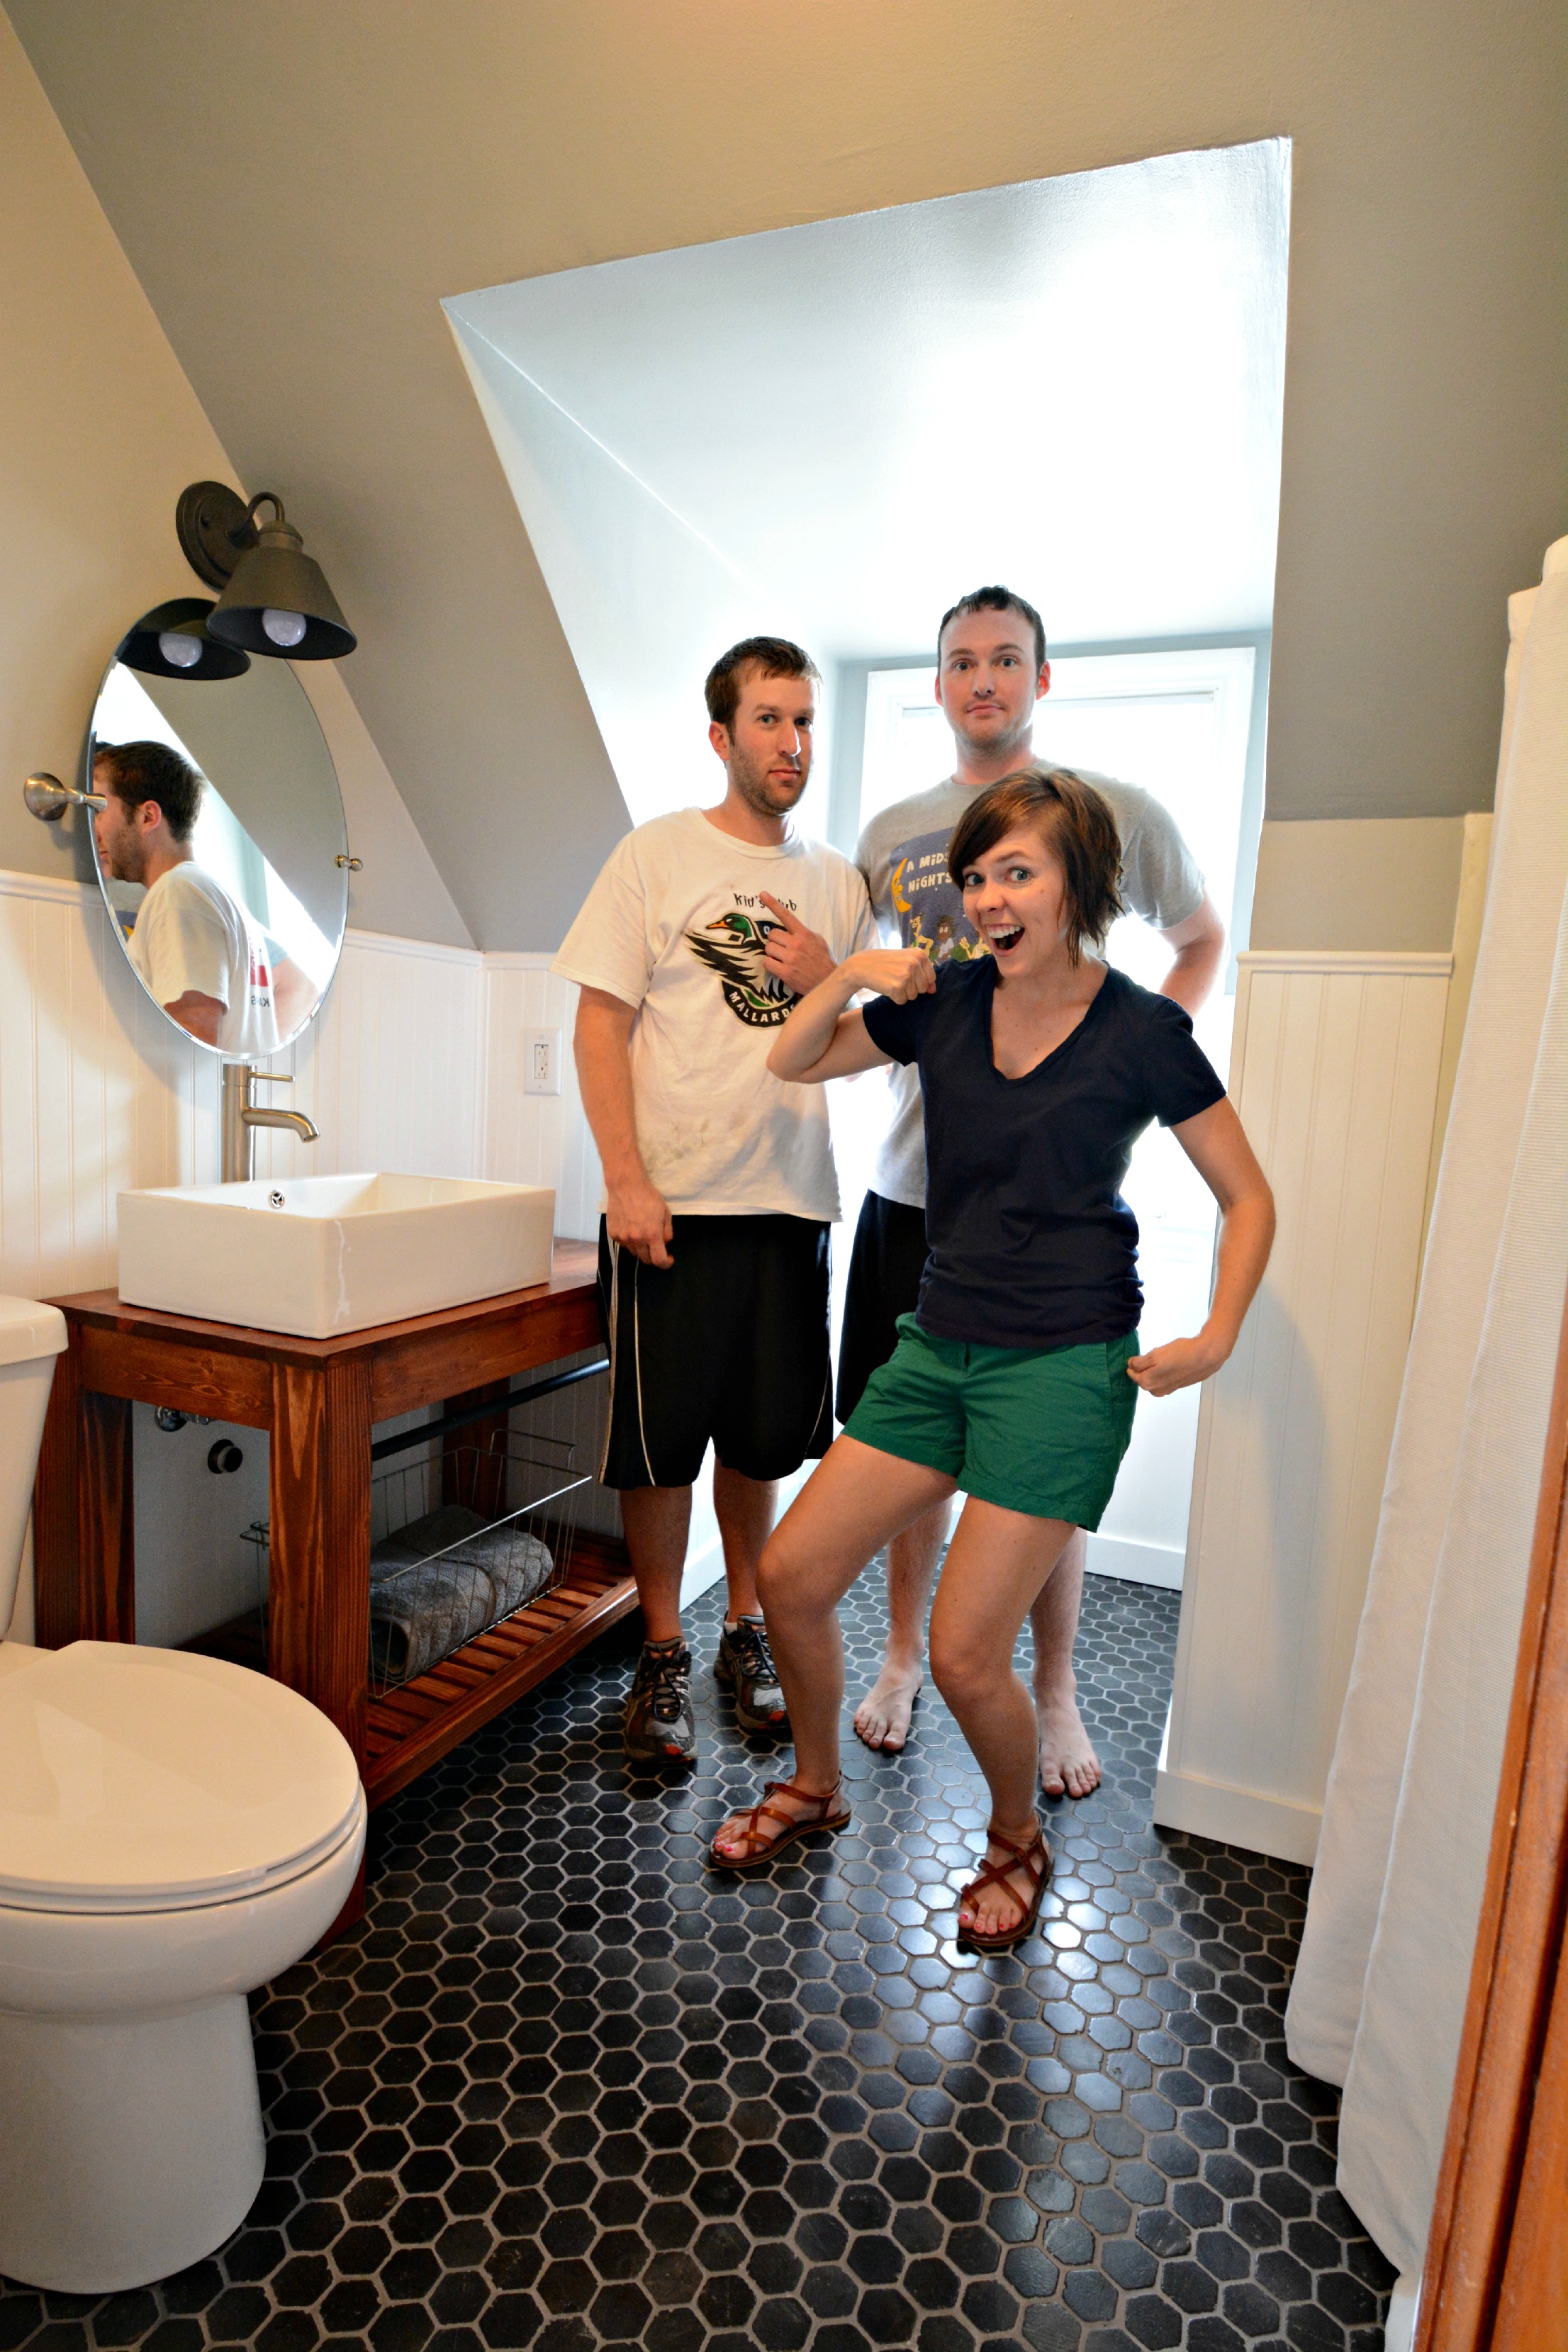
It's amazing we were still smiling after being shoved into this small space for four days. At this point I think we were all just excited it was finally done!
Check out these past photos for more bathroom information: