Dog Model
/(inspired by this post...edited for dog photographing purposes)....
We were looking for a picture of Ike to frame and hang in our dining room. With a black flat bed sheet, a camera and the dog we set out to taking pictures.
The first step was finding a spot to take Ike’s picture. With it being a sunny day and not wanting to use the flash on the camera (as it would create harsh lighting on Ike’s white fur), we went up to our master closet that faces south. We set up the sheet by tucking it into our built-in drawers and letting it sit a couple of feet on the floor. We did not want direct light on him so we angled the blinds up a little bit so the light would reflect off the ceiling (take that window blind haters).
We then coaxed Ike to sit on the sheet using a treat (he is a treat monkey!). Michelle held the treat and said things like “walk” and “car ride” to try to get him to turn his head while I snapped the photos.
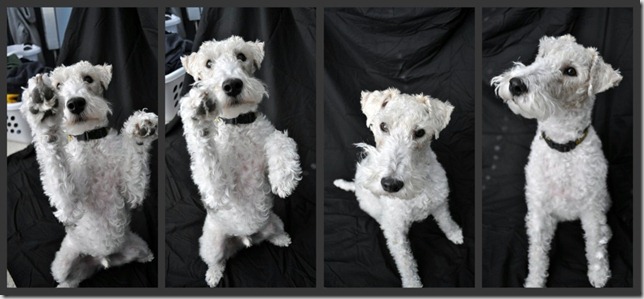
We took probably 20 – 30 pictures so we had a wide variety to choose from later…some sitting, begging, laying down, etc….some with our laundry basket in the background…
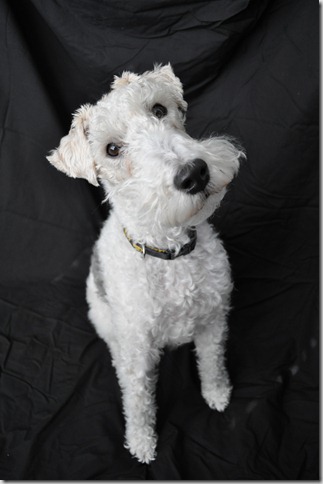
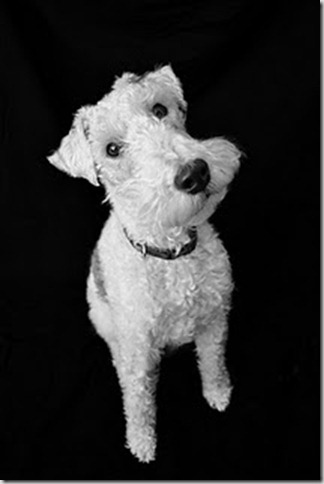
After unloading the pictures onto the computer, we both picked this one as the winner.
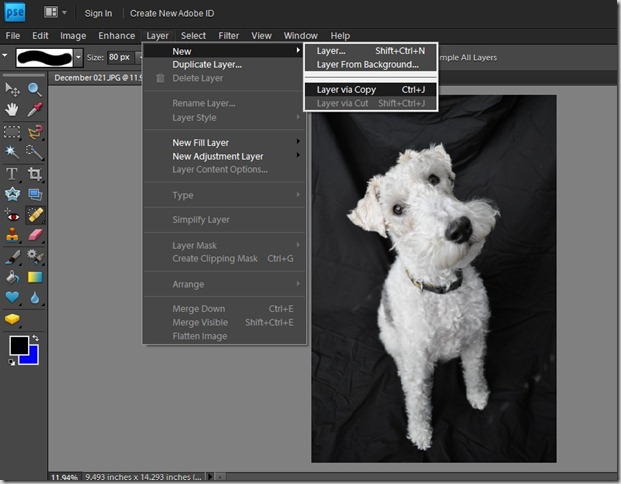
I then opened the picture in Photoshop Elements, then went to Layer/New/Layer via Copy.
After the new layer is opened, make sure the layer is selected, not the background, go to Image/Adjustments/Brightness Contrast. When the adjustment window opens (for the black background) slide the contrast to the right and brightness to the left.
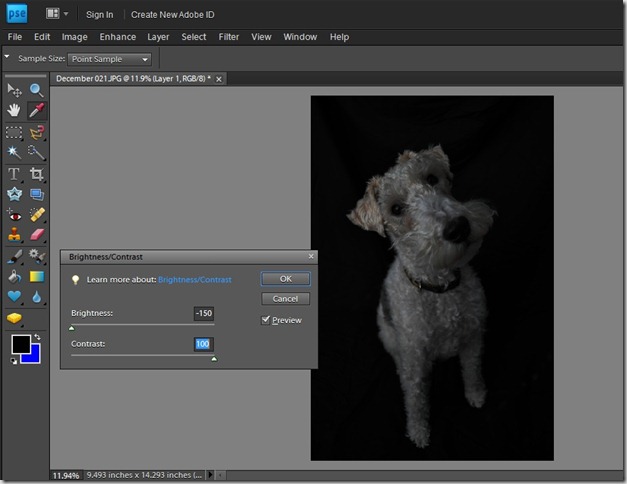
Doing this it will “smooth” out the background, and you will notice that the subject will also become very dark, but do not worry. We will fix that in a minute.
Now go down to the bottom right hand corner and click on the little dark grey box with the white circle on it. You just created a layer mask.
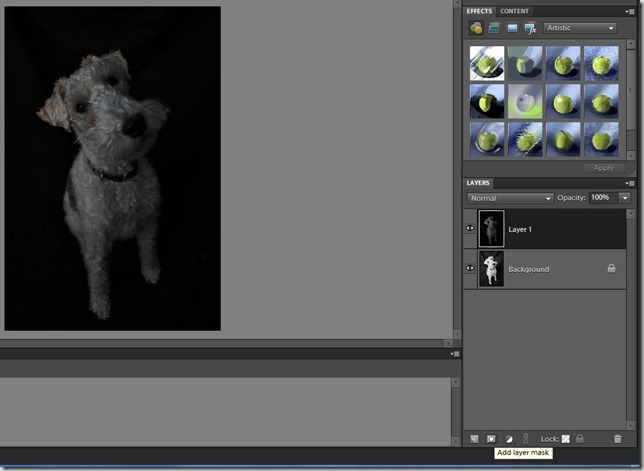
With that layer mask, select the paintbrush and and the color black. Now color in over the subject area in the layer, and the original image will show through.
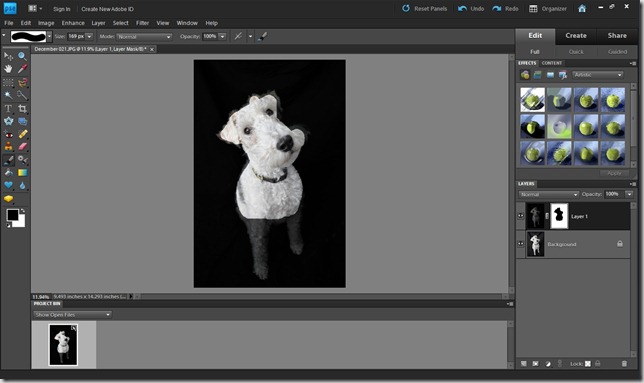
One problem that came up with Ike’s fur and the hard-edge paintbrush (the default, and what should be used to paint the interior of the picture) was getting the edges to look good. If you went in between the “tufts”, the wrinkly background would show through, and if you did not get close enough they either looked dark or were lost into the background.
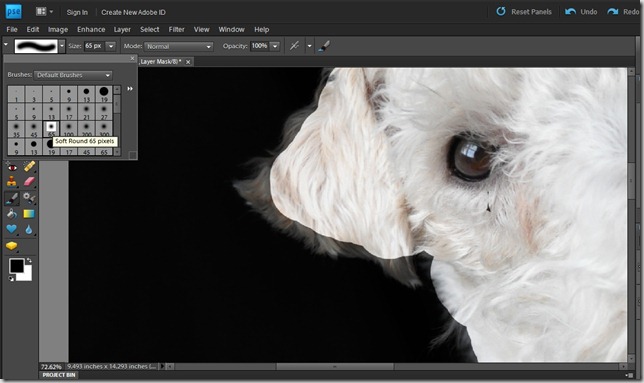
To fix this, zoom in to the edges and select a soft round edge brush and paint around the entire subject. This will allow the hair to come through without being able to see the original background.
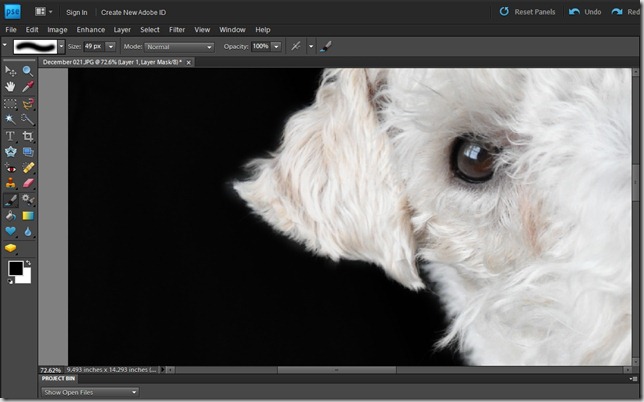
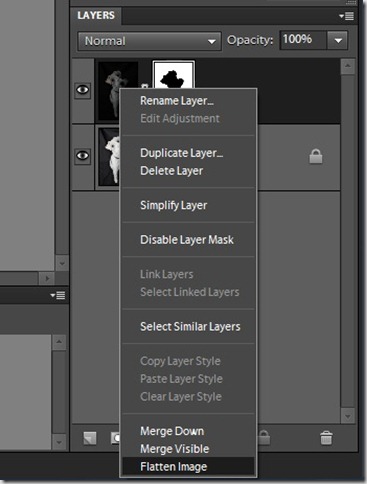
Next flatten all layers of the image.
After all of this (which for a beginner like me took under 5 minutes) here is the resulting image.
And here is the photo hanging in our dining room.
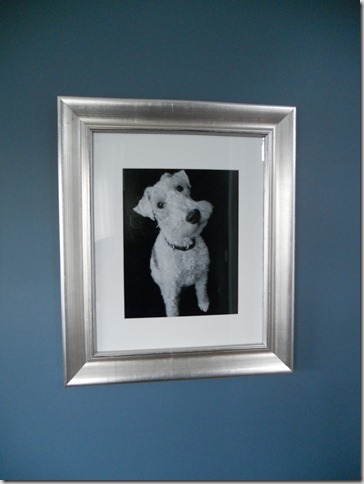
We ordered the picture from http://www.mpix.com/. We bought the frame from Hobby Lobby (half off, of course). We wanted to get the mat cut to size but the cutter at Hobby Lobby has been broken since Christmas. In the mean time, we are using this standard size mat that is a little large.
There you have it. Easy, inexpensive art for your dining room…because only normal people have a large photo of their dog in their formal dining room.
Anyone else use their pets to decorate their home? Any questions on the tutorial?

