Pumpkin Mania + Fall Home Tour

This post is action packed.  Seriously.

First up, it's time for Pumpkin Mania.  I'm teaming up with a fabulous group of bloggers for a pumpkin themed party.  We'll each be sharing a pumpkin project next week.  I'd better get to crafting!

I also think you need to get to crafting!  We'd love for you to show us your pumpkin project on October 11th when we're hosting the Pumpkin Mania link party!  More info next week but we wanted to give you some time to jump on that pumpkin project! (Anything pumpkin will fly!)


pumpkin mania.jpg

Next, I've been invited to join another group of ladies for a blogger home tour series, based on a "fresh and modern spin"on Fall. We were asked to think of fresh ideas - not your basic Fall decor.  Being part of this tour is exciting and terrifying at the same time beings I have approximately two Fall items in my house right now.  I have some fun work ahead of me!  Be sure to check out the tours from the hosts today!

Modern and Fresh Fall.jpg
1 – Kristen and Lindsay. 2 – Sarah from Sarah M. Dorsey Designs 3 – Gabbi from Retro Ranch Reno 4 – Brittany from Brittany Makes 5 – Jesse from Scout & Nimble 6 – Julia from Cuckoo 4 Design 7 – Carolyn from Sweet Chaos Home 8 – Jennifer from The Chronicles of Home 9 – Bethany from Dwellings by Devore 10 – Carmel from Our Fifth House 11 – Kristin from The Hunted Interior 12 – Annekke from This That & Life 13 – Michelle from Decor and the Dog 14 – Cassie from Primitive & Proper 15 – Ally from From the Right Bank 16 – Shannon from Shannon Berrey Designs 17 – Danika from Gorgeous Shiny Things 18 – Kristin from Bliss at Home 19 – Jenna from Rain on a Tin Roof 20 – Jessica from Dear Emmeline 21 – Kelly from View Along the Way 22 – Sarah from Lacquer and Linen 23 – Eileen from A Creative Day Blog 24 – Sarah from Royal Marigold 25 – Lori from Lori May Interiors 26 – Jennifer from Dimples and Tangles 27 – Caitlin from Desert Domicile 28 – Sherry from Design Indulgence 29 – Lakeitha from Lakeitha Duncan Lifestyle Blog 30 – Shavonda from A Home Full of Color and Whitney from The Curtis Casa. 31 – Angela from Number Fifty-three and Jennifer from Brave New Home.

I need a nap.


Wanted: Good Looking Legs

Nate and I've been on the hunt for some good looking legs. 

Curvy.  Interesting. Substantial.  Full of character.  You know, characteristics that a lot of people want in their dining room table legs. 

We both agreed that we wanted big ol' curvy legs for our eight foot long dining room table.   Simple, boring legs weren't going to cut it.

We started our search at our local big box stores.  We knew shipping on legs would probably be expensive so we wanted to try to avoid that if possible.  We went to every store in our area that we could think that would carry table legs.

We ended up purchasing the legs on the right from Lowe's at $23 per leg. 


table legs.jpg

They were the only legs locally that came close to what we were looking for.  The price was right. The only problem was that they were 35 inches tall (counter height) versus 30 inches (table height).   Nate thought we could make it work.  (We were pretty much desperate at this point.)  We got them home and started to plan out the table.  Nate couldn't cut from the top and I didn't really want to lose the detail at the bottom.  We decided to not just "make it work" and returned them.

We did some on-line searching and came across some plans from Ana White that included the most beautiful table legs known to man.   These dream legs are the husky dining table legs from Osborne Wood Products.

The legs of our dreams, however ,came with a husky price tag at $54 per leg (plus $50 shipping).  (Well, it seemed husky at the time.  After comparing many other chunky legs, we soon realized that these giant stems were a pretty decent deal. )

But we're cheap.  Did we really want to spend $250 on table legs?   

We sat on it.  We hemmed and hawed.  We both kept going to back to the husky beauties. 

We priced other eight foot farmhouse tables and they averaged around $1200 in price.   We only needed to purchase an additional $30 in materials to finish this table (because we had some free barn wood siting in our garage.)  We decided that the $250 was worth it to build the dining table we both really wanted.  

We had a pleasant ordering experience from Osborne Wood Products.  Their customer service e-mailed after our purchase to make sure we found everything we were looking for.  The legs arrived quickly.  They called after delivery to make sure we were happy with our order.  We'd 100% order from them again.

Who knew finding the right set of legs would be such a challenge but end so well?


osborne wood products husky dining table leg.jpg

The things that excite us as DIYing adults! 

Osborne Wood Products doesn't know about our blog so it's safe to say we were not compensated in any way for this post.  We just wanted to assist others that might be in the market for some husky legs.

Who's a fan of big, chunky legs?  We prefers super skinny ones?  Who has never thought about table legs in their life until today? 

Photobucket Photobucket Photobucket Photobucket PhotobucketPhotobucketfollow us in feedly

Relaxing Vacations and Other Awesome Things

Happy Friday!  I hope you all have big plans for the weekend. 

We plan to spend the weekend:

Sleeping in.   Well, Ike will want up at 5:00am only so he can snuggle in bed with me.  He's so cute that I can't complain.

IMG_20130917_065217.jpg

Eating all things pumpkin.   I made these muffins last weekend. I will make them again this weekend.  And the next.  And the next.

IMG_20130922_093403.jpg

Finishing up my craft from last night's craft night.  Do you all have a craft night group?  I highly recommend getting one.   You can't have mine though because I love them all.  Except they are sort of making me want a squishy baby because all of their squishy babies are so cute.  Someone talk some sense into me! Melissa? Amanda?  Help!

IMG_20130926_190213.jpg

I also have a Sew Midwestern quilt order to finish up.  This quilt is puppy dog themed and Ike thinks it's his.  He will be sad when it gets shipped off. I do, however, have a dog bed plan for him (finally) so hopefully I can keep the peace.

IMG_20130925_194004.jpg

Nate is going to be busy starting on our new dining room table with big ol' chunky legs.  We are both equally as excited about this.  Weird things are happening. 

Today I am also sharing our favorite relaxing vacation destinations over at Attempts at Domestication.  Who couldn't use some beach photos to get them through Friday?

If you're bored, you can check out my craft room over at Apartment Therapy.  They are having a color contest.  Voting ends today.  I was recently discussing entering your home photos on other sites.  I recommend to enter everything and have a short memory.  You'll be excited a month later when they select your craft room! 

Speaking of bloggers entering their rooms, check out this post over at CNN sharing some of my blog favorites  (Boxy Colonial, Bliss at Home, View Along the Way, Shift Ctrl Art)!

Girl with focus issues out. 

Happy weekend! 


Pumpkin Spice Sugar Body Scrub

Happy Fall.  Or Happy blogosphere turns to all things pumpkin until November.  If it ain't pumpkin, you can't blog about it.  (That's seriously a rule.)

Last week I co-hosted a Pinteresting party.  Part of my co-host responsibilities was to find a craft for our group to make.  It was hard finding a craft for 40 people that was inexpensive but would also be appeal to a large group of women.   

I decided to go with a Pumpkin Spice body scrub.  While not exactly a "craft", there are some crafty steps at the end to make it gift-givable.  I had been wanting to make a body scrub but for whatever reason, they terrified me.  Turns out they are the world's easiest thing to make.   And I'm now kind of obsessed with making them.


Pumpkin Spice Sugar Body Scrub.jpg

This scrub is perfect for a craft night with the girls.  It requires little thought but you feel all fancy making something to use in the shower later.  Or at least I feel all fancy when I make it.  It's the little things in life.

I think this scrub makes a great, inexpensive gift.  It would be an awesome hostess gift for the upcoming holidays. 

Here's how you can make your own!

Ingredients (for one small canning jar):

  • 1 cup brown sugar
  • 1/4 white sugar
  • 1/2 tsp cinnamon
  • 2-3 tsp pumpkin pie spice
  • 1/4 tsp nutmeg
  • 3-4 Tbsp oil (You will want to use something that doesn't have a strong smell.  I recommend olive, coconut or almond oil.)

Instructions:

Combine the sugars and spices. 


DSC_0153.JPG

Slowly add the oil.   

Pumpkin Spice Sugar Scrub.jpg

Stir it up well.  You want the scrub to be damp but not runny.  I think the consistency of wet sand is the best way to describe the finished product.

Sugar scrub.jpg

You are now ready to assemble your packaging.  This step isn't necessary if you are making the scrub for yourself.  Unless you like to give yourself pretty packages like I do.

I purchased canning jars from the Dollar Tree.  Amazon has a bunch of super cute jars but I needed to keep my costs down.  I actually really ended up liking how the canning jars looked.  I used some Baker's twine, tags and washi tape to decorate the jars.  I mean, can a blogger create a craft without Washi tape these days.  The answer is no.  If you can't beat 'em, join 'em. 

DSC_0163.JPG

My mom helped me cut out the tags using her Cricut.  (Thanks, Mom.)  For the Pinteresting party, I also included a tag with the ingredients and instructions.  I think you could go either way on this for gift giving.

DSC_0167.JPG

I placed the circle of scrapbook paper inside the canning jar lid.  I used Baker's twine to attach the tags.  I like the simple look. 

Sugar Body Scrub.JPG

Some at the Pinteresting Party included Washi tape on the lid and layered the Baker's twine.

Pumpkin Sugar Scrub.jpg

This scrub smells ridiculously good.  Nate asked why our shower smelled like Thanksgiving.  It's that good.  The scrub melts away when you use it in the shower and leaves your skin all nice and soft.  Obsessed I tell you.

Make Your Own Pumpkin Spice Scrub.  Great craft night idea!

Are you ready for all things pumpkin?  Have you made body scrubs before? 

Photobucket Photobucket Photobucket Photobucket PhotobucketPhotobucketfollow us in feedly

Linking up to: The Lettered Cottage

Fall Mantel 2013

I was over at the Woodward's last night.  Kim was all making meatloaf, teaching me how to quilt, and decorating her fall mantel.  All at once.  Seriously.  It's pretty impressive to watch her in action.   

And then I was like.  Man, I don't want to miss out on the "It's Fall Y'all" link party.  Because I am clearly a party animal.  So this morning I whipped up my fall mantel. That's what normal people do before they work an 8+ hour shift in a crazy pharmacy, right?

fall mantel.JPG

It looks a lot like my mantel from 2012 but sometimes you need to stick with a good thing.  At least I think it's a good thing. 

fall mantel 2013.jpg

It's not super fall-ish but it's cozy.  I think that's what fall is all about. Being cozy.  What's more cozy than books?  Add a cup of tea and a snuggling in a blanket with your dog. Bam.  It's fall y'all. 

fall mantel.JPG

I'm still super jealous of all of you with mantels without a television above them.  I just have to remember that television brings Mad Men into my life.  I then want to pretend I never spoke bad about my poor beautiful television. 

fall mantel.jpg

Ike tells me that owls are so 2012 and the fox is where it's at in 2013.  He's so very trendy. 

DSC_0201.JPG
ike and fox.jpg

What's your fall mantel looking like?  Is your dog trendier than you are?  It's cool. 

Photobucket Photobucket Photobucket Photobucket PhotobucketPhotobucketfollow us in feedly

Linking up to: Thrifty Decor Chick

If you're bored, we'd love for you to vote for our craft room over at Apartment Therapy

New Kitchen Stools

I'd like you to meet some new members of our household. 

DSC_0143.JPG

Aren't they handsome?  They are Target's Threshold Lewiston stool.

I have had my eye on them since they were released.  Nate, on the other hand, hates all things awesome and denied my stool request.  Rude.  

Actually, I'm trying really hard to include him on home purchases.  We have very similar taste but we differ on "needing" things.  I had previously made over some thrift store stools.  I liked them but they just weren't right spatially.  I needed four.  The thrift store only had three. There weren't the most sturdy things ever. The area just never looked finished.  Nate thought "finished" meant "we have a place to sit".  I, on the other hand considered those thrift store stools as more of placeholders until the right stools came along.

I remained patient.  (That's a lie.) I asked Nate nicely (okay, I pestered) if I could buy the stools every time we went into Target.  DENIED.  Being a good wife is hard.

And then one day (this is like a fairy tale), my lovely internet friend, Caitlin, let me know about an amazing deal on these precious stools.  (She has them in her kitchen, too.)  They were on sale for $59.  There was a 25% Cartwheel for Threshold stools.  And I get 5% off with my Target Red card.  I told Nate about the deal of a lifetime.   I was expecting him to swoop me up and take me to Target in a horse-drawn carriage to buy them.

His response.  "Eh.  You're going to do what you want anyways."   Which I took as, "I love you beautiful wife.  Please do not miss this amazing stool opportunity." 

 Three Target stores later, I brought my beautiful stool babies home.  (In my 2006 Jeep.  Not a horse drawn-carriage.  Just to make sure this story is clear.)  Funny thing, Nate didn't feel sorry for me when I had a horrible time tracking these lovelies down.  No sympathy at all.  Rude. 

DSC_0137.JPG
DSC_0127.JPG

Nate can now rest easily because our kitchen is done.  I said it.  Stick a fork in it. Done.  

Threshold Lewiston Stool.jpg

Now onto the one hundred other rooms that need to be completed.  I'm looking at you ugly office...

Photobucket Photobucket Photobucket Photobucket PhotobucketPhotobucketfollow us in feedly

Life Lately

Phew.  Am I glad it's Friday.  And I only worked 3 days this week.  It's almost a full moon though which always makes my days in the pharmacy seem twice as long. 

Today I'd like to share with you some of my favorite moments from the past week.  I'll be back next week with an update to our kitchen plus info on hosting a Pinteresting party!  Get. Excited.

Nate, Ike and I went to visit my parents last week.  Ike made himself right at home in my parents recently updated guest bedroom.  I should have snapped some pictures before we destroyed it. 

IMG_20130913_175941.jpg

It was the big Iowa Hawkeyes versus Iowa State Cyclones football game last Saturday.  It's the one football game I actually enjoy watching.  Watch the video to see who Ike was voting for.  

The dog kills me.  He does everything in life with such passion. 

My dad and I agree on many things in life.  I was skeptical about his lastest food creation though.  Fruit salad with Butterfinger Bits.  He insists me the Butterfinger Bits are the croutons of the salad.  I was really having a hard time believing it was good until I ate it. 

IMG_20130915_124634.jpg

I will never doubt my dad again.  

Wait. I still doubt him when it comes to home decor.  He misread the latest trends memo.  Faux taxidermy is trendy, not the real stuff.  I kept feeling like someone was watching me when I would sit on the their couch.  Always trust your instinct. 

taxidermy.jpg

Next random subject: I highly recommend you make this one pot pasta from Martha Stewart.  Nate and I aren't big tomato fans but we both loved this.  (Except we'd cut back on the red pepper because we're weenies.) 

martha stewart one pot pasta.jpg

Okay, time to head to work.  Speaking of work, I was recognized at our staff appreciation day for 5 years of service.  This is what happens to pharmacists after 5 years of working. 

IMG_20130913_112241.jpg

True story.  Happy weekend!

Photobucket Photobucket Photobucket Photobucket PhotobucketPhotobucketfollow us in feedly

Keeping My Home Clean With BISSELL

This post brought to you by BISSELL Homecare, Inc.. All opinions are 100% mine.

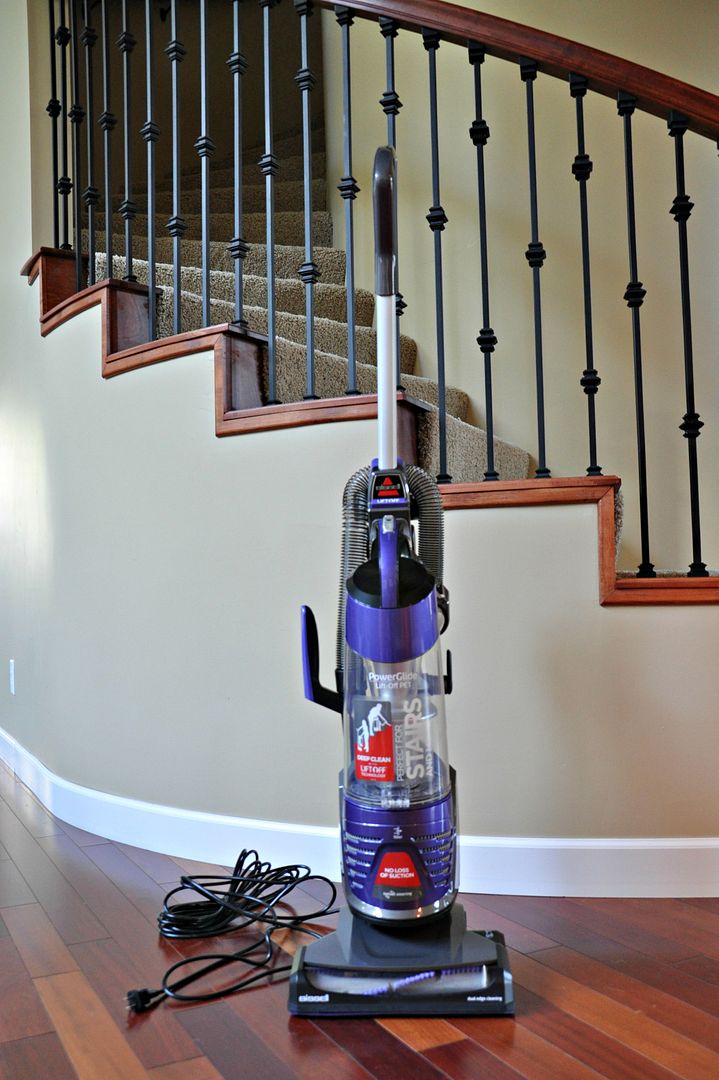
I think it's a well known fact here on this blog that I'm kind of a neat freak.  I don't like clutter.  I don't like junk laying around.  I like the place neat and tidy.  You can imagine how giddy I got when I was offered the opportunity to try out the new BISSELL PowerGlide Vacuum with Lift-Off Technology (PGLO).  

It's a neat freak's dream come true. 

Now here's where I come clean.  For someone that is a self-proclaimed neat person,  I'm not really into deep cleaning.  I'm all about surface cleaning.  Wipe some counters.  Dust some shelves. Run a vacuum over some carpet.  Done!  

Deep cleaning is time consuming.  Who really looks at baseboards?  Or nook and crannies?  Or the cobwebs hanging from my bathroom chandelier?   Not this girl.  Maybe it's because I'm more a big picture person but those little details slip by me.  

In the past I have moved every few years and the need to deep clean disappeared. We plan to stay in this house for a very long time which means I need to get my act together.

Before winter comes (which could be in a few weeks here in Iowa), I would like to make a fall cleaning checklist (which I will share with you all soon)!  That list is going to include things like cleaning out cabinets and drawers.  Our carpets need cleaned.  Along with our couches.  

Oh, the things that are probably living in our upholstery.  (Thanks, Ike!)

I also need to give the carpet on our stairs a good cleaning.  Our previous vacuums have either been so heavy that I pull something in my old lady back trying to lug them up and down or they are light but have no suction. I live with a man and a dog.   My vacuum needs to be lightweight and able to handle messes!

My new buddy, Mr. BISSELL PowerGlide, will come in handy.  It has a long-stretch hose along with a lift-off pod and crevice tool that makes cleaning in touch places easy.  It's lightweight making it easy to carry up and down stairs and from room to room.  My heart is happy just typing this.  I can't wait to get start writing the fall cleaning checklist!

I've recently been browsing BISSELL's site to gather some great cleaning tips.  On that site, I saw that BISSELL is currently running a "Celebrate Everyday Messes" contest.  Something I'm sure all of us can relate to!   Be sure to visit their facebook page to enter to win

Use coupon code POWERGLIDE to get $20 Off Plus Free Shipping for the following products: PowerGlide Pet Vacuum with Lift-Off Technology, PowerGlide Pet Bagged Rewind Vacuum or PowerGlide Pet Vacuum!

Do you prefer to surface or deep clean?  What's your least favorite cleaning chore?  


Visit Sponsor's Site

How to Change Cabinet Hardware

Happy Monday!   (I'm off work today. Can you tell?)

Part of our bathroom makeover included changing our cabinet hardware.  You may (or may not) remember that our bathroom looked like this. 

004.JPG

I didn't hate the cabinet hardware.  Nate, on the other hand, did.  So weird.  Usually I'm the one that's all about change. I guess he has never liked it.  The things you learn.

We decided that we would tile the wall and get the mirror and lights hung before we would make a decision on the cabinet hardware.  I was still remaining optimistic that we wouldn't have to change the hardware. That is a lot of knobs. 

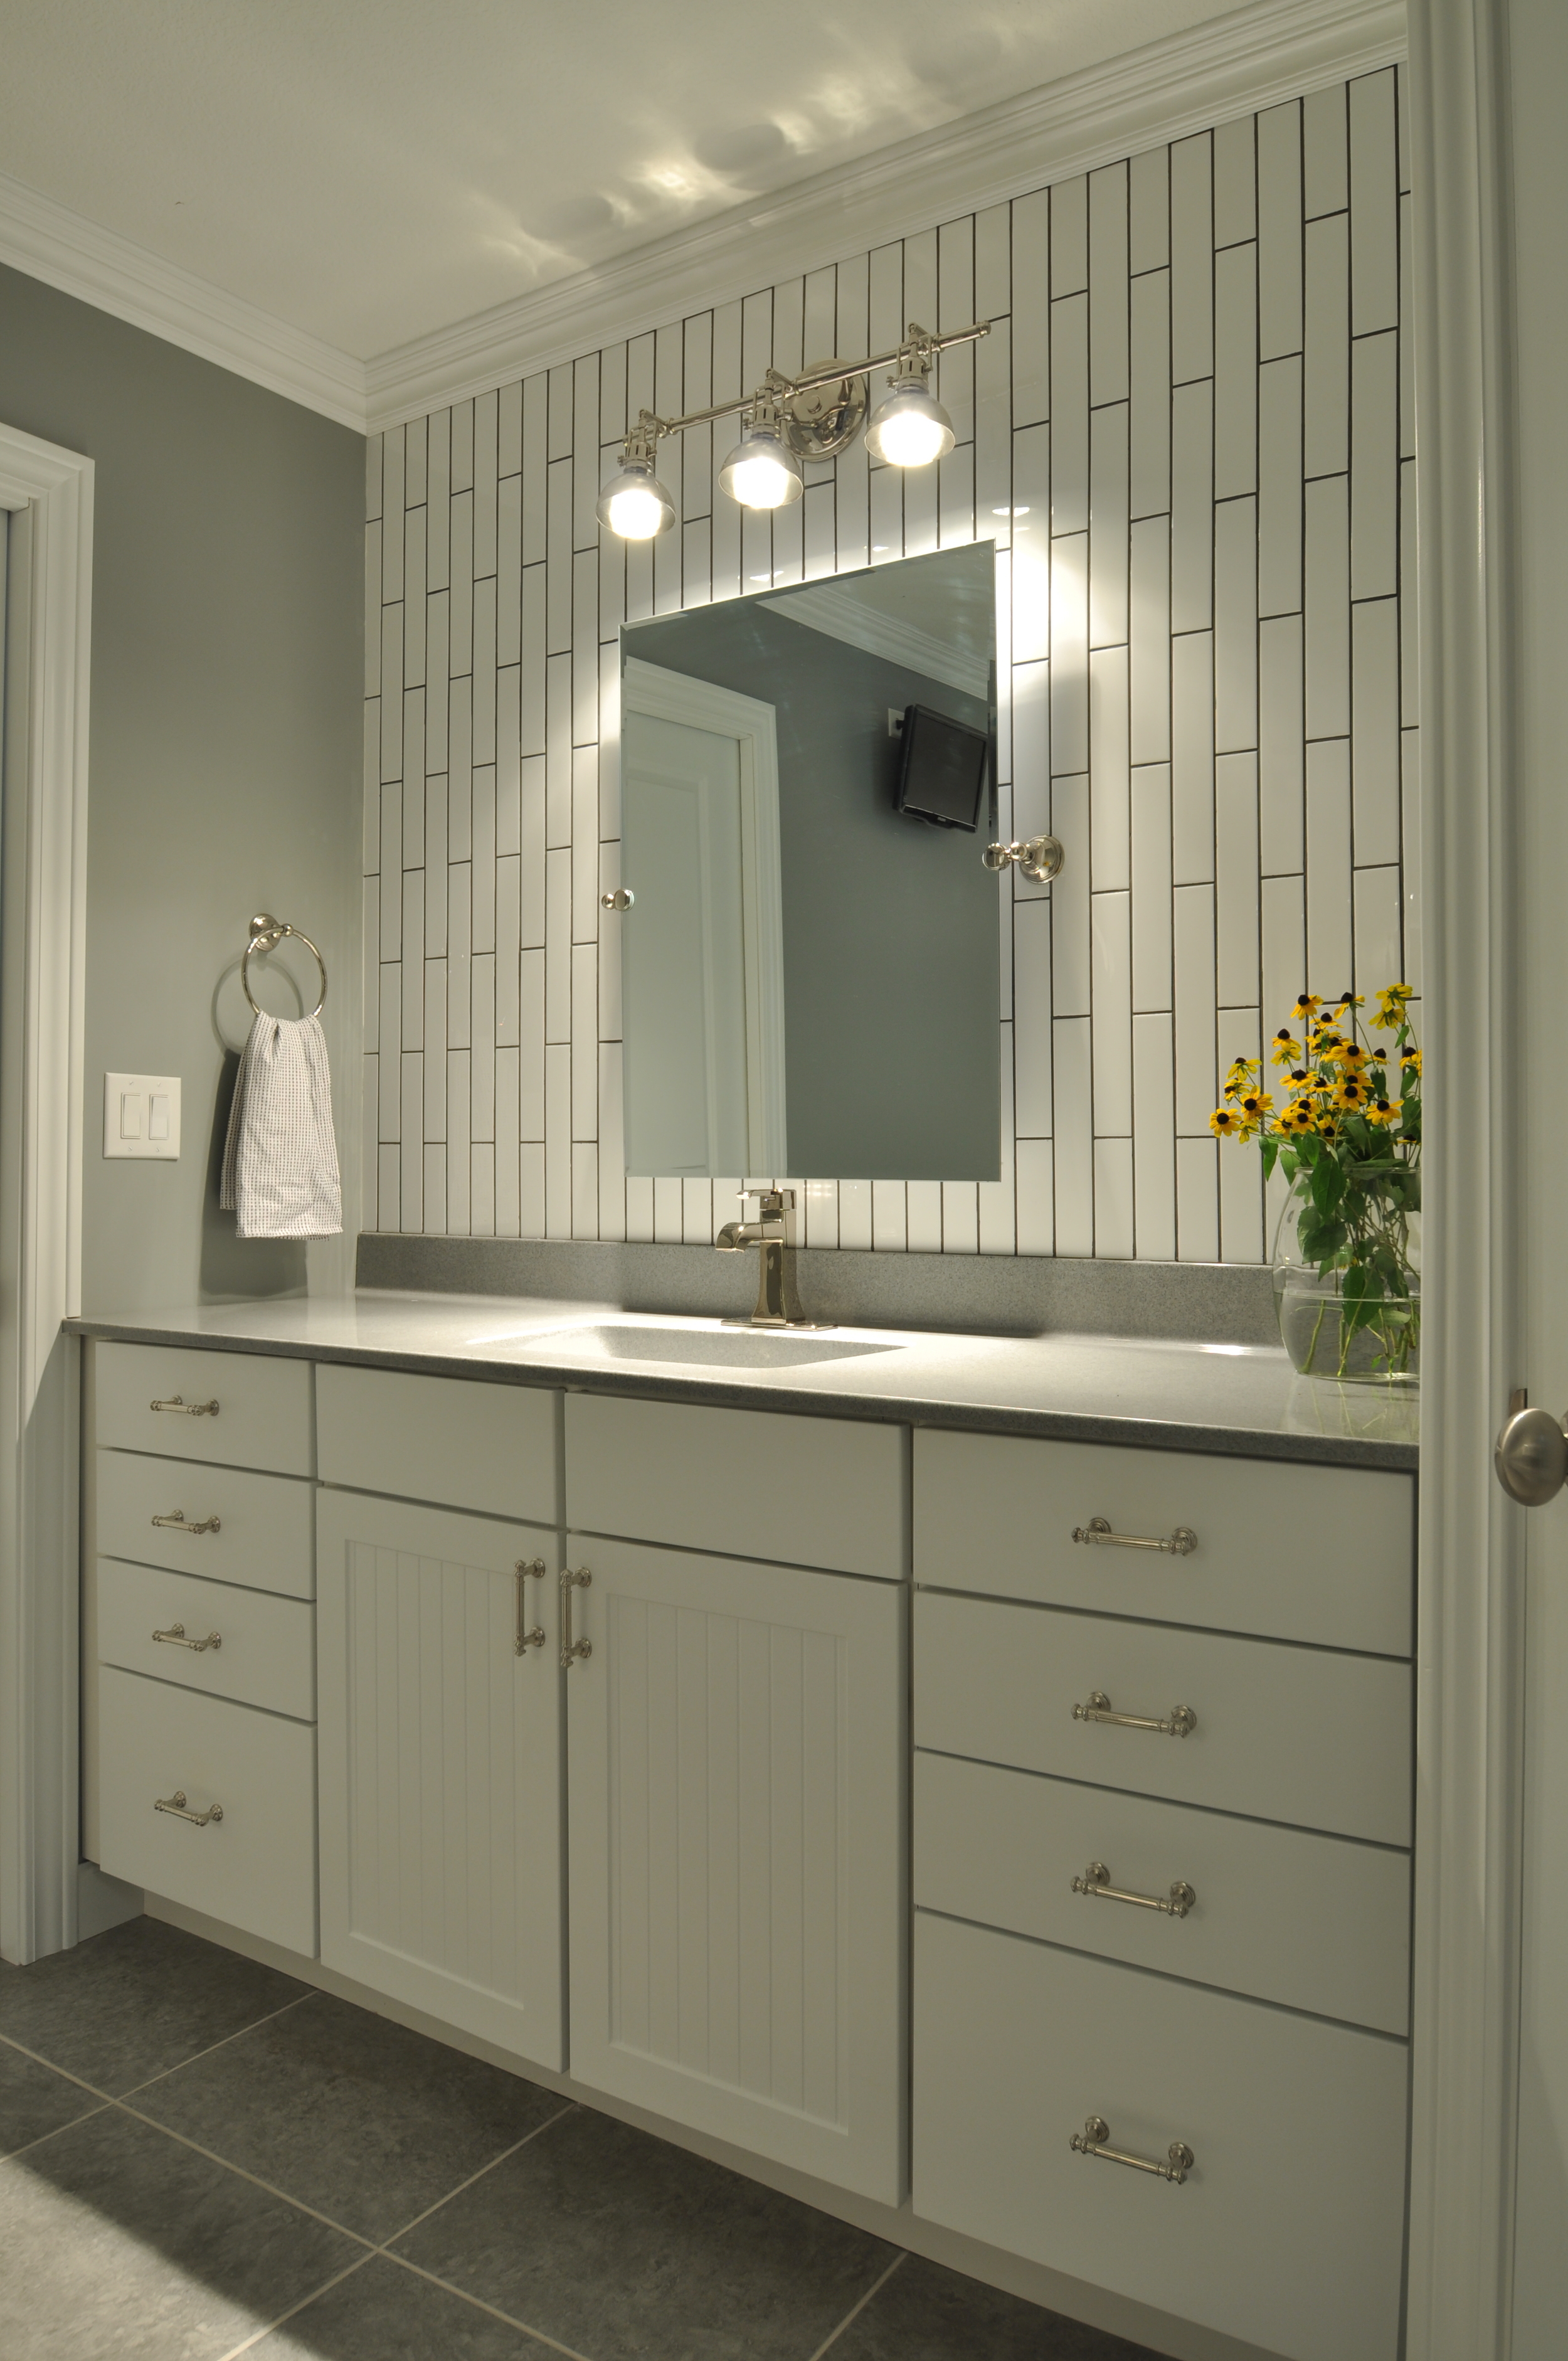
We tackled the previously mentioned tasks accomplished and we were left with this amazing cell phone photo. 

How to Change Cabinet Hardware.jpg

I was "eh" about the situation.  Nate still hated it. I decided to trust him.

We headed off to our local big box stores in search of some polished nickel hardware.  If you haven't gathered, choosing polished nickel was not one of our smartest moves.  A pretty move, yes.  Smart move, no.  Home Depot was the only store that carried a polished nickel finish.  Luckily we found one that we both loved.  It's the Finial Pull from Martha Stewart Living.   Simple yet elegant.  Thanks, Martha.

I then got a little sad.  We have knobs.  These are handles.  Nate said it was no big deal. We could change them.  I was skeptical.  Like always.  Wouldn't it look funny?  Wouldn't it be a lot of work to change them? 

Turns out it was no big deal.  You can see a tiny hole between the handles if you look super close. 

How to Change Cabinet Hardware.jpg

Step 1

Remove previous hardware. 

Step 2  

Fill in the holes from the previous hardware.   We used Red Devil Onetime Spackling.  We use this as wood filler for a lot of projects that we do.  It's lightweight.  Easy to use.  The only con is that it does shrink a little.  We usually apply two rounds.

Step 3

Use paint (or stain if you have stained cabinets) to touch up the filled in holes. 

Step 4

Build a template to help you install your new hardware.   Nate used scrap wood to make this beauty.

How to Replace Cabinet Hardware.jpg

Nate made the template as wide as the drawer/door and then over half of the height of the drawer/door. Drill holes that will match up with hardware.  For example, our handles were 3" apart.  Nate found the center of the template and measured 1.5" from each side of center.  He then measured the height of the drawer/door and found half of that.  He then measured top down on the template to find the vertical placement. Last, he created a hanger out of the pieces. 

Step 5

Place the template on top of the drawer/door.  Match the two sides.  Drill into pre-drilled holes.

160.JPG

Step 6

Install new hardware.   Drool over your pretty new bathroom update!


How to Change Cabinet Hardware.JPG

Changing the hardware on both sets of cabinets took us about 45 minutes.  Nate did the drilling and I installed the new hardware.  A pretty quick update! 

I hate to say this but Nate was not wrong.  (My keys to a successful marriage: a King sized bed and never outright admitting your spouse was right.  The latter goes to their head and that's hard to deal with.) 

How to Change Cabinet Hardware 2.jpg
How to Change Cabinet Hardware.JPG

Have you changed out your cabinet hardware?  Or are you scared like I was?  Ever made a decision that was super pretty but a giant pain in your rear end? 

Photobucket Photobucket Photobucket Photobucket PhotobucketPhotobucketfollow us in feedly

Royal Design Studio Stencil Giveaway

Happy Friday!  Who's pumped for the weekend?  We're headed to the land of slow internet to visit my family.  I always enjoy a nice little break from civilization.

Today we have a slight change in our regularly schedule programming.  Last week I shared my newly stenciled craft room where I used the Royal Design Studio chevron wall stencil.

Decor and the Dog Craft Room 1.jpg

Today Royal Design Studio is offering a stencil giveaway!   There are so many great options to choose from!

Royal Design Studio Stencil Giveaway.jpg
Nate and I generally aren't that couple that tells the other what they can and can't do.  But there are a few things we have agreed on.  I'm not allowed to wallpaper. He's not allowed to sky dive.  Deal.
 
Luckily, stenciling is basically like wallpaper.  It's not extremely difficult.  Time consuming, yes.  Difficult, no.  Overall, you get the same effect but you can easily paint over it.   I said our powder room was the last room I would stencil.  And then the craft room happened.  Wonder which room will be my next victim?
  • PRIZE: One stencil $50 or less with free shipping included!
  • TO ENTER (required):  Enter via Rafflecopter below.  If you have trouble commenting, try using a different browser.  (Sorry!  Squarespace has no other fixes for me. Womp, womp.)
  • GIVEAWAY CLOSES: September 19, 2013 11:59PM
  • NUMBER OF WINNERS: One
  • OTHER STUFF: U.S. Residents only. The winner will be selected using Rafflecopter and announced on Monday, September 23rd.  Good luck!


Photobucket Photobucket Photobucket Photobucket PhotobucketPhotobucketfollow us in feedly