How To Drill Into Tile

On Monday, we revealed our master bathroom updates. 

DSC_0032.JPG

Today we'd like to share with you our tips on how to drill into tile.  Well, I don't actually want to share it because it's boring and I only like sharing fun and pretty things.  I guess this blog should be useful for something now and then though, right?

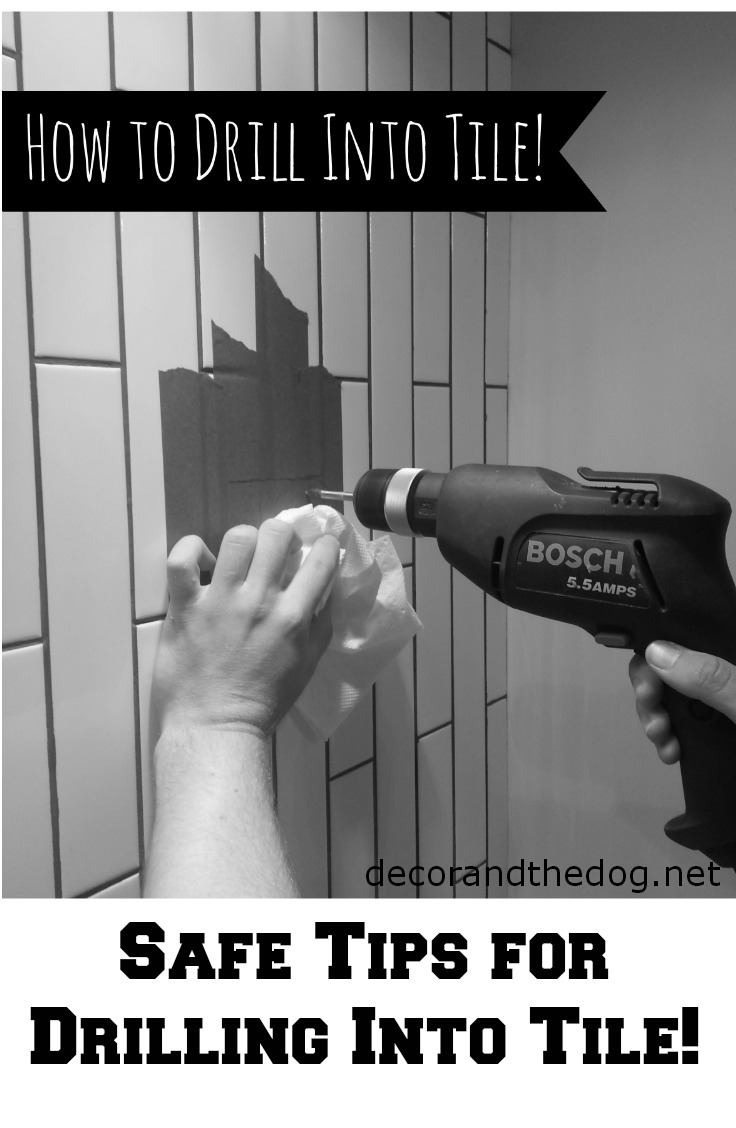
How to drill into tile.  Safe Tips for drilling into tile

We installed the tile onto the wall.  We then needed to hang the mirrors.  The only way to hang the mirrors was to drill through our precious tile.  The thought of breaking/chipping/ruining our pretty new walls was terrifying.  Did we really need mirrors in a bathroom?  Turns out we did.  We sucked it up, did some research, some drilling and then stared longingly into our beautifully hung mirrors.

Tip #1

 Choose the correct drill bit.  

Regular drill bits aren't strong enough to drill through tile.  Tile is made to be strong and hold up to a beating but these qualities make it hard to drill into.

We chose a carbide-tipped masonry drill bit.  These bits are made to drill through very tough surfaces.

We purchased our bit at Menard's for ~$8.00


carbide-tipped drill bit.jpg

Tip #2

Prep the area you are going to drill into.  

We used painter's tape to mark the spot where we were going to drill.  

How to Drill Through Tile.jpg

The painter's tape helps mark the spot but it's also very important because it helps prevent the drill from slipping.   It's hard to drill into tile because the drill bit likes to hop around on the tile instead of drilling into it.  The tape gives the bit some traction.

Tip #3

Let the drill do the work.  

Use light pressure on the drill.  It's tempting to want to drill fast.  Drilling through tile takes patience. It took about 5-10 minutes for each hole drilled. 

How To Drill Into Tile.jpg

Tip #4

Keep the drill bit cool.

The drill bit will get hot.  It's important to keep it cool so it doesn't break.  The easiest way to do this is to periodically dip it into water. 

You now have holes that are ready for hanging your mirror! 


DSC_0019edit.jpg

Have you experienced the fear of drilling through tile?  Who just looked at the pretty pictures? ;) 

Photobucket Photobucket Photobucket Photobucket PhotobucketPhotobucketfollow us in feedly

Master Bathroom Reveal

Our master bathroom is finally done!  Ike is pretty excited about it. 

Master Bathroom reveal {the tile shop, subway tile, polished nickel finishes}

As you may remember, The Tile Shop offered us some free tile.  We said "Are you sure?" followed by "Yes, please!".  We previously purchased the tile for our kitchen backsplash from The Tile Shop.  We love their selection and customer service so we were excited to partner with them!

 The addition of tile walls quickly spiraled into new lights, new mirrors, new faucets, new towel hooks, new cabinet hardware and crown molding.  The poor bathroom didn't see it coming.  (I don't think Nate did either.)

We weren't completely happy with this bathroom since building it.  It never felt like us. It never felt fancy like a master bathroom should. It never felt finished. Probably because it wasn't.  There were pieces of trim missing, the cabinets weren't finished, etc.  Tiling the walls was the extra motivation that we needed to complete this room. 

Our bathroom is now a great reflection of our style.  Which I think we've decided is modern farmhouse.  That's a thing, right?  

Master Bathroom reveal {the tile shop, subway tile, polished nickel finishes}

We used the 2x12 in Imperial Bianco Gloss tile with charcoal unsanded grout.  Nate wanted to install the tiles vertically.  I wasn't sure at first.  We taped some tiles to the wall to get an idea of how it would look.  We both liked it so we went for it. 

We each have our own sink area which is usually awesome.  It's not quite as awesome when you decide to tile the walls behind the sinks.  Double the work is never fun.  First world problems are hard.  

This side is mine. I love the amount of cabinets and counter space.

Master Bathroom reveal {the tile shop, subway tile, polished nickel finishes}

This side is Nate's.  He gets less counter space because it takes less to make him pretty.  (I have to put fluff stuff like this in here because he's still mad grumbling at having to install crown molding.  Crown molding that he really likes.)  The cabinet tower holds towels and also functions as our medicine cabinet.


Master Bathroom reveal {the tile shop, subway tile, polished nickel finishes}

The area next to towels is our walk-in shower.   Another favorite feature of this room.  Don't ask Nate about installing crown molding around that shower.  It's a touchy subject.  But doesn't it look pretty?

Master Bathroom reveal {the tile shop, subway tile, polished nickel finishes}

As a reminder, this is what we started with. 

bathbefore.jpg
bathbefore2.jpg

We would like to thank The Tile Shop for supplying us with the tile to kick off this project.  We would also like to think Pfister for supplying our beautiful faucets.  You've made Ike's day! 

Master Bathroom reveal {the tile shop, subway tile, polished nickel finishes}

Sources: 

We'll be back Wednesday with tips for drilling into tile!  Friday we'll cover how we changed up the hardware. 

Like this post?  Check out our home tour and diy page for more ideas!

Who's happy we finally finished this bathroom?   Is there anything better than a smiling Ike?

Photobucket Photobucket Photobucket Photobucket PhotobucketPhotobucketfollow us in feedly

Chicago Favorites

A couple of weekends ago, Nate and I went to Chicago.

Chicago Favorites.jpg
Chicago Favorites.JPG

We were joined by some crazy kids.  Also known as my parents.  In case you were wondering, I get my wit from my dad.  I get my height and blog photos from my mom.  My mom took 500 photos in Chicago.  Nate and I took like 30 combined.  She was that crazy tourist taking pictures of other people's weddings, dogs, etc.   Totally embarrassing.  As a mother should be.

Nate and I were their tour guides.  My parents told us to show them the cool stuff.  Nate and I are by no means Chicago experts.  We only go once a year and usually do about the same things.  They are all pretty touristy so I thought they might be useful for anyone planning an upcoming trip.   You may notice that our trips revolve around food.  One of my favorite parts of Chicago.

Accommodations

When traveling to Chicago, we prefer to stay downtown.  The room rates are obviously higher than the suburbs but we like the convenience.  For this trip, we stayed at The River Hotel.  

riverhotel.JPG

This was our first stay here and we were impressed.  The hotel is clean and quiet.  Checking in and out was easy.  Check in wasn't until 3pm but they let us have our room right away.  The location is wonderful as it is right next to Michigan Avenue.  The other nerdy thing we like is that there is free bottled water on every floor.  It's the little things.

We have also stayed at The Central Loop Hotel and  Wyndham Grand Hotel.  We like both.  The Wyndham is located right next to The River Hotel (right off Michigan Avenue).  The rooms are huge.  The Central Loop is very similar to the River Hotel. We've stayed here a few times. The only disadvantage is that is located further from a lot of the restaurants we enjoy.

Tip:  Don't be afraid of Priceline.  We've booked all of these hotels for around $120-150 per night. We recommend starting to look early.  We search for hotels that are 4 star and higher in the Millennium Park/Loop/Grant Park area.  We start around $100. 

Food

Oh, the food.  Where to start. How about breakfast?

My all time favorite is Yolk

Yolk Chicago Breakfast.jpg

On the left is my all time favorite.  It is cinnamon roll French toast which is also known as what dreams are made of.  I would eat this every day of my life if I lived in Chicago.  Seriously.  Everyone enjoyed their breakfast, even my dad who is a pretty tough critic of breakfast food. 

The second morning we headed to a doughnut shop recommended to us by Alli.  (Alli gave us some good food tips before heading in.  I still have a few more restaurants on her list to try! )  We are now also big fans of Glazed and Infused. With flavors like Maple Bacon, Creme Brulee, Cherry Granola and Toffee, how can you not be?  I want to go back now.

Glazed and Infused Chicago.jpg

You can't go to Chicago without getting deep dish pizza.  At least we can't.  I know the choice of deep dish establishments is controversial with Chicago residents.   I received many complaints on Instagram that we prefer Giordano's over Lou Malnati's.  We've only had Lou's once but we weren't impressed.  Maybe it was an off day.  We aren't willing to risk our yearly deep dish experience so we stick with Giordano's.

Giordano's Pizza Chicago.jpg

One of our lunch time favorites is Portillo's.   The food is tasty.  I find the atmosphere amusing.  It's very fast paced and loud.

IMG_3759.JPG

We are also big hot fudge sundae fans so a stop at Ghirardelli's is a must.   The following photo is a result of my mother's constant photographing.  She should be a blogger.  Nate also finds it important for his desserts to match his shirts.

Ghirardelli's Chicago.JPG

One of Alli's dinner suggestions was Bub City.  Their website states they serve barbeque for their whiskey drinking crowd.   The food was good.  The Whiskey Tango I had, however, was amazing.  Who knew peach sweet tea with whiskey could be so amazing?  I might need to get out more.

Bub City Chicago.jpg

Things To Do

One of Nate and I's favorite things to do in Chicago is just walk around.  It's probably our small town living that makes us find wandering the city enjoyable.  Besides walking, here are some of our favorites. 

Chicago Cubs Games

Love them or hate them.  Either way, going to a Cubs game is still a good time.  Nate and I appreciate the history of the ballpark.   (It also doesn't hurt that my dad has a business partner that gives us free tickets.)

Chicago Cubs.jpg

Field Museum

We always enjoy a trip to the Field Museum.  It's a good place to stop if you're traveling in the Summer.  The air conditioning break is appreciated.  I think the museum is entertaining for kids and adults. 

Tip: I'm not going to lie.  One of the reasons we love the Field Museum is because we can get in free (with guests).  Nate is a member of a museum in town that also offers free admission to select Chicago museums. If you have a local museum membership, check to see if it covers museums in other cities! 

Field Museum.jpg

Architecture Boat Tour

We didn't take a boat tour this trip (because we have multiple other times) but we do recommend it.  The boat tours are great way to see the city without having to walk.  We both actually learned quite a bit about architecture and the city's history. 

Chicago 2012 103.JPG

Navy Pier

Navy Pier has a special place in our hearts because Nate proposed on the Ferris wheel.  Cue the "awwws".  Barf.   We usually visit the pier at night.  There is usually some kind of live music and there are fireworks on Saturdays.

Chicago 2012 094.JPG

Buckingham Fountain/Millennium Park


We always make a trip to the fountain (where I sing the theme song to Married with Children).  We also wander the gardens at Mellinnium Park and make stops at the Cloud Gate and Crown Fountain.

IMG_20130817_123740.jpg
Buckingham fountainjpg
crown fountain.JPG

Tip: Visit the Cloud Gate early in the morning.  (Preferably after donuts.)  We went at 7:30 on Sunday morning and there were very few people there.  The following pictures are from noon on Saturday and then Sunday morning.

Cloud Gate chicago.JPG
Chicago 2013-56.jpg

Second City

We caught our first Second City show during this trip.  Second City is a sketch comedy/improve show.  It's the place where Tina Fey and Chris Farley got their starts.  The fours of us all enjoyed the show.  We plan on going to another show in the future. 

Second City.jpg
Read about past trips here and here!

Is Chicago on your destination list? Do you have any favorite Chicago stops?  I think I'm heading back in October with some of my favorite people so suggestions are welcome! 

Photobucket Photobucket Photobucket Photobucket PhotobucketPhotobucketfollow us in feedly

Pinteresting Party

A sporadic post every day this week.  Whoa. 

Remember that time I met this girl from the internet?  Her name is Kim. You might know her from NewlyWoodwards fame.   I initially thought she might chop me into pieces during our first meeting.  That's what people from the internet do, right?  Turns out she has been an incredible influence on me.  She's incredibly involved, bubbly and motivating.  If you don't have a Kim in your life, find one.

Enough with my love letter.  The point of this point is to invite you to a party.  A party Kim and I are hosting for a great organization! 

Photos above are inspiration for our crafts via Maybe Matilda (sugar scrub), The Preppy Owl (fabric flower) and Our Sweet Serindipity (chalkboard).

Photos above are inspiration for our crafts via Maybe Matilda (sugar scrub), The Preppy Owl (fabric flower) and Our Sweet Serindipity (chalkboard).

Who doesn't love a good crafting party that helps empower women? 

I have information for locals and my interweb friends.  Keep reading!

Local readers can join us:


Thursday, Sept. 19, 6 to 8:30 p.m.

Moline Public Library, 3210 41st Street, Moline, Ill. 61265

Get in touch with your crafty side at this fun, creative event. You’ll have the opportunity to try your hand at several crafty projects and take home your own creations – including a rustic chalkboard, fabric flower pin and body scrub.

In lieu of a cost for the workshop, please make a donation to Dress for Success Quad Cities. 100 percent of donations go to the organization, which empowers women toward economic stability by providing them with business-appropriate clothing, mentoring and professional development programs.

RSVP online!

When you RSVP, you will have the opportunity to donate to Dress for Success online through a secure PayPal transaction. Remember – all supplies will be provided. There is no cost to craft, get your swag bag or indulge in some delicious food.  I'm baking.  Get excited.

Not local? Want to help?

Your donation helps women working toward economic independence. Plus, if you RSVP now and donate at least $30 through the link below, We’ll send you a special swag bag and put together a small craft kit to complete the fabric flower pin on your own. (The kit will ship by October.) So you can help women and also participate in the craft night on your own time! 

Fun, right?  I thought so.

To take part, RSVP now online and donate securely through PayPal.

Feel free to pass this along to your friends and family. Share this invite to other women you think would be interested in making their own decorative signs, meeting other women and helping Dress for Success Quad Cities. The more, the merrier! (Please ask friends to RSVP if they plan to attend so I can be prepared with enough supplies.)

Thanks for your support!

Photobucket Photobucket Photobucket Photobucket PhotobucketPhotobucketfollow us in feedly

Craft Room Tour

My craft room is clean.  What?  And it's done.  I think.  Sort of.

Decor and the Dog Craft Room tour {chevron stenciled wall}.jpg

Ike just wants to know where his dog bed is.  Poor guy.

I have shown you all each piece of the room but I don't have a post with the room as a whole.  Mainly because I would photograph one section and shove everything else to the other side of the room. 

This room is probably temporary.  As in, it will exist until our spawn take over.  I figured since it was temporary, I could do whatever the heck I wanted.  Everything in here is something that makes me happy.  It may not necessarily go together but who cares!

The room started with me wanting to stencil a wall.  I decided to go with the chevron wall stencil from Royal Design Studios.   I know chevron is a love it or hate it thing.  Chevron belongs in my happy place.

Decor and the Dog Craft Room 5.jpg

I found the rocking chair at the Salvation Army.  It was hunter green.  I then painted it grey.  And then I painted it 100 different shades of spray paint coral until I gave up and bought a paint sprayer.  I then used Sherwin Williams Dishy Coral that I used elsewhere in the room.  Nate has renamed this the million dollar chair because he loves it so much.  Or he thinks I sunk a million dollars in spray paint into it.  I don't remember which.

Painted Rocking Chair, Chevron Wall, Gold Lamp.jpg

The lamp is from Urban Outfitters. I really wanted a gold floor lamp.  It's just the right amount of vintage for me. It really doesn't go with the room but that's the beauty of it. I made that pillow cover in 5.4 minutes using some Amy Butler fabric. I'm still pretty impressed with that one. 

One of my coworkers gave me an antique buffet.  It was in rough shape so I removed the veneer and painted it Sherwin Williams Agate green.   I added the button art when I co-hosted the Pinterest Challenge.  The buffet is storage for my crafting supplies.

Decor and the Dog Craft Room 6.jpg

I love having this room to sew.  I can start projects without worrying about needing to clean up.  Which explains why this room is never presentable.  Nate built me a sewing table.  We hung the crib spring to display my Instagram photos.  I found the chairs at a thrift store and gave them a coat of paint.

Instagram Display, Sewing Table, Painted Thrift Store Chairs.jpg

Speaking of Instagram, I framed a couple of Instagram photos to hang on the left side of the window.  Ike is quite the quilter.

Instagram Photos.jpg

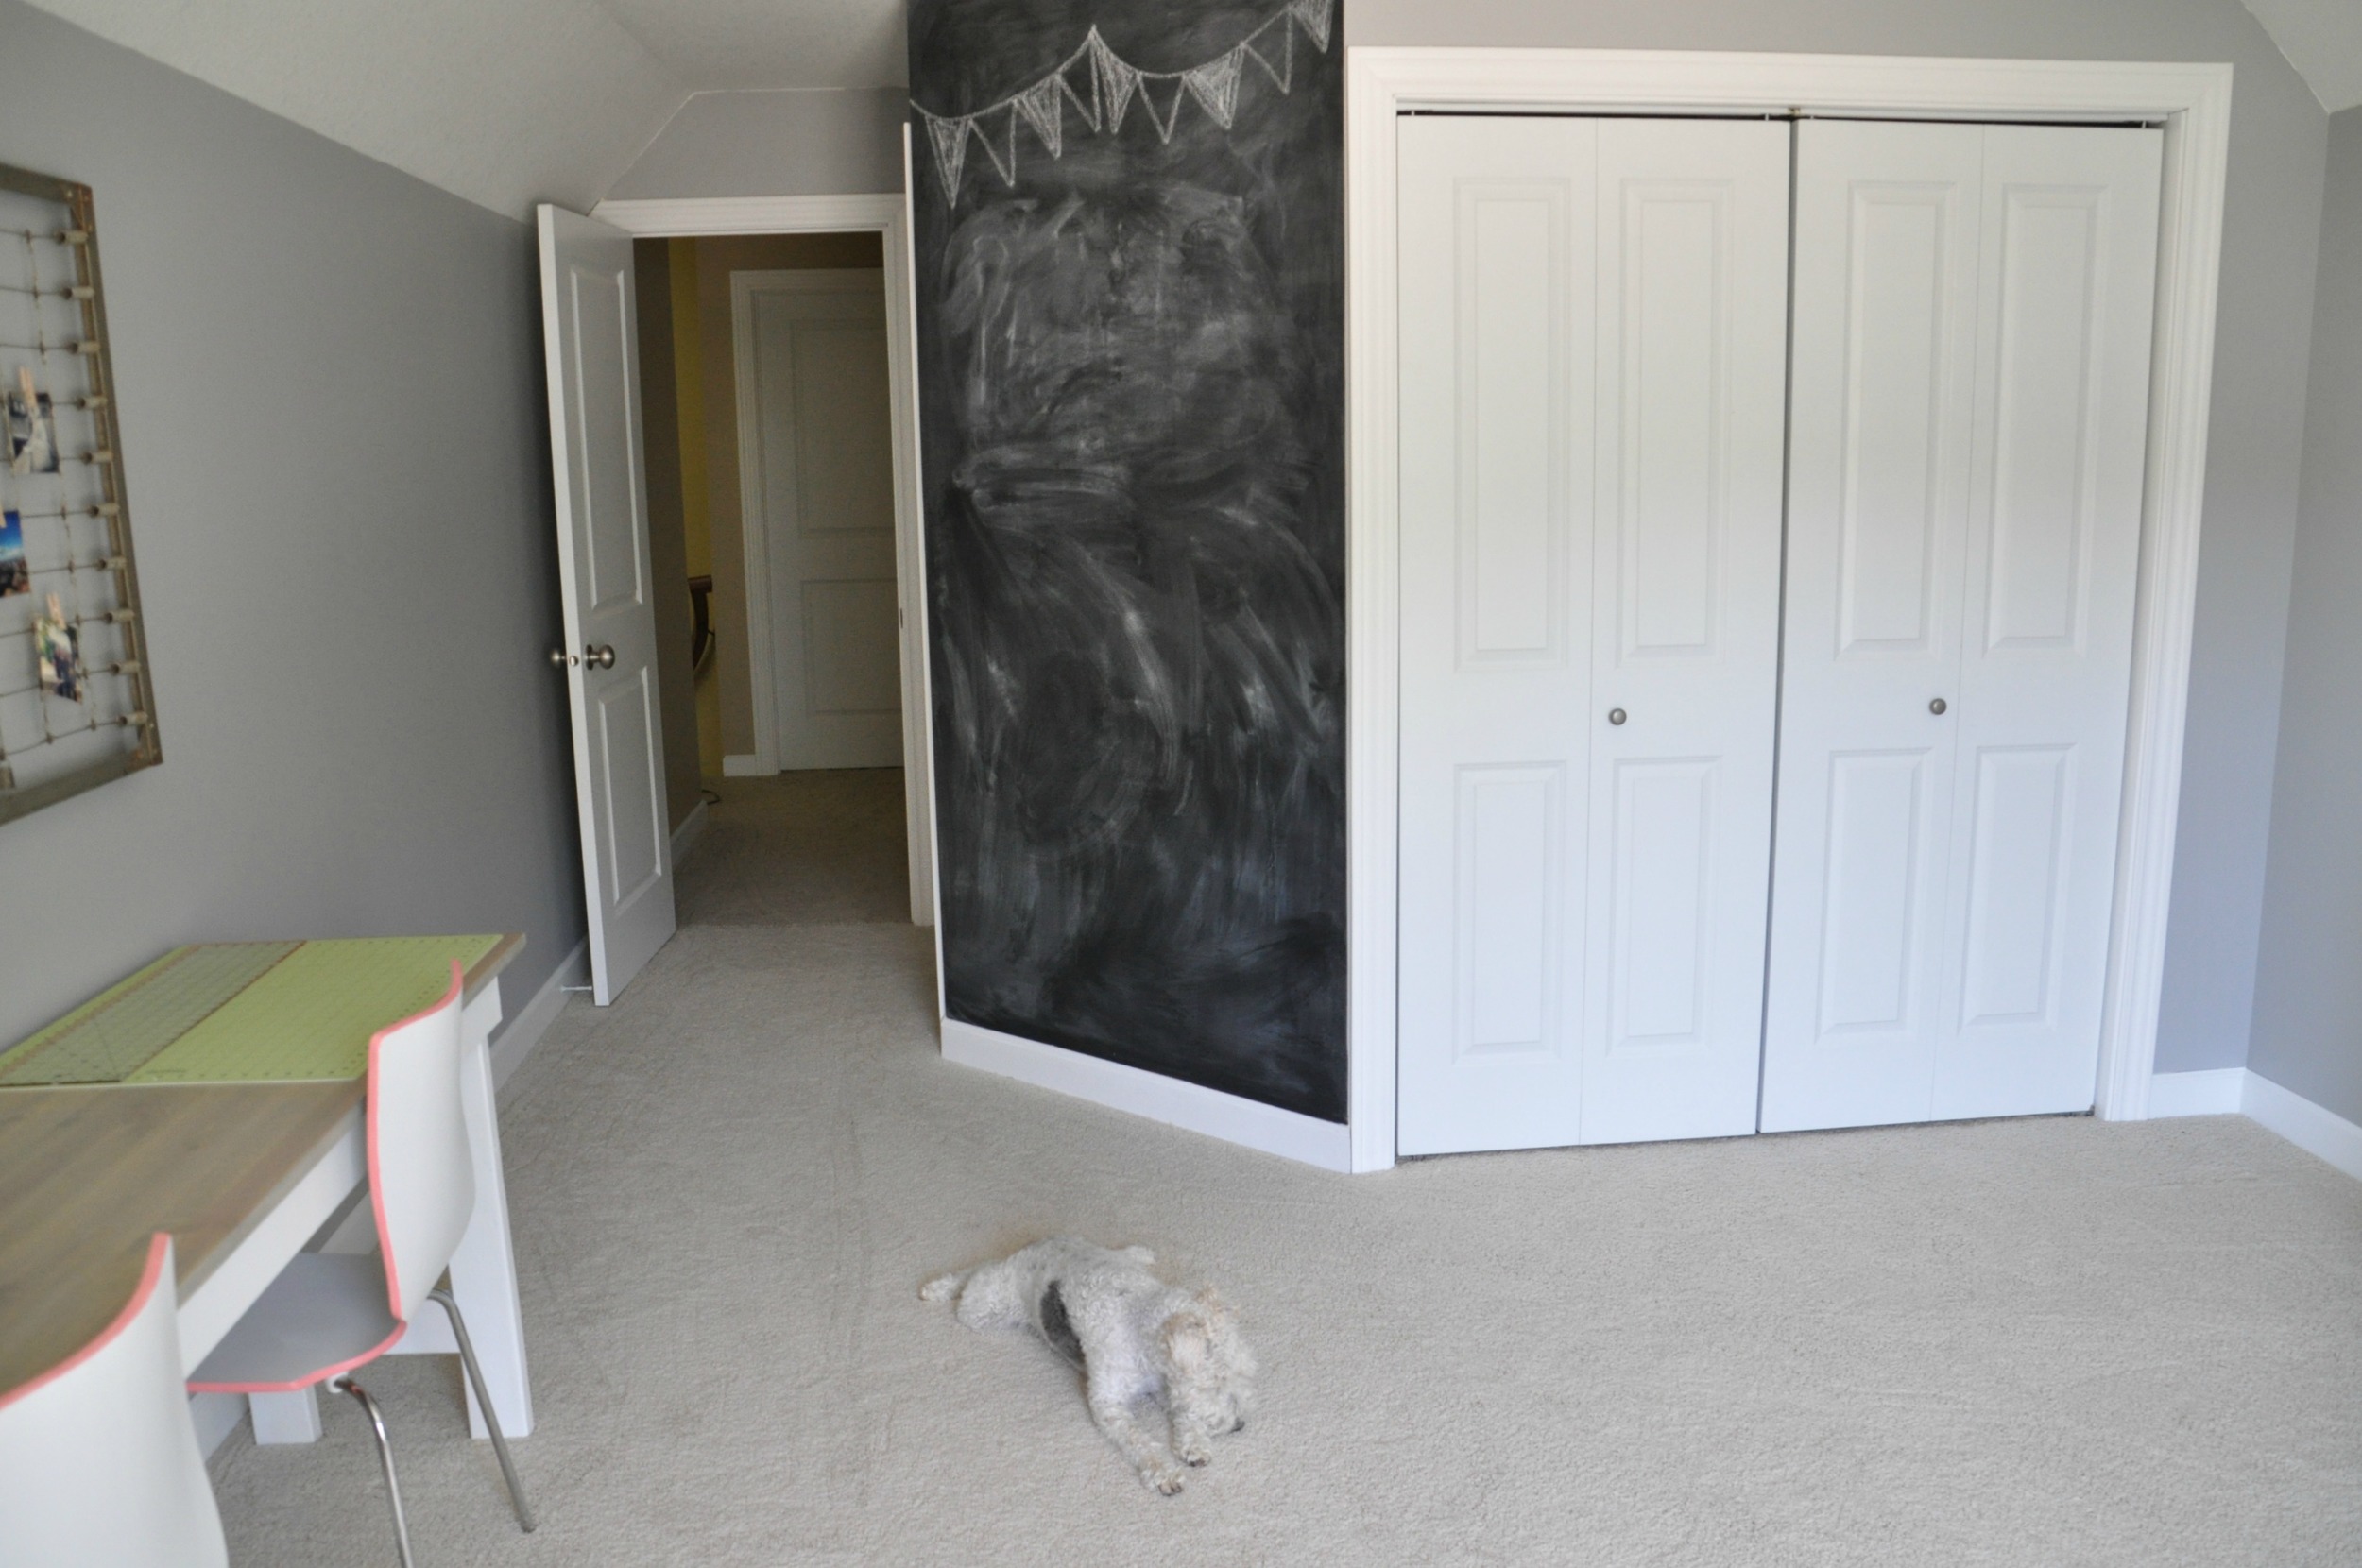
I painted a chalkboard wall.  I had been wanting a chalkboard wall but I was too chicken to put one anywhere else in my house.  My craft room is a great place for it because I kind of lost interest in it after I painted it.   Oops.

Craft Room Chalkboard Wall.jpg

Behind those closet doors is where I store my fabric.  And junk. I don't recommend opening them.

Ike and I are love crafting/sewing in this room.  It's bright and happy (I need a thesaurus).

Decor and the Dog Craft Room 2.jpg

Little craft room has come a long ways. 

Adorable Craft Room Reveal.jpg

Did you enjoy playing the Ike edition of Where's Waldo?  What items belong in your happy place? Gold lamps, dogs, chevron?

Photobucket Photobucket Photobucket Photobucket PhotobucketPhotobucketfollow us in feedly

Layered Fabric Hoop Art {DIY}

Happy Tuesday!  The long holiday weekend gave me enough energy to get some stuff done.  Including this cute layered fabric hoop art.

Decor and the Dog Layered fabric hoop art.jpg

After a long hike at a nearby state park with Nate and Ike, I decided to get crafty.  I had been itching to create something small but cute.  Always important criteria. 

I had previously seen some hoop art at an antique store. I forgot to snap a photo of it but it was basically fabric scraps smushed into a hoop.  I thought I could totally make that.  I did and it was surprisingly easy.  Like I didn't even yell at my sewing machine easy.  (It's out to get me.  Don't try to tell me otherwise.)

I grabbed some scraps that I had left over from baby quilt that I made recently.   I decided to go with the black and gold for my hoop art.  The Iowa football team is going to need any kind of positive energy they can get this year and I figured my hoop couldn't hurt.

Supplies

  • Fabric scraps cut to whatever size you would like. I choose 3"x3"  
  • 1" wide fabric or ribbon
  • Embroidery hoop
  • Hot glue gun

124.JPG

Step 1: Sew fabric squares together.  My Type A self is having a hard time writing this but the beauty of this project is that things do not need to be perfect.  Wow.  That was hard.  You don't have to sew a perfectly straight line.  Your squares don't have to line up perfectly.  (Who am I?) It's actually a great beginner project.  I laid my squares out over the hoop and guessed how many I would need for each row.  Press seams open.

layered fabric hoop art {step 1}.jpg

Step 2:   Use your 1" wide strip of fabric or ribbon to wrap the outside hoop.  I used a small amount of hot glue at the beginning and end of each strip.

DIY layered hoop art {step 2}.jpg
Layred Fabric Art {step 3}.JPG

Step 3:   Stack your fabric rows onto the inner hoop. I started at the bottom and overlapped a little on each row.

Step 4: Place the outer hoop over top the inner hoop and fabric.  Pull the fabric tight while securing.

Layered Fabric Art {step4}.JPG
Layered Hoop Art {Step 5}.jpg

 Step 5:   Trim the edges from the back side and enjoy your quirky hoop art!

Now I think I need to make some matching bunting and find a place to hang my Hawkeye spirit.  Go team.  Or something sports like.

155.JPG
layered fabric hoop art.jpg

 Did you enjoy the weekend?  Do you have any favorite fabric scrap projects?  Who thinks I need more than hoop art and bunting to make this a tolerable football season?  {Don't answer this little brother.}

Photobucket Photobucket Photobucket Photobucket PhotobucketPhotobucketfollow us in feedly

New Digs

Welcome to our new internet home! 

We like to think that our new site better suits us.  It's cleaner.  More organized.  And a little quirky.   (Quirky is the nice way to say weird, right?)

We decided to go with Squarespace.  It is working great for us so far.  We like to take the road less traveled.  AKA, make things difficult for us.  Squarespace allows us to have a clean site with just a small amount of coding knowledge.  It's comparable to WordPress in cost and SEO (Arguable, I know. Just nod your head.)

Take a look around and please let us know if anything seems too weird or if links aren't working.

We're off to enjoy the rest of the long holiday weekend.  We hope you are enjoying yours as much as Ike is enjoying his. 

Lazy Wire Fox Terrier

Party animal. 

{The comment area is now located near the speech bubble below.  It's the one thing I can't change to my liking!} 

What do you think of the new site?   

August Recap + Michelle’s Random Thoughts

1. I’m so on top of this monthly recap that it’s not even funny.

2. I am transferring the blog to a new site this weekend.  If things get weird, that’s why.  Also, if you can’t find me next week.  Come look for me.  I’ll update this site with direction to the new one when I get that all figured out.

3. I have no clue how to transfer a blog.  Most people hire that done.  I’m cheap and am good with the Google.  Plus I like to make things hard.  I’m sure it’s just typing my new blog address into blogger and bam!, new website. 

4. I’m sometimes delusional.

5. I think I’ll have a craft room reveal next week.  And maybe a stencil giveaway.  And then a bathroom reveal the following week.  High five!

Blog Pic-1-2

Happy recap day!

Catch up on the rest of 2013 here:  January February March April May June July

Big weekend plans?  Who’s pumped for the new site?

Hawkeye Inspired Pennant Baby Quilt

So, I was at a beer tasting the other night.  Because that’s what grown-ups do.

I was talking to a nice girl that I had just met.  The conversation was going great until I got the dreaded “Do you have kids?” question.  Well, it’s not really the question that is dreaded.  It’s the response.  Which is “Oh.” followed by looking away in pity/awkwardness/horror that an almost 32 year old woman doesn’t have kids.  The conversation then ends because I clearly can not be your friend because I can’t join you for play dates.

My dog is fun.  Darn it.

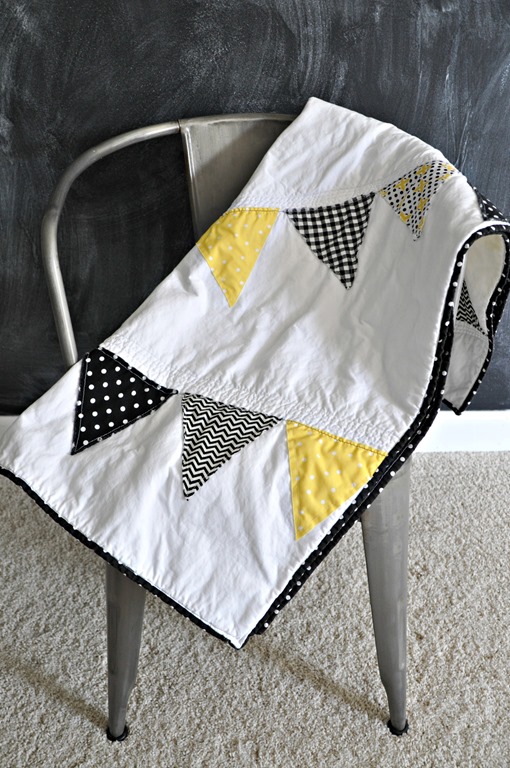
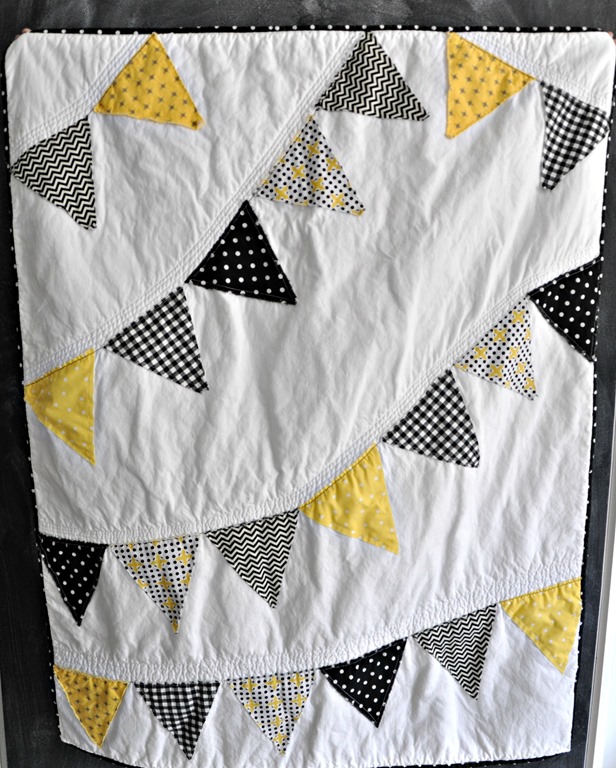
Sorry for my rant.  Here’s a pretty Hawkeye inspired pennant baby quilt that I made for a dear friend.  My dear friend that lived across the hall from me sophomore year at the University of Northern Iowa.  My friend that I watched every episode of the Bachelor with.  My Euchre partner that helped me beat all of the boys in their floor tournament.  This quilt is for her 3rd baby.  STOP IT TIME!

Hawkeye Pennant Quilt

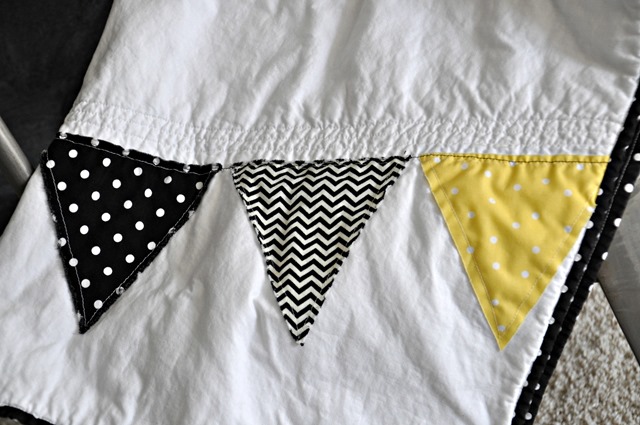
My friend is a big fan of the Iowa Hawkeyes.  She is also not finding out the sex of the baby.  I decided to go with the black and gold color scheme.  I like that it is themed but still classy.  Black and gold are great gender neutral colors without being too “baby”.

hawkeye inspired baby pennant quilt

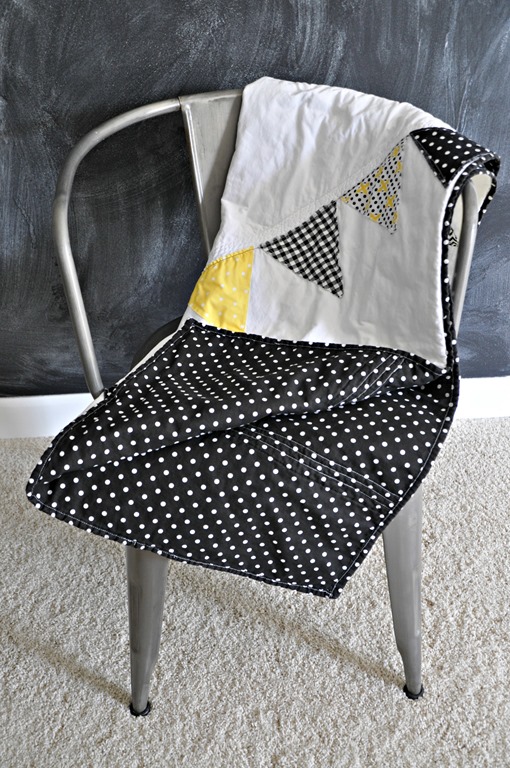
Back of pennant quilt

I am madly in love with quilt.  I want to make one for myself.  I love how the bunting lines pucker in the wash.  I also love how the pennants fray a little giving it a vintage feel.

Hawkeye Inspired Baby Quilt

I swear this isn’t a shameless plus (well, it didn’t start that way) but if you are looking for a custom pennant quilt of your own, head on over to Sew Midwestern and Kim {NewlyWoodwards} and I will get to quilting.  Unless you want Cyclone colors.  I might have issues with that.  (I kid. I kid. Sort of. It would just hurt a lot.)

Now if only this quilt would help our football team this year.  A girl can dream.

Who wants to be Ike’s play date?  Who wants a baby only as need for a cute Hawkeye quilt?  Me neither.  Go Hawks!

Pfister Park Avenue Faucet

Don’t you hate when bloggers do teaser posts about the big projects they are working on?  Yeah.  Me, too.

Oh, hey!  Look at our pretty new faucets in our almost finished bathroom that I can’t show until a week or two.

Pfister Park Avenue

If you can’t beat ‘em, join ‘em.  Right?

We are so stinking close on the world’s longest bathroom project.  Just a little touch up paint and some styling and we’re good to go.

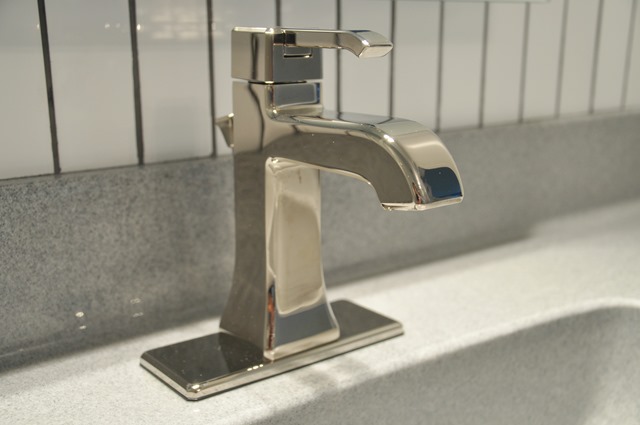
In the mean time, let’s discuss our new faucets.  The ever generous folks over at Pfister sent us these Park Avenue Faucets.  We feel all fancy now when we wash our hands.  As I was washing my face last night I told Nate that this must be how the other half lives.  The only way they could be better is if they turned on themselves or gave Ike a bath.

The faucet was easy to install. We previously had some inexpensive faucets.  Nate tells me that the install on these guys was much easier.  No swear words.  No threats of divorce.  Beautiful.

The faucet is a single control.  The flow is great.  And it’s drool worth.  All very important in Michelle-land.

Pfister Park Ave Fauce

We chose the polished nickel.  I am madly in love with the polished nickel.  I just wouldn’t recommend others following in my difficult footsteps.  There aren’t many options for the polished nickel finish in mirrors, faucets or hardware.  I love the options that we found for all but it was a challenge.  Also, we just installed these babies but I can already tell that keeping the polished nickel clean may send me over the edge.  (Not a far push.)

Thanks to Pfister for sending us these beauties.  They have gone to a happy home!

Have you ever fallen hard for a faucet?  What big DIY projects did you work on this weekend?

I wasn’t compensated for this post.  Pfister supplied us these beautiful faucets.  I wasn’t required to review them.  We just love them so we thought we would!