Vlogging Tips and Outtakes

Last week I posted a vlog.  I had never done a vlog before.  The thought terrified me.  It was a requirement for this fancy schpants partnership that I have with the Home Depot.  I’m not sure I’m cut out for fancy schpants blogging.  But I lived through it.  And true to be told, it was kind of fun.  Ike loved it.  He’s totally meant for film.

20130507_175308

In true blogger fashion, today I am going to share with you tips that I learned from “filming” my first vlog.  As a blogger, you are considered an expert once you complete something once.  True story.  (I hope you all catch my sarcasm in that statement.  I still have no clue what I’m doing.)

Oh, and there are outtakes at the end. Ike kills me with cuteness.

Tip #1: Choose a quiet location.

  • My entire series of posts for the Home Depot was about the outdoors. Filming indoors didn’t seem like a good fit.  Unfortunately, there are noises outside that you can’t control.  Like sirens.  Sirens that I hear maybe five times a year in my tiny town. The ice cream man, on the other hand, drives around every night. Our deck was a good spot otherwise because it’s fairly quiet and pretty.

Tip #2:  Be animated but yet yourself.

  • I’ve watched some blogs where the blogger was either too animated or bored with their own vlog.  Try to find a happy medium.  Use words you would normally use. Pretend like you’re talking to a friend. I pretended like I was telling Nate all about flowers and I then pretended that he actually cared.

Tip #3: don’t be afraid of the vlog

  • Vlogging is surprisingly fun. I understand that it’s hard enough to put your words out there for the world to read.  It’s another story putting your face and voice out there.  I always think it’s fun to actually hear the blogger behind those words I read every day. I received a lot of positive feedback and will be vlogging again soon.

Tip #4:  Include your cute dog for distraction.

  • I bet 65% of you didn’t hear a word I said.  And that is beautiful.  The dog adds an additional challenge but he does help make some pretty awesome outtakes.

Tip #5:  Edit your video.

  • We used our Nikon D5000 to film the vlog.  We then used a free trial of CyberLink PowerDirector to edit the video.  We were really pleased with the software. The video makes me look like I have my act together.  (Which we all know is not a true statement.)  We would buy the software if we did vlogs a lot.  Which we might.  Who knows!

And now for the good stuff.  Me telling Nate how to direct and Ike catching bugs.  HGTV is going to be knocking on our door any second now.


Have you posted a vlog?  If so, did you enjoy it?  If not, what’s holding you back?  Do you enjoy vlogs?

How to Build a Vertical Garden Tutorial {Part 3: #DigIn}

This is a sponsored post written by me on behalf of The Home Depot.  I know, a sponsored post.  But keep reading because the project is awesome!

Who’s ready to see our vertical garden?

DIY Vertical Garden Tutorial #digin #heartoutdoors

Fun, right? Well, it’ll be even more fun when it fills out.  Hurry up Summer!

Who’s ready to tackle a DIY vertical garden of their own?

We used the vertical garden plans from the Garden Club over at Home Depot.  There are written plans and a video on how to make the garden.  We found the video to be the most helpful.  We did notice that the cut list was incorrect and the material list was missing many items.  We added those in our tutorial for completeness sake.

FYI, there are many photos and steps to this project.  Don’t let the length of this tutorial scare you you away.  We just wanted to make the tutorial as complete as possible.  The build really isn’t super hard.  It is, however, a little time consuming. I think it took us 3-4 hours in total.  We’re happy with the results though so it was totally worth our time.

Get your shopping shoes/building shoes on!

Materials:


  • One 8’ 1'”x4” whitewood (or pressure treated wood) (We choose whitewood for all.)
  • Two 6’ 1”x2” whitewood (or pressure treated wood)
  • Two 6’ 1”x6” whitewood (or pressure treated wood)
  • 2’x4’ 1/4” plywood
  • One 2’x8’ lattice
  • Wood Stain (or exterior paint). (Sample size is the perfect amount.)
  • 1 1/2” exterior screws (1 small box)
    • We also used Brad nails.
  • Plastic drop cloth 2mil (or other moisture barrier cloth 2 mil)
  • Weed barrier
  • Two 2' 3/4” PVC pipe
  • Two 3/4” PVC caps
  • Two 3/4” x 1-1/4” PVC reducing bushing
  • PVC glue
  • Silicone caulk (optional)
  • One bag (1.5 cubic feet) potting soil
  • Flowers (Read about our suggestions for choosing vertical garden flowers here.)
  • Tools needed: 
    • Drill, drill bits, pocket hole jig (optional), utility knife, staple gun/staples
    • Miter saw, circular saw (or have the cuts made at Home Depot)
#digin DIY Vertical Garden supplies

Cut List:
1”x6” whitewood

  • 2 @ 32”
  • 3 @ 15”
1”x2” whitewood
  • 2 @ 32”
  • 1 @ 15”
  • 1 @ 18”
1”x4” whitewood
  • Inside length: mitered at 45 degrees
    • 2 @ 28.5”
    • 2 @ 16.5”
1/4” plywood 32” x 16.5”
3/4” PVC
  • 1 @ 10”
  • 1 @ 24” (If you bought a 2’ section, you do not need to cut this piece.)
You will want to start by grabbing your cut list and cutting your boards to size.  (Or have the Home Depot cut them for you if you don’t have a miter saw at home.  Nate’s dad stores his at our house.  Super convenient.)

#digin DIY Vertical Garden Cut List

You can stain your project at any time.  I think it’s easier to do in the beginning and it gives the project a cleaner look.  We used Behr Weather Proofing Stain in Driftwood Grey.  It’s important that you choose a finish that is appropriate for outdoor projects.  The Behr Weather Proofing is a stain and sealer in one which will help protect the box from the elements.  I applied two thin coats. It’s also important that you wear your best paint shirt when photographing blog photos. (Go Hawks!)

#digin DIY Vertical Garden Staining

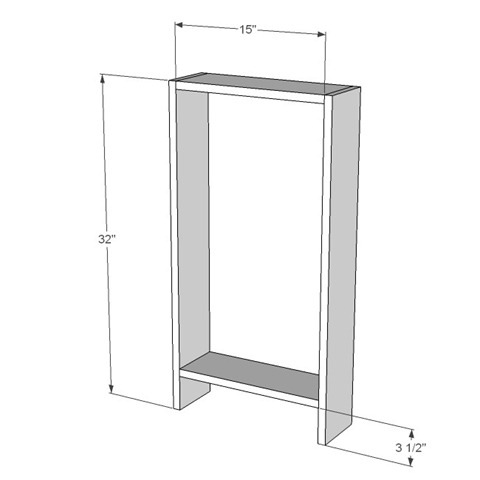
Take the 2 lengths of 32” wood and measure down from the top by 14” and up from the bottom by 3 ½”. Place a mark at each location.   Now with the three 15” boards place one at the very top one at the 14” mark and one at the 3 ½” mark.  These boards will form the body and compartments of the soil bed.  With the exception of the board at the 14” mark secure these in place with 1 ½” exterior wood screws.

Vertical Garden Basic No Middle


#digin Vertical Garden

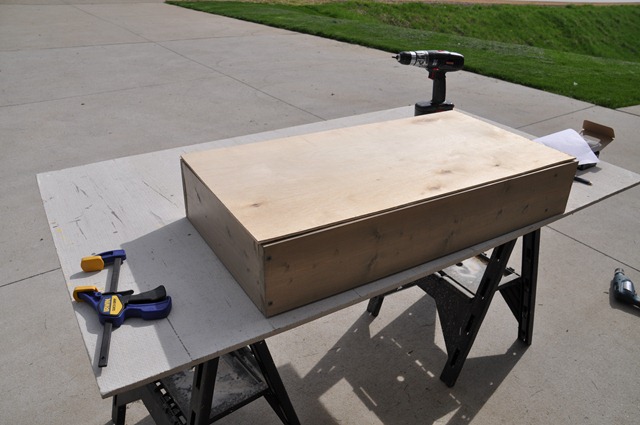
Take the piece of 16 ½”  x 32” plywood and secure it to the bed frame with wood screws or with Brad nails. This will form the back of the vertical garden.

Vertical Garden Back 

 
#digin Vertical Garden
Add caption


Now it is time to add the holes for our drip irrigation system. We used ¾” PVC pipe, one routed to each compartment. Use a 1” spade bit to drill a hole in the top of the frame. This hole should be just off center.

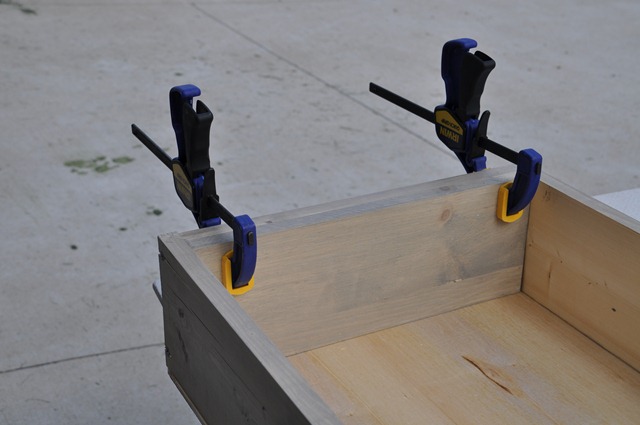
Take the middle support we didn’t screw in previously and slide it up and flush with the top board.  Using clamps to hold the board in place, drill the hole for the lower compartment. Clamping the boards together insures that the holes line up perfectly for the PVC to pass through.

#digin Vertical Garden


#digin Vertical Garden


Remove the clamps and move the center support back down to the 14” mark and fasten it into place as you did the top and bottom.

Vertical Garden Basic with Middle

#digin Vertical Garden

Use a 1” spade bit to drill a second hole in the top of the frame. This hole should be just off center.  This hole will be used to provide irrigation for the top compartment.

#digin Vertical Garden

To build the frame supports, the 32” long 1”x2” are drilled into place along the top edge of the soil bed.  This frame will give us extra surface area to support the face frame.

Repeat this with the 18” long 1”x2” along the top and the 15” long 1”x2” along the bottom.

Vertical Garden No Border
 
#digin Vertical Garden


#digin Vertical Garden

Now it is time to line the bed with a moisture barrier. This is to prevent wood rot and warping from the moist soil over time. We used a plastic drop cloth (2 mil) that stated it was waterproof.

#digin Vertical Garden

Line each compartment and secure the plastic with staples.  Cut away excess.

#digin Vertical Garden

Next we need to add the irrigation system.  Make “X” shaped incisions in the plastic liner at the 1” holes we drilled into the bed frame.

#digin Vertical Garden

Take the piece of 10” long PVC and push through the hole without the pass through into the second compartment. When it’s about half way in attach the PVC cap to the end within the box. Glue the 1 ¼” - ¾” reducing bushing to the opposite end (this will be the water inlet).  Repeat the process for the 24” long PVC line that runs into the second compartment.

020022


#digin Vertical Garden

We applied a thin strip of caulk to the outside to help keep moisture from getting in behind the pipes and plastic.  Wipe away excess.

#digin Vertical Garden

Use a small drill bit to place drip holes along the length of PVC, rotating slightly after each one. Make sure to get a hole as close to the bottom as possible to prevent standing water in the line.  On the 24” pipe, you only need to drill the drip holes into the second compartment section of pipe, leaving the rest solid.

#digin Vertical Garden

Now you are ready to add your soil. We filled the bed half way with soil and then wetted it down a little.  We did this to help settle the soil to ensure that we filled it full enough.  We then filled the bed with soil up to the edges. You should also shake the box a little to help the soil settle. Check out that heavy lifting.  Hercules, Hercules!

#digin Vertical Garden


#digin Vertical Garden

Next, cover the bed with a layer of weed block placed tightly across the top.  Staple in place.  Cut away excess.

#digin Vertical Garden

Now you need to construct the frame.  Using the mitered 1”x4” pieces, place pocket holes (using a pocket hole jig) on the outside edges of the 16.5” pieces.  Secure with clamps.  Attach together with pocket hole screws. Optional: You could bypass this step and attach each piece to the bed frame with screws.  We chose to use the pocket hole method because it creates a stronger and cleaner looking frame.
Vertical Garden Border
 
#digin Vertical Garden

You now have a completed box and frame.  It’s time to attach them using Brad nails (or screws).

#digin Vertical Garden


#digin Vertical Garden

I told Nate to look like he was having fun.  That’s what I got.

You’re almost there.  We just need to add the lattice!

#digin Vertical Garden

Measure the inside of your box.  It should be 20.5”x16.5” but it could vary.  Cut your lattice with a circular saw.   Attach the lattice to the inner support with Brad nails or staples.

Vertical Garden Complete

#digin Vertical Garden

Woo hoo! You did it.  Your vertical garden build is ready for flowers!  We’ll finish the series on Friday with planting the flowers, hanging and styling the vertical garden.

Choosing Flowers for a Vertical Garden Vlog {Part 2: #DigIn}

This is a sponsored post written by me on behalf of The Home Depot.  I know, a sponsored post.  But keep reading because the project is awesome and Ike stars in a vlog!

Simple Tips for Choosing Flowers for a Vertical Garden (or flower garden)

I don’t know about you but I used to find garden centers intimidating.  All of those aisles.  All of those needy plants.  Sun. Shade. Little water. A lot of water.  Big roots.  Little roots.  6” spacing.  36” spacing.  So many things to consider when choosing flowers to spruce up your outdoor living space.

Lucky for you, Ike and I are here today with a vlog on how to choose the correct flowers for a vertical garden (or any flower garden for that matter).  The tips are simple but choosing the correct flower is actually a very simple process.  Ike is currently looking for agents now that he’s a vlog star.

If you’re not in an appropriate vlog viewing environment, here’s what Ike and I discuss in the vlog:

Sun/Shade:

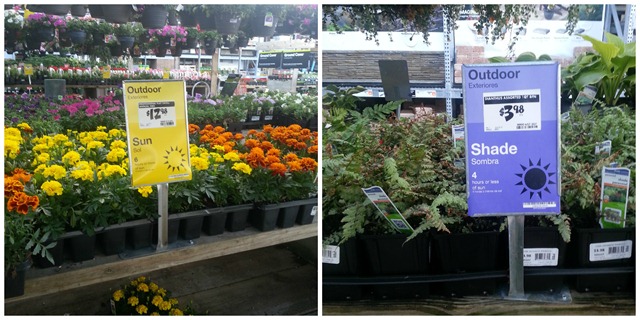
You will first need to determine where you are going to place your vertical garden (or where your flower garden is located). If your garden will receive 6 or more hours of sun, you will want to choose plants that grow well in sun. If you garden is in the shade, you will want to choose plants that grow well in the shade. This seems obvious but I have tried many times to grow a sun loving plant in the shade. It won’t work. No matter how hard you try. The Home Depot Garden Center makes this step easy. The flowers are separated by sun loving and shade loving. They even have big signs to help direct you.

*There are sirens in the video.  I live in a super safe, tiny town.  There just happens to be sirens the one time I try to shoot a vlog.  Good work.   I just couldn't do another take of this tip without losing my marbles.  Ike sees a bug.  Decides it's too far away to chase.*

Sun and Shade Flowers #DigIn

Water Requirements:

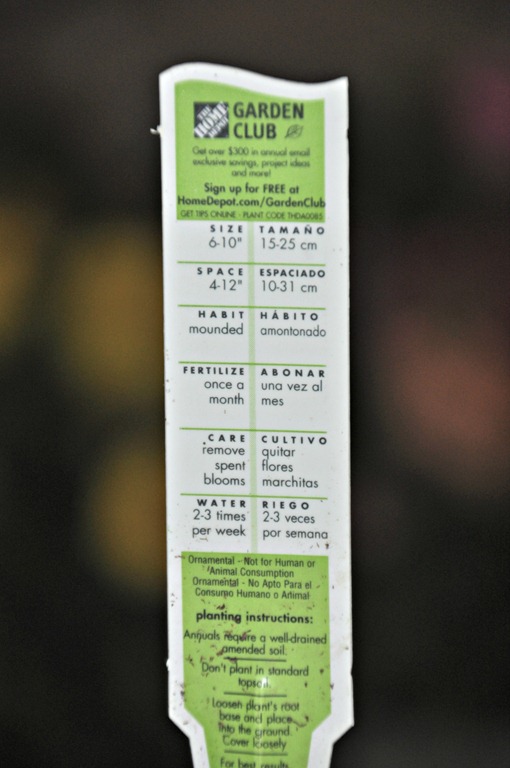
The next thing you will want to keep in mind is how much water will your flowers will need. This is especially important in a vertical garden.  You wouldn’t want to put a water loving plant next to a succulent.  One of them will not end up a happy plant.  Sad plants make for sad plant owners.  The flowers I chose (verbena, asylum, petunias and marigolds) all need water about 2-3 times per week.  How do you know how much water your flower will need?  Check the tag that comes with the flower.  Easy peasy. (Don’t forget to sign up for the Home Depot Garden Club!) 

*Ike sleeps through this tip.*

What to plant in a vertical garden

Size:

For a vertical garden, you will want to select plants with a short root system.  Short roots make for a lighter box.  You will also want to select plants that spread a little (to cover the box) but not so much that they take over the entire box.  The plants that I selected will spread about 4-12” each.  How do you tell how big your plant will get?  Again, check that tag that comes with the flower.  (See above.) 

*Ike gets bored during this tip and decides to take a nap.*

Color:

We chose flowers over succulents or herbs for our vertical garden because we wanted to add some color to our otherwise dull and boring deck.  I choose some bright pink and purple verbena and some purple petunias.  I grabbed some yellow marigolds to wake that little vertical planter up.  I will use asylum to add some greenery to break up the brighter colors.  I tried to find flowers that would look great together but also meet the above requirements.

*Ike smells each flower.*

I hope these simple tips help you be all smiles at your next trip the garden center.

Choosing flowers for a vertical garden

Read about our vertical garden inspiration in

Part 1: 

Vertical Garden Insipiration

Part 2: 

Choosing Flowers for Your Vertical Garden

Part 3:

How to Build a Vertical Garden (A Tutorial)

Part 4:

Planting and Caring for Your Vertical Garden

This is a sponsored post written by me on behalf of The Home Depot.

Check back on Monday to see how the vertical garden is constructed!

Do you have a brown thumb or a green thumb?  Do you love garden centers or do they overwhelm you?  What are your favorite types of flowers?  Think Ike has an acting career ahead of him?

Win the CB2 and Novogratz Brazil Getaway

This is a Sponsored post written by me on behalf of CB2. All opinions are 100% mine.
 photo The-Novogratz-Collection-Designs-by-Robert-and-Cortney-Novogratz-CB2_zpsa2e2ab7b.jpg
Have you heard that CB2 has teamed up with husband and wife design duo Robert and Cortney Novogratz to form a collection of items that was inspired by the Novogratz's vacation home in Brazil?  The CB2 and Novogratz Collection debuts May 2nd. The collection is full of bright and vibrant pieces with some warm wood tones mixed in.
Do you want to see some of my favorite pieces?  Of course you do!
The Dupla Credenza is a perfect blend of clean lines and bright  colors. And don't even get me started on that Soneca Pendant Lamp.  Drooling.  Want it.  Need it.

An outdoor swing is totally on my summer wish list. I have the perfect spot for it under our deck!

I'm also a board game nerd who is a sucker for stylish looking board games.  The boa sorte backgammon board makes me want to learn backgammon stat.

Now the most exciting part, enter to win the CB2 and Novogratz Brasil Sweepstakes.
-You and 3 of your friends could win a one week stay at the vacation home of CB2 collaborators Robert and Cortney Novogratz in beautiful Trancoso, Brazil.
-10 other lucky winners will receive a CB2 gift card worth $100 along with a personally signed copy of the book “Home by Novogratz”
-Enter via cb2.com/sweeps . Sweepstakes will run from May 2nd through June 3rd.
Follow CB2 on their social media channels for updates on the sweepstakes!
-Twitter: CB2Tweets
-Pinterest: CB2
-Facebook: https://www.facebook.com/cb2
The only catch is that you have to take me with you if you win.  I kid.  I kid.  Sort of.  I promise to learn backgammon by then.
What your favorite piece in the collection?  Are you a big CB2 or Novogratz fan?  What's your favorite board game?
Visit Sponsor's Site

Chevron Stenciled Wall {Craft Room}

This post is to remind myself that I will never stencil again.  Of course, I said this after I finished our powder room also.  I’m a slow learner.  And a sucker for stenciling.
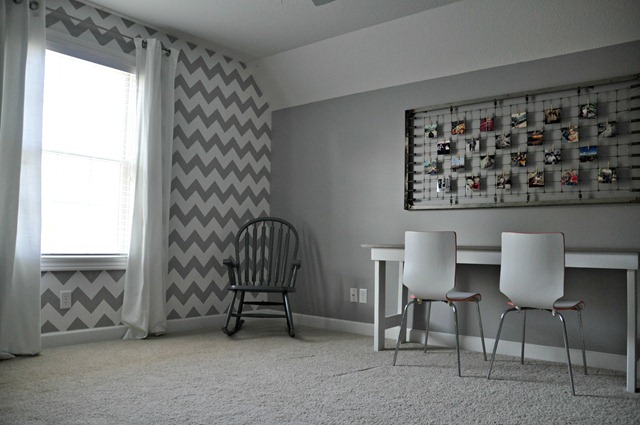
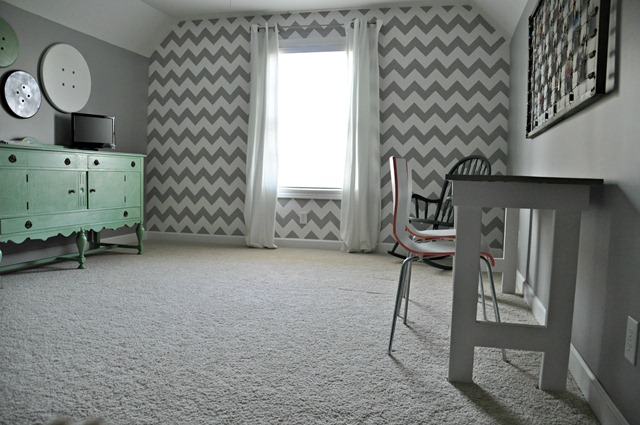
The Pinterest Challenge was announced last week. I’m a big fan of the Pinterest Challenge.  It was just the kick in the buns that I needed to finish my 3/4 stenciled wall in my craft room.  The room isn’t complete yet and it’s totally not styled.  That post will come soon.  But the stenciling is FINALLY done!!!  I thought the day would never come.

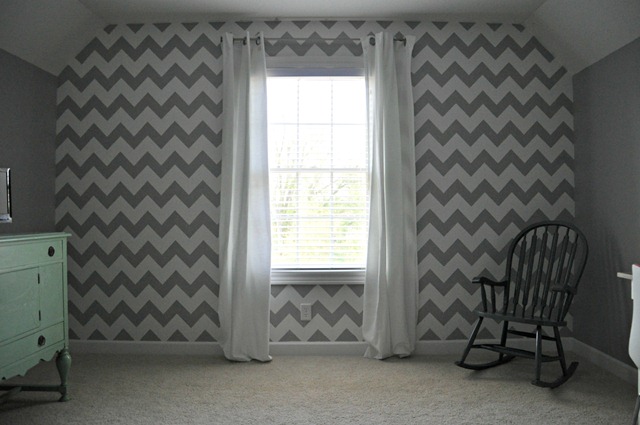
Chevron Stenciled Wall in craft room

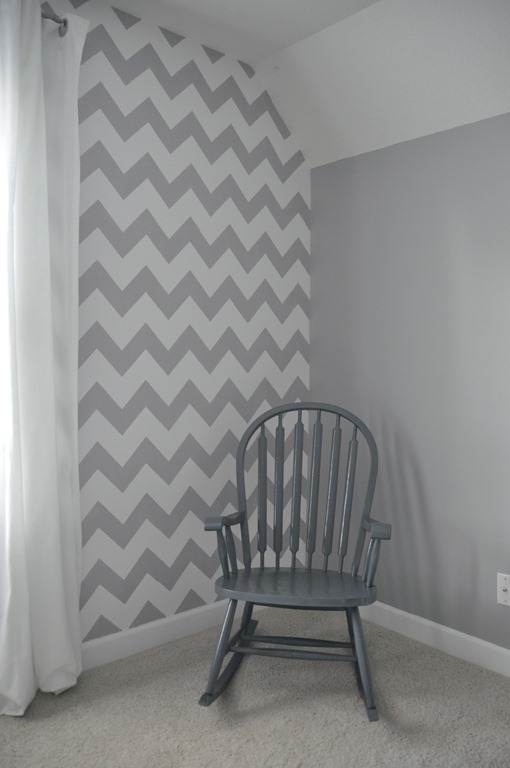
I used the Modern Chevron Wall Stencil from Royal Design Studios. (Not a sponsored post.  Lord knows I’m doing enough of them this week.  I won the stencil by submitting our powder room in a contest.)  I’ll share more thoughts on the stencil and tips for stenciling in the next week or so.

I know chevron is overdone in blogland. However, here in Iowa only 4% of the population knows what chevron is so my friends think I’m a designing genius.  And I like chevron. 

I’m not done with the room yet but I like how it looks with my Instagram display and rocking chair.

Chevron Wall Stencil and Instagram display

Modern Chevron Stencil

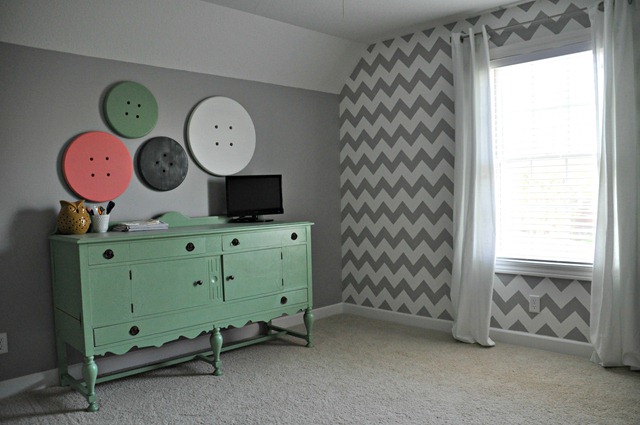
It also lives happily next to the button art!

Chevron Stencil and Button Art

I stole the curtains from the dining room to see if I liked the white.  I do.  I’ll soon purchase curtains at the correct length for this room.  Someday.

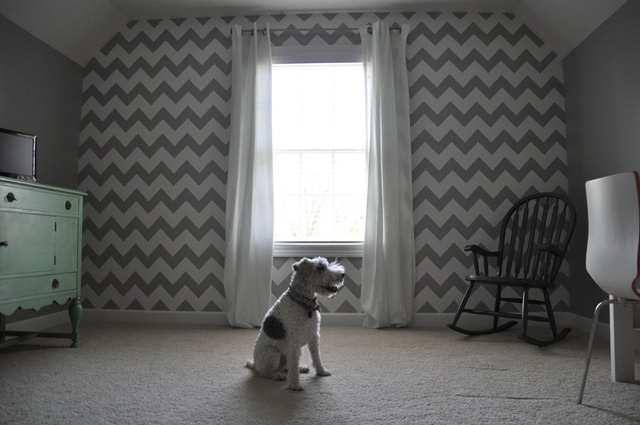
Even Ike approves.  Or does he?  He refused to model early this morning.  He’s worn out from his first video appearance.  Check that out on Friday!

Ike Loves Chevron

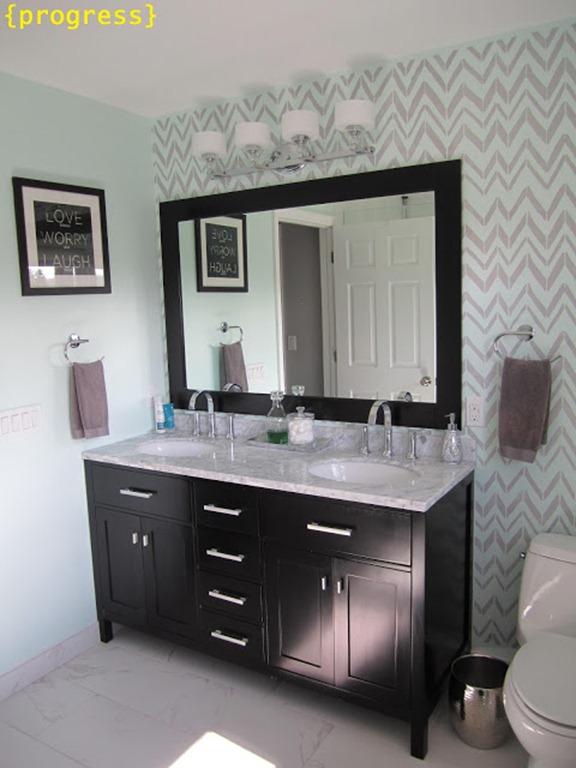
My Pinspiration was from the lovely Gabbi at Retro Ranch Reno.  The chevron wall in her bathroom totally kicks the room up a notch. Be sure to check out Gabbi’s house.  Their transformation is impressive.  And she has good taste.  And I like her.  Is that enough reasons?

Chevron Stencil Wall Retro Ranch Reno

Unfortunately, I do not have the same patience for stenciling as Gabbi does.  I swore I was going to still be stenciling at age 93.  Luckily I finished at age 31.  Although I feel like this project may have aged me approximately 60 years.  But it sure is pretty. 

Wall Stencil Chevron

Check out our past Pinterest Challenge projects below!

Linking up: Young House Love, Bower Power, Sparkle Meets Pop, Red Bird Blue

Did you participate in the Pinterest Challenge?  Have you stenciled before?  Are you interested in stenciling or does it scare you?

Vertical Garden Inspiration { Part 1: #DigIn}

This is a sponsored post written by me on behalf of The Home Depot.  I know, a sponsored post.  But keep reading because the project is awesome and they let me say whatever I want!  Which you all know is dangerous.

Last month I discussed joining the Home Depot Garden Club. As a member of the Garden Club you receive a $5.00 coupon. (Bonus!) There are also a bunch of fun outdoor project ideas. Nate and I have decided to take on the Vertical Garden .

What exactly is a vertical garden?  Good question. Vertical gardens are basically hanging flower boxes.  They are like fancy pieces of outdoor art.   Vertical gardens can be used to grow flowers, succulents, herbs and even vegetables.

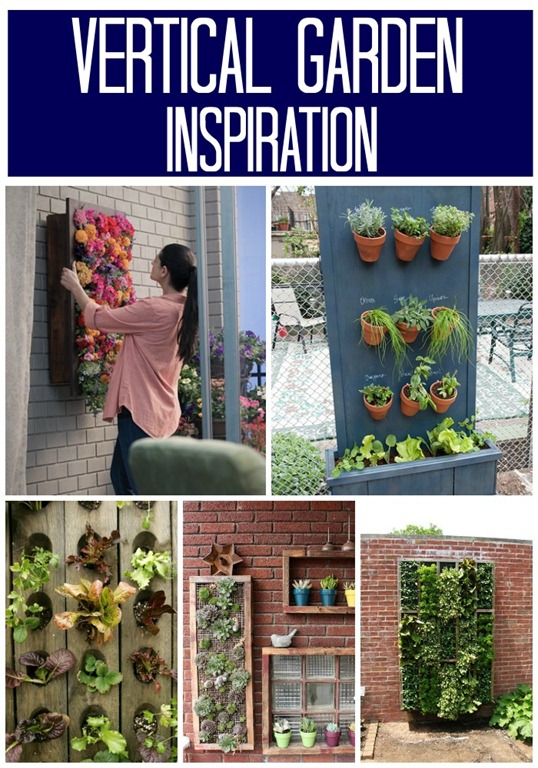
Before heading to the Home Depot, I did a little internet browsing to gather some vertical garden inspiration.

Vertical Garden Inspiration Ideas #DigIn

{clockwise:Home Depot,Brooklyn Limestone,Apartment Therapy,Inspired By Charm,Jillbert}

I was really debating succulents and herbs.  Mainly because succulents and herbs are all hipster blogger like. After much debate, Nate and I have decided to place the vertical garden on our deck.

20130505_194456

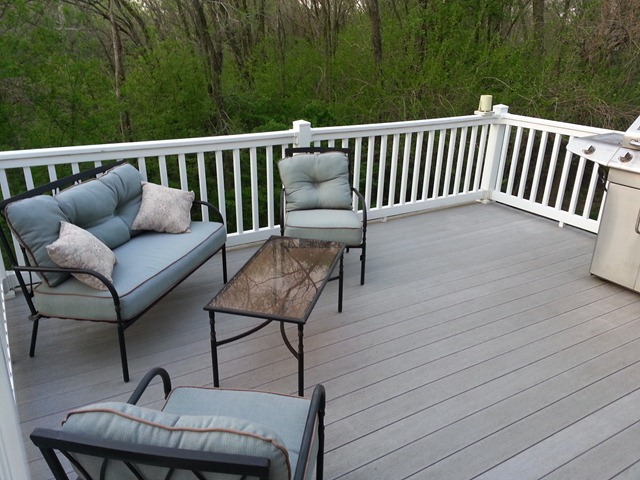
Our deck is looking pretty boring and we decided that a vertical planter full of colorful flowers would brighten it up!  And who am I kidding?  I can only dream of being a hipster.  Until next time little succulents.

I learned that vertical gardens have many benefits.  I’m always a fan of aesthetics over function.  Vertical gardens are great for adding visual drama and hiding ugly walls.  Nate is more of a function over aesthetics guy so he enjoyed that weeds are controlled in these gardens and the plants are less accessible to disease and pests.

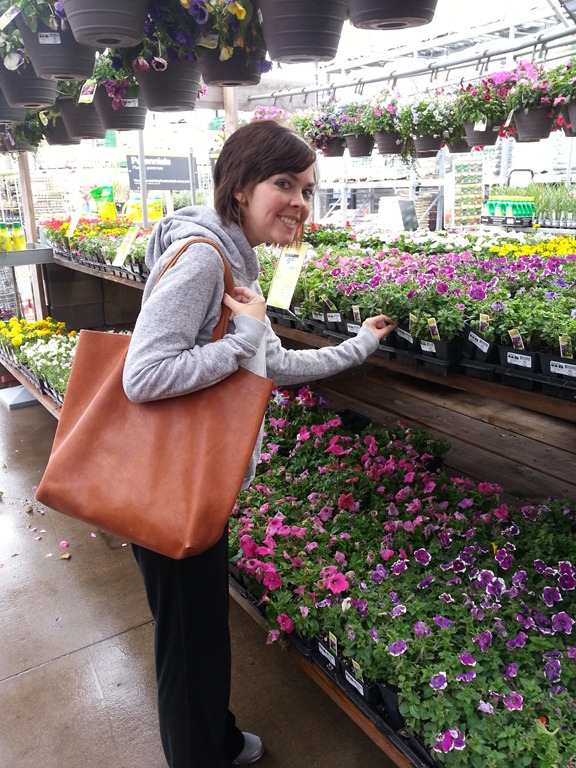
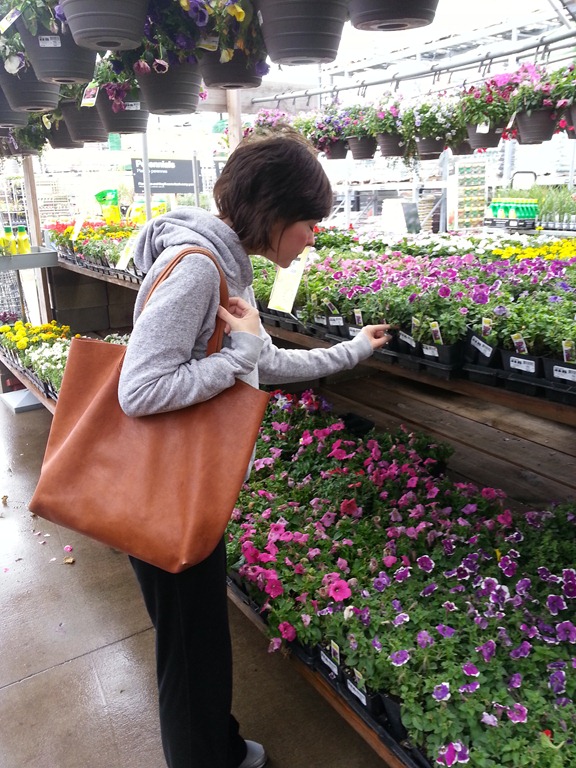
Armed with our new knowledge and a supply list, we headed to the Home Depot.  We first stopped by the garden center where we picked out our flowers.  I will share more about our flower selection on Friday.  There will be a vlog.  It will be awesome.

20130505_101248

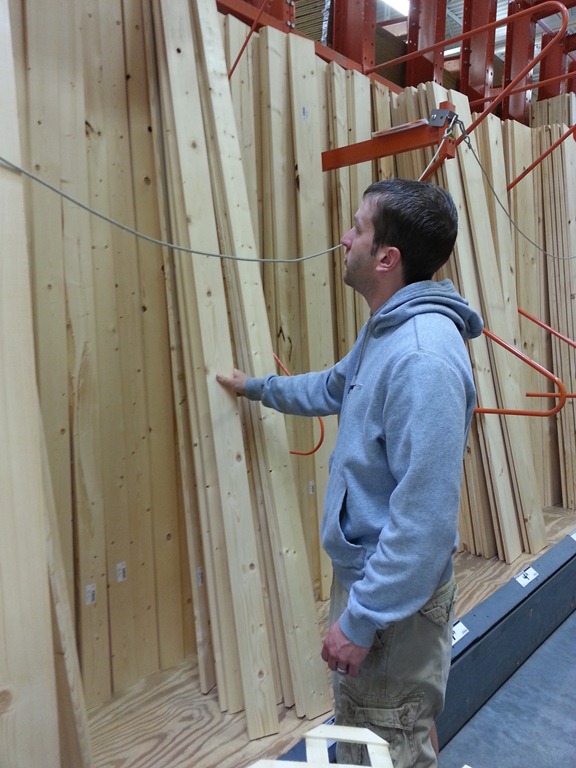
After selecting our flowers, we headed to our second home (aka: the lumber section) to grab our building materials.

20130505_111112

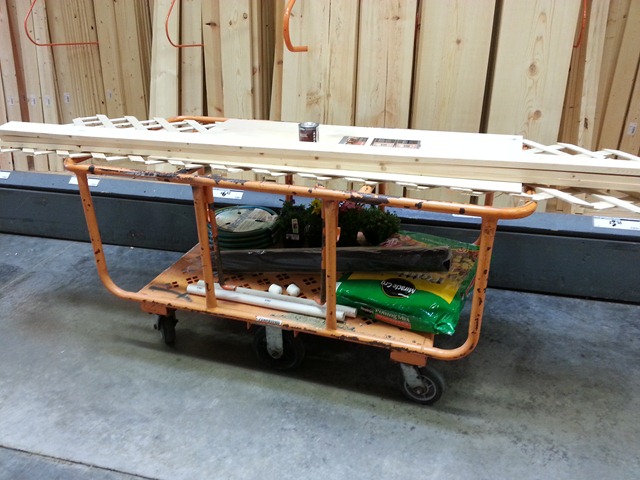
We will share a project tutorial next week complete with supply list.  Here’s a sneak peek of what we used.  (Hover over the image.  Ooo, html magic!)

We pushed our full cart to the front of the store and headed on home to start the project.

How to build a vertical garden

Read more!

Part 1: 

Vertical Garden Insipiration

Part 2: 

Choosing Flowers for Your Vertical Garden


Part 3:


How to Build a Vertical Garden (A Tutorial)

Part 4:

Planting and Caring for Your Vertical Garden

Did you tackle any outdoor projects this week-end?  Any big plans on your to-do list?  Are you hip enough for succulents?  Who's pumped for the vlog?

April Monthly Recap

When did it become May?  Oh, 3 days ago.  Got it.  I’m having trouble returning to normal life after vacation. I still think it’s the middle of April.

A few random thoughts before I recap the month of April.

We are having a garage sale on Saturday.  I hate having garage sales.  But I do love purging junk.  I’ve become a hoarder.  It’s not my fault.  It’s hereditary.  I totally went nuts yesterday though and gathered things to sell left and right.  It’s supposed to be cold and rainy on Saturday.  Work with me, Iowa.  I need to rid my life of this excess.  Or something.

I have kicked Ike out of our bedroom for the next week.  I felt fantastic in Florida.  I come home and my sinuses and lungs are instantly inflamed.  My allergy testing came back that I am allergic to dust mites and dogs.  I am in denial about the dog thing.  Wire Fox Terriers are supposedly hypoallergenic.  But it doesn’t always work that way.  We’ve also had him for 6 1/2 years and my problems started about a year ago.  But people can develop allergies at any time.  My allergist recommended that he not sleep in our room (beings we spend a good majority of our lives sleeping).  He is ALWAYS in our room.  I think it’s actually harder on me than him.  We’ll see.  Part of me hopes that I still feel like crap after a week so we can go back to normal and have our naps together.  If it’s not the dog, then we have larger issues to tackle.  Like carpet.  But new hardwood floors aren’t all bad, right?

Nate and I are on a vacation craptastic food detox.  We have done super well at only eating things made from scratch.  I think the only “processed” food that ate this week was a small bun, a whole wheat English muffin and a little flour.  I even ate vegetables.  Weird.  Any great healthy recipes for me?

And now, April in review.  Maybe you missed something.  Maybe you want to re-read something.  Maybe you’re new (Welcome!).  Maybe you don’t care.

Updates on Some Things

That title is going to win me some search engine optimization points.  Boo-yah.

Today I’d like to update you on some items around our house.  I get e-mails on these three topics so I figured it would be good to cover them.

First item: The Tile Setting Mat from Simple Mat

Backsplash-2

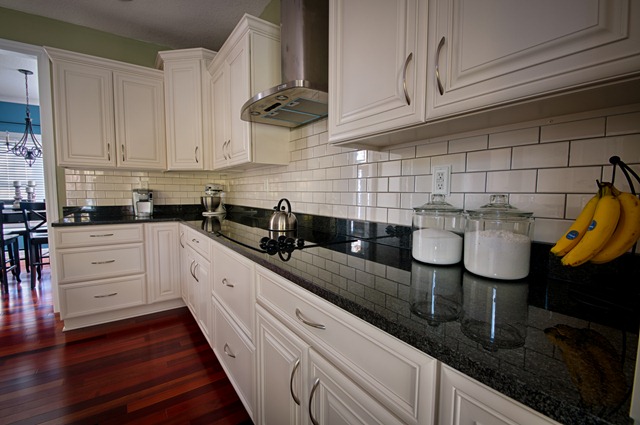
We loved the ease of install but were slightly concerned about how well the backsplash would hold up. We had some lose/wiggly tiles before grouting. It made us nervous. We carried on.

Verdict: 6 months later and all of the tiles are still intact. I have scrubbed pasta sauce, cupcake batter, etc off of the backsplash and no movement. We are now confident that this backsplash is going nowhere.  That backsplash still makes me smile every day.  Good life decision.

Second item:  Under Cabinet Lighting

undercabinet

Look how naked our kitchen looked before that backsplash.  The kitchen is embarrassed. 

Anywho, we installed the under cabinet lights we purchased at Sam’s. Let me start this story by telling you that Nate always reads reviews before buying anything. ANYTHING. Except for these lights. We used the lights twice and then they stopped working.  We thought maybe we left them on on accident.  Nate then decided to read the reviews.  The reviews were all terrible. We decided to replace all of the batteries in the off chance that we did forget to turn them off.  The lights died again after about 3 uses.  We’re done with them and we are looking for an alternative. 

Verdict: FAIL!  Super duper Heidi Montag like fail.

Third item: Burlap Wallpaper

295pn

Yes, I did have blond hair.  Yes, we look like babies in that photo. 

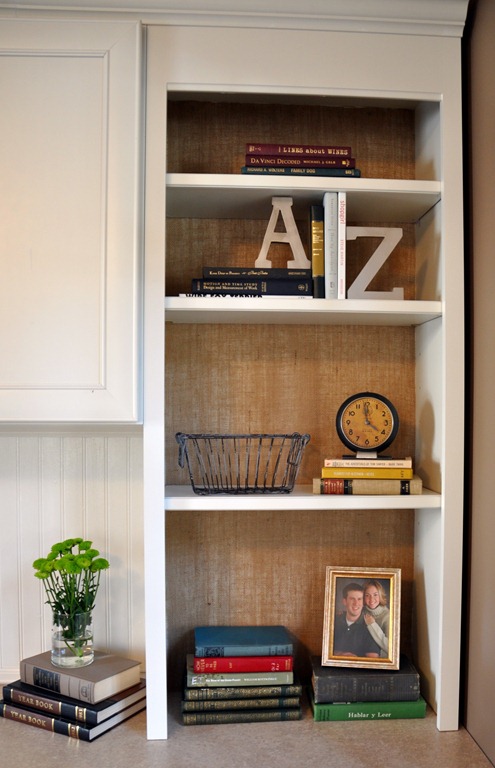
This now brunette decided to use burlap to line the back of the book cases in the office. I used a cornstarch mixture to adhere the burlap to the back of the bookcases to add a little texture. 

Verdict:  Still going strong.  The burlap has not moved and it’s been hanging for over a year.  And I’m not sick of it yet.  Even more impressive.

Who has under cabinet lighting suggestions for us?  How do you decorate the back of your shelves? Is my blond hair still weirding you out? 

Siesta Key Vacation Camera Phone Photos

Vacation is over. So sad.  I bet those of you that follow me on Instagram are glad my beach photos will be replaced with Ike photos.

If you don’t follow me on Instagram (decorandthedog), Nate and I vacationed in Siesta Key, Fl last week.  It was a fantastic vacation.  Fantastically lazy.  We did nothing other than walk on the beach, lay on the beach and swim.  The sand was amazing.  It’s mainly quartz.  It felt like flour and was always cool to the touch.  The waters were clear and a pretty turquoise color.  We had plans to check out some local museums/parks but we just couldn’t tear ourselves away.  Can you blame us?

20130423_124159

We didn’t use the DSLR much…because we were so lazy.  Nate is still editing the few that we did take.  I used my phone a bunch so let the torture of poor quality blogger vacation photos begin.

Our days went something like this.

9:00am:  Wake up and eat breakfast in the condo.  Watch Who Wants to be a Millionaire.  Nate’s choice. I think he was channeling his inner 80 year old self while in Florida.

10:00am:  Walk on beach or lay in beach chair and people watch or read.  I forgot my sun hat so I bought a ridiculous cowgirl hat.  Gotta protect the noggin’ from sun.  The beach in front of our condo complex was very quiet.  Most of the other people there were elderly.  I love the elderly.  I fit right in. 

IMG_20130427_132104

1:00pm: Eat lunch in condo.  Watch How I Met Your Mother.  Nate is obsessed.  He can relate any life moment to HIMYM.  It’s impressive and annoying all at the same time.

2:30-4:30pm: Sit on beach and nap/people watch/read.  One day I read “The Five Love Languages”.  It was a fascinating read.  I tried to get Nate to discuss his love language.  Turns out he doesn’t have one so I decided to discuss HIMYM instead.

IMG_20130423_164644

IMG_20130422_102905

4:30-5:00pm: Swim in pool.

5:00-5:30pm:  Shower.  Get ready for supper.

5:30-7:00pm.  Eat a disgustingly amazing supper. I never want to eat French fries again.  We had seafood, Five Guys,and a beer battered hot dog with bacon and cheese.

IMG_20130423_180035

20130424_181148

I’m eating only fruit for the next week.

7:00-8:00pm Get ice cream and then stroll the beach at sunset.

20130422_193542

IMG_20130422_202140

IMG_20130426_201740

IMG_20130427_205142

8:00-10:00pm- Tv or reading and then sleep.

Repeat times 6 days.

We both feel recharged and ready to tackle life.  We’re both big believers in getting away and experiencing life in a new place at least once per year.

Any suggestions for the place for our next vacation?  Are you a fan of lazy beach bum vacations or are you the go and do type?

Quick and Easy Craft #4- Sharpie Mugs

While I am soaking up the rays in Florida (while wearing SPF 50 and a big floppy hat), I will leave you with 4 days worth of quick and easy crafts. You may have seen some of them multiple times. Some may be new. All with be easy, fairly quick and inexpensive ways to entertain your friends. Enjoy!

I’ve been wanting to try that project that I have seen on Pinterest 1 million times where you write with Sharpie on some piece of dinnerware and then bake it.  What better time than with friends. 

This may be the world’s easiest project.

Materials Needed:

  • Dollar store mug.
  • Sharpie
  • Oven

20130419_161408

Step 1.  Write something witty in your very best handwriting. 

Step 2.  Heat in 350 degree oven for 30 minutes to set the Sharpie.

20130419_161820

Step 3.  Enjoy your witty mugs.

20130420_135326

We think we are funny. 

Have you participated in the Sharpie dinnerware craze?  What saying do you want on a mug?