STRIPE MANIA

I love stripes.  I also love blogging.

When on I saw this post over at decor8, I knew I had to participate.  Who can pass up a #Stripe Mania party?? Plus I had planned to wear this dress to a birthday party this week-end so it was perfect timing!

Ben Birthday 014 copypn

They said to accessorize.  Check out that belt and earrings. I’m a total fashionista! :P

I also just received this purse in the mail on Friday.  My first Etsy purchase and I’m in love.  It’s darling.  I’m not into designer handbags. I prefer cute unique bags like this.

 Black white denim handbag

There you have it.  Me in stripes.  A fashion post on Decor and the Dog.  Don’t worry, there won’t be many more of these because my house is better dressed than I am.

Participating in this party is super easy except for the fact that I don’t really get Twitter.  I blame it on my old age.  You can follow me @decorandthedog and teach me all about this tweeting bizness.

Be sure to let me know if you participate so I can check out your stripey attire!

Happy Sunday!  Must get to being productive…gloomy day and all!

A Stroll Down Memory Lane- Basement Walls/1st Floor

Let’s take another stroll down memory lane and check out where we were on our house building process 3 years ago…

3 Years Ago Last Week (since I skipped it while we were on vacay): We had basement walls!


And the start of the basement ceiling/first floor…


This was a very exciting week for us.  We had waited an entire month just to see a hole in the ground.  In one week we had an entire framed basement.  This progress was extremely promising! 

3 Years Ago This Week: We had the start of a first floor!


The start of the dining room…very exciting!  The original plans did not call for the large picture window facing west. The people we worked with to design the house strongly discouraged it because it limited the amount of furniture we could place in the room. I knew I wanted to paint the dining room a dark color and we wanted all of the natural light we could get in the room so I went with my gut.  It turned out to be a great decision (pats self on back).


The garage walls also went up!


And the walkway to our master bedroom on the first floor was started.  Do you like the openness of our living room at this point??? So breezy…


Ike approved of the building progress….check out that tail wag!
Let us know if you have any questions regarding the process (be sure to leave your e-mail or make sure your profile has your e-mail listed!) or if you have any questions about what’s going on in any of the photos!

Savannah- Part Uno

Since you all humored me on my Tybee Island post, I am going to break up our Savannah trip into 2 posts (we spent 2 half days in Savannah).

Our first trip to Savannah included stops at the Moon River Brewing Company and River Street.

First stop, Moon River Brewing Company. 

Tybee Savannah 319

Nate and my brother are obsessed with beer.  They go to Hy-Vee (because we are classy Midwesterners) and they stare at the beer selection for what seems like hours.  So annoying.

Needless to say, I was less than excited about this stop. BUT, the food there was D-E-L-I-C-I-O-U-S!  Their garlic fries are fan-freaking-tastic.  I wish I had a picture (what were you doing Mom??).  I ordered a fish sandwich…this is what I received…

247840_559008117328_123701768_31634597_2888558_npn

Only the World’s largest fish sandwich.  I ate almost the whole thing…it was THAT good.

Summary of Moon River Brewing Company: Food= awesome.  Beer (according to the experts) = Poor selection (only 4 beers on tap) and just “eh” on taste.

After consuming the largest fish sandwich known to man, it was time to burn off some of that greasy goodness.  We headed down to River Street for a stroll.

Tybee Savannah 253

River Street is along the Savannah River (someone was slacking on road names that day).  Century old buildings, which were once cotton warehouses, have been converted to antique shops, distinctive boutiques, galleries, brew pubs, restaurants, and hotels.  It’s quite beautiful!

I’ll let the pictures do the talking now (thank goodness, right?)…

Tybee Savannah 260

Tybee Savannah 263

Tybee Savannah 266pn

Tybee Savannah 277pn

Tybee Savannah 287pn

Tybee Savannah 305

Tybee Savannah 314pn

Tybee Savannah 276pn

Our first trip to Savannah was a good one!  I loved how such a historic town was so full of life.  There were people of all ages.  Live music.  Definitely recommend River Street as a stop in Savannah!

I’ll share with you our trip to the historic district next week.

Tell me about your favorite vacation destination. I like to add to my “must-travel-to” list!  (Did I mention that blog comments get me through my work day?)

Dining Room Crown Molding

We were busy little DIY’ers before we left for our trip to Tybee Island.

Along with working on our guest bedroom (read about that process here), Nate and his dad hung crown molding in our dining room…and it’s pretty…

066
067

(Nate snapped these photos before I returned our glassware to the hutch…you can never be to safe around this house!)

How’d we do it?  Exactly the same as the office (read about the process here) except we did have to deal with this vent that was installed a little too close to the ceiling…

058

Here’s our easy fix...

The vent is a return vent.  This vent pulls air from the room and returns it to the geothermal system to properly cool/heat the house.  It’s an important vent but not so important that we couldn’t touch it.

We removed the cover…(we apologize for the poor light balance…)

059

We hung the crown molding as we did in the rest of the room…

064

Nate then replaced the vent cover by screwing it into the wall in it’s new location.  We may lose a tiny amount of air circulation by doing this but not enough to affect the heating/cooling of our house. 
(We still needed to fill in the splice where the crown meets above the vent.)

086

There you have it.  Another room checked off the crown molding to-do list!

Picnik collagemay2011

What do you think of the vent fix?  Would you have noticed if I hadn’t pointed it out?

Next on my to-do list….learn how to set the table all pretty and grown-up like.  Growing up my family didn’t use anything fancy like table cloths….or matching dinnerware for that matter…so there will be some blog/pinterest stalking in the future for fancy table decorating ideas.  Do you have any you want to share?

Tybee Time

I’m baaaackkkkkk!  Did you miss me?  I bet you didn’t even know I was gone beings my lovely guests held the fort blog down? (Thanks again ladies!)

Nate and I took a trip with my family to Tybee Island, Georgia.  A whole week of sun, 90+ degrees, and no work….woo hoo to island life!!

Tybee Savannah 463

And now you get to suffer through vacation photos…mwah ha ha.  I really think they could make vacation photos some sort of prisoner torture strategy!  Luckily I am just going to share with you some of my favorites and not all 1300 photos that my mom took (you only wish I was joking).

How’d we spend our time on Tybee Island?

We people watched from our condo…one of my favorite vacation past times…

Tybee Savannah 007

Sunbathed.  Can you believe that neither of us got burnt?  Thank you SPF 45…and nap time during peak sun hours…oh, nap time…I miss you already…

069

We toured the Tybee Island lighthouse and surrounding buildings…

Tybee Savannah 010

The house is where the lighthouse keeper lived.  The banister in the house was built to resemble the lighthouse…someone was thinking…

Tybee Savannah 052pn

The view from the top was amazing…and super scary for a girl who doesn’t even like the second step on a ladder…

Tybee Savannah 038

We took a day trip to the Wormsloe Historic Site where we strolled through the 400+ oak trees with beautiful Spanish moss…

Tybee Savannah 210

The Wormsloe site contains tabby ruins that are the oldest standing structures in Savannah. True tabby is made of equal parts lime, water, sand, oyster shells, and ash.  You won’t find this as a building material in Iowa!

Tybee Savannah 166

We ate the most delicious gelato once twice almost every night…

055

In the mornings, my parents and I would wander the island streets and check out the beach houses…and make room for more gelato…

Picnik collagehouses

We took a family photo…my dad was totally into it…

Tybee Savannah 370

My brother walked on water…(Single ladies, he’s available. Contact me for his info…)

Tybee Savannah 352

And Nate took pretty pictures…

Tybee Savannah 337

Tybee Savannah 387

Tybee Savannah 425

Tybee Savannah 416

We also did some sightseeing in Savannah which I will share with you on Thursday…just when you thought the torture had ended!!  **insert evil laugh**

What’s your favorite vacation destination?  Are you a beach fanatic or land lover?  Are you the relaxing type or a go-getter vacationer? 

I want to hear from every one of you that reads this blog today….your comments may be the only things that get me through my first day back at work. :)

$50 PetSmart Gift Card Giveaway Winner

We were going to wait to announce the winner of the Gift Card until tomorrow…but the suspense was killing us!!

Ike is happy to announce that comment #21 is the winner of the $50 PetSmart Gift Card Giveaway from Apartment Guide!

image

Teddy (whose mom is April from A Kitchen Table for Two) is the lucky winner of the PetSmart Gift Card Giveaway! 

Teddy’s mom states that he will be getting a few new toys (he LOVES the fleecy chews!), and probably a pillow or two - he's a lounger!

Sounds like our kind of dog! Look at that face!

Thanks again to Apartment Guide for this fun opportunity!

Before and After: NewlyWoodwards

Our final "Before and After" guest is Kim from NewlyWoodwards.  Kim is a fellow Quad Citian so that gets her extra points in my book.  She has also been extremely kind about promoting this ol' blog.  If you are a new blogger (or think back to when you were) you know that it can seem a little lonely on your blog until you get those first few readers/comments and I definitely have Kim to thank for helping a fellow blogger out!!  

Kim and her husband are renovating pros. Seriously. Pros.  I'd hire them.  You should check our her weekly renovation reports on Thursdays.  I'm not sure they sleep.  Kim also has some mad sewing skills...check out this quilt...and this one.  Told you...mad skills!  Kim is doing a unique "Before and After" that will give you 7 additional blogs to check out as well. Week-end bonus!!

***

Hi, Decor and the Dog readers! I'm Kim from NewlyWoodwards, and I'm thrilled that Michelle asked me to hang out over here today.


Like you, I'm a huge fan of all the awesome projects in this corner of the blogosphere - from the DIY headboard to installing crown moulding and making curtain rods (bloody brilliant).


But, I'm particularly fond of the chair makeovers at Decor and the Dog. I'm smitten with her cheerful $5 Salvation Army chair, and don't even get me started with her newest winged chair makeover. Love.


So in honor of Michelle and her chair-prowess, I thought I'd share seven of my other favorite chair re-dos in the blogosphere. Because we all need a little seating inspiration now and then.


Number One
Jen at Home in the Country
Another yellow and white chevron redo, Jen made her own slipcovers for this pretty little nursery rocker.


Number Two
Lucie at Design Sponge Online
I love the perky fabric and the chrome legs and arms on this bright chair makeover. I'm dreaming of these chairs gracing a breakfast nook. (I don't have a breakfast nook, but it's my dream, darn it.)


Number Three
Elise Blaha
These cheerful little beauties prove that a vibrant hue of kelly green paint can go a long way. And the lovely fabric certainly doesn't hurt.


Number Four
Our Busy Beach Life
This pretty monogrammed number makes me think that every person in my family needs their own personalized chair. Practical, when you forget which seat is yours.


Number Five
So Stinkin' Cute
Begging for a good book and a reading light, this chick black armchair could really be my new favorite rainy-day reading spot.


Number Six
Sugar Bee Crafts
Who would have thought something so ugly could turn into something so cute? I love this fun makeover of an everyday office chair.


Number Seven
Liz at It's Great to be Home
It blows my mind that you can actually paint a pattern on IKEA slipcovers and make it look good. Liz did it.


So, there you have it. And while I'm here, of course I have to shamelessly share three of my own chair redos... My first office chair, made over from an old chair given to me by my parents.


My second office chair, inspired by Jen and found on Craigslist. I didn't even have to paint this one. I just recovered the seat in nubby linen and scrubbed it down.


And finally, a black paint job on our dining room chairs made the dated seating look fresh once more.


Thanks again to Michelle for having me! Hope you'll pop in to see us at NewlyWoodwards, where we blog about our current house, our newest renovation and any other projects that pop up, which happen more than we care to admit.


If you stop over with a bottle of wine, you know I'll have a chair ready for you.


Have you done your own chair makeover?

***

Isn't her dining room charming?  Hope it's rainy in your neck of the woods so you have time to check out all of these blogs (along with this week's previous guests!!) 

Did you enjoy the series?  Would you like an opportunity to guest post? If so, contact us at decorandthedog@gmail.com!

Don't forget about our $50 PetSmart Gift Card Giveaway...enter here!...it closes at 11:59PM today!
The winner will be announced on Tuesday!

Before and After: Design Build Love

Today's guest is Ashley from Design Build Love.  Ashley is a frequent commenter on this blog (see, it's pays to comment) and we have quickly become blog buddies.  I enjoy reading Ashley's blog because she is also "fixing up/decorating" a newer home on a budget. You can tour her lovely home here! Ashley and her husband were also on an episode of the DIY Network's House Crashers (read about her experience on the show here).  How awesome is that?  Ashley is now going to share with you her favorite "Before and After"...

***

Hi y'all, I'm Ashley and I blog over at Design Build Love! Let's just say that when Michelle emailed me about guest blogging over here, I was more than excited! I LOVE Michelle and her blog... and her adorable dog! To be honest, I don't even know how I originally found Michelle's blog, but once I did, I was hooked, and it seemed to be a great design match for me since our homes follow along the same color palette. Most people know Michelle's amazing West Elm headboard knock-off, but have you seen her gorgeous thrift store, made-over dresser that lives in her master bedroom? That is one of my all-time faves in blogland!

If you head over to my blog, you might notice that I often refer to my blog as "our" blog and that's because I have an amazing husband named Eric, who's always by my side to join in on each and every project I dream up! This is us:

summer-2010-319

We describe ourselves as young, newlywed professionals who moonlight as designers/home-improvement-DIYers! We’re BUSY, we’re FRUGAL, and we LOVE to DO-IT-OURSELVES. Our motto is to save and buy what we want, or if it’s out of reach, build it ourselves! We’ll never pay someone to do something that we can do ourselves (unless there’s a safety issue), because we both believe in learning, and with a little eagerness and determination, we usually can accomplish any of our projects!

To get a little taste of what we do, we thought we'd share our Guest Bathroom Before and After and our custom aluminum tile framed mirror.

After a bit of love and construction, our guest bathroom looked like this:
112

BUT... it wasn't pretty to start...

Our house was a fairly beat-up short sale, so our bathroom was nothing but nastiness... see...

13748_815780227753_3221771_46067183_4028814_n

We knew there was no way we could allow guests to use a bathroom like that. We quickly painted the bathroom a soothing blue, hung some accessories, and added a new shower curtain, but our very builder-grade bathroom still lacked some major pizazz... See...


IMG_1305
Guest Bathroom Before Tiled Mirror, but After Paint, New Shower Curtain, and Accessories
 
After a lucky break, inheriting some left-over Recycled Aluminum Tiles from a friend, we decided to make a tile-framed mirror for our bathroom! Sure, we could have used our existing mirror for this project, and just tiled around it, but we really just wanted more BANG for our effort... and the final product absolutely rocked our world:
 

113
Mirror Updated!

We are sooooo thrilled with the results, and while we still have more plans for the bathroom, we couldn't be happier with our "pizzaz!"

In case you were wondering how to make a tile-framed mirror (it took me a lot of online research to find the right method for us), this is how we did it... STEP by STEP:
  1. Buy the proper size mirror for your space (we went with a 24x36, beveled edge mirror from Lowe's).
  2. Lay out the tiles around your mirror to determine best layout and proper spacing. For ours, we decided to do a double row around both mirrors, with a married center row (we didn't have enough width over the vanity to do a double row around each mirror separately).

  3. IMG_1307
  4. Once you have the layout down, choose the proper mounting method!!! Choosing the proper method is essential to the project. After much back and forth, we decided to go with a plywood mounting method. To do this, cut a sheet of plywood down to size (to allow for a quarter-inch of the tiles to hang over on each side) and then primer the wood on both sides for moisture protection- see the primered wood below.
  5. After the primer dries, snap a chalk-line down the middle to properly align the tiles down the center. Start by tiling the middle two rows along the chalk line. To secure the tiles to the wood, we used Liquid Nails, as we were butting the tiles up to one another with no space between.IMG_1349
  6. Next, place the mirrors onto the plywood using Mirror Adhesive by Liquid Nails. This is absolutely essential because if you do not use the proper adhesive when mounting a mirror, the adhesive will eat away at the coating on the back of the mirror and it will look very bad.IMG_1353
  7. After both mirrors are place, then tile the remainder of the frame using the Liquid Nails and the tile pattern that you've already laid out in Step 2.IMG_1360
  8. Allow to cure for at least 24 hours.
  9. After curing, flip the mirror over and apply a line of liquid nails to the back of the tiles and the edge of the plywood for extra security.IMG_1361
  10. Lastly, secure proper hanging hardware. We went with the new Hangman Track System! Traditional hardware was not strong enough in the plywood, nor secure enough for the weight of the newly mounted mirrors. But, the Hangman system was perfect and extremely easy to use!!! For the Hangman system, you will mount the hanging hardware on the back of the mirror and then on the wall. Afterward, we just set the mirror on the wall-mounted track and we were all DONE!!! :D We are so thrilled with the result. It made such an impact and was a wonderful D-I-Y project!113
If you're into a little DIY-fun, pop on over for a visit at www.DesignBuildLove.co (no "M") and let us know what you think!

-Ashley

***

How impressive is that mirror?  Makes our trim addition look all boring!  Be sure to stop by Design Build Love and check out the improvements Ashley and her husband have made to their beautiful home!!

Don't forget about our $50 PetSmart Gift Card Giveaway...enter here!

Before and After: Finding Silver Linings

Today's "Before and After" guest is Mindy from Finding Silver Linings.  Mindy was one of my first regular commentors on this ol' blog. (Thanks, Mindy!) I've enjoyed reading Mindy's adventures in home improvement and furniture make-overs.  Mindy is bolder in her color/design choices than I am. (For instance, her chalkboard wall in her kitchen (check it out 
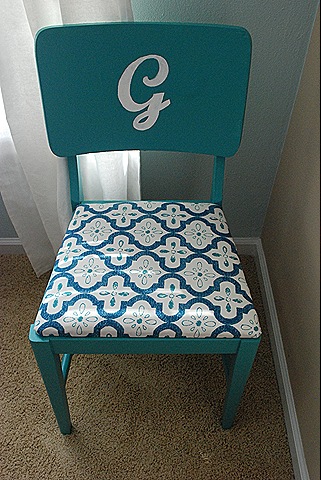
here)).  Her bolder choices keep me checking back each day to see what she is up to!  Mindy is going share with you her beautiful desk she scored off of Craiglist for free.  Yes, you read that...free. So. Incredibly. Jealous....

***
Hello everyone! I'm really excited as this is my very first guest post. My name is Mindy. I'm a newlywed, first-time homeowner, & creator of my blog Finding Silver Linings. Michelle is a master DIYer, and like me, she loves a good makeover. Here's my favorite furniture makeover I've done so far...

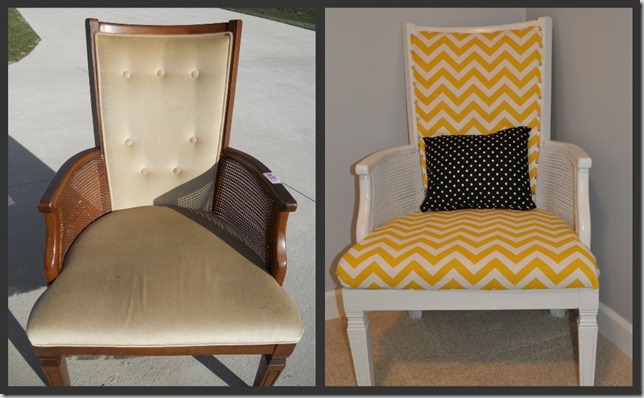
It's truly amazing what a little paint can do. It can completely transform something from old and ratty to updated and fresh.

This tutorial is not the end all be all in furniture painting, it's just how I did it.

I started with this desk. (click here to see how I got it)


The desk was stained, a little burned, and scratched.


I drove to Lowes and picked up primer, spray paint, clear sealant, fine grit sand paper, and tack cloth. I also bought satin nickel paint for the hardware (but I didn't end up using this because I liked the way the original hardware's finish looked). This all totaled up to about $25. Sweet.


The first thing I did was remove all the hardware with a screwdriver.


I sanded the surface a little to get any previous sealant off. In the places it was dinged or scratched, I used a little elbow grease and just sanded a bit more until it felt smoother. I didn't sand every inch. It didn't need to be perfect.


Remove all drawers and give the faces of them a quick sand also.
I used a sandpaper block because the it was easier to hold than paper, plus since it was flat, the desk top was uniformly sanded.


Run over the entire surface area with a tack cloth. I didn't know what a tack cloth was until now. It's like less-sticky fly paper that picks up all the dust from sanding. Don't skip this step. If you have a dusty surface, the paint will stick to the dust, not the desk.


Be sure to do this in a well ventilated space (ideally outside). Also, if you are at all concerned with the floor or grass you are about to paint on, be sure to cover it with a tarp. Don't end up like me. Like me meaning in the dog house for a few days because you have successfully primed and painted your grass a lovely shade of Oceanic Blue.


Spray the primer on in long strokes. Try to hold the can about 8 inches from the desk. I put on 2 thin coats of primer.


Yes, I primed the grass by accident.
I waited about 10 minutes in between coats.
Don't forget to prime the drawers too!


Next up was my favorite part. COLOR!

When you spray paint the color on, use long, even strokes.


(Before I got to this point I found random plastic in our garage to put under the legs in an attempt to save the lawn)
Don't panic like I did when the paint looks like this after one coat...


After 3 thin coats, the streaks disappeared.
Again, don't forget the drawers!


After the paint dries, It's time for the clear sealant. I chose a satin finish to try to mask the spots that I didn't sand as well as I thought I did.

Evenly spray 2 coats of this stuff on the furniture.


I did my happy dance when I knew it was going to turn out nicely! Our poor neighbors!
I let this dry for a few hours.


I am so impatient!
Screw on the hardware when you are sure it's dry.
I am so happy with the end result, and even happier that it was so easy!


***

I told you she makes bold choices. And don't they turn out beautifully??  I still can't believe that desk was free.  As in no money.  Be sure to stop by Finding Silver Linings and check out all of Mindy's fun projects!

Don't forget about our $50 PetSmart Gift Card Giveaway...enter here!

Before and After: Mr & Mrs

Our "Before and After" guest today is Lyndsay from Mr and Mrs.  Lyndsay and her husband are currently fixing up their adorable Cape Cod home.  Lyndsay's blog caught my attention with her kitchen (which she'll share with you today) but I definitely stuck around after seeing her painted built-ins (check them out here).  I also blame her for my Pinterest addiction.  It's always good to have someone to blame for your addictions, right? 

***

hi everyone! I'm Lyndsay from over at Mr & Mrs where my hubby and I are renovating our first home on Cape Cod in Massachusetts. I am thrilled to be guest posting for Michelle here at Decor and the Dog, especially to showcase my most favorite house project that my hubby and I have tackled yet...our kitchen!

Living in New England means high home prices, so when house hunting, my hubby and I knew we were going to be purchasing something that would need some work (Check out more about our home-buying process here). Being the foodies that we are, the most important item on our wishlist was that the kitchen needed to be roomy. It didn't need to be updated...we knew we could tackle that on our own, but it needed to have the right layout to be functional for two people who cook every night. Seriously, we eat out/order takeout maybe 1x every 2-3 months!

Here is what the kitchen looked like on our closing day:


like every blogger with their first home project...i WISH i had taken more before photos! Alas, all i have is this not-so-clear cell phone picture.

The negatives: natural wood cabinets (not my style), white (& grossly dirty) appliances, a broken microwave over the stove, tarnished brass hardware.

The positives: granite!! I am not sure that i would have chosen this color granite had we been replacing the counter tops, but since we aren't planning to stay in this house forever, it doesn't make sense to replace them.
Step #1 was to sand/paint all the cabinets. This, my friends, is NOT a fun project. Boy did my excitement diminish as I tackled cabinet after cabinet, after cabinet.

The whole process took us over 6 months because we needed to be able to use the kitchen throughout the process. So, instead of tackling everything at once, I completed little sections one at a time. Read about the cleaning, sanding, priming, painting process here.

The total cost of the cabinet re-do was $60.00 for paint and supplies and $90 for 40 new pieces of hardware and we were left with this:

and this:
(notice that we also ripped out the broken microwave AND the small cabinets above it)

Step #2: Appliances

You may notice that we already have our new fridge in this picture, due to an amazing price mistake discovery by my hubby, we purchased our fridge from Lowe's long before the rest of our appliances.
Aside from the fridge, we found the lowest prices on appliances from AJ Madison, a wholesale company out of New York. AJ Madison doesn't offer free installation and delivery like Lowe's or Home Depot, but even with the addition of the $100 charge for white glove delivery (the guys bring it into the room for you), we saved over $900 ordering from AJ Madison instead. The only downside...all the installation is on you. Luckily, my hubs felt confident that he could get it done. The worst part was leveling the stove, but we managed to get 'er done.
Read more about the types of appliances we decided on here.

Total cost for all appliances (microwave, dishwasher, double oven, hood, fridge): $3,066

Here is the kitchen after the appliances were installed:


Step #3- tiling the backsplash

I smiled from ear-to-ear when I finished cleaning, sanding, priming, painting the last cabinet and thought to myself- the worst is over!

HAHA! Little did I know what kind of time commitment tiling a backsplash is :)

Tiling our backsplash was easily the most backbreaking, foot killing, mind numbing, time consuming task we had ever taken on. When you purchase the beautifully neat 12 x 12 squares of tiles, it seems so easy, until you come to the realization that there is very little of the area you are tiling that actually fits a whole sheet. The tiles we picked were hard to work with because of their various shapes, sizes, and colors, and we ended up having to do many more custom cuts than we were hoping, and having to break apart most of the 12 x 12 sheets and fit individual tiles like puzzle pieces.


The tiling project took us about 40 straight hours to complete 27 square feet around the kitchen and cost $300 for tiles, grout, sealant, quikset, and trowels.


Before I show you what the kitchen looks like today, let's take a final look at the before:


and after $3, 500.00 and a lot of man hours, here is the after:


...and it's this clean and neat every day ;)

Hope you enjoyed my post! Thank you SOOO much Michelle, for inviting me!

***

How's that for a kitchen make-over?? I have some pretty talented blog buddies! Be sure to stop by Mr and Mrs and check out Lyndsay's home renovations!!

Don't forget about our $50 PetSmart Gift Card Giveaway...enter here!