Before and After: Hazardous Design

This week is a very exciting week on Decor and the Dog!  I am having 5 of my favorite bloggers share their favorite "Before and After"....because who doesn't love a good "Before and After"...and who doesn't need more awesome blogs to add to their blogroll? The bathroom will clean itself, I swear...read on!


Our first guest blogger is Carrie from Hazardous Design. Carrie and her husband have fabulous taste and have done amazing things to their New England home. (Check out their house tour here.) Carrie and I are also in a "blog club" together.  Yes, their is such a thing as blog club...and yes, it is as nerdy as it sounds.  Carrie is now going to share with us her favorite "Before and After"...

***

When Michelle asked me to participate in her "Before and After" series, I knew I wanted to share my proudest accomplishment yet in our new home on Hazard Ave...the Home Office.

Here are a few pictures of what the room looked like "Before", during the home inspection walkthrough.


The room doesn't look that bad in pictures --at least nothing that a good spring cleaning couldn't help, but close up we could see the kind of wear and tear one would expect of a house built in 1886. The blue paint had become chalky, the plaster walls were pitted, and there were millions of cracks in the ceiling. (Okay, so "millions of cracks" is a bit of an exaggeration, but it sure did feel that way when I was up on the scaffolding trying to patch them all...)


Skim-coating the walls did a world of difference to smooth out the texture and fill the holes and cracks.  My husband attached crown molding to the built in shelves.


I put a fresh coat of paint on the walls


And we took down the dated chandelier and replaced it with one we had in the dining room of our old house.


After we switched out the solid wood doors with French doors, we finally considered the room DONE!

Here is what our Home Office looks like "After" all our changes.


Thanks Michelle, this has been a fun trip down memory lane! 

***

I told you she had fabulous taste! Be sure to stop by Hazardous Design and check out all of Carrie's hard work!
Don't forget about our $50 PetSmart Gift Card Giveaway...enter here!

$50 PetSmart Gift Card Giveaway!

Yesterday we shared with you our mudroom make-over plans as part of Apartment Guide's “A New Place for Your Pet” Blogger Challenge.  Ike is pretty excited about the plans for his room but he’s even more excited about his new Wubbas…

7021843pn

7021838pn

He acts like he just won the Lotto…the Wubba Lotto.  Ike wants your pet to be this happy also!  As part of the challenge, Apartment Guide has generously offered a $50.00 PetSmart Gift Card to one of our lucky readers…so you can buy whatever you'd like to pamper your pet too!

7021837pn

How do you enter?

  • PRIZE: $50 PetSmart Gift Card
  • TO ENTER (required): 
    • “like” Apartment Guide on facebook and/or follow Apartment Guide on Twitter. Leave us a comment (with your e-mail) on this post letting us know you did so!
    • Also, tell us all about your (or friend’s/relative’s) pet and how you would pamper them with $50!
  • BONUS ENTRIES: (Leave a comment for each)…
  • GIVEAWAY CLOSES: Friday, May 27th at 11:59 PM CST
  • NUMBER OF WINNERS: One
  • PRIZE SHIPS: United States only
  • OTHER STUFF: The winner will be selected using random.org and announced on Tuesday, May 31st. 

Did you know?

Who knew?!  Be sure to tell your friends about the giveaway and good luck!!

“A New Place For Your Pet” Blogger Challenge

When we were approached about participating in Apartment Guide's “A New Place For Your Pet” Blogger Challenge, we were super excited!  Apartment Guide would supply us with a gift card to purchase anything we wanted…new pet accessories or even materials to build a new space within our home or yard for Ike to play and live. 

This opportunity sounded like a perfect “challenge” for a blog titled "Decor and the Dog.”

Key word….challenge.  How were we going to find a way to create a new space for the dog who he has already made himself VERY comfortable in every room in our house? 

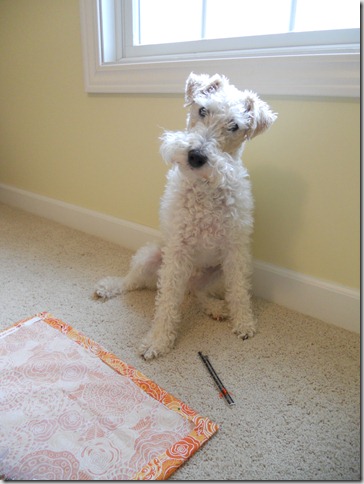
Ike was just as puzzled…

April 2011 018

The three of us pondered this challenge on our nightly walk around town last week. And then it came to us…let’s fix up the mudroom…aka Ike’s room!

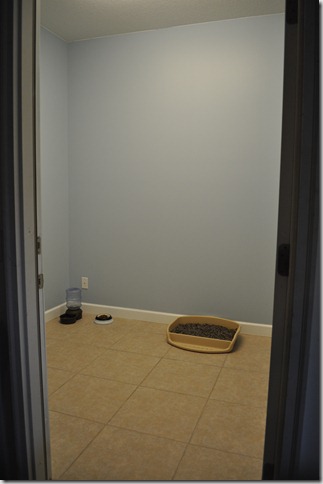
Here’s our mudroom (Ike’s room) currently…

010

As you can see, it’s all dog….and no decor. (That box?  It’s Ike’s litter box.  Read more about that here.)

We’ve been meaning to do something with this space but we just haven’t gotten around to it.  It won’t be completed for a few more weeks but here’s a mood board we whipped up with our plans to spruce the place up…

image

The Breakdown:

  • A Built-in Corner Seat/Storage Area: We’ll use this built-in for easy access to dog treats, bones, and poo bags which will be fully stocked thanks to Apartment Guide!  We will install hooks for coats, purses, and the Ike’s leash. Ike’s food and water dishes will be stored under the bench as well. We’ll share more about building this built-in when we get to it! (Nate designed the built-in using SketchUp. Fancy, huh?)
  • Gallery Wall:  We plan to hang a gallery wall of photos/prints like the ones in the upper left.  (Most of these are found from CafePress.  We do plan to DIY some of them..of course!)  We also plan to DIY the sign that states “All You Need is Love…and a Dog”.  How perfect, right? (Found it on Pinterest!) We also plan to include “family” photos and some of Ike’s baby pictures.
  • Ikea Bastis Dog Leash Hook: We purchased this hook from Amazon beings our nearest Ikea is 3 hours away.  Who doesn’t love a little red dog butt hook???  I’ve had my eye on these for awhile.  I was just waiting for the perfect excuse to purchase it without Nate thinking I was too crazy (too late!)
  • Red Dog Food Dish: Red is, obviously, our accent color.  We think it will look great against Valspar’s Schoolboy Blue.  And what dog wouldn’t love a red food dish?? (Found on Amazon.) Ike says he doesn’t care as long as it’s full!
  • Red Wubbas:  Ike’s request was Wubbas…and more Wubbas…and more Wubbas (We get his at PetSmart). They are, obviously, his favorite toy. He’s gnawing on a tiger patterned one as I write this post.

Do you have a space in your house dedicated to your pet?  Tell us all about it!  Or do you think we’re plain crazy for designing a room around our dog?  Weigh in!!

Check back tomorrow to enter our first giveaway.  The prize…a $50 PetSmart Gift Card Giveaway (from Apartment Guide) so you can start to design a space for your pet…or just spoil them silly!

Apartment Guide is owned by Consumer Source, Inc. Apartment Guide partnered with bloggers such as me to participate in its “A New Place For Your Pet” Blogger Challenge. As part of that program, I received compensation. They did not tell me what to purchase or what to say about the products used for the “A New Place For Your Pet” Blogger Challenge. Apartment Guide and Consumer Source believe that consumers and bloggers are free to form their own opinions and share them in their own words. Consumer Source’s policies align with WOMMA Ethics Code, FTC guidelines and social media engagement recommendations.

Guest Bedroom Update

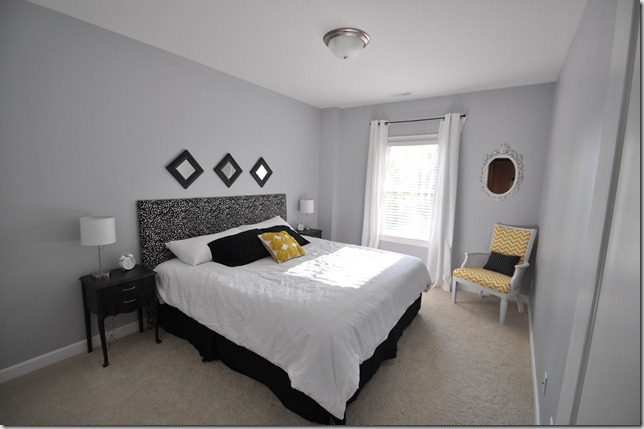
We did a little more work on the ol’ guest bedroom this past week-end. 

It is still not complete but we are working our way there…baby steps…

071

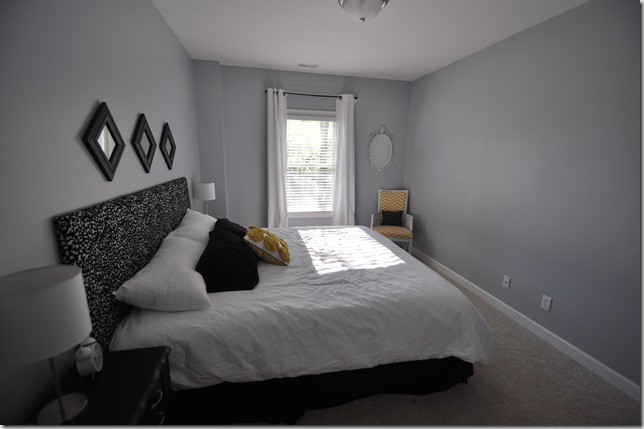
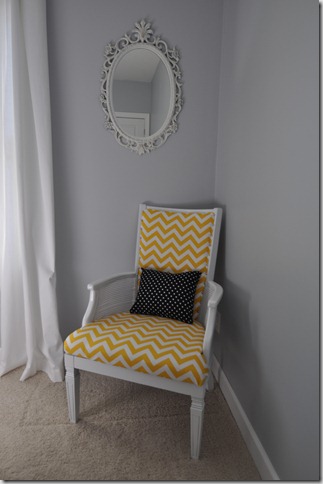
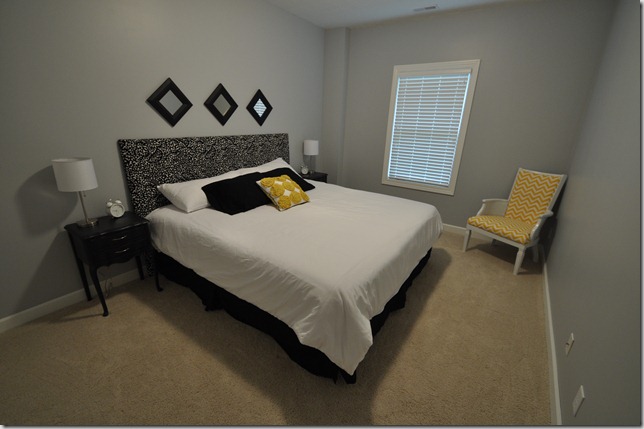
We added the chair (read about it here).  We also hung some curtains and a mirror.  The curtains are from Target ($20 for the pair).  The mirror I found at a garage sale back home ($8).  Simple changes (minus the chair…NOT simple) that really warmed up the room.

075
080
079

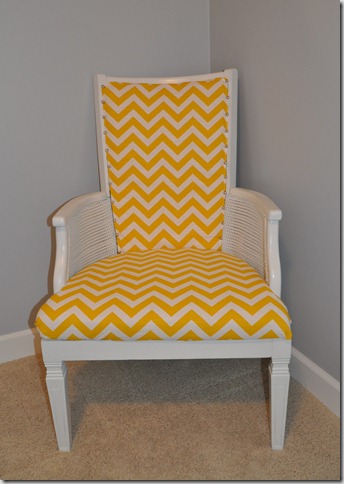
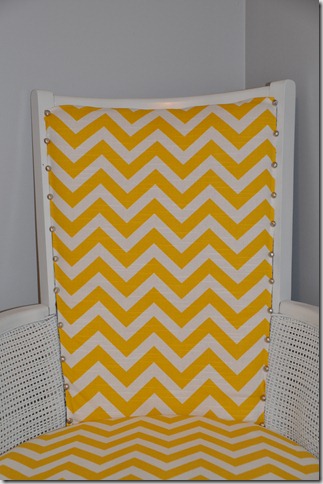
Are you sick of the yellow chevron chair yet? I didn’t think so. I would like to clear something up.  The chair is totally safe to sit it…and mighty comfy.  I did use pins in an awesome upholstering job but you would have never known had I not told you…I swear.  Super comfy…super thick foam.  No stab wounds reported. Yet… :P

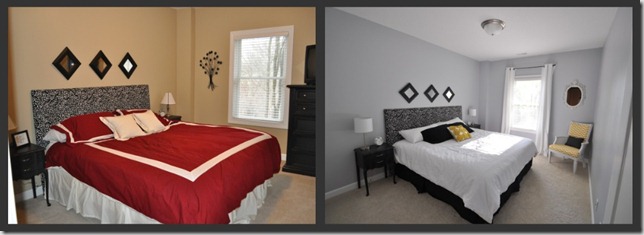
This room has come a long ways in the past few months…(read more about our progress here)

Picnik collagebedroom

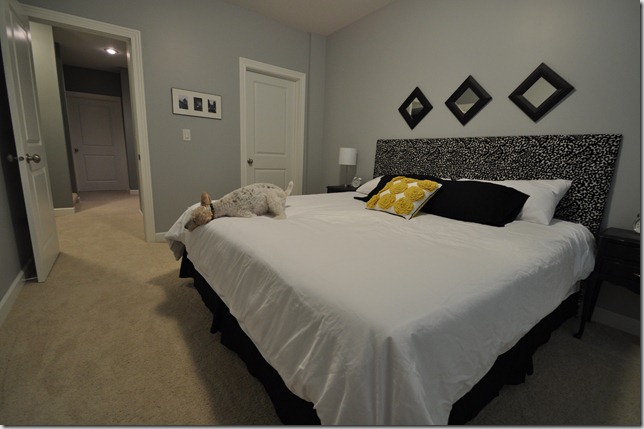
Excuse the wrinkly duvet cover. I didn’t realize how wrinkly it was until I uploaded the pictures…and now it’s dark. I have no idea how it got so wrinkly…

042

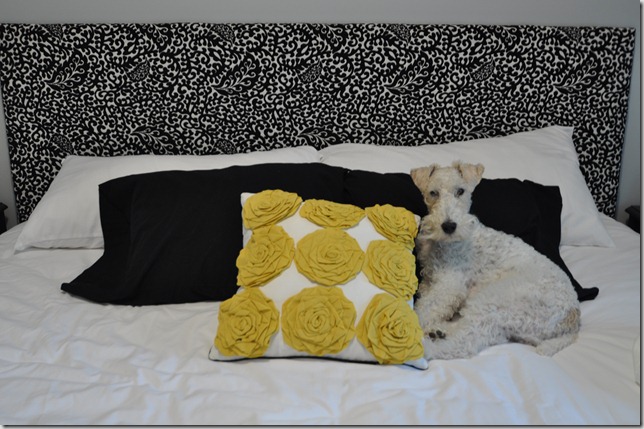
Makes you want to spend the night, huh?  Luckily he’s cute..

050

We still plan to add a gallery wall (on the big blank wall) and crown molding.  I would also like to get a cheap (priced cheap, not cheap looking) chandelier to replace the boob light.  Yes, Mom, I wrote boob light.

Do you think I should wash that duvet cover before my parents come for the week-end? ;)

Reupholstering a Wingback Chair

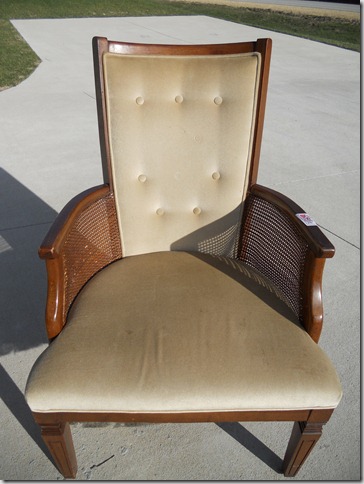
How did I change this $7 chair from 1970 to 2011 (See more photos here.)
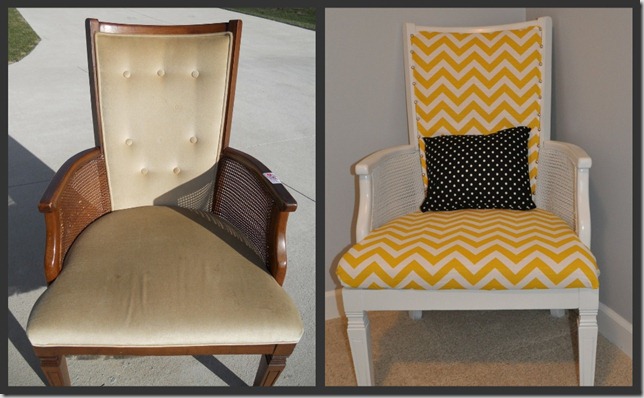
Picnik collagewingback

First we torn the chair apart (read about that process here)…
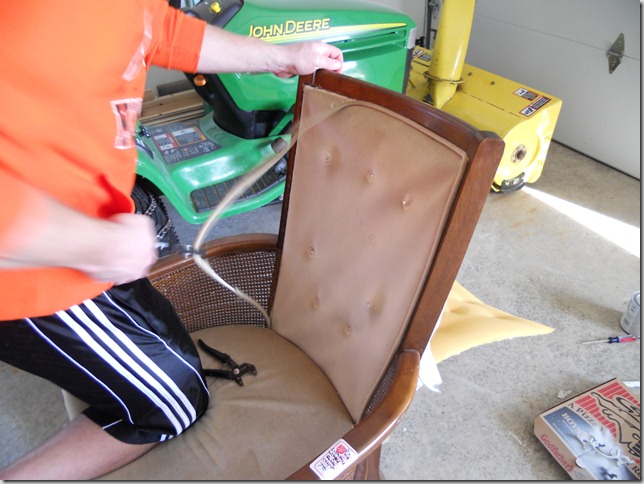
April 2011 061

I then sanded, primed, and spray painted the chair…(Use cardboard under you chair when spray painting…or you might get an annoyed look from your significant other…just saying…)
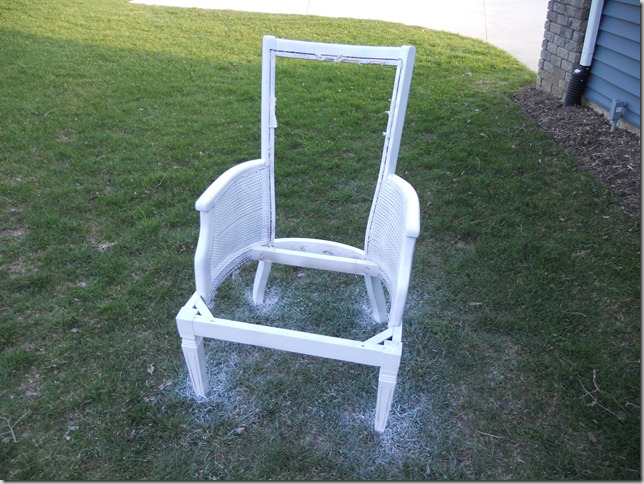
April 2011 010

The chair sat in this stage in our garage for a couple of weeks because I was too chicken to reupholster it.  I’m not a big fan of failure and I really wasn’t sure I would be successful with this one. 

This past Saturday was the day.  I was going to do it.  I stopped in Hancock fabrics and they had a perfect yellow chevron outdoor fabric on sale for 40% off plus an additional 10%.  Deal.  It’s mine.  I can totally do this.

I used the old nasty fabric as a template for my new fabric and I cut the 3 pieces I needed…
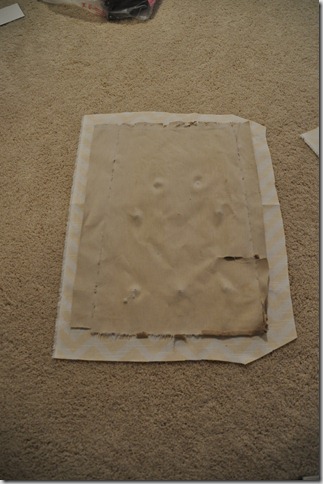
011

I started on the seat because I knew I could handle that part (read about another chair I’ve tackled here)…
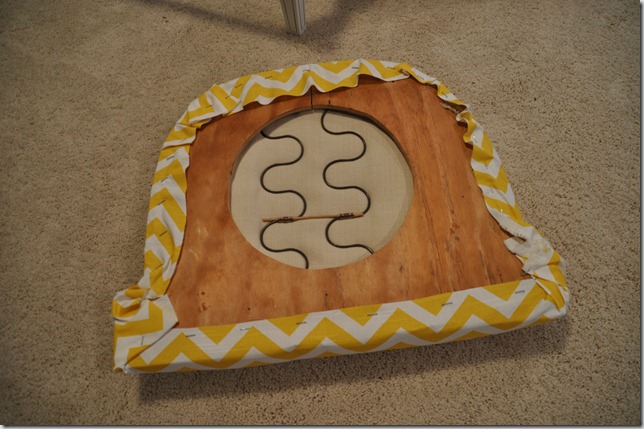
013

Easy. I can totally do this.  And then I looked at the back of the chair.  I called Nate in for help..and he so willingly agreed…oh wait, this isn’t a fantasy blog…I begged for his help.  He gave in after he couldn’t handle my whining any longer.

With double the brain power, we decided to staple the back piece of fabric first…
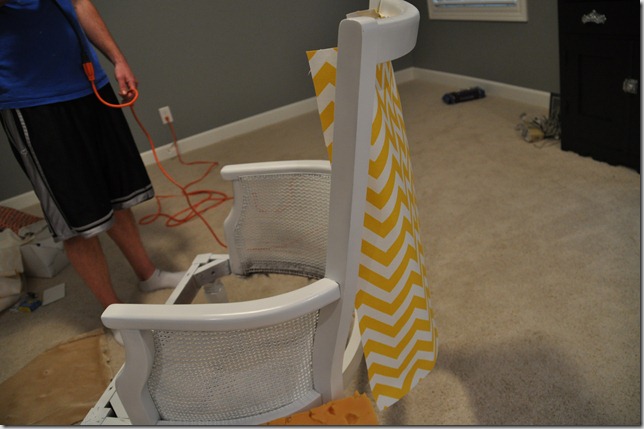
015

016

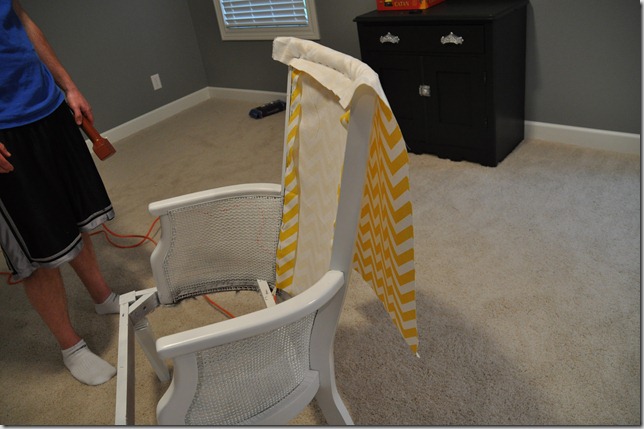
We then stapled the top edge of the front fabric….kind of cape-like…
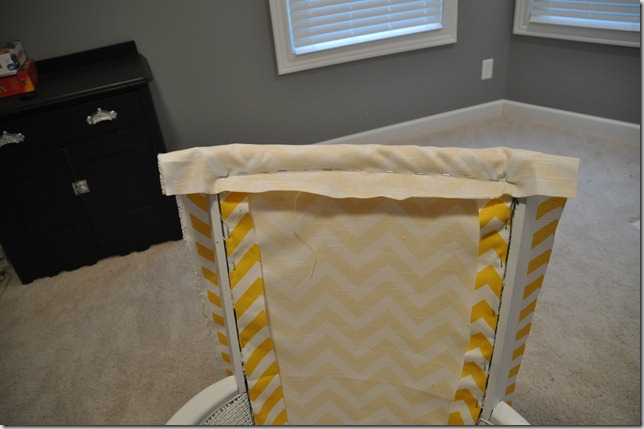
020

021

This is where it gets a little….weird.  I feel for the person who reupholsters this chair in another 30 years. 

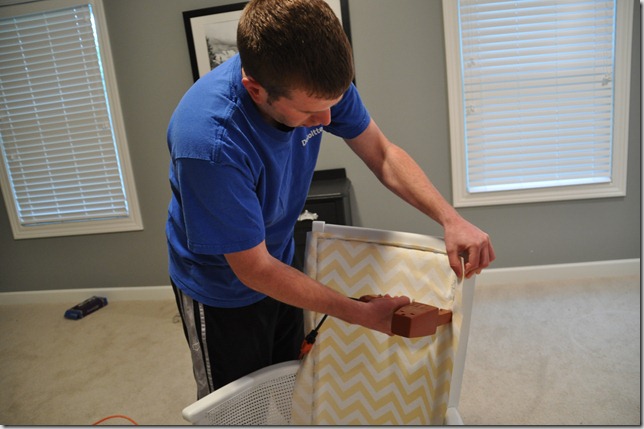
We slid the foam underneath the “cape” and pinned the excess fabric around the foam…I don’t remember why I had a hammer at this point…but it’s the best picture of the weirdness…(and my new hairdo)…I should have pinned an apology note for the next person.  Don’t worry…the foam is super think so there is no chance of someone getting poked.
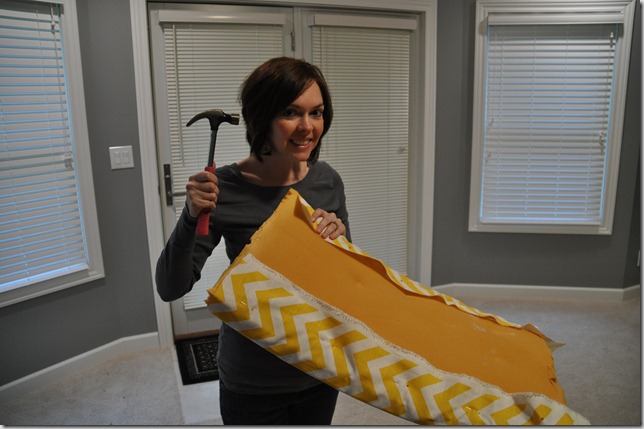
023

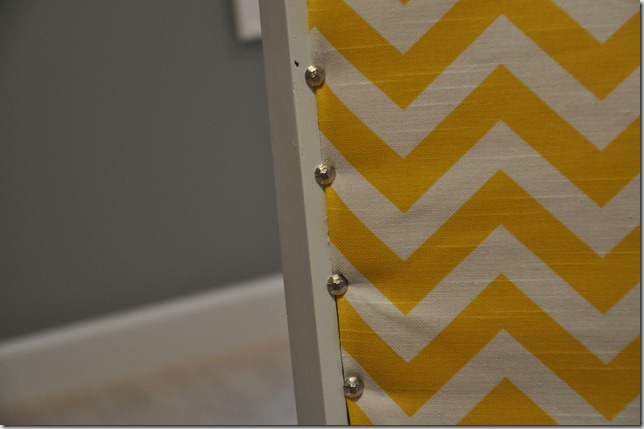
We placed the professionally covered foam in it’s final position and added nail head trim. We used the nail head trim to hold the back cushion in place.  We used this in place of staples for a cleaner look.

024

025

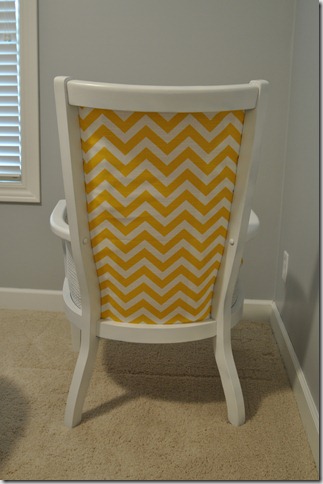
Nate screwed the seat in place..and ta-da…a finished chair…
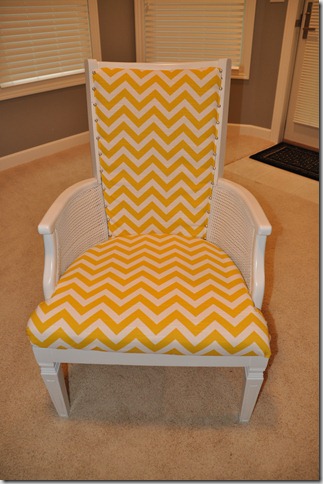
032

047

092pn

I think I made it sound easy.  It wasn’t.  And it obviously isn’t a professional finish.  But I’m happy with the result. 

There you have it…a wingback chair reupholstering tutorial! 

Who’s brave enough to attack one of these babies??  Any questions or have I sufficiently scared you away?

Linking to: DIY Show Off, A Bowl Full of Lemons, Type A Decorating, Primitive and Proper, Wow Us Wednesdays, Not Just a Housewife, The Stories of A2Z, A Diamond in the Stuff, Tuesday's Treasures, Domestically Speaking, Someday Crafts, Handy Man, Crafty Woman, House of Hepworths, Shabby Chic Cottage, Remodelaholic, French Country Cottage, Simple Home Life, The Lettered Cottage, Thrifty Decor Chick

Guest Post- Hyphen Interiors

Today you can find me over at Hyphen Interiors chatting about our West Elm Headboard Copy Cat

I was thrilled when Kristy invited me to guest post!  Kristy is amazingly talented.  Have you seen her painted chair tutorial? Beyond impressive…

Kristy is the “Painted Chair Girl” in blogland and I am the “West Elm Headboard Copy Cat girl”. It’s good to have a “thing”.

This guest post is a little different than the other guest posts I’ve done in the past.  I answer some questions on why we decided to build the headboard and what we would do differently.

Stop by Hyphen Interiors to check out my answers and to say “hi” to Kristy…and her chair!
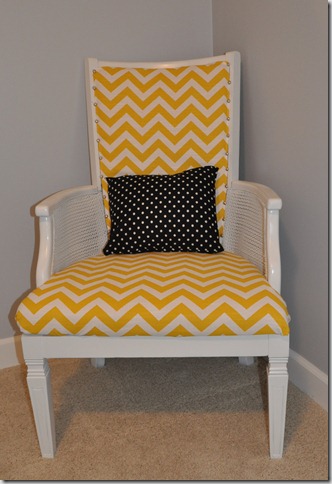
Chevron + Junk Chair = LOVE

Remember this chair that I bought over a month ago (if not, read about it here)…

April 2011 049

I finally worked up enough courage to reupholster it….

091pn

090

047

I whipped up a little polka dot pillow to be the chair’s friend.  Speaking of friends, my sewing machine and I are currently on good terms.  Let’s not go screwing that up Mr. Sewing Machine…

092pn

And here is the chair living happily in our guest bedroom (sans the polka dot pillow).  The chair is replacing the big hunking dresser that used to live in that corner.  Removing the dresser was a good decision (it’s going to live with my brother).  It opened up the room a lot.

040

Tomorrow I will show you how I reupholstered this chair. 

Stop by on Wednesday for a few more updates to this room!

Linking up to: Spray Paint Party, Between Naps on the Porch

A Stroll Down Memory Lane-Foundation

Let’s take another stroll down memory lane and check out where we were on our house building process 3 years ago.  (Check out our 1st memory trip post here.)

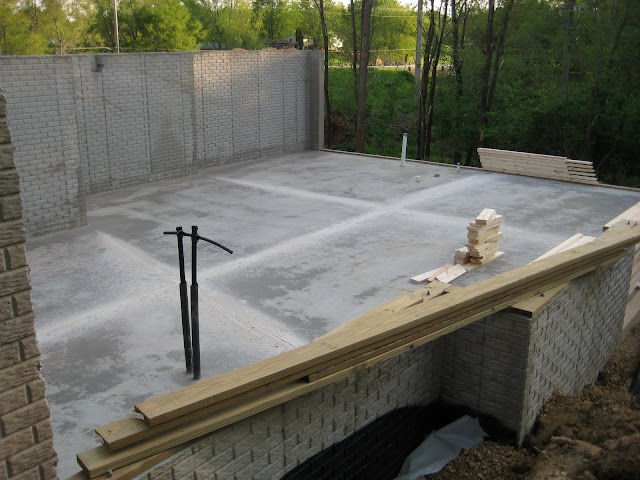
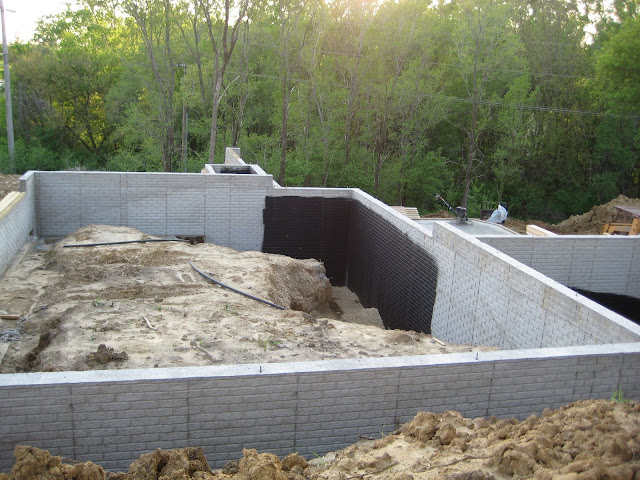
3 Years Ago This Week: We had a foundation..finally.  It seemed like it rained for weeks which delayed the progress of the house by 3-4 weeks.  This was the theme for the entire building process.  Seeing the foundation poured was a VERY exciting step.

The two black pipes running outside of the foundation are for the drainage tile that is around the outside and inside of the walls.  The two black pipes sticking up out of the floor are for the geothermal that was installed under the foundation before the concrete was poured. 

I was really confused at this point of house building.  I did not understand how a family room, guest bedroom, guest bathroom, and storage room were all going to fit into this space.  It seemed way too small. I’m obviously lacking some spatial skills because it all fit.

We also had the start of the garage….super exciting…

Nate and I argued over a 3 car garage.  I thought it was a waste of space because we only had 2 cars.  He insisted that all houses being built in 2008 had 3 car garages.  I obviously lost this round but after seeing how much crap useful stuff we have in that 3rd spot….he may have been right.  Uggg.  The second time this week I’ve had to say that.  Painful.

There you have it.  Our house 3 years ago this week.

I’ll try to post an update each week.  It’s a good way for Nate and I to document the building process.  We’re having a little trouble remembering the details and it’s only been 3 years…can’t imagine how little we’ll remember by 10 years if we don’t write it down….we might be crazy enough to do it all again if I don’t get the entire painful rewarding process written down.

Do you have any questions about our house building process? What’s your opinion on the appropriate number of garage stalls?

Chicken Hobo

Warm weather = grilling at Decor and the Dog!

One of our favorite recipes is Chicken Hobo.  It’s yummy and quick.  Our favorite combination…

025

How do you make this delicious aluminum foil pocket of goodness?  Easy.

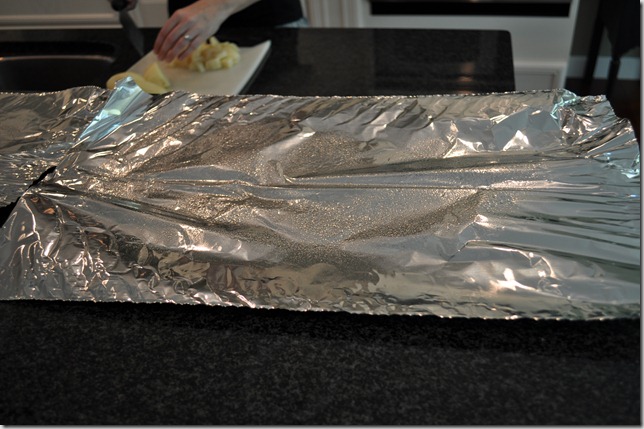
First you spray some aluminum foil with Pam (or your cooking spray of choice)….~1 foot piece for each pocket that you want to make.

002

Chop up some potatoes.  The smaller the better.  They cook faster that way.  We don’t have a set amount…depends on how hungry you are that night and how much carby-delciousness you are looking for…

004

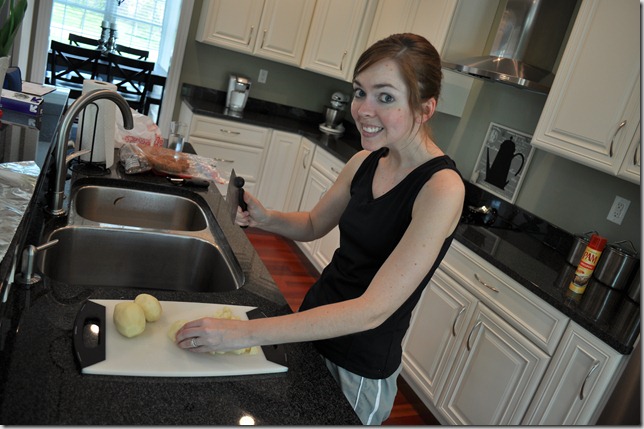
Do not call Ghostbusters on my pasty skin…I have a knife…and no, this photo was not staged.  I do occasionally spend some time in the kitchen.  Nate did, however, fire me from cutting potatoes shortly after taking this photo because I wasn’t cutting them small enough. I like my fingers. Whatever…

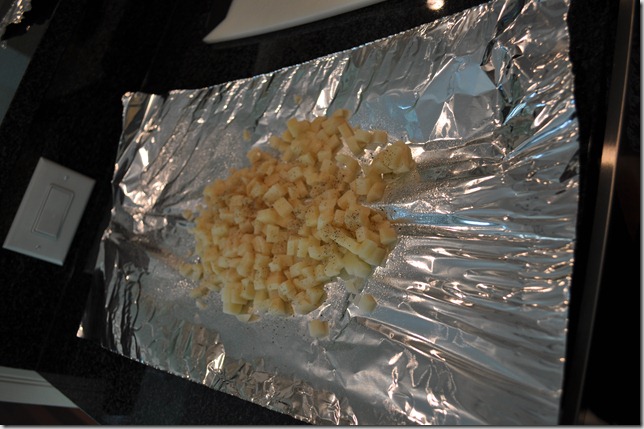
Place potatoes on greased aluminum foil.  Add salt and pepper to taste…

006

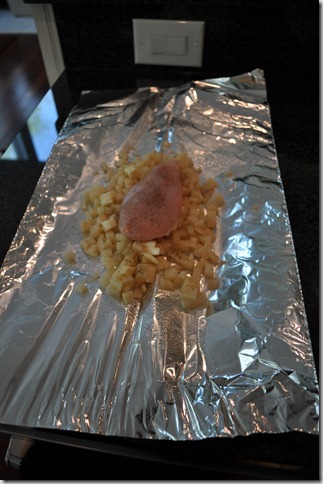
Add some butter (again to taste…we use about 1 Tablespoon per packet) and a raw chicken breast.  Season chicken breast with salt, pepper, and onion powder…

009

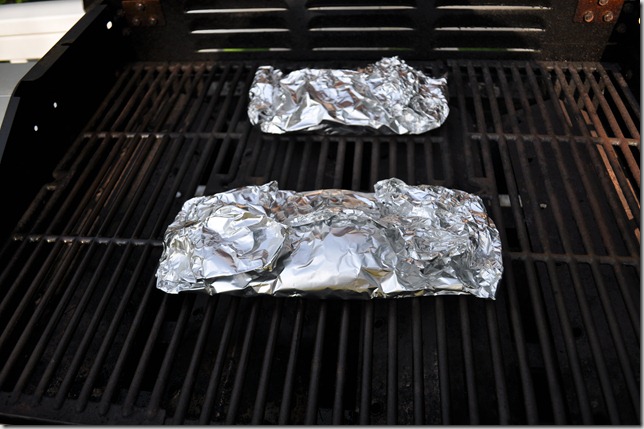
Fold up the pouch so nothing can escape and place on the grill for 20 minutes (or until chicken is thoroughly cooked)…rotating the pouch about half way through…

010

Mess with the dog while it’s cooking…

019

When you’re done grilling, top with bacon (the refrigerated kind…is there any other way?) and shredded cheese.  Enjoy!

025pn

What’s your favorite grilling recipe?  Do share!!

Linking up to: Remodelaholic, Centsational Girl

Chicken Hobo

Warm weather = grilling at Decor and the Dog!

One of our favorite recipes is Chicken Hobo.  It’s yummy and quick.  Our favorite combination…

025

How do you make this delicious aluminum foil pocket of goodness?  Easy.

First you spray some aluminum foil with Pam (or your cooking spray of choice)….~1 foot piece for each pocket that you want to make.

002

Chop up some potatoes.  The smaller the better.  They cook faster that way.  We don’t have a set amount…depends on how hungry you are that night and how much carby-delciousness you are looking for…

Chicken Hobo: Cheesy Chicken and Potato Packets

Do not call Ghostbusters on my pasty skin…I have a knife…and no, this photo was not staged.  I do occasionally spend some time in the kitchen.  Nate did, however, fire me from cutting potatoes shortly after taking this photo because I wasn’t cutting them small enough. I like my fingers. Whatever…

Place potatoes on greased aluminum foil.  Add salt and pepper to taste…

006

Add some butter (again to taste…we use about 1 Tablespoon per packet) and a raw chicken breast.  Season chicken breast with salt, pepper, and onion powder…

009

Fold up the pouch so nothing can escape and place on the grill for 20 minutes (or until chicken is thoroughly cooked)…rotating the pouch about half way through…

010

Mess with the dog while it’s cooking…

019

When you’re done grilling, top with bacon (the refrigerated kind…is there any other way?) and shredded cheese.  Enjoy!

025pn
Grilled Cheesy Chicken + Potatoes packets

What’s your favorite grilling recipe?  Do share!!