Guest Post at the Fabulous 50s Housewife

Today starts my first of a few “guest posts.”  If you would have asked me 4 months ago if another blogger would want some of my ideas on their blog, I would have thought you were crazy…but here we are today!

Today I am posting at Fabulous 50s Housewife.

fab50

Nicole is a fellow blogger who works full-time outside of the home but likes to squeeze in blogging and time with her hubby and children…the four legged kind.

Stop by and say “hi” to Nicole while checking out my post about the chalkboard I made from an old picture!

On Monday I will be participating in the Parade of Homes Tour organized by A Bowl Full of Lemons…I’ll give the full tour of our house…there will even be some unseen rooms…oh, the suspense…

Have a great week-end!  I will be hosting my best friend’s bridal shower on Saturday…pretty excited about that. There will be blog posts…of course! :)

Our Wedding Invitation

While browsing Pinterest (oh, how I LOVE Pinterest…follow me here) awhile back, I ran across this image about 1000 times.  The image received lots of “repins”.

image

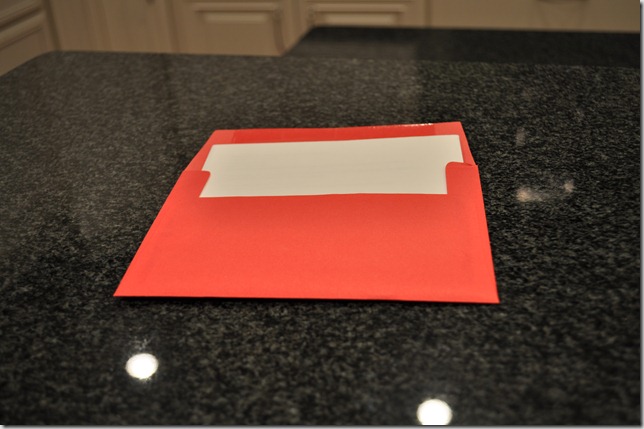
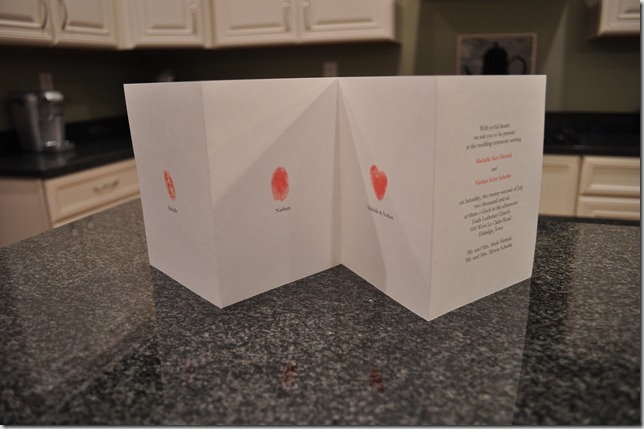
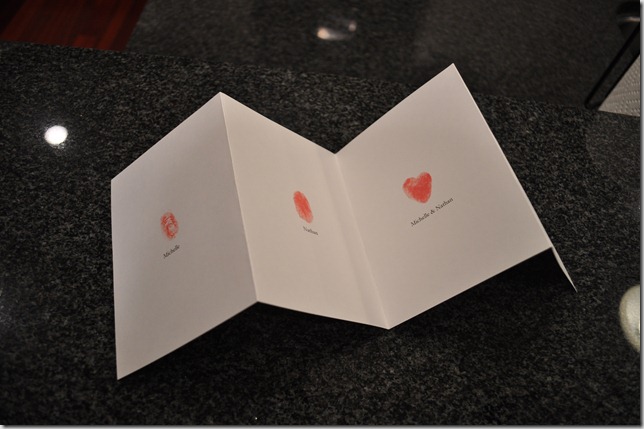
It reminded me of our wedding invitation.  Awwww….

005

007

008

009

And some scanned close-ups.  We aren’t sure if we still have a digital copy…we should look for that.  (I also cut our parents names off of the bottom to protect their identities. :P)

001pn 002pn 003pn 004pn

We designed and printed the invitation ourselves….is there any other way?  I found the idea in a invitation idea book (I don’t remember which one).  We liked the idea of making them ourselves.  I liked that they were a bit quirky but not too quirky (kind of like Nate and I).

Writing this post is making me think about framing the invite…but I like having it stored in the original envelopes. I only have 1 copy…probably a good reason to see if we can dig up the electronic copy!

Nate and I DIY’ed something “hip” almost 5 years ago.  Who would have thought?

Easy Sew King Pillow Cover

Don’t you hate the price of pillow covers?  Yeah, me too. 

Are you a little dangerous with a sewing machine? Yeah, me too.

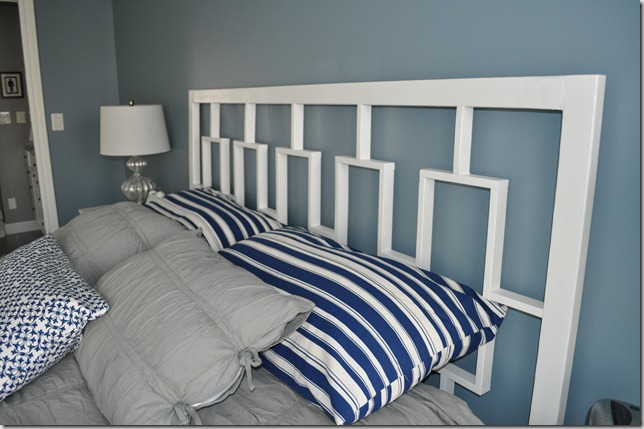
I decided to try my hand at making pillow covers/shams for our bedroom.

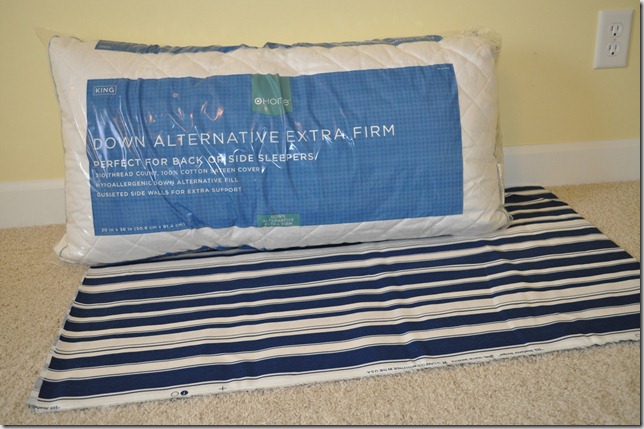
I purchased 2 king size pillows from Target.  $12.99 per pillow.  Nate kept trying to figure out how we could make the $2.50 pillows work.  No such luck.

I purchased the fabric from JoAnn’s. $9.99 per yard.  I was guessing that I would need a yard per pillow. (Good guess!) I used a 50% off coupon so my total was $9.99 for 2 King pillows.

015

I usually sew envelope style pillow covers and that is what I had originally planned to do with these pillows…until I realized that the pillow was 36” wide….the same as a yard of fabric.  I still ended up with an envelope pillow cover, I just took an easier approach than I normally do.

I cut the fabric in half so I had 1 yard for each pillow.

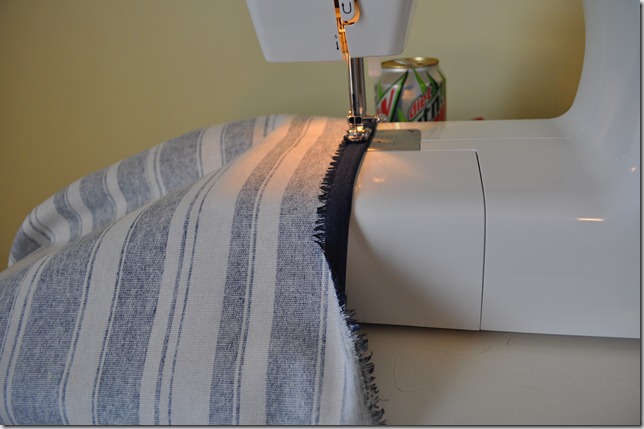
I hemmed one of the long sides so the envelope would have a finished edge.  (Be sure you have your Diet Dew handy if you are doing this before church on Easter morning….yes, I am crazy.)

019

I then placed the fabric right sides together with about 2 inches of overlap.  Place your hemmed edge on the bottom…this will place it on top when you flip the pillow cover.

020

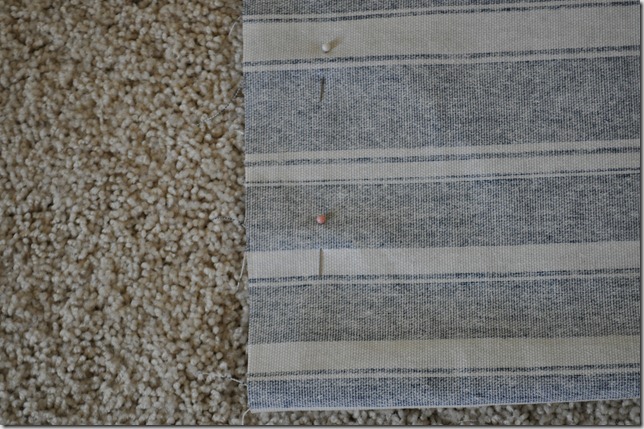
I then pinned the 2 sides.  The nice thing about sewing a cover that is 36” long is that you only have 2 sides to fight your sewing machine sew.

023

Sew the two sides.  Turn the pillow cover right sides out.  Be sure to poke the corners out completely.

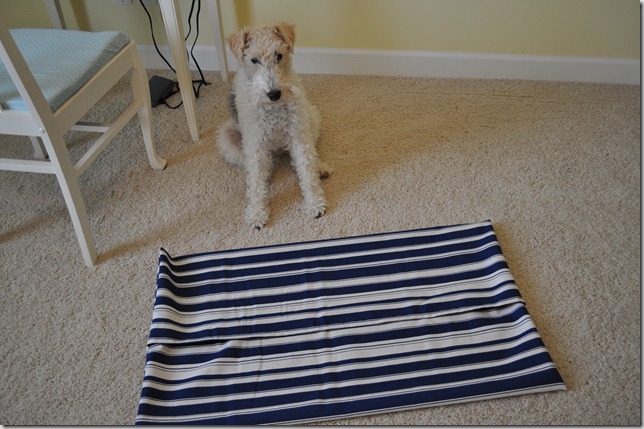
Enjoy your new pillow cover that took about 10 minutes to make…maybe less if your “helper” isn’t getting into everything in your craft room…

026

Envelope….

031

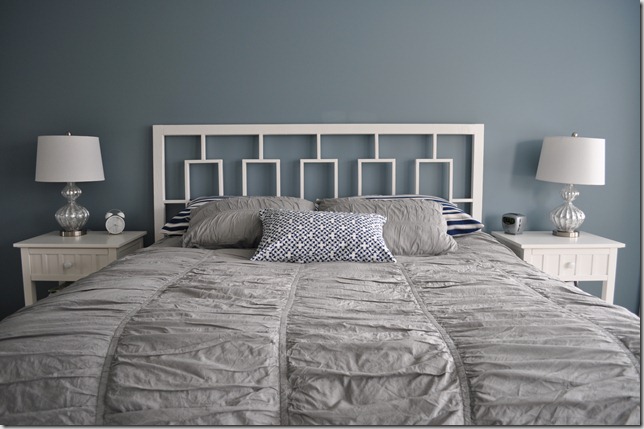
I also made a smaller version with another fabric….

040

081

049 

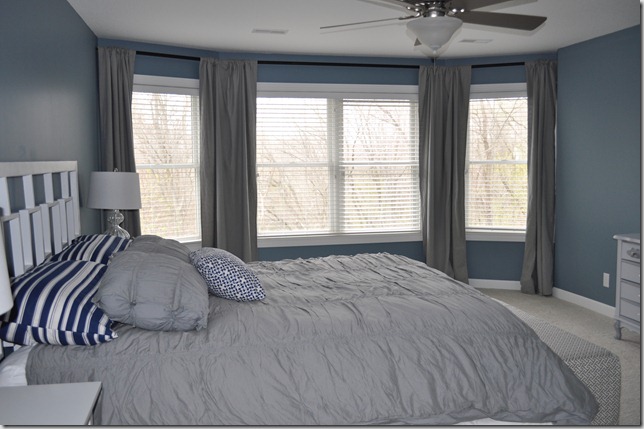
And a better curtain shot…since the sun finally decided to shine!

072

Someday I’ll hopefully be all fancy with my sewing machine but until that happens…I’ll continue to find ways to cheat the expensive pillow cover situation with my beginner skills.

What’s your favorite beginner sewing project?  Or do sewing machines scare you?

Slate Tile Porch

Today we are going to share with you how we spiced up our front entry.  (I like when people say “spiced up.”)

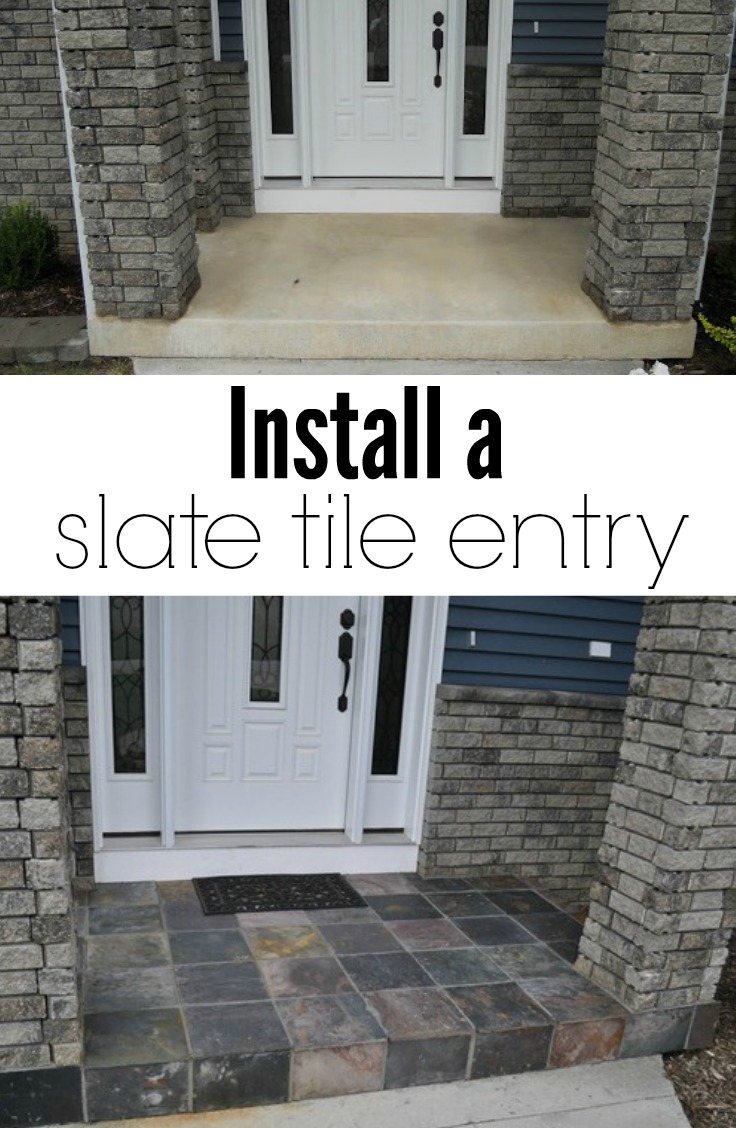
Here is our front porch before…oh, how I can’t wait to plant petunias…

We both thought it was lacking something.  It was fine but it just felt blah.

Nothing a little slate tile can’t fix…

095

How’d we do it? 

We started looking at various big box stores for slate tile.  We found some we liked at Home Depot. 

We figured the dimensions on the porch, including the front and left side (we did not put any on the right side as no one would ever see it).  We then multiplied all the dimensions together, coming up with the total square footage needed, then added an additional 10% for scrap and mistakes.

In addition to the tile, we also purchased thin set, grout and tile spacers.  Luckily Nate’s dad already had a notched trowel, grout bag, grout sponge and tile cutter (It pays to have in-laws a block away).  After comparing the price of the pre-mixed thin set and the stuff that requires some water and mixing, the pre-mixed was a lot more expensive when comparing the square footage both would cover.  The instructions on the thin set bag were pretty good and easy to follow. 

The first thing we did was sweep off the porch and we used pressure washer to make sure all dirt was off of it in order to make sure the thin set would adhere properly.  Then we laid out the tile as a dry fit both down the middle and to both sides, after this we determined that 5/8” spacers would be needed in order to best use the tiles with minimal cutting. (Sorry for the lack of pictures…this was completed pre-blogging!)

Starting from the middle, after mixing the thin set, Nate put down enough thin set to lay the first tile up against the door using the notched trowel.  He then laid the first tile down, wiggled it around to make sure it was firmly set.  The one nice thing about the natural slate tile is that it is naturally uneven, so as long as it is firmly into the thin set, you do not have to worry as much about making it level with the tile next to it.  

After the first one was down, Nate continued on in each direction until he could no longer put down a full tile.  Since he wanted to do all of the cutting at once, he cleaned up the thin set so it would not harden and moved on to the next full tile that could be laid down. 

After all of the full tiles are down, Nate then measure the areas that need to be filled in, cutting them out with the tile cutter.  Nate filled in all the gaps on the top of the step, then moved on to the sides of the step.  He measured from the bottom of the step, leaving a small gap to account for expansion, to the top.  Then just make sure the widths that are being put on the side of the step match up with the tile that is on the step.  For the side, Nate put thin set on the step, and put a little on the back of the tile to make sure there was enough of the thin set to prevent the tile from coming loose later.

After allowing the 24 hours for the thin set to cure, we applied the grout.  For the slate tile we used a grout bag (kind of like a large frosting bag) because if the grout was applied by spreading it into the gaps like normal tile it would be very tough to clean it off of the tile as it is very natural and rough.  We went with a natural gray pre-mixed grout since the price difference was large and we were a little scared of getting the have-to-mix-yourself grout just right in color and consistency.  We piped the grout on, smoothed it out, and cleaned up any excess that may have accidentally got onto the tile.  We let the grout sit for the 24 hours required and then enjoyed our new step.

After all of that, we ended up with this…(Halloween and now)

101
102
095
How to Install a Slate Tile Entry

Some of the rust from the slate tile has stained the concrete.  I need to Google a remedy for that one.  Anyone know of a solution?

We like how it added a little character to the entry.  We also liked the colors of the slate with the brick and blue siding.

Check out more DIY projects and our home tour!

Any plans for sprucing up your front entrance?

Easter Week-end Recap

Our Easter was spent with Nate’s family.  We didn’t get much done around the house but had fun bonding with the family.  While we recover from the week-end, here are a few of our favorite photos from the week-end…

Family photo by the lake!
It was bright…and wonderful..chilly but still wonderful.

Easter Egg Hunting
Easter Egg Hunting
Baby Snuggling
Dog Snuggling
Future blogger?
(He's almost 3 and probably better able to navigate the internet than I am.)
Fish Feeding
Easter_128
Chocolate Marshmallow Bunny Eating
Back tomorrow with some house stuff!! 

How was your Easter?  Are you still recovering?

Lame Bunny

Earlier in the week I had planned to write this great post for Earth day.  I was going to write about ways we are helping save the planet. 

That was until Thursday rolled around and I went to work (which was particularly soul sucking), walked 3 miles, and cleaned the first and second floors of my house (darn OCD).  There is no energy left to walk around my house and photograph earth saving things.

Instead, you get a lame post about a bunny I purchased for $0.75 at the Salvation Army.

Here is lame bunny…

April 2011 019

Isn’t she pretty with her shawl and creepy eye lashes?

And here is lame bunny after a good spray prime/paint…

April 2011 015

April 2011 014

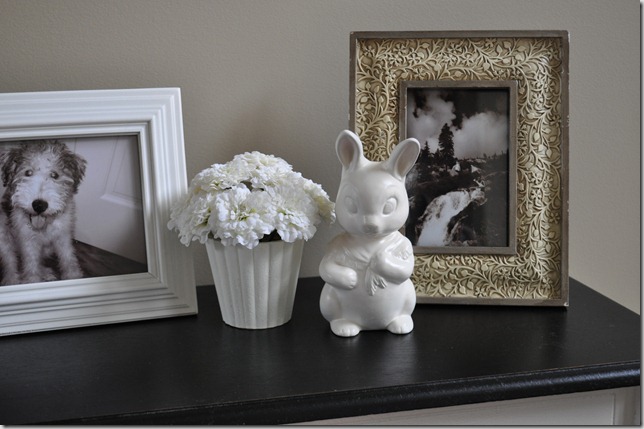
She looks a little like these bunnies from Pottery Barn…

Ceramic Bunnies

Or at least like their ugly step sister…

Do you have any big Easter plans?  We have some family bonding, church attending, and yummy food eating planned. 

Happy Easter and enjoy your week-end!

Crown Molding Installation

Yesterday we shared with you photos of the crown molding we installed in our office.

Today we’ll share with you how we did it and what we learned along the way.

First we purchased our crown molding from Lowe’s.  Read more about that here.

We wiped the boards down with a cloth to remove any dirt.  We then placed the boards on two sawhorses and started painting. 
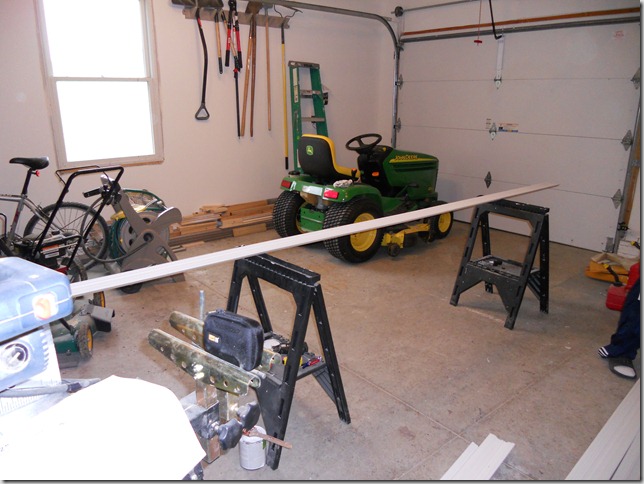
April 2011 082

We used Olympic’s Zero VOC semi-gloss paint in white.  The rest of the trim in our house is  painted with Sherwin William’s trim paint.  The whites were basically identical and beings the crown was up 9 feet, we decided it would be okay to use a different paint.

We let the paint dry overnight.

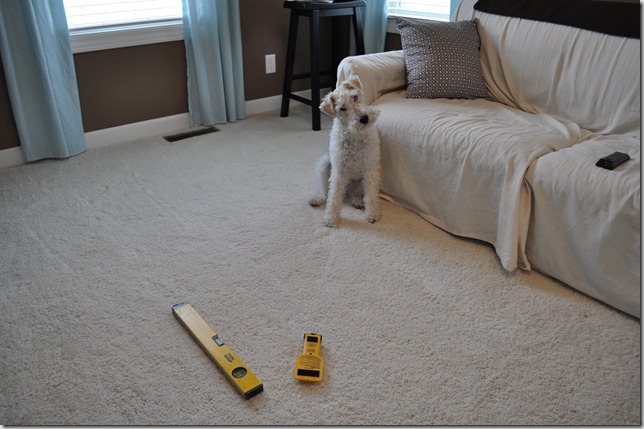
Nate used a stud finder to locate the studs in the wall and marked the stud location with painter’s tape.  Marking the studs made nailing easier and faster.
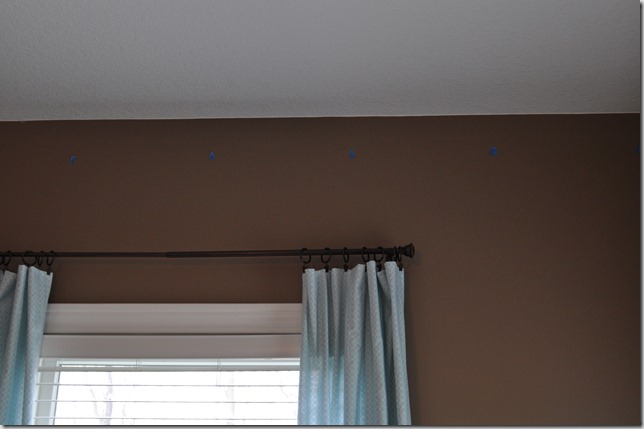
April 2011 025

We knew that cutting may be confusing.  We had some left over crown from the kitchen cabinets and we used this for some practice cuts.  We used these practice cuts as examples when making cuts later. 

All of the corners in our den are inside corners, so we figured out the left and right insides. What does all of this inside, left side, right side business look like?
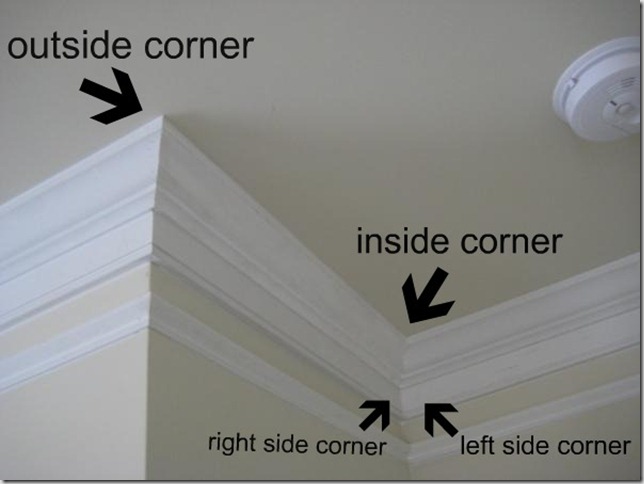
crownpaint

Nate and his dad measured the width of the room.  They used that measurement to cut the first board.  Very nerve racking.
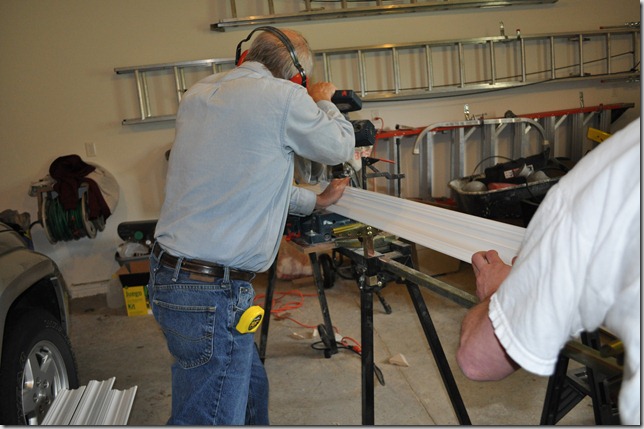
April 2011 030

To cut the board, turn it upside down, placing the bottom of the board on the back rail of the miter saw (as you can see in the picture below). Place the trim on the saw as it would be on the wall.  Set the saw to 45 degrees (turn it to the right for a right side corner and left for the left side corner).  One good thing to think about is that on an inside corner you always want the bottom side of the board to be the longest part of the board because that is the only way the crown will fit in the corners.
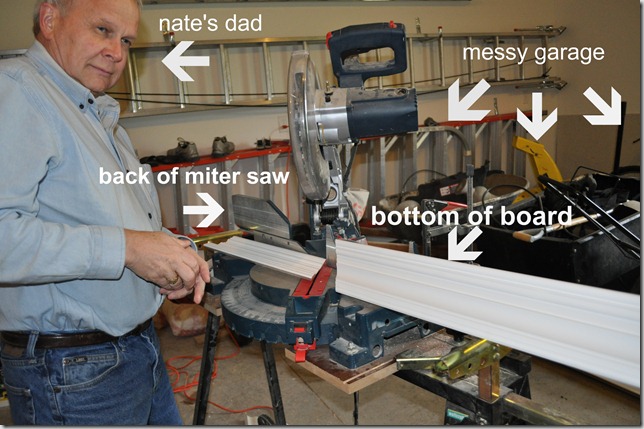
sawpicnik

Take the cut board into the room and dry fit the board to make sure it is the proper length.  Also make sure that you have your nail gun and air compressor ready…not that we forgot….
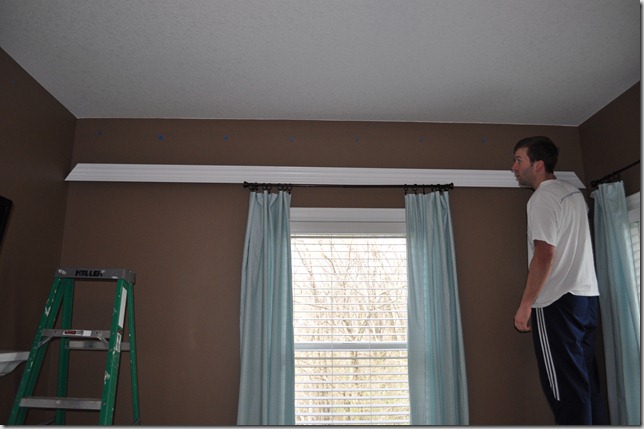
April 2011 032

Nail the board on the bottom into the pre-marked studs.  We found that nailing it on the bottom created a tight fit on the ceiling. There were a couple of spots where the ceiling was uneven and we had to put a couple of nails up into the floor joists running through the ceiling.
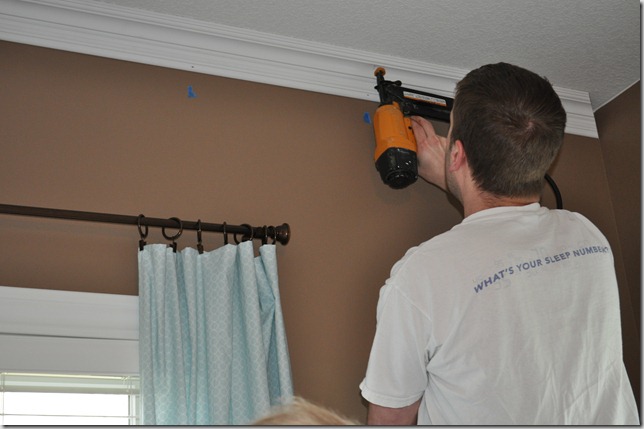
April 2011 036

For the long side of the room, and since we had 12’ boards, we measured out to a stud that was closest to 12’ to minimize waste.  We cut the board to that length, setting the saw at a 45 degree angle to the left, as it would better hide the splice from the angle it would most likely be seen from (the right side of the room).  To get a matching splice for your next board, leave the saw at the same setting and then cut the beginning of the next board.
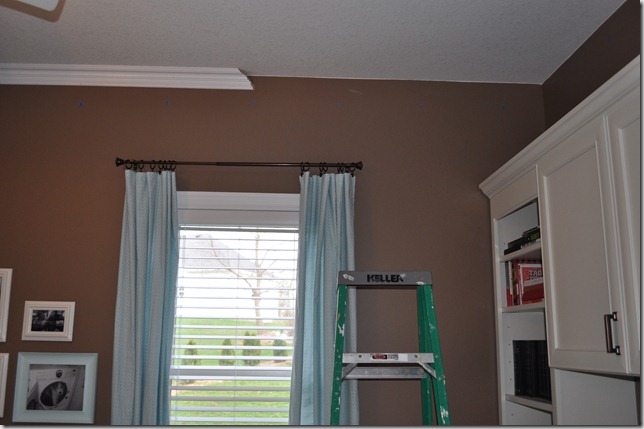
April 2011 040

Then continue along until the room is finished.

Fill in any nail holes (or not so perfect, but close, corners) with wood filler. Sand.  Paint the nail holes for a seamless finish.

What’d we learn? 

  • Installing crown molding isn’t as hard as we thought.  It took us around 2 hours (start to finish) to finish this room.  We thought that was okay for newbies.
  • You need the proper equipment (miter saw, nail gun, and air compressor) to make the project go smoothly.  Thank you father-in-law who lives a block away.
  • The desk surface is not a safe place to walk.  Nate may or may not have fallen off of the desk, into the ladder, taking down some of the cabinet crown with him.  The ladder may or may not have busted up a little bit of our fireplace mantel.
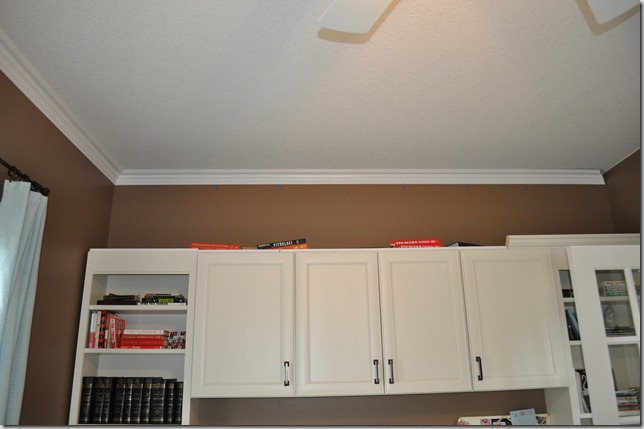
April 2011 041

I wanted to photograph Nate after the fall but I would have needed to rename the blog “Divorced and the Dog”….catchy….

Luckily, Nate was fine…just a scratched ego arm.  The cabinet trim was an easy fix. (I learned how to pull out tiny nails…fun!) 

(Like how I prop up my globes??….old pharmacy school books and CPA review books…at least those $100s of dollars are good for something now…)

And the finished product with the office back to normal…
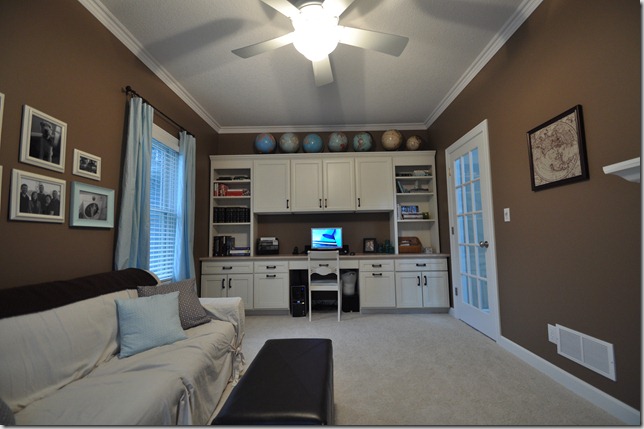
April 2011 114

Crown for the Office

I should save this for a tribute to the royal wedding…

This week-end we installed crown molding for the first time.  We decided to start in the office.  It was the room I wanted to do last but luckily Nate is the rational one in the relationship. 

The office was a good first choice because it doesn’t have any tricky corners or a return vent that is located right next to the ceiling…like our master bedroom and dining room.  We have a fix for the vent in mind.  We’ll share that when we get there.

February11 043

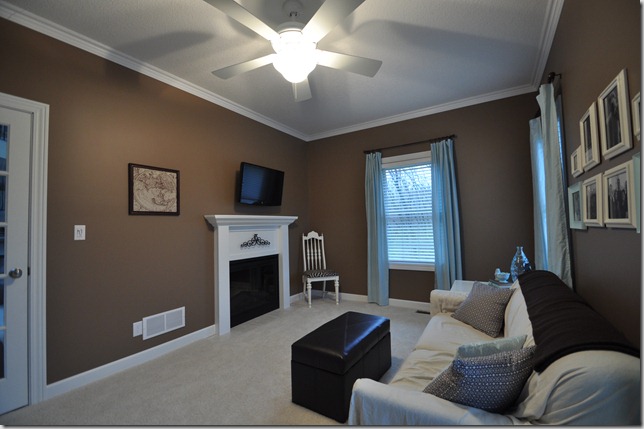
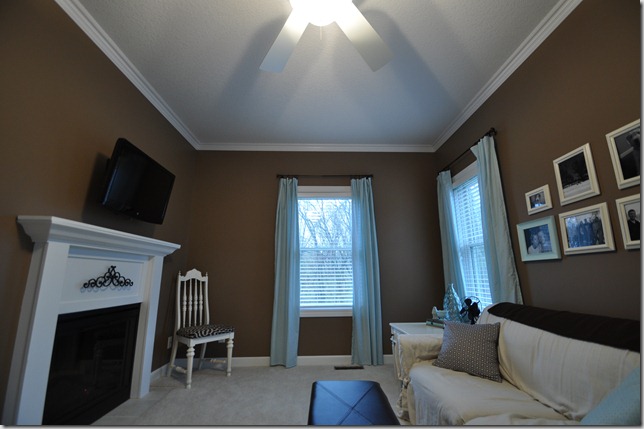
Here is our office before…

now

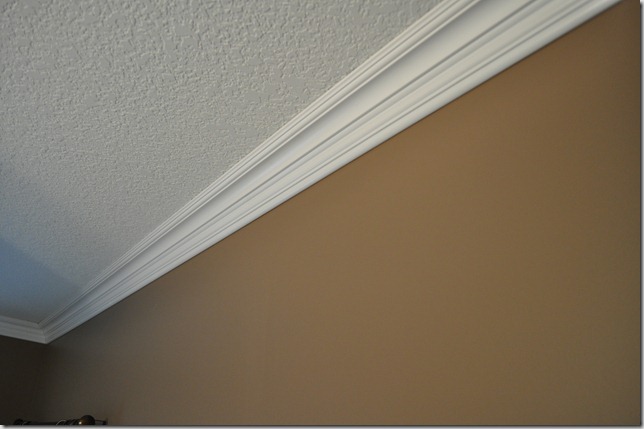
And after the installation of the crown molding…

April 2011 114
April 2011 116
April 2011 111

Nate busted out his fancy lens that I’m not allowed to touch until I read the camera manual.

And a close up…

April 2011 108

What did we learn along the way?

April 2011 033

We’ll share that info tomorrow!

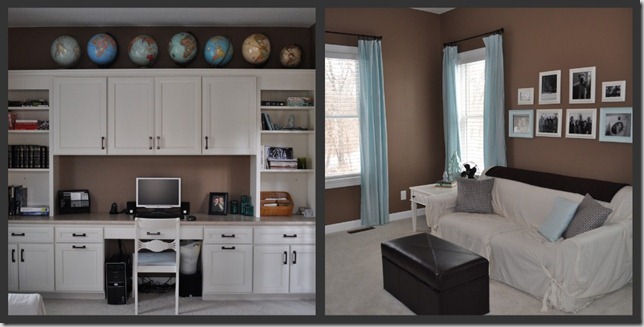
**I have no vision for this room.  If anyone has any brilliant suggestions (especially for our built-ins)..do share!**

Linking up to: HOUSEography

DIY Curtain Rods

Why are curtain rods so expensive?  It’s a piece of metal for crying out loud. 

Wal-Mart is usually my go-to curtain rod source.  Gasp.  I can’t believe I said the “W” on this blog.  What can I say?  I’m cheap.

I wanted to avoid a trip to Wal-Mart something a little nicer for our bedroom.  I soon realized nicer equaled A LOT more money because we needed 3 rods…one of which was pretty long.

I then ran across a few tutorials on how to make curtain rods for little $$$. (Read those tutorials here and here.  This is not our original idea.  Our tutorial is a combo of those tutorials with our own tips added in…especially with regards to a bay window) 

Curtain rods for less. Sign. Us. Up.

Nate measured the length of the walls.  We wanted the rods to touch to make the curtain rod appear to be one continuous rod for our bay window.
Untitled
We headed to Lowes and picked up our supplies:
  • Two 10’ conduit pipes (1” diameter) ($10.56..we have a little left over)
  • Eight 1” conduit straps ($2.56…we used 6 (2 per window))
  • Eight 2.5” L brackets ($5.94…we used 6 (2 per window))
April 2011 058 April 2011 003 April 2011 002

We already had :
  • nuts and bolts to attach conduit strap to L bracket
  • Black spray paint
  • Screws and wall anchors to attach the L bracket to the wall
I tried to talk Nate into having someone at Lowe’s cut the conduit for us. The man DIYer in Nate came through and he insisted it wouldn’t be hard at home.

We cut the conduit using our measurements and a borrowed pipe cutter from Nate’s dad.  It worked.  It just took a REALLY long time.  I held the rod.  Nate used the cutter.  He kept saying “We’re getting really close now” and then 20 minutes later 1 rod was cut.  (Have someone at Lowe’s cut the pipe for you….)

April 2011 070

Nate assembled the conduit strap to the L bracket.

April 2011 075

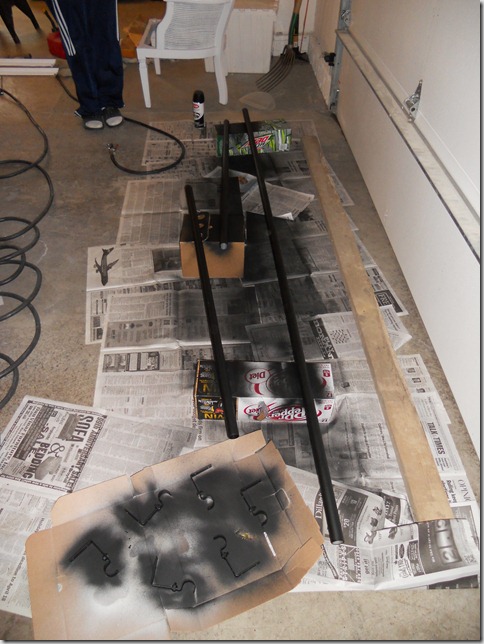
I then spray painted the conduit and hardware.  I rested them on a couple of six packs.  We are nothing but classy here on Decor and the Dog.  I did a light coat. Rotated. Light coat. Repeat.  There will soon be a tutorial on how to remove black spray paint from your garage floor…

April 2011 083

We let the paint dry overnight.

The next day Nate held the curtains up to determine how high to place the L bracket.  He then found the stud in the wall and marked the location for the screws.  He drilled a pilot hole and then screwed the L brackets to the wall.

April 2011 043

We then placed the curtains on the rod and positioned the conduit rod into the conduit strap.
Wah-lah.  Curtains hung.

April 2011 055

$19.06 for curtain rods for a bay window.  Not so shabby.  I priced 3 similar length rods (thinner diameter) at Target and our total would have been between $70-$80….and we would have had that annoying middle strap that always comes with lesser quality curtain rods.

For those of you wanting to try this on your bay window, we recommend purchasing curtains that are not pole-pocket.  It’s doable but would be easier with grommet curtains.

Overall, a pretty easy project that saved us quite a bit of cash. 

Would we do it again?  Absolutely.  I know I want curtains in our guest room and we think we have enough pipe left to make it work!

**Edit: Here are some updates from comments we have received…**

Here are what the ends look like…
April 2011 054

Our ends just but up to the wall. No finials for us. They will look cleaner when we add crown molding. Note: still gloomy….

Wall color: Poolhouse by Sherwin Williams

Our curtains are purely for looks only.  No function.  That’s what our lovely blinds are for.  Chipping of the spray paint may be a concern if you were to open and close the curtains a lot!  Keep that in mind.

The curtains can be removed VERY easily.  Just lift the rod from the conduit strap.

Want to see more of the curtains…read yesterday’s post here!

Linking up to: Remodelaholic, SAS Interiors/Green Door Design, Savy Southern Style