Clawfoot Tub

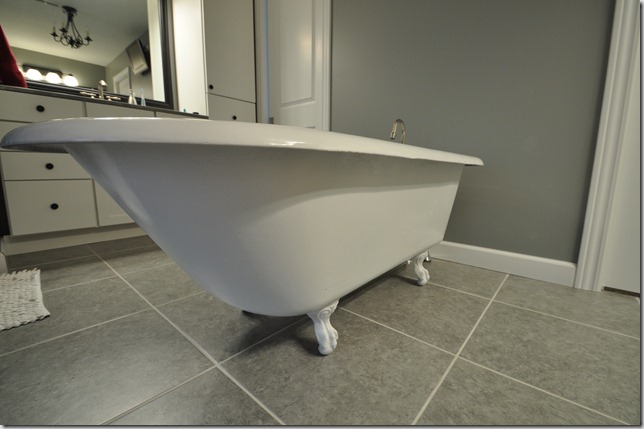
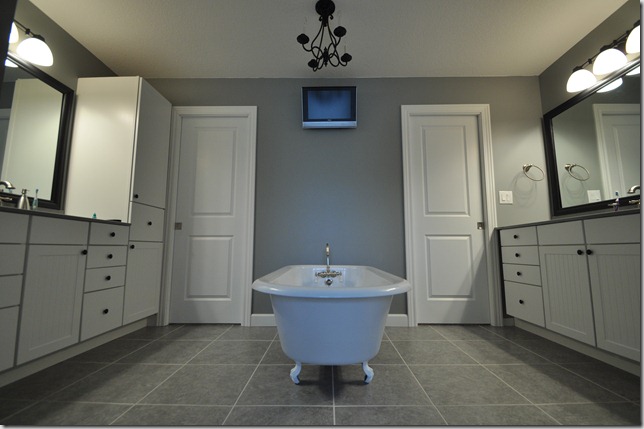
When designing our master bathroom, I knew a clawfoot tub was a must-have! I grew up dreaming of having a clawfoot tub in my adult bathroom and now it was time to make that dream a reality.

What’s not to love about a super deep bath tub with beautiful curves and super cute feet?

April 2011 070
April 2011 073
April 2011 016
April 2011 014
April 2011 020

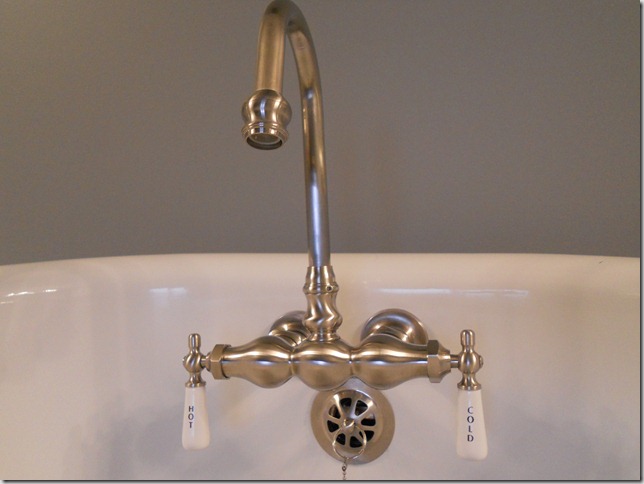
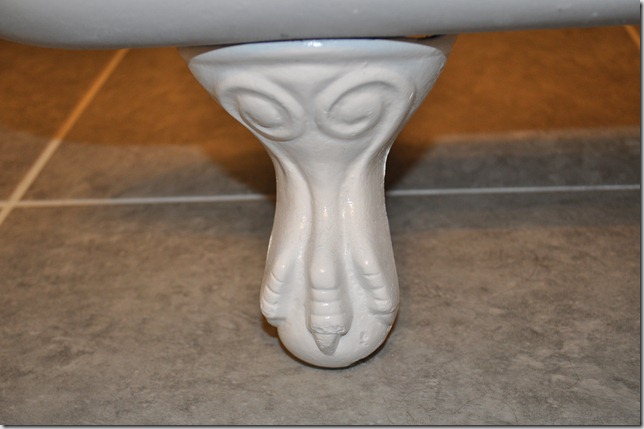
How can you not love those creepy cute clawfeet???  And that faucet!! 

We originally looked on Craigslist for a tub.  After some research, we learned a local bathroom resurfacing company had tubs in stock that we could choose from. After selecting our tub, the resurfacing company chemically etched, neutralized, doubled primed and top coated the tub to ensure a long finish life. I wish I had a before picture.

We liked the idea of having something repurposed into our home.  It is a good example of our decorating style….something old made modern.

Who shares my love of clawfoot tubs?  Or do those feet creep you out?

Dear West Elm

March 30th

Dear West Elm,

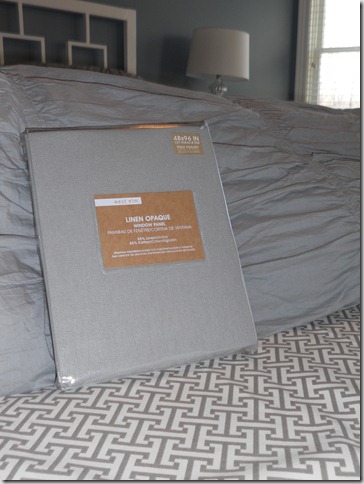
I ordered these lovely curtains (Opaque Linen Window Panels) from you on February 7th…

img63m[1]

The back order date on these curtains has changed 3 times since my order date.  It is now almost April and my windows are still naked.  How can you help a girl out?

Sincerely, Michelle

March 31st

Dear Michelle,

Thank you for contacting west elm regarding order number &&*(&*(&^&^.

We sincerely apologize for the backorder delay.  Please know that the backorder dates we receive from our manufacturers are estimated arrival dates.  We show the shipment was expected to arrive in our Distribution Center March 29th.  As yet we do not show that the shipment has arrived, or not yet checked in.
We truly apologize for any inconvenience. ~West Elm

April 1st

Dear West Elm,

I appreciate your attempt at concern but this response does not put your lovely curtains in my home.  Get to it!!

Sincerely, Michelle

April 6th

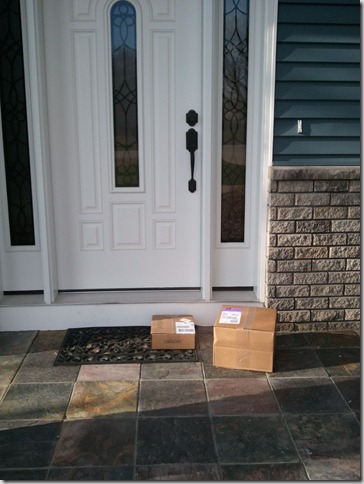
Look what I found at my front door last night after work (along with a free Valspar paint sample..BONUS!!)…

 2011-04-06_17.32.38

Guess annoying e-mails speed up back orders. 

(Or it could be completely a coincidence and only one nice e-mail was sent to West Elm.  I’ll let you decide the truth….FYI: West Elm does have great customer service…not to influence your decision…)

And now for the curtains long awaited debut….

April 2011 021

I surprisingly like the color.  I was worried it was going to be all wrong but I like it.

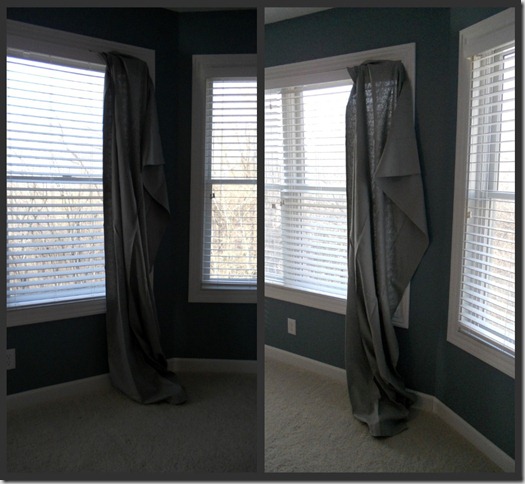
I am horrible at visualizing things and Nate wasn’t home so I shoved a curtain into the blinds to “hang” it. The lighting was awful for pictures but I’m going to show you them anyways…because that’s what you get from a blogger that has a 8-5 job…week day photos in bad lighting…

I’m starting a new trend with window treatments…it’s called “low and narrow” and it will soon be replacing “high and wide.” Watch for it…

Picnik collage

I think I am going to like them. At first I thought they might be too dark but the more I looked at them…the more I liked them.

What do you think? I know it’s really easy to tell with them shoved into the blinds but honest opinions are welcomed! 

What do you think for the curtain rod finish…brushed nickel, black, satin nickel, oil rubbed bronze???

How do you like the “low and narrow?” 

What crazy things have you done while your husband wasn’t around?  This could get interesting…..

Herb Farmer

The other day I thought about starting a garden.  And then I remember I don’t eat vegetables….

I then decided that I wanted to start growing herbs.  Doesn’t cooking with fresh herbs sound fun?  Not that I usually cook with herbs…or cook period…but it still sounds like fun.

I have a tendency to start things and not finish them.  Nate suggested I start with one herb and go from there.
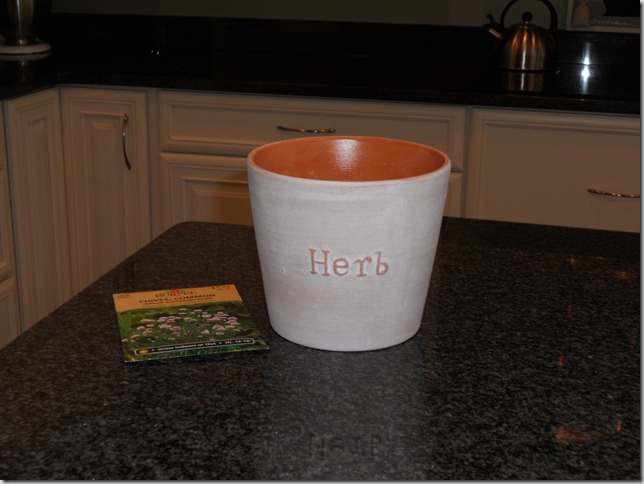
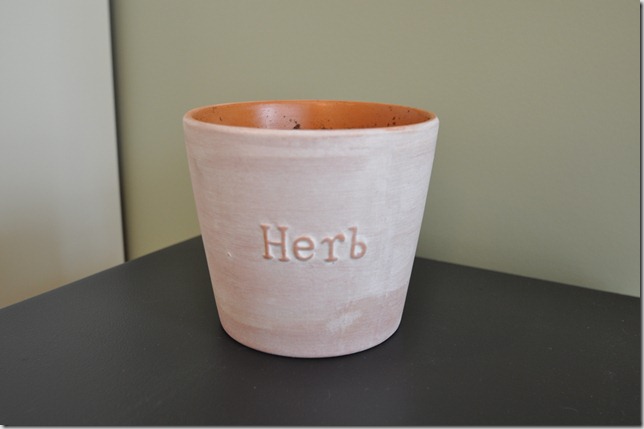
While bored out of my mind in Menard’s (waiting for Nate to locate some yard thingy), I found this darling herb pot…

April 2011 071

We'll call him "Herb"...short for Herbert.

I purchased the $3.97 pot and an 80 cent package of chives.

I placed some dirt in the pot and sprinkled the seeds on top.  I then covered the seeds with 1/4” of dirt, as suggested on the package.  I gave them some water and set the herb pot on the end table in our kitchen.

April 2011 060

Now I’m anxiously awaiting the sprouting of chives!!  I planted them on Sunday.  I don't see anything yet.  I'm getting discouraged.  Yes, I do have a bachelor's degree in Biology but that still doesn't make the waiting any easier...

Have you tried to grow herbs?  Do you have a favorite recipe that uses chives?

In Over My Head

Have you watched that show on HGTV called “Over Your Head”?  If not, it’s a show where a professional from HGTV saves someone from a DIY disaster.

Wonder if they have this show for furniture disasters?

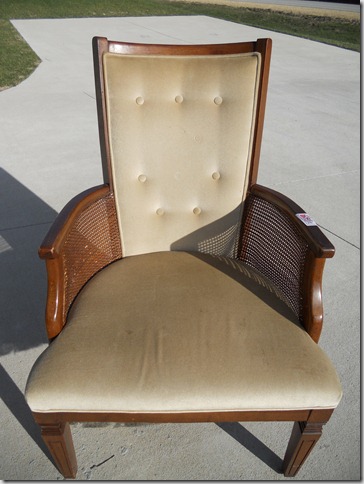
I purchased this chair at the Salvation Army for $7...

April 2011 049

The lady in line behind me was purchasing a book about Leonard DiCaprio.  Her son (probably about 10 years old) kept asking if Leo was dead.  Man, I feel old.

Who got the better deal....me or DiCaprio book lady??  The verdict is still out.

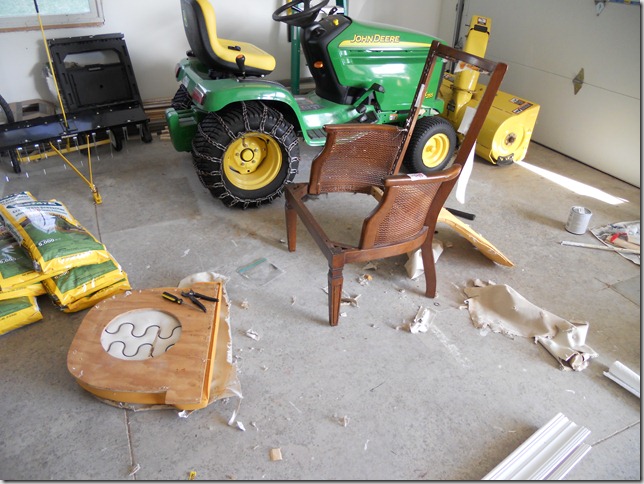
I knew this chair was going to be more difficult than other chairs I have tackled because it’s a wingback.  It was just too pretty to pass up and I was feeling pretty adventurous that day.  I figured that I’d only be out $7 if it didn’t work out.

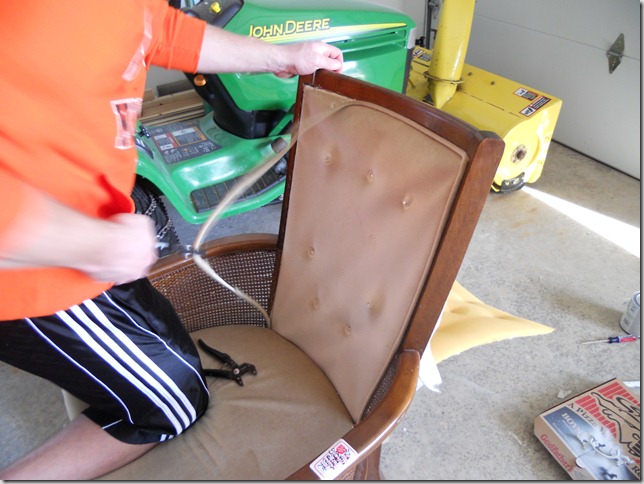
I brought it home and tried to tear it apart…..it was hard.  This chair is a beast. I usually tackle furniture projects on my own but I called in reinforcement on this one…in the form of Nate.

April 2011 061 April 2011 052

He used his man powers to start ripping off the 100000 million trillion staples….this chair was upholstered well.  He ripped most of it off and told me I was on my own with my craziness.  Seems fair.

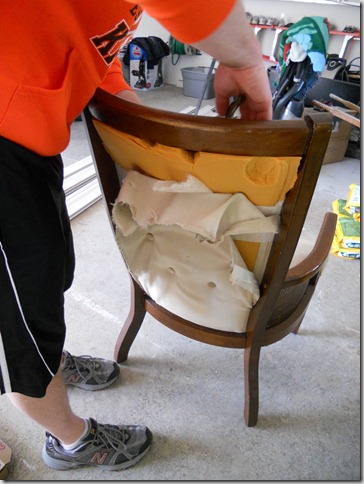
After removing the fabric from the seat cushion, I left the project like this…

April 2011 065

I need some time to recuperate.  We already have about 30 minutes of destroying time in this chair.  I’m excited to sand and prime the chair but I’m extremely nervous about reupholstering it.  I have found some decent tutorials on-line and will give it a shot next week-end…which means this post is….to be continued!

Have you tackled something that was “over your head”?  How’d it turn out?

Have you reupholstered a wing back chair?  Any tips?

Do you think the Leonardo DiCaprio book lady got a better deal?  It's okay. I can take it...

Loving Lowe’s and Crown Molding

Last Friday morning we opened our e-mails to find this…

033111_hero_20110331[1]

A few weeks ago I mentioned to Nate that I would like to start on crown molding in a few rooms.  He laughed at me and told me “Good Luck with that.” 

A week later he brought me an ad in the Sunday paper and wanted to know what I thought of the crown molding.  I love planting “thought seeds” that grow beautifully.

With our coupons in hand, we headed off to the molding section of Lowe’s that night…

2011-04-01_18.02.17

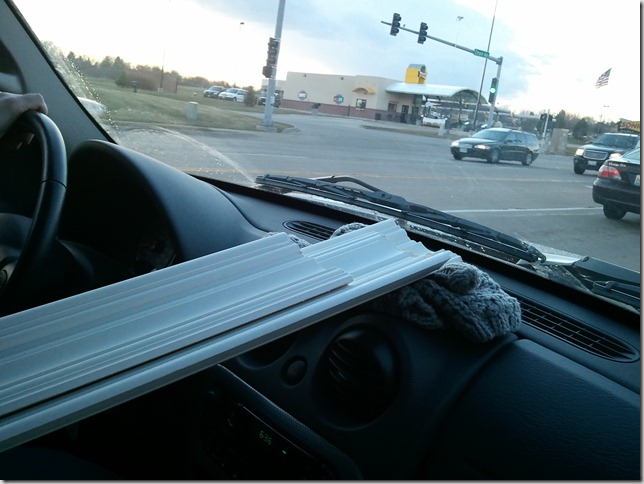
Unfortunately some man beat us to the molding we wanted and took all but three 8 foot boards.  They had 12 foot boards in the same style…unfortunately 12 foot boards don’t fit well in a Jeep Liberty.  I tried staring the man down hoping he would move on and leave us the boards…but it didn’t work..and Nate was embarrassed.

We did decide to purchase the three remaining boards (and a few cleaning supplies) that night and come back for the 12 foot boards the next day. On the receipt of that purchase was another $10 of $50 coupon. Bonus!

We loaded the 8 foot boards up in my Jeep and called it a night…

2011-04-01_18.37.14

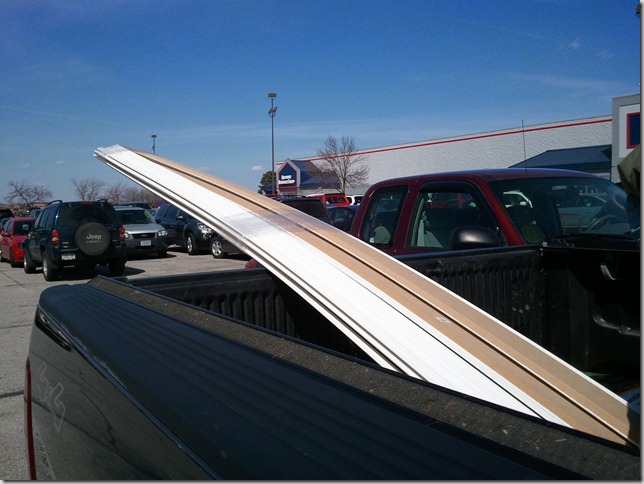
We returned on Saturday and purchased our remaining boards and made the slow 15 mile journey home with 12 foot boards hanging out the back of Nate’s parents’ truck…on a nice and windy Iowa day.

2011-04-02_14.54.27

We purchased $200.00 worth of crown molding.  Using the 4 coupons (2 web coupons and 2 store receipt coupons), we saved $40.  The $200.00 worth of molding should complete our dining room, master bedroom, and office.  Crown molding is expensive but we feel it is a good investment…especially since we saved $40 on molding we planned to purchase anyways.  This project will be our main house expense for April…and probably May.

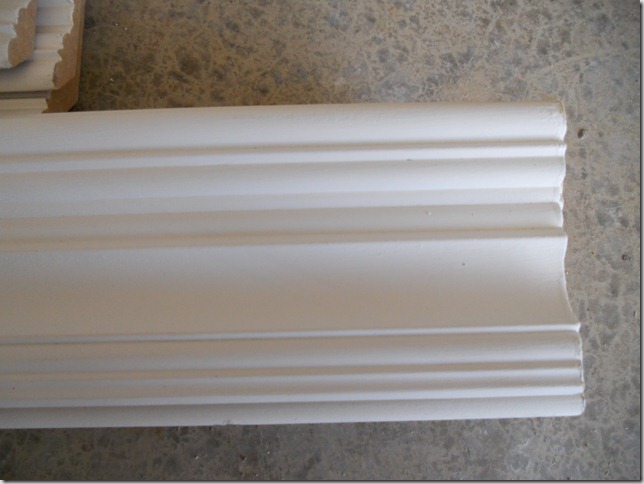
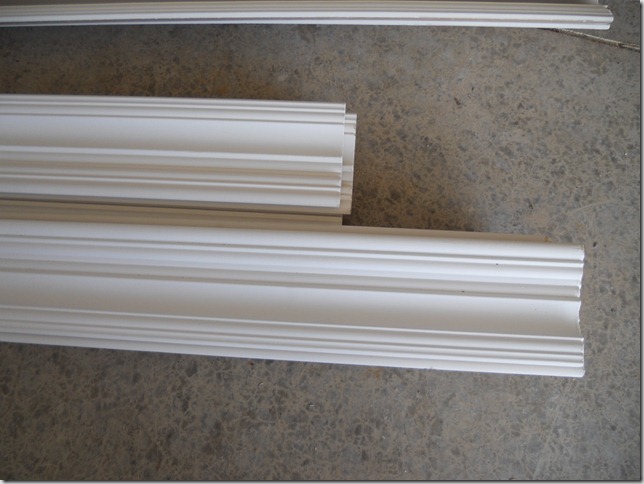
And most importantly….here’s the style we picked out…

April 2011 056
April 2011 055

We’re excited to learn how to install crown molding and see how it looks in our rooms….but unfortunately it’s still tax season so this project will need to wait a few more weeks!

Any experience with crown molding?  Any tips?

What’s your favorite big box DIY store?  We’re Lowe’s fans…mainly because of this and frequent coupons!

Dog Model

Today Nate will explain to you how we used Ike, a sheet, and Photoshop Elements to create art for our house…
(inspired by this post...edited for dog photographing purposes)....

We were looking for a picture of Ike to frame and hang in our dining room.  With a black flat bed sheet, a camera and the dog we set out to taking pictures.

The first step was finding a spot to take Ike’s picture.  With it being a sunny day and not wanting to use the flash on the camera (as it would create harsh lighting on Ike’s white fur), we went up to our master closet that faces south. We set up the sheet by tucking it into our built-in drawers and letting it sit a couple of feet on the floor.  We did not want direct light on him so we angled the blinds up a little bit so the light would reflect off the ceiling (take that window blind haters).

We then coaxed Ike to sit on the sheet using a treat (he is a treat monkey!).  Michelle held the treat and said things like “walk” and “car ride” to try to get him to turn his head while I snapped the photos. 

We took probably 20 – 30 pictures so we had a wide variety to choose from later…some sitting, begging, laying down, etc….some with our laundry basket in the background…

outtakes

After unloading the pictures onto the computer, we both picked this one as the winner.

 December_021

I then opened the picture in Photoshop Elements, then went to Layer/New/Layer via Copy.
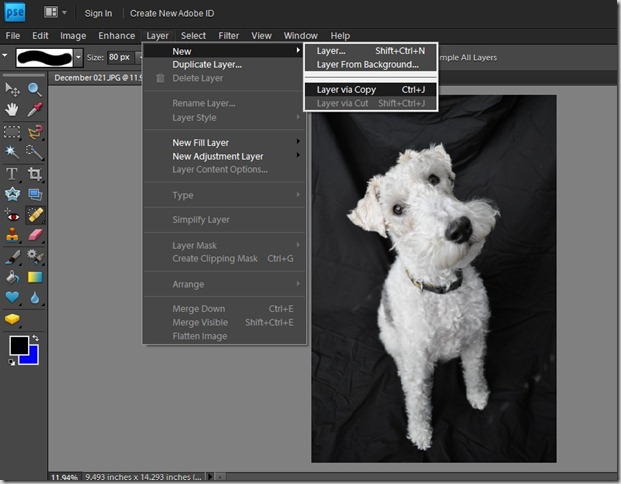
Layer via copy

After the new layer is opened, make sure the layer is selected, not the background, go to Image/Adjustments/Brightness Contrast.  When the adjustment window opens (for the black background) slide the contrast to the right and brightness to the left.
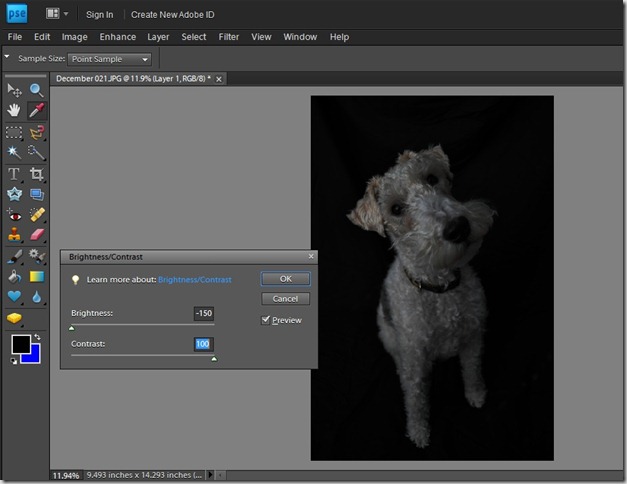
Brightness Contrast

Doing this it will “smooth” out the background, and you will notice that the subject will also become very dark, but do not worry.  We will fix that in a minute.

Now go down to the bottom right hand corner and click on the little dark grey box with the white circle on it.  You just created a layer mask.
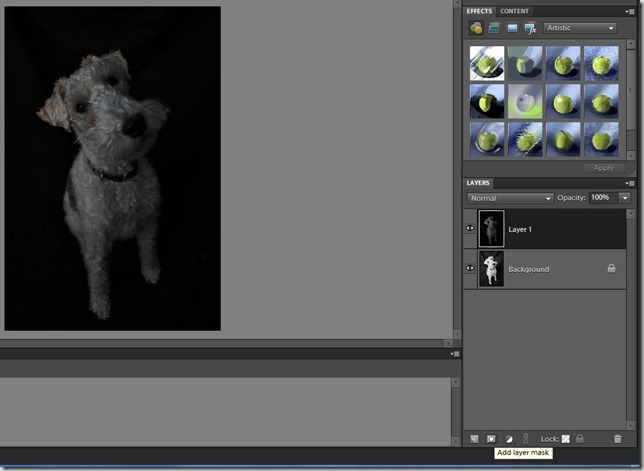
Layer Mask

With that layer mask, select the paintbrush and and the color black.  Now color in over the subject area in the layer, and the original image will show through. 
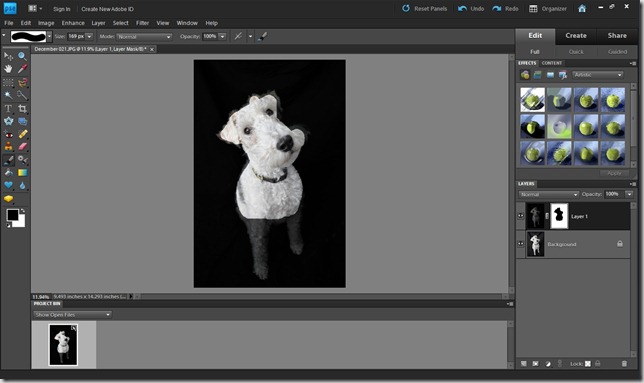
Paint

One problem that came up with Ike’s fur and the hard-edge paintbrush (the default, and what should be used to paint the interior of the picture) was getting the edges to look good.  If you went in between the “tufts”, the wrinkly background would show through, and if you did not get close enough they either looked dark or were lost into the background.
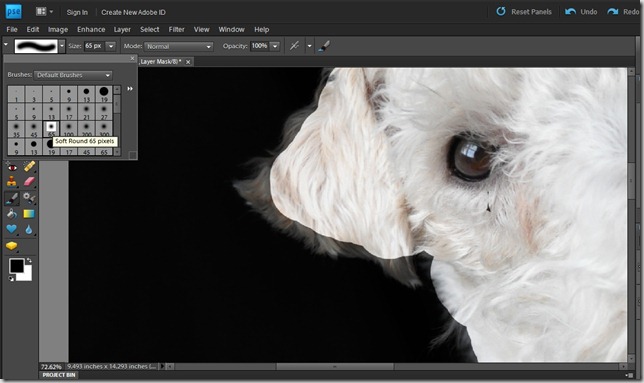
Soft Brush

To fix this, zoom in to the edges and select a soft round edge brush and paint around the entire subject.  This will allow the hair to come through without being able to see the original background.
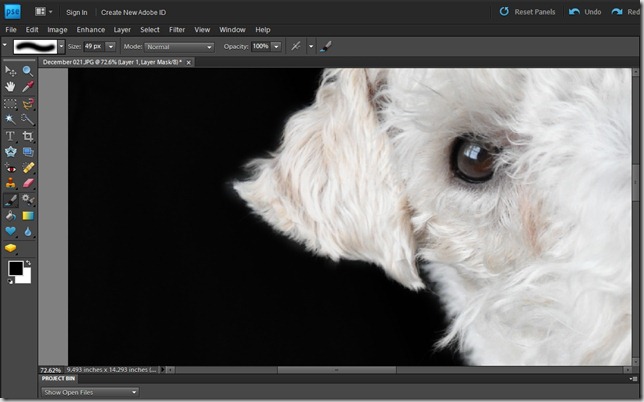
 Edges

Next flatten all layers of the image.
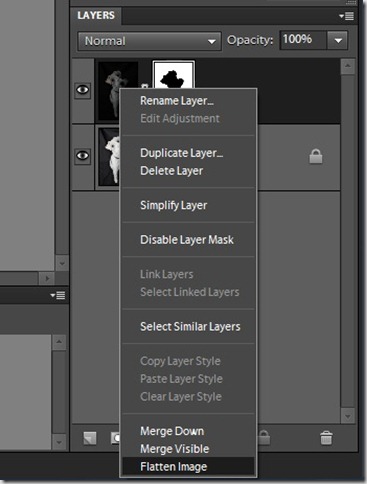
Flatten

After all of this (which for a beginner like me took under 5 minutes) here is the resulting image.

December_021_upload

And here is the photo hanging in our dining room.
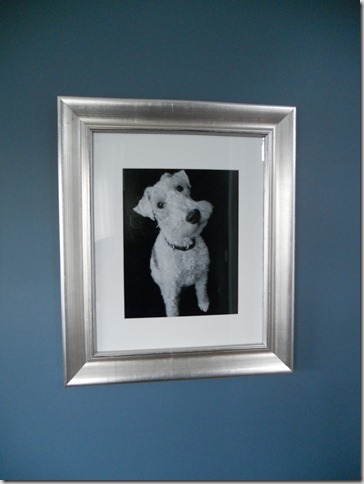
March2011 014

We ordered the picture from http://www.mpix.com/.  We bought the frame from Hobby Lobby (half off, of course).  We wanted to get the mat cut to size but the cutter at Hobby Lobby has been broken since Christmas.  In the mean time, we are using this standard size mat that is a little large.

There you have it.  Easy, inexpensive art for your dining room…because only normal people have a large photo of their dog in their formal dining room.

Anyone else use their pets to decorate their home?  Any questions on the tutorial?
Then and Now- Living Room & Office

Let's continue with the Nate and Michelle and cheap frugal story...

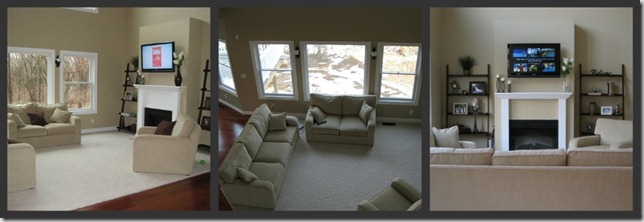
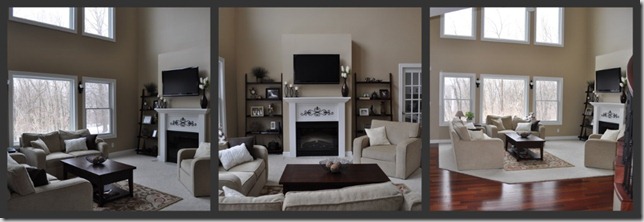
This is what our living room looked like when we moved in….

thencollage

We lived like this for about a year.  No coffee table, no end table, the mantel was a work in progress.  I’m pretty sure that anyone who entered our house thought we were in way over our heads…..too house poor to furnish it.  Nope, just cheap.

Here is the living room after living in our house for about a year….

thenPicnik collage

We broke down and purchased a coffee table and end table from American.  We finally had a place to set our drinks and some magazines!!  Trust me, this was an exciting day! We added a little more detail to the mantel with an iron piece from Hobby Lobby.  Our rug (JcPenney), however, was a bit too small…but hey, it was a rug!

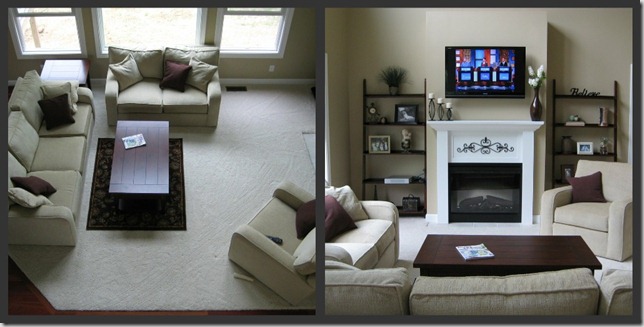
And this is what our living room looks like today…

nowPicnik collage

Our new rug is a better size.  The addition of pillows in different textures and colors helps lead to that cozy look that we were going for.  We added a few plants to bring some life to the room.

We eventually plan to add built-ins and a fancy-schmancy mantle.  It’s going to be beautiful.  Darn budget…(You can read more about our living room here.)

On to the office….

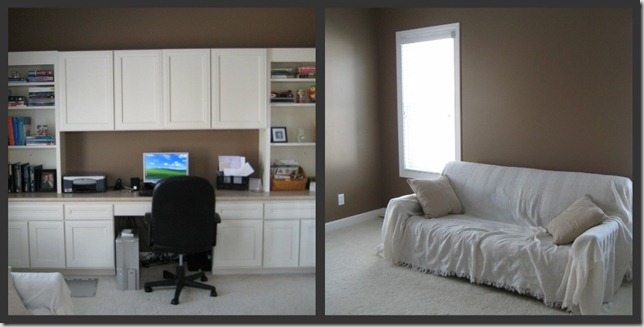
This is what our office looked like when we moved in…

Picnik collagethen

The couch was given to us from a pharmacy school roommate and we were using an awesome black office chair. 

Fabulousness all around.

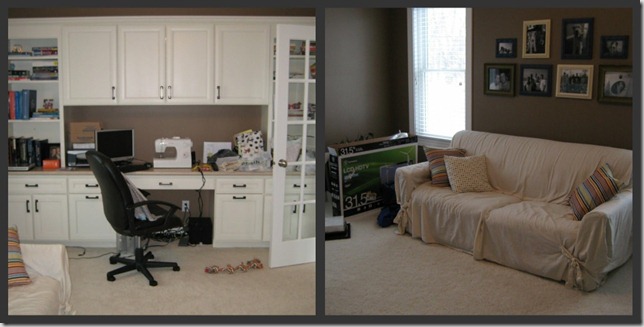
After living in our house for a year, this room became the junk room…..

then2

If we didn’t want to put something away in it’s proper location, it landed here.  Nate bought a television for above the mantel…because you can never have too many televisions…and you should keep the box in the room for about 3 months...just in case it doesn't work...

I thought I’d be all crafty and hang a gallery wall behind the couch.  The frames are crooked.  The pillows are loud.

Ike wants to know how we let this room look like this…

025

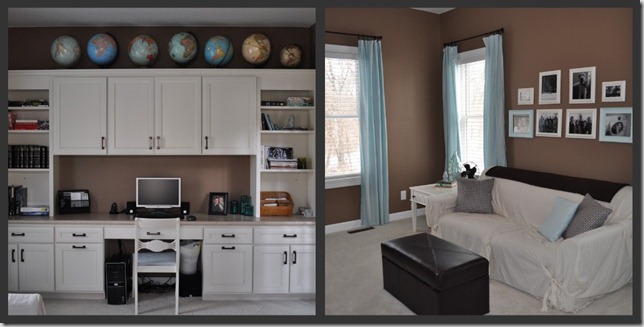
About 6 months after my awesome attempt to “decorate” this room, I got the brilliant idea that I would sew curtains…

now

I bought some fabric.  Measured.  Measured wrong.  They turned out ok….just don’t look too closely at one of the curtains behind the couch.  I made some coordinating pillow cases.  I started a globe collection.  Found the ottoman at the Salvation Army for $25 and I painted the frames to coordinate with the blue/brown scheme.  (Read more about the office here.)

This room needs help….suggest away!!

That concludes the Then and Now series.  What’d you think???

Then and Now-Master Suite and Guest Bedroom

Let’s continue the Then and Now series with our master suite and guest bedroom…

Picnik collage

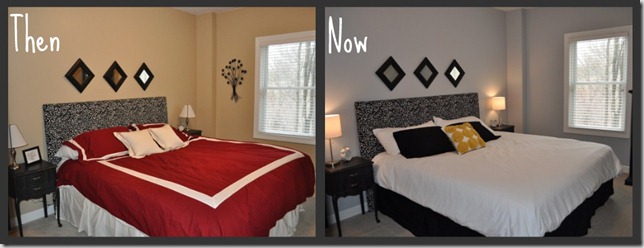
Our master bedroom (read more about it here) started with a bed and ONE of those awesome $8 round tables with a cover on it.  I wasn’t even lucky enough to have an awesome $8 end table…it was on Nate’s side. That was it.

About 6 months after we moved in, Nate’s mom was redoing her bedroom and gave us her old headboard (I think she felt sorry for us).  We recovered her lovely floral pattern with some white fabric.  I wish I would have photographed this process..but I didn't.

A few months after that I begged Nate for the Crate and Barrel night stands.  He finally caved.  And now I want these mirrored nightstands from Pier 1....how can I make him cave again? hmmm....

Earlier this year, I was bored with our striped comforter (and it had seen better days). I did some extensive comforter search and decided on the West Elm parachute duvet. LOVE.

We built a knock off of the West Elm Window headboard (read about it here).  I purchased some larger lamps and that brings us to today. I’m still deciding on additional pillows for the bed and waiting on curtains.  We are also going to build a bed frame...soon...hurry up end of tax season!!!

Picnik collage

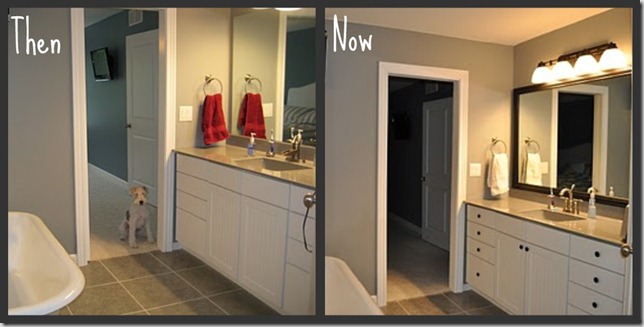
We haven’t made a lot of changes in our master bath other than adding trim around our ugly mirrors and replacing the faucets.  I’ll post on our faucet change in the next few weeks. Read more about adding the trim here.

Picnik collage

I showed you our guest bedroom during a house tour post.  I couldn’t get over how ugly the room was.  That same week-end, I painted the room and purchased new bedding and lamps (all from the Room collection at Target…Room=inexpensive).  It’s crazy how a few fairly inexpensive changes can transform a room.  You can read about the room and our plans for it here.

Tomorrow I’ll show the changes we’ve made in our living room and office!!

**A blog that I love is sharing my dresser make-over today..check it out!  Modern Jane Design....you don't know how much this makes me smile...such a blogging nerd!!**