House Tour- Guest Bedroom

The house tour now begins with the not-so-pretty in our house.

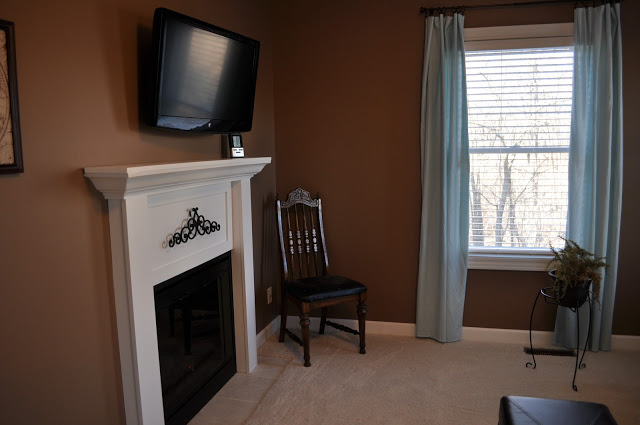
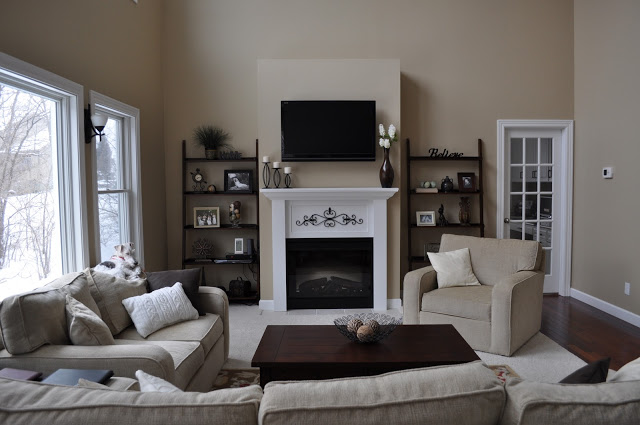
The guest room started like this….

June 003
and it stayed liked that for about a year and half. Oops!

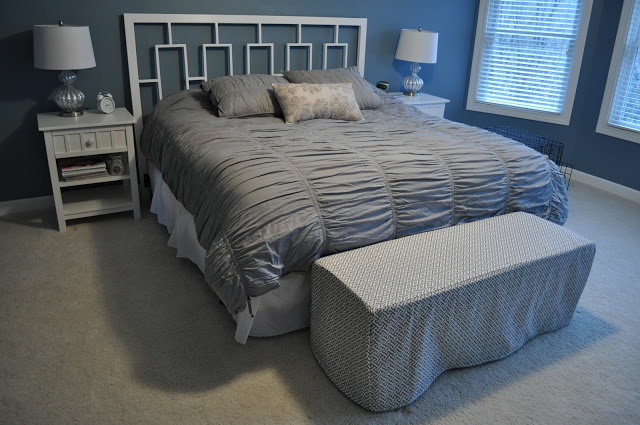
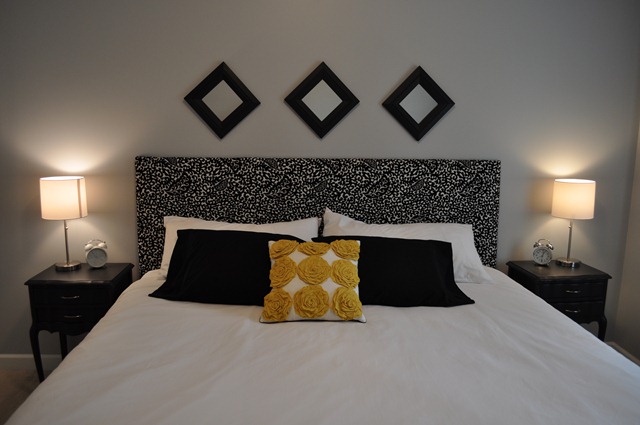
We’ve slowly added stuff to the room and it currently looks like this…

001

It just doesn’t look like I want it to…luckily we haven’t had to spend a lot of money in here.
(I had to post the before picture so you can at least see that we're making progress.)

What don't I like?
  • I think the flowers are going to find a new home (after I made Nate put a screw in the wall to hold them…oops!)
  • The comforter looks messy…always.  It was the comforter we used in our master in our first house and I was happy to trade it in.  So, I think I’m on the look out for another one in here.  I’m thinking plain old white with a black bedskirt.
  • And that hunking tv……Nate and I are still battling over that tv.  Our compromise may be moving a smaller one from my sewing room in here. 
  • And I’m not digging the wall color in this room.  I like it in our living room but not here.
  • And….
After all of that babbling, the tour continues…

004 
February11 156

I plan on adding a “gallery wall” of frames on the left wall.

Room info:
Wall color: Sherwin Williams Macademia
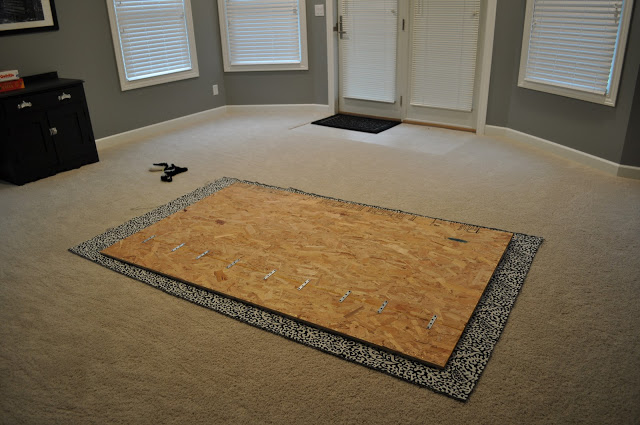
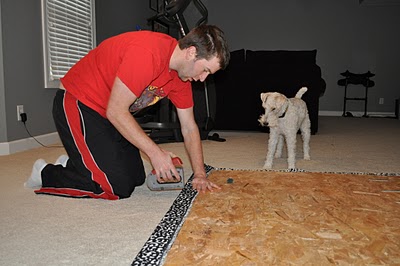
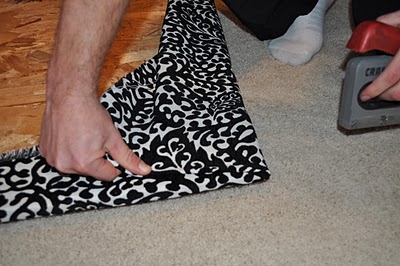
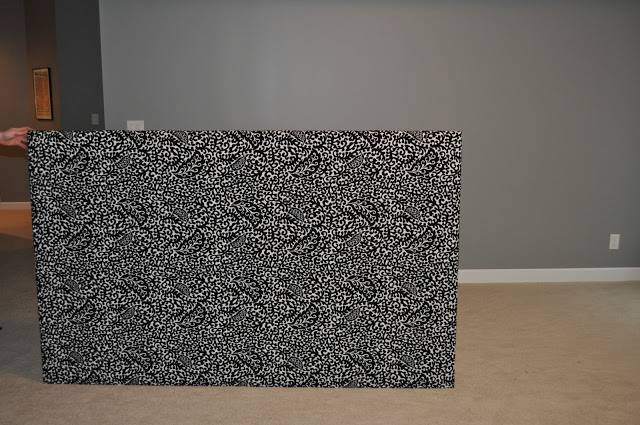
Headboard: Made it! (read about it here)
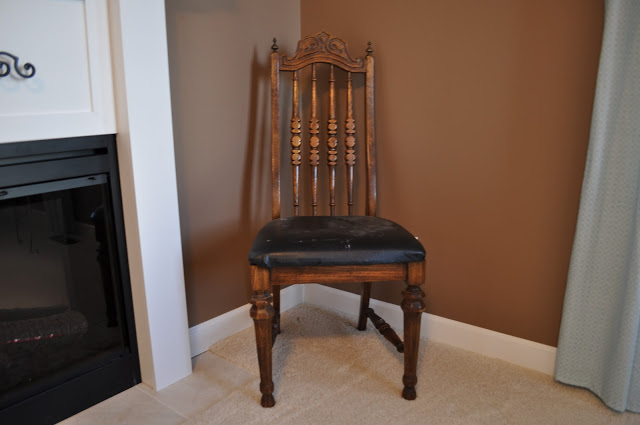
End tables: Salvation Army (read about them here )
Dresser: Hand me down (read about it here)
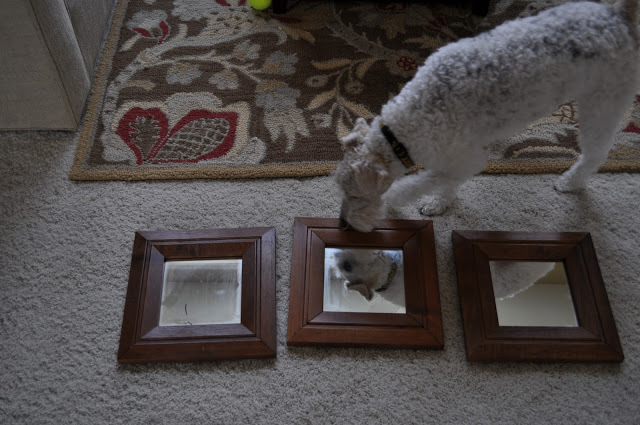
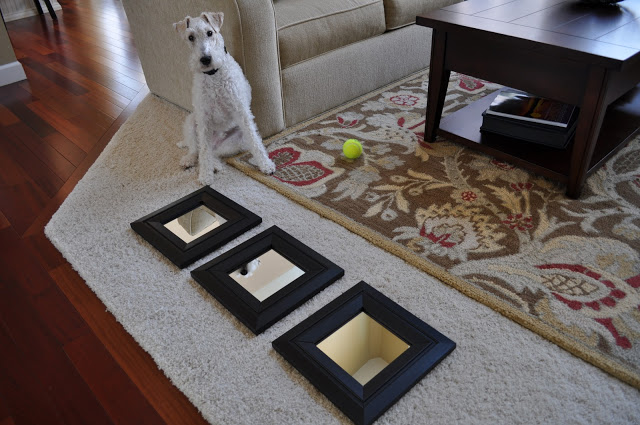
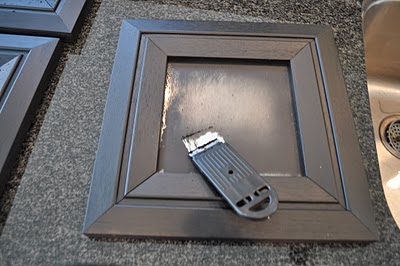
Mirrors: Salvation Army (read about them here)
Lamps: Target
Bedding: Fieldcrest something (Target) (We received it as a wedding gift.)
Wall Flowers: Pier 1 (gift)
Anything else: Ask!

What are your thoughts? 
  • on bedding...love it? hate it? suggestions?
  • If you have been my guest/plan to be a guest….do you think the tv is important or is it just a giant eye sore?  Don’t worry, you won’t hurt my feelings...maybe Nate's..but not mine.
Have a great week-end and comment away!!!

Trio of Mirrors

The Salvation Army comes through again....


This trio of mirrors was $9.00 ($3.00 per mirror).

Plus $3.00 for black spray paint equals...

(Ike could care less about mirrors...he just wants to play tennis ball.)

Spray painting mirrors is easy if you can take the mirror out. 
The backs on these were pretty secure so I just decided to skip tearing them apart or taping them and just spray painted away. 
I've taped mirrors in the past and the paint still sneaks it's way through...probably because I'm impatient with tape. 
Mirrors are nice though because you can take a razor to them and they are as good as new!


Moral of this mirror story: They are a lazy person's dream project.

Now where to hang them.....
I think I have an idea....which I will share with you tomorrow!

5 Dollars and 70 cents

$5.70 doesn't buy a lot these days.  My 80 year old self (that I keep trying to hide on this blog but she keeps sneaking out) is doing the talking...

It does, however, buy you this beauty from the Salvation Army Outlet ($5.00). 


Yes, you read that right.  Outlet.  It's really dirty and probably not the safest but it is one of my favorite stores in town!

Why?  Because 70 cents buys you this....


I don't really know what I'm going to do with it yet but it was just too pretty not to bring home!

I bought the chair out of neccesity.  I swear.
Usually a fern lives in the corner of our office (shown on right in photo below). 
I can never remember to water the fern.  It's time for it to move on....to the woods to finish out its dead life. 
We needed another chair in the office (that moves easily) for when we do important things as a couple....
like when Nate taught me how to pay our bills a few weeks back.  That was fun....


Now to decide on paint color and fabric for the cushion....decisions, decisions?

Light blue chair, fun brown pattern cover?
White chair, fun blue patter cover?
White chair, fun brown pattern cover?
Something else entirely?

What's your vote? 
Who handles the bill paying in your house?  Would a cute chair make the process less boring?

Bench Cover

Nate's mom gave us this bench....

Unfortunately it didn't really go with the rest of our bedroom...


She really does have good taste.  I swear.

I debated on how to cover the bench.  It sat in my sewing room for several months.  I just couldn't decide what to do with it.

I thought about reupholstering it but then I came up with the idea for a cover.  I like easy. 
Covers are easy....if you don't end up in a battle with your sewing machine....stupid sewing machine.

I ordered this fabric from amazon.  Grey fabric is incredibly hard to find.

The bench is 53" wide, 18" tall, and 18" deep.

I cut three 54"x19" rectangles (top, front panel, back panel) and two 19"x19" squares (side pieces).


I then sewed the pieces together.  I'm not great at sewing so there will be not be a detailed "how to". I used what little common sense that I have to sew the pieces together.  I have no idea what my seam allowance was.  I was just trying to keep my line straight while still making the cover fit the bench. I just "Make it work!" (love Tim Gunn)


My sewing machine and I had a disagreement after I had finished sewing the sides together. 
I still needed to hem the bottom edges but just couldn't handle the fight...so it sat unhemmed in our bedroom for about a month...because I'm awesome.

I finally got around to waging war on my sewing machine hemming it this week-end and we now have a pretty bench cover...

A bench cover that fits in a little better....


What do you think?  Should I take the cover off and leave that beautiful floral pattern?
On an unrelated note, does anyone have a tailored bed skirt that they like? Do share!

How to Upholster a Headboard

 Remember this headboard from our master bedroom?

How to Upholster a Headboard

We decided it needed a face lift before making its' home in our guest bedroom.

Making this king upholstered headboard was a super easy project.

Neither of us was digging the curve so Nate sawed it off.  The sawing took about 5 minutes and left us with this...

How to Upholster a Headboard Tutorial DIY

(Please ignore our disaster of a storage room....now you're looking closer...stop....)

Since this was a re-upholster job, we just needed to staple on the fabric. 

If you are starting from scratch you will need a plain old piece of plywood cut to the appropriate size (our king size headboard was 49" x 80"). 

From there, staple some batting onto the plywood and you are caught up with us!

I then headed to the fabric store.  I think this was the longest part of the process because it's such a big decision....and I get lost in fabric stores.  Half of the time I forget why I'm even there....

Our headboard was 49" x 80" (fits a king size bed).  The fabric on the spool was 58" wide so I purchased 2.5 yards to make sure I had enough fabric to wrap on the sides.  The upholestery fabric was 50% off so my total was $23.00.

We placed the fabric on the floor and then layed the plywood on top.

How to Upholster a Headboard Tutorial DIY

We centered the fabric and then started stapling away.  Ike is a great supervisor.

How to Upholster a Headboard Tutorial DIY

We started in the center at the top of the headboard and then worked our way to the outsides.  The corners were the only slightly tricky part of this project.  We just had to make sure they were nice and tight.

How to Upholster a Headboard Tutorial DIY

We pulled, tightened, and stapled our way around the headboard (took about 10 minutes max) and ended with this....

How to Upholster a Headboard Tutorial DIY

And here it is living in our guest bedroom....

How to Upholster a Headboard Tutorial DIY

How to Upholster a Headboard Tutorial DIY

You can attach the plywood to the bed.  We're lazy and leaned it against the wall.  You can't tell either way. Seriously.


Have you been wanting to upholster a headboard? What's holding you back? It's easy.....trust me. See more room photos here!

Be sure to check out our other headboard projects here!

Make your own upholstered headboard

Sunday Night Supper

If you’ve been reading this blog, you know that I have trouble in the kitchen.

I tried to cook oatmeal on Saturday morning.  This is what happened…

February11 001

I don’t like oatmeal anyways.

There is one dish that I am capable of making….mac&cheese casserole.  I’ve been a little under the weather this week-end and wanted a nice comfort dish.

February11 002

Look.  Proof that I am allowed in the kitchen. 

I was in charge of the casserole.  Nate was in charge of the Parmesan chicken.

February11 005

We make a good team.

After about 45 minutes we had a tasty supper...

February11 008

We placed the hot casserole dish on our new trivet. 
Nate’s parents brought it back from Costa Rica.  It’s made from Costa Rican wood. Fancy.

February11 006

Hope you had a great week-end!

Mac & Cheese Casserole (Family recipe from my grandmother)
8oz macaroni
3 T. butter
2 T. flour
2 c. milk
1 t. salt
2 c. grated or cubed cheese (We use Velveeta. Healthy.)
¼ c. buttered bread crumbs
Cook macaroni until tender. Drain and rinse.
Melt butter in a saucepan. Add flour and blend.
Add milk. Cook and stir until the resulting sauce is smooth and thickened.
(This takes forever and I know it’s done when I can’t handle stirring anymore).
Add salt and all but ¼ c. cheese. Stir over low heat until cheese is melted.
Combine with macaroni and pour into greased casserole dish.
Top with remaining cheese and bread crumbs.
Bake at 350 for about 30 minutes or until heated and lightly brown on top.

Parmesan chicken (Edited recipe.  Supposedly a Noodles knock-off)
Mix 1 cup of the flour with 1 cup bread crumbs and 1 cup parmesan cheese.
Dredge a chicken breast in plain flour, then dip it into heavy cream, then finally into the parmesan breading.
Heat a skillet with 1 T vegetable oil, then place the breaded chicken into the pan. Cook on medium heat for 1-2 minutes or until golden and flip over to cook other side. (We cut ours into strips to make sure they were cooked through).

House Tour- Living Room

Today we will tour the living room....

This is the room where we spend most of our time watching tv, reading, blogging, napping, etc....
you know, living.....in the living room....

When planning this room I wanted something that looked like grown-ups lived in the house (even though they don't) but was still warm and inviting. 

Please note the dog located in his usual position...


View from the front door

View from the kitchen/eating area

Room info
  • Wall color: Macademia (Sherwin Williams)
  • Furniture: Ethan Allen Retreat sofa, love seat, and chair
    • (This was before I knew furniture shouldn't be so matchy-matchy but matchy-matchy it is. I kind of like matchy in certain rooms...like this one...because I have no choice...)
  • Shelves: JCPenney Leaning Shelf
  • Coffee table and end table: American Furniture
  • Rug: Pottery Barn rug bought at Tuesday Morning for over half off (BONUS!)
  • Accessories on shelves: thrift stores, Gordman's, gifts, TJMaxx, Marshall's
This is one room that I am pretty much done with.  Weird, right?

We do eventually plan to add built-in shelves and a fancy-schmancy mantle but that is a ways away (pesky student loans) and I am always changing out pillows and accessories on the shelves but overall...done...sort of...

What are your opinions on matchy-matchy furniture?

Linking up to:
Thrifty Decor Chick

Happy 4th Birthday!

Ike turns 4 today!  They grow up so fast....


Everyone thinks their kid dog is the cutest and funniest...but ours really is. :)  Seriously.

I can't believe he is 4 already.  Crazy!
I was looking back through some old photos and realized there was never a dull (or inexpensive) moment when Ike was a puppy.  For example:
  • He chewed some holes in the dry wall of our last house (I was busy cramming for an exam and thought he was chewing on a bone...nope, it was the wall)..this is how we learned to repair drywall
  • He ate 1 of Nate's new cell phones....if its in shorts pockets in the laundry basket it's fair game if you are Ike...this is how we learned about insurance on cell phones.
  • I had an emergency root canal on one of my front teeth because I bent down to pet him and he accidently jumped straight into my face.  (He's lucky I didn't need a crown on that tooth....just don't think I would look right with a "grill". :P)...this is how we learned the importance of dental insurance.
He's still high energy but behaves much better these days.  Maybe we should have done that whole obedience school thing a few years ago.

Here are some pictures of his younger days....bad haircuts and all...


We love our dog...


Time for a birthday nap.....


Anyone else treat their dog like their child?  Anyone like their dog better than their human child?
Do you throw your furry friend a birthday party?  Please share!

Pantry Organization

Overall, we are neat and organized people.
I'm border line OCD.  It's a serious medical condition.  Nothing to joke about.

I HATE clutter on counters....so I throw it in drawers and closets.
Wah-lah. Clutter gone!  Everyone thinks you are a neat freak!

Until you need to find something....

I'm now on a mission.

The pantry was my first victim.

I'm a little embarrassed to post this picture but it is what it is.


Surprisingly, I didn't throw very much away. I just straightened, organized, and consolidated. 
(The Target bags will be returned to Target for recycling.  I just learned they did this! 
Way to go Target....add that to my list of reasons why I love you so.)

I didn't buy anything new...I just organized.

After about 20 minutes, the pantry looked like this....


It will probably stay like this until...Friday.  At least there is now proof that it was clean and organized.

And yes, I eat like a 6 year old. Don't judge.

How do you keep your pantry/food cupboard in order? Or do you?  Any fun storage containers? 
Are you one of those weirdos that has to alphabetize the stuff on there shelves? Weigh in!