How to Build a Flower Tower

I’ll let you in on a little secret.  Remember the vertical garden we built as part of a sponsored program for Home Depot?  Well, we were assigned the project.  We weren’t super excited about it at first with but we ended up really liking it after it was built.  That’s the inside scoop.

Where am I going with this?  Ah, yes.  What I really wanted to build was a diy flower tower!

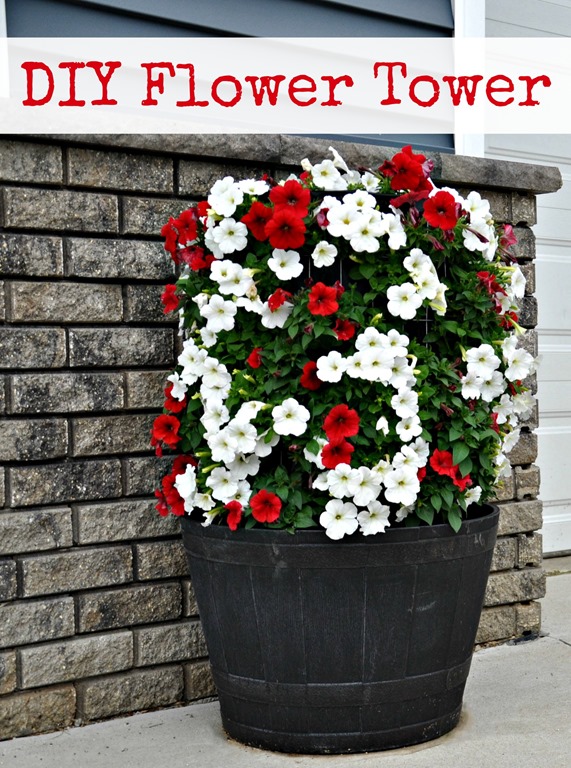
How to Make a Flower Tower {DIY}

I mean, it’s a tower of flowers.  It has a cool name.  I love Home Depot’s commercial where the wife is all like “This won’t take long.  Will it?”  THAT’S TOTALLY ME.

I had to have one. So we headed to pick up our supplies.  I quickly began to realize that these little ol’ flower towers aren’t exactly cheap.  Like those people in the commercial with 15 of them in their backyard must be loaded.  Like Justin Bieber or drug dealer loaded.  Not pharmacist and accountant loaded.

But I had to have one.  You know how that goes. I compromised and limited myself to one tower instead of the 27 I had imagined in my head.

These towers are ridiculously easy to build.  Like I did it mostly by myself.  Whoa.  That’s going to be the theme for this week.  Michelle actually does stuff.  Alert the media.  Here's how to make your diy flower tower.

Gather your supplies. (The reason this project is expensive is that they don’t sell small quantities of some of the materials.  Like you need 3-4 feet of wire fencing and it comes in a 50 foot roll.  Nice.)

    • 4-foot galvanized wire fencing with 2-inch x 4-inch openings (~$30)
    • Landscape fabric (~$10. We had this left over from the vertical garden.)
    • 6-inch black zip ties (~$2)
    • flower pot (Price varies.  We used one we already had.)
    • Dirt (~$13 for a large bag.)

Gather your tools.  (We had all of the tools.)

  • Utility knife
  • Aviation snips or tin snips
  • Scissors
  • The Home Depot recommends gloves when working with the wire. I skipped them but thought I’d throw it in for safety purposes.

Step 1: Create a cylinder with the wire fencing that you will place inside your pot.  Allow an overlap of one fencing section to allow for a more stable seam.  Cut the fencing using aviation snips.

DIY Flower Tower

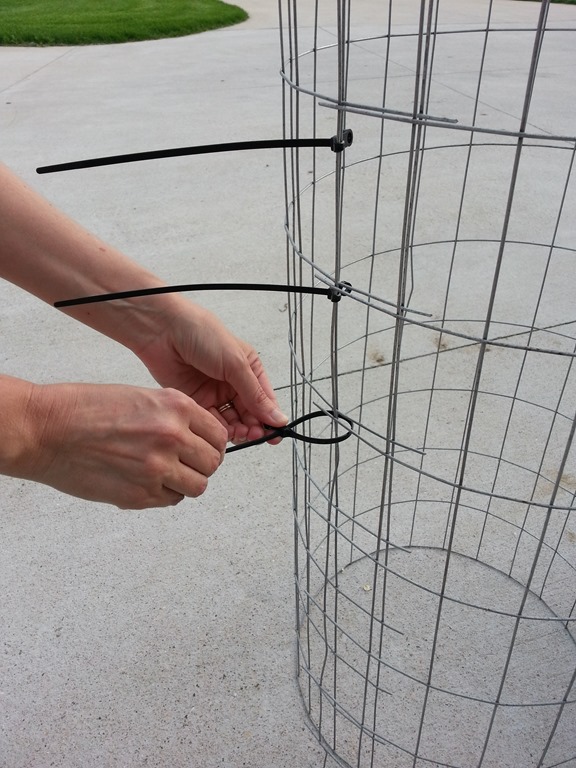
Step 2:  Overlap one section of the wire fencing and use the zip ties to tie the sides of the cylinder together.  I used a tie in each section from top to bottom.  Trim the zip ties to about 1/4”.
DIY Flower Tower

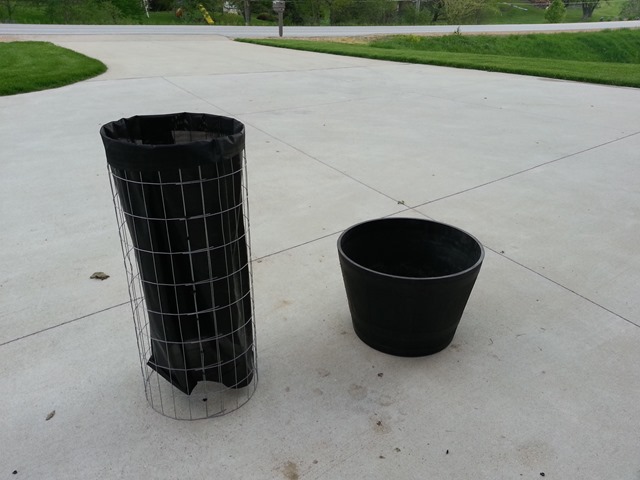
Step 3:  Wrap the landscape fabric around the outside of the tower to measure how much you’ll need.  Overlap an inch or two to ensure that soil doesn’t fall out through the seam.  Cut the fabric to size using scissors or a utility knife.  Slide the fabric inside the wire fencing.  Cut the excess fabric from the top of the tower leaving about 2 inches extending from the top of the tower to help secure the fabric to the tower.
DIY Flower Tower

Step 4: Fold the two inch flap over the top of the tower.  Use your utility knife cut small slits through both layers of fabric just under the metal rim.  Cut one slit in every third rectangle of the fencing.  Insert the zip ties through the slits and tie down the top of the fabric.  Cut the ends of the zip ties to about 1/4”.

DIY Flower Tower
DIY Flower Tower

Step 5:  Place fencing in your flower pot.  Fill the tower about 1/3 full with soil.  Add water to settle the soil.  Add another 1/3 of soil.  Add more water.  Fill to about 1 inch from the top of the tower with soil and add water.  Lightly press the soil once it is full to prevent sinking.  I repeated the last water and pressing step a few times.  Also add soil to the inside of the container just outside of the tower.

DIY Flower Tower

Step 7:  Cut a vertical slit in every other rectangle and stagger on your way down the tower.  (The Home Depot instructions suggest making a cross slit.  I found that the flowers were sturdier if I only made the horizontal slit.)

DIY Flower Tower

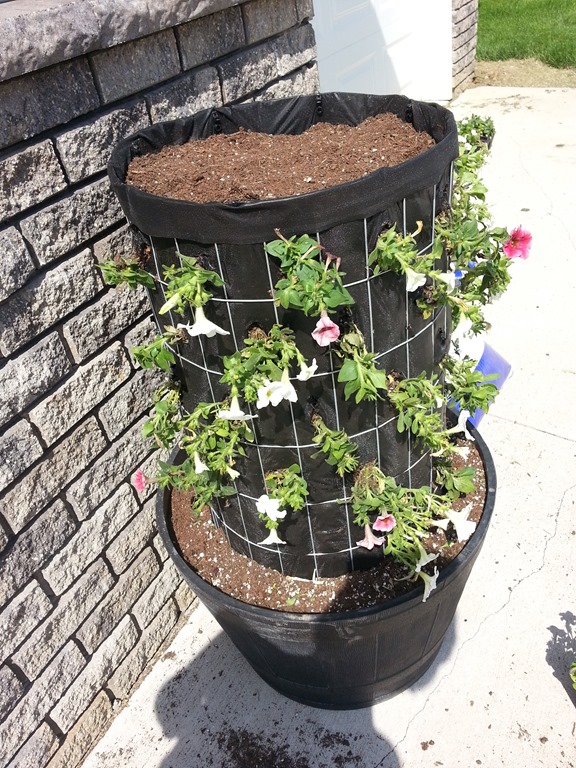
Step 8:  Add your flowers.  I chose petunias because they grow like weeds in sunny locations.  Use your finger to create a little pocket behind the opening to place the plant into.  It should fit snuggly but you don’t want to shove it in there and ruin the poor little plant’s roots.  Once the plant is inserted into the tower, make sure the flaps of the landscape fabric close around the stem of the flower to help keep the soil in while water.  Don’t forget to plant flowers in the top of the tower as well.

It doesn’t look like much at first.  I’m not going to lie.  It’s pretty hideous for the first two weeks.  I’m pretty sure the neighbors were wondering what the heck the monstrosity by our garage was. 
DIY Flower Tower
DIY Flower Tower

Step 9:  Water and cross your fingers that the thing lives.  As long as you chose petunias and you water them, the tower will live.  I’m certain of it.

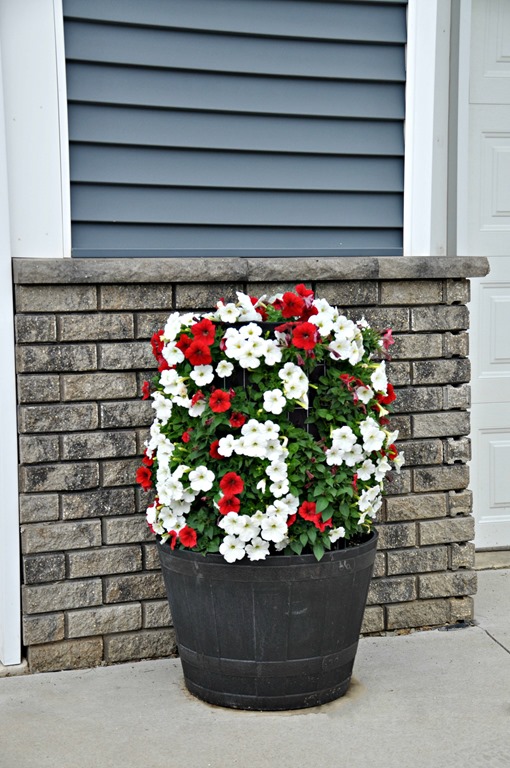
Our tower has been growing for about 3 weeks and it has filled in nicely.  There is still time for you to build one for the summer!
Flower Tower
DiY Flower Tower
How to build a Flower Tower {Decor and the Dog}
How to Build a Flower Tower {DIY}

Be sure to check out more projects on our DIY projects page!

Any fun outdoor projects planned for the summer? Do your neighbors wonder what the heck you are doing on a regular basis?

DIY Outdoor Patio Table Tutorial

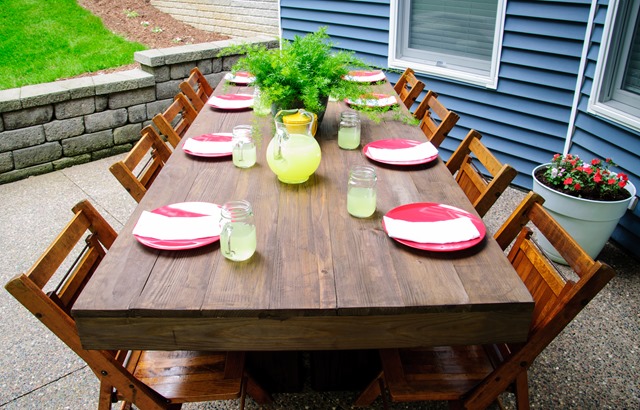
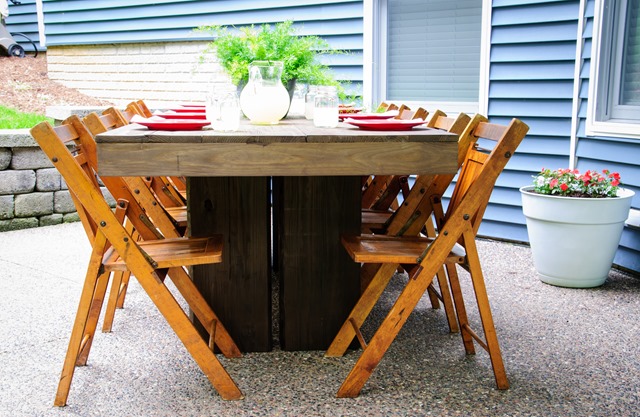
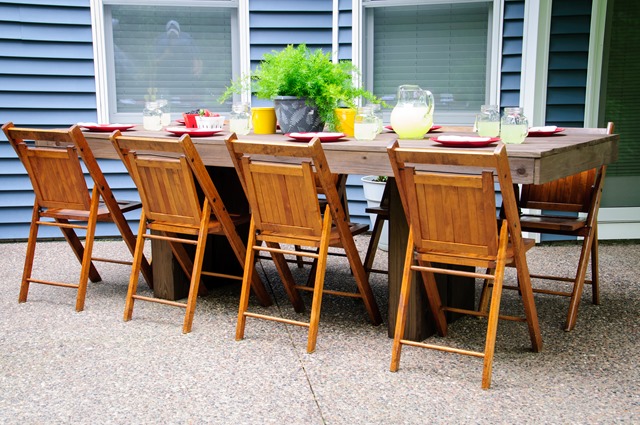
On Monday, I shared with you our newly built outdoor patio table.

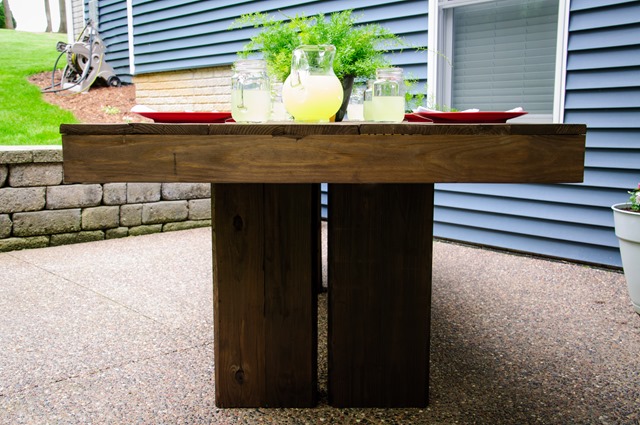
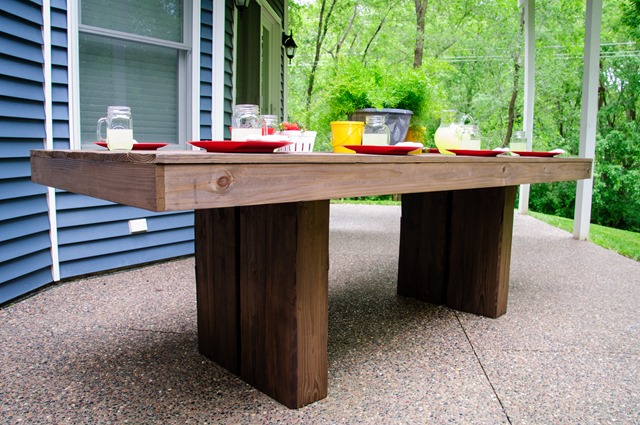
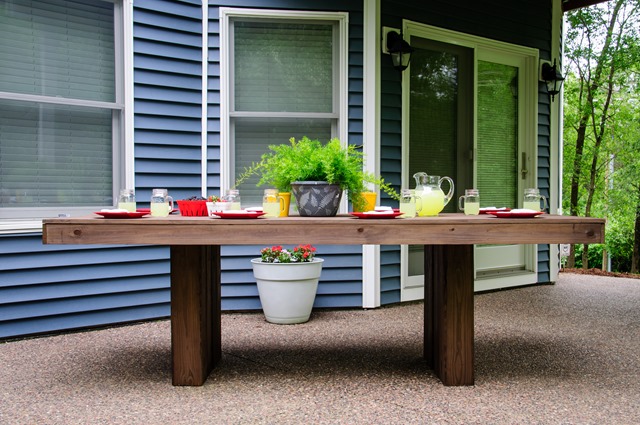
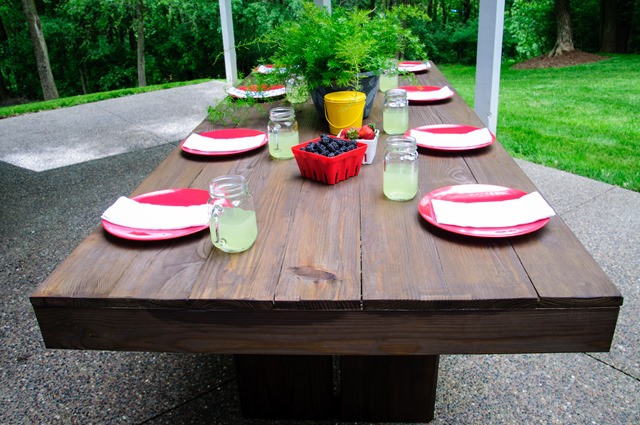
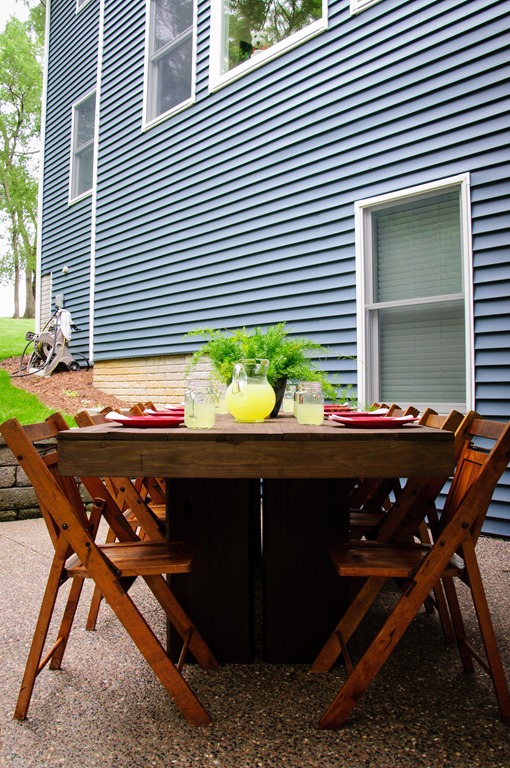
DIY Patio Table Tutorial from Decor and the Dog
Outdoor Table-8

Today we’re back with a tutorial so you can make your very own.  The tutorial is wordy but we tried to include as many descriptions/instructions as possible.  We hate starting projects to find that the tutorial left out an important step or isn’t quite clear.  Feel free to ask any questions. We’ll answer them in the comment section below.

The table cost us about $150 to build.  Pressure treated wood is more expensive.  You could choose a less expensive wood.  We’re hoping that the pressure treated will better withstand the elements.  Do take proper precautions when working with pressure treated wood.  Wear a mask when cutting and sanding.  Wash hands well after handling the wood.  There are some concerns about pressure treated wood not being safe to eat from.  After much reading, we determined that it was the right choice for us.  We sealed the table and have no plans to eat directly off it.  It’s also not a table that we eat at every day so we feel the benefits of the pressure treated wood outweighed the risks for us. You choose what’s best for you!

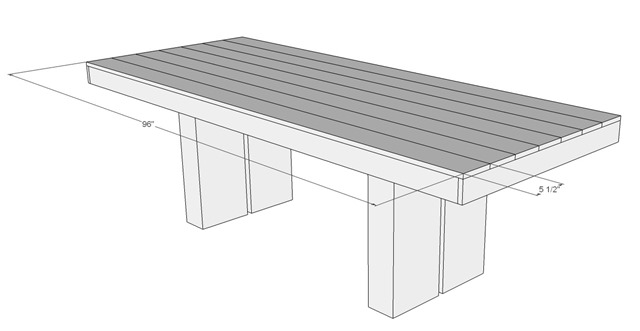
Also, please excuse our disgusting hot mess of a garage in the photos below. Cleaning it is on our to-do list. We are two of the neatest and tidiest people but for some reason, our garage can never stay clean.  Ever.  There is some kind of law against it.  And it won’t stop raining in Iowa so all of our pictures are taken in our disgusting/poorly lit garage.  At least there are pretty sketch-up drawings?  Carry on.

Material List

Cut List

  • 1x4
    • 94.5" - 2
    •    38.5" - 2
    • 2x4
      • 37" – 4
      • 5" inside tapered out at 45 degrees for corner supports (can be approximate)
      • 6x6
        • 30" - 8

Directions

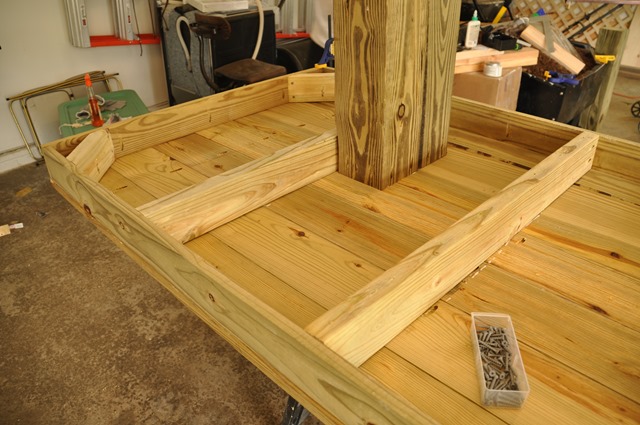
Glue one side of a 6x6 to another 6x6 to make one leg that is 11"x5.5"x30".  It is best to clamp these together overnight.  If you do not have clamps big enough for these, I think putting something heavy on it will work just fine.  Once dried overnight, sand smooth.

DIY Outdoor Patio Table Tutorial Leg
DIY Outdoor Patio Table Tutorial (Farmhouse)

Using pocket hole screws, attach the 94.5" 1x4 to the 38.5” with the 1 1/4" outdoor screws and wood glue (do not use the regular kreg screws as they will rust with the pressure treated wood/weather conditions).  If you just have deck screws like I did, just make sure not to screw them too far as they will pop out the other side of the board.

DIY Outdoor Patio Table Tutorial (Outside frame)

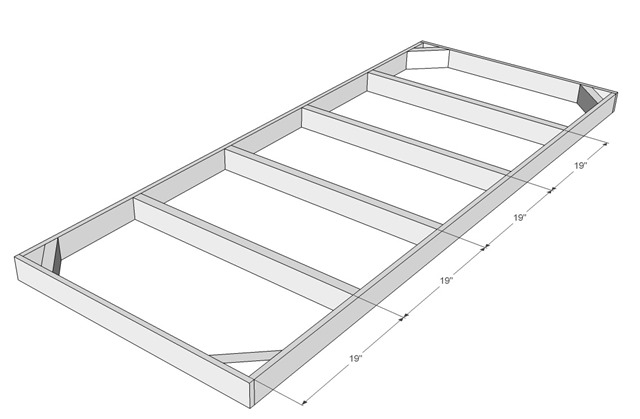
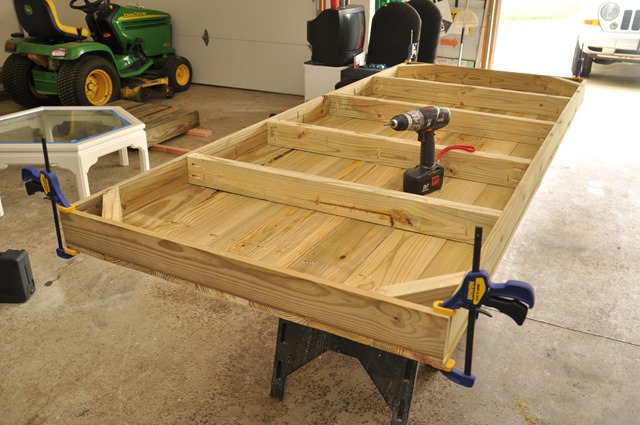
Put the 37" center supports in at 19" intervals using glue, 1 1/4" screws and pocket holes.

DIY Outdoor Patio Table Tutorial Top Support

Drill straight down on the long sides of the corner supports so the hole comes out the middle of the 45 degree cut.  Using wood glue and 1 1/4" screws put in all 4 corners.

DIY Outdoor Patio Table Tutorial Corner Supports

Put pocket holes in each center support (I did 3) and in the center supports and on the edges.

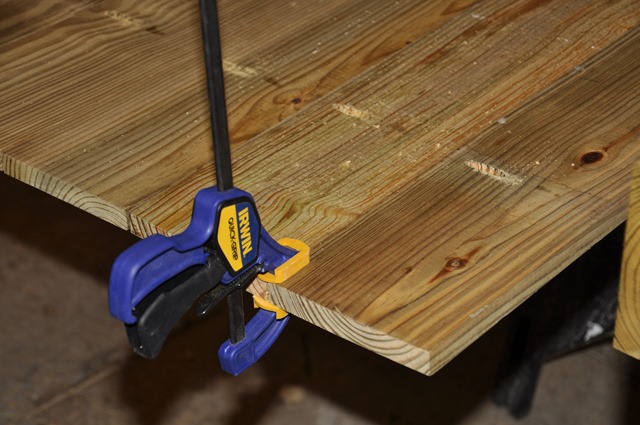
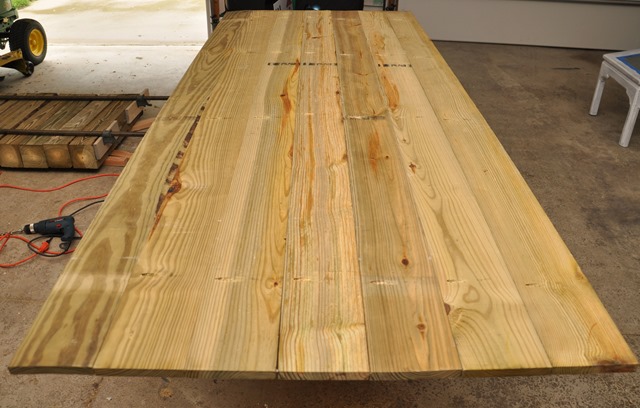
Check to make sure the 1x6 boards are 96" (mine were all uneven lengths longer than 96").  Place 4-5 pocket holes in each board, besides the last one, and using 1 1/4" screws and glue attach boards together for the table top.  I found it helpful to have a large clamp to help pull uneven boards together. Flip so top is up, sand out any unevenness. (Ignore the legs in the following photo.)

DIY Outdoor Patio Table Tutorial Top Dimension
DIY Outdoor Patio Table Tutorial (Farmhouse)

Flip top back over.  Put glue on top of the structure built earlier, flip down on top of the table top, screw together to top.

DIY Outdoor Patio Table Tutorial (Farmhouse)

While it still upside-down, on the outside 2x4 supports, measure 18" from each side, this is where the insides of the legs will go.  Make sure to mark the side of the board that is closest to the middle.

DIY Outdoor Patio Table Tutorial (Farmhouse)
DIY Outdoor Patio Table Tutorial Leg Bottoms

Put pocket holes on the 3 sides of the legs that will not be touching the 2x4 support.  Using glue place on the upside down table, using 1 1/4 screws in the pocket holes, and after drilling pilot holes in the 2x4 support (I did 4 in each 6x6, or 8 in each leg) attach with the 3" screws.  It might be best to stain the inside of the legs before attaching them as there is only 1" in between, we were able to get it stained with brushes after, but would be much easier before.

DIY Outdoor Patio Table Tutorial (Farmhouse)

Once all legs are attached, it is time to flip it back over.  You will want friends for this as it is heavy and awkward.  We had four of us (one on each corner).

DIY Outdoor Patio Table Tutorial Final Product

Stain with a outdoor stain/sealant or stain and outdoor poly.  We used Olympic Maximum (Stain + Sealant in One) in Oxford Brown.  We liked the fact that it was one coat and we were done.  Let dry and then you are ready to enjoy your new table.

DIY Outdoor Patio Table Tutorial (Farmhouse)
Outdoor Patio Table Tutorial | Decor and the Dog

See the full reveal here!

Any big outdoor patio plans this summer?  I need to get to hosting an outdoor gathering soon!

Photobucket Photobucket Photobucket PhotobucketPhotobucketPhotobucketfollow us in feedly

DIY Outdoor Patio Table

How was your weekend?  Nate and I were busy kids.  That’s what the old dude at the hardware store called us anyways. I’m going with it.

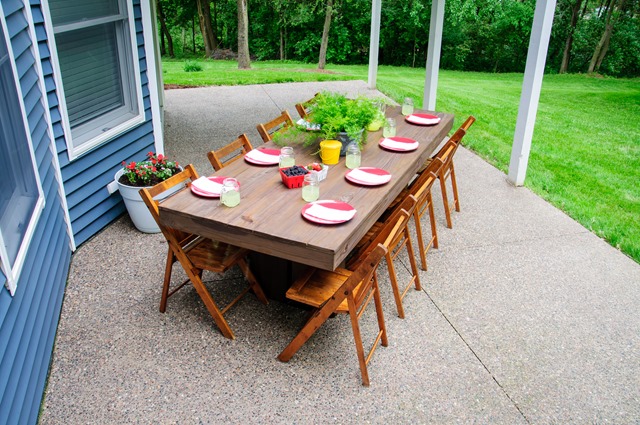
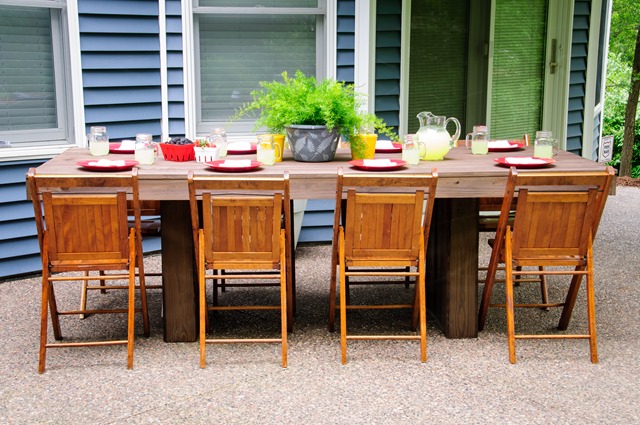
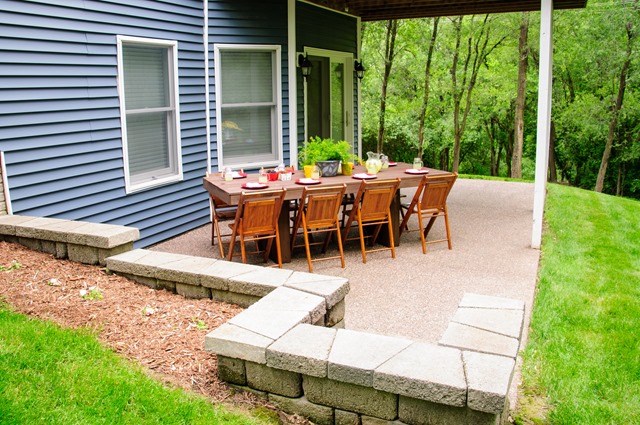
We put the finishing touches on our outdoor patio table that Nate built last weekend.  We enlisted the help of Nate’s parents to help us carry it from the garage.  Our patio now has a table and my car can go back in the garage. Double win.

DIY Outdoor Patio Table

This patio has been neglected for the 4 years that we have lived in the house.  We were holding off until we figured out how we wanted to use the space.  We are also cheap.  We aren’t done with the patio yet but we now have a good start.  We’ll probably finish the rest in another four years.  We don’t want to rush things.

DIY Outdoor Patio Table

Nate and I both liked this table.  Unfortunately $2000 wasn’t exactly in our outdoor budget range.  Or our indoor budget range for that matter. We were having a hard time shelling out hundreds of dollars (let alone thousands) for furniture that would end up eventually being covered in bird poo and insect guts.

DIY Outdoor Patio Table

Nate thought he could build a similar table.  I said go for it.  $150 and a few hours later, we had ourselves an outdoor table. 

DIY Outdoor Patio Table

I found the outdoor chairs for $8/chair at a local antique store.  $220 isn’t exactly pocket change but we’re happy with it beings that we have a heavy/sturdy outdoor table with seating for eight.

DIY Outdoor Patio Table
Outdoor Table-4
DIY Outdoor Patio Table

Ike hasn’t been down to check out the table but he appeared to approve from his perch in the living room.

Outdoor Table-6

We’ll be back on Wednesday with a tutorial on how to make the table.  In the mean time, I have to continue to make the neighbors question why I’m setting a table for a fake dinner party outside.  We were actually going to use this setup yesterday until the gnats carried me back into the house.  You think I’m joking.  They are that bad.  Guess they dig the new outdoor table too.

Photobucket PhotobucketPhotobucket Photobucket PhotobucketPhotobucketfollow us in feedly

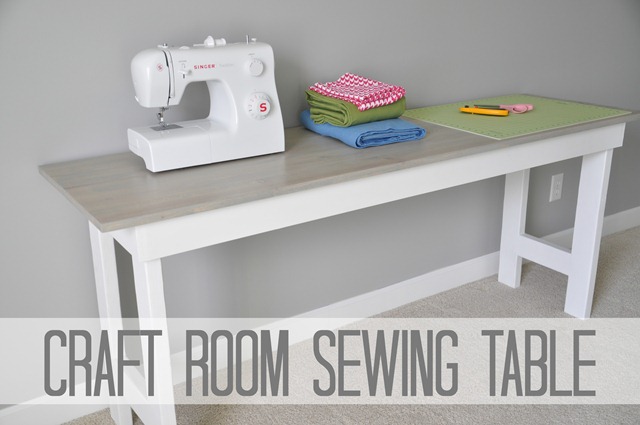
Craft Room Sewing Table Tutorial

On Monday, I posted the reveal of my new sewing table.  Today I’d like to share with you a tutorial so you can build your very own.

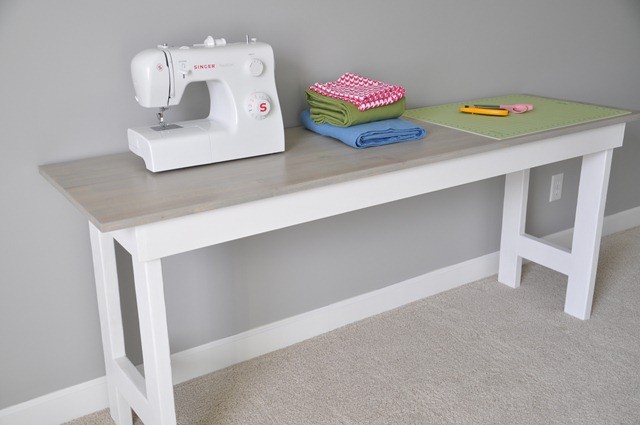
DIY Craft Room Table Sewing Table

Nate wrote the tutorial.  During tax season.  I tried to translate the directions to English.  But I fell asleep.  I wish you luck.  (This tutorial explains why I write and Nate takes photos.  You’ll see.)

(This tutorial is based off a plan from Ana White.)

The dimensions for this table are 20”x72”.  The perfect length for a sewing machine and some room to cut.

You will need to purchase:

*affiliate links included

From your supplies you will need to cut:

  • 2 - 64.5" 1x4
  • 2 - 18" 1x4
  • 4 - 29.25" 2x4
  • 2 - 9.5" 2x4
  • 3 - 16.5" 2x2

Start by drilling 2 pocket holes into the ends of the 64.5" 1x4 boards.  Using a square, attach the long 1x4's (64.5”) into the short 1x4's (18”) using wood glue and 1.25" pocket hole screws.   (The Kreg pocket hole drill will include directions on how to do this.)

Craft Table Bottom Edge

Make sure each corner is as square as possible.  I found that I thought it was not going to turn out square but when the center supports were added, it really squared it up.

222

Mark 16.5" on the each side of the long (64.5”) boards. Then mark 16.5" from those points 2 more times for the center supports. (Michelle translation: You will add a total of 3 support boards 16.5” apart.) Drill pocket holes on each side of the center supports and attach the 16.5” boards with wood glue and 1.25" pocket hole screws. 

Craft Table Center Supports
229

Place each 29.5” 2x4 boards one by one on the inside corners. Attach with wood glue and 2" screws.  Drill pilot holes with a drill bit slightly smaller than the diameter of the screws.  I found it easier to keep the board where I wanted by using a couple of clamps on the boards.  I used 4 screws in each board for stability.

Craft Table Legs
226

Mark 6" up from the bottom of the legs (29.5” boards) and drill 2 pocket holes in each side of the 9.5" 2x4s.  Using clamps to keep the boards in place, use wood glue and 1.5" pocket hole screws to attach.

Craft Table Leg Supports

Fill in all gaps and the pocket holes in the leg supports with wood filler. Sand well and then fill again as some of the gaps and pocket holes will be too big to fill only once.  Sand again when the filler is dry.  Prime or stain the bottom.

257

Paint or stain and poly the table top.

Once all of the legs and top are dry, drill pocket holes in the outside edge of the 2x4 legs at the top of the table. 

Place the top of the table upside down on the floor onto cardboard (or something else to protect it).  

You will now need to determine where to place the bottom of the table onto the top.  At each corner on the under side of the table top, mark 3" from short edge and 1" from the long edge.  Place wood glue on the top of the legs and supports that will attach to the table top.  Place onto the table top.  Be sure to match the corners of the bottom up with the marks made on the underneath of the table top. 

Using 1.25" pocket hole screws, attach the 2x4 legs to the top. 

Sewing Table 010

On each center support, drill 3 holes, on the outsides and the middle, and use 2" (I don't know if my center supports were slightly bigger because I had to use 2.5" screws. I recommend comparing the size of the screw to the support before drilling.) to secure the top to the supports.

Sewing Table 013
Sewing Table 006

Turn table over, enjoy.

Craft Table
DIY Sewing Table
Sewing Table 087

Bam. Sewing table.  Amazing.  Feel free to ask questions.  I was involved in part of the building process which helped me translate but I’m still not convinced it makes complete sense. 

Now I need to finish this craft room so I have time to actually sew.

Big plans for the week-end?  What are you working on for The Pinterest Challenge?

Linking up to: Home Stories a to z

Craft Room: Sewing Table

My craft room dreams are starting to come true.  Slowly but surely.

They are starting with this pretty little table that my darling husband built.  See the full tutorial here!

DIY Craft Room Table Sewing Table

The key to my heart is handmade furniture.  Write that down.

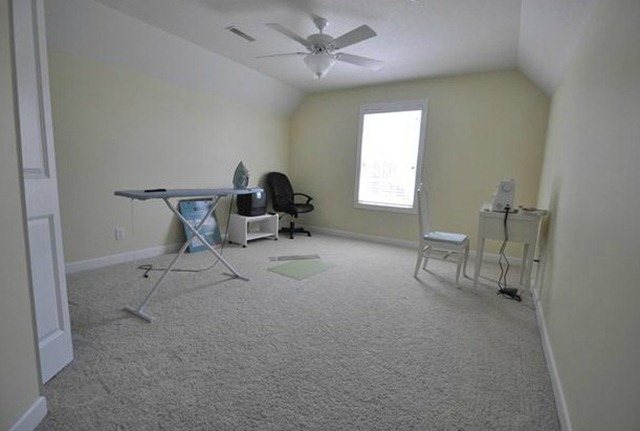
As you may recall, my craft room looked like this.

craft room before

My default “I don’t know what color to paint this room” used to be yellow. Yellow is a tricky color.  I didn’t do it well.

Now my default is grey.  I’m sure my future self will eventually cringe.  But gender neutral baby yellow?  Seriously, younger Michelle.  So sad.  Borderline tragic.

I painted the side walls March Wind by Sherwin Williams.  I painted the wall with the window Sherwin Williams standard white.  I have stenciling plans for that wall.  I just need to psych myself up to stencil again.

Sherwin Williams March Wind DIY Sewing Table

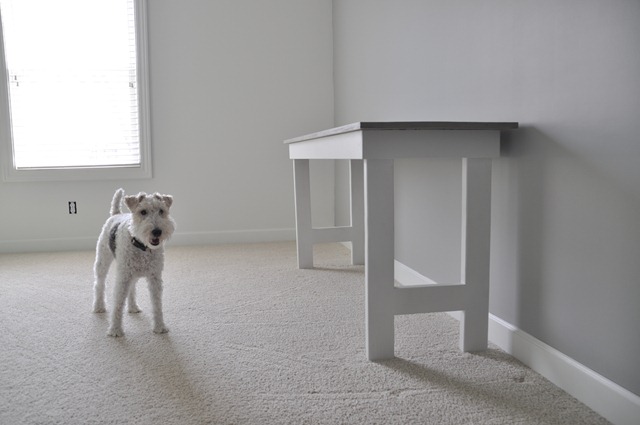
Ike is clearly pleased with the changes.

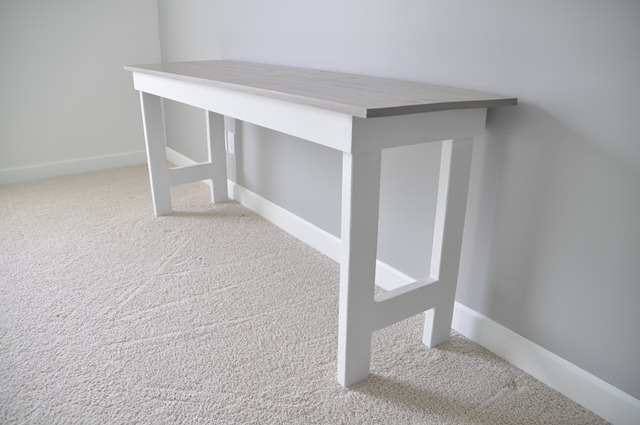
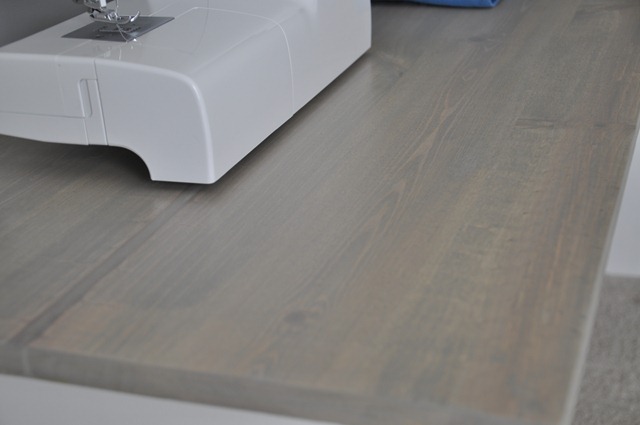
The legs/bottom of the table are painted a standard white from Sherwin Williams.  The top is stained with Rust-Oleum’s Sunbleached Ultimate Wood stain.  I never thought I’d be in love with a stain.  But I am.

DIY Sewing Table
Rust Oleum's Sunbleached Ultimate Wood Stain

I wanted the table to be long and narrow. The table is 6 feet long.  I like that I have enough room for my sewing machine and a place to cut fabric.  Kim (NewlyWoodwards) has been giving me sewing lessons.  Look out.  Things are getting serious.

Sewing Table 082

I’m now on the hunt for a set of chairs to go with this table.  I like this set from Target.  My cheap self can’t commit just yet.

Are you interested in a cute table of your own?  We’ll post the tutorial on Friday.  Nate tells me that it’s a fairly simple build.  It took us about 3-4 hours to complete (building/sanding/staining/painting).

Check back Wednesday for a pee your pants announcement.  Hint: I am not pregnant.

Do you sew?  What do you use for a table?  What’s your “I don’t know what color to paint this room” go to?  Any great chair suggestions?

DIY Scarf Hanger

Today I would like to share with you an $8.00/1 hour project that has improved our marriage.

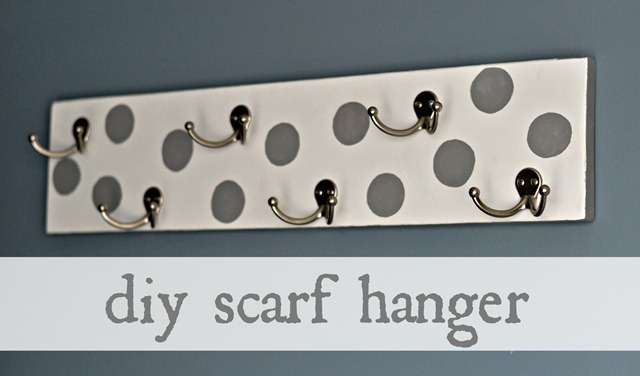
DIY Scarf Hanger from Decor & the Dog

Yes, a scarf hanger has improved our marriage drastically enough that I feel the need to tell the world about it.

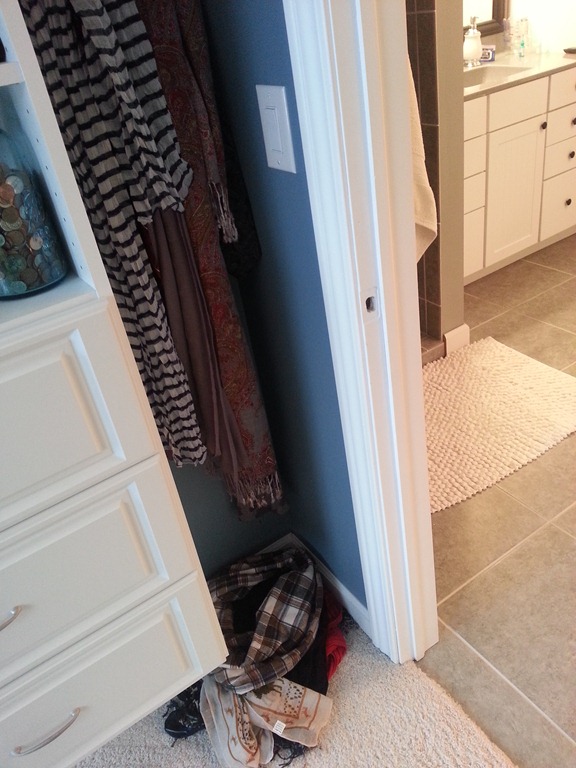
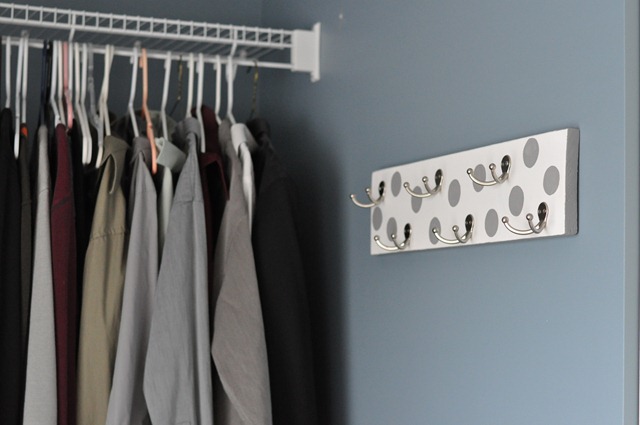
You see, I kind of took over a little area of our closet.  This area has hooks for belts and ties.  Or scarfs.  (I totally Googled the plural of “scarf”.  “Scarfs” and “Scarves” are acceptable.  The things you learn here at Decor and the Dog.)  Nate could no longer reach a belt or tie.  He’d get annoyed and throw my scarves (thought I’d use them both to see which one I liked better) on the floor.  I would be annoyed that my precious scarves were thrown on the floor.  Vicious cycle.

20130113_154505

How’d we make it?

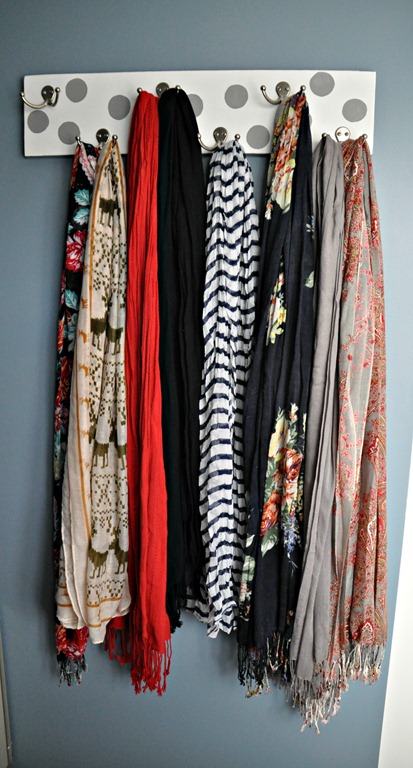
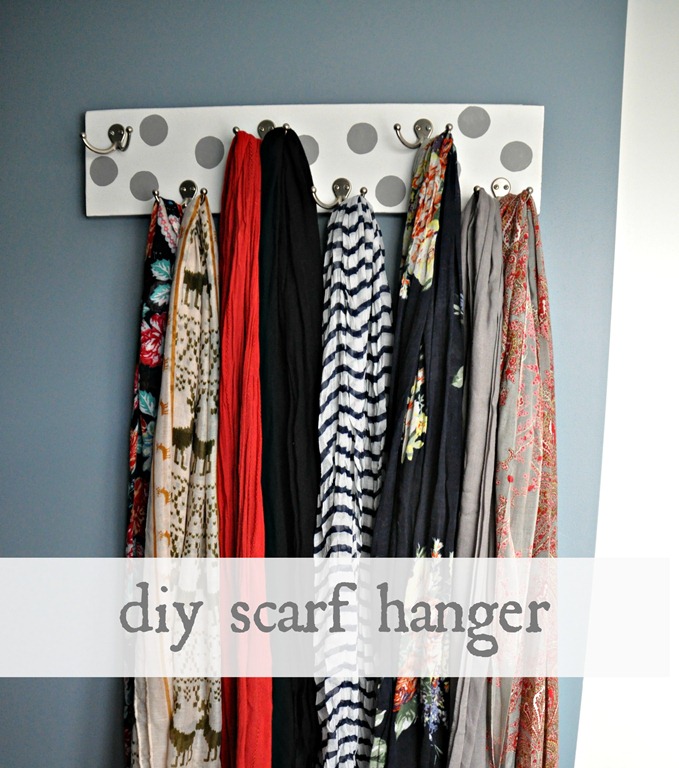
  • We purchased a 1x6.  Nate cut it down to 24” and sanded it nicely.
  • I painted it all pretty like (Polka dots are my new love).
  • We added 6 hooks purchased from Menard’s. 
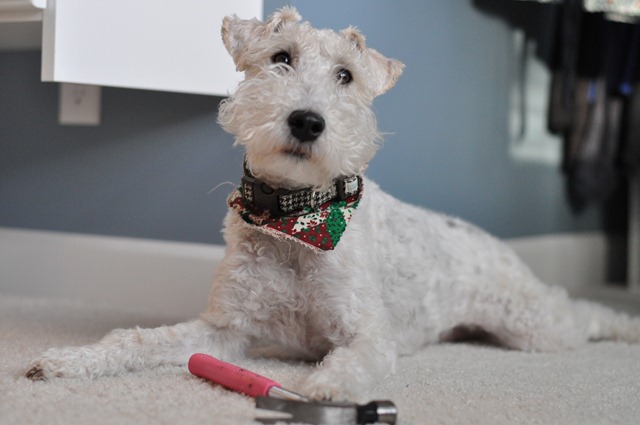
  • Ike kept an eye on the hammer.

137

  • Nate hung the scarf hanger on the wall with some screws and wall anchors.
  • All was right again in our closet…and lives.

105

diy scarf hanger by decor and the dog

diy scarf hanger

My scarves are happier.  I am happier.  Nate is happier.  Ike is always happy.  Life is good.  And I have still have room for more scarves. Yes!

Do your scarves need a new home?  Are you a scarf hoarder?  What inexpensive project has improved your love life?

DIY Console Table How-To

I’m back.  I needed a blog break. Have you ever had one of those times in life where everything that you touch breaks and you do awesome things like lock your keys in your car and flood your garage?  Yeah, that was my last couple of weeks.

I also finished reading 7: An Experimental Mutiny Against Excess and it messed with my mind. It made me want to start a vegetable garden (I don’t eat vegetables.), adopt babies from Africa (I’m not quite ready for babies.), and stop buying crap for my house (I like crap for my house.).  I told you, it messed with my mind.

And then I bought a new rug for the living room and all was right again with the world.

Now I’m back with the DIY Console Table how-to that you all have been so patiently waiting for.

How to build a console table tutorial, copper legs

Purchase List:

  • 3 four foot 1x10’s
    • Our console table top dimensions are 4 foot long and 10” wide
    • 2 eight foot copper grounding rods
      • We found ours in the electrical section (near the conduit) at Lowe’s
      • 1 1/4” wood screws
      • 2” wood screws
      • Wood glue
      • 1/2” wood bit
      • Drill
      • Stain
        • We used MinWax’s Red Mahagony
        • Poly
          • MinWax’s Satin Poly

Directions:

  • Select one of the 1x10s to be the bottom board.  Place wood glue on top of this board.
How to build a console table tutorial, copper legs
  • Place bottom board and middle board together and clamp together.
How to build a console table tutorial, copper legs
  • Screw the two boards together using 1 1/4" screws. Start screwing from the bottom of the bottom board.
  • Allow the boards to dry.
  • Determine how tall you would like your console table to be.  Our table is 28.5” from the floor to the bottom board.
  • To figure out the length and the angle of the legs, use saw horses and scrap pieces of wood to prop the boards up to the desired height.  Doing this will help you get the correct angle and length for the copper rod legs. 
How to build a console table tutorial, copper legs
  • Add caption
  • Place a mark 3" from the outside edge on each corner.
  • Put the rod straight up from the edge, then angle in to the 3” mark, placing a line on the rod parallel to the top of the top board
How to build a console table tutorial, copper legs

Add caption

  • While the rod is at the angle, take a spare 2x4 and place a line on it to match the angle of the rod.
How to build a console table tutorial, copper legs
  • Cut the copper rod using a hack saw.
How to build a console table tutorial, copper legs
  • Repeat for all 4 legs.
  • To make the holes for the legs, measure in 4" from the ends and 1.25" from the front and back
  • Using a 1/2" drill bit, drill a hole through the 2 boards using the angle marked on the scrap 2x4 earlier.  Clamps will help keep the 2x4 in place while drilling.
How to build a console table tutorial, copper legs
  • Place glue on the bottom side of the top board and set this on the top of the middle board and clamp together.  Screw the three boards together from the bottom board using 2" screws
  • Distress boards.  AKA beat the boards up with whatever random tools you can find.  We used hammers, crow bars, screws, etc.  You can’t mess this step up.  More is more when distressing.  Scratches, scrapes and dents are all wanted.
image
  • Stain and poly.  We used 1 coat of stain and 2 coats of poly.
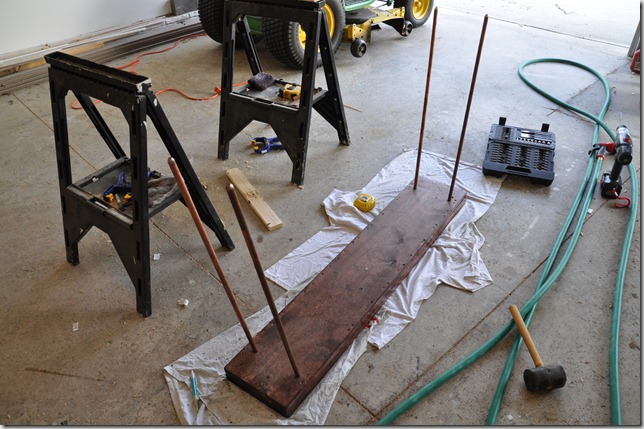
  • Cover the ground with something soft to protect the table. Place the table top on the ground with the holes up.  Pound the rods into the holes with a rubber mallet.  Do it classy like we did.  I really should learn to not put pictures like this up on the interweb. Or I could clean our garage.  Neither of which will probably happen.
How to build a console table tutorial, copper legs
  • The rods will take a little effort to pound into the table because the holes are intentionally smaller than the rods.  This tight fit will help keep the legs sturdy.  You may need to drill a little bit extra out of the holes to get the rods to fit.
  • Place the table on a level surface to check to see if the legs are all even.  We had to flip the table and adjust legs a couple of times to get the table level.  We found it best to find which leg is taller and pound that leg in more.
  • Set your table up and decorate it with your favorite thrifty finds!
How to build a console table tutorial, copper legs

Any questions?  Anyone else recovering from a life funk?  Have you read “7”?  Any good thrifty finds lately?

Photobucket Photobucket Photobucket Photobucket PhotobucketPhotobucketfollow us in feedly

DIY Console Table Reveal

Ooooo, it’s time for me to reveal our top secret project that I mentioned on Monday.  (Even though my SEO friendly title already ruined it).

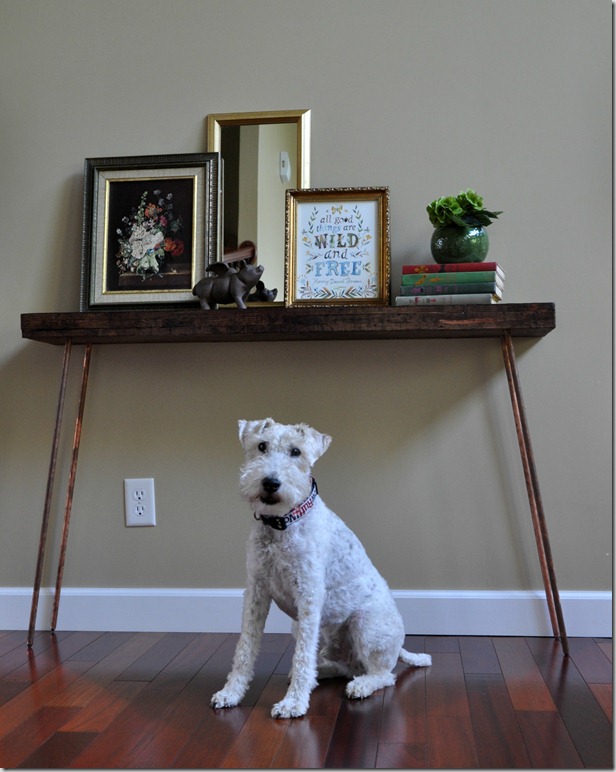
Today Ike and I would like to introduce you to our pretty new console table.

DIY Console Table
DIY Console Table
DIY Console Table

I’ll share the tutorial with you next week but we made the top out of 1x10’s that we beat with a hammer, crow bar, screw driver, etc to give it that reclaimed wood look. The legs are made from copper grounding rods.  Copper is a hip metal these days.  Hipsters.  The total cost was ~$40.

DIY Console Table
DIY Console Table

I was originally inspired by some hairpin leg tables that I had seen floating around.  I wasn’t a fan of the $300+ price tags.  I then looked into the hairpin legs which were still $20 a piece. Four $20 legs plus wood for the top equals too much dinero.  That’s when I conspired with my partner in crime and we saw the copper grounding rod while wandering Lowe’s.  It was a major experiment on our part because we weren’t even sure we could get something to like this to stand.  Somehow we did.  And we’re in love.  Both of us.  Nate is less into furniture PDA than I am.  But trust me, he’s in furniture love.

It’s like the table was made for this spot.  Oh wait, it was. Never mind.

DIY Console Table

Our farmhouse table now has a mini-friend.  (Don’t mind the tv in the mirror.  I do like how the owl appears to be waving though.  It’s the little things in life.)

DIY Console Table

Are you digging copper these days?  What about that brassy/old lady decorating scheme I have going on?  Is a console table on your DIY list?  Who’s excited for the tutorial? 

Photobucket Photobucket Photobucket Photobucket PhotobucketPhotobucketfollow us in feedly

Simple Bedframe Tutorial

On Monday, we shared with you the bedframe we recently built.

DIY Bed Frame Tutorial

We’re pretty ecstatic that we’ve slept on it for a week without falling through.  So ecstatic that we’re going to share with you how we built it!


purchaseDIY Bed Frame Tutorial
queentwin

We're also going to get fancy pants blogger on you.  SketchUps and real life photos.  Be prepared to be amazed.

Start by putting together the front and back of the frame using pocket hole screws.  Nate is a big fan of our $20 Kreg jig.


DIY Bed Frame Tutorial

DIY Bed Frame Tutorial


DIY Bed Frame Tutorial

DIY Bed Frame Tutorial

Attach the sides to the front and back sections with pocket hole screws.  Clamps help to position the boards correctly.

DIY Bed Frame Tutorial

DIY Bed Frame Tutorial

DIY Bed Frame Tutorial

DIY Bed Frame Tutorial

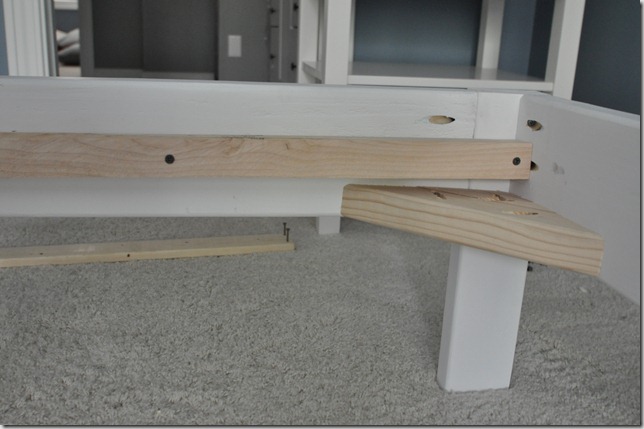
Attach the corner supports at the bottom of each 2x6, first in the front corner, then the opposite corner as this will help square the bed frame.

DIY Bed Frame Tutorial

DIY Bed Frame Tutorial

DIY Bed Frame Tutorial

Attach the side supports so the top of the board is 2" from the top.  Wood glue will help secure the board.

DIY Bed Frame Tutorial

DIY Bed Frame Tutorial

DIY Bed Frame Tutorial

Attach the center support leg to the center support in the middle of the board with a couple of pocket hold screws.  This is only recommended for a King size bed.  It wouldn’t hurt with a Queen.  The center support leg isn’t needed for a Twin.


DIY Bed Frame Tutorial

DIY Bed Frame Tutorial

Attach the center support in the middle of the front and back boards, so the bottom of the support lines up with the bottom of the 2x6.


DIY Bed Frame Tutorial

DIY Bed Frame Tutorial

Attach the first support slat at the top, flush with the top 2x6.  Then attach each slat 4" from the previous one.  You should end with the last slat against the bottom 2x6.


DIY Bed Frame Tutorial

DIY Bed Frame Tutorial

Check it out! You’ve built a bedframe.  Unfortunately, it’s not quite nap time.  Man, I love nap time.  I want to make nap time a requirement in the world.  I digress...


DIY Bed Frame Tutorial

DIY Bed Frame Tutorial

Inform the dog that the bed will not permanently reside in front of the window for his barking/viewing pleasure.
 

DIY Bed Frame Tutorial

Attach your bedframe to your headboard (may we recommend our DIY Window headboard).  We used a couple large screws and L-brackets to attach ours.

Use wood filler to close up any gaps in the joints. Sand.  Paint. (I did two coats prior to assembling and 1 coat after because Nate has disgusting, slimy hands.  I tried not to complain.  But seriously.)

Throw on your pretty comforter and enjoy your hard work!

DIY Bed Frame Tutorial


Any questions?  Who wants tips on how to con their husband into building them things?  Who wants a nap?  Yeah, me too...

Like our headboard?  Check out the tutorial here!  Be sure to check out more free furniture plans on our "Build It" page!  

Build Your Own Bed Frame. Learn how with these free plans!

Any questions?  Who wants tips on how to con their husband into building them things?  Who wants a nap?  Yeah, me too...

Linking up to: East Coast Creative

Photobucket Photobucket Photobucket PhotobucketPhotobucketPhotobucketfollow us in feedly

West Elm Inspired Bedframe

The following is an actual conversation from a Thursday night.

Michelle:  "Wanna build a bedframe this week-end?"

Nate: “Grumble. Grumble.”

Michelle: “Ike, Nate is being a Grouch-a-saurus-rex again today.  Guess we’ll have to continue to live with our ugly bed skirt.”

The next day I come home to SketchUp drawings of a bedframe on the computer.  I started jumping up and down.  Nate pretended to grumble while I knew deep down he was pumped for another furniture build.  We headed to Lowe’s where we spent ~$50.  One week-end later we had a simple and beautiful bedframe.

Bed Frame 045
Bed Frame 125_HDR

We think it pairs well with our DIY Window headboard.

Bed Frame 119
Bed Frame 079_HDR

It’s crazy how $50 worth of wood can class a place right up.

bedframe

I’m linking this baby on up to the ol’ Pinterest challenge tomorrow.  This beauty of a bedframe was inspired by a West Elm bedframe that no longer exists.  Luckily, my pin lives forever.

Source:

westelm.com

via

Michelle

on

Pinterest

We’ll be back on Wednesday with the how-to. We’ve slept on it for over a week and haven’t fallen through so we feel safe sharing how we built it.  Nate even got all fancy with SketchUP.  Deep down he likes being married to a blogger.

Are you a fellow bed skirt hater?  Whose spouse secretly likes being married to a blogger?