
DIY Living Room End Table Tutorial
/Do you know what makes the middle of the work week even more boring? A Decor and the Dog tutorial. But some people love these. People that are crazy like Nate.
Without further ado, here's the tutorial for the living room end table that I shared on Monday! Thanks to all of you that shared your thoughts. We're still torn on it but it's hanging around until a better model arrives. You know, similar to how Nate and Ike are keeping me around.

Material List
1-1/4-Inch Pocket Screws
Wood Glue
Paint (We used a random black from our basement stash.)
Minwax Satin Polycrylic Protective Finish
Rust-Oleum Ultimate Wood Stain, Weathered Gray
Cut List
1"x2"
20" (Bottom)
11 1/4" - 2 (Bottom)
24" - 4 (Legs)
1"x20"
24" - 2 (Shelf)

Drill 1 pocket hole screw at the ends of the 20" and 11 1/4" boards. On the 20" board, make a mark on the bottom side of the board at 9 1/4" on both sides of the board. Using wood glue and a pocket hole screw attach both of the 11 1/4" boards to the 20" board at the mark.


Attach the 24" 1x2's legs to the ends of each bottom boards with wood glue and a pocket hole screw. At this point we sanded all surfaces and painted black.

Drill pocket holes on the bottom of each shelf at 10" and 12" from each edge. Sand the shelves smooth. Stain/paint/poly the shelves.

Make a mark 5 3/4" from the top of each leg. Attach the bottom board with pocket hole screws in the holes drilled in the shelves (You can use wood glue, but it will most likely get all down the legs when putting the shelf in. Ours is holding great without it.). Do the same with the top shelf, making sure the shelf is level with the legs.


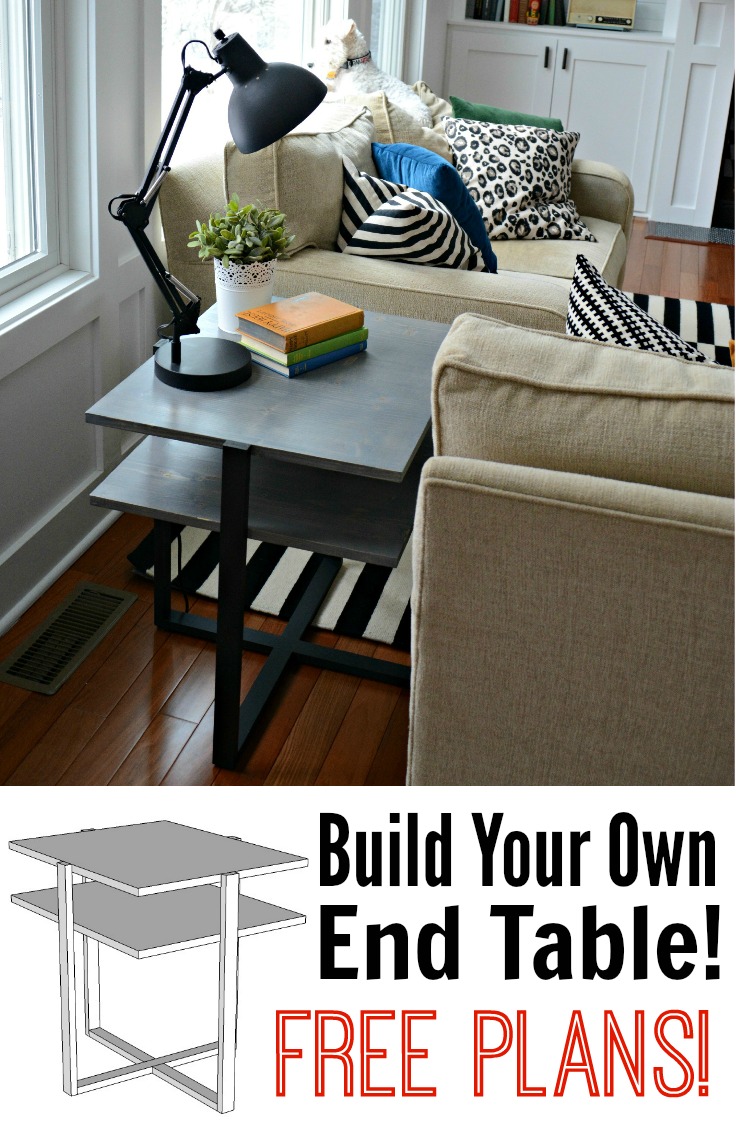
Overall, a quick and fairly simple build!


