
DIY Chalkboard Vase Tutorial
/One Sunday I was reading the Home and Garden section of our local newspaper. I usually learn about trends from two years ago that are just now catching on in Iowa. It's super informative. (Thank goodness for the interwebs.)
A few weeks ago I did see a vase that caught my eye. A wooden chalkboard vase. Why didn't I think of that? I found the product on uncommon goods for $40. I couldn't believe the price and knew I could make it for a lot less.

I had Nate construct the vase for me. He's my favorite.
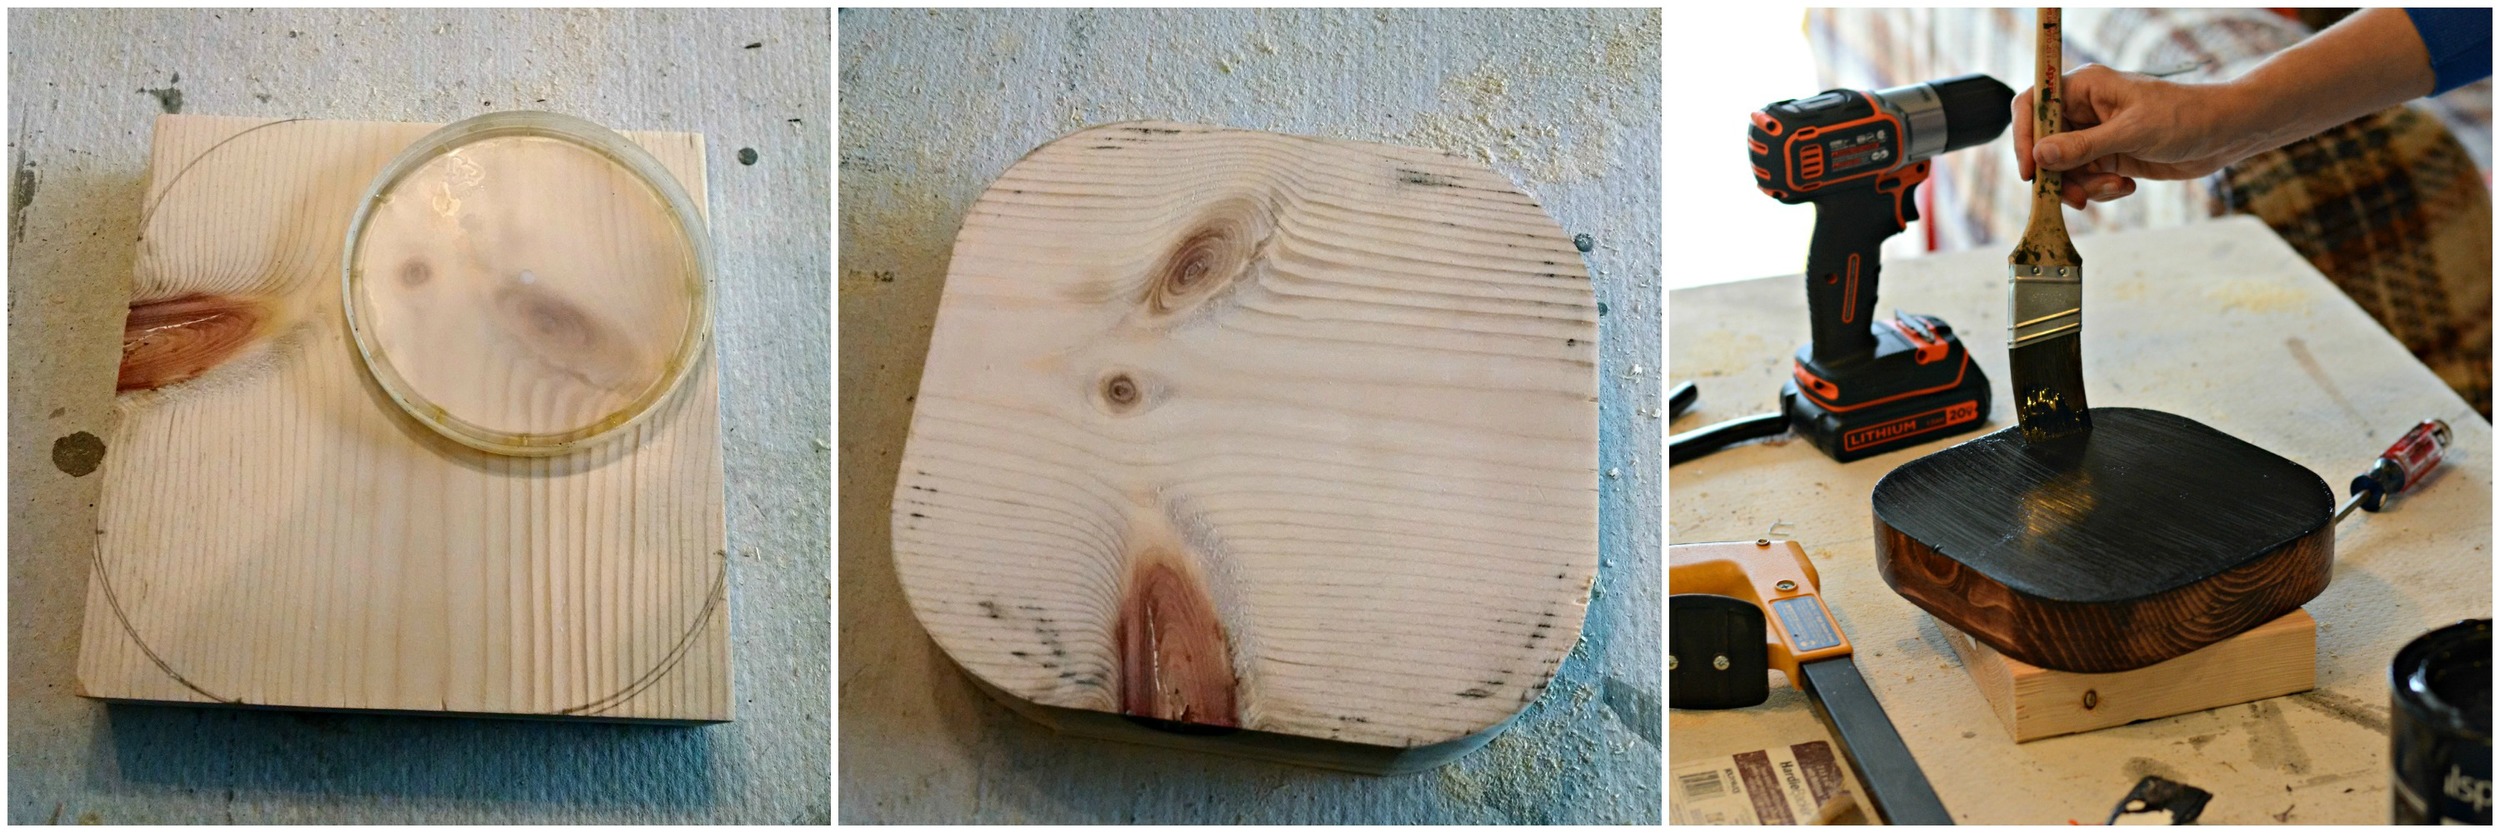
The easiest way to make this vase is to cut a 2x8 to a 7.5 inch square. (We didn't have one in the garage so Nate glued together two 1x8's.) Use a round cap to help determine the shape of the edges. Cut off the edges using a SKil saw. (You could also leave it square.) Sand smooth. Finish the sides to your liking. I stained the edges. I think paint would look cute as well. Apply 2-3 coats of chalkboard paint. (I tried Valspar's chalkboard paint for the first time and LOVED it. It goes on super smooth and wipes clean. New big fan.)
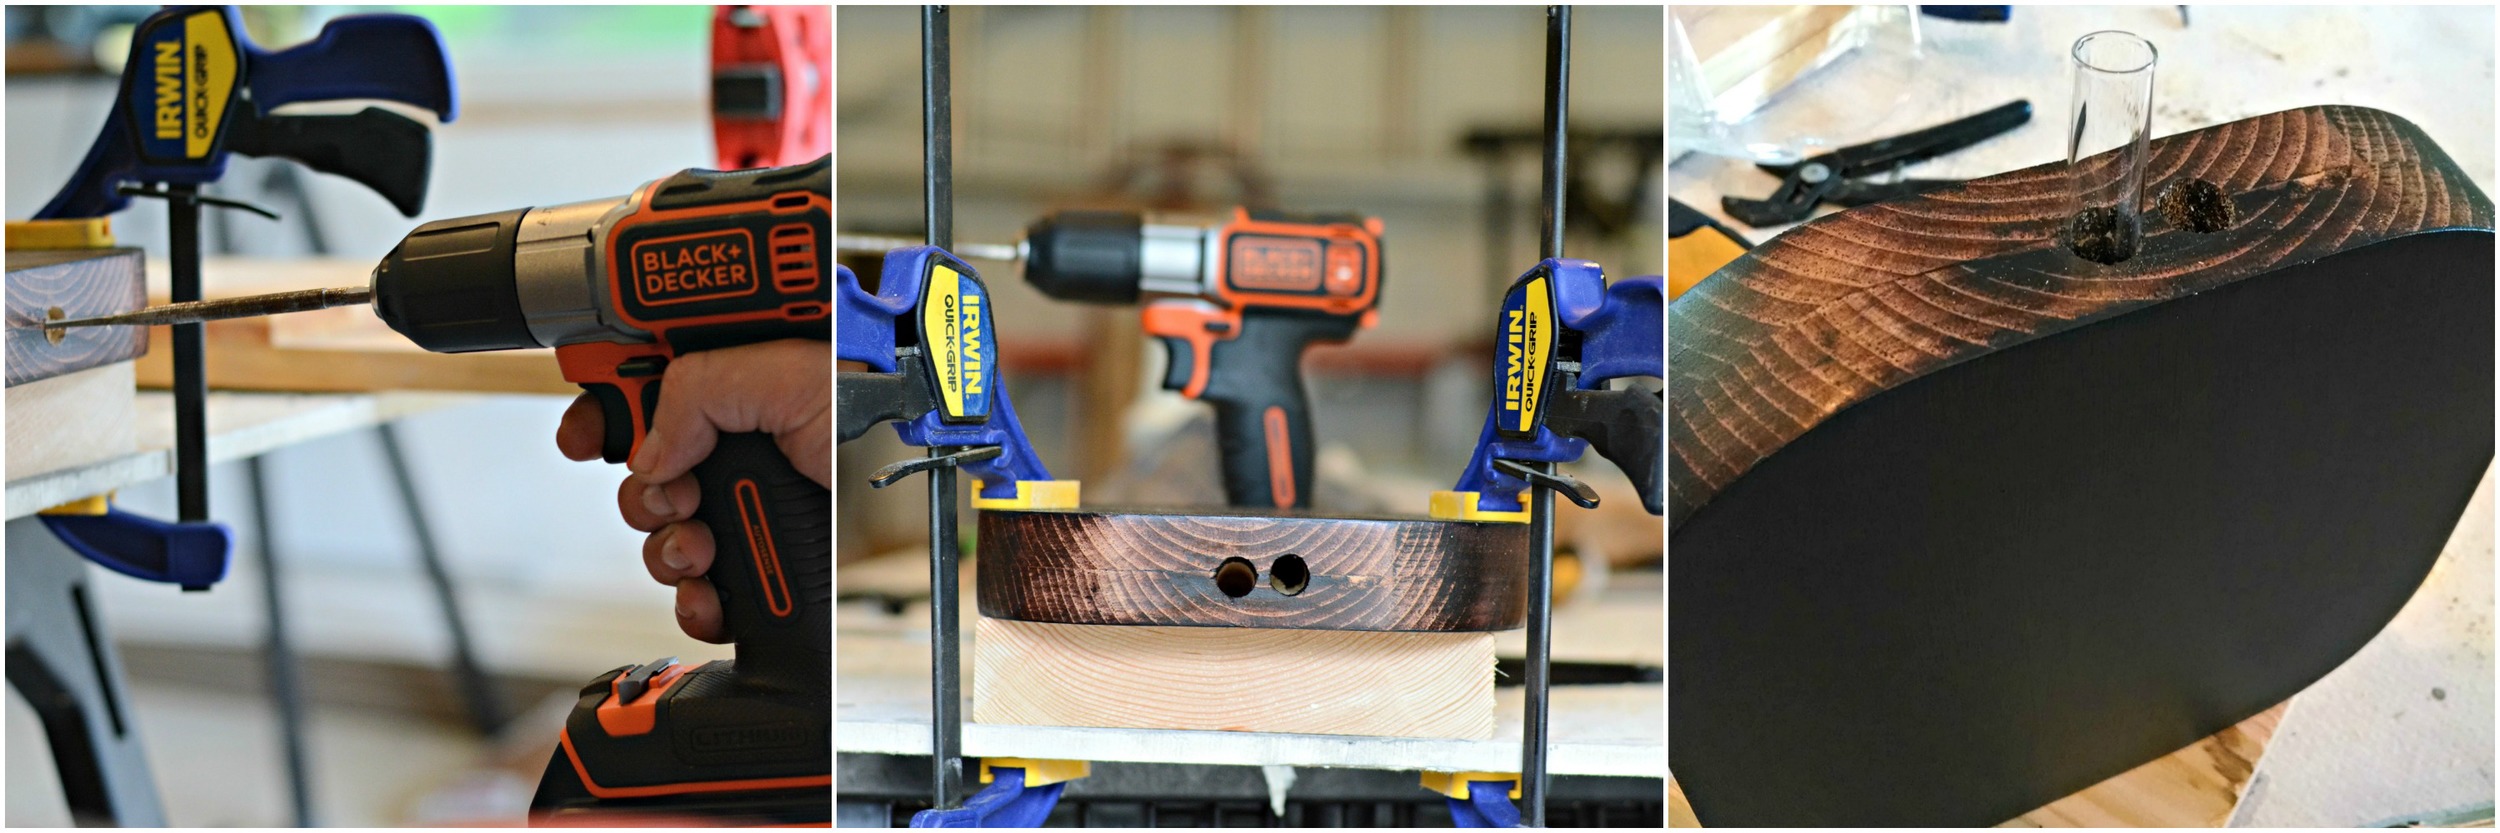
Drill two 1/2 inch holes in the top. We ordered some test tubes to use inside the wood vase.
Stick your flowers into the tubes and your vase is done!


I do recommend "priming" the vase by rubbing chalk all of over it and then wiping clean.

Doodle away!

I think they would make fun table centerpieces at a shower or wedding. It's a good thing my wedding was many years ago. You know, before I was full of crazy ideas.

I also think these vases would make a great gift. Birthday? Get well? A token of love from your dog?

I always love a cheap and easy DIY project! I think this guy is going to live in the kitchen. I hope I have lots of Summer blooms to keep it full!
***Don't forget to enter Monday's giveaway for the BLACK+DECKER drill. It totally came in handy for this project!***


