Decor and the Dog Photo: New Photos

Hey.  Remember our shop that we opened way back in November? Our shop that is doing surprisingly well.  (Thanks to all that have ordered photos!!  We super duper appreciate your support. Seriously.)

We finally got around to putting up a new bundle of photos for the start of the new year.  Well, sort of the start of the year.  Let’s go with the start of tax season.  Not much reason to celebrate but we’re going with it.  See ya in April dear husband of mine…

Nate picked out five more of his favorite photos.  Like the first bundle, they are farm themed.  We’re from Iowa.  What can we say?

Bundle 2 Collagepost

We are now offering the option to purchase prints in addition to the digital files.  We know that sometimes it’s just easier to get a print in the mail than have to deal with the hassle of ordering/picking up/etc.  We are here for you.

Head on over to Decor and the Dog Photo for additional details and to purchase a Decor and the Dog masterpiece for your home!

Which photo is your favorite this month?  Any photo theme requests?  Big week-end plans?

Homemade Soft Pretzels

Nate and I have a new addiction.  Homemade pretzels. 

I had no clue you could make pretzels at home.  The things you learn in the ripe old age of 30. 

I also learned how to use the broil feature on our oven for the first time last week.  I blame 8 years of college for making me miss out on learning these amazing life features.

Our recent reader survey also said that recipes were your least favorite posts.  I give my readers what they want post what I want.

Homemade Pretzels by Decor and the Dog

These pretzels are so good that you are going to be begging for recipes from me.  Seriously.

Homemade Soft Pretzels

Recipe adapted from Alton Brown. (Side note: I fell asleep to Alton Brown for about 2 years straight.  Nate had a slight addiction to ol’ Alton.  Man knows his pretzels.)

Yields: 8 pretzels.  (We use half of the dough for the two of us.)

Ingredients

  • 1 1/2 cups warm (110 to 115 degrees F) water
  • 1 tablespoon sugar
  • 2 teaspoons kosher salt
  • 1 package active dry yeast
  • 4 1/2 cups all-purpose flour
  • 2 ounces unsalted butter, melted
  • 10 cups water
  • 2/3 cup baking soda
  • Butter (melted) for brushing (~1-2 tablespoons)
  • Optional: Kosher salt for cheese dipping pretzels or cinnamon/sugar for sweet pretzels.

Combine the water, sugar and kosher salt in the bowl of a stand mixer and sprinkle the yeast on top. Allow to sit for 5 minutes or until the mixture begins to foam. Mmm, foam.

Add the flour and butter and, using the dough hook attachment, mix on low speed until well combined. Change to medium speed and knead until the dough is smooth and pulls away from the side of the bowl, approximately 3 to 5 minutes. Remove the dough from the bowl and place into greased bowl.  Cover with plastic wrap. 

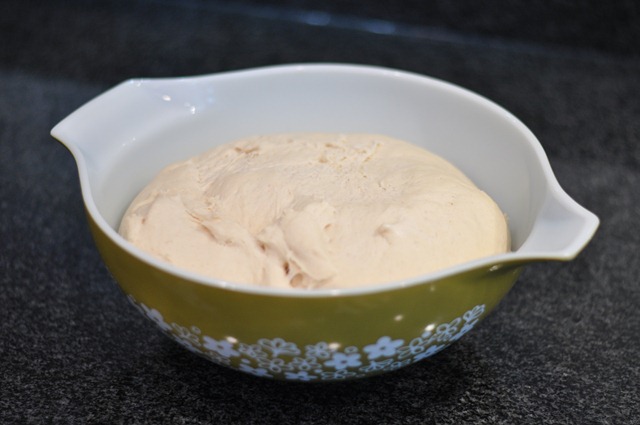
Sit in a warm place for approximately 50 to 55 minutes or until the dough has doubled in size.  We turn on our fireplace and shut the office door.  Instant sauna.  I suggest napping during this step.  Mmm, napping.
002

Preheat the oven to 425 degrees F. (I bold this step because I always forget it.)

Bring the 10 cups of water and the baking soda to a rolling boil in an 8-quart saucepan or roasting pan.

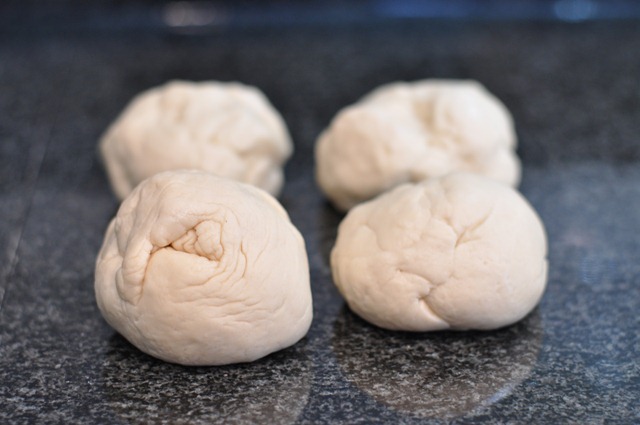
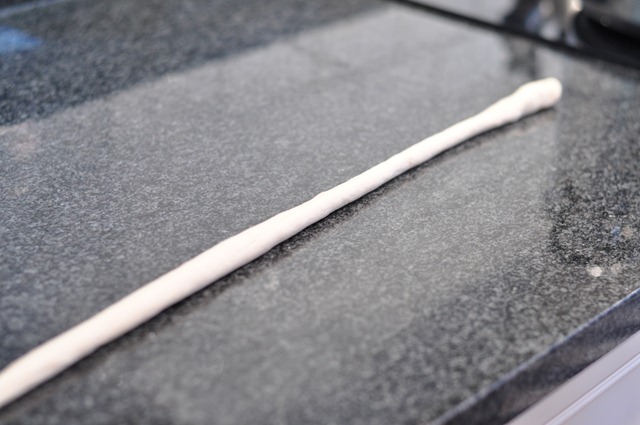
In the meantime, divide the dough into 8 equal pieces. Roll out each piece of dough into a 24-inch rope.
009

010

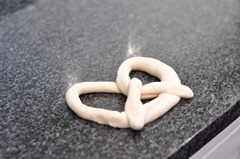
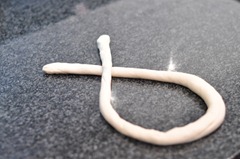
To make the traditional pretzel shape: Make a U-shape with the rope, holding the ends of the rope, cross them over each other and press onto the bottom of the U in order to form the shape of a pretzel.

013014

015016

To make the pretzel bites: Slice the rope into ~1 inch pieces.

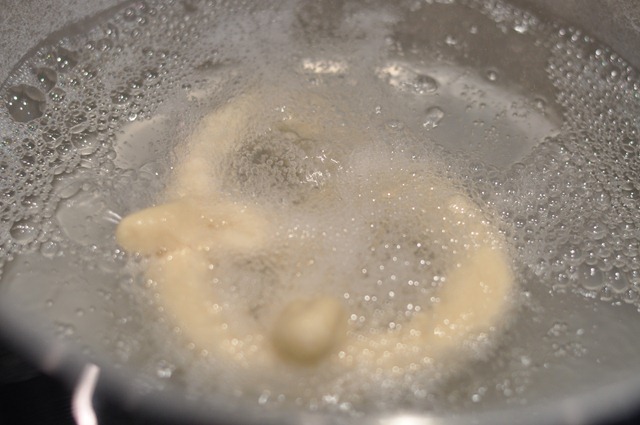
Place the pretzels into the boiling water, 1 by 1, for 30 seconds.
012

Remove them from the water using a large flat spatula. Drain the best you can.  Place on a baking sheet.

To make pretzels for cheese dipping:  Brush the top of each pretzel with the melted butter and sprinkle with Kosher salt. Bake until dark golden brown in color, approximately 10 – 12 minutes. Brush with remaining melted butter before serving. Serve warm.

Cheese sauce recipe:

  • 2 tbsp unsalted butter
  • 2 tbsp all-purpose flour
  • 1 cup milk
  • 8 oz extra sharp cheddar cheese, shredded (Shred your own for better taste/consistency!)
  • Kosher salt
  1. In a small saucepan set over medium heat, melt the butter.  Whisk in the flour and cook for 30 seconds, whisking constantly.
  2. Slowly whisk in the milk until no lumps of flour remain.  Stirring constantly, bring the milk to a simmer over medium-low heat until it thickens, about 3-5 minutes.  Remove the pan from the stove and stir in the shredded cheese until all of the cheese has melted. 

To make pretzels for cinnamon/sugar:  Brush the top of each pretzel with the melted butter. Bake until dark golden brown in color, approximately 10 – 12 minutes. Dip into melted butter and then into cinnamon/sugar mixture.  Serve warm.

037

Enjoy!  We found that the pretzels weren’t very good later in the day so enjoy them quickly!

Homemade Pretzels by Decor and the Dog

Are you a pretzel fan?  Did you know you could make them at home or did you think they were only a mall specialty?  Did you know you could bake brownies without a box mix?  Yeah, learned that one recently too.  Life’s miracles.

Tidy Kitchen Tips

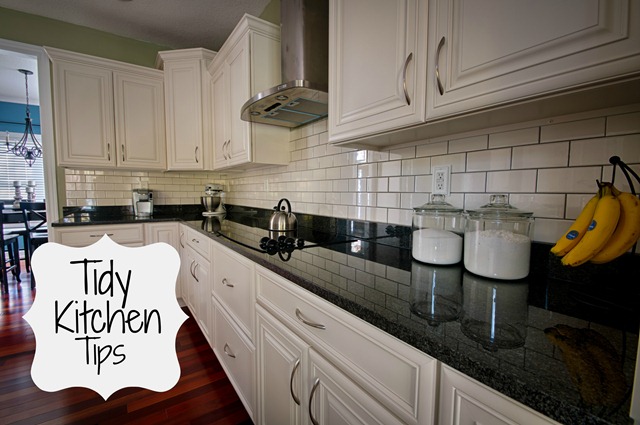
Tidy Kitchen Tips from Decor and the Dog

I often get asked a series of multiple questions about our kitchen.

  • Your kitchen is so clean.  How do you do it?
  • Does your kitchen always look like this?
  • Do you all cook? Because your kitchen is way too clean.

The answers are as follows.

  • Yes.  Read below.
  • Mostly.  Except when we’re cooking.  We are horribly messy cooks.  Seriously.  Awful.
  • We do cook. I would love to eat out all of the time but then we’d be poor and unhealthy.  And that would make me sad. We generally only eat out once a week (sometimes twice).  Breakfast is eaten at home.  Lunches are packed.  All but one or two suppers are prepared in our kitchen.

Today I’m going to share with you my secrets.  They don’t require multiple expensive storage containers.  They aren’t super time consuming. They aren’t rocket science.  I swear.  Pinky swear. 

Tip #1:

Have a place for everything. At the end of each day, put everything back in it’s place. If you don’t have a place for something, get rid of it!

  • It’s simple.  Everything in your kitchen must have a home.  If it doesn’t, do you need it?  If it does, find it’s permanent home. 
  • Do you only use that turkey platter and gravy boat one time a year?  Maybe store it in your storage area (basement, closet, etc).  Who wants to fight with the turkey platter every time you try to grab a dinner plate?  Not this girl.
  • How many pans do you really cook with?  Do you need 15 bread pans? (I’m talking to you, Mom.)
  • I also realize that I have a lot of kitchen storage.  Our last house had a smaller kitchen and it was equally as tidy.  I just stored more things in our basement/owned less kitchen items.
  • (I shared this tip over at View Along the Way last week.  Be sure to check out other great organizing tips there!)
084
083

Tip #2:

Don’t go to bed with dirty dishes/counters/appliances.

  • This is one that I picked up from my mom.  I don’t ever remember waking up to dirty dishes and it’s something that has always stuck with me. 
  • I spend 10-15 minutes every night washing up the dishes from the day, putting things back where they belong, and wiping off the counters.  10-15 minutes. That’s it.
    • Most nights I just use a wash rag to wipe the counters.  About once or twice a week I use Method’s granite cleaner to clean the counters.
    • I use Rubbermaid’s Stainless Steel cleaner on the appliances once a week.
    • I wipe down the cabinet faces about every other week or when visibly dirty.
    • I clean the stovetop when visibly dirty.
Backsplash-3

Tip #3

Be neurotic/borderline being diagnosed with OCD.

  • That should probably be tip #1.  And it probably explains most of our kitchen.  But keep reading for more helpful tips.

Tip #4.

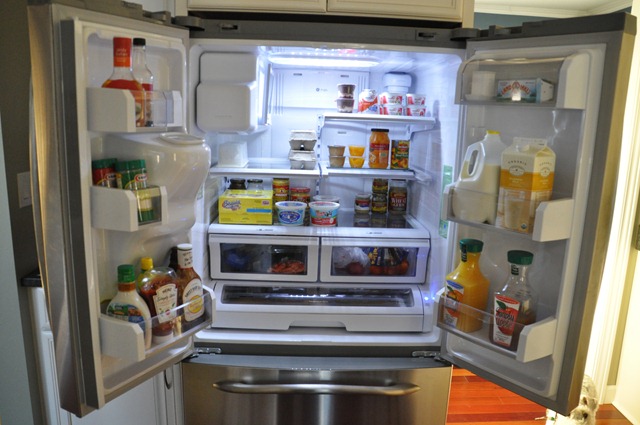
Clean out your fridge often.

  • It sounds simple but even I can be known to find a melted kiwi in the fruit drawer from time to time.  Keep like items grouped together.  Healthy stuff up front, of course.  I also place leftovers up front so I don’t forget about them.
  • Throw away leftovers after 3-4 days.  Again, sounds simple but do you do it?
  • I have also found that meal planning cuts down on fridge waste.  Leftovers are planned to be eaten.  We only purchase what we need for meals.  Nothing more.
  • I wipe the fridge shelves down every 3 months or when visibly dirty.
070

Tip #4:

Use those pantry doors as a kitchen command center.  Don’t have a pantry?  Use the back of a cabinet door.

062
  • Our pantry houses a list of items in the freezer, our weekly grocery list, and a spot to record leftovers so they don’t get lost in the fridge/freezer.
    • Having lists will seriously make your life easier.  It’s takes a little set up time but maintenance is easy.
    • You will notice that my pantry is organized yet not super duper pretty.  It doesn’t have a hundred pretty glass containers, chalkboard labels, or any of those other dream blogger pantry necessities. I don’t know about you but I don’t really care to spend $5 on 100 containers to store all of my pantry staples.  I also don’t want to spend an hour each week dumping cereal, noodles, etc into containers.  I have Downton Abbey to watch.  I don’t need chalkboard labels to tell me where my cereal or canned goods are located.  Got it covered.  I do have some random baskets that I picked up from the Salvation Army that corral things like baking supplies.
    • Again, meal planning has also helped us reduce the amount of items/waste in the pantry.

Tip #5:

Keep your utensils in one location and within easy reach.

095
  • We are nothing on the counter type of people so our utensils go in a drawer right next to the stove.  A utensil caddy is perfectly acceptable in my book as long as it’s not overflowing.
  • We group all of our utensils with their similar friends.  Spoons together, spatulas together, measuring spoons together, etc.  This makes cooking very easy.  Again, a place for everything and everything in its place.

Tip #6:

Organize your spice cupboard.  It will change your world.

spicecupboard
  • Our spices are stored on cheapo Wal-Mart spice racks.  They are alphabetized because I’m neurotic like to be able to find spices quickly.
    • Again meal planning comes into play.  I can easily glance through the racks to see if we need to purchase any spices for the upcoming week’s meals.
    • We have kept this spice cupboard like this for almost a year so the system works.  And it works well.

Follow these helpful tips and you too will have a tidy kitchen. *Cue infomercial music*

Backsplash-4

Are you a person with a tidy kitchen or are you a “Why bother. It’s just going to get dirty again” person?”  What’s your #1 tidy kitchen tip?

Like this post? Check out our meal planning tips here!