How to Build a Vertical Planter {The Home Depot DIY Workshop}
/*Today's post is brought to you by The Home Depot*
Last week I mentioned that we were teaming up with The Home Depot to co-host a few workshops in 2015. Our first workshop is this coming Saturday and we will be building a vertical planter. (Sign up for the free workshop at your local The Home Depot right here!)
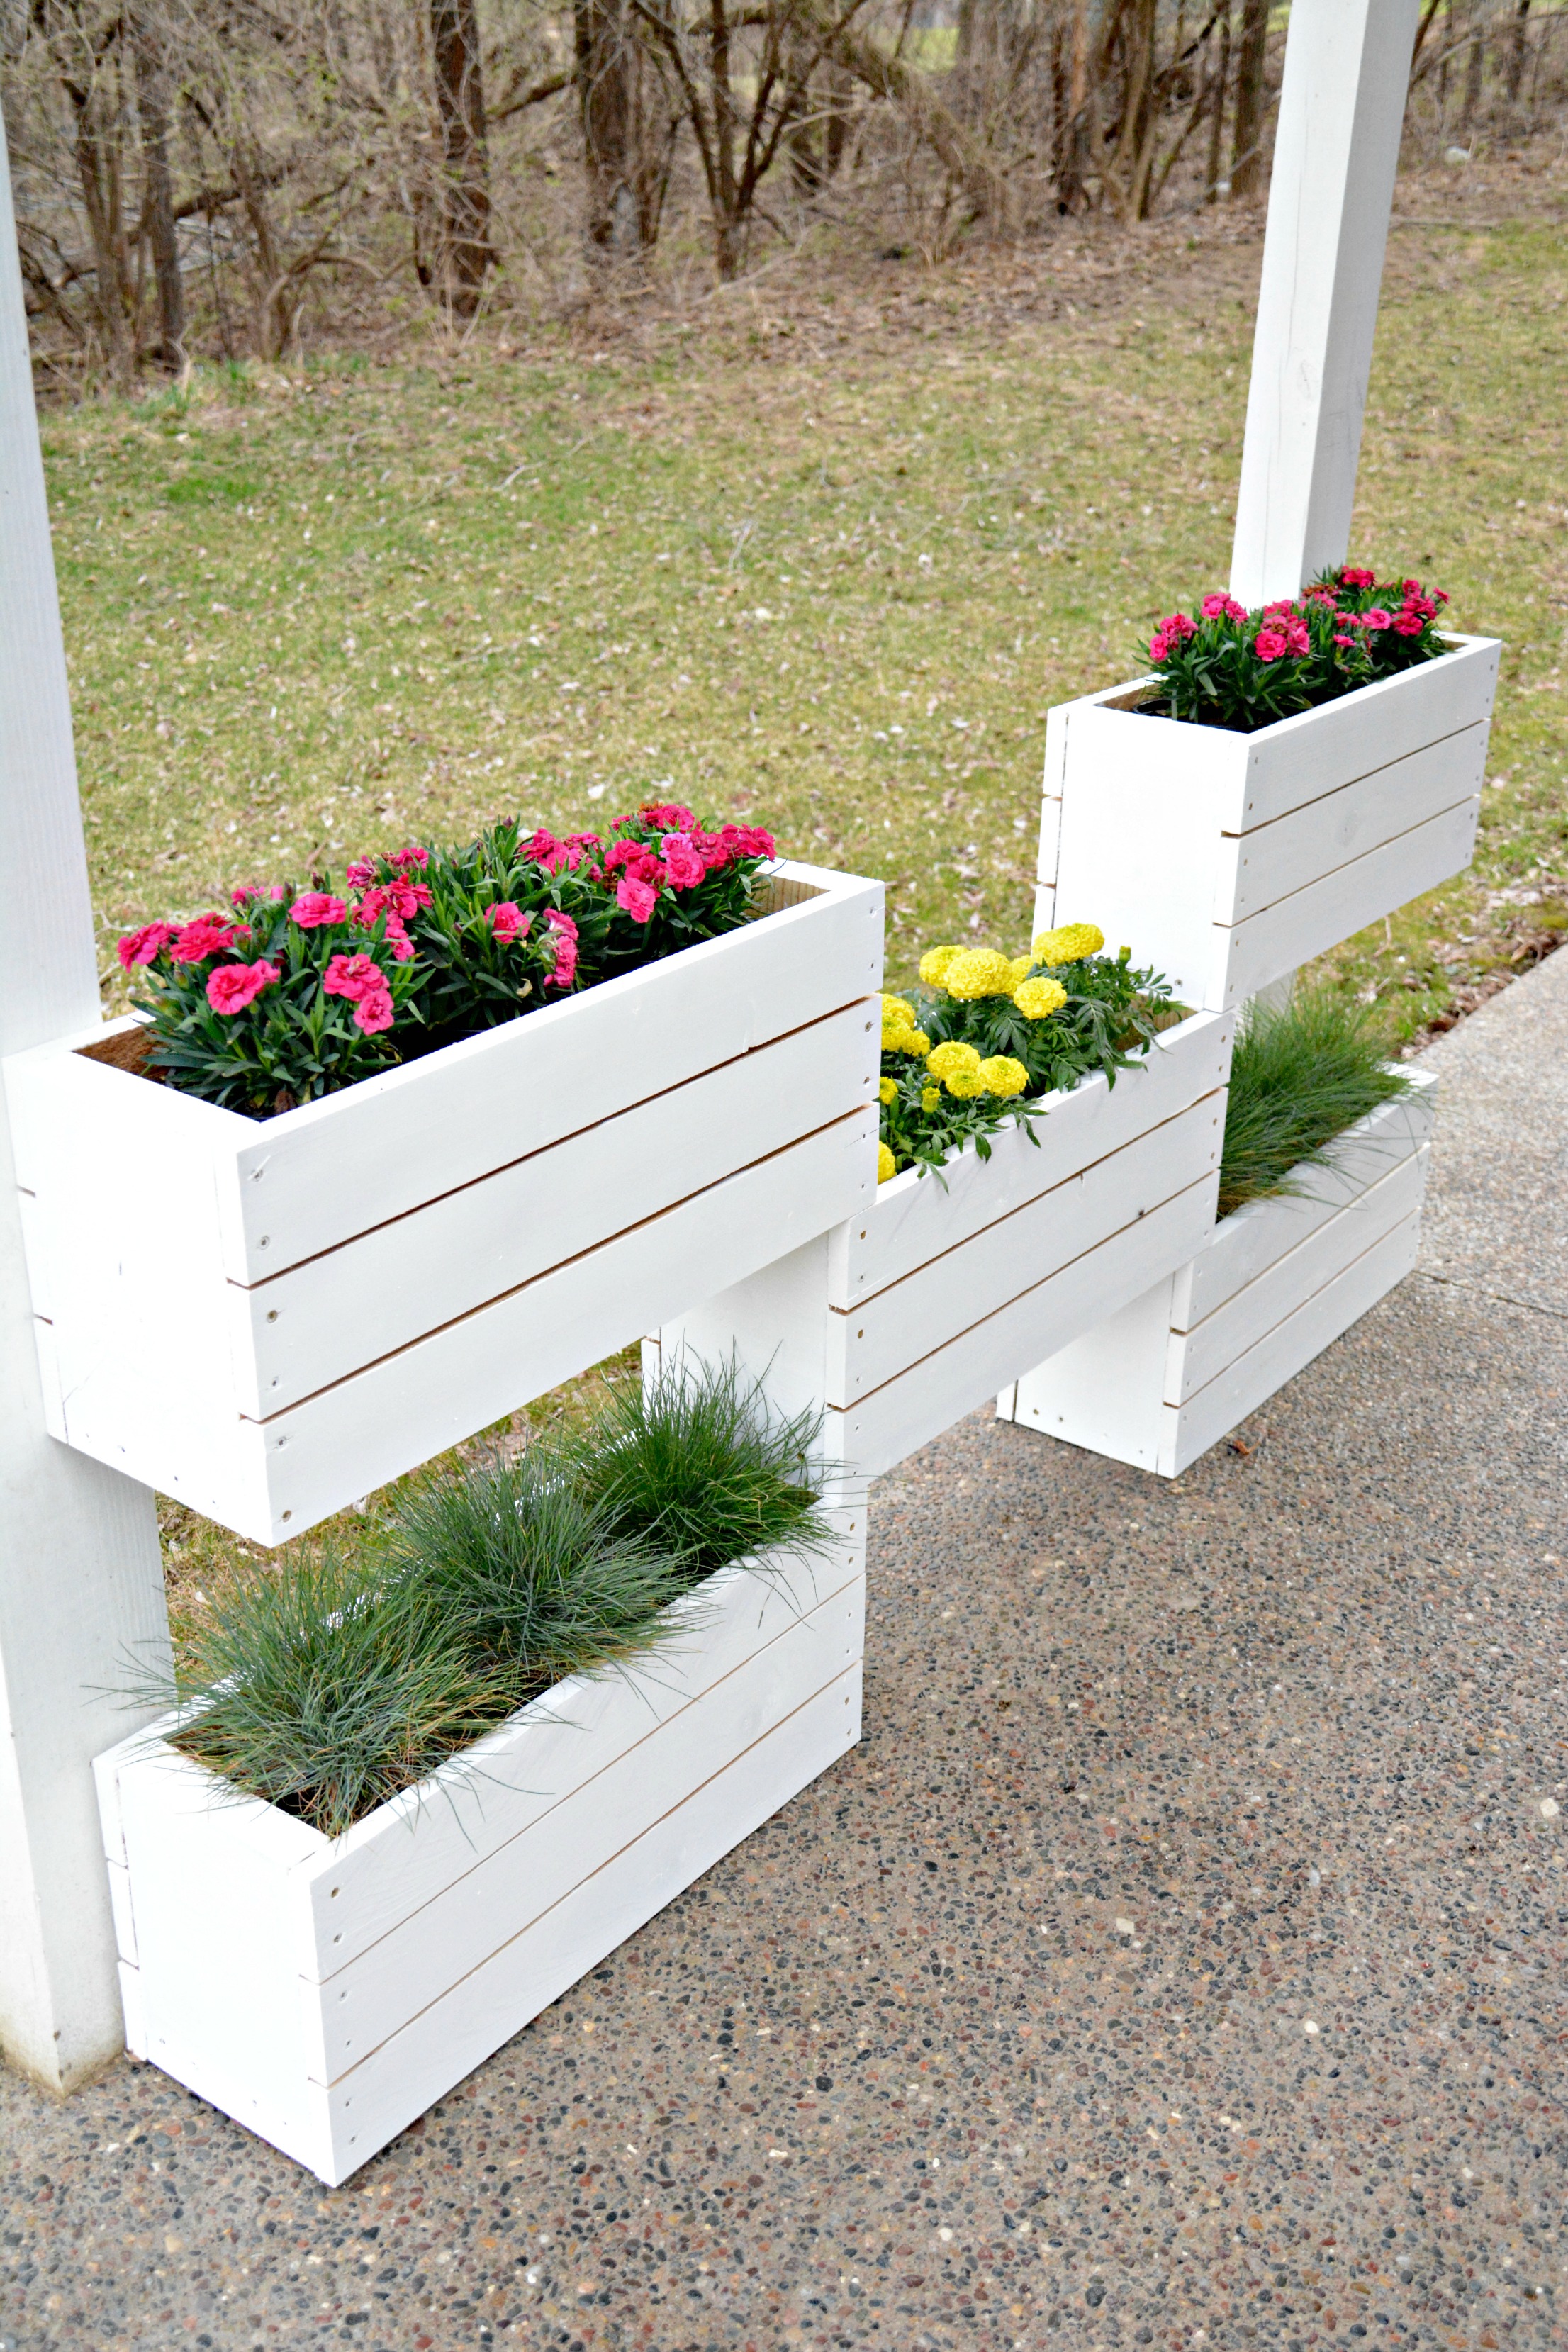
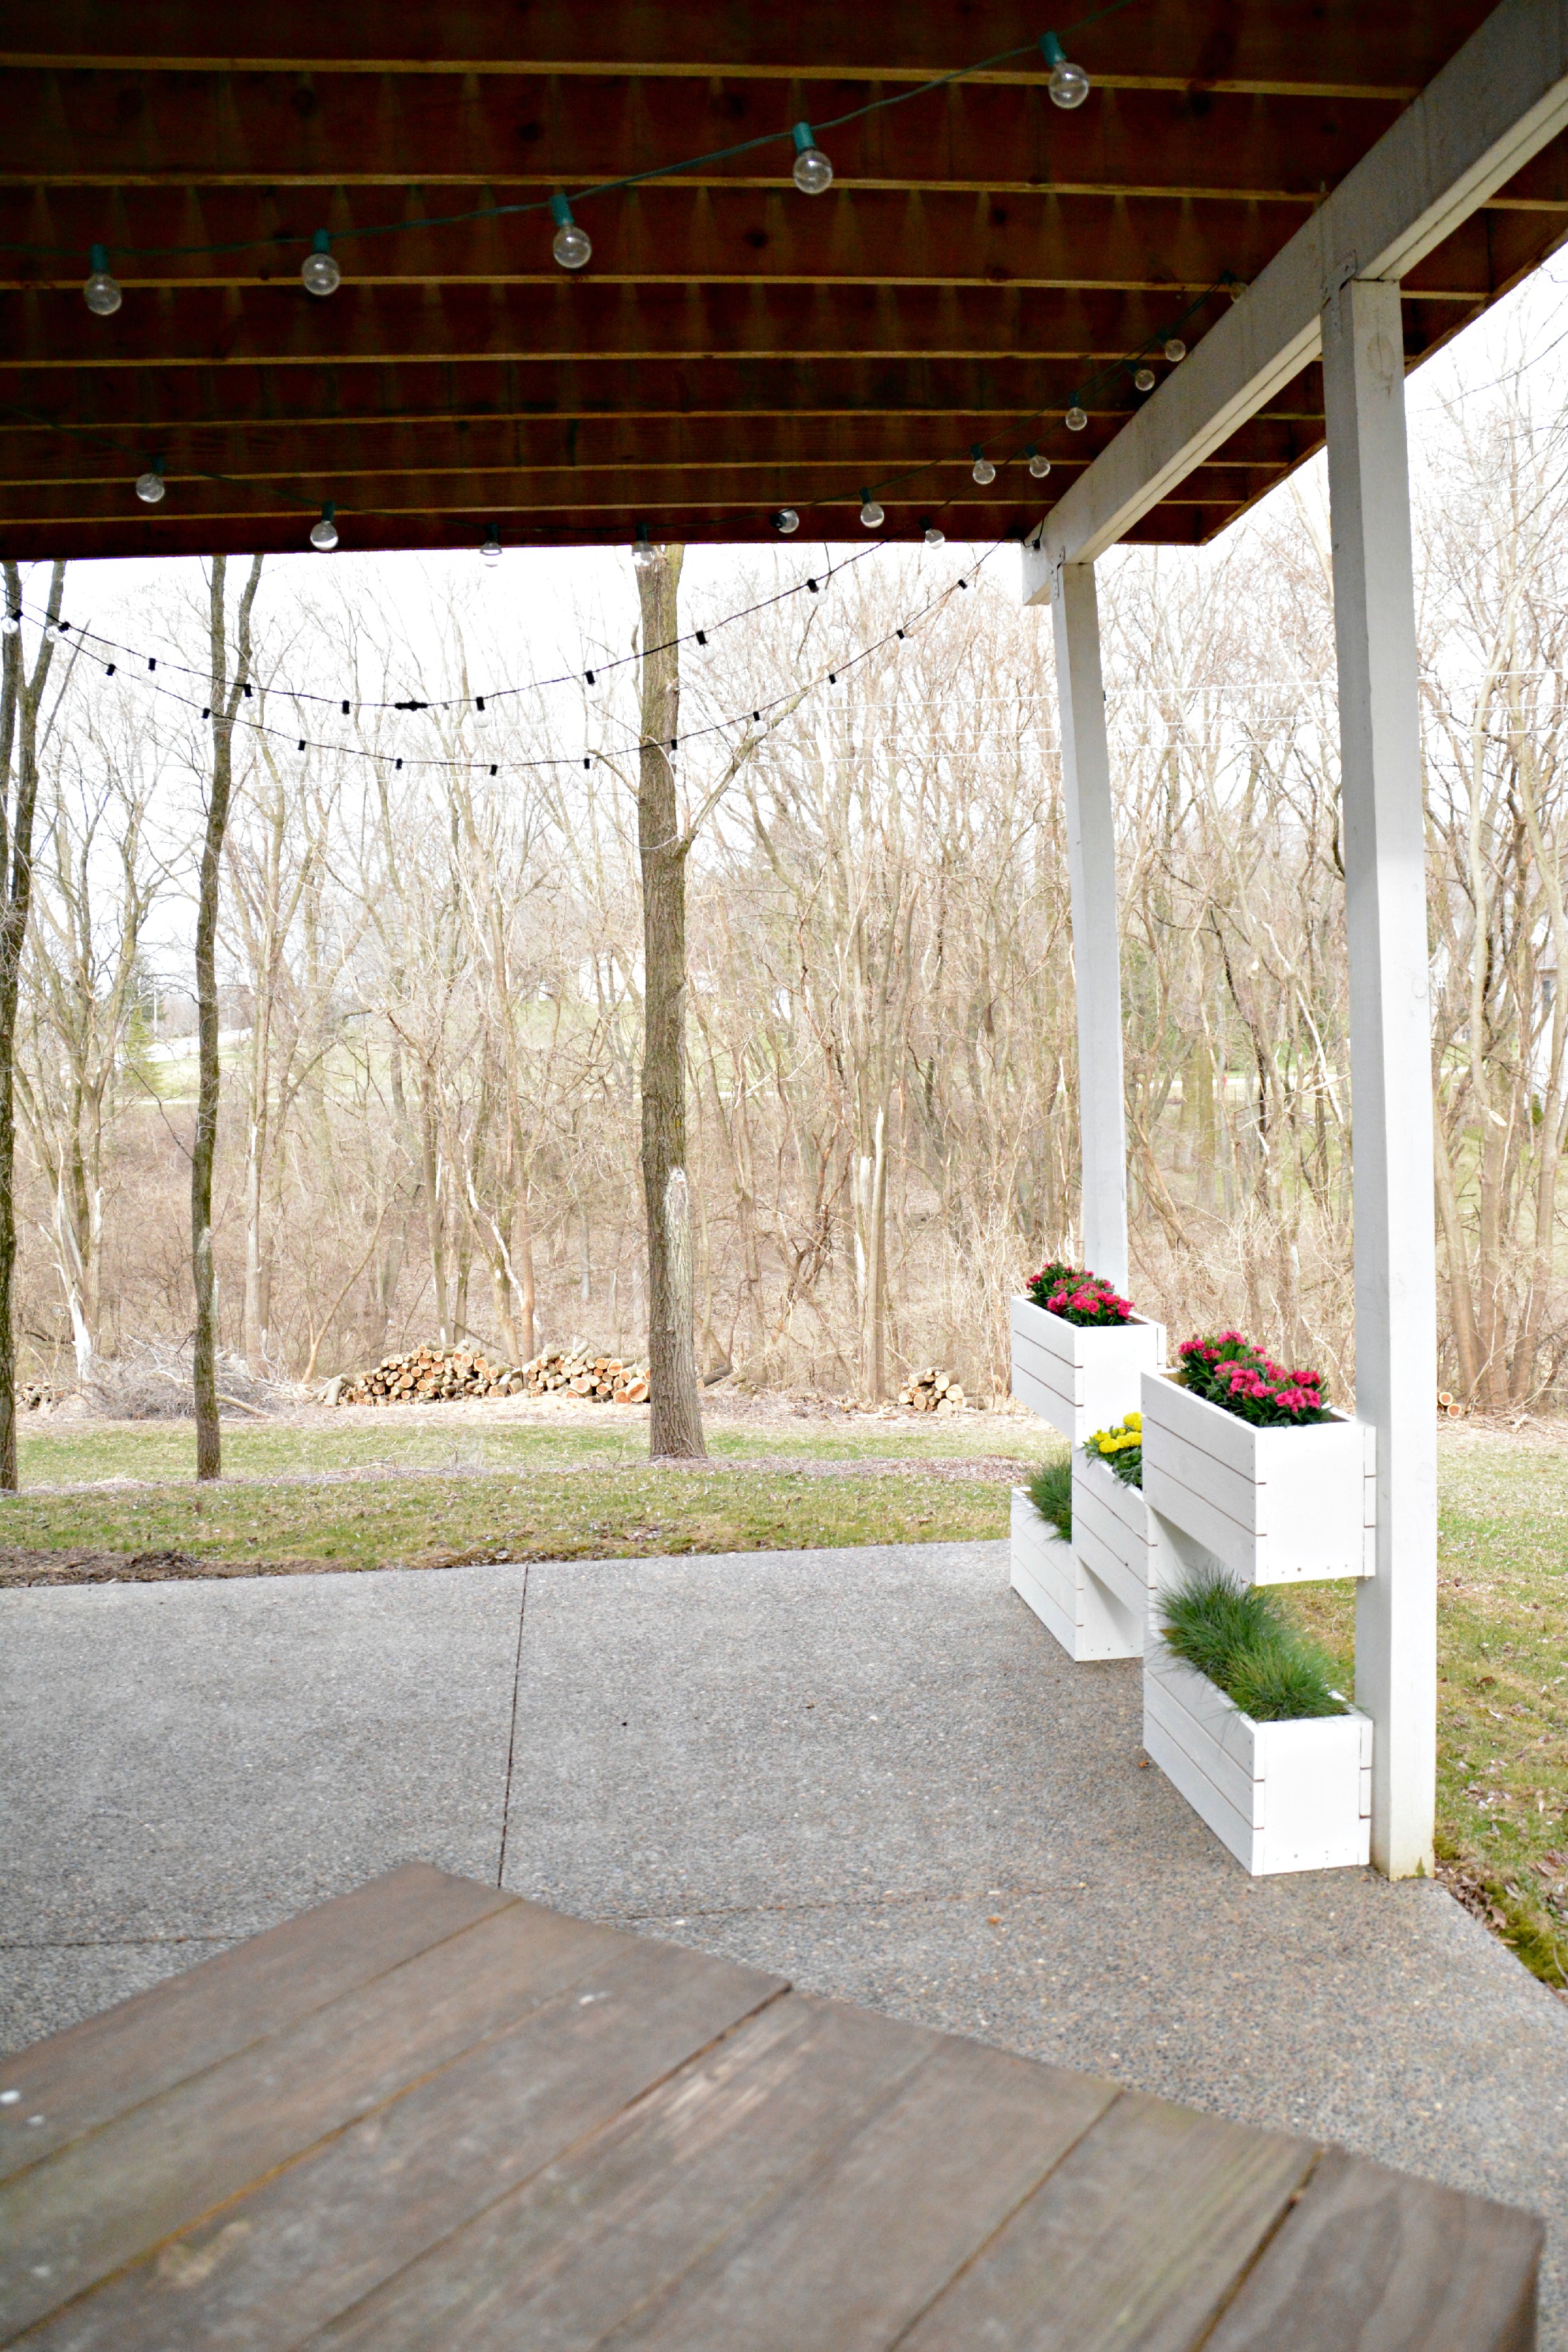
To prepare for the workshop we needed to construct a vertical planter of our own. The inspiration project was built next to a fence. We aren't allowed fences in our neighborhood so we needed to get creative. We decided on this vertical plant wall on our back patio.

We love how it adds a little bit of life to our bland patio area!
Want to make your own? Join us on Saturday at The Home Depot in Bettendorf, IA where we'll be sharing our tips and tricks! Get. Excited.

Today I'm sharing our customized plans for our variation on the project. Nate and I actually enjoyed working on this project together. This project was great for us because it didn't have to be too precise and it whipped up quickly. Nate even said I was helpful on this project. He usually says it only takes twice as long with my help. But not this time. I was using the drill like a pro.
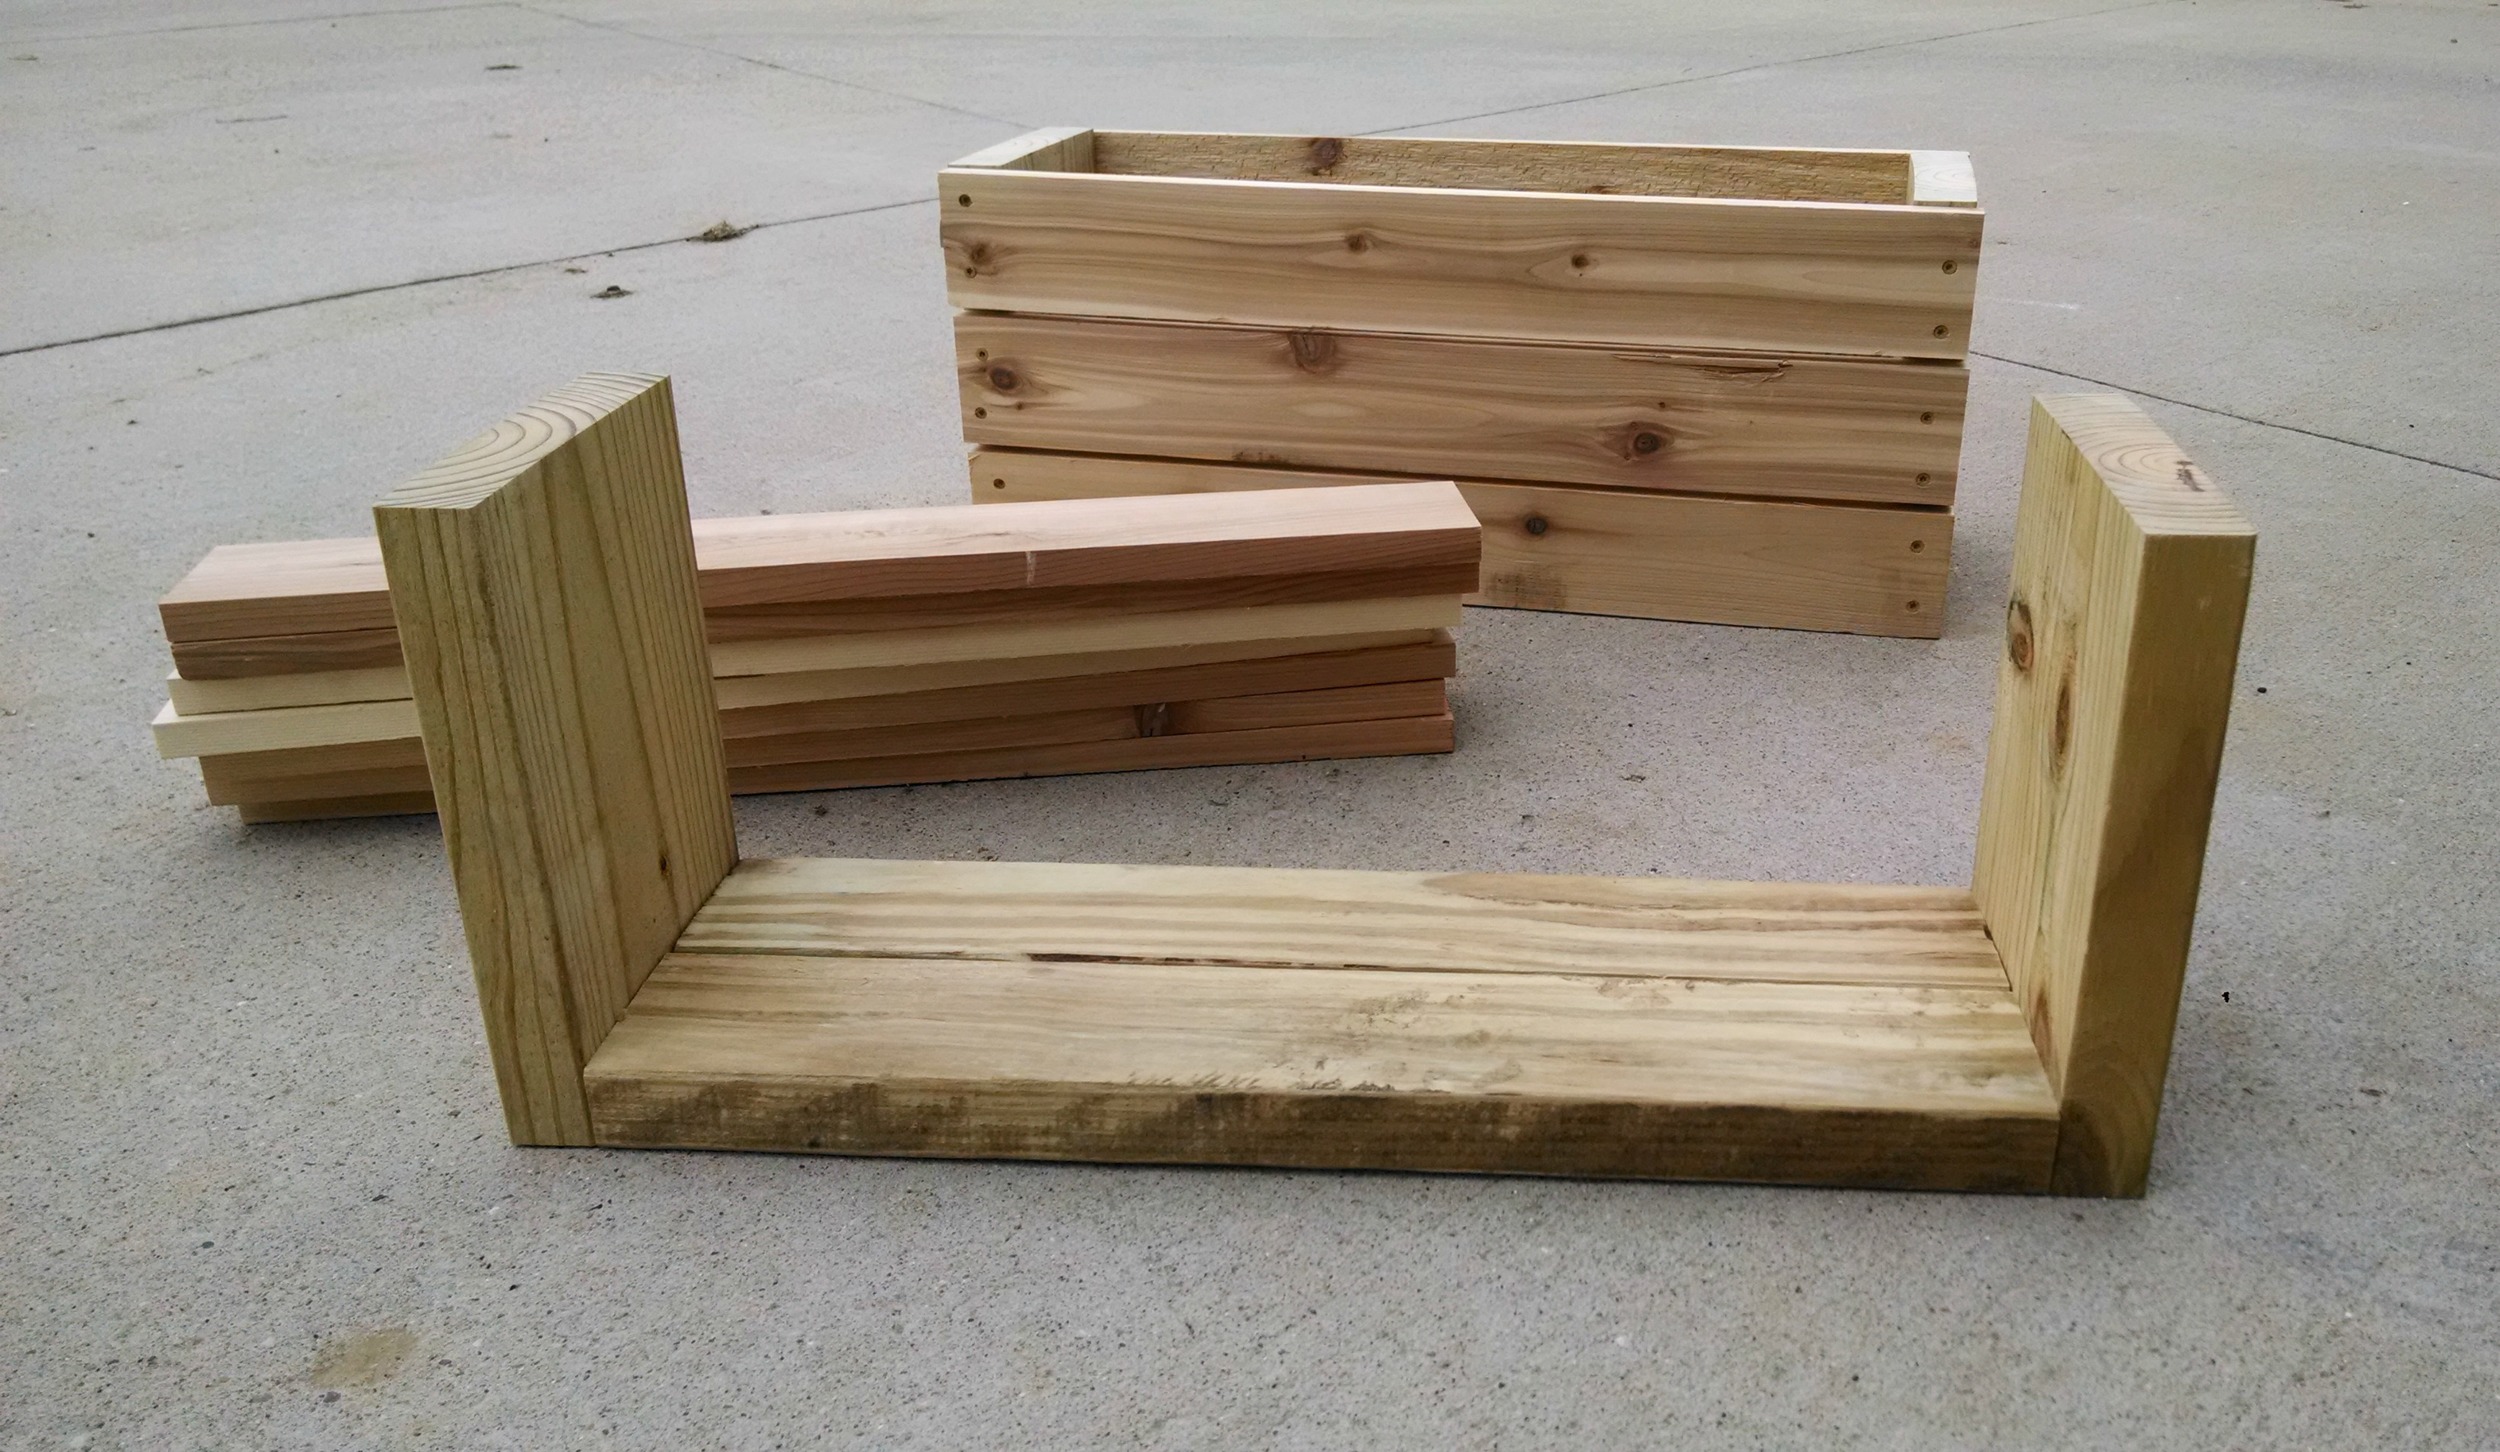
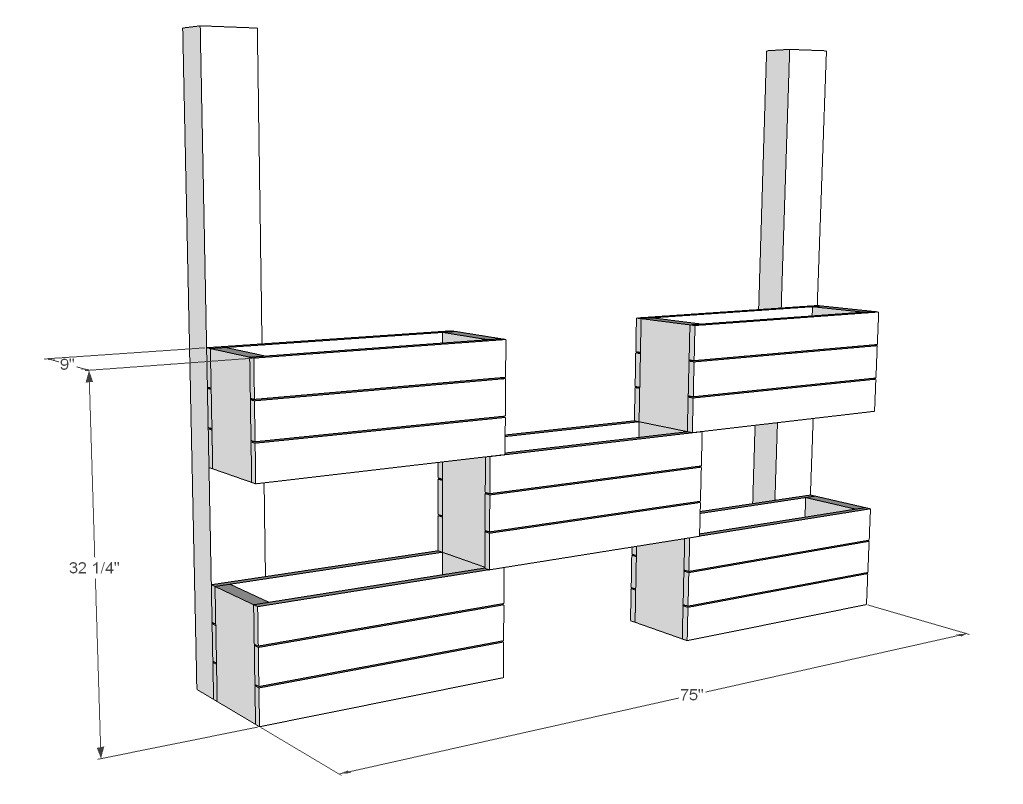
Material List
- 2"x8"x8' - 2 (Pressure treated or Cedar)
- We used a mixture of both. These are woods that withstand the elements well.
- 2"x4"x8' - 3
- 1"x4"x8' - 10
- 3" deck screws
- 1 1/2" deck screws
- 1/8" drill bit
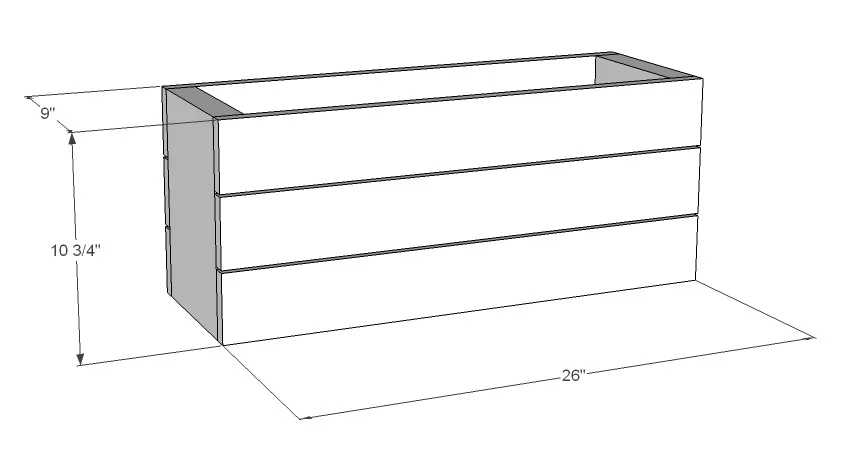
Cut List
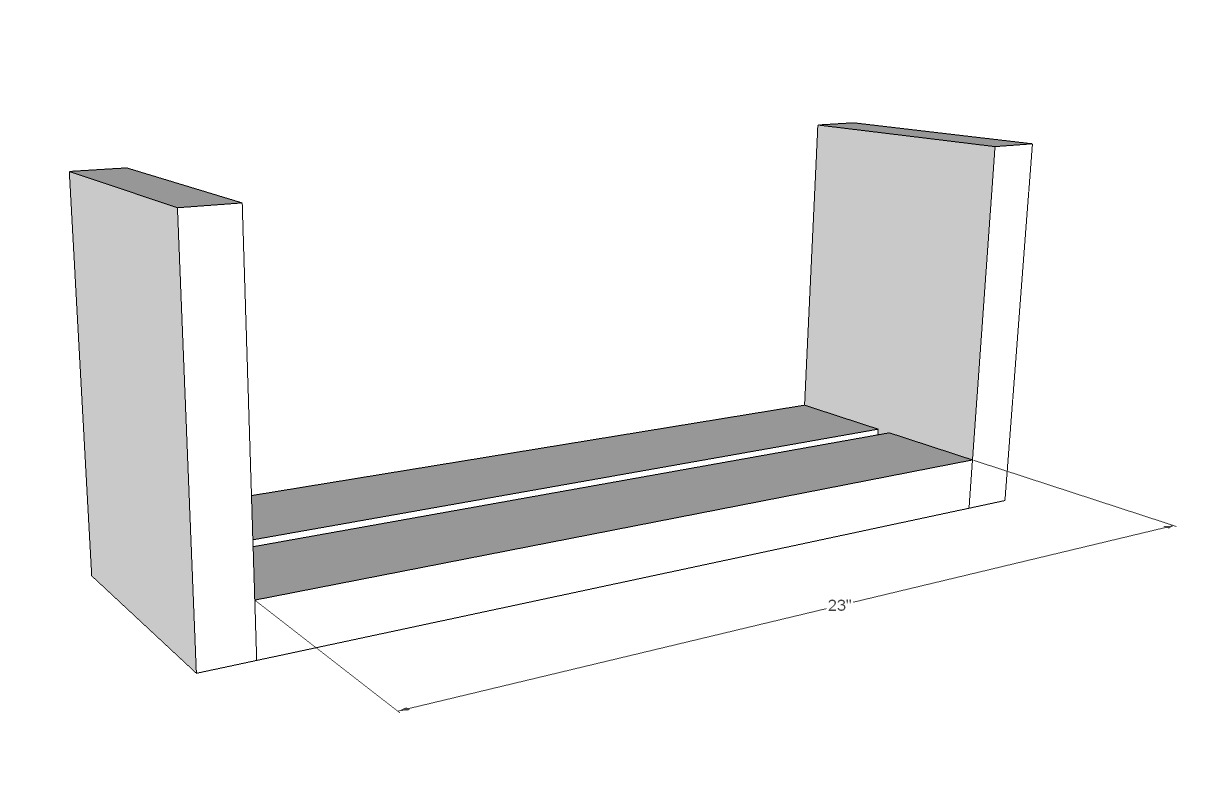
- 2"x10"
- 10 3/4" - 10
- 2"x4"
- 23" - 10
- 1"x4"
- 26" - 30

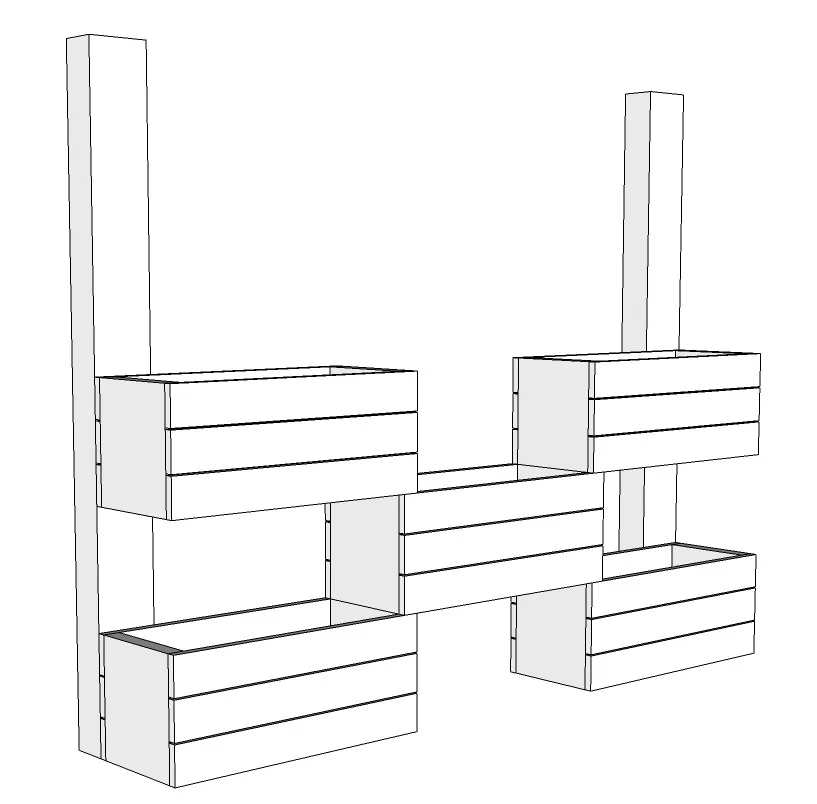
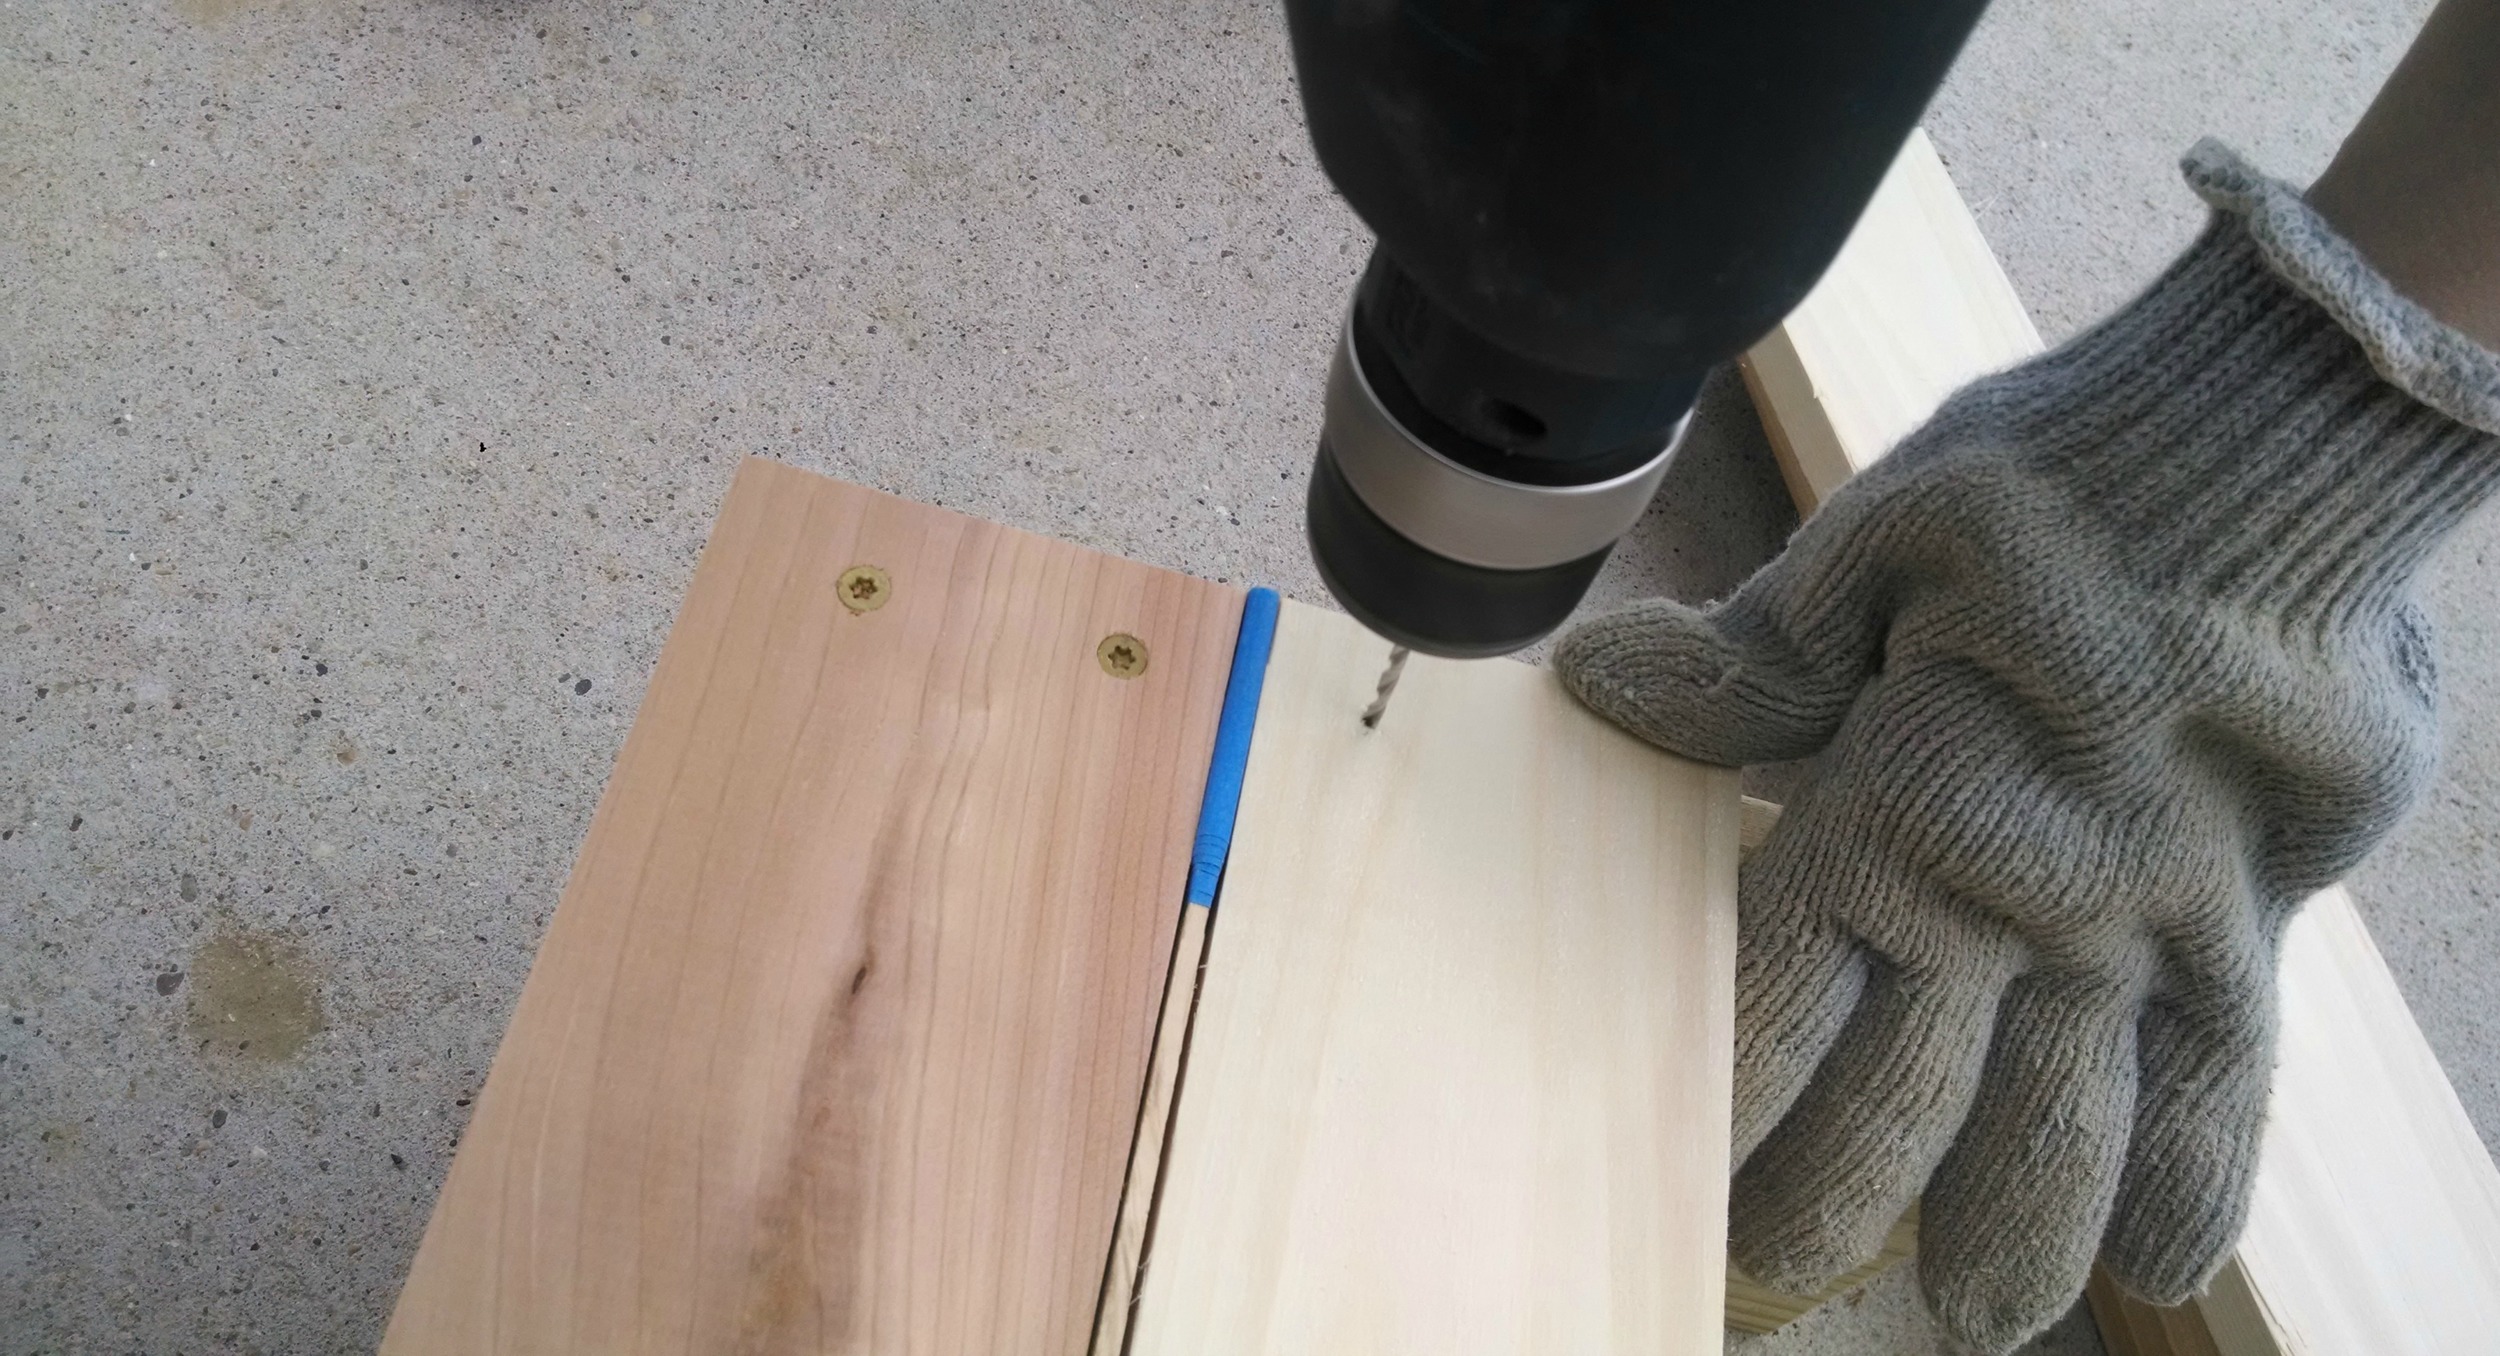
Drill pilot holes in the bottom of the 2x8's on the outside of the board, then using the 3" deck screws attach the 2x4's to the inside of the 2x8's.
Next drill pilot holes in the 1x4's by lining up the board to the bottom of the box just constructed. Attach using the 1-1/2" screws. We used a spare piece of wood with some tape around it to create a space for in between the boards, at about 1/8" thick. Using the space, drill holes and attach the second board. Attach the last board to the top. Flip over and repeat for the back.


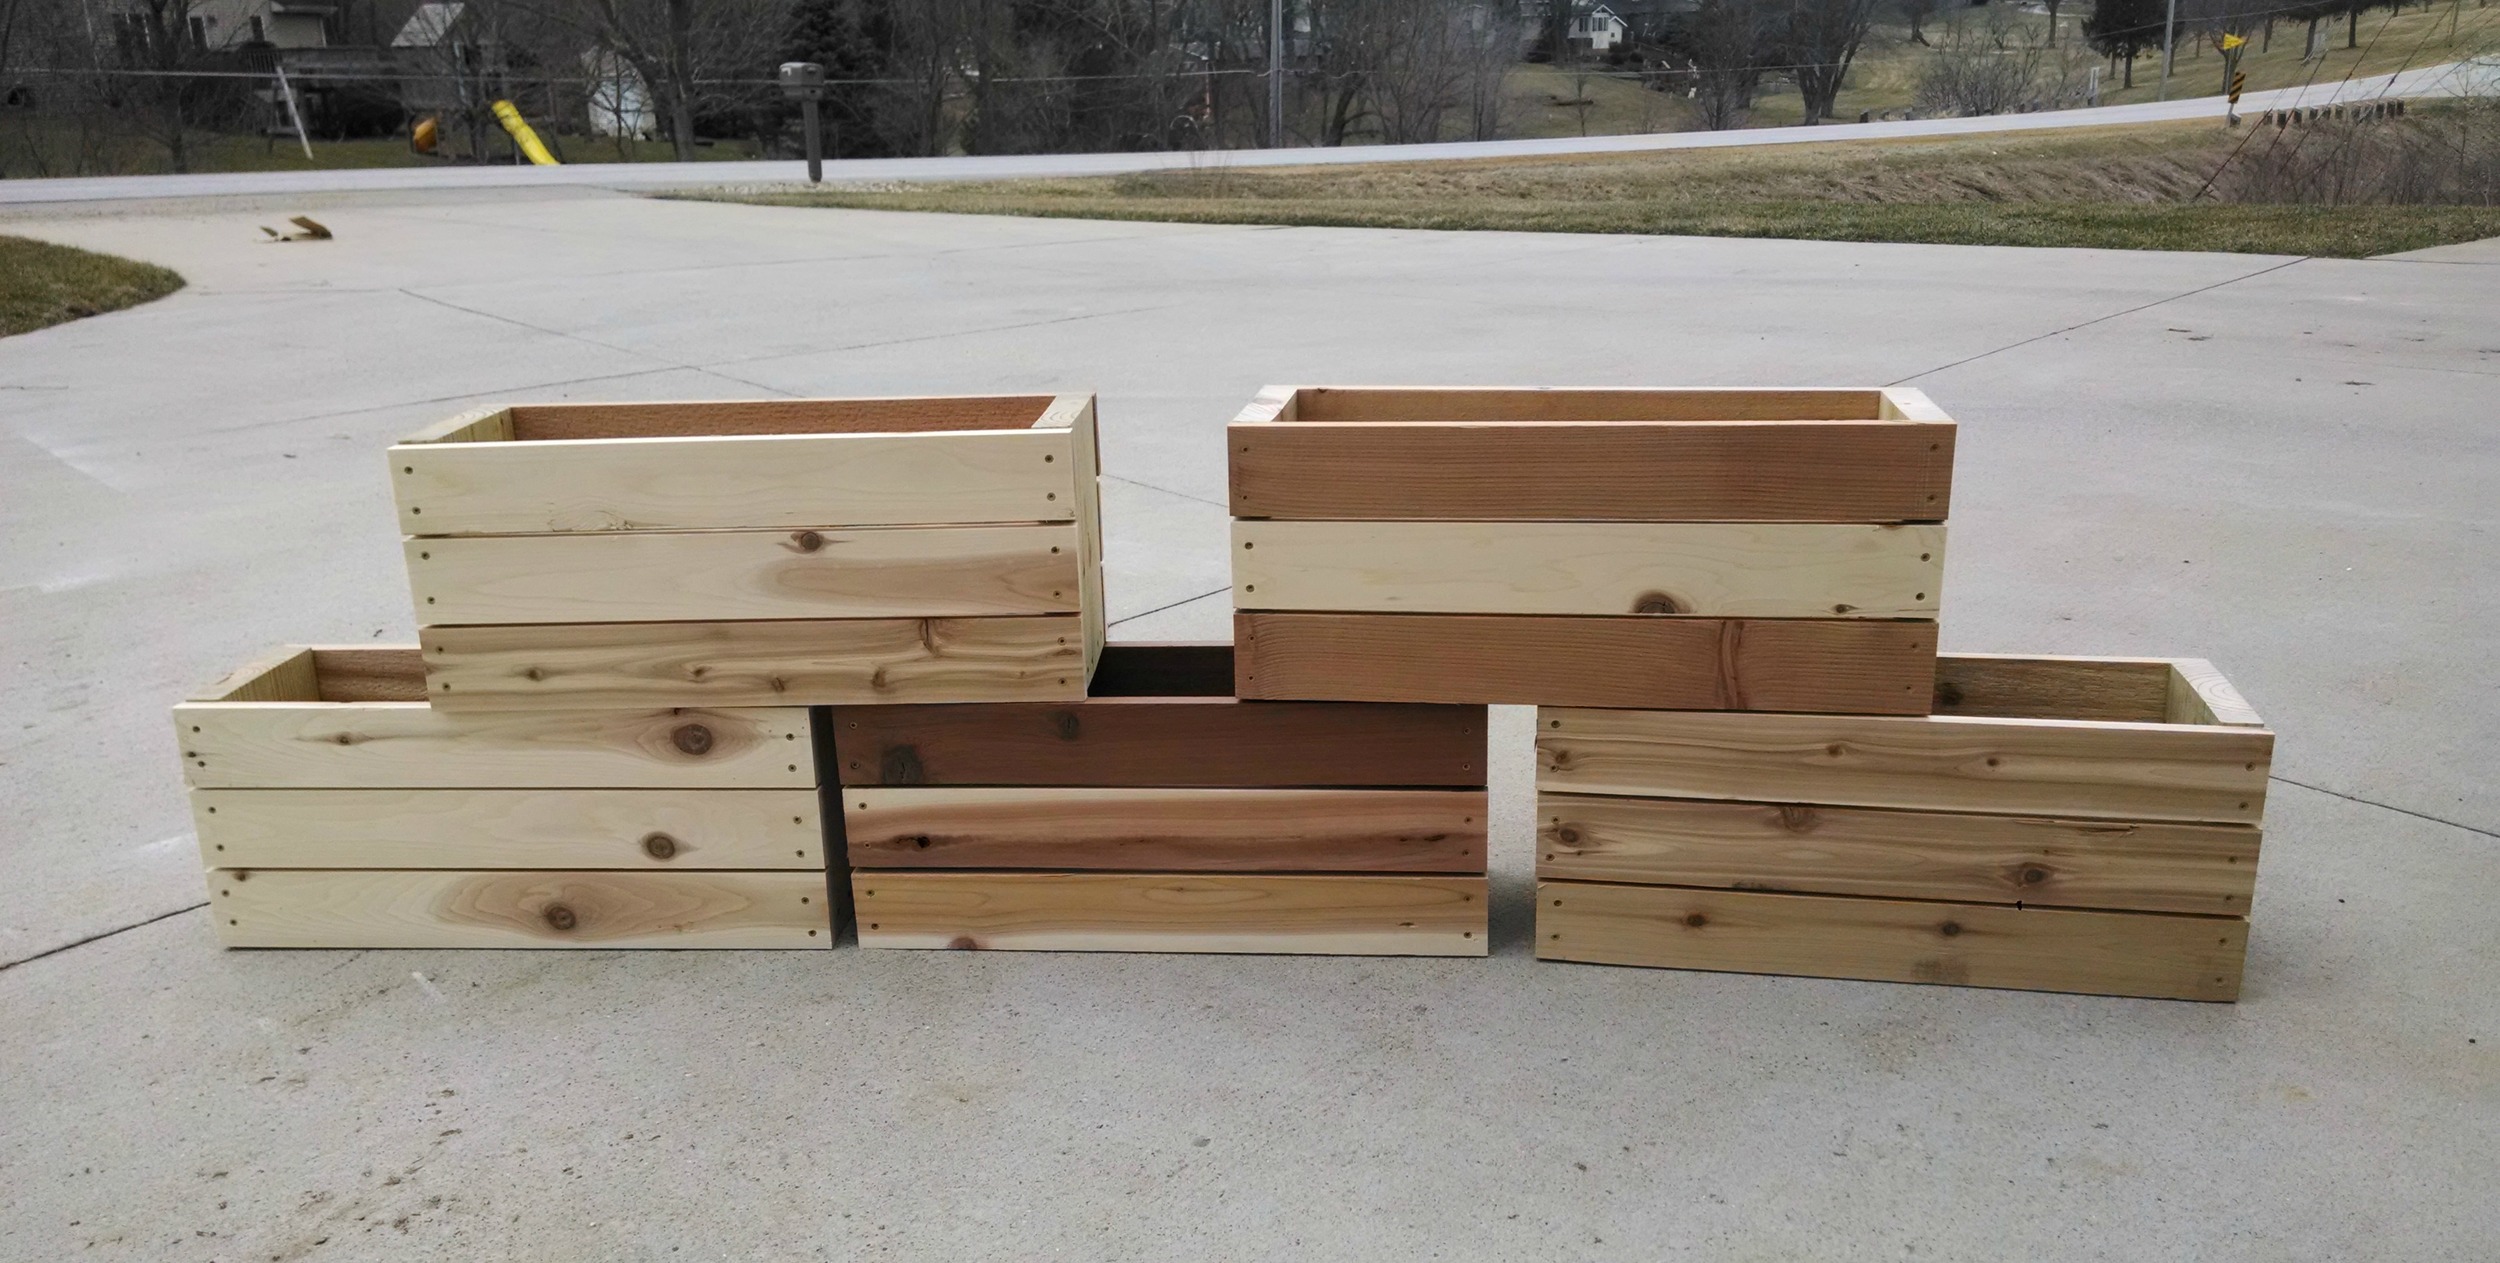
Repeat for 4 more times.
Place the bottom 2 boxes on the ground so there is 23" between them. Place a box in between, making sure everything is lined up. Attach the boxes by drilling down from the middle box so the screw will go into the 2x8 in the bottom box using 3" screws.

With a level on the top of one of the remaining boxes place it on the outside of the middle box, level the box, then screw it to the post with 3" screws in the top and bottom of the box.
Then attach to the middle box the same way as the bottom. Repeat on the other side.
Plant your flowers and you're done! (For those eagle eyes, I didn't actually plant the flowers. Although we have been having some pretty stellar weather, there is a slim to none chance that they will live in Iowa if planted this early. It's fun to pretend though!)
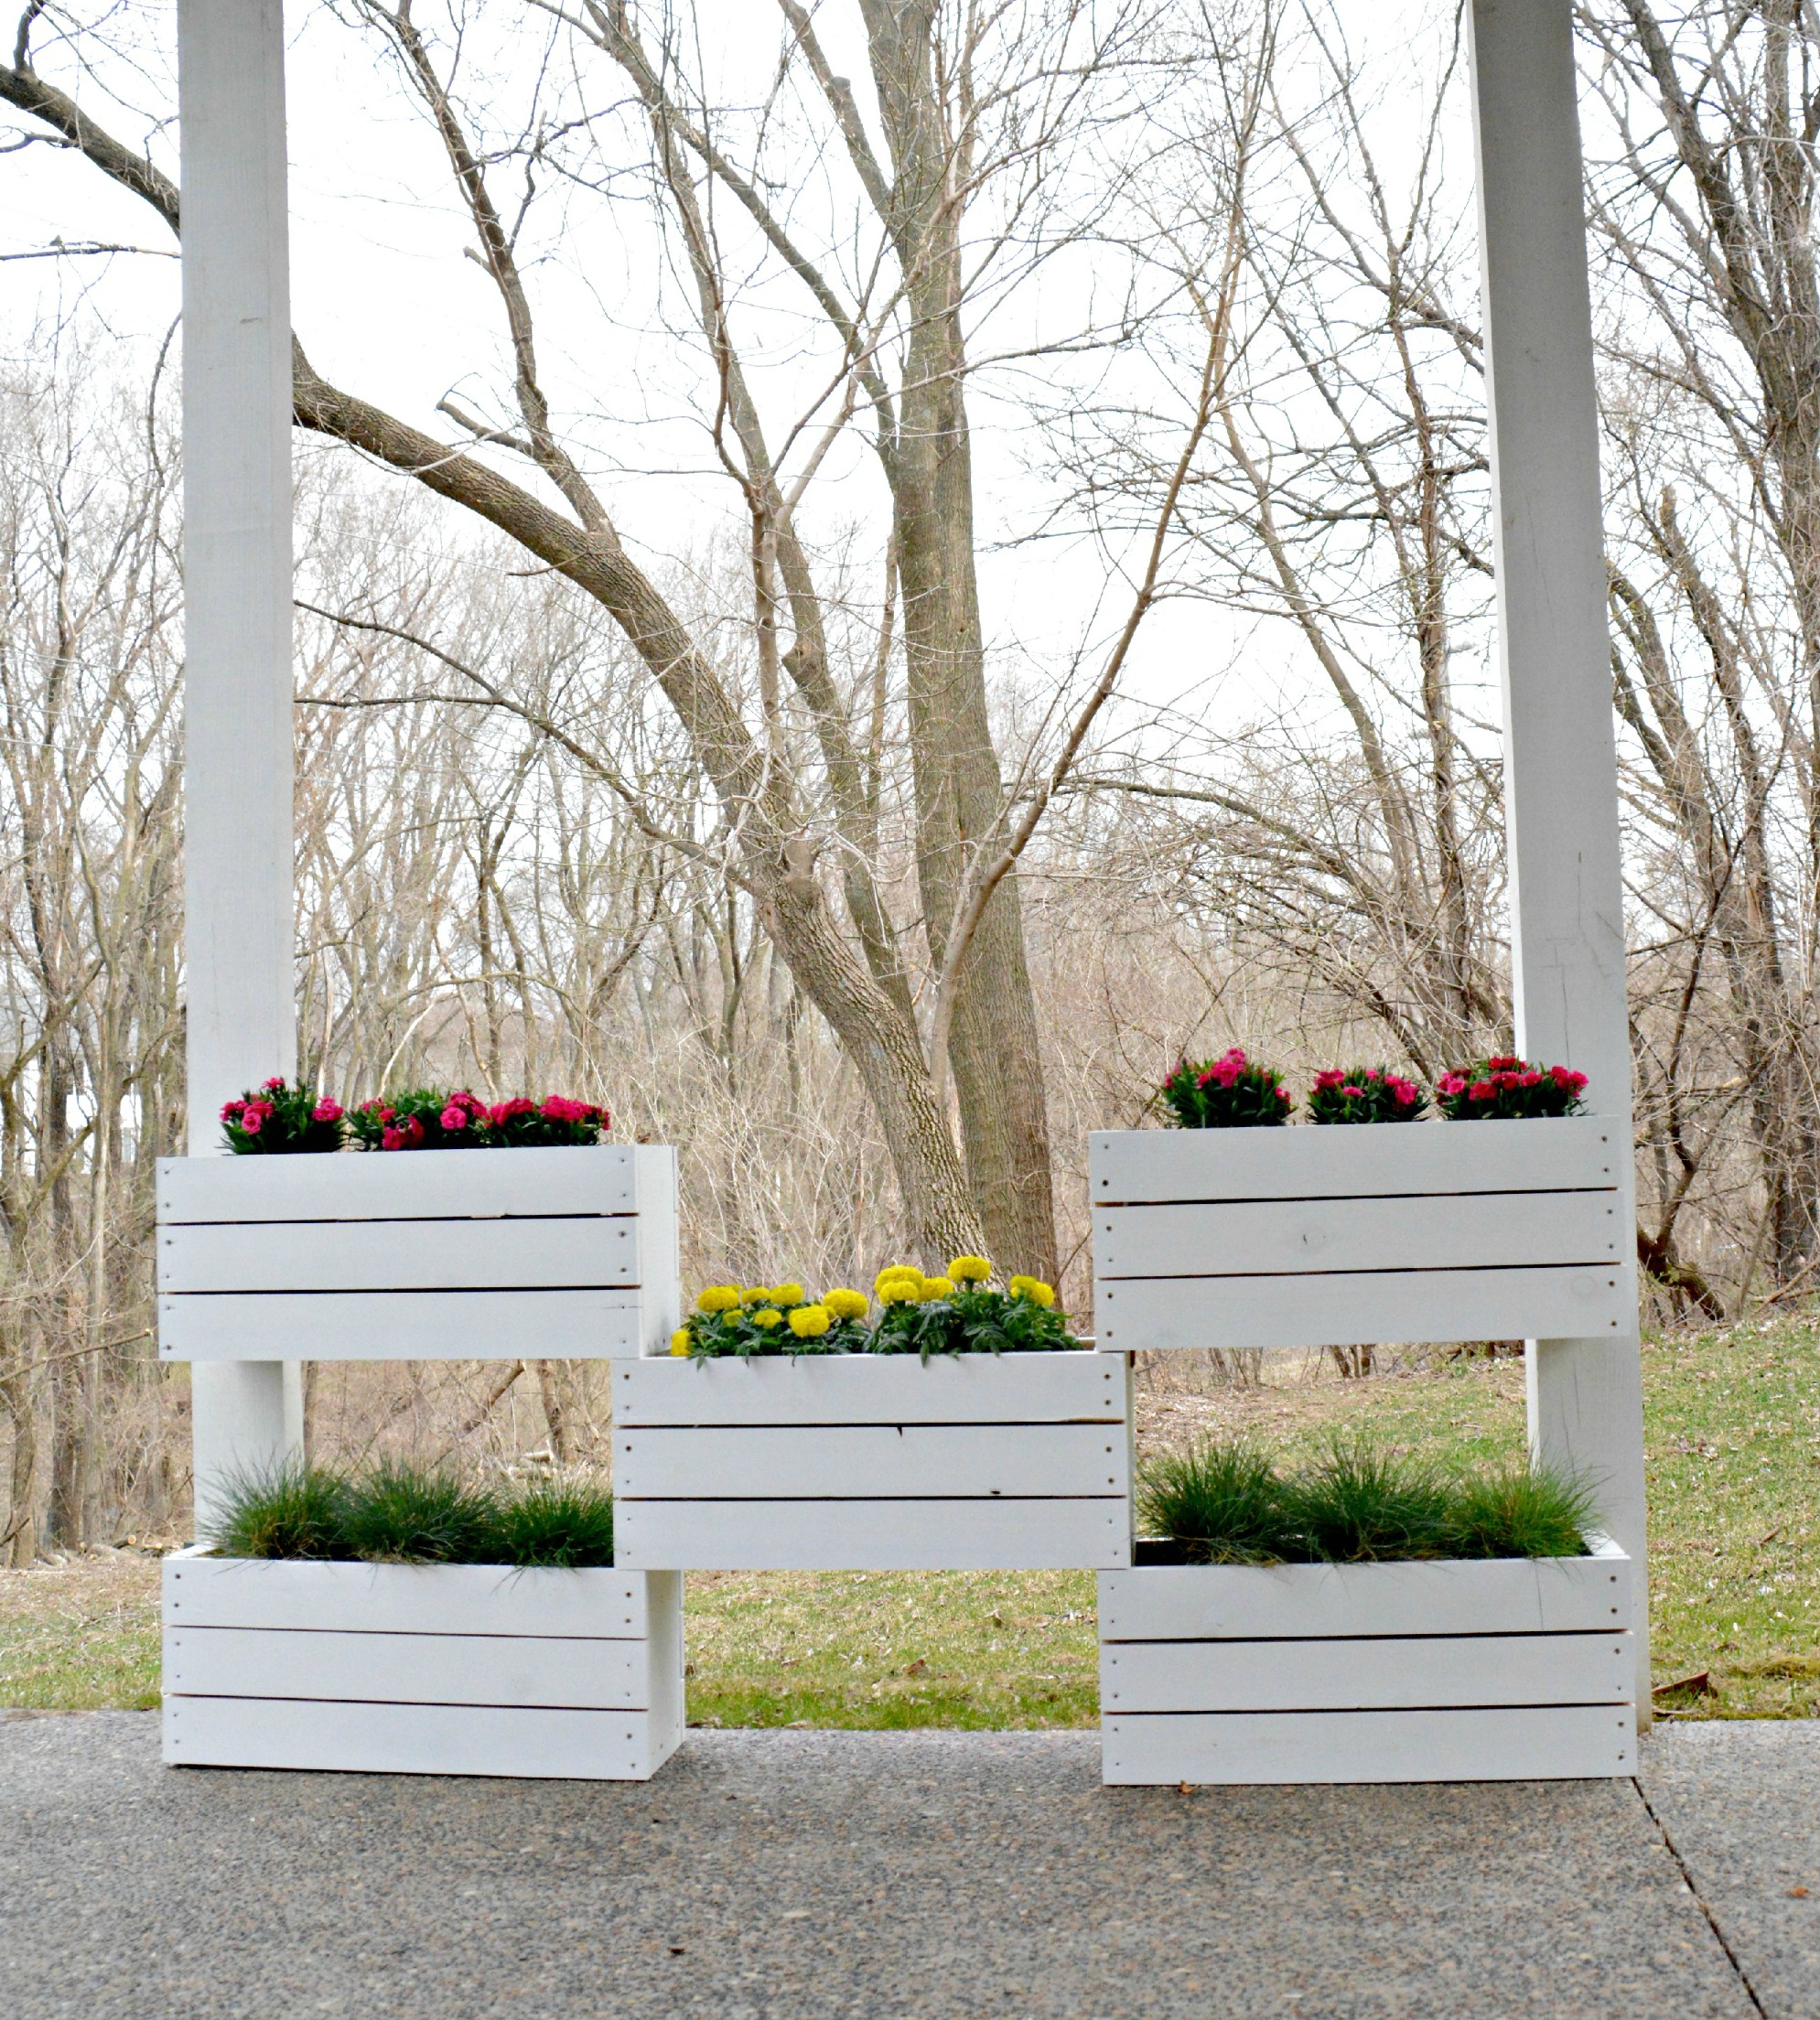
I can't wait to bust out the patio furniture and enjoy this fun project!

A quick reminder about Saturday's event!
Who: You! Your friends! Your family! Your co-workers! Everyone you know!
What: Learn how to build a Vertical Planter at The Home Depot Do-It-Yourself (DIY) Workshop. (It's free!)
When: Saturday, April 11th from 10:00-11:30am.
Where: The Home Depot nearest you! I will be hosting at the Bettendorf, IA location (920 Middle Road).
Don't forget to register here!

I hope to meet some of you on Saturday! If you're not local, be sure to share using #DIYWorkshop so I can see what you're up to!