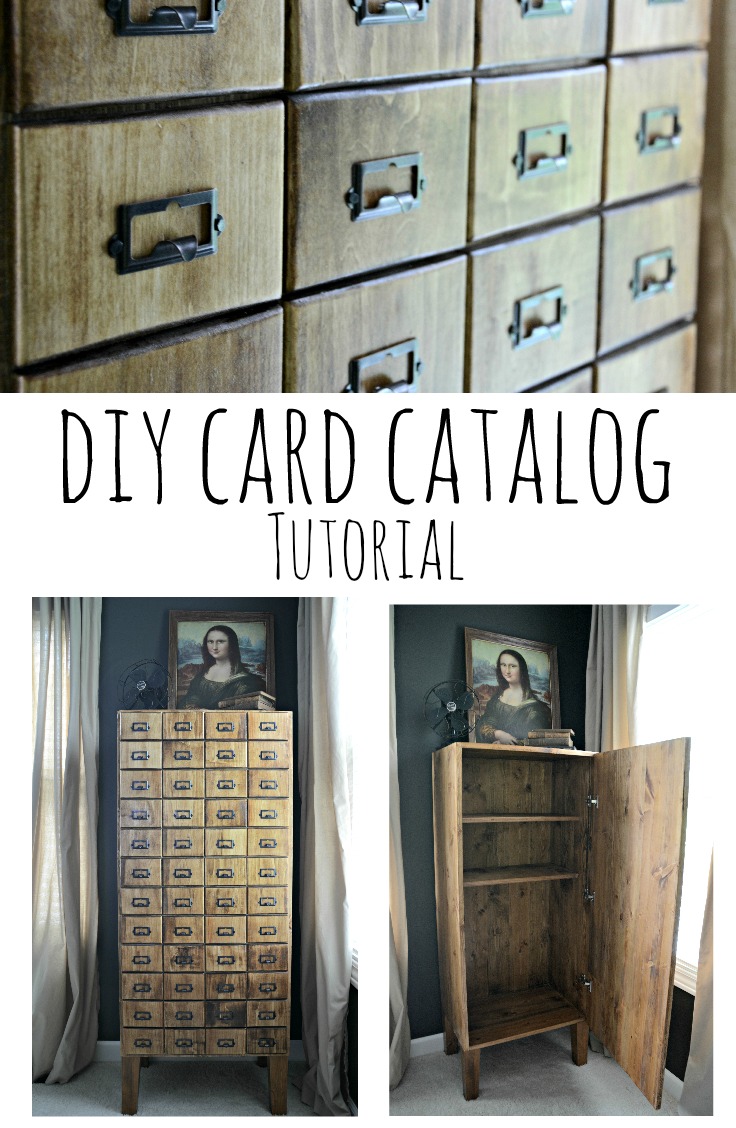
DIY Card Catalog Cabinet Tutorial
/Last week we shared with you our newest furniture love. Today you can learn how to build your own card catalog cabinet.
See the full cabinet reveal here! Check out our other furniture builds here!

I came up with the idea and REALLY wanted to build it myself. Turns out it isn't a great beginner build. It's more in the intermediate realm. I did get to saw some stuff, drill some things and say "I told you so" a couple of times. I consider that a good first attempt at furniture building.
Luckily my "told you so's" were few and far between. Nate made my crazy idea come to life. He actually made it turn out better than in my head which is pretty awesome.
Here's how to make your own card catalog cabinet.
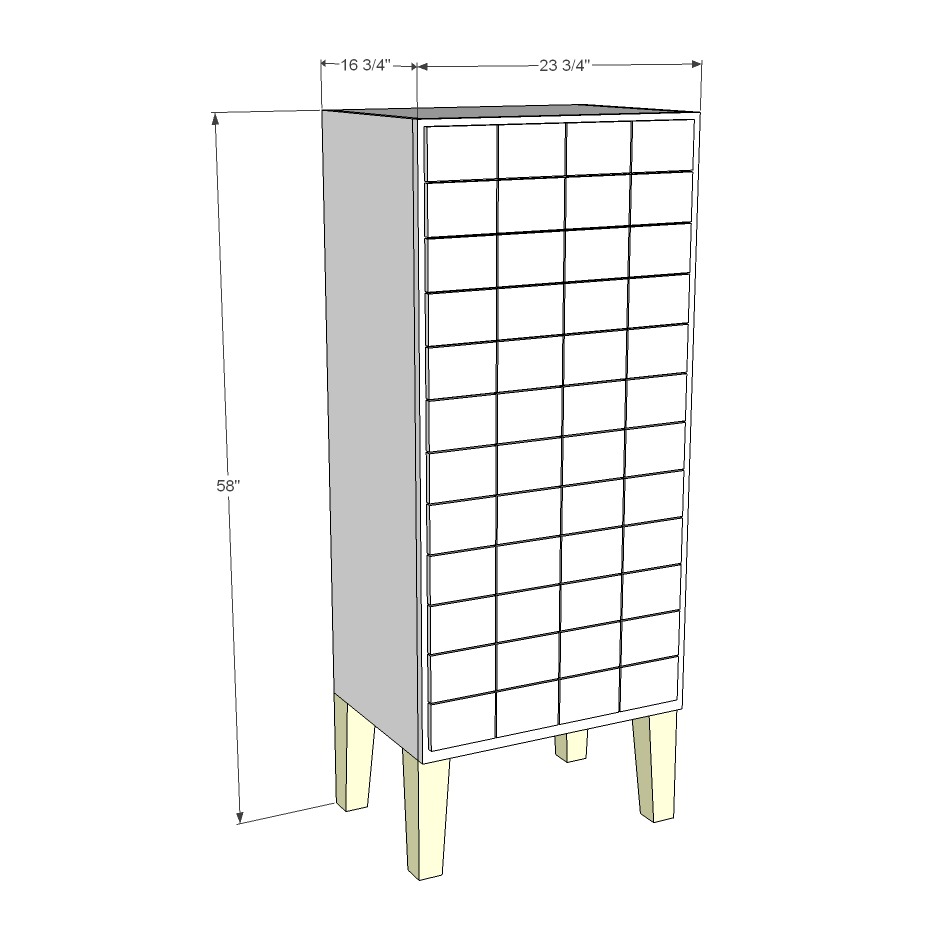
Material List
- 48" x 24" x 1" - 2 One will not be cut
- 96" x 16" x 1"
- 48" x 16" x 1"
- 48" x 12" x 1"
- 48" x 6" x 1/2" - 4
- (We used Pine for the bigger boards, Aspen for 6")
- Legs
- We used the Two Sided Taper legs from Osborne Wood Products, Inc.
- Card Catalog Hardware
- Cut tacks - to attach hardware
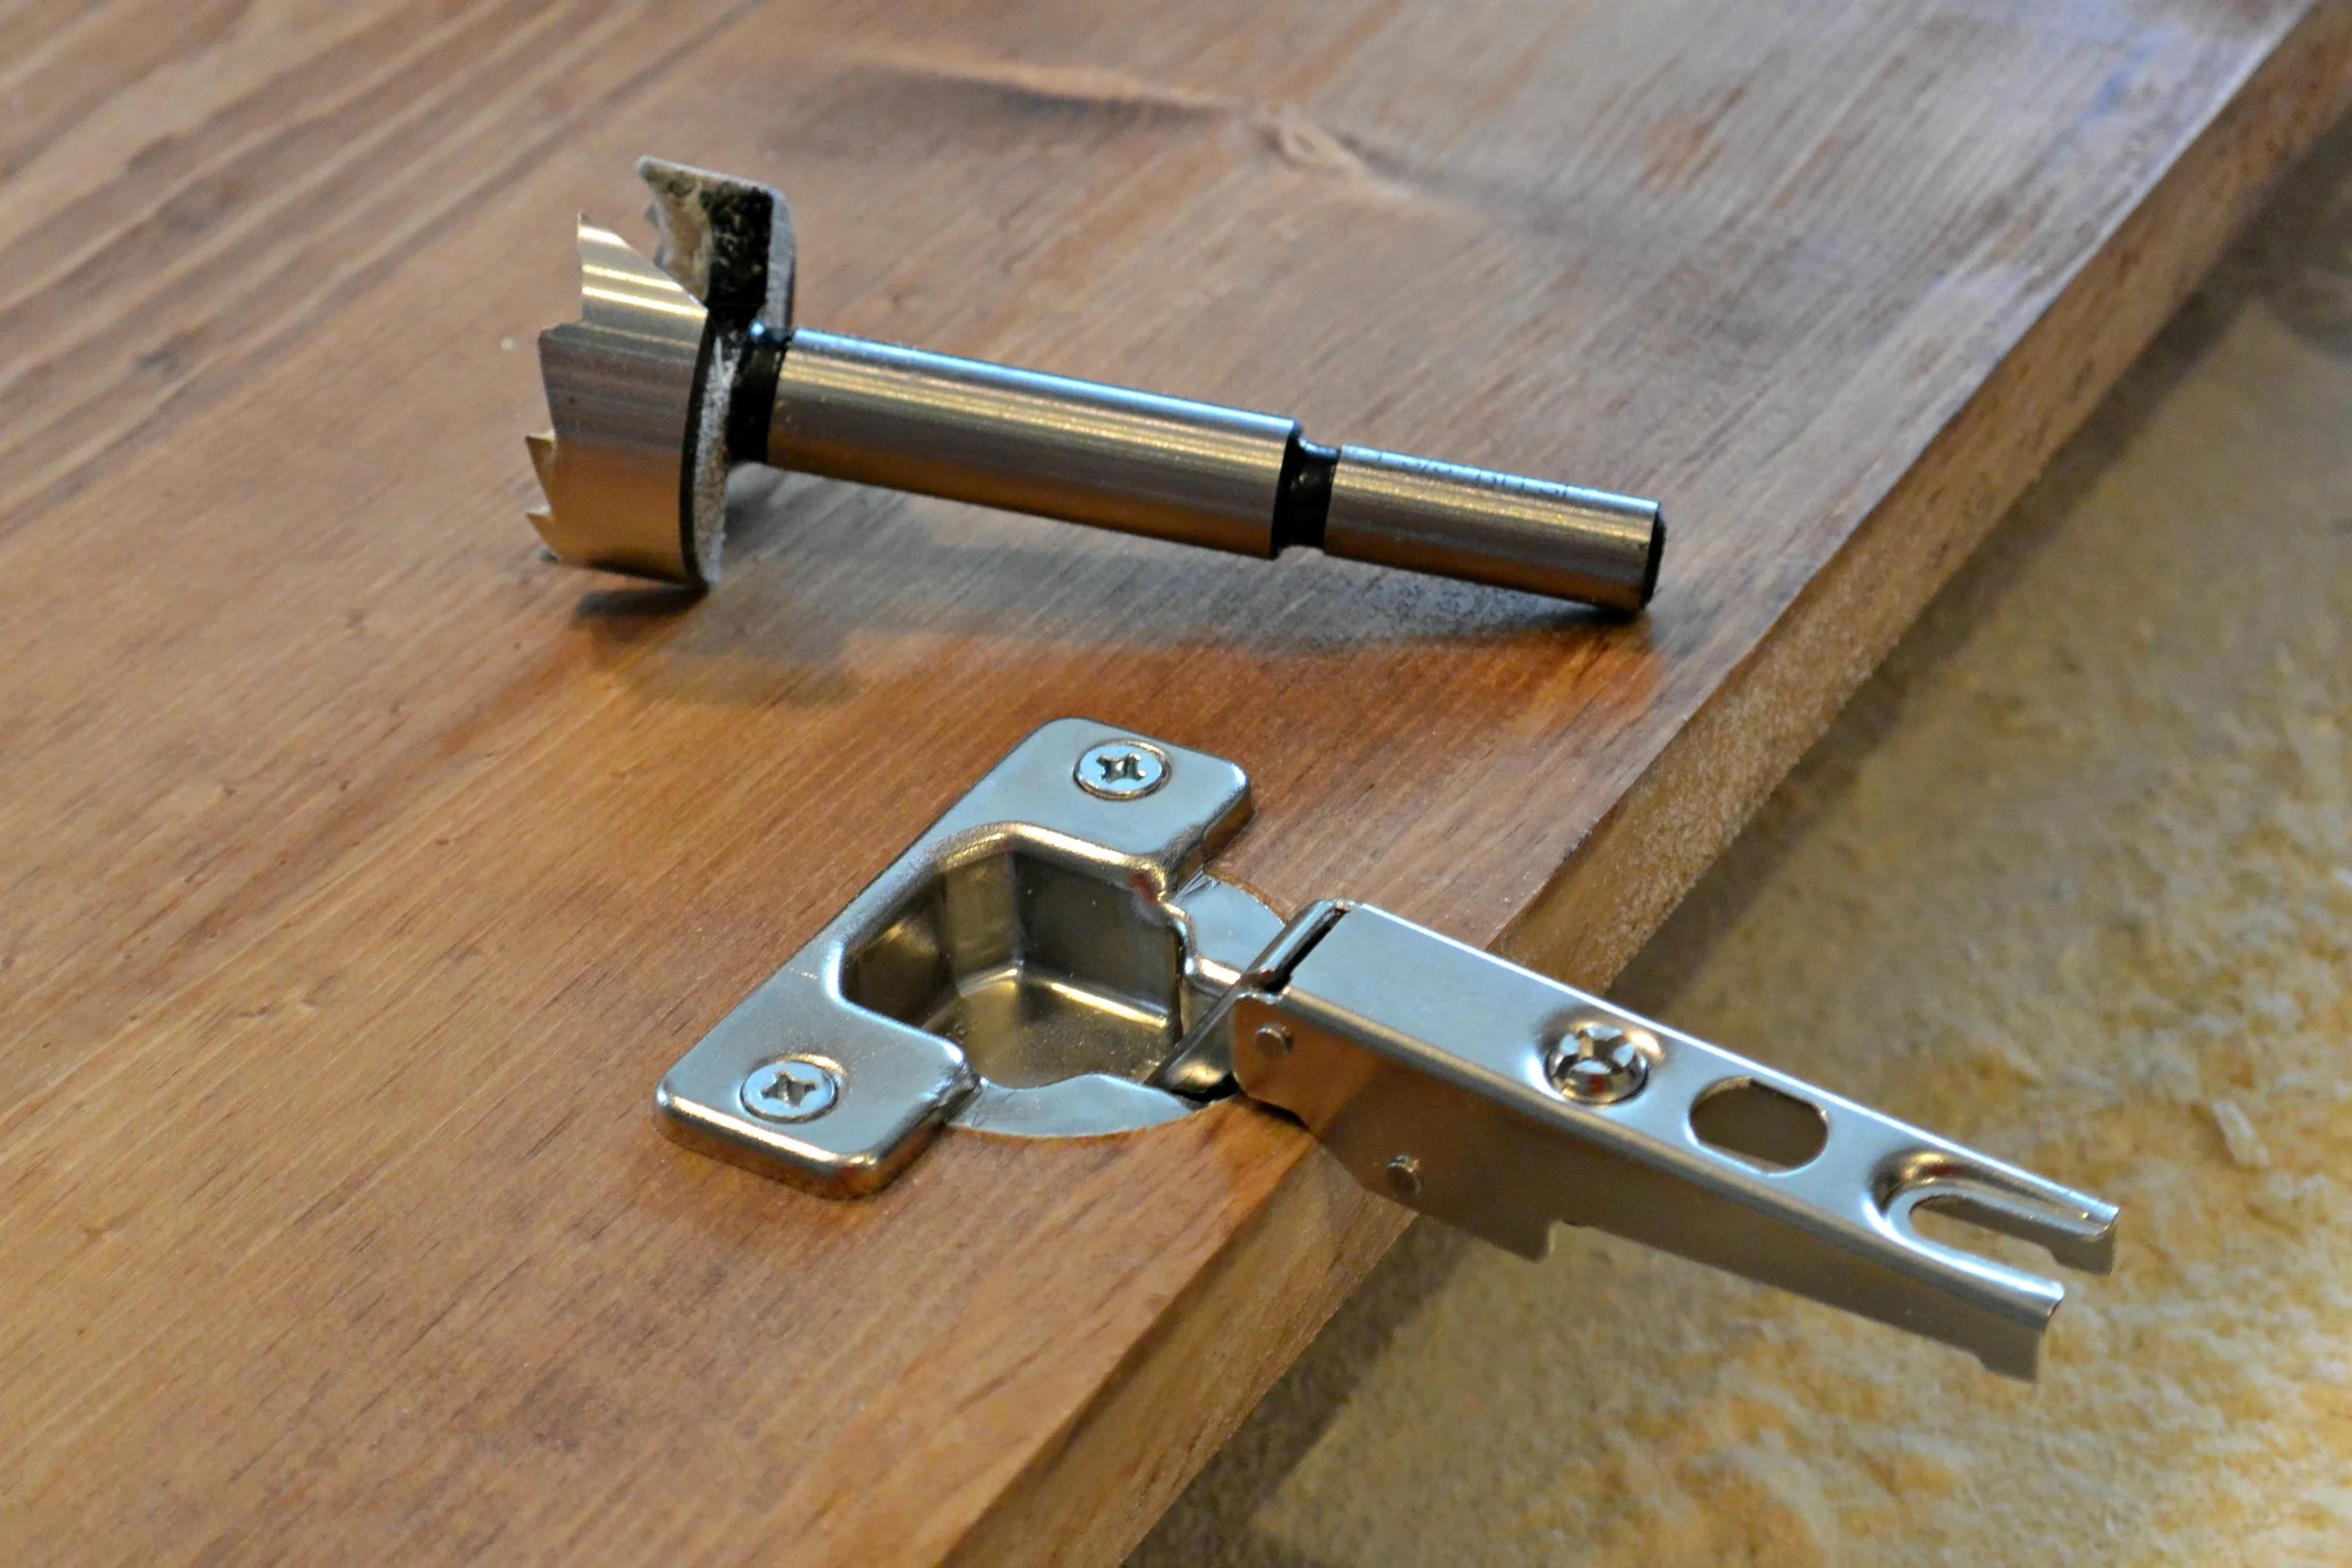
- Flush mount cabinet hinges - 3
- 1 1/4" Pocket Hole screws (We use Kreg products.)
- 2" Screws
- Wood Glue
- 1" staples for air gun
- Stain (or paint)
- We used Minwax Early American stain
- Polyurethane
*affiliate links included
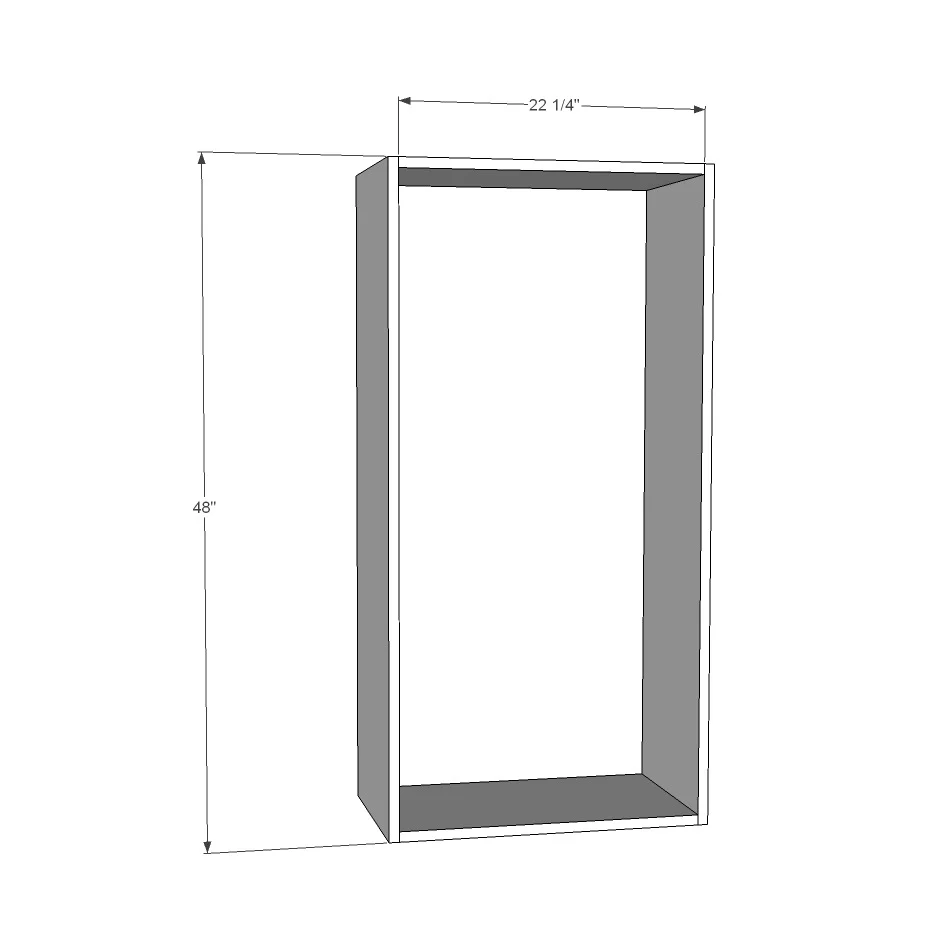
Cut List
- 24" Board
- 46 1/2" x 22 1/4" (back)
- 16" Board
- 48" - 2 (Cabinet Sides)
- 22 1/4 " - 2 (top and bottom)
- 12" Board
- 22 1/4" - 2 (shelves)
- 6" Boards
- 3 3/4 - 48 ("Drawers")
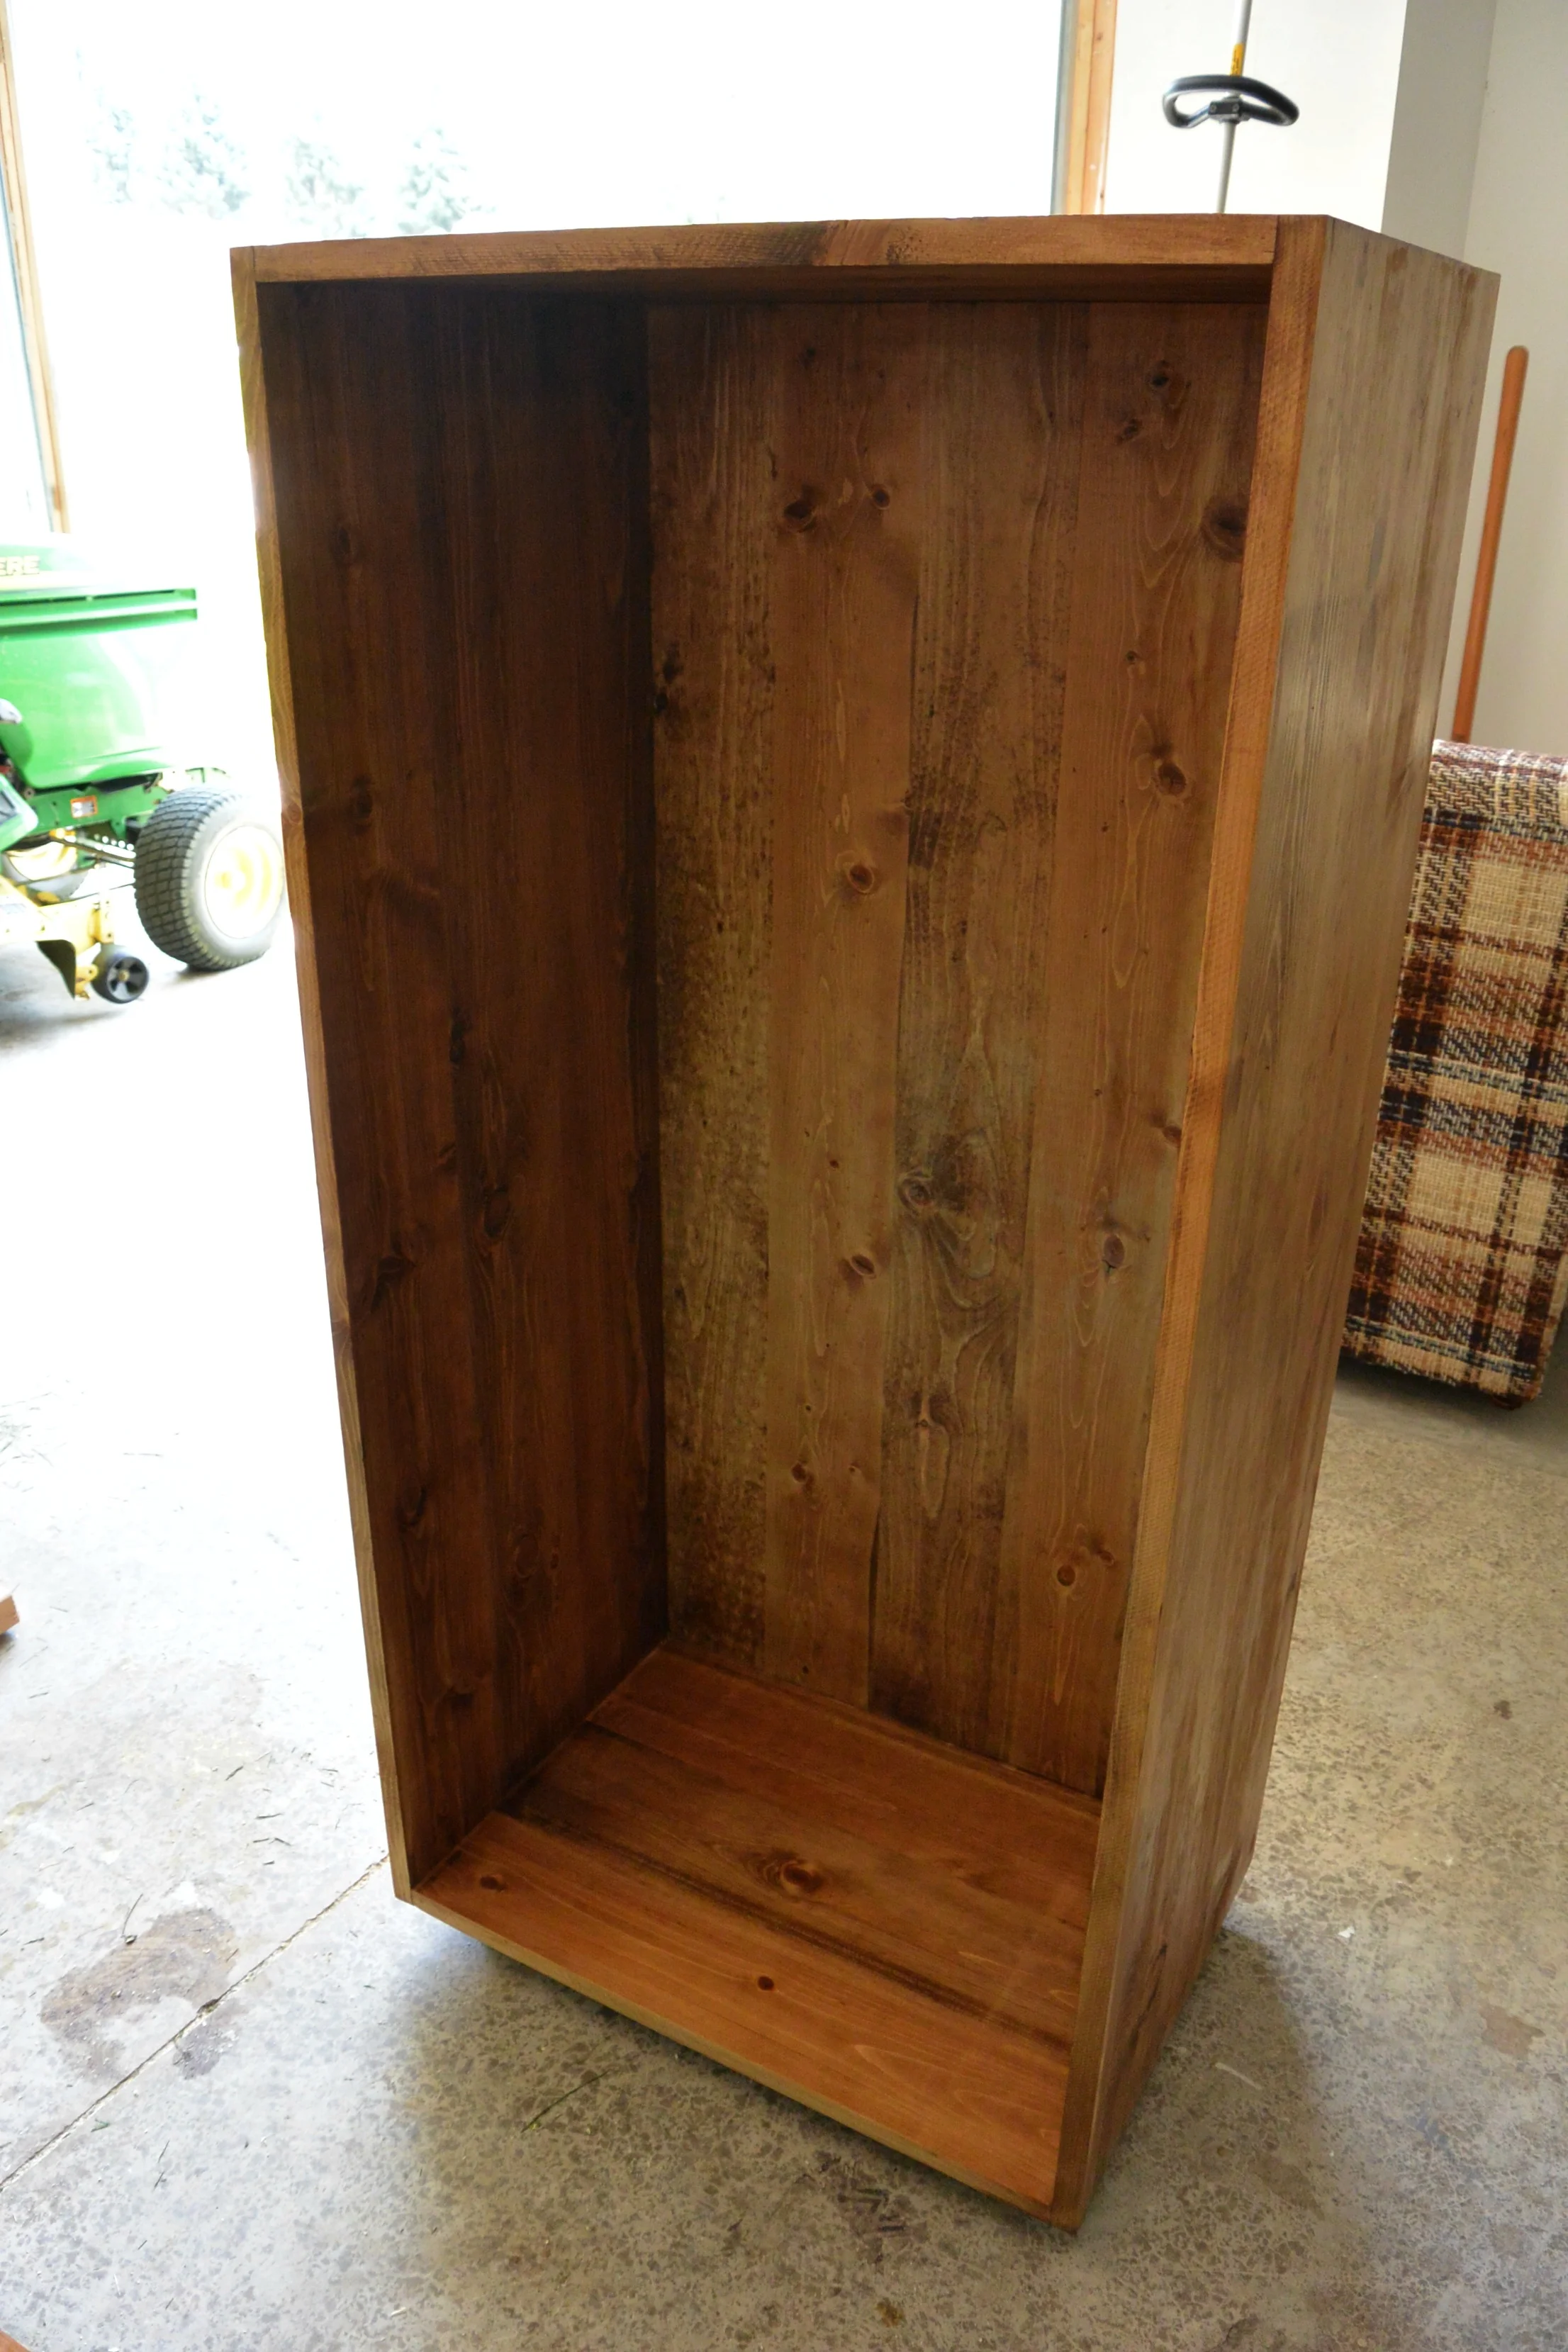
Start by using pocket hole screws and wood glue to attach the top and bottom to the sides. In order to best hide the pocket hole screws, place the pocket holes on the underside of the top of the cabinet and on the bottom of the cabinet. (You could also use pocket hole plugs but we find that the holes are well hidden on the underside.)
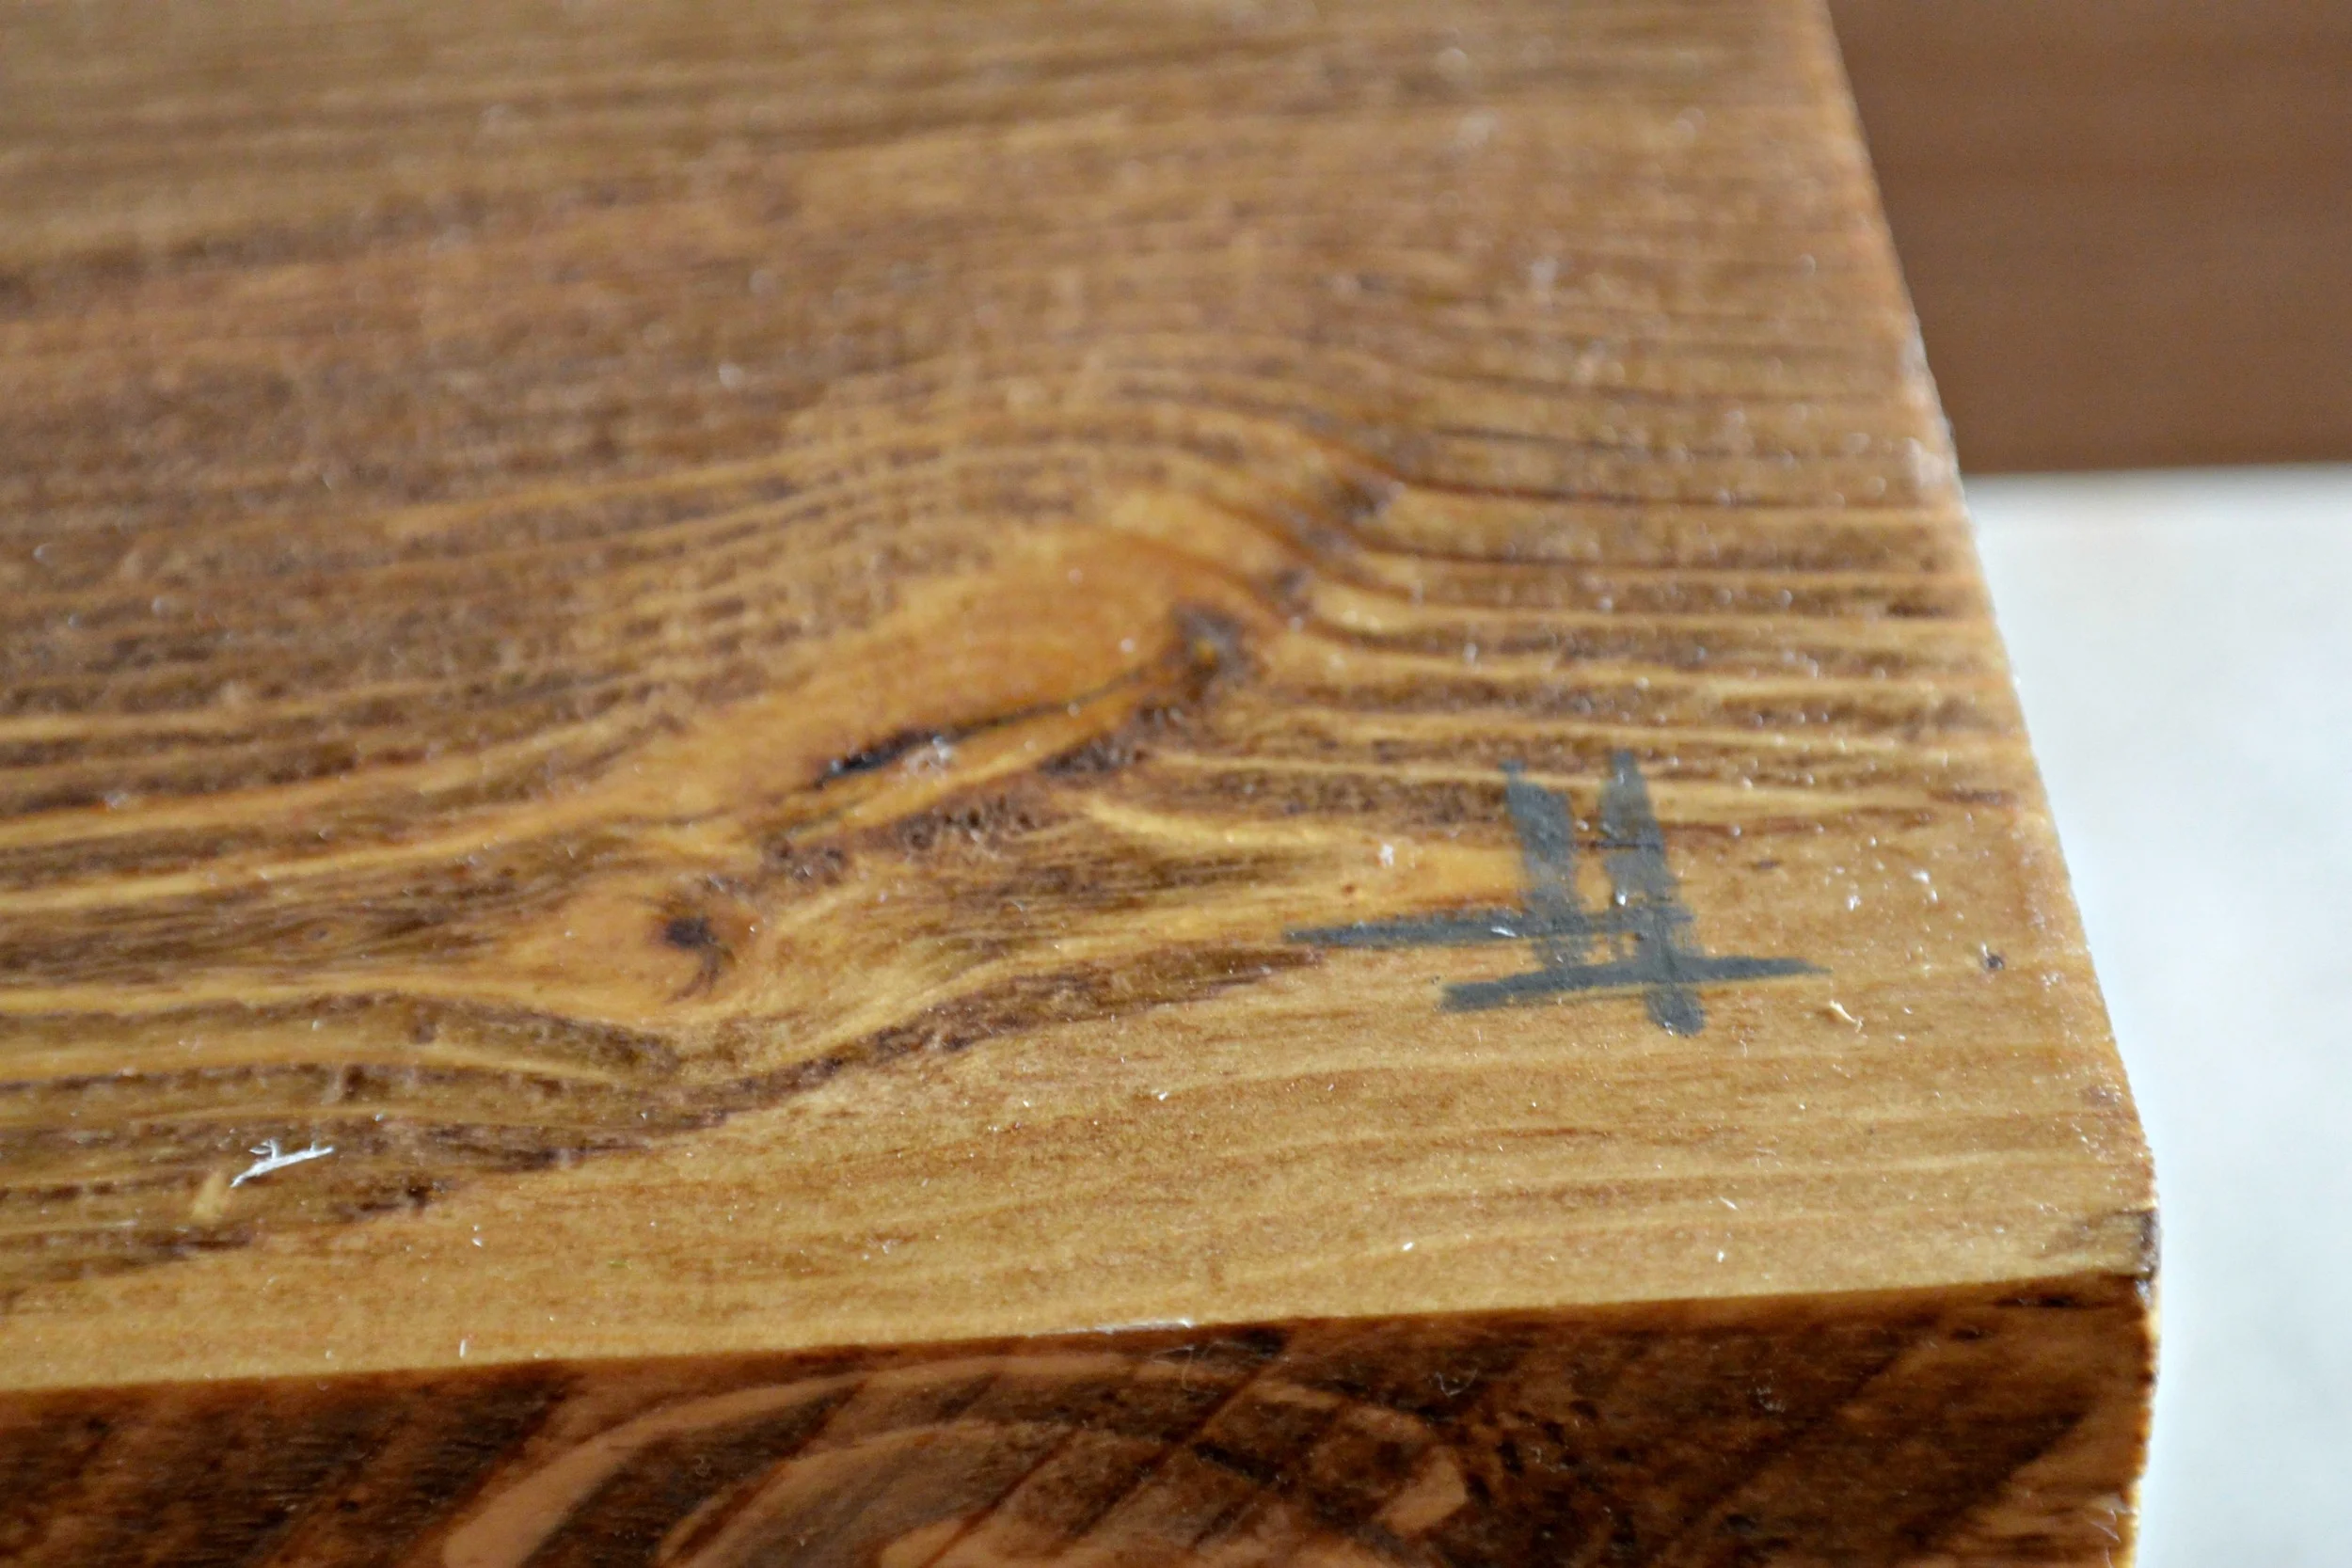
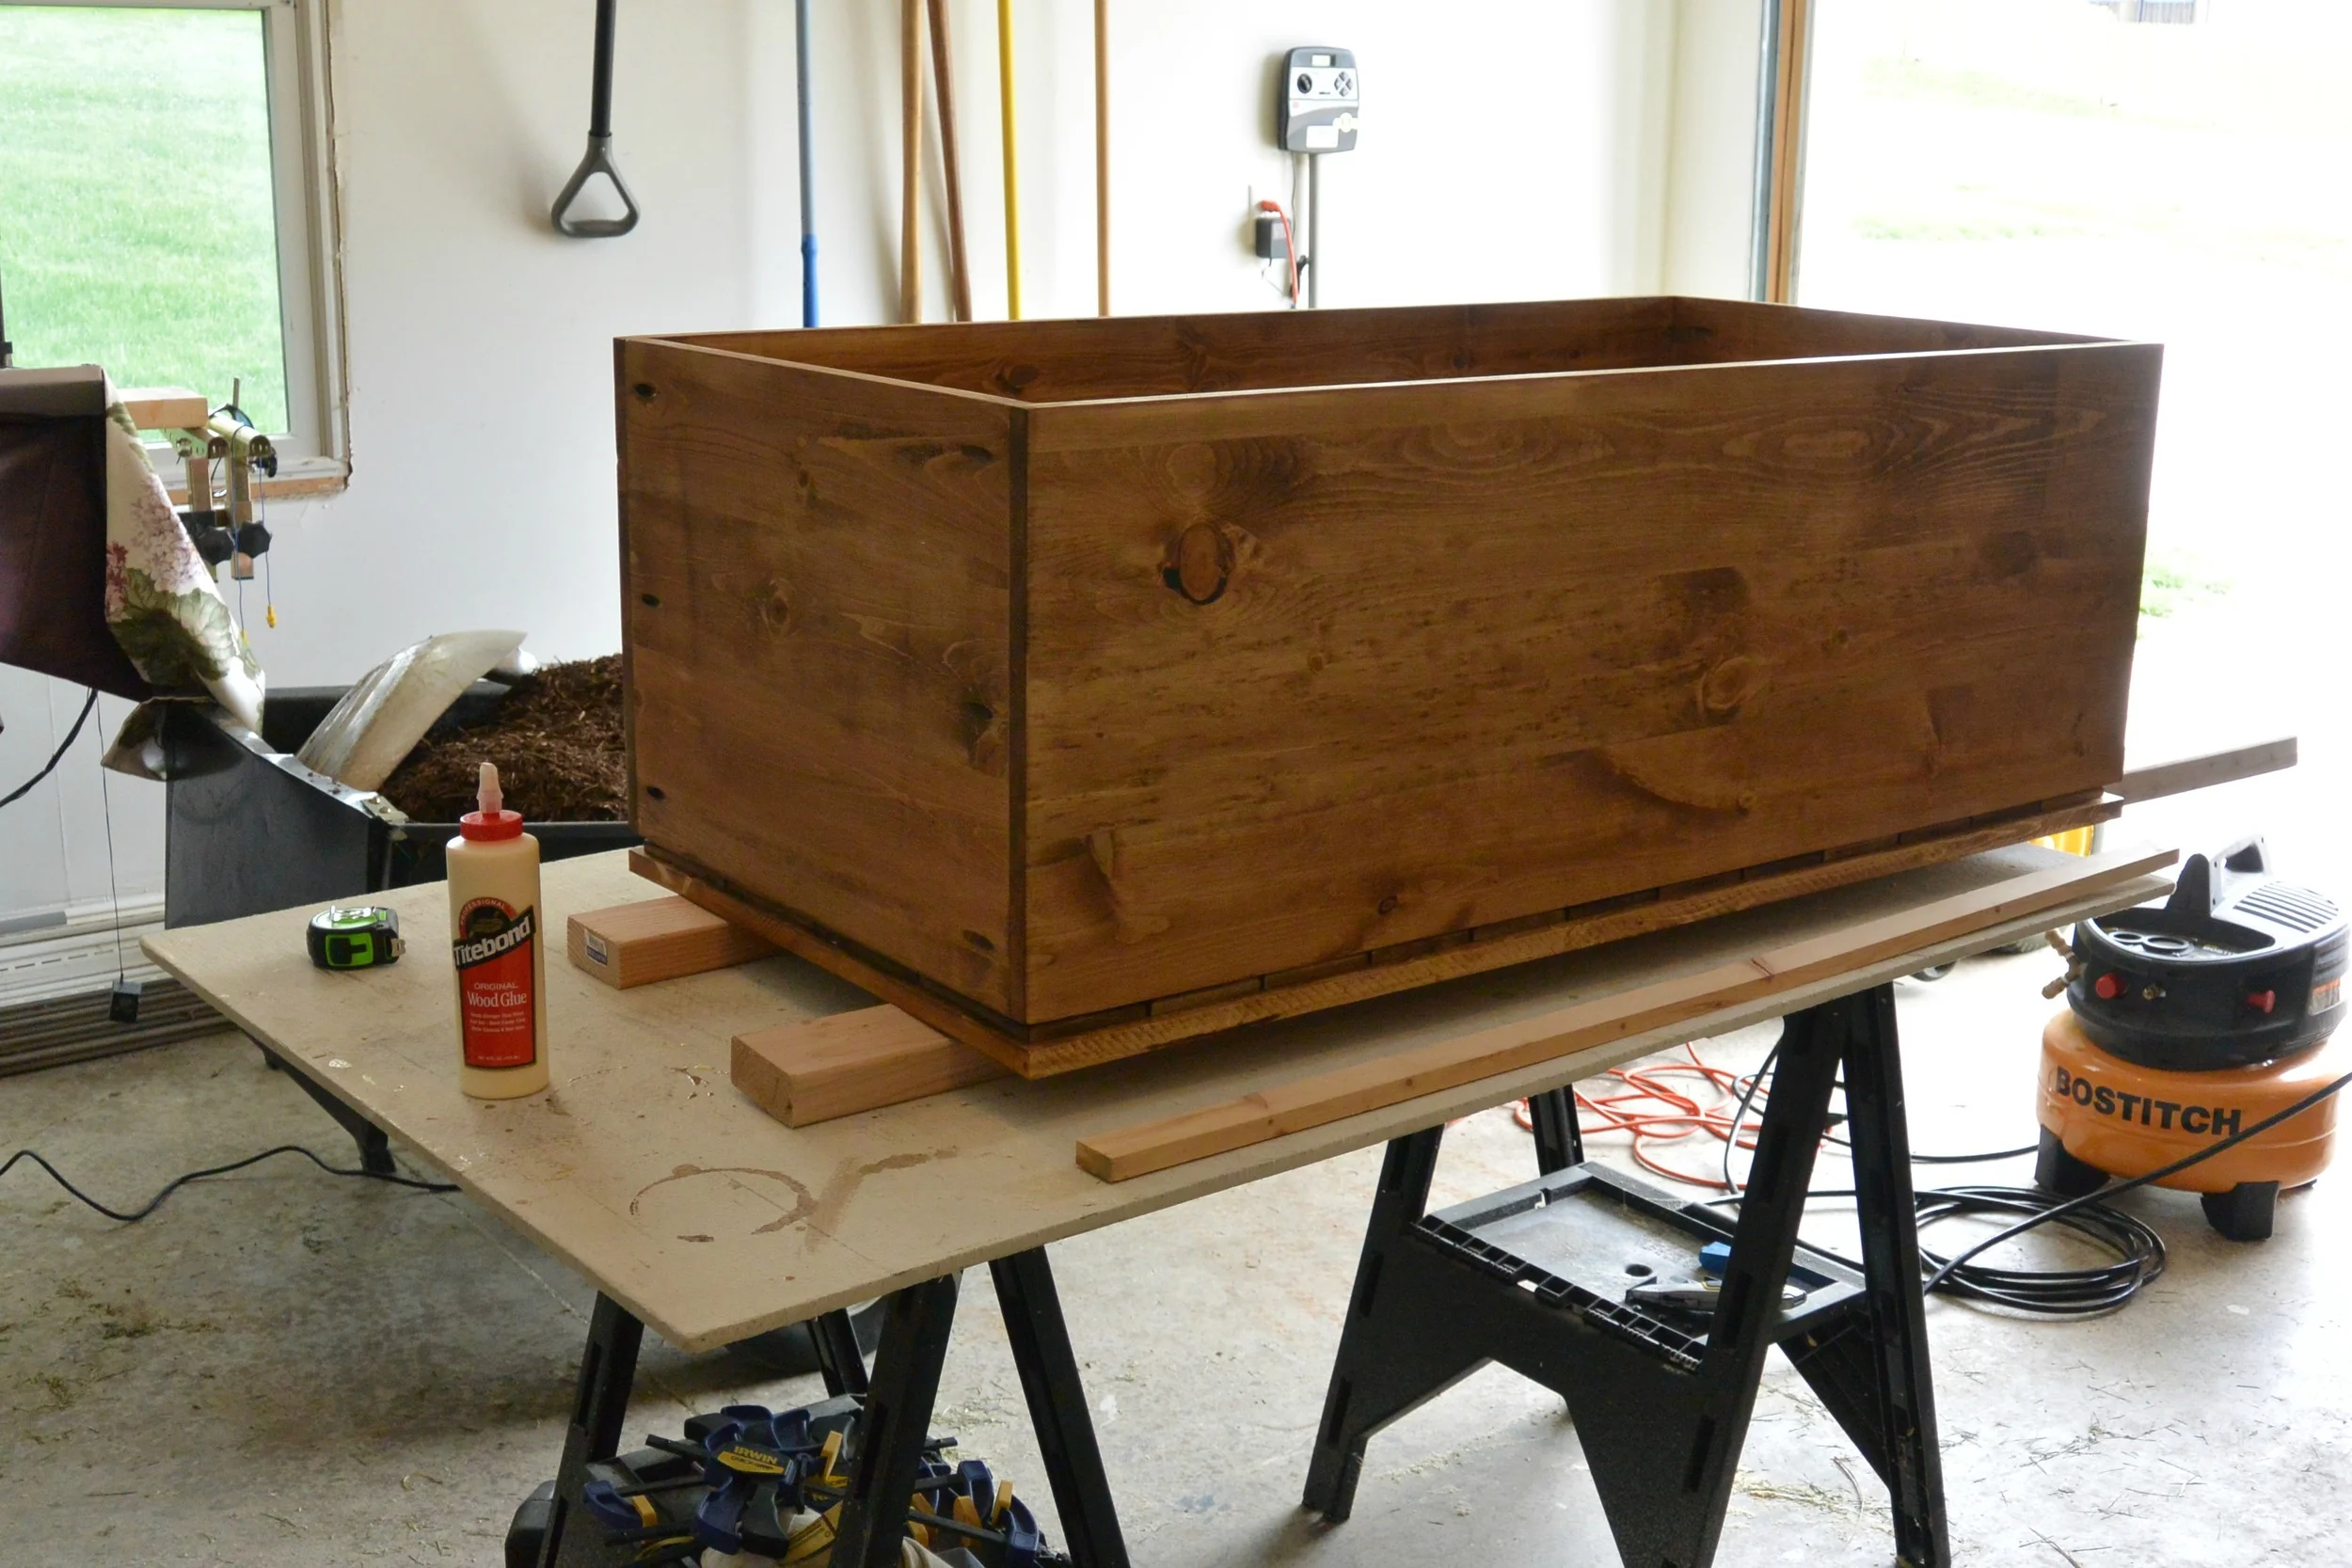
Add the back panel using pocket hole screws. Pay special attention to ensure that your box if flush on all edges. Sand all areas smooth.
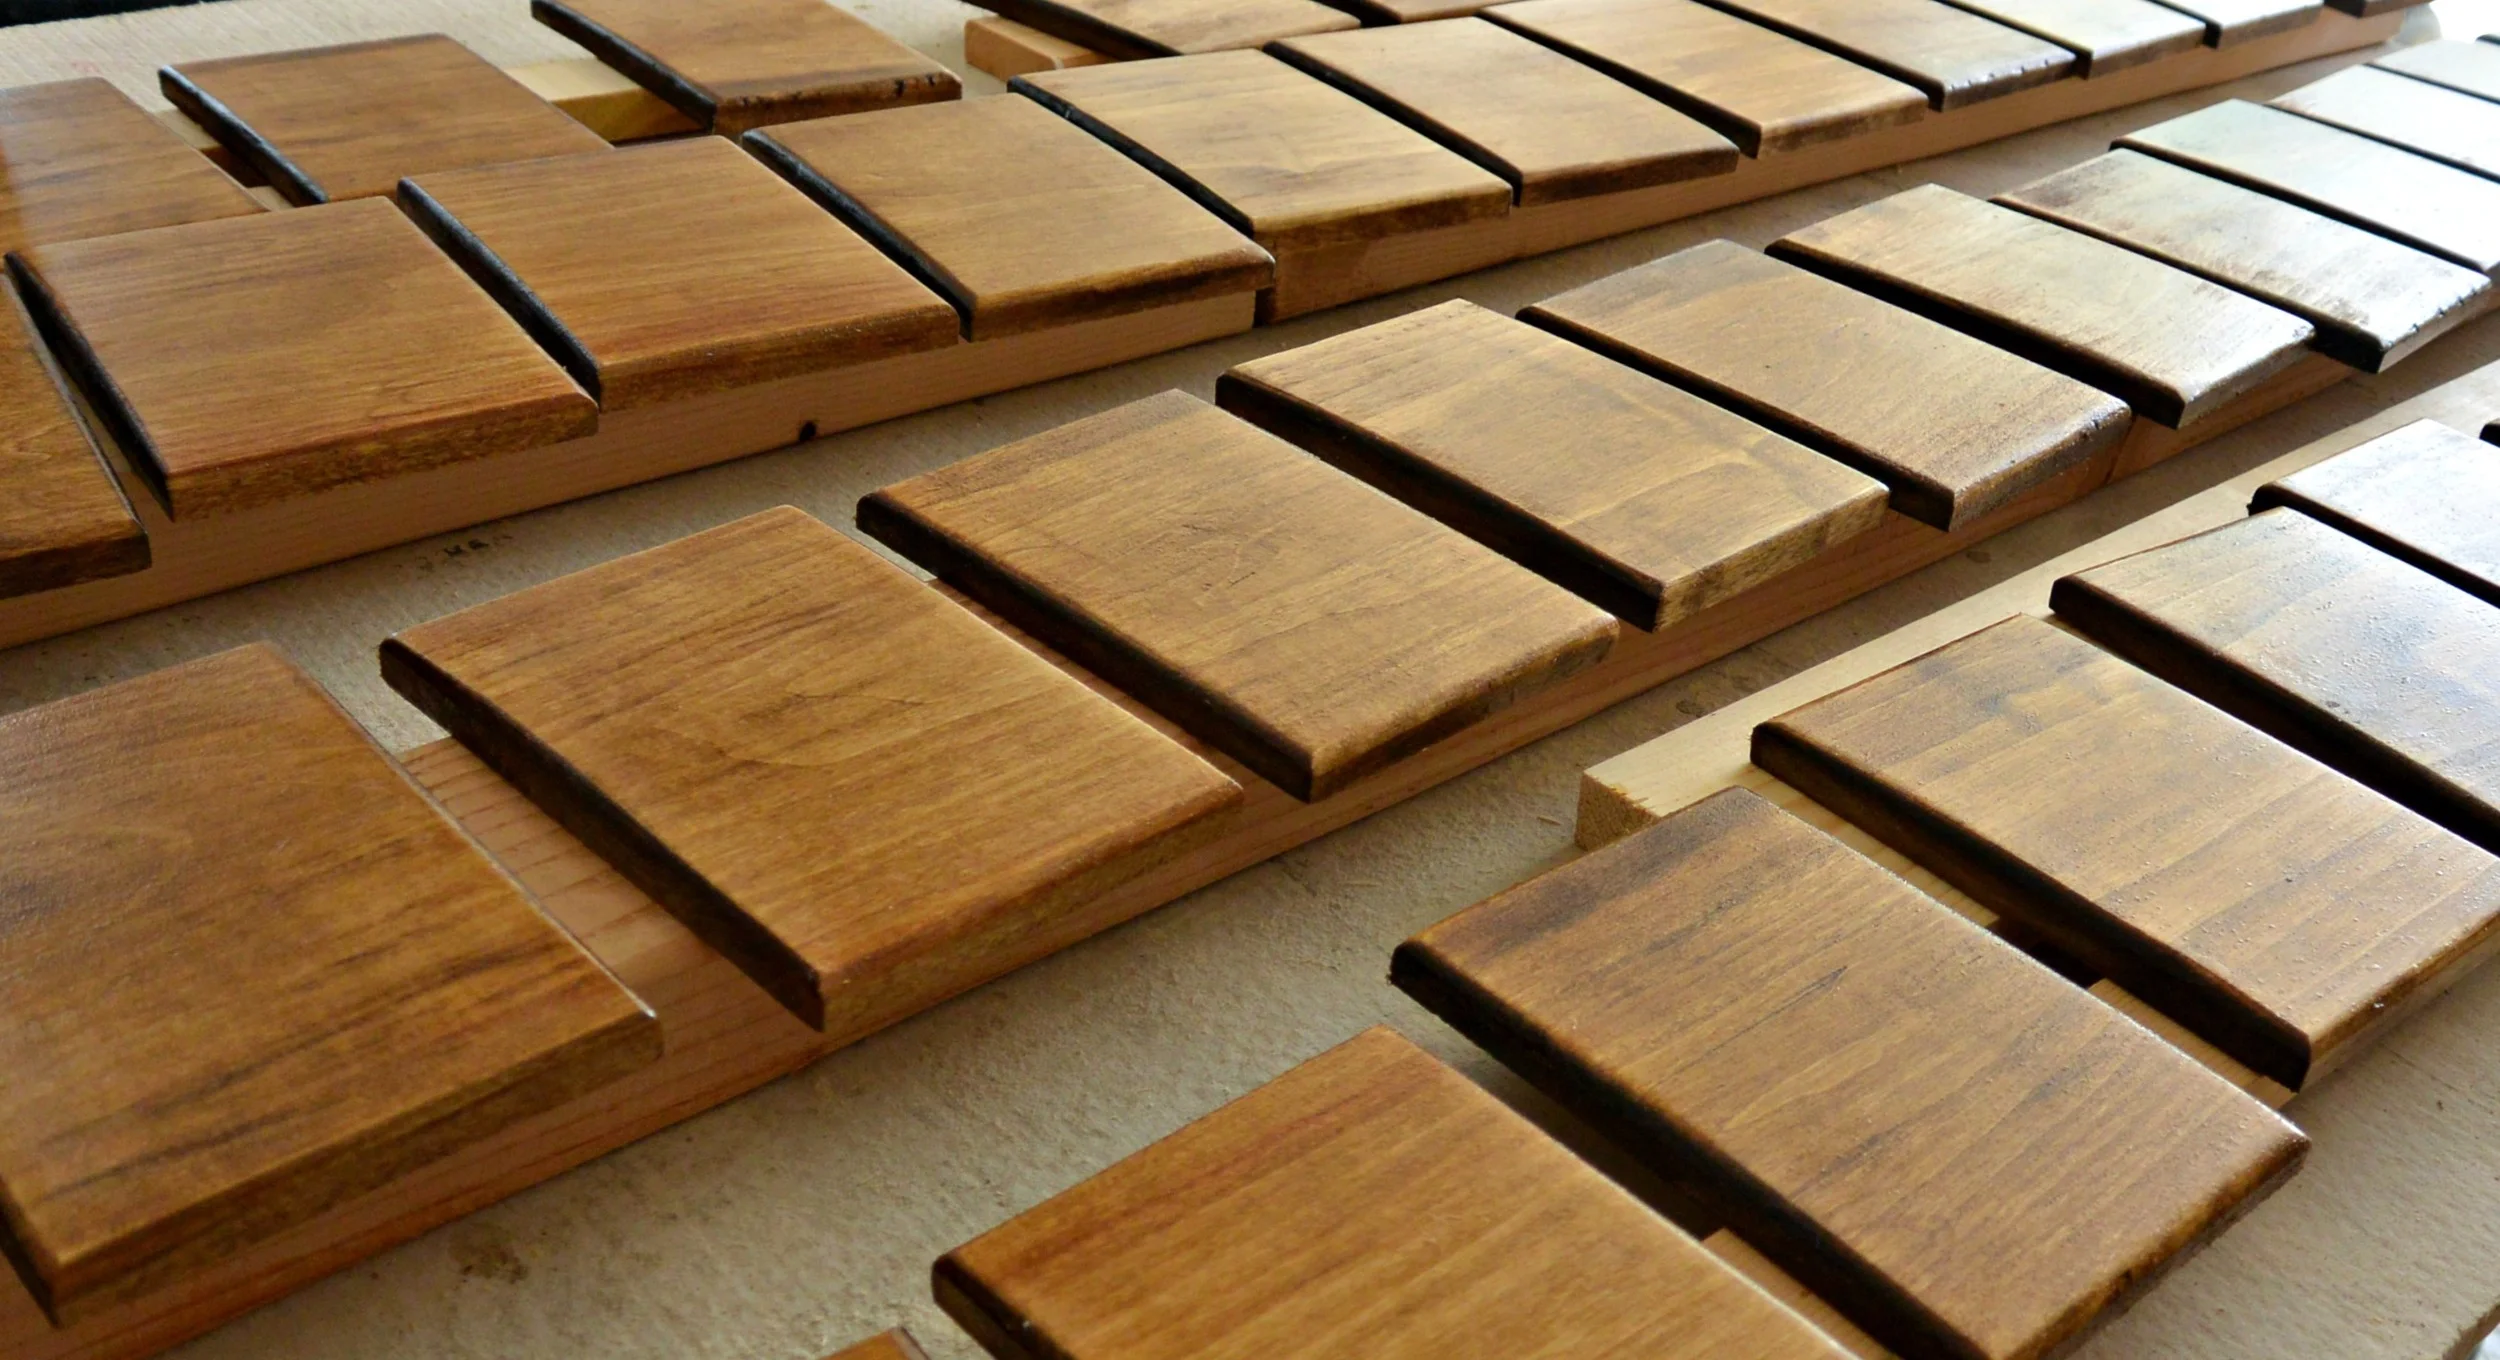
Route all edges of the 48 "drawer" fronts with a small round over bit. You could also try to sand the edges round but the router will be much faster. (Thanks to Nate's dad for assisting us in this step. He volunteered. We let him.) Sand all edges of the "drawer" fronts.
At this point, we stained and poly'd the box, fronts, door and legs separately. We thought it would be easier to do them before assembling beings there are a lot of crevices.
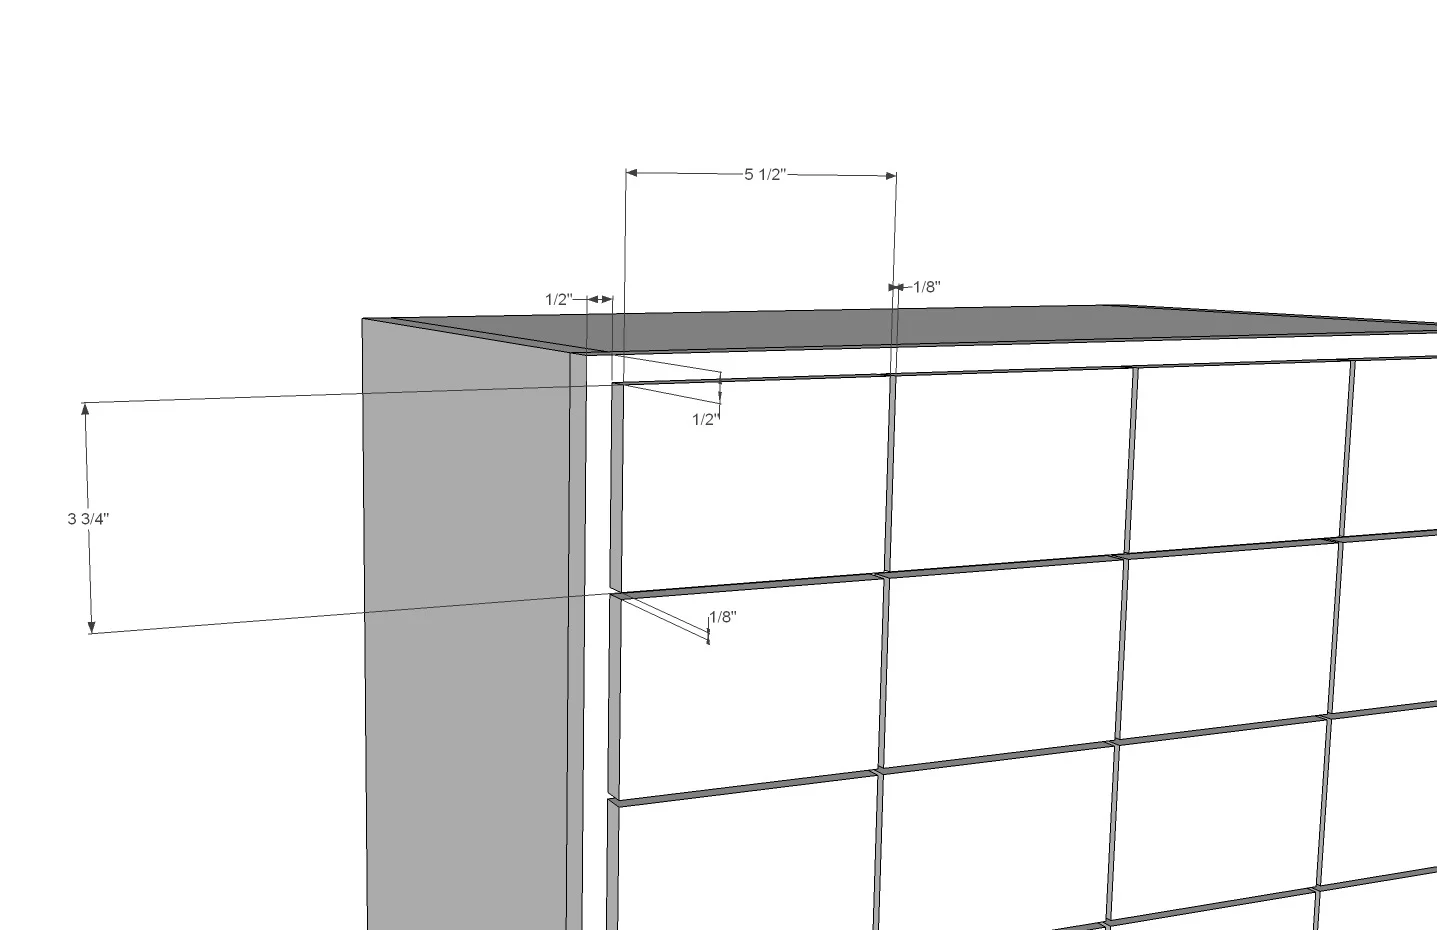
Once everything is dry, it is time to attach the fronts to the door. It is going to be best to dry fit the pieces. After dry fitting it was determined that 1/2" from all edges would work for a starting point, with approximately 1/8" gaps between each front. Yours may vary as our board was not quite exact 48" tall. We made a mark for each distance at the upper left, bottom left, and bottom right, using these marks, some scrap wood that is straight and clamps we created the desired border.

Place the drawer front snug against the frame you just created. You will now need to create a template to separate the drawer fronts. We were lucky enough to have a strip of wood that was 1/8" wide. We cut two pieces from this that were slightly smaller than the length and width of the fronts. If you are not lucky enough to have a random piece of wood with the perfect measurements, something like a paint stick would be close.
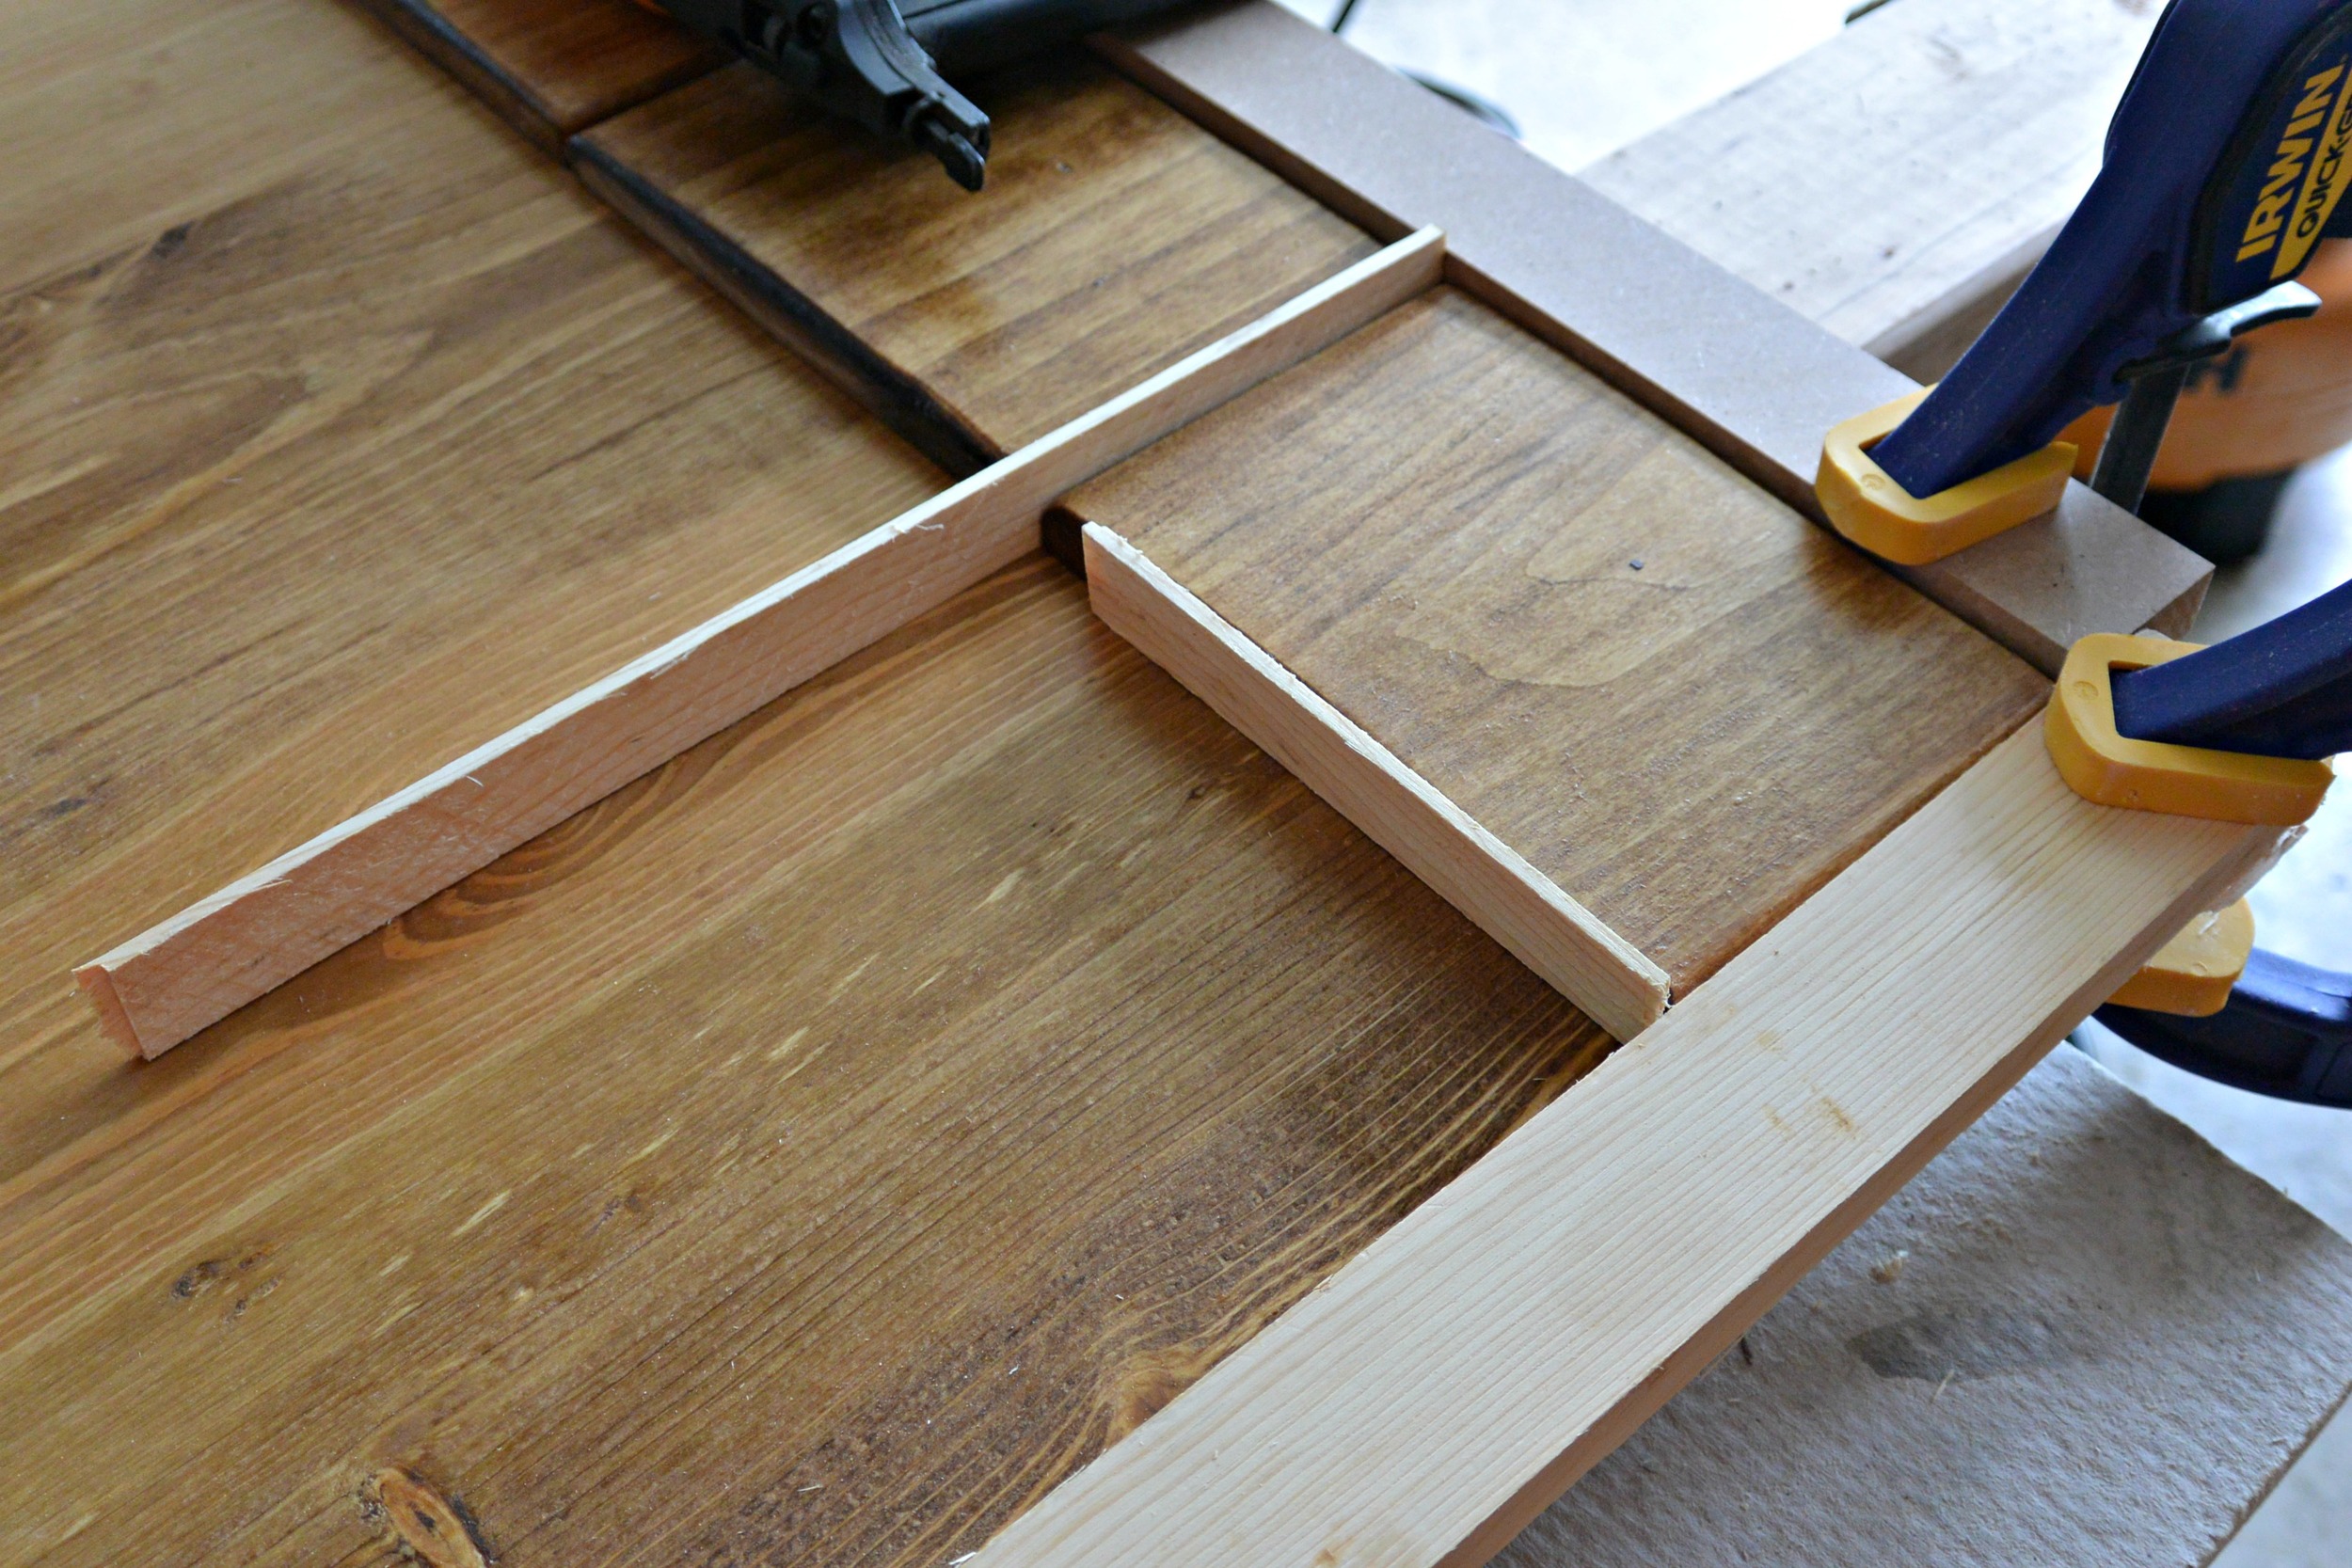
Use wood glue and 1" staples in a brad nailer attach the drawer fronts to the front of the cabinet. Place the staple in a location that will be covered by your hardware.
After attaching the first drawer front, put the strip of wood to the right of the one just attached and place the next board. Attach and move the strip. Repeat until the row is finished. Start the next row by putting a strip along the top of the previous row and place it snug against the outside frame. Repeat one billion times until all drawer fronts are attached.
The staple should be enough to hold the drawer front while the glue dries but for extra assurance, we put the cabinet box on top to apply extra pressure.
Now it is time to attach the cabinet hardware. We created a template using a scrap piece of wood. Each hole is 1 5/8" up from the bottom and the holes are 1 5/8" and 3 13/16" from the left. Place the two strips of wood to create "rails". Place the template against the "rails". Lightly drive a nail (or mark with a pencil) the location of each hole. Attach the hardware to each front using the marks from the template. We attached our hardware with cut tacks purchased at Lowe's.


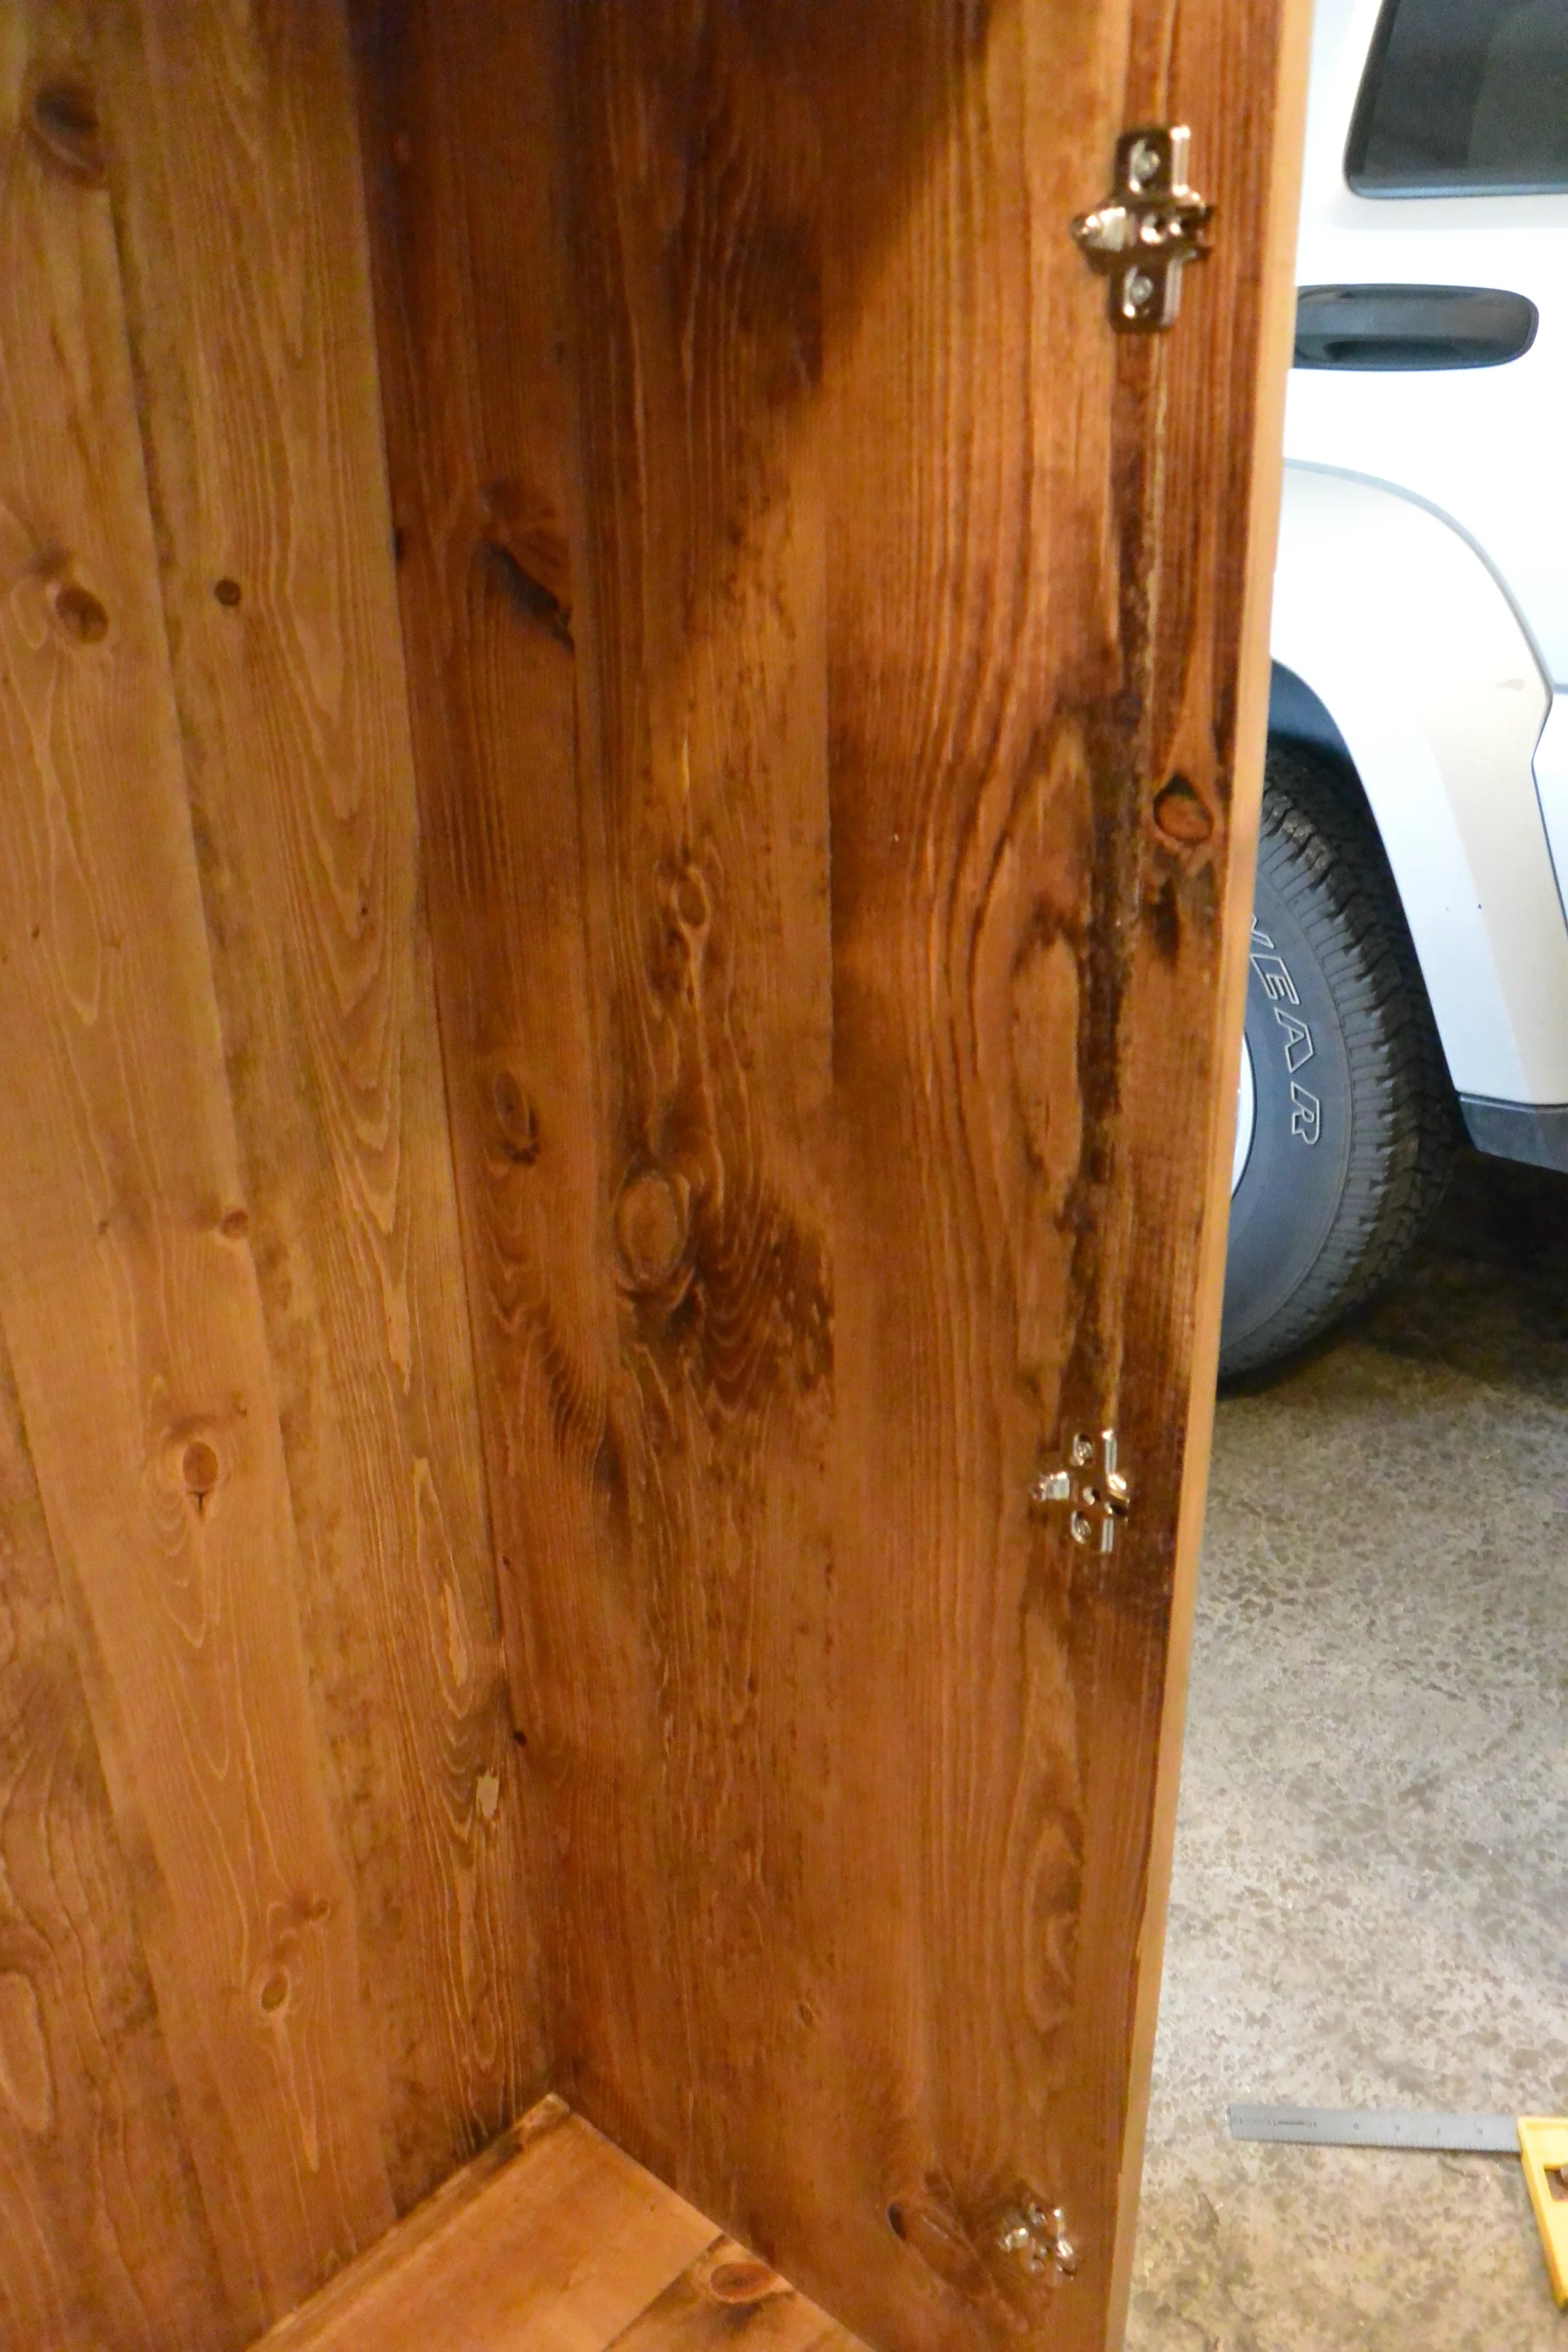
Attach shelves using pocket hole screws. Our shelves are located 10" and 20" from the top.

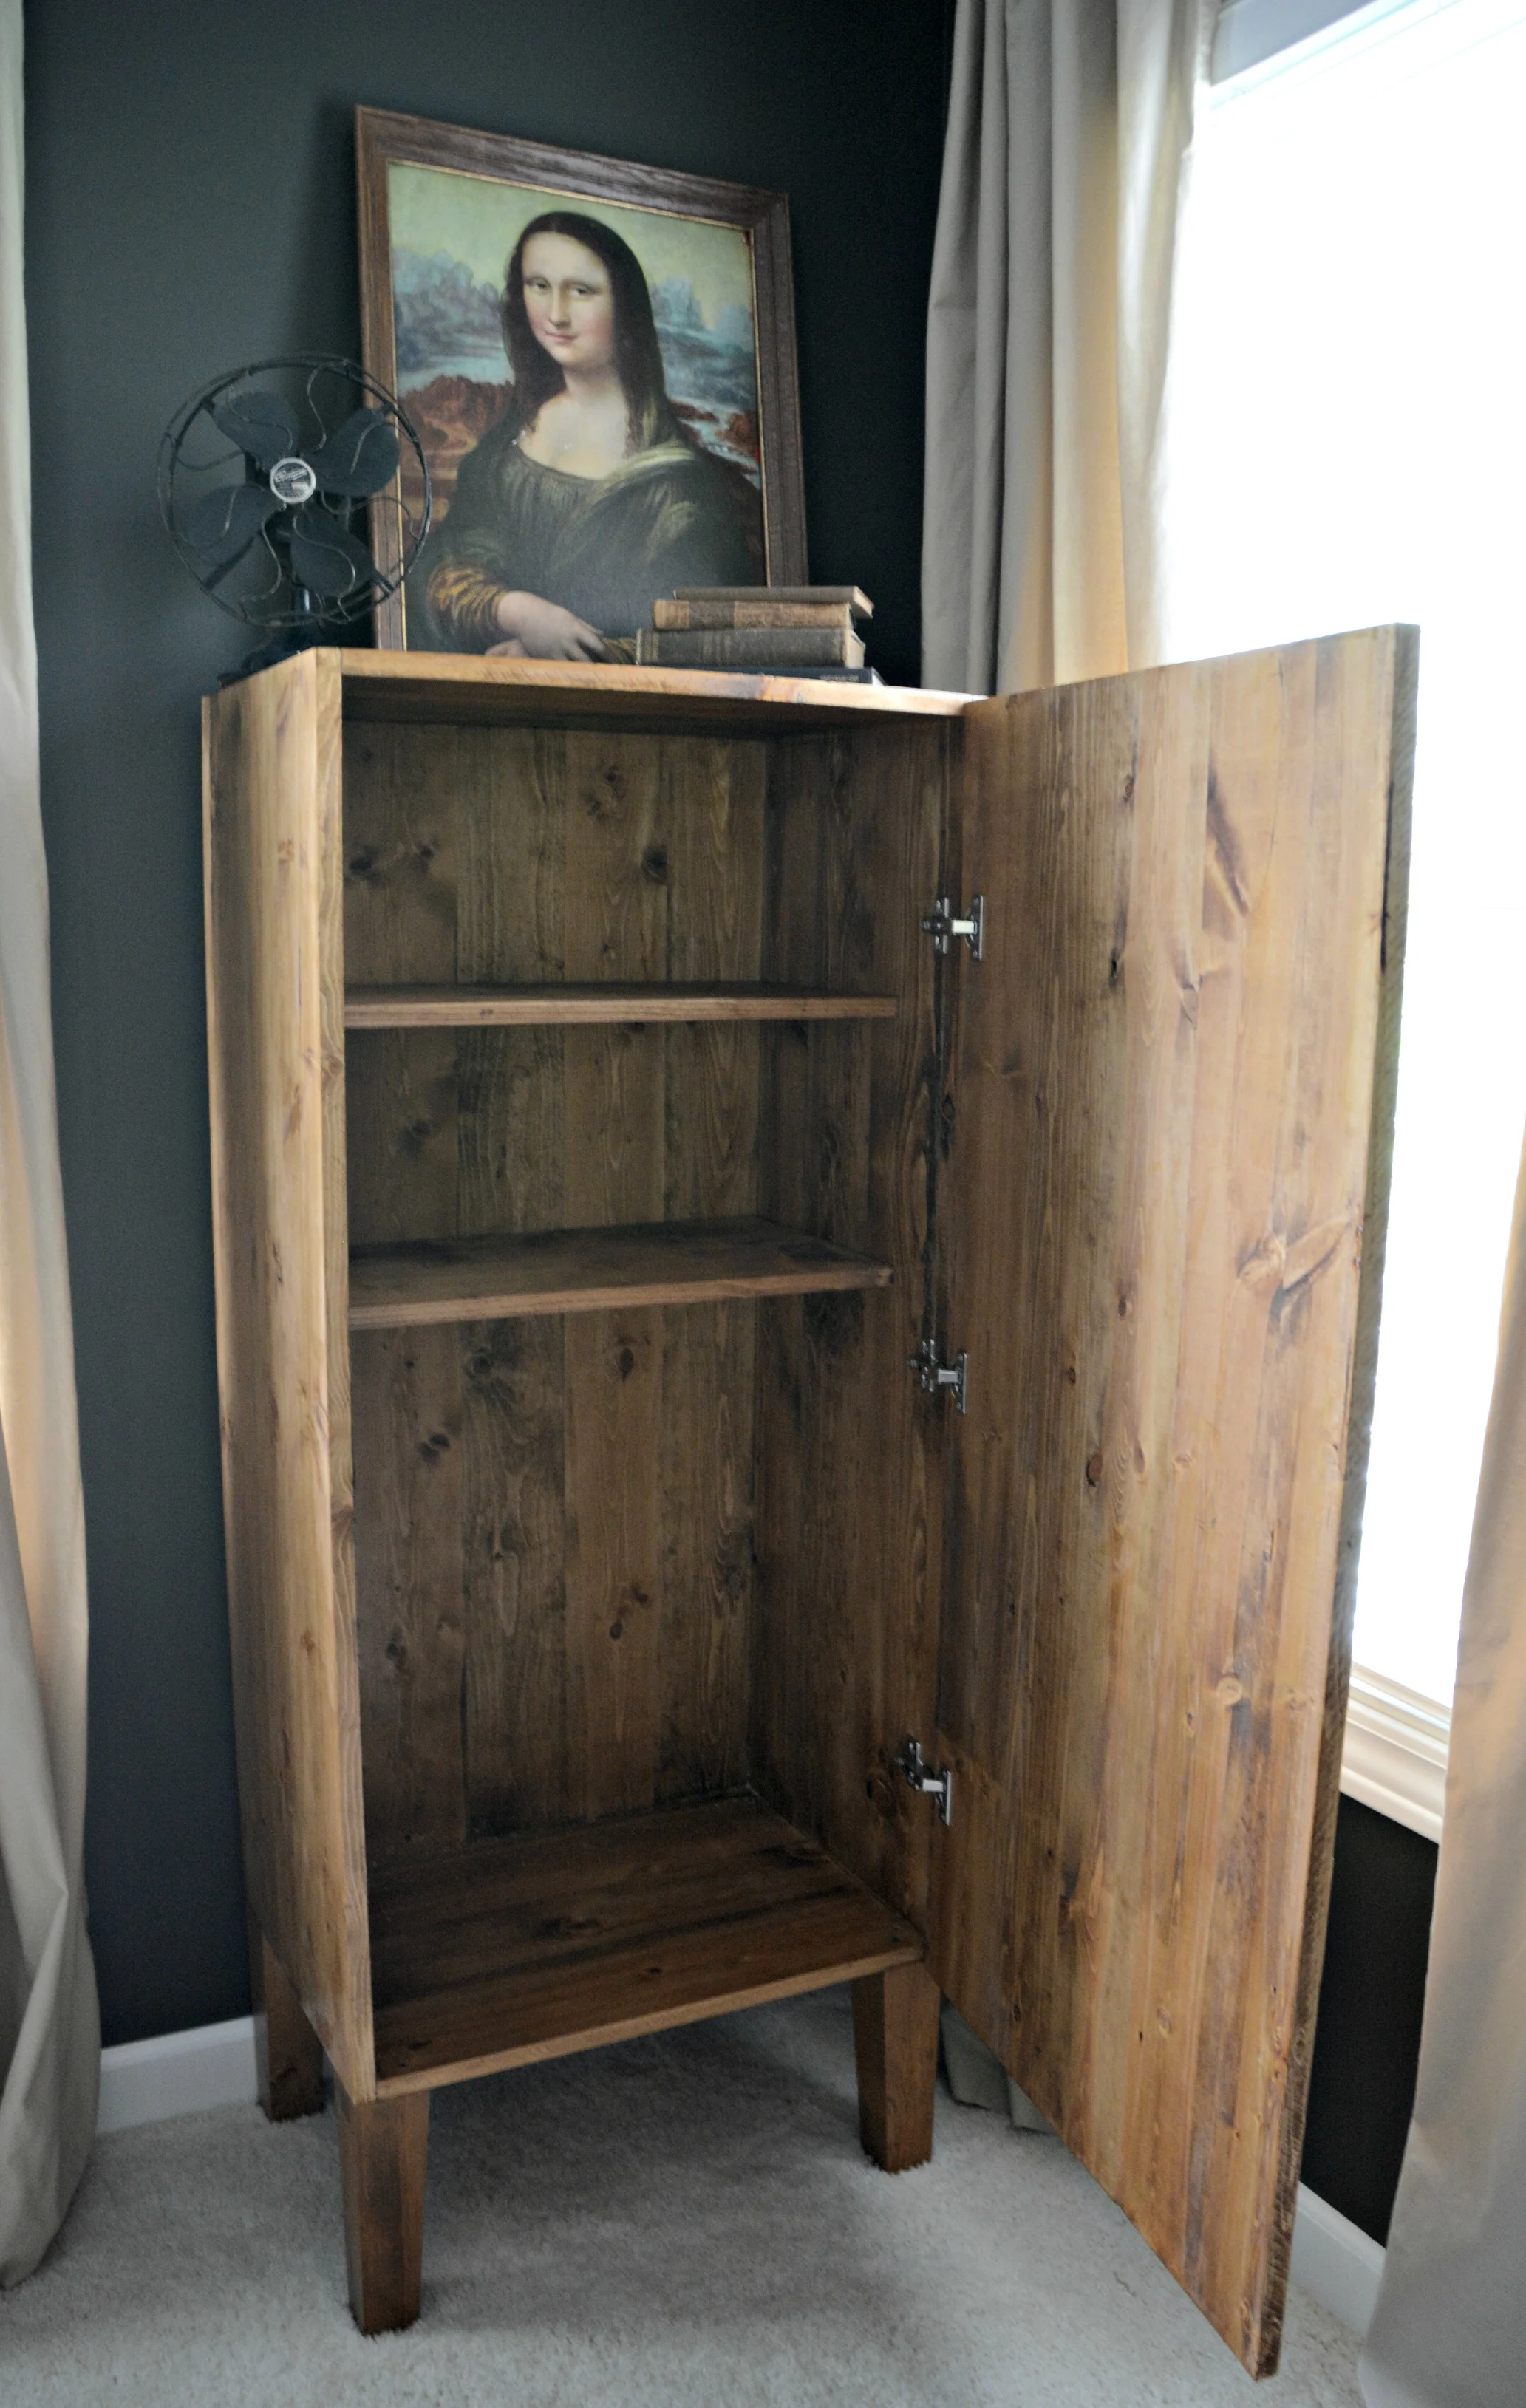
Attach the legs to the bottom of the cabinet. We used wood glue and 2" screws from the bottom of the cabinet and attached from the inside of the cabinet. You could probably attach the legs with a different method but this was easy and we don't notice the screws in the bottom.
Attach the door using flush mount hinges so they are not noticeable from the outside. This helps make the piece appear more as a card catalog and not as a cabinet. Tricky, right?
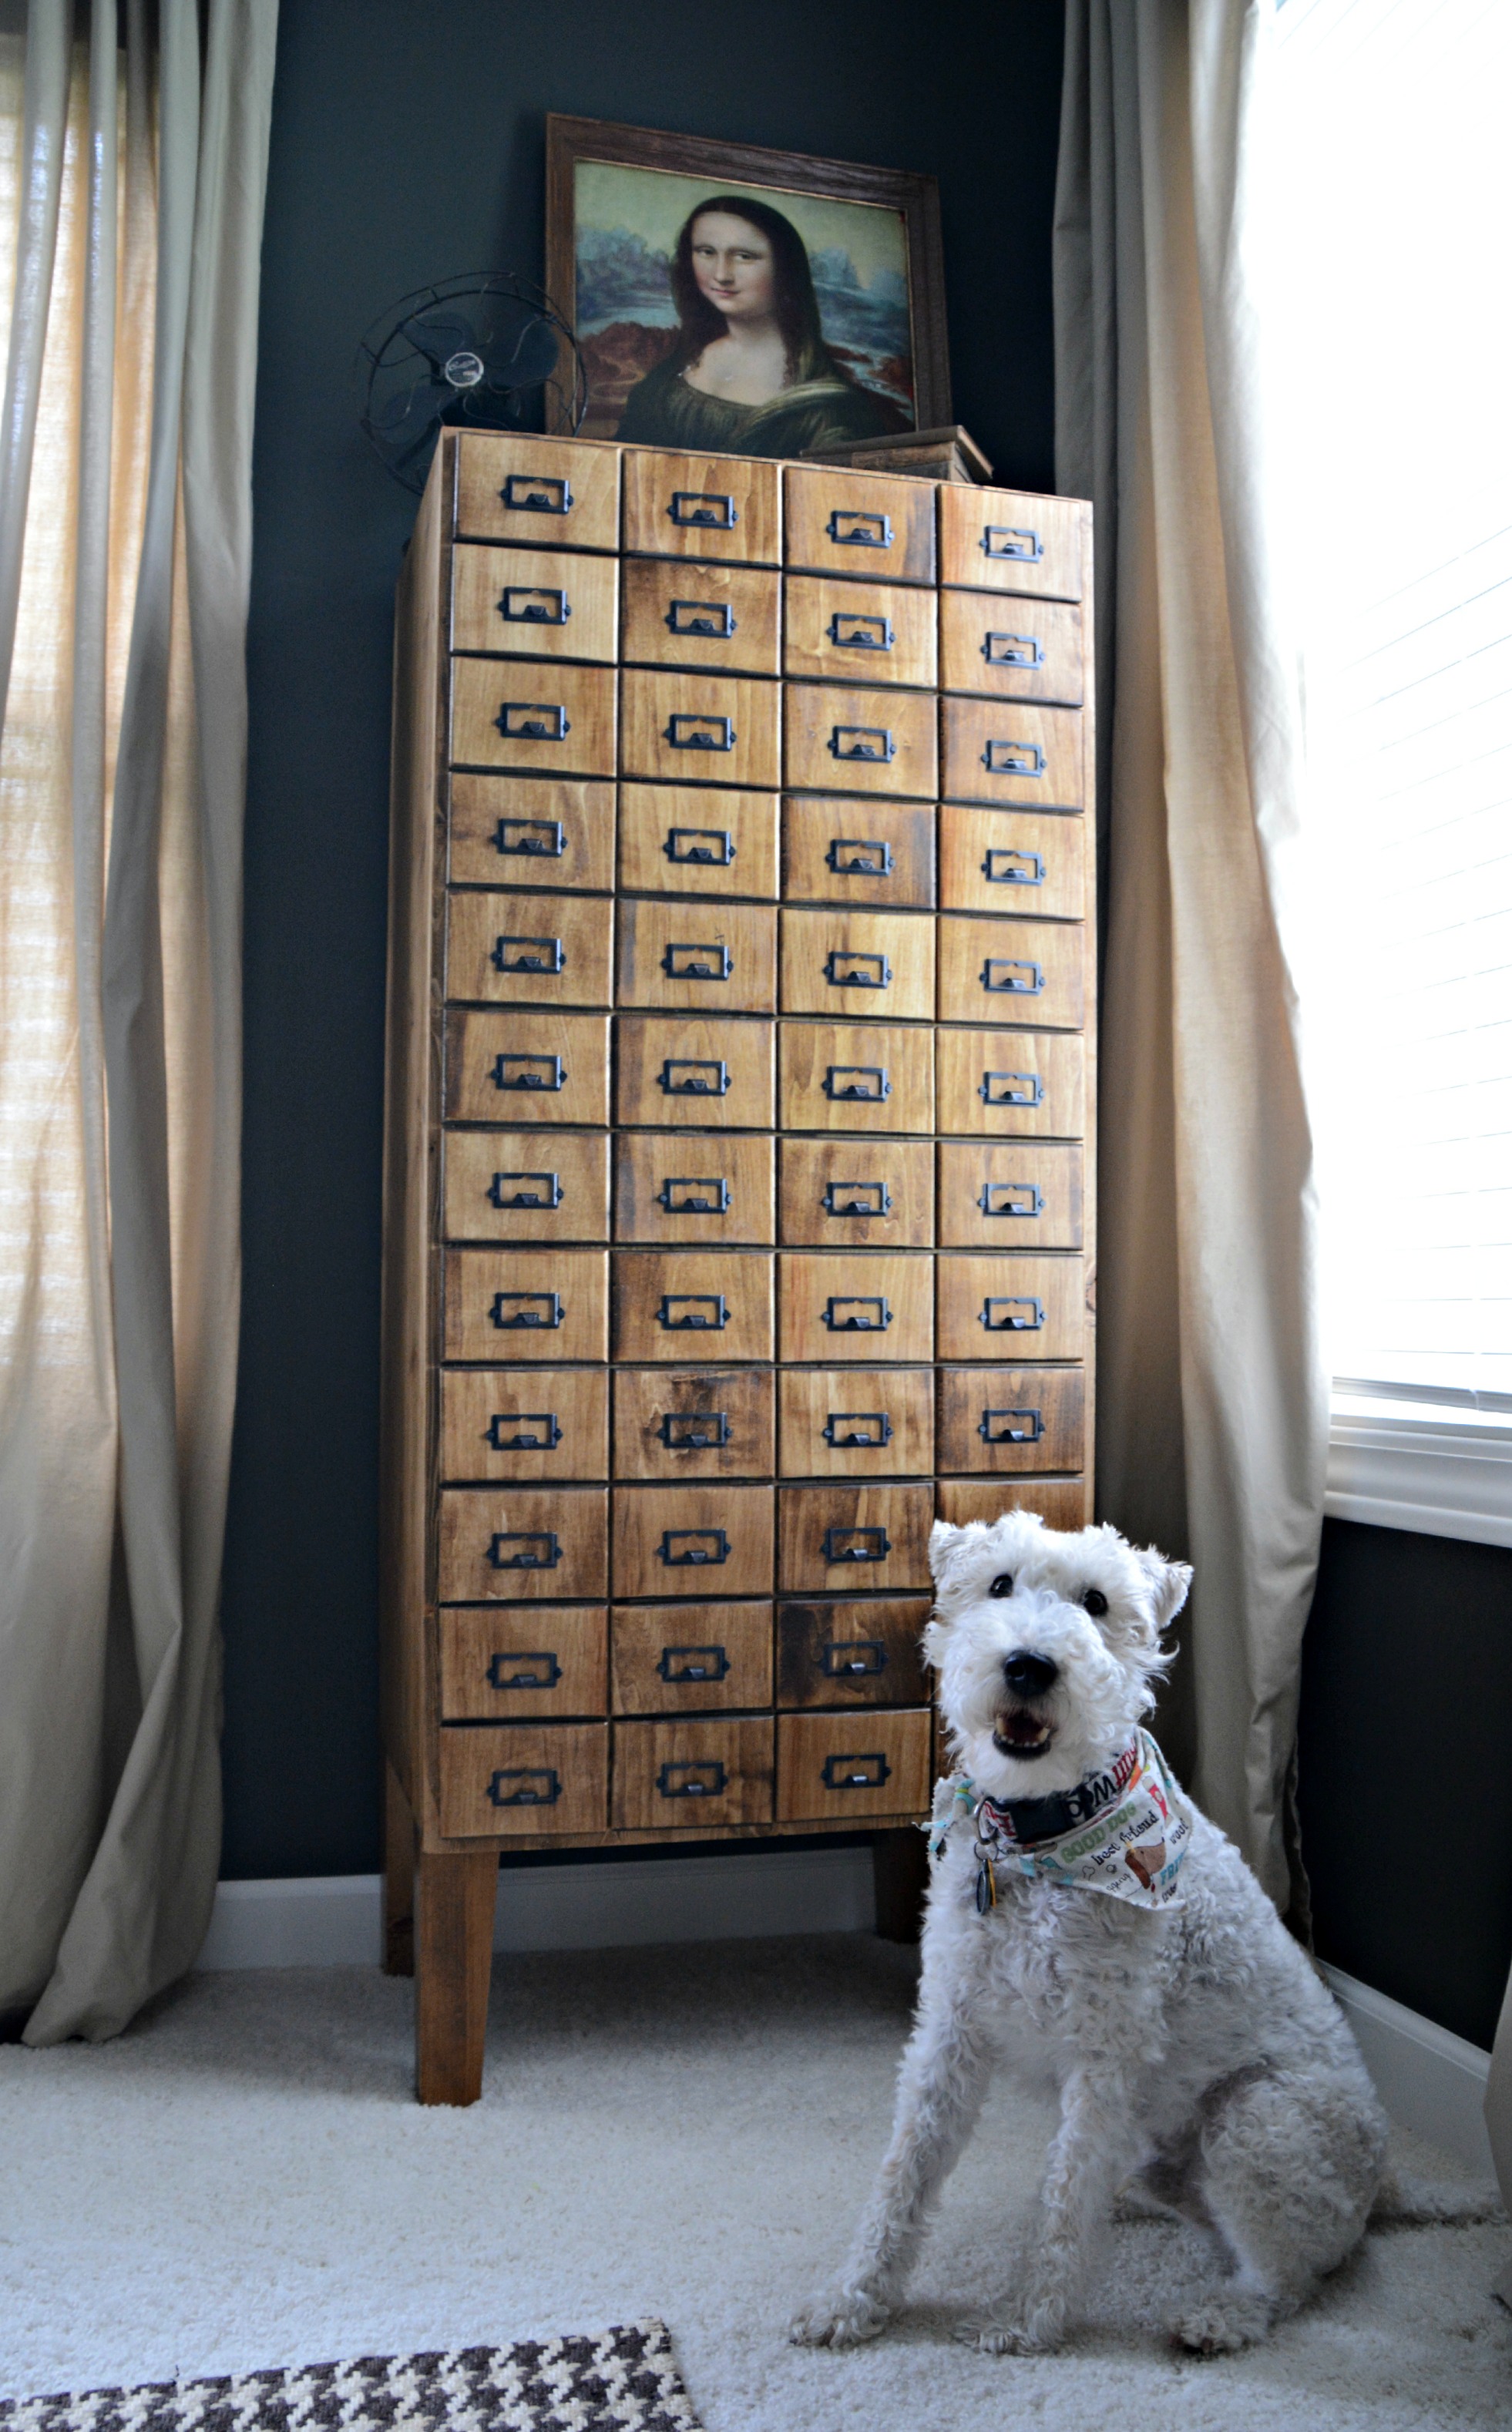
Congratulations! Your survived! Now it's time to drool over that beautiful piece of furniture!

The last step is to get your dog's approval. Ike loved it. Or did he just want his new stuffy toy? The world will never know.
Any questions? We'll answer them in the comment section!
We hope you all have a great weekend. We've got big plans for the holiday weekend! Hopefully we won't be too worn out to share them next week!