How to Build a Flower Tower
/I’ll let you in on a little secret. Remember the vertical garden we built as part of a sponsored program for Home Depot? Well, we were assigned the project. We weren’t super excited about it at first with but we ended up really liking it after it was built. That’s the inside scoop.
Where am I going with this? Ah, yes. What I really wanted to build was a diy flower tower!

I mean, it’s a tower of flowers. It has a cool name. I love Home Depot’s commercial where the wife is all like “This won’t take long. Will it?” THAT’S TOTALLY ME.
I had to have one. So we headed to pick up our supplies. I quickly began to realize that these little ol’ flower towers aren’t exactly cheap. Like those people in the commercial with 15 of them in their backyard must be loaded. Like Justin Bieber or drug dealer loaded. Not pharmacist and accountant loaded.
But I had to have one. You know how that goes. I compromised and limited myself to one tower instead of the 27 I had imagined in my head.
These towers are ridiculously easy to build. Like I did it mostly by myself. Whoa. That’s going to be the theme for this week. Michelle actually does stuff. Alert the media. Here's how to make your diy flower tower.
Gather your supplies. (The reason this project is expensive is that they don’t sell small quantities of some of the materials. Like you need 3-4 feet of wire fencing and it comes in a 50 foot roll. Nice.)
- 4-foot galvanized wire fencing with 2-inch x 4-inch openings (~$30)
- Landscape fabric (~$10. We had this left over from the vertical garden.)
- 6-inch black zip ties (~$2)
- flower pot (Price varies. We used one we already had.)
- Dirt (~$13 for a large bag.)
Gather your tools. (We had all of the tools.)
- Utility knife
- Aviation snips or tin snips
- Scissors
- The Home Depot recommends gloves when working with the wire. I skipped them but thought I’d throw it in for safety purposes.
Step 1: Create a cylinder with the wire fencing that you will place inside your pot. Allow an overlap of one fencing section to allow for a more stable seam. Cut the fencing using aviation snips.

Step 2: Overlap one section of the wire fencing and use the zip ties to tie the sides of the cylinder together. I used a tie in each section from top to bottom. Trim the zip ties to about 1/4”.
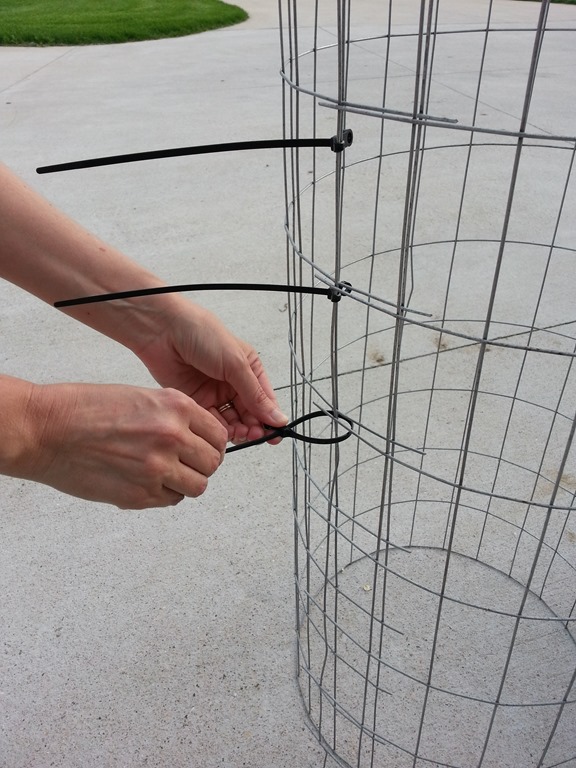
Step 3: Wrap the landscape fabric around the outside of the tower to measure how much you’ll need. Overlap an inch or two to ensure that soil doesn’t fall out through the seam. Cut the fabric to size using scissors or a utility knife. Slide the fabric inside the wire fencing. Cut the excess fabric from the top of the tower leaving about 2 inches extending from the top of the tower to help secure the fabric to the tower.
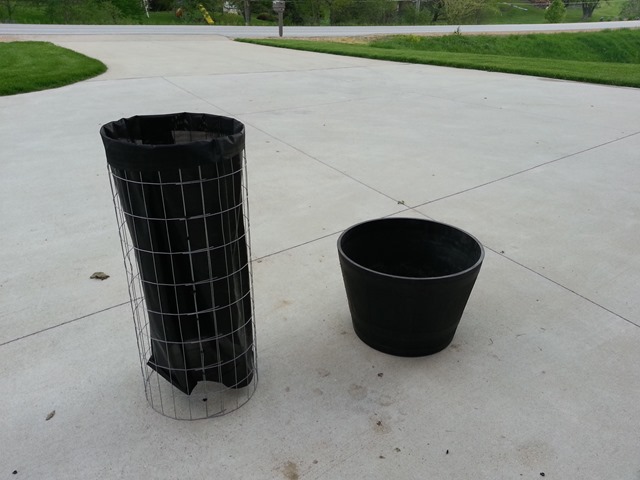
Step 4: Fold the two inch flap over the top of the tower. Use your utility knife cut small slits through both layers of fabric just under the metal rim. Cut one slit in every third rectangle of the fencing. Insert the zip ties through the slits and tie down the top of the fabric. Cut the ends of the zip ties to about 1/4”.


Step 5: Place fencing in your flower pot. Fill the tower about 1/3 full with soil. Add water to settle the soil. Add another 1/3 of soil. Add more water. Fill to about 1 inch from the top of the tower with soil and add water. Lightly press the soil once it is full to prevent sinking. I repeated the last water and pressing step a few times. Also add soil to the inside of the container just outside of the tower.

Step 7: Cut a vertical slit in every other rectangle and stagger on your way down the tower. (The Home Depot instructions suggest making a cross slit. I found that the flowers were sturdier if I only made the horizontal slit.)

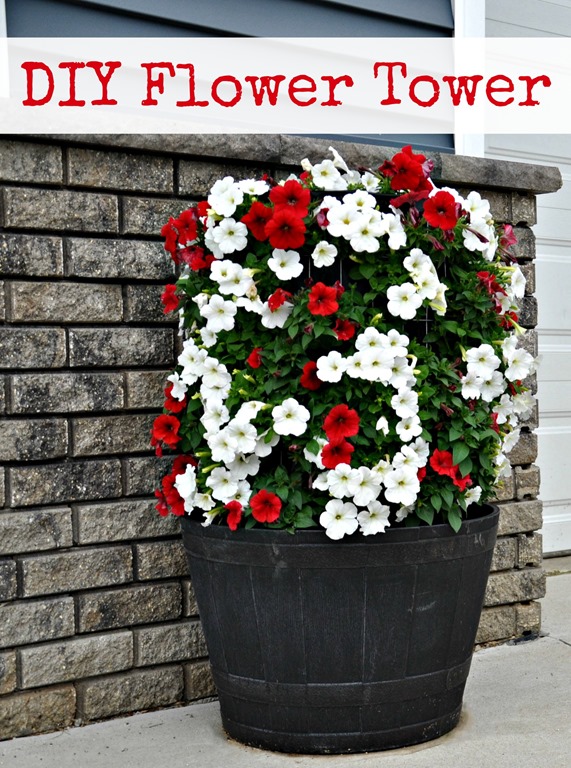
Step 8: Add your flowers. I chose petunias because they grow like weeds in sunny locations. Use your finger to create a little pocket behind the opening to place the plant into. It should fit snuggly but you don’t want to shove it in there and ruin the poor little plant’s roots. Once the plant is inserted into the tower, make sure the flaps of the landscape fabric close around the stem of the flower to help keep the soil in while water. Don’t forget to plant flowers in the top of the tower as well.
It doesn’t look like much at first. I’m not going to lie. It’s pretty hideous for the first two weeks. I’m pretty sure the neighbors were wondering what the heck the monstrosity by our garage was.
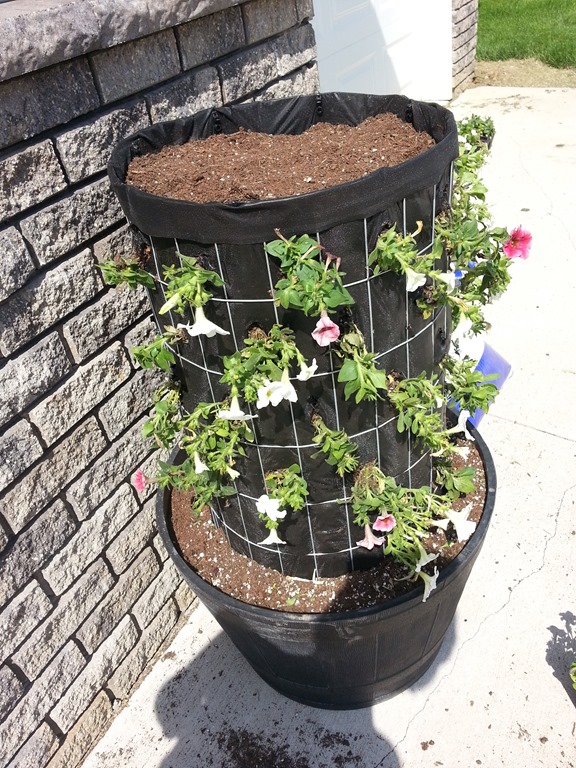

Step 9: Water and cross your fingers that the thing lives. As long as you chose petunias and you water them, the tower will live. I’m certain of it.
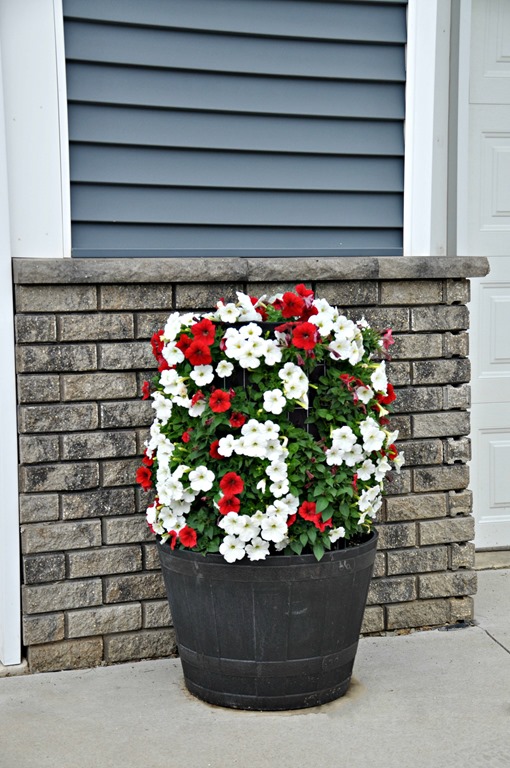
Our tower has been growing for about 3 weeks and it has filled in nicely. There is still time for you to build one for the summer!


Be sure to check out more projects on our DIY projects page!
Any fun outdoor projects planned for the summer? Do your neighbors wonder what the heck you are doing on a regular basis?


