Independence Day Flashbacks and Nonsense

How was your weekend?  Ours was lovely.  We discovered Mad Men and iced green tea lattes.  Both have changed our lives.  I’m changing the name of the blog again.  It’s now “Mad Men and the Dog”.  Or “Mad Girl and the Dog”.  That’s probably more like it.

We did manage to get some things done.  Non-blogworthy things like getting our lives in order.  You know, like cleaning out the bathroom medicine cupboard.  And the garage.  Oh, the garage.  Fun stuff.  I’m also getting ready to move the ol’ blog to a different platform.  I have no clue what I’m doing and it’s going to be amazing.

Beings that I didn’t take a picture of the expired bottle of cough syrup from 2010 (Yes, I’m a pharmacist.  Why do you ask?), I’m digging out some ol’ Independence day inspiration from the archives. It’s make me sad when lovely posts get forgotten. Enjoy!

***

Who’s excited to watch fireworks this week?  Want to photograph some of those fireworks?  Nate has some tips for you.  My tips are wear bug spray and drink green tea lattes to help you stay awake.  Also try not to sit next to annoying people.  I’m horrible at that last one.

How to Photograph Fireworks

How to Photograph Fireworks

Want your dog to be super stylish in red, white and blue.  How about an easy sew dog tie?  You know Ike will be wearing his.

Easy Sew Dog Tie

Easy Sew Dog Tie

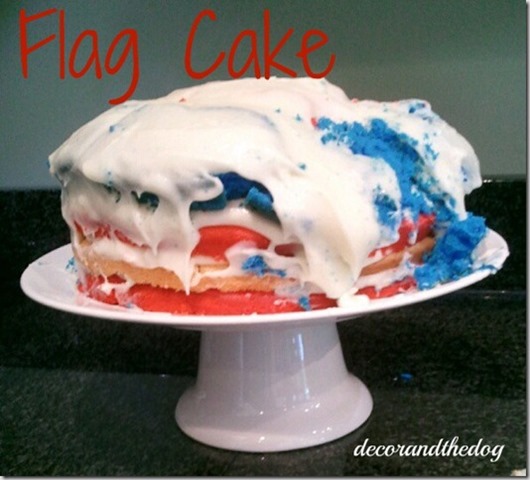
Or how about baking a flag cake.  Mine, obviously, turned out well.

Flag Cake

Flag Cake

Big 4th of July plans?  Any fellow Mad Men fans?  Whose dog needs a tie?  Any cake fails?

Life As We Know It

I’m going to be honest with you all.  Having your blog grow is a weird (yet awesome) thing. But there comes this pressure to have stellar pin-worthy posts all of the time.  That just isn’t my style of blogging, yo.  I tried it. I didn’t like it.  I would panic when I couldn’t come up with a stellar post idea and instead write nothing.  Lame.

Today, I’m headed back to the Michelle way of blogging. Why?  Because I can.  (I’m on a power trip.  Look out Nate.)

Today we will discuss life.  Mostly according to Instagram.  Because really, is it life if it wasn’t capture on Instagram?  There is no order to this nonsense.  Just like my life.

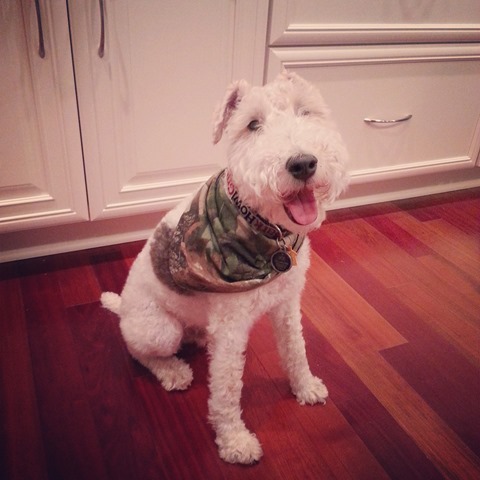
Ike is now a redneck.  He is madly in love with this bandana that his uncle gave him.  He is the only dog I know that gets upset if you take his bandana off.  I think I will rename the blog “Ike Dynasty”.  (Thanks, Kristel!)

IMG_20130625_202212

Oh, it makes me so sad. Is this what it’s like when you’re kid wants to wear that Disney princess horribleness instead of the cute Gap cardigan you bought her?  But that look on his face.

There’s a new antique store in town.  It’s not good for my savings account. So much old cuteness.  I’m going to talk to them about a frequent shopper card.

IMG_20130616_133750

I’m kind of behind times but I forgot to mention that I got to meet Shannon (Bottle Pop Party Co.) back in May.  I love meeting strangers from the internet.  First I survived meeting Kim and then Shannon.  Maybe I should test my luck and meet a stranger from Craigslist. (I kid. I kid.)  Shannon is cool and she got me addicted to Straw-ber-itas.  I like friends that are good influences.  She’s also ridiculously good at party planning.  Party on, Wayne.  Party on, Garth.

IMG_20130525_191937

Speaking of good influences,  Kim and I should have a new item listed in our shop, Sew Midwestern, soon.  Sneak peek.  ***Spoiler Alert:  It’s not my purse.  Or the baby monitor.***

IMG_20130617_171549

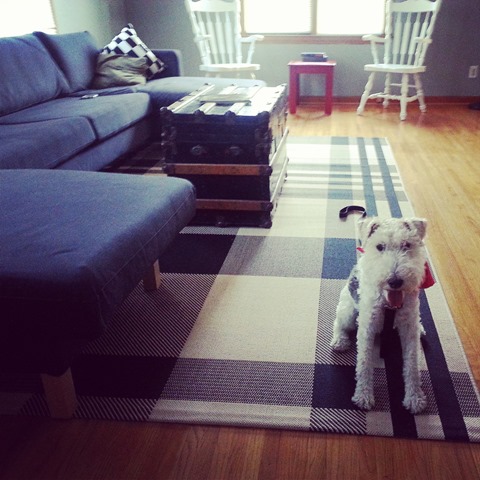
Earlier this week I shared with you some of my brothers house (the exterior and bathroom).  Here is Ike super pumped to check out his living room when we first arrived.  I’m liking brother’s rug.  He does good work.  (I did, however, crop out the deer heads.  Brother Dynasty.)

IMG_20130621_173727

We had a storm go through the other day.  I got to spend 30 minutes of my work day sitting in the hallway wondering if I was going to die. ***Spoiler Alert: I didn’t.***  I was close to getting one of the docs to write me a script for Xanax.  ***Spoiler Alert: I wasn’t close.***

IMG_20130624_155325

This was the aftermath of the storm.

IMG_20130625_174026

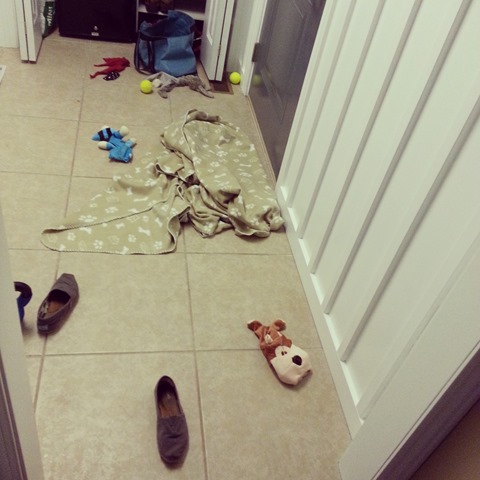
Or that was the aftermath of me accidently falling asleep after work one day this week.  He opened the bi-fold doors, pulled his travel bag off of the mini-fridge and then proceeded to take out it’s contents.  He left the treats and food.  Because normal dogs do that???  They also do this too. I’m sure of it.

IMG_20130617_102734

Oh, Ike.

That’s life.  Or some of it.  Actually lately it’s been feel of sweating a lot and trying to get arm muscles. It’s my newest obsessions.  I’m so weird.  And beastly.

What are you all up to this weekend my beastly readers?

Pink Bathroom Makeover

Brother:  “Why are you cleaning my bathroom?”

Me: “Because I’m going to snap photos for the blog.  Hope that’s okay.”

Brother:  “Want to photograph my upstairs bath then too?  How about my kitchen?  The dining room?”

Good try, little brother.  Good try.

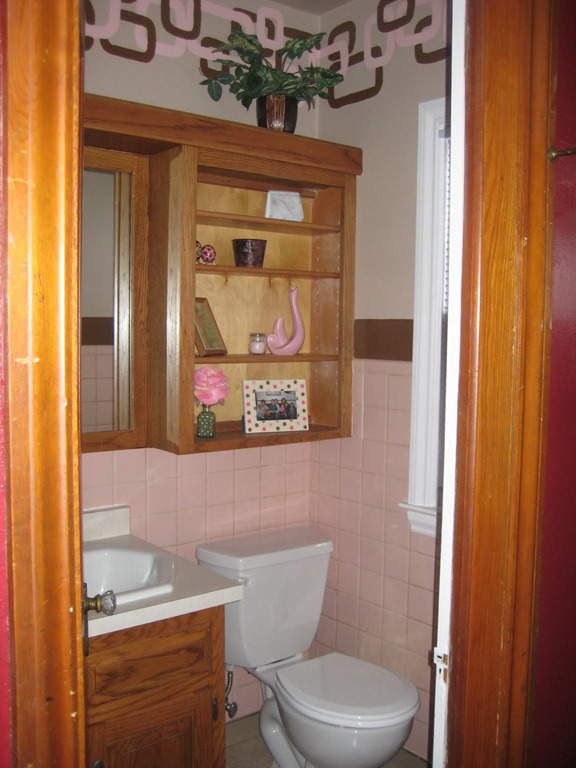
This is what the bathroom looked like when little brother bought his house.

Pink Tile Bathroom Before

I don’t know about you but I was totally digging that stencil.  That dirty pink tile was to die for.  The oversized vanity and shelving unit where pretty stellar too.

But for some reason, little brother hated it.  I just don’t get it.  He was afraid of the cost to fix it.  Luckily his sister is an important DIY/home decor blogger.  (I kill me.)  Or he’s lucky he has a brother-in-law that is handy.  And a dad that likes to destroy things. 

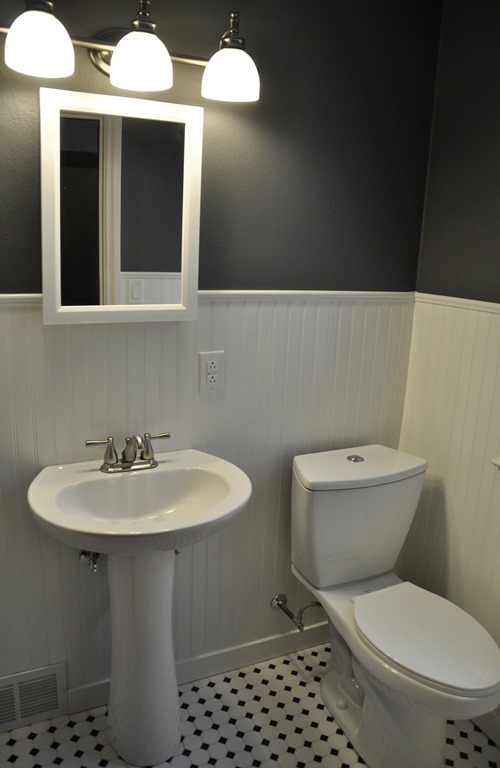
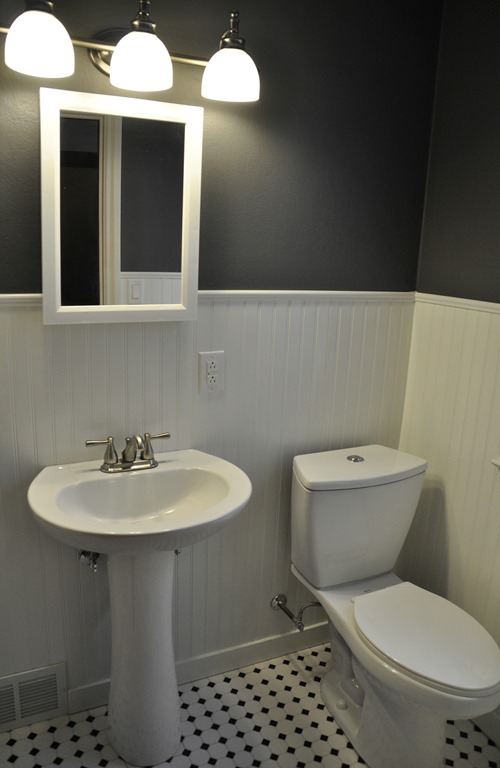
Some sweat, family bonding and around $350.00 left his bathroom looking like this.

Bathroom Makeover (Beadboard, Peppercorn, Hex tile)

One thing that has surprised me about my brother during this whole house renovation process is that he actually has really good taste.  (Well, minus the deer heads in the living room.)  But overall, his selections have impressed me.  He usually asks if what he likes is okay but I rarely have to tell him it’s not (minus the deer heads).

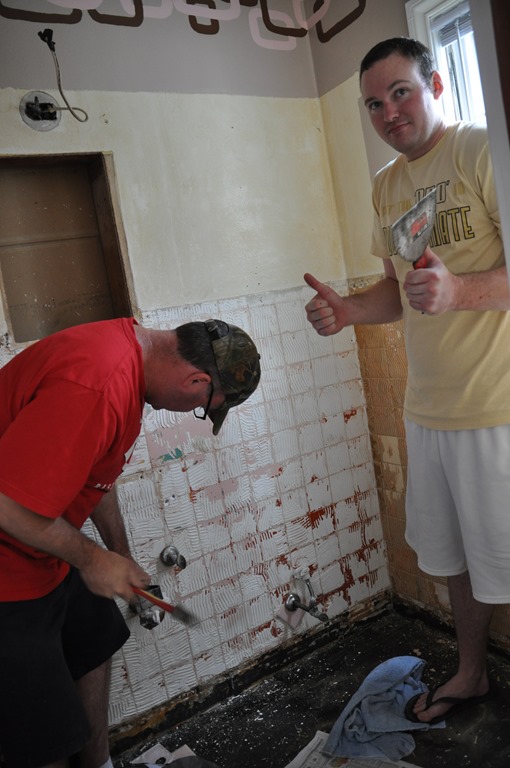
The makeover started by gutting the bathroom. (We make our father proud.)

Powder Room Makeover

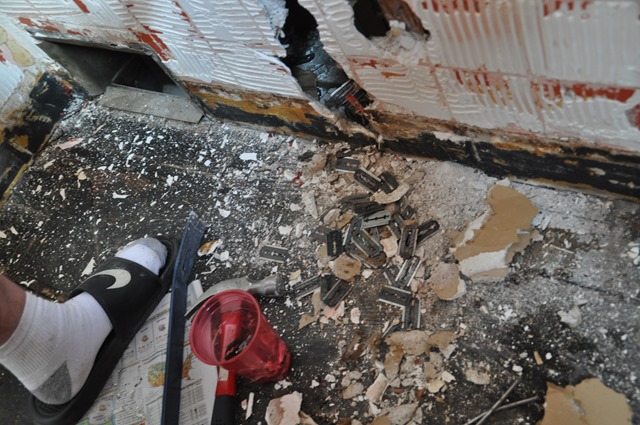
Moving the plumbing and adding a new outlet revealed a giant mass of razors.  About a week later we watched a home improvement show that had the same issue. I guess it was common to just drop razors in a slot in the medicine cabinet and let them fill up a space in the wall.  Guess those dudes weren’t thinking about the poor people in 2013 that would have to clean that mess up.  (Soccer sandals and socks are a favorite trend in Iowa.)

Powder Room Makeover

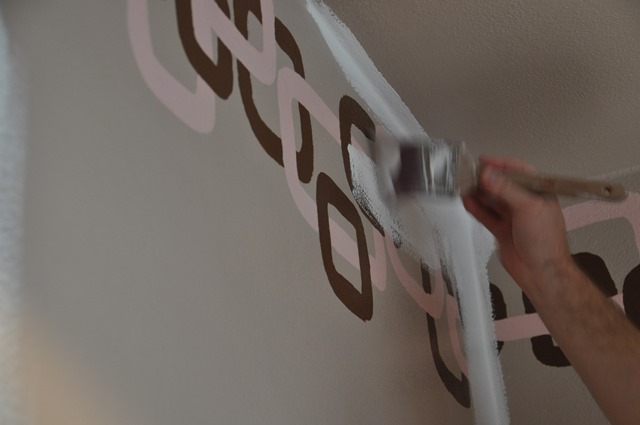
After cleaning up the hot razor mess, it was time to prime and paint.  I did feel slightly bad covering up someone’s time consuming stenciling.  But only slightly.  Brother could have cared less.  He chose Dutch Boy’s Peppercorn for the wall color.

Powder Room Makeover

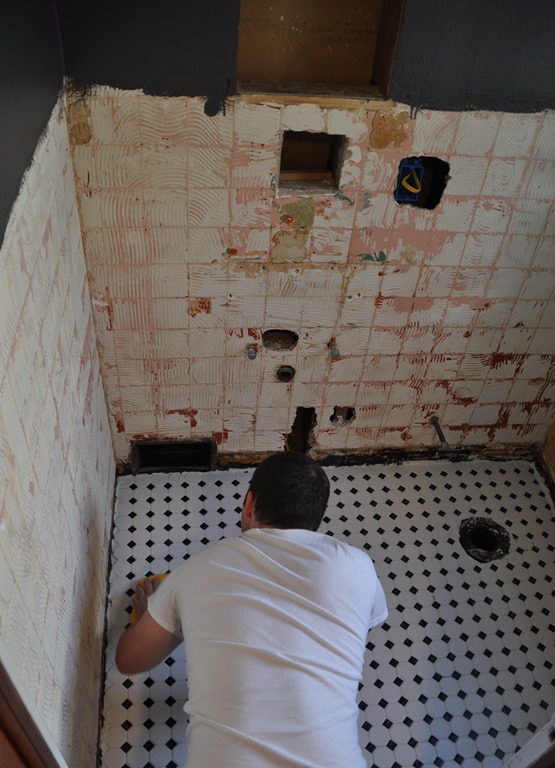
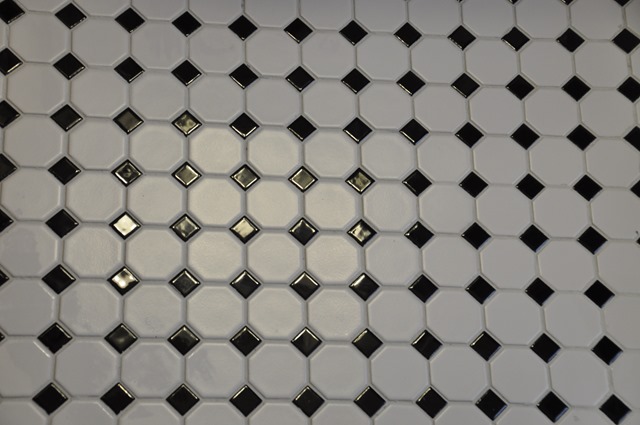
It was then time to lay the tile.  The tile was purchased at Menard’s.

Bathroom Makeover

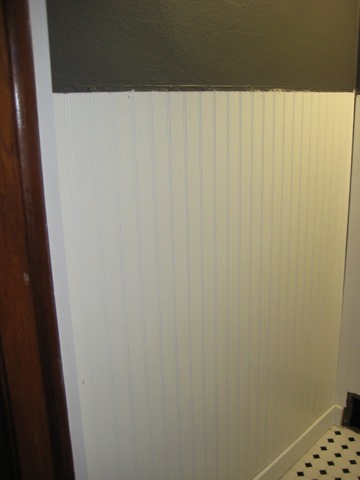
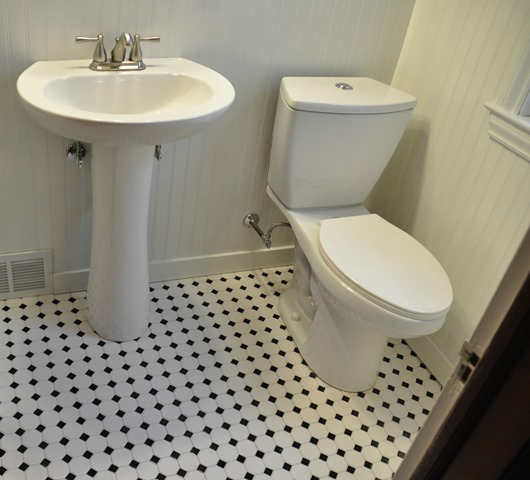
My dad and brother then installed bead board and molding to cover up the tile grossness.

Bathroom Makeover

They then replaced the toilet.  He also added a new sink, light and medicine cabinet. It’s hard to believe it’s the same room.

Bathroom Makeover (Beadboard, Peppercorn, Hex tile)

Pretty impressive finishes for a bachelor.  (I’m still looking for a sister-in-law.  Contact me if interested. I mean, you get a cute house out of the deal.  I’m sure the deer heads are negotiable if you’re not his sister.  Man, I’m going to get sucker punched for this one.  Let’s look at more pretty after photos.)

Bathroom Makeover (Beadboard, Peppercorn, Hex tile)
Inexpensive DIY Bathroom Reveal

Who thinks the pink tile was pretty rocking?  Any takers on that whole future sister-in-law thing?


Photobucket Photobucket Photobucket Photobucket PhotobucketPhotobucketfollow us in feedly

Curb Appeal at Little Brother’s House

How was your weekend?  Ours was good. If waking up sore on Monday is good.  I’m not sure if I’m more sore from physical labor or sleeping with a bed hogging dog.  Something about dogs don’t sleep at the end of the bed. That’s for animals.

We headed North to help my little brother do some work on his house. (We had previously helped him here and here.)

Curp Appeal Updates

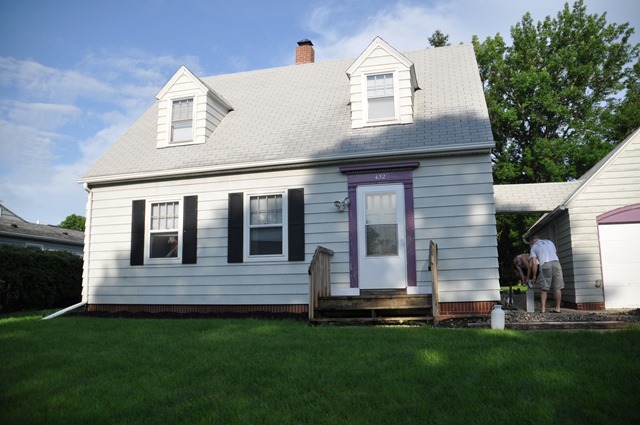
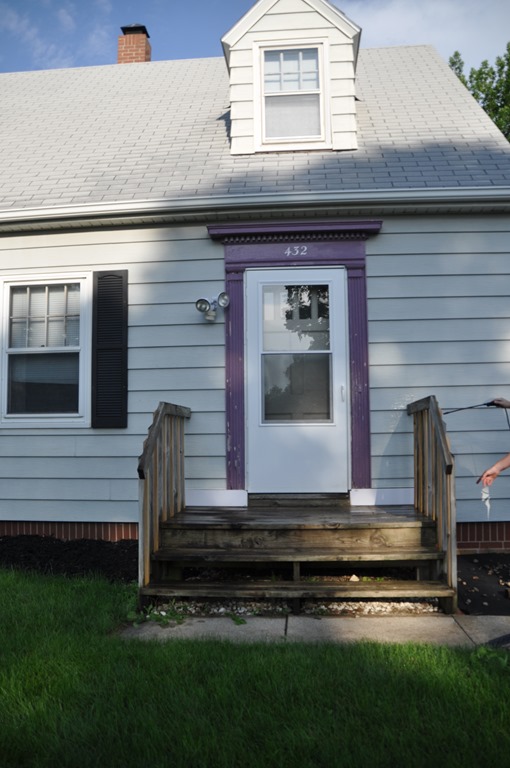
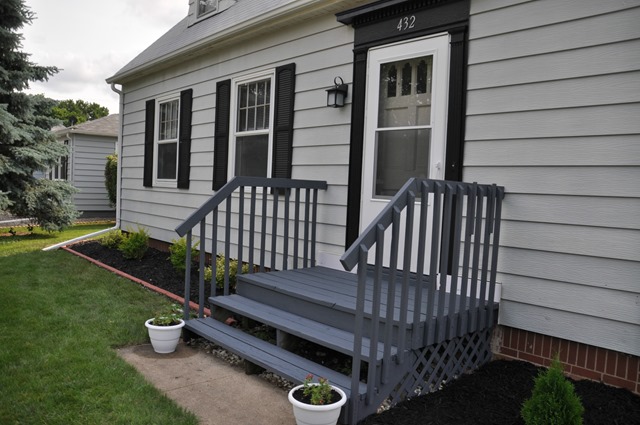
Baby brother wanted some help with the exterior of his house.  Something about dudes don’t like purple houses.  Or flood lights as exterior lights.  Or decks that look sad.  Or houses that lack landscaping.  Please note Ike in the window above. He quite enjoyed his time at his uncle’s house. How could he not?  Uncle bought him a new toy and bandana.  Spoiled much?

Curp Appeal Updates

Brother had previously put down some black mulch and installed black shutters.  Otherwise the exterior of the house hadn’t been touched in a long while.

Curp Appeal Updates

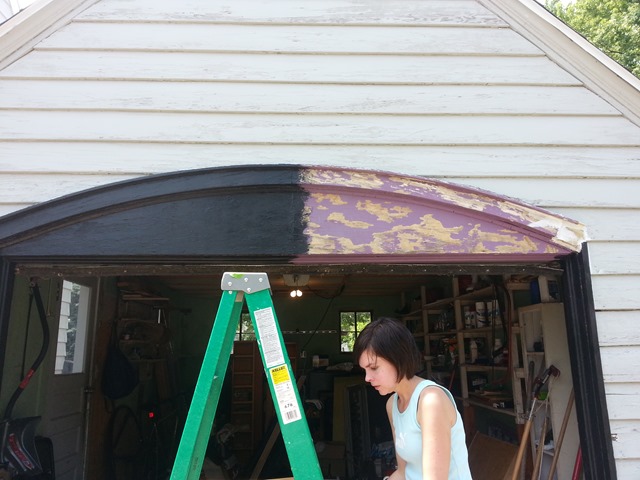
Brother cleaned the front deck.  My mom, brother and I scraped and painted the purple trim.  I’m pretty sure the previous owner used interior paint.  Awesome. Tasks to add to my “I hate this” list: scraping paint and painting decks.

Curp Appeal Updates

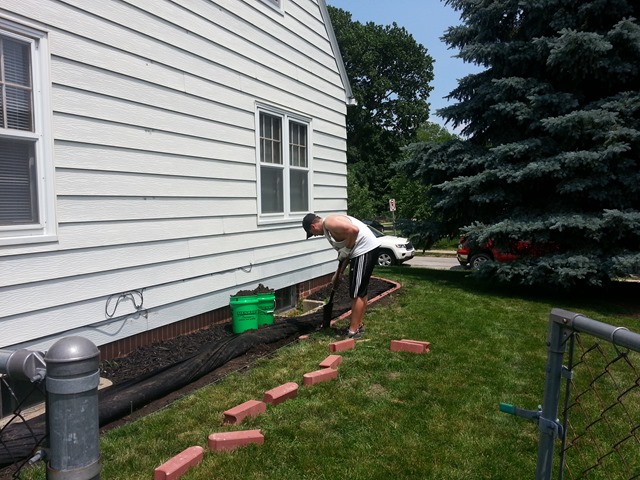
Nate installed landscape edging.  It also decided to actually be Summer in Iowa this weekend as well.  We missed the 90+ degrees with 7000% humidity.  That’s not a typo.  That’s how humid it gets in Iowa in Summer.  You think I’m joking. 

Curp Appeal Updates

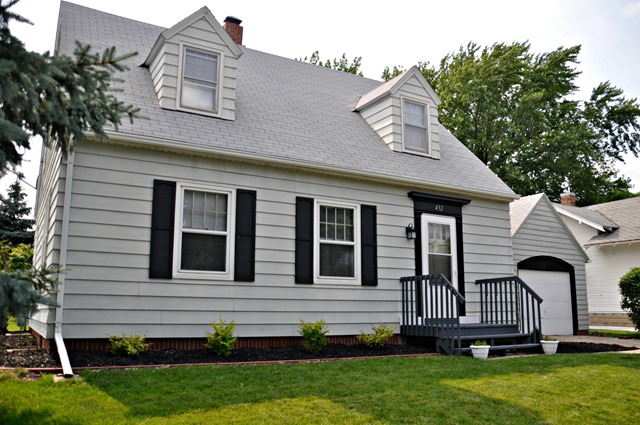
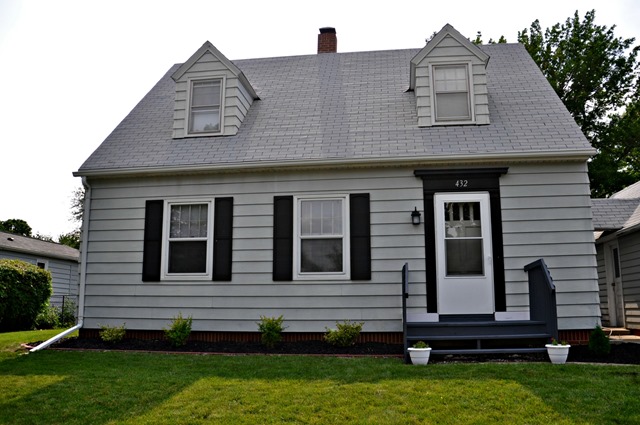
Brother bought some bushes and more mulch.  Magically the house looked like a grown-up lived there.

Curp Appeal Updates
Curp Appeal Updates
Curp Appeal Updates

I told him that I bet the neighbors thought someone new bought the house.  And then he sucker punched me.  I threatened to never come back.  And then he bought me Perkins.  My work here is done.

How was your weekend? Any curb appeal projects?  Who thinks my brother has the best sister and brother-in-law ever?  Don’t worry.  We remind him often.

Add Curb Appeal in One Weekend!.jpg
Photobucket Photobucket Photobucket Photobucket PhotobucketPhotobucketfollow us in feedly

How to Create a GIF in Google+

Happy Friday!  I’m currently in the middle of a four day week-end. I swear I do work.  Sometimes.  The rest of the time I waste time on the internet and read books.  And people wonder why I don’t have kids.

Last week I posted a GIF of Ike as part of a post for Method’s Cute Pet Contest.  (There’s still time to enter.  Read more about it here!)  I got a lot of comments about the fancy GIF.  You all think I’m a computer whiz. 

How to Create a GIF in Google+

It’s a front.  I really don’t know how I’ve survived being a blogger with my lack of computer skills.  Wait, The Google helps me.  (Thanks, Google.)

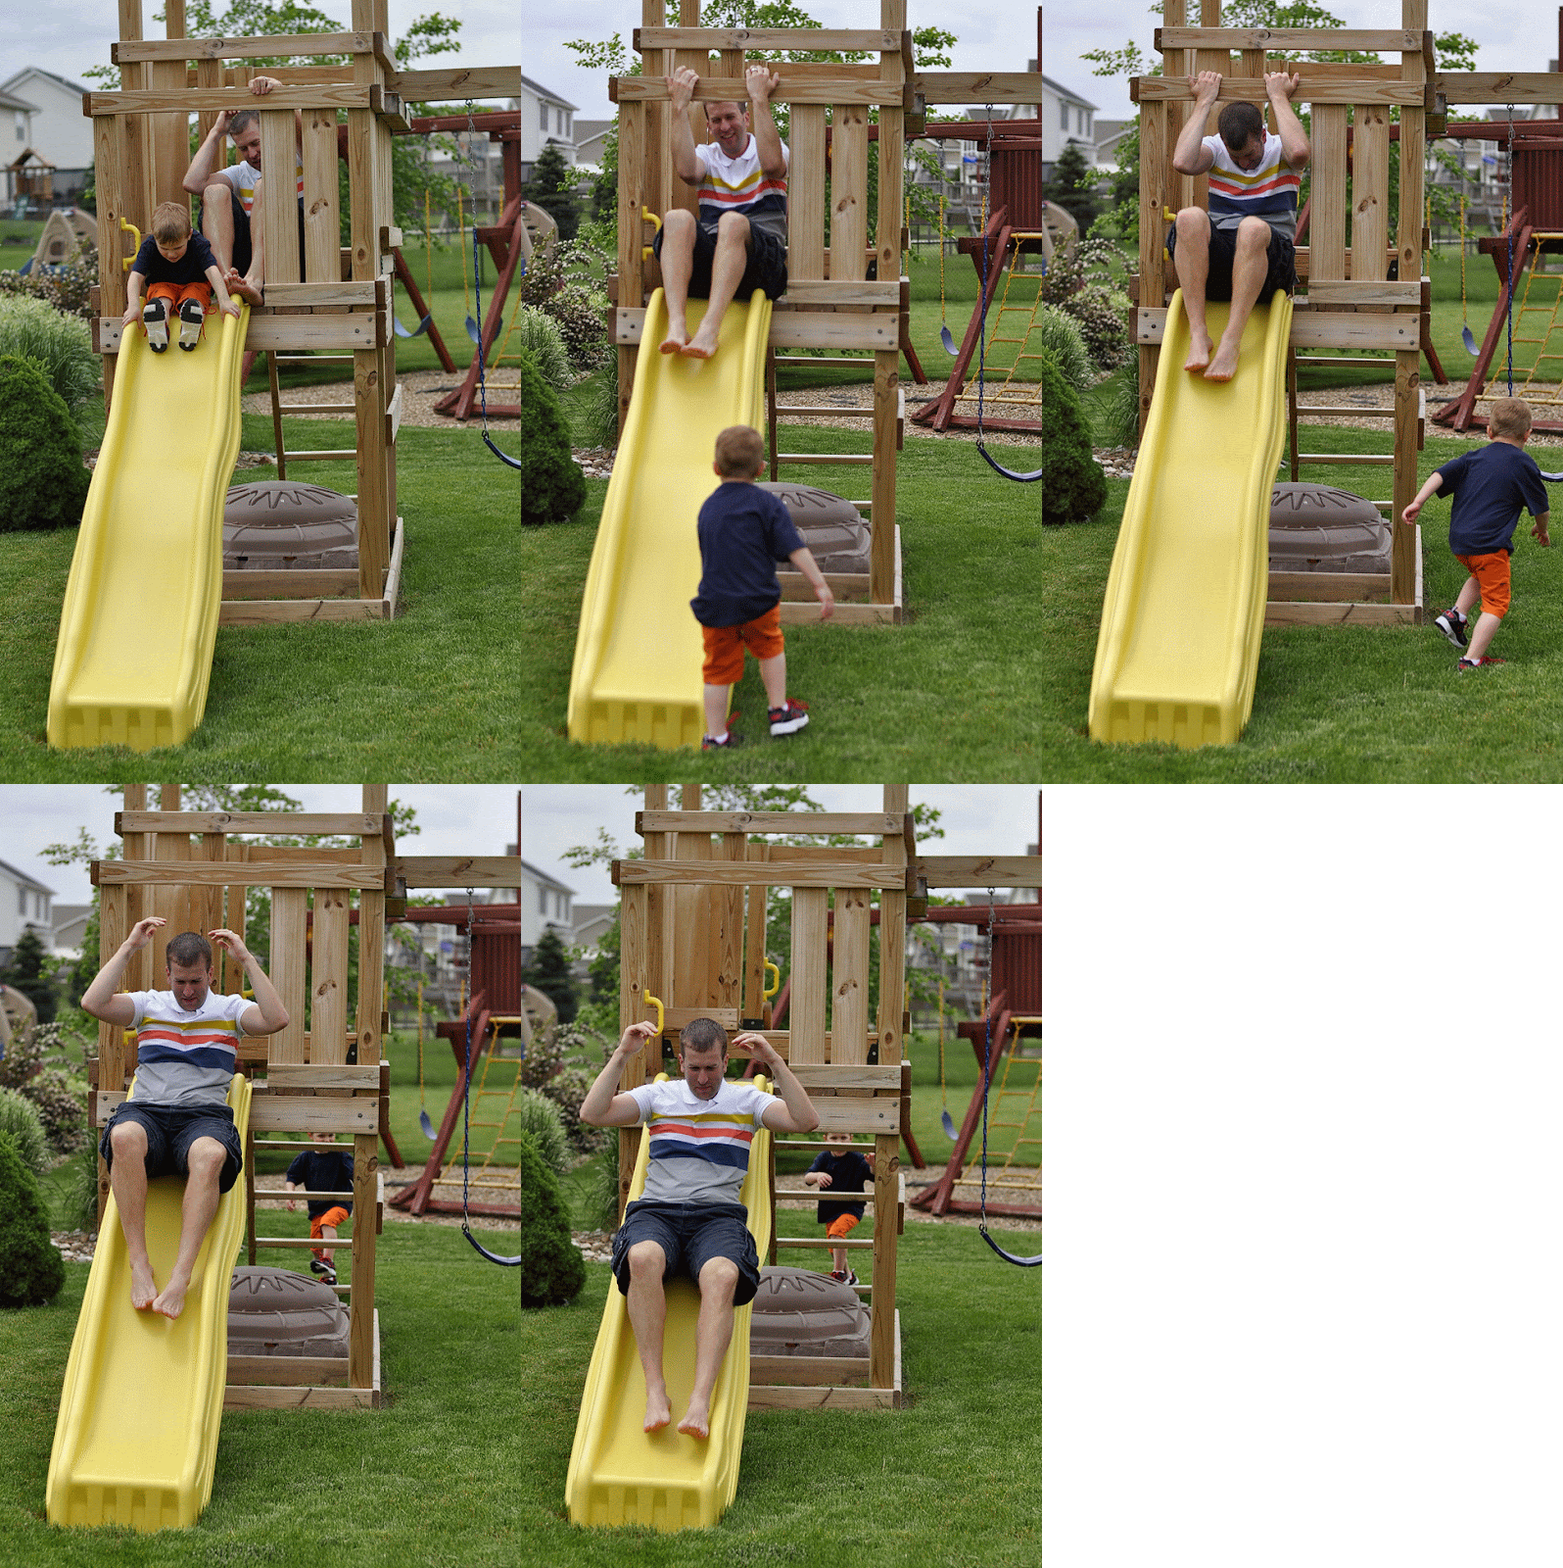
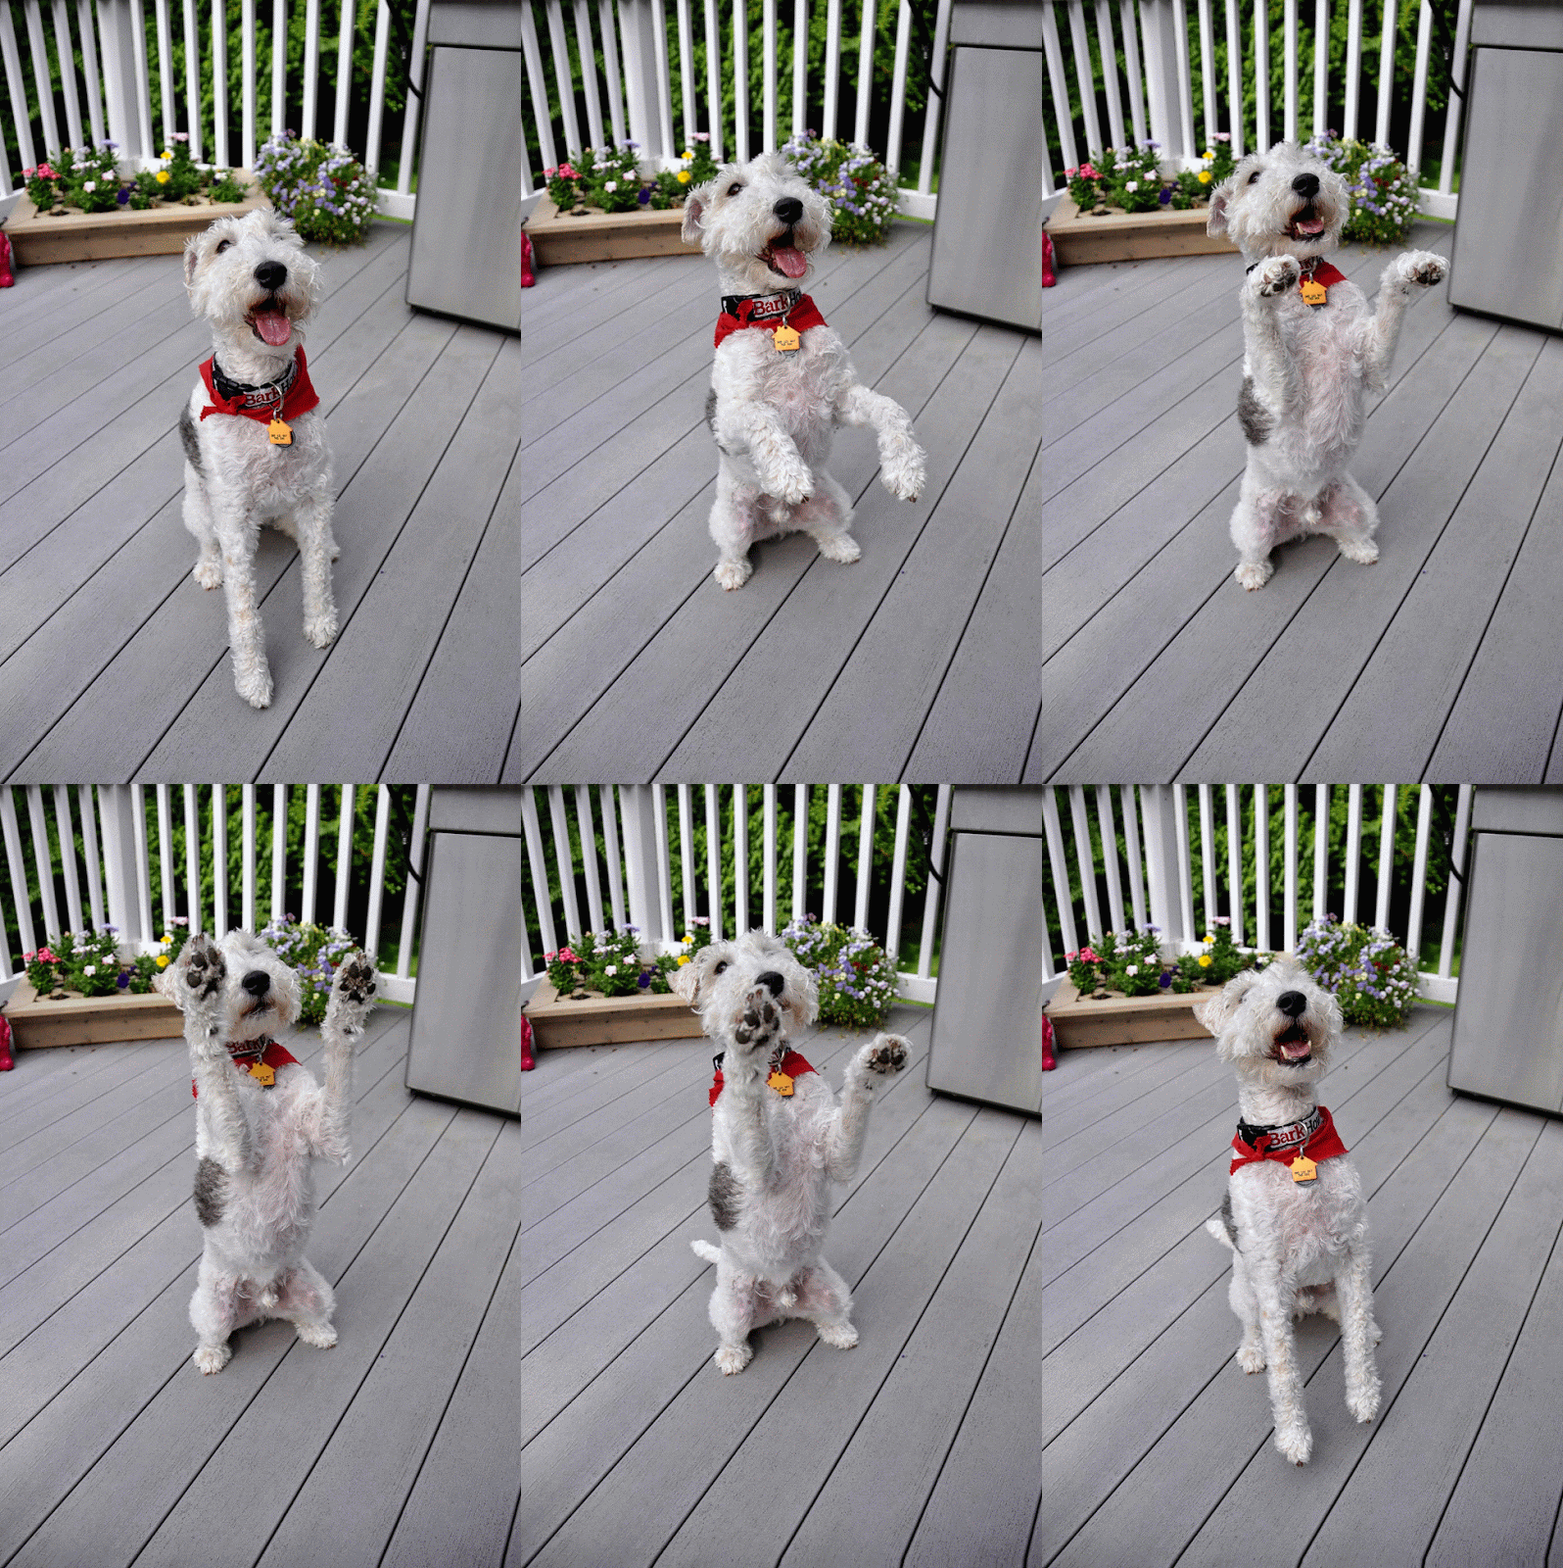
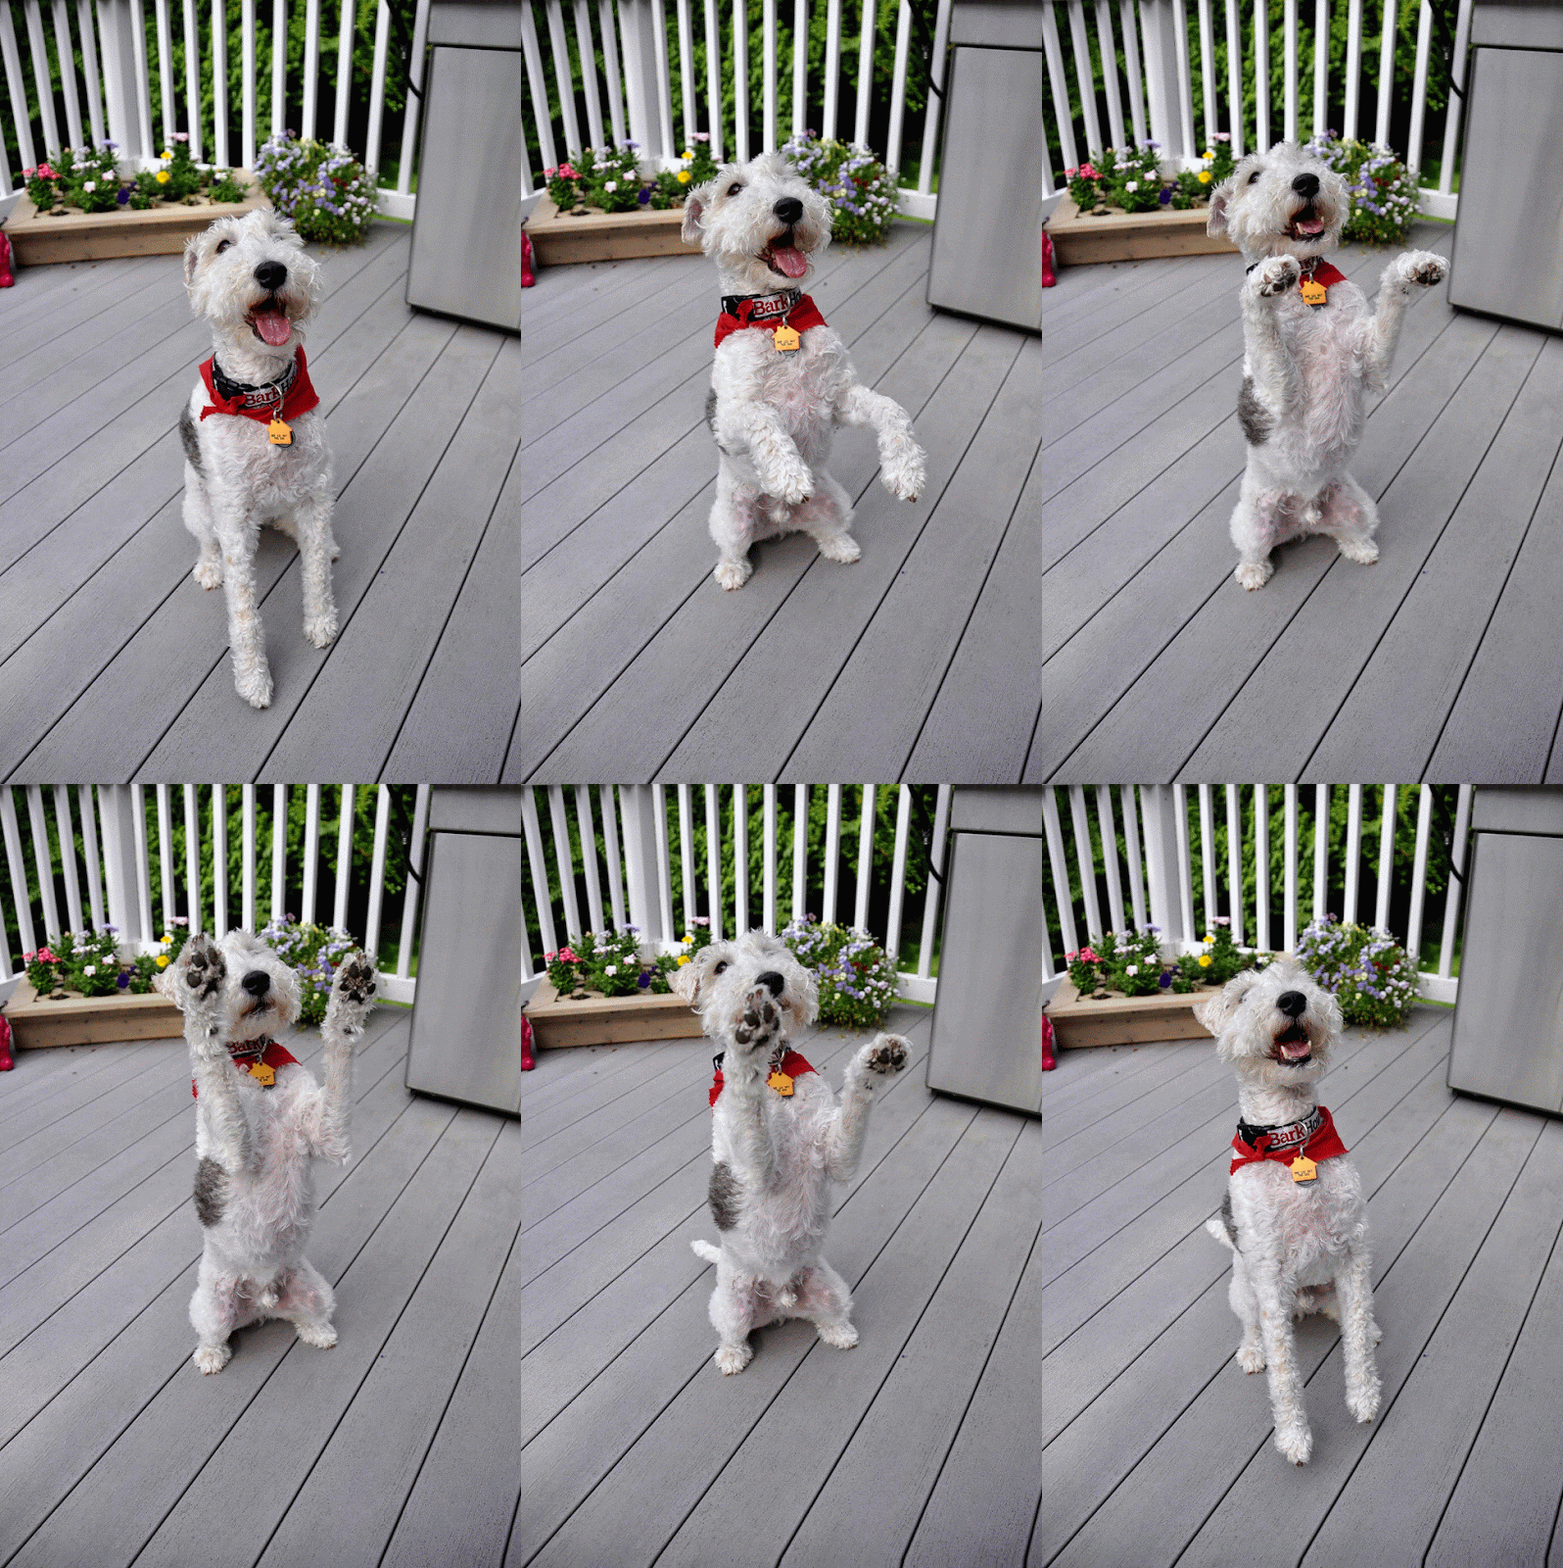
I’m going to share with you all my lazy GIF secret.  Any of you can do this.  It involves Awesome and Google+.  See, Google now has this system called “Awesome”.  (How awesome is that?)  If you take at least 5 photos within 10 seconds and then upload them to Google+, “Awesome” will automatically turn it into a GIF for you.  You only have to take the photos.  Bam. GIF.  AWESOME!

How to Create a GIF in Google+

For the photos above, Nate shot in continuous mode with the DSLR.  For the photo below, I just snapped a bunch of photos.  Either way will work.  The continuous mode is obviously a little more fluid.  But I also like the animated effect on the one below.

How to Create a GIF in Google+

That’s it.  Super simple.

Feel free to follow me on Google+.  I’ve been using it for the past few months and I really like it.  Like want to kick bookface to the curb like it.  A lot.  bookface doesn’t have an Awesome system.  And they like to only show my posts to a certain percentage of readers.  Lame.  Google+ for the win.  #teamgoogle

Are you using Google+?  Did you know about Awesome and GIFs?  Who is going to create their very own GIF right now?  Or maybe this weekend?

DIY Beer Tasting Flight Carrier

This post is for the dudes. And the beer drinking chicks.  Which doesn’t include me.  Unless it’s in the form of a straw-ber-ita. I’m that girl.  I wish I was cool enough to be one of those beer drinking girls. But beer is gross.  And I’m obnoxious enough without alcohol.

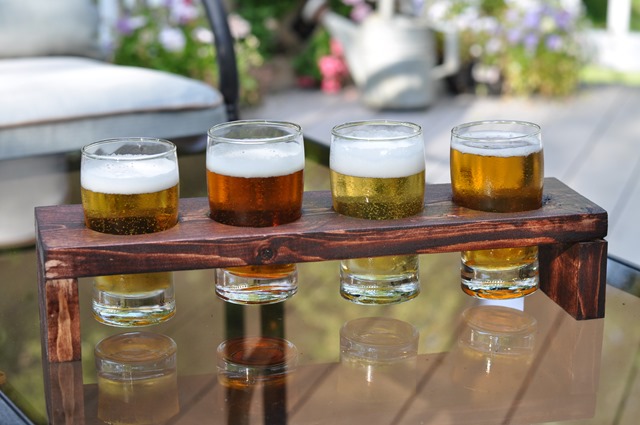
DIY Beer Tasting Flight

Last week, Nate was all like “Hey Girl.  I’m going to make this beer tasting thing.  Wanna blog about it?”  I’d make a dorky Ryan Gosling-esque picture but he may divorce me.  Or not build me stuff.  Equally bad.

Nate likes beer.  Different varieties of beer.  It takes him at least 10 minutes in the freezing cold Target beer aisle to make his selection.  After about two minutes I threaten to head to the clothes department if he doesn’t hurry up. Grocery trips with us are fun.  Don’t even get me started on the trips to Hy-Vee Wine and Spirits when my brother comes to town.  At least TJMaxx is next door.

Back to the beer.

We like to host beer tastings on occasion.  Everyone brings a six pack to share. I drink Sangria that I don’t share.  (I am one heck of a host.)  We usually serve some kind of easy to prepare food like tacos or burgers.  It’s a super easy party to throw because the entertainment is discussing the many varieties of beer everyone brought.  Bam.  Party hosted.

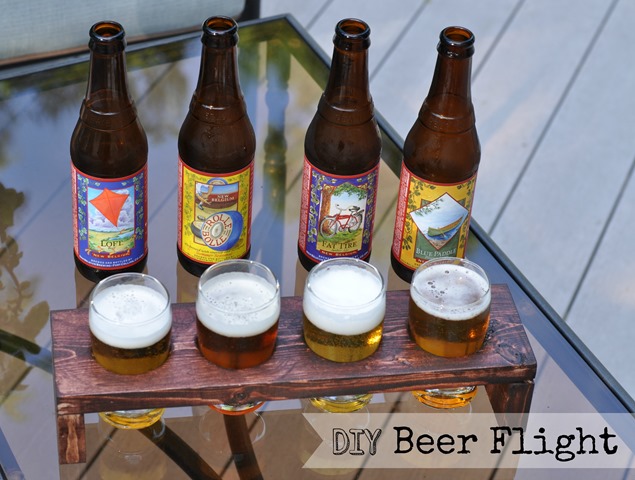
Nate thought it would be fun to make fancy beer flights. 

DIY Beer Tasting Flight

Because beer tastings totally need to be fancy. This would make a great gift for the dudes in your life!

Here is Nate’s tutorial. He’s a man of many words.

Materials

  • 1 x 4 - Need about 18" (I had a scrap piece laying around from other projects.)
  • 2 1/8" drill bit
  • 5 oz beer glasses (we bought ours from the dollar spot at Target) that are 2" at the bottom and flare out at the top
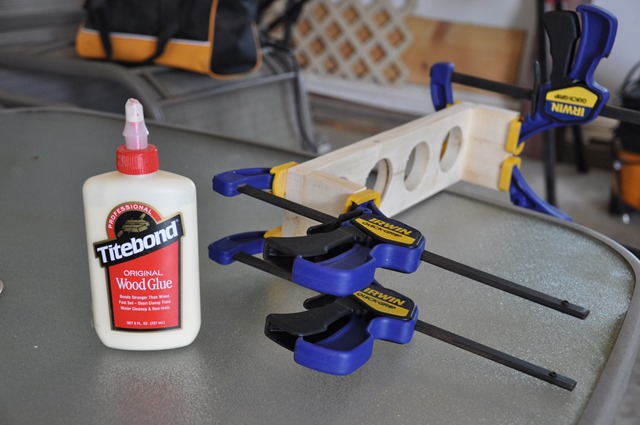
  • wood glue
  • clamps

Cut List

  • 1 - 13.5"
  • 2 - 2"

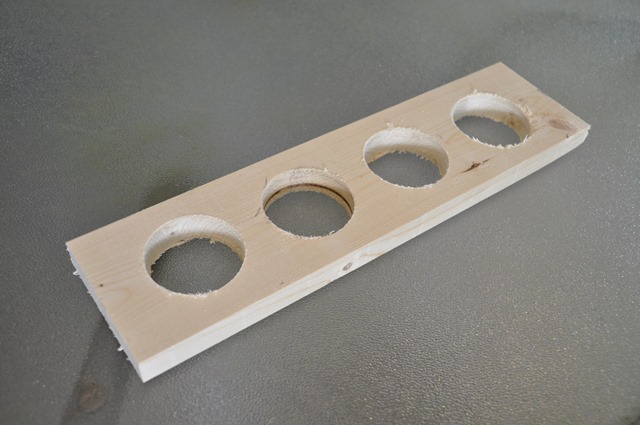
On the 13.5" board, put marks in the middle of the board at 2.25", 5.25", 8.25" and 11.25

Using the marks, drill the holes using the 2 1/8" drill bit

DIY Beer Tasting Flight

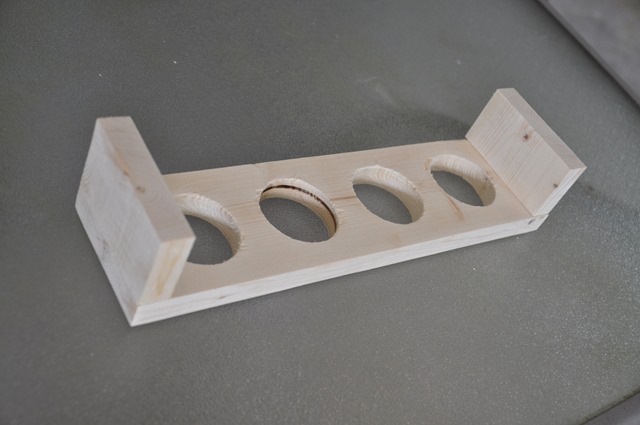
Glue the 2" pieces to the outside bottom of the long board.  Clamp overnight.

DIY Beer Tasting Flight

Sand smooth. Make sure to sand out the excess glue if you are staining as the stain will not absorb into the glue.

Stain and poly or paint.

Drink beer.

DIY Beer Flight
DIY Beer Flight

Have you hosted a beer tasting?  Or do you prefer to consume your calories in cupcake form?


Photobucket Photobucket Photobucket Photobucket PhotobucketPhotobucketfollow us in feedly

Sew Midwestern Etsy Shop

Today I’d like to share with you my newest favorite Etsy shop, Sew Midwestern.

sewmidwestern

Why’s it my favorite?  Probably because it’s co-owned by the lovely Kim {NewlyWoodwards} and myself. Funny how that works.  Both of us had been wanting to open a shop but neither of us had gotten around to it.  So why not do it together? 

Our shop combines our love for classic and quirky hand-made items.  Items that we make because we love them ourselves.  It’s impressive we got this shop rolling because we kept wanting to keep all of the items that we made.  Seriously.  It’s a problem.  Both of our husbands kept making joking about the opening date of Sew Midwestern.  Guess we showed them?  (Okay, so we started back in February.  We just didn’t want to rush things.)

Our shop items will change along with our ever changing obsessions.  And trust me, they change faster than you can say Sew Midwestern.  I think we dreamt up 20 new ideas during our latest sewing session.  Check back often for new products!

Here’s a sampling of what we are currently offering:

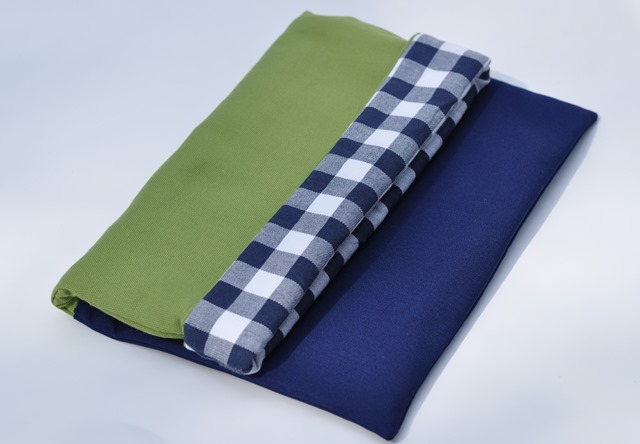
Multi-purpose clutches

022

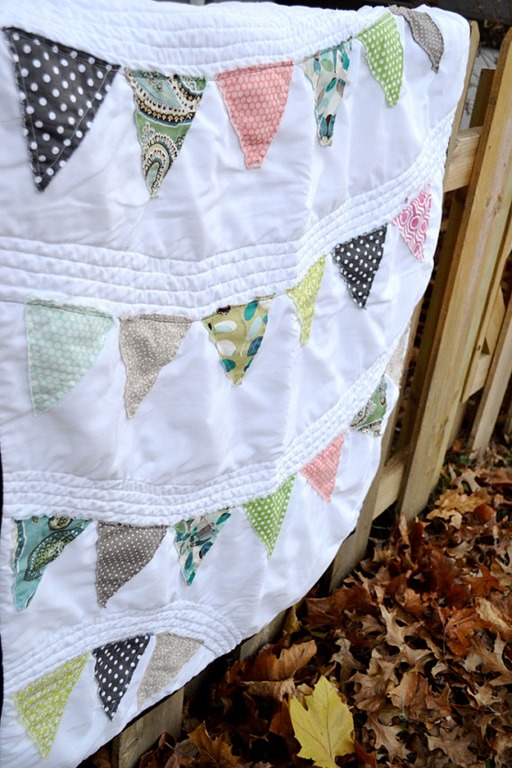
Whimsical custom quilts

quilt

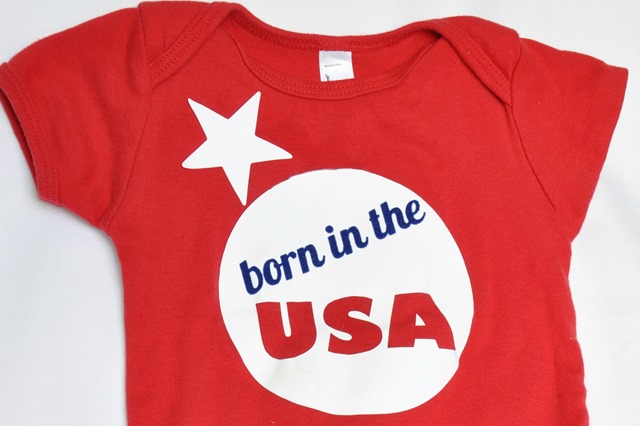
And adorable custom onesies

137closeup

Head on over to Sew Midwestern.  Maybe you’ll find that next baby shower/bridal shower/just because gift.  Be sure to follow Sew Midwestern on twitter and facebook for updates on new products!

What’s your favorite item currently in our shop?  Any suggestions for things you’d like to see available?  Who needs an extra push to get that handmade shop started?

Gallery Wall: Change of Art

Reading blogs pays.  You heard it here first.

Awhile back, I won a giveaway from Kelly’s blog (View Along the Way).  The giveaway was for a set of six frames from Change of Art

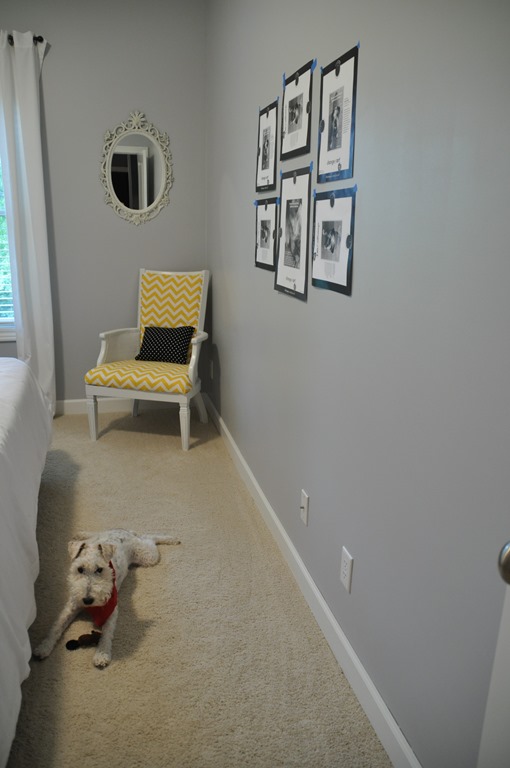
I was super excited about winning this giveaway. I started a gallery wall in our guest bedroom approximately two years ago.  I wish I was over exaggerating. It was missing frames and photos.  My dad would make smart comments about not recognizing the people in the stock images.  Hardy, har, har.  I couldn’t decide what photos to put in the frames. I needed to buy more.  Excuses, excuses.

I took down the ratty attempt at a gallery wall.  I wish I had a photo. It was good. I patched and painted holes.  I was left with this big, blank wall.
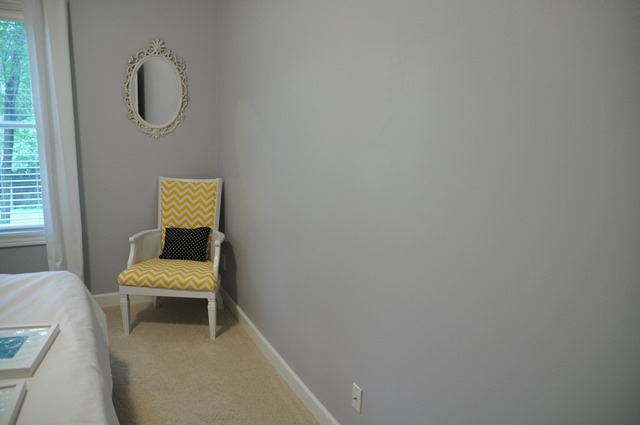
Gallery Wall Change of Art

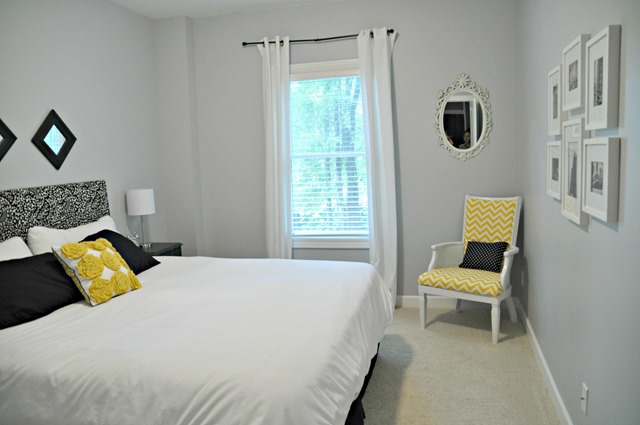
My Change of Art frames arrived about three months ago. I hung them on Sunday. I don’t like to rush things.  In about 15 minutes, we had our entire gallery wall hung.  Patience pays off.
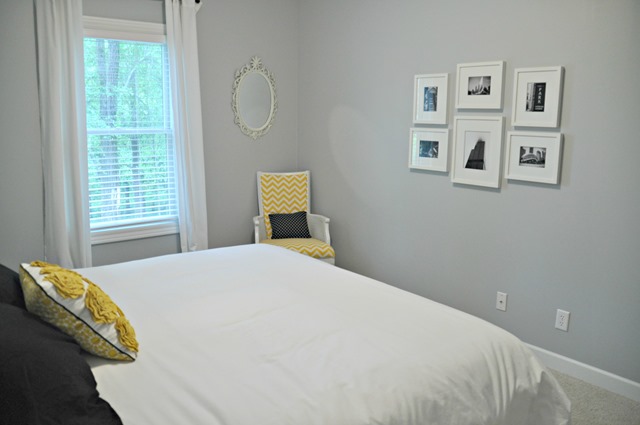
Change of Art Gallery Wall Guest Room

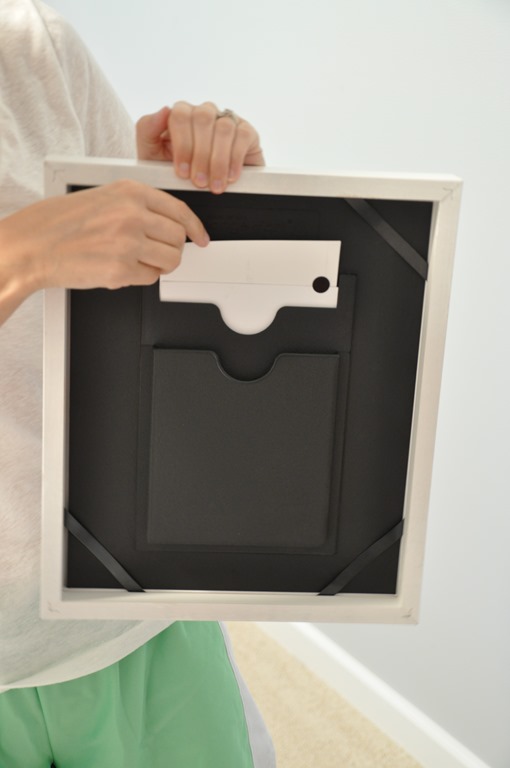
I was super impressed with the Change of Art frames.  The frames are different because you can easily change out the photos/art you want to display. Which is awesome for someone as indecisive as myself. I’m also accident prone and end up stabbing myself with those stupid black tabby things on the back of most frames.  No blood was shed in this gallery wall.  There is also a spot in the back to store additional photos.  Handy!
Gallery Wall Change of Art

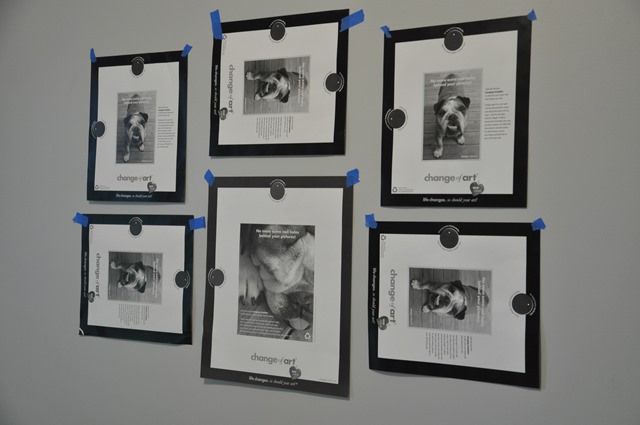
The frames were super easy to hang.  Each frame came individually boxed (all materials are eco-friendly).  In the box was the frame, a hanger, a nail and a paper template to use to assist in arranging/hanging the photo.

I arranged the paper templates on the wall.  I had Nate help me ensure that I had them evenly spaced/level.  I don’t see straight.  Minor problem.  After that, I was on my own.
Gallery Wall Change of Art

Well, I had Ike to help me out.

Gallery Wall Change of Art

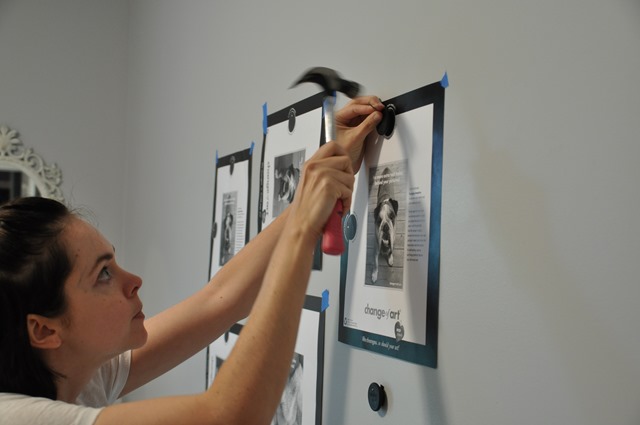
All I had to do was place the hanger onto the appropriate spot on the template and hammer away.  (Excuse the look of fear in my eyes.  I hate putting nails in the wall.)
Gallery Wall Change of Art

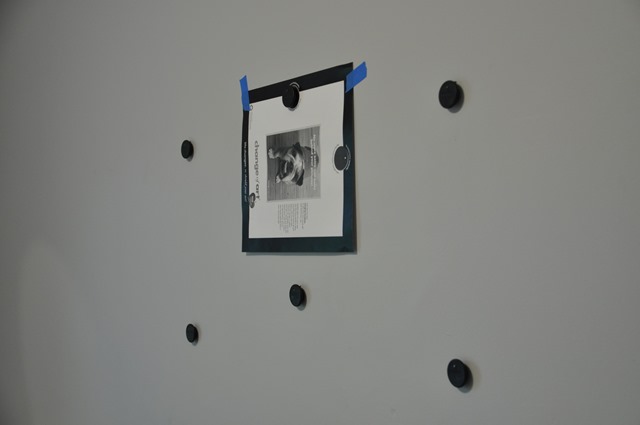
Once the hangers were installed, I ripped down the templates.
Gallery Wall Change of Art

I then gently placed the frame onto the hanger.  There is a little notch that allows it to rest gently and self-level.
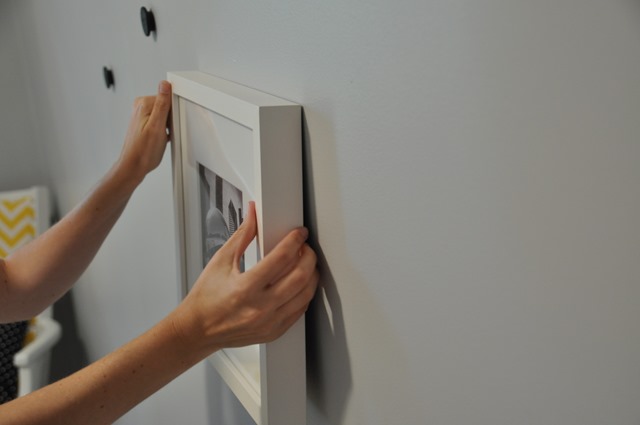
Gallery Wall Change of Art

Gallery wall hung.  And to think it only too me two years.
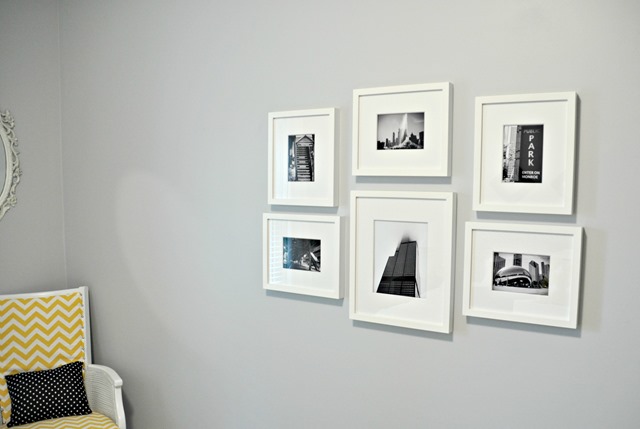
Change of Art Gallery Wall

Gallery Wall Change of Art

For the first gallery wall set-up, I used some black and white Chicago photos from Decor and the Dog Photo.  *shameless plug*
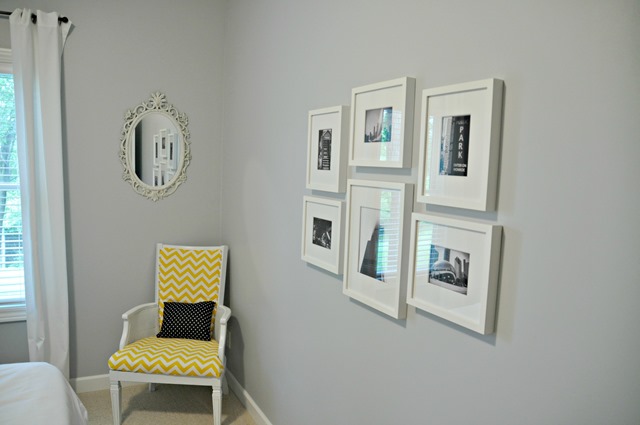
Guest Room Gallery Wall Change of Art

I’m a big fan of the Change of Art frames. Easy to hang, eco-friendly and made in America.  The only downfall I see is that they are a bit pricey for my cheapskate self. Having said that, I will be purchasing another set in the future because I really like how professional they look and how easy they are to hang.  As the old saying goes, sometimes you get what you pay for!

Are you a gallery wall fan?  What’s your longest running project?

***I wasn’t compensated for this post.  I won the frames in a giveaway and was in no way obligated to post about them. Ike and I just thought the frames were pretty awesome.***

Don’t forget to enter the Method Cute Pet Contest!

Method’s Cute Pet Contest

This post is sponsored by Method.

Today I have a quiz for you my dear Decor and the Dog readers.  There’s a potential prize at the end.

Q: Who is the cutest dog on the planet?  A dog that is arguably the happiest dog around.  A dog that has endless energy and is a fantastic snuggle buddy.  A dog that brings endless smiles even when he’s up to no good. A: Ike.

Method Cute Pet Photo Contest

Okay.  That was easy.

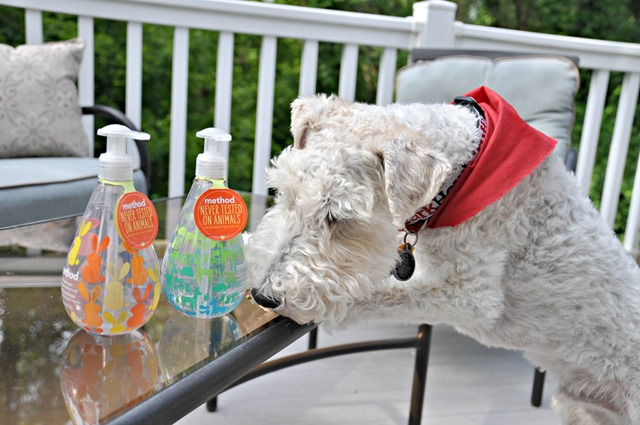
Q:  Who makes an entire product line that is pet friendly, not tested on animals and contains no animal by-products (that’s dirty!)?  A product line that suckered me in years ago with their amazing packaging and kept me around with their great performing products and inspiring do good mission.  A: Method.  I’m a big fan of their granite cleaner, bathroom cleaner, glass cleaner, hand soaps and laundry detergent! Okay, so basically all of their products.

method-designed-for-good-soap-series

Q: What do you get when you combine a cute pet and Method?

Method's Cute Pet Contest

A:  A Cute Pet Photo Contest and support for a good cause!
To highlight pet appreciation week and their own policy against animal testing, Method is supporting the ASPCA. Method and soap.com are teaming up create a photo contest on Facebook and Instagram.  The contest will begin on June 11 and end June 30. Method will select one winner each week to receive the two “designed for good” soaps and a $50 gift card to soap.com. The “designed for good” soaps were designed to help raise awareness for the fair treatment of animals. Cute with a cause. Method gets me every time. (Only residents of the US and Canada (excluding Quebec) are eligible to win.)

To further support the cause, Method and soap.com are teaming up to donate 15% of Method product sales on soap.com in June to the ASPCA®, whose mission is to provide effective means for the prevention of cruelty to animals throughout the United States.

Buying your Method products at soap.com? Use the code PAWPRINT at checkout to receive 20% off your purchase. This offer is only available to first time soap.com customers.

How To Enter Method’s Cute Pet Photo Contest:

Step 1: Take a photo of your ridiculously adorable pet. Or one hundred ridiculously adorable photos if your pet is as cute as the Ike man.

Method's Cute Pet Contest Runners Up

Step 2: Choose how you want to enter the contest: Facebook (desktop), Facebook (mobile) or Instagram
  • Facebook: Find the ‘pet photo contest’ tab on Method’s Facebook page and follow the instructions on the tab for uploading your photo.
  • Instagram: Post your pet’s photo to your Instagram account using the hashtag #methodcutepets. You must also follow @methodhome in order to be eligible to win.
Super easy and lots of fun!  Ike and I can’t wait to check out Facebook and Instagram to look for familiar furry faces!  Ike is super excited about helping out such a great cause!

DSC_0118-MOTION

What’s your favorite Method product?  Does your dog get super excited about helping out a good cause?  Did you enter your pet?  Let us know so we can “like” or “heart” your photo!

This post is sponsored by Method.  All thoughts and super cute dog images are my own.

How to Build a Flower Tower

I’ll let you in on a little secret.  Remember the vertical garden we built as part of a sponsored program for Home Depot?  Well, we were assigned the project.  We weren’t super excited about it at first with but we ended up really liking it after it was built.  That’s the inside scoop.

Where am I going with this?  Ah, yes.  What I really wanted to build was a diy flower tower!

How to Make a Flower Tower {DIY}

I mean, it’s a tower of flowers.  It has a cool name.  I love Home Depot’s commercial where the wife is all like “This won’t take long.  Will it?”  THAT’S TOTALLY ME.

I had to have one. So we headed to pick up our supplies.  I quickly began to realize that these little ol’ flower towers aren’t exactly cheap.  Like those people in the commercial with 15 of them in their backyard must be loaded.  Like Justin Bieber or drug dealer loaded.  Not pharmacist and accountant loaded.

But I had to have one.  You know how that goes. I compromised and limited myself to one tower instead of the 27 I had imagined in my head.

These towers are ridiculously easy to build.  Like I did it mostly by myself.  Whoa.  That’s going to be the theme for this week.  Michelle actually does stuff.  Alert the media.  Here's how to make your diy flower tower.

Gather your supplies. (The reason this project is expensive is that they don’t sell small quantities of some of the materials.  Like you need 3-4 feet of wire fencing and it comes in a 50 foot roll.  Nice.)

    • 4-foot galvanized wire fencing with 2-inch x 4-inch openings (~$30)
    • Landscape fabric (~$10. We had this left over from the vertical garden.)
    • 6-inch black zip ties (~$2)
    • flower pot (Price varies.  We used one we already had.)
    • Dirt (~$13 for a large bag.)

Gather your tools.  (We had all of the tools.)

  • Utility knife
  • Aviation snips or tin snips
  • Scissors
  • The Home Depot recommends gloves when working with the wire. I skipped them but thought I’d throw it in for safety purposes.

Step 1: Create a cylinder with the wire fencing that you will place inside your pot.  Allow an overlap of one fencing section to allow for a more stable seam.  Cut the fencing using aviation snips.

DIY Flower Tower

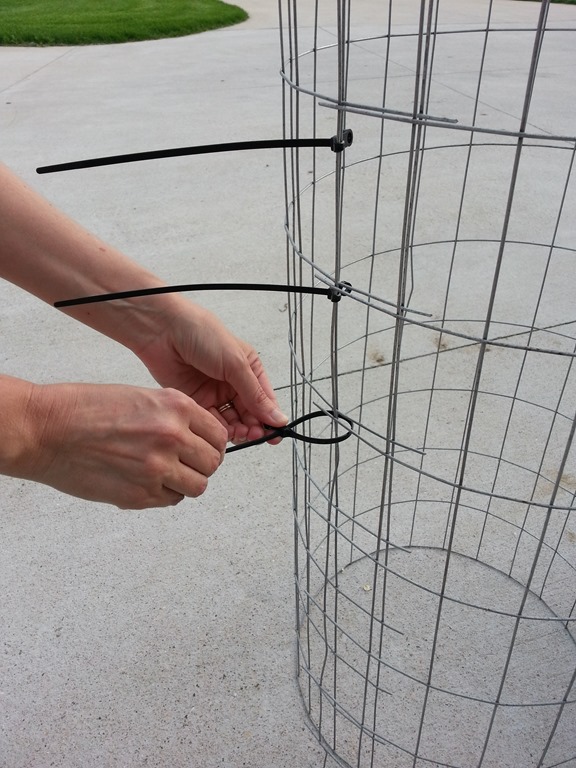
Step 2:  Overlap one section of the wire fencing and use the zip ties to tie the sides of the cylinder together.  I used a tie in each section from top to bottom.  Trim the zip ties to about 1/4”.

DIY Flower Tower

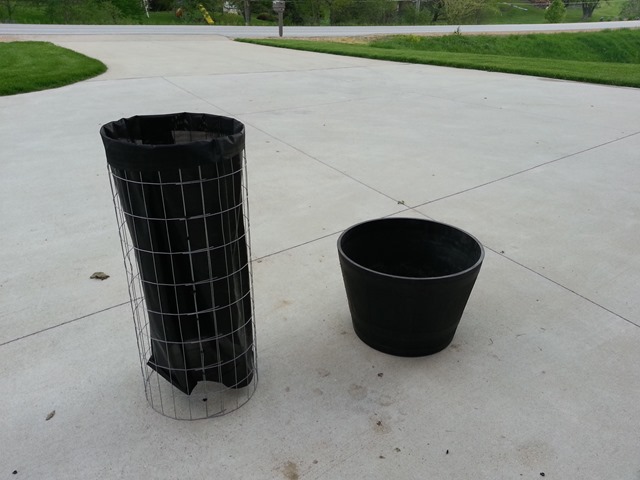
Step 3:  Wrap the landscape fabric around the outside of the tower to measure how much you’ll need.  Overlap an inch or two to ensure that soil doesn’t fall out through the seam.  Cut the fabric to size using scissors or a utility knife.  Slide the fabric inside the wire fencing.  Cut the excess fabric from the top of the tower leaving about 2 inches extending from the top of the tower to help secure the fabric to the tower.

DIY Flower Tower

Step 4: Fold the two inch flap over the top of the tower.  Use your utility knife cut small slits through both layers of fabric just under the metal rim.  Cut one slit in every third rectangle of the fencing.  Insert the zip ties through the slits and tie down the top of the fabric.  Cut the ends of the zip ties to about 1/4”.

DIY Flower Tower
DIY Flower Tower

Step 5:  Place fencing in your flower pot.  Fill the tower about 1/3 full with soil.  Add water to settle the soil.  Add another 1/3 of soil.  Add more water.  Fill to about 1 inch from the top of the tower with soil and add water.  Lightly press the soil once it is full to prevent sinking.  I repeated the last water and pressing step a few times.  Also add soil to the inside of the container just outside of the tower.

DIY Flower Tower

Step 7:  Cut a vertical slit in every other rectangle and stagger on your way down the tower.  (The Home Depot instructions suggest making a cross slit.  I found that the flowers were sturdier if I only made the horizontal slit.)

DIY Flower Tower

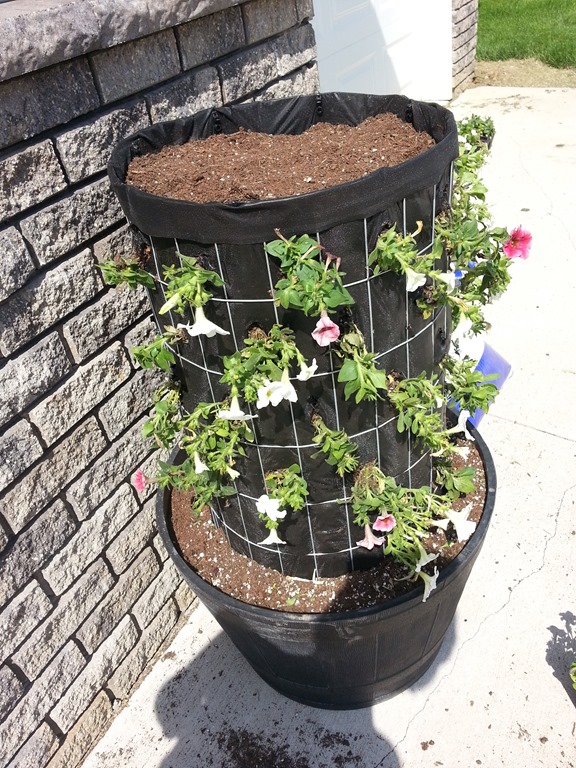
Step 8:  Add your flowers.  I chose petunias because they grow like weeds in sunny locations.  Use your finger to create a little pocket behind the opening to place the plant into.  It should fit snuggly but you don’t want to shove it in there and ruin the poor little plant’s roots.  Once the plant is inserted into the tower, make sure the flaps of the landscape fabric close around the stem of the flower to help keep the soil in while water.  Don’t forget to plant flowers in the top of the tower as well.

It doesn’t look like much at first.  I’m not going to lie.  It’s pretty hideous for the first two weeks.  I’m pretty sure the neighbors were wondering what the heck the monstrosity by our garage was. 

DIY Flower Tower
DIY Flower Tower

Step 9:  Water and cross your fingers that the thing lives.  As long as you chose petunias and you water them, the tower will live.  I’m certain of it.

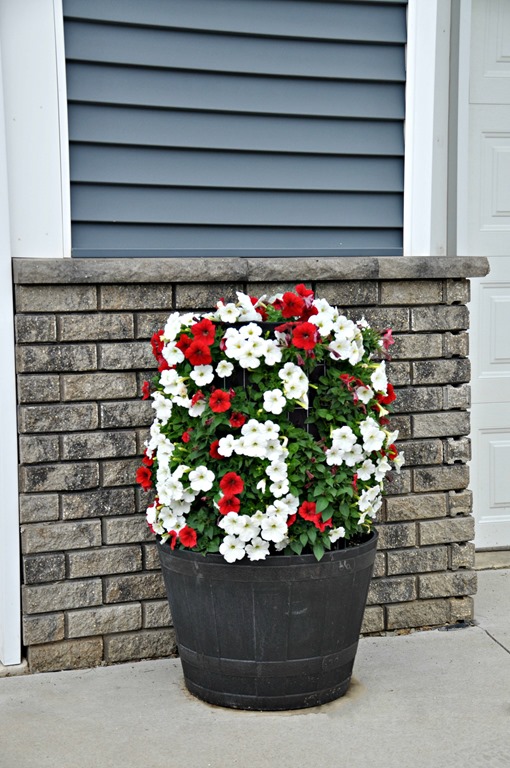
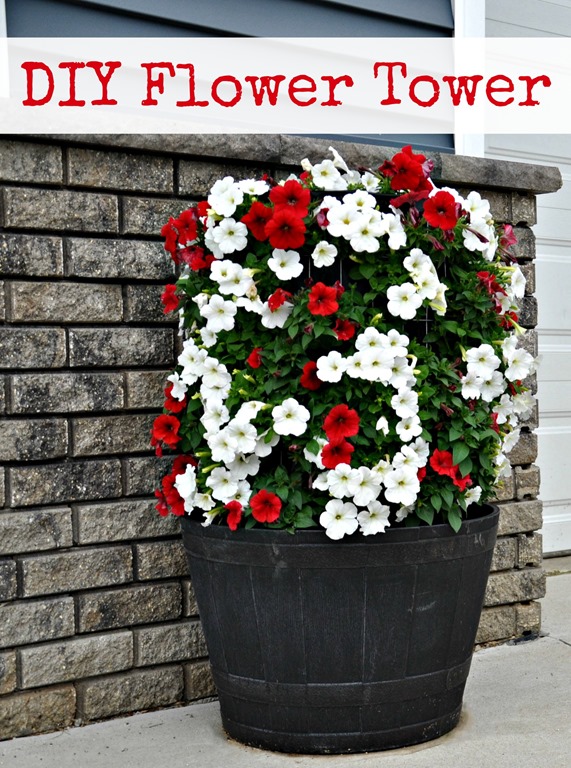
Our tower has been growing for about 3 weeks and it has filled in nicely.  There is still time for you to build one for the summer!

Flower Tower
DiY Flower Tower
How to build a Flower Tower {Decor and the Dog}
How to Build a Flower Tower {DIY}

Be sure to check out more projects on our DIY projects page!

Any fun outdoor projects planned for the summer? Do your neighbors wonder what the heck you are doing on a regular basis?