Holiday Console Table

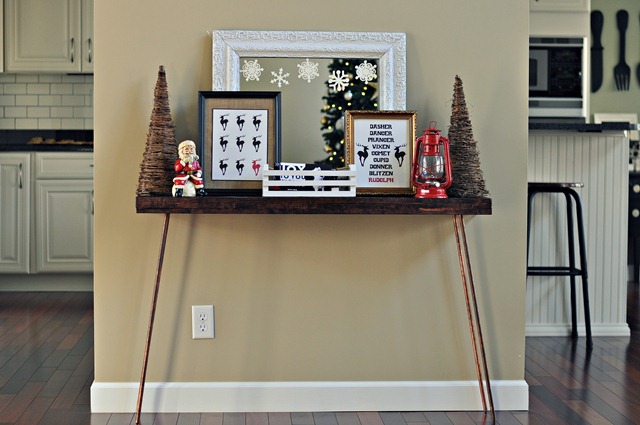
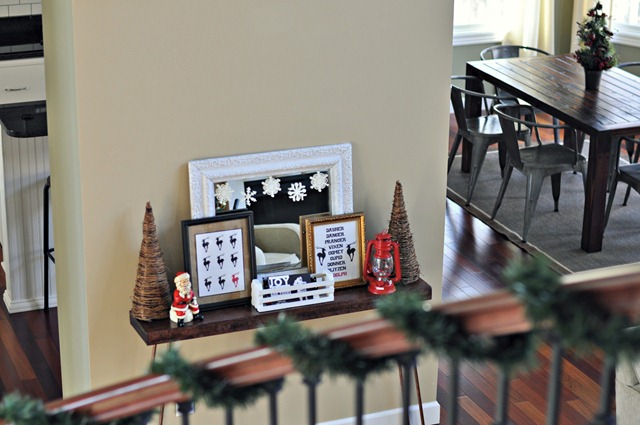
The mantel was my first holiday decorating victim.  Our console table was next.

Decor and the Dog Holiday Vignette 1

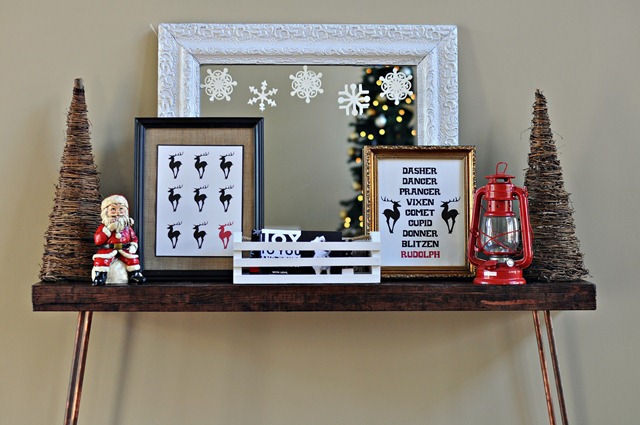
I went with a woodsy/red/black theme.  And snowflakes.  Snowflakes are like the winter version of owls for me.  Obsessed.  The crate in the center was a Salvation Army find and it will hold all of this year’s holiday cards.  I’m not big on holiday card displays.  I’d rather be able to flip through them.  And the crate is tidy.  I like tidy.

Decor and the Dog Vignette 2

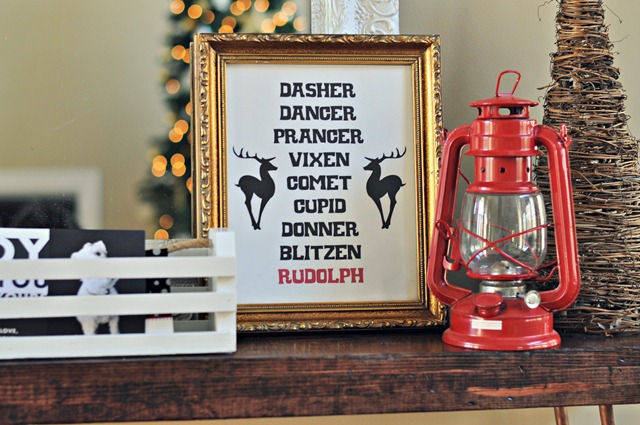
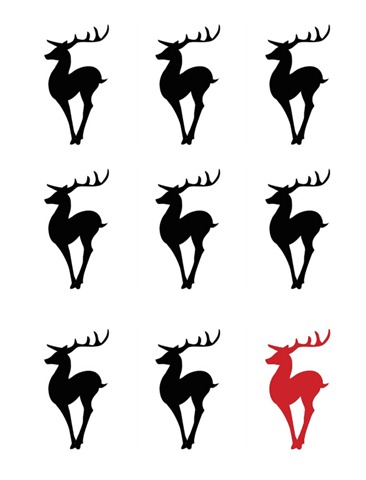
I made the prints. I’m teaching myself to use Photoshop Elements. (I also am teaching myself how to use our DSLR. I took all of these photos with Nate’s 50mm and none of them are blurry. I seriously think the Mayans were right. I’m getting freaked out.) There are links to download the prints at the bottom of the post.

Reindeer Print from Decor and the Dog

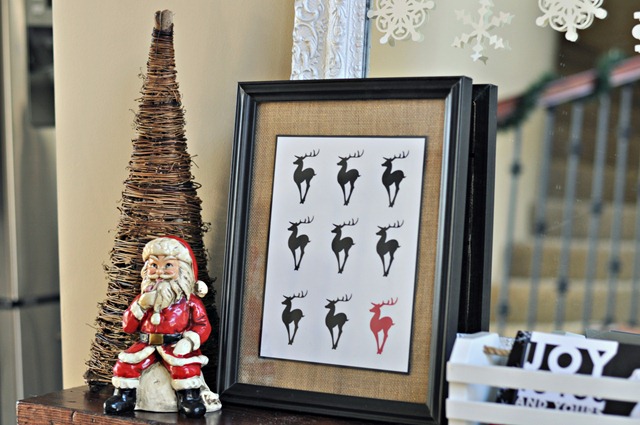
I stuck this reindeer print on some burlap and placed it in a frame from Goodwill.  Cheap yet classy.  That’s how I roll.  (Classy people say stuff like that, right?)

One Red Reindeer Print from Decor and the Dog

The trees are from Hobby Lobby.  Santa, the mirror, the lantern, and the two frames are all from thrift stores.

I like the view as I come down our stairs each morning.  Man, I love Christmas.

Decor and the Dog Vignette from stairs

And because it’s the season of giving.  Free reindeer prints!  Just click the link below the print to download.

1redreindeer

One Red Reindeer


SantasReindeer

Santa's Reindeer

What’s your holiday decorating color scheme this year?  How do you display your holiday cards?

***FYI: I added a Holidays 2012 tab at the top of the blog for easy reference to all things holidays this month!***

Linking up to: Primitive and Proper, Southern Hospitality, A Thoughtful Place

Deck the Mantel- 2012 Edition

‘Tis the season to decorate all surfaces of your house.  Fa la la la la, la la la la.

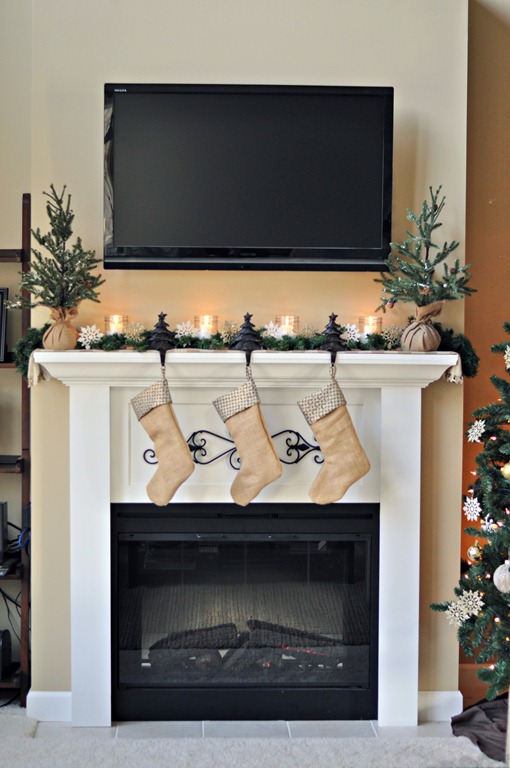
First up.  The mantel. 

Decor and the Dog Holiday Mantel 1

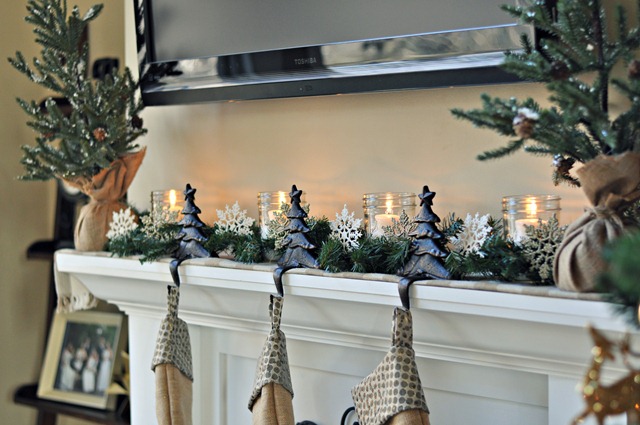
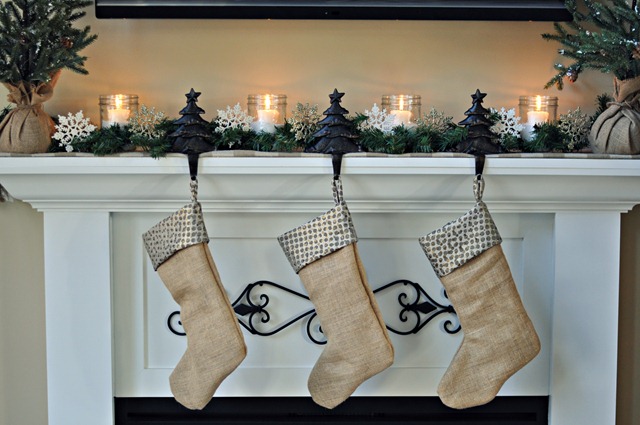
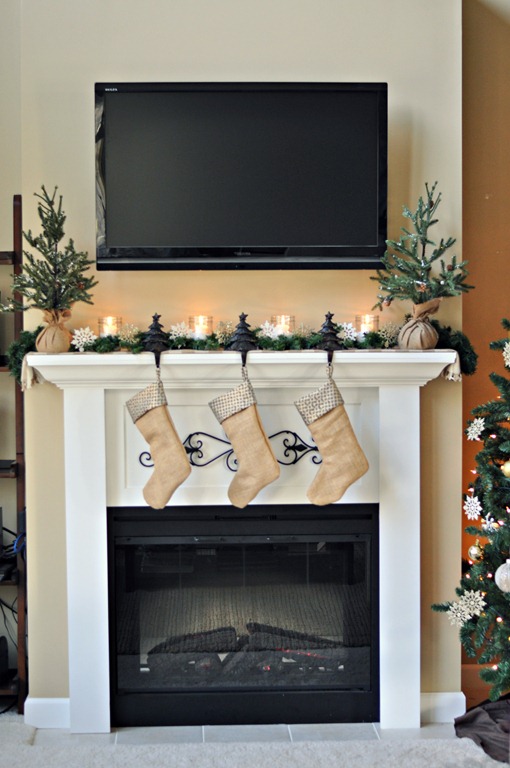
I went with a woodsy snowflake motif this year.  I also embraced the television.  Who wants a beautiful mirror with a ton of snowflakes on it over their mantel?  Not this girl.  Nope.  (That’s a lie.)  Even so, I’m still happy with how it turned out.

Decor and the Dog Holiday Mantel 2

Decor and the Dog Holiday Mantel 4

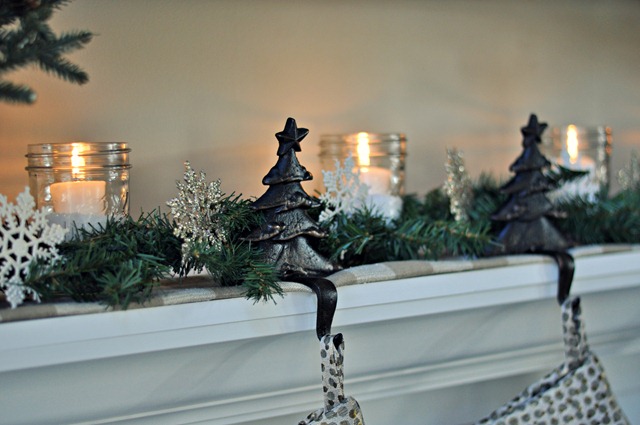
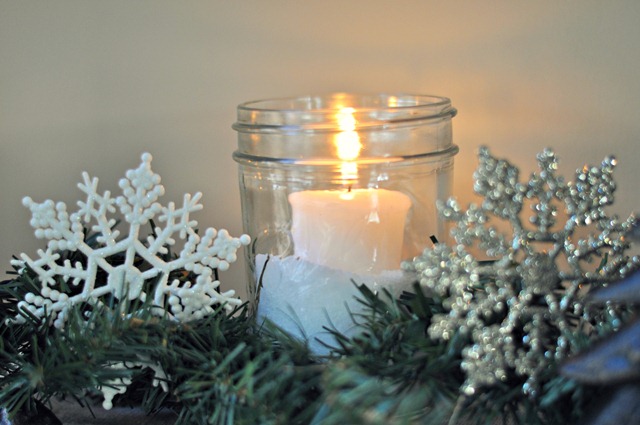
I tried out the ol’ Epsom salt in a Mason jar (a blogger holiday favorite).  The pharmacist in me enjoyed the fact that I was using medicine to decorate.  It’s hard being me.

Decor and the Dog Mason Jar with Epsom salt

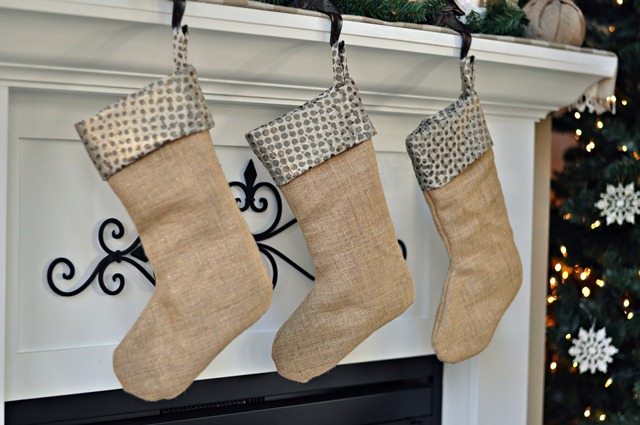
I made the stockings that are hanging by the lack of chimney with care.  Turns out I’m allergic to burlap.  (Tutorial on Friday.  Get. Excited.  Because my sinuses aren’t.)

Decor and the Dog Holiday Mantel 3

Burlap and Gold Stockings from Decor and the Dog

This is the point where Nate asked me how many photos one could have of a tiny area.  I had to give him that one.

Fa la la la la, la la la la

Decor and the Dog Holiday Mantel 2012

Sources: Trees (Michael’s), Snowflakes (Salvation Army and Hobby Lobby), Stocking holders (Hobby Lobby 2011), Mason jars (Hobby Lobby), Garland (Target), Stockings (Handmade.  Tutorial on Friday.)

You can see our 2011 mantel here.  I definitely think my mantel eye is improving.

Are you done decking the halls?  Just started?  What’s your mantel motif this year? 

Linking up to:  The Lettered Cottage, Ten June, Finding Silver Pennies

Have a handmade gift post?  Be sure to link up here!

Dare to DIY (Give Handmade) Link Party

How was your week-end?  We finished up some holiday decorating.  We started Christmas shopping…which is actually really early for us. Weird. We went to see Cirque Dreams Holidaze last night.  Pretty impressive show.  I want to be a circus performer.  Nate told me that my lack of coordination and fear of heights would hold me back.  I thought spouses were supposed to be encouraging?

I also got the blog all organized for December.  In case you missed Saturday's post, there will be at least 21 straight days of blog posts in December.  Unless I flake.  Totally a possibility.

Today is the day where you get to show off your handmade gift goodness.  Who doesn’t love handmade?  I have some other handmade gifts up my sleeve but I don’t want to ruin the surprise.  Because if my friends/family are anything like me, they’ll peek. 

On Friday I shared with you a tutorial for making a Wood Bead Necklace.

062

My co-hosts also whipped up some pretty impressive gifts.  I fully expect one of each on my doorstep before the 25th.  Rachel may want to get started on my king size crocheted blanket…if she already hasn’t.

Give Handmade
l-r: Maybe Matilda, NewlyWoodwards, Two Twenty One

Now it’s your turn!

Each Monday, the link party goes live for that week's Dare to DIY challenge. You can link up as many projects as you wish, as long as the posts correspond with the theme of the week.

You can link up on any of the co-hosts blogs. The linky below will stay live through Wednesday. This Thursday, each co-host will spotlight at least 3 projects we loved from the week on their blogs. We'll also pin those projects on our shared Pinterest board!

The only rules:

1. Please follow the Dare to DIY theme of the week (this week is “give handmade”). 

2. Please link back to Dare to DIY on one of our blogs (preferably all but we understand that time is precious). (Or copy this: I’m sharing this at the Dare to DIY party hosted by Decor and the Dog, Maybe Matilda, Newly Woodwards, and Two Twenty One!)

3. Please go to at least one other blog and comment. I can make it to all 60+.  You can make it to one. I promise.

dare to diy 675x675 pixels

Glittery Gold Whispy Ornament Wreath

A blogger having the same wreath each season is like a celebrity wearing the same dress to two different movie premieres.  Shameful.

I usually use a berry wreath for our holiday decorating.  The berries usually shed all over the floor and it just didn’t seem to go with my glittery gold motif I have going on this year.  So I took matters into my own hands and created my 20 minute Glittery Gold Whispy Ornament Wreath.  Patent pending on the name.

Glittery Gold Whispy Wreath

This

wreath

is super easy.

Head to Hobby Lobby.  Find whispy wreath for $14.99.  Find gold spray paint for $3.  Find gold Glitter Blast spray paint for $7.99.  Holy rip off but my mind was set on glitter.  Logic goes on the window when your mind is on glitter.  Luckily I had a coupon. This will probably take you 5 minutes if you are an expert Hobby Lobby shopper like myself.  Wait in line for at least 8 minutes…because it’s Hobby Lobby.

Once you are home, scrounge around for some ornaments that you aren’t using.  My were pink and purple left over from my college days. I’m sad I didn’t photograph them.

052

Spray the wreath and ornaments with the gold spray paint.  1 minute.

Let dry.  1 minute.  (Because you are impatient and want to spray everything with glittery spray paint.)

Repeat on opposite side of wreath and ornaments. 1 minute.

Let dry. 2 minutes. (Because you are impatient and want to spray everything with glittery spray paint.)

Spray the wreath and ornaments with the Glitter Blast spray paint.  1 minute.  Let dry.  Words of wisdom:  When they say “blast”, they mean blast.  Be prepared.  It was pretty awesome actually.  Glitter explosion.

Attach ornaments to wreath using ornament hooks.  Just wrap the hook around.

148

Give the wreath one more good round of glitter blast.  1 minute.

Hang and enjoy your beautiful Glittery Gold Whispy Ornament Wreath.

155
GlitteryGoldWhispyOrnamentWreath
Glittery Gold Ornament Wreath.jpg

What’s your holiday wreath look like?  Or are you anti-wreath?  I was kind of impartial to wreaths before this gold beauty came into my life.


Our Wish Lists 2012

Happy December!  I woke up super early this morning because a certain someone was snoring loudly.  I won’t name names but it wasn’t Ike or myself. Ahem.  I decided to work on my blog schedule.  I quickly realized that I have a lot to post about in the ol’ month of December.

Today starts 21 straight days of blog posts on Decor and the Dog. Maybe more. Whoa. Intense.  Be sure to check back daily to see what we’re up to.  A couple of days I will even post twice.  What can I say, the holidays bring out the best in ol’ Decor and the Dog!

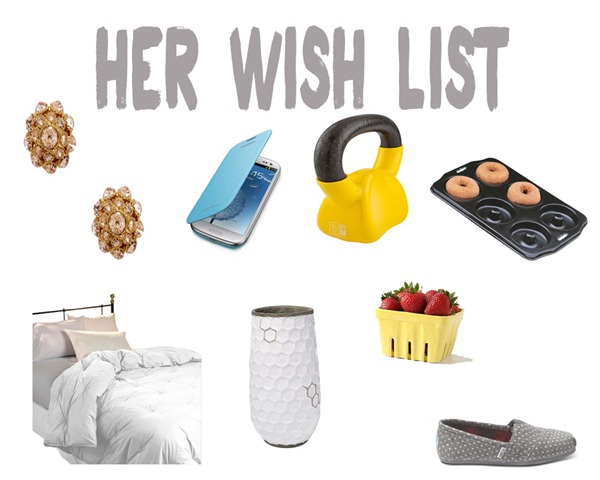
Today we will be sharing our 2012 wish lists with you.  Our families are big on lists.  I don’t mind.  Maybe it’s just me but I really like looking at other people’s wish lists.  I’m always intrigued by what people want.  I also usually find some things to add to my own list.  These are just a few of the items on our lists that I thought you all might be interested in as well.  (You can view my full wish list here and Nate’s here!)

her

Kate Spade Earrings, Galaxy S3 Phone Cover, Kettlebell,
Donut Pan, Down Comforter, Hive Vase, Farmers Market Basket, Grey Dot TOMS

nate-2 copy

ASUS Monitor, Pneumatic Nailer, Camera Sling, Breaking Bad, Spyder4 Express, Portable Worklight

What’s on your wish list this season?  Do you like using lists or do you prefer a surprise?  Anyone else humored by the kettlebell by the donut pan?  Oh man, I need sleep.

Dare to DIY Handmade: Wood Bead Necklace

Who’s ready for the Dare to Give Handmade link up on Monday?

dare to diy 675x675 pixels

Monday’s challenge is Dare to Give Handmade.  We dare you to DIY a gift made by you. Nothing is more special to give than something you created. Ideas include bath and body items, kitchen gifts, hand-sewn clothing or home decor. 

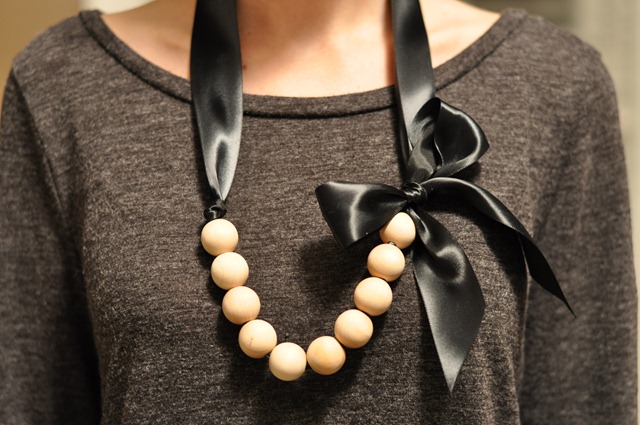
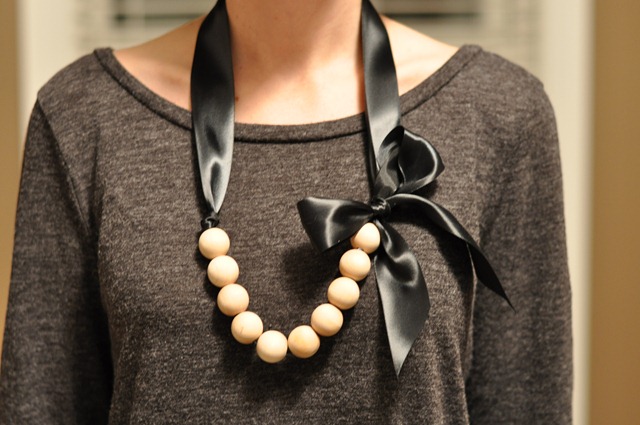
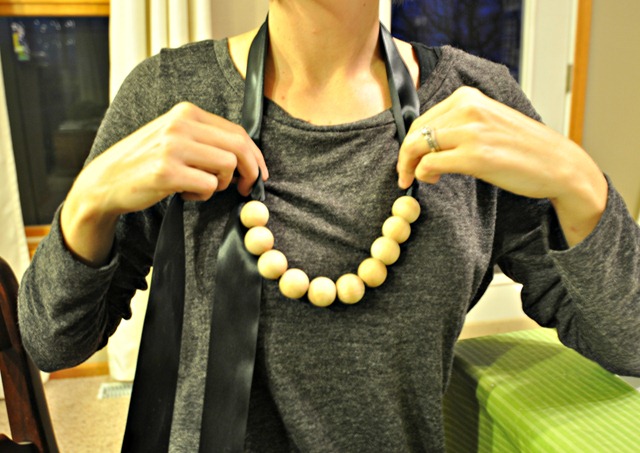
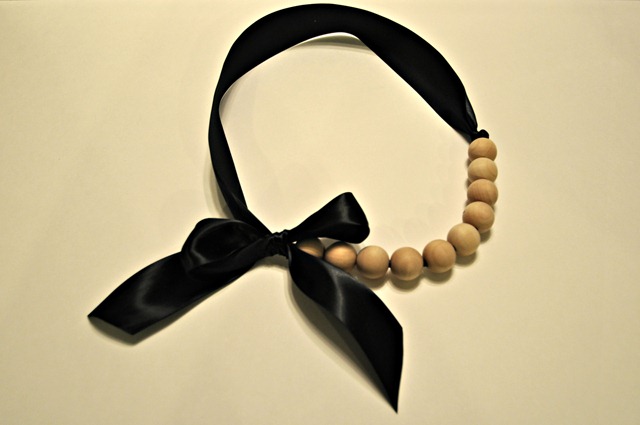
My handmade gift is a ribbon and wood bead necklace that I made for my mom.

057

Well, I made her help me design one and then I made one for her. If that isn’t love, I don’t know what is.

This necklace takes about 15 minutes to make and will cost you about $2 per necklace.

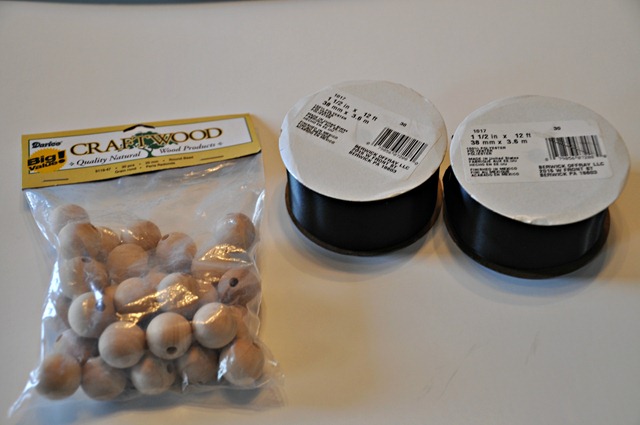
You will need 1.5” ribbon in the color of your choice.  10 wood beads.  (I purchased both of these items at Joann’s.  You will only need one spool of ribbon.  Don’t let the photo mislead you.)

Wood Bead Necklace Supplies

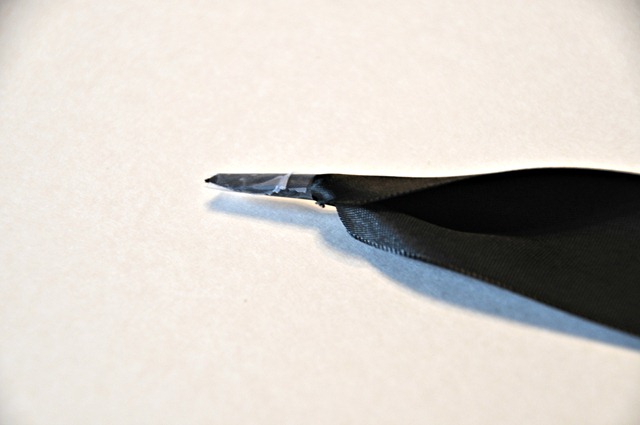
Step 1: Cut the end of your ribbon into a point.

Step 1

Step 2.  Fold this point in half and cover in tape.  The tape isn’t completely necessary but we did find it was easier to place the beads on the ribbon by using it.

Step 2

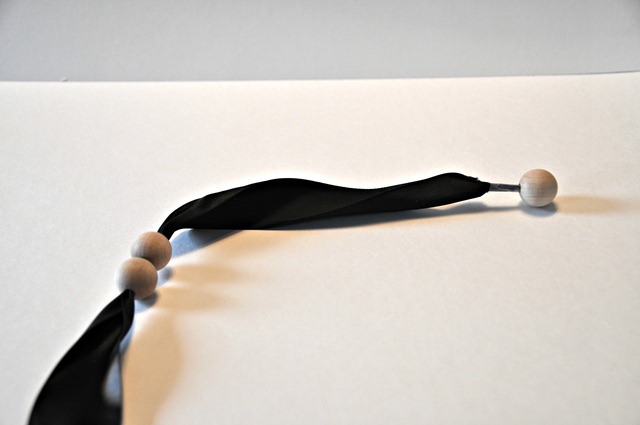
Step 3: String your ten beads onto the ribbon.  You need to string them on so you have at least 10 inches of ribbon on the end that you are stringing them from.  Be gentle while adding the beads.  We found that we scratched the ribbon a little if we fought with the beads too much.

Step 3

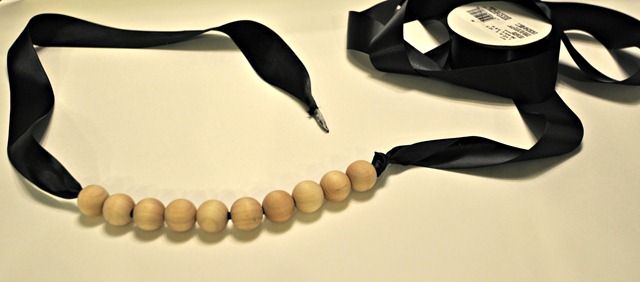
Step 4:  Tie a knot at the end of the beads. The knot should be tied at the end where the ribbon is still attached to the spool.

Step 4

Step 5.  Determine the length of your necklace.  I did this by holding the ribbon and beads.  You need enough ribbon to get the necklace over your head easily plus some additional to tie the bow.  I erred on the side of having too much ribbon. 

Step 5

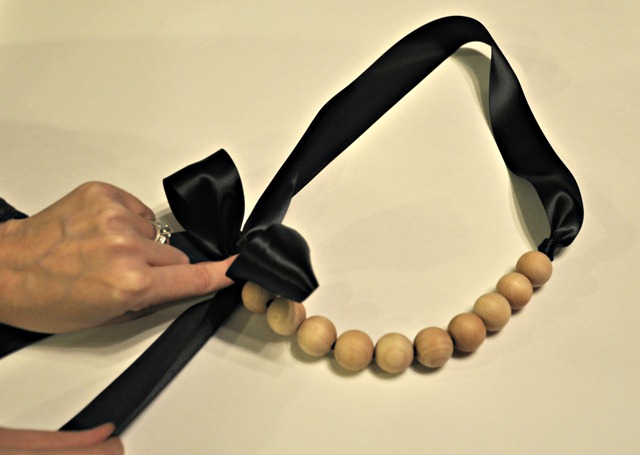
Step 6:  Tie a bow.  This step is just like tying your shoes.  Seriously. Don’t over think it.  My bow looked worse when I thought about it.  Be sure that your ribbon is not twisted when you tie the bow.  You don’t want to give your recipient a necklace that looks wonky around the neck, do you?

Step 7

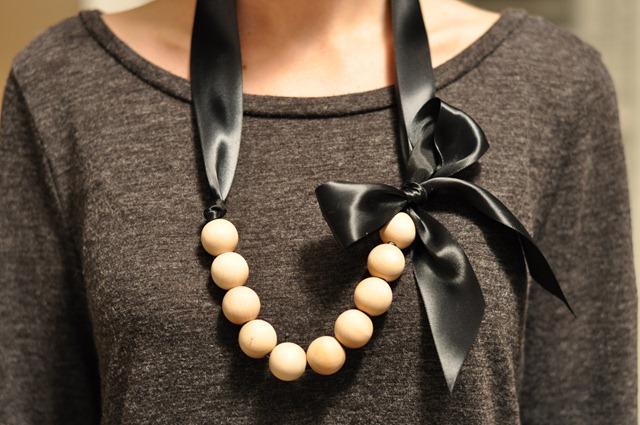
Step 7:  Trim the ribbon ends to your desired length and you have completed your super easy (yet adorable) handmade gift.

Necklace Final

062

Why is the bow on different sides in these photos?  Good question.  You can twist the necklace.  I took the final photos at a different time than when I made them.  I probably had the ribbon twisted on my neck and didn’t pay attention.  Eh.  Guess that not twisting step isn’t so important.

I looking forward to seeing your handmade gifts on Monday! If you want more Dare to DIY inspiration, check out my co-hosts' projects at Maybe Matilda, NewlyWoodwards, and Two Twenty One.

Next week we get all holiday decorating up in here.  Get ready to brush the glitter of your clothes now.  That’s what you get when you wake up reading Décor and the Dog.  *sing to similar Katy Perry’s Waking Up in Vegas*

Linking up to: Funky Junk Interiors

Dare to DIY “Entertain” Features

You all impressed me with your fake dinner parties that you shared at the Dare to DIY Entertain link party.  I appreciate the fact that I’m not the only other crazy person out there.  Nice work blog buddies.

Now it’s time to share my favorites.  I think picking three favorites may be the hardest part of this whole co-host gig.  Maybe Matilda, NewlyWoodwards, and Two Twenty One will also be sharing their three favorites so be sure to check out their picks.  Tell them Ike sent you.

We'll be sharing all the picks on our shared Pinterest board, too.  Sharing is caring.

In no particular order.  Drum roll please.  Suspense building music.

This simple, yet elegant, table setting over at Retro Ranch Renovation spoke to me.  I’m drooling over that fabric.  I like that this table setting looks nice but yet still very comfortable.

retroranchrenovation

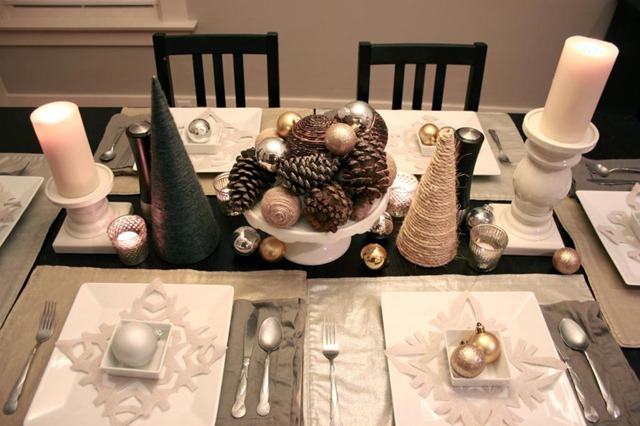
I fell for this table setting by Ceci-Bean.  Snowflakes made out of drop cloths.  Why didn’t I think of that?  The colors and textures are perfection.

ceci-bean

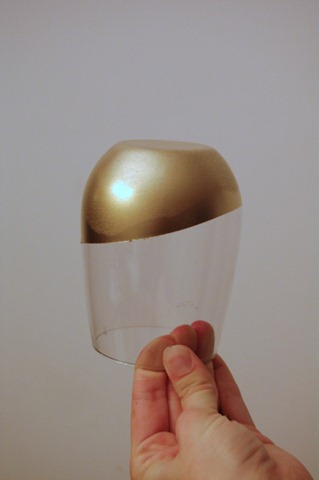
I think these gilded stemless glasses over at Ramblings from the Burbs are beautiful.  I kind of want to make some. I could totally drink Sangria from these, right?

ramblings

Thanks to everyone that linked up! Be sure to join us on Monday for next week’s dare…to give handmade.  I’ll be sharing my project tomorrow.  Get. Excited.

What was your favorite project for the week?  Are you pumped for next week’s challenge?

Hi 5 Mitten Knock Off

I have an unhealthy obsession with Kate Spade lately.  It’s bad.  Handbags, wallets, jewelry.  The list goes on.  Unfortunately, I have more of a Miley Cyrus for Wal-Mart budget.

Take these mittens for example.


Super cute, right?  How about $68.00 cute?  About that.

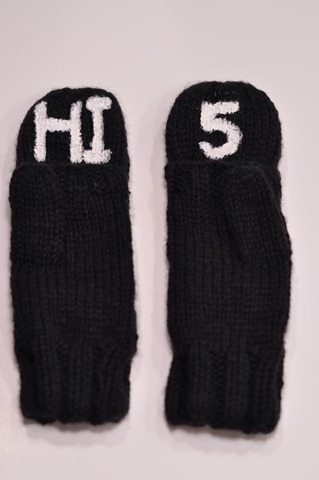
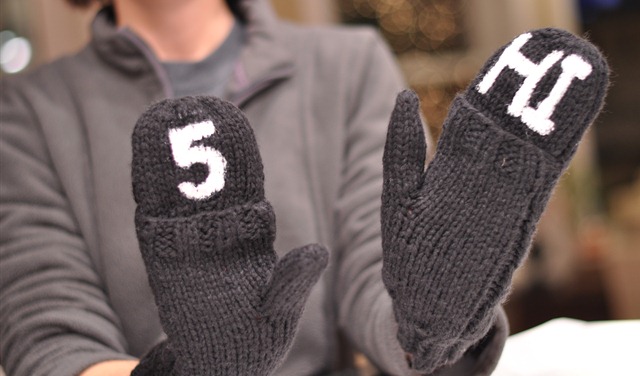
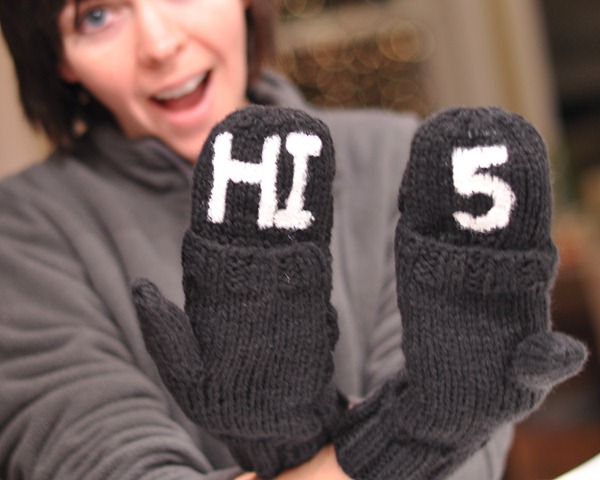
I grabbed some cheap mittens from Target and some fabric paint.  Bam.

1364

1367

They’re a little more Miley than Kate. I’d like to think they are more Miley pre-haircut though.  Party in the U.S.A.

1368

Are you a Kate Spade fan?  Miley?  Is anything safe from me and fabric paint lately?

Pie Baking and Ike’s Thanksgiving

I never thought as a kid that Thanksgiving would be towards the top of my holiday favorite list.  As an adult, it’s totally made the top two.

I like that it’s a low key holiday filled with family and food. Nothing else. I love Christmas as much as the rest of them but I appreciate Thanksgiving’s low key celebrating.  No need to shop for gifts. No need to decorate. 

We have established some pretty fun Thanksgiving day traditions.  We head to Nate’s sister’s house on Wednesday night.  We eat chili.  We sleep on air mattresses and wake up super tired on Thursday.  Thursday is full of baking, cooking, and ad reading.  It’s a pretty fabulous day.  Friday is for late Black Friday shopping.  We’re not crazy.  Friday afternoon through Sunday are spent with my family.

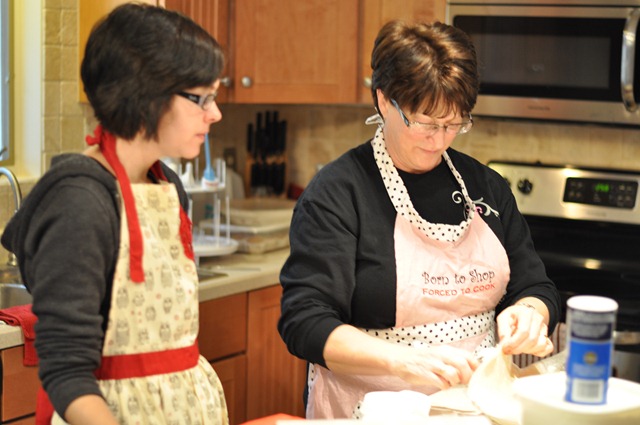
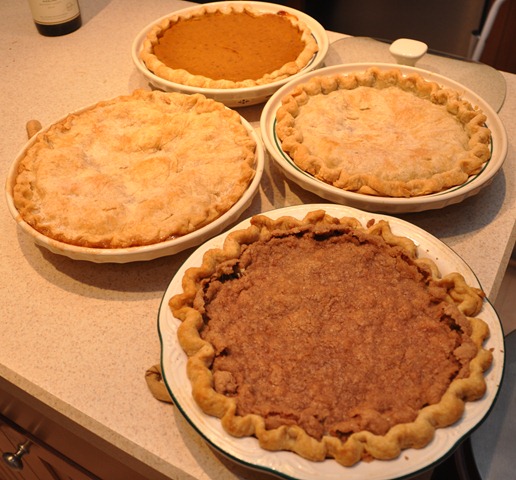
Nate’s mom is usually in charge of making the pies.  I didn’t think I liked pie until I started eating Nate’s mom’s pies.  They are that good.  She usually makes pumpkin, apple, blueberry, and rhubarb.  Sometimes a cherry is thrown in there.  Nate’s mom didn’t have time to prepare the pies ahead of time this year so I had her teach me.  She didn’t know what she was getting into.

1033

We donned fancy aprons and got to work.  I think the aprons were an important step.

I didn’t realize that pie crust only consisted of a few ingredients.  I did, however, realize that it would be easy to screw up and I was super nervous about ruining the Thanksgiving pies.  Ruining the pies would be worse than the Grinch stealing Christmas.  I’m not joking.  Nate’s mom kept a close eye on me.

This is the recipe we used for the single crust pies.   It will change your life. If you make it right…

  • 1 1/4 cup all-purpose flour
  • 1/2 teaspoon salt
  • 1/3 cup shortening
  • 3-4 tablespoons cold water (Cold is super important.  Warm/hot will melt your shortening.)

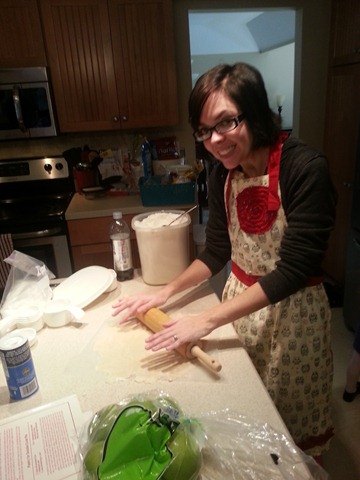
In medium mixing bowl stir together flour and salt.  Cut in shortening till pieces are the size of small peas.  Don’t over do this step.  Sprinkle 1 tablespoon of the water over part of the mixture; gently toss with a fork.  Push to side of bowl. Repeat until all is moistened.  Form dough into a ball.  Roll dough on lightly floured surface.  Nate’s mom had me do this between two pieces of waxed paper. 

20121122_104538

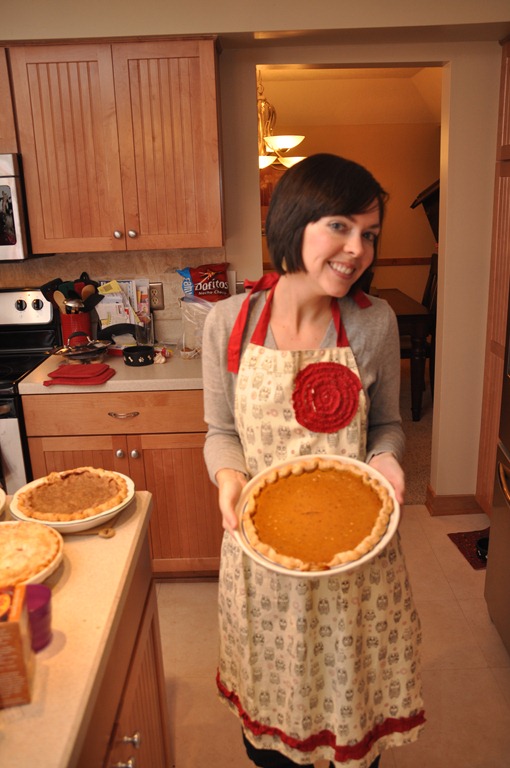
Roll the dough until it is slightly larger than the pie pan you are using.  Place in pan. Make pretty (this is the part I fail at.) Fill with your filling of choice.  Bake and show off your pretty pie.  Again, you must wear an apron during all steps of pie baking.
1282

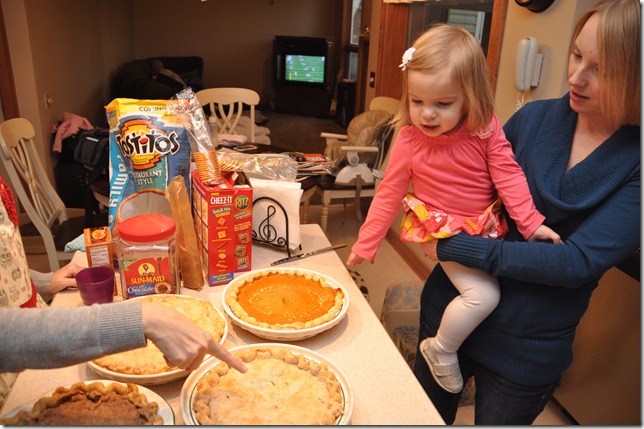
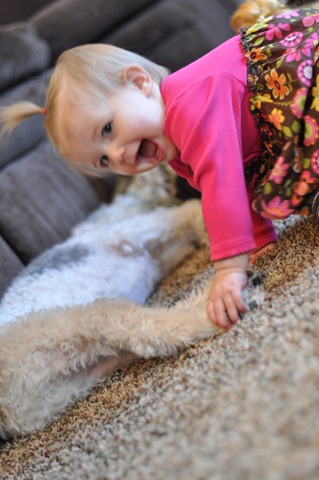
Not only did I learn to bake pies but I taught one of my super cute nieces about the many different kinds of wonderful pies.  Rhubarb was challenging for a not quite two year old.  I’m sure she will soon learn that is the hardest to say but the very best kind of pie around.

1291

1329

What was Ike up while all of this pie baking was going on?

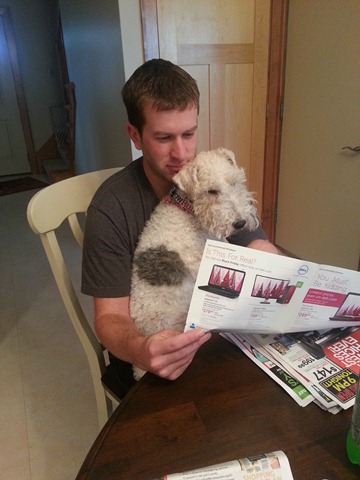
He was busy reading the ads.

20121122_094240

He had a tennis ball to look after.

1178

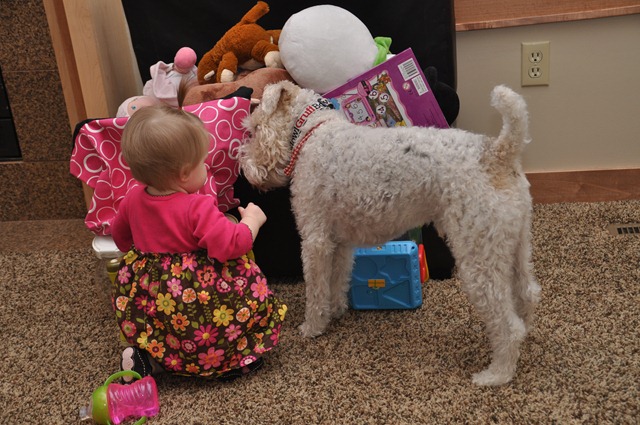
He also spent a lot of time with one of his biggest fans.  He usually runs from small children but he has a special bond with our youngest niece. It’s quite precious.

1299

1195

Have you made a pie before? How’d it go?  Is Thankgiving one of your favorite holidays or do you find that it’s more of a roadblock to Christmas?

Dare to DIY (Entertain) Link Party

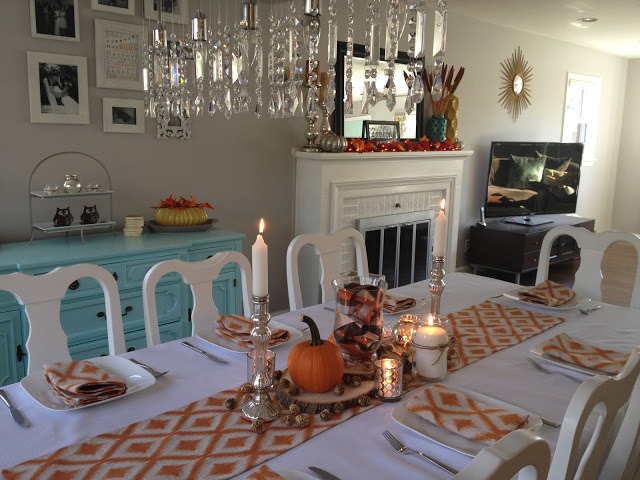
The Monday after Thanksgiving. Always a rough one.  Not enough turkey.  Too much working.  Let’s ease back into reality by sharing some DIY entertaining fun.

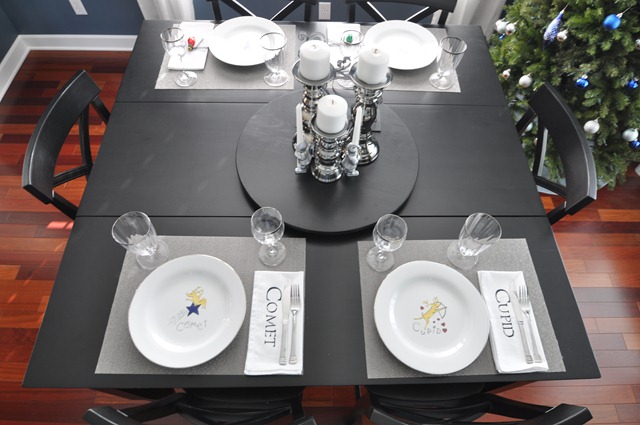
On Friday, I shared with you my fake dinner party.  If you are like me, you missed it because you haven’t read/commented on blogs for a week.  How about a quick recap?

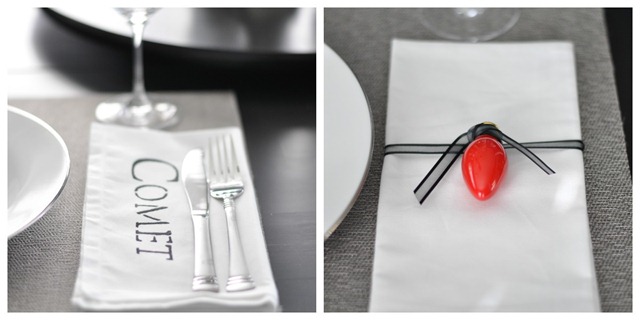
I stenciled some napkins and used some vintage bulbs to make “napkin holders.”  You can see more photos here!

Dare to DIY Decor and the Dog

948

My partners in crime also shared their lovely settings.  Be sure to check their posts out for additional holiday decorating ideas!

Dare to DIYentertain
l-r: Maybe Matilda, NewlyWoodwards, Two Twenty One

Now it’s your turn!

Each Monday, the link party goes live for that week's Dare to DIY challenge. You can link up as many projects as you wish, as long as the posts correspond with the theme of the week.

You can link up on any of the co-hosts blogs. The linky below will stay live through Wednesday. This Wednesday, each co-host will spotlight at least 3 projects we loved from the week on their blogs. We'll also pin those projects on our shared Pinterest board!

The only rules:

1. Please follow the Dare to DIY theme of the week (this week is “entertain”). 

2. Please link back to Dare to DIY on one of our blogs (preferably all but we understand that time is precious). (Or copy this: I’m sharing this at the Dare to DIY party hosted by Decor and the Dog, Maybe Matilda, Newly Woodwards, and Two Twenty One!)

3. Please go to at least one other blog and comment. This is a party. I noticed a lack of commenting last week.  Don’t make me come after you.

dare to diy 675x675 pixels

Okay, it's time for the fun. We can't wait to see your projects! If you have a WordPress blog, look for my comment in your spam folder.  WordPress thinks I am spam. Awesome.